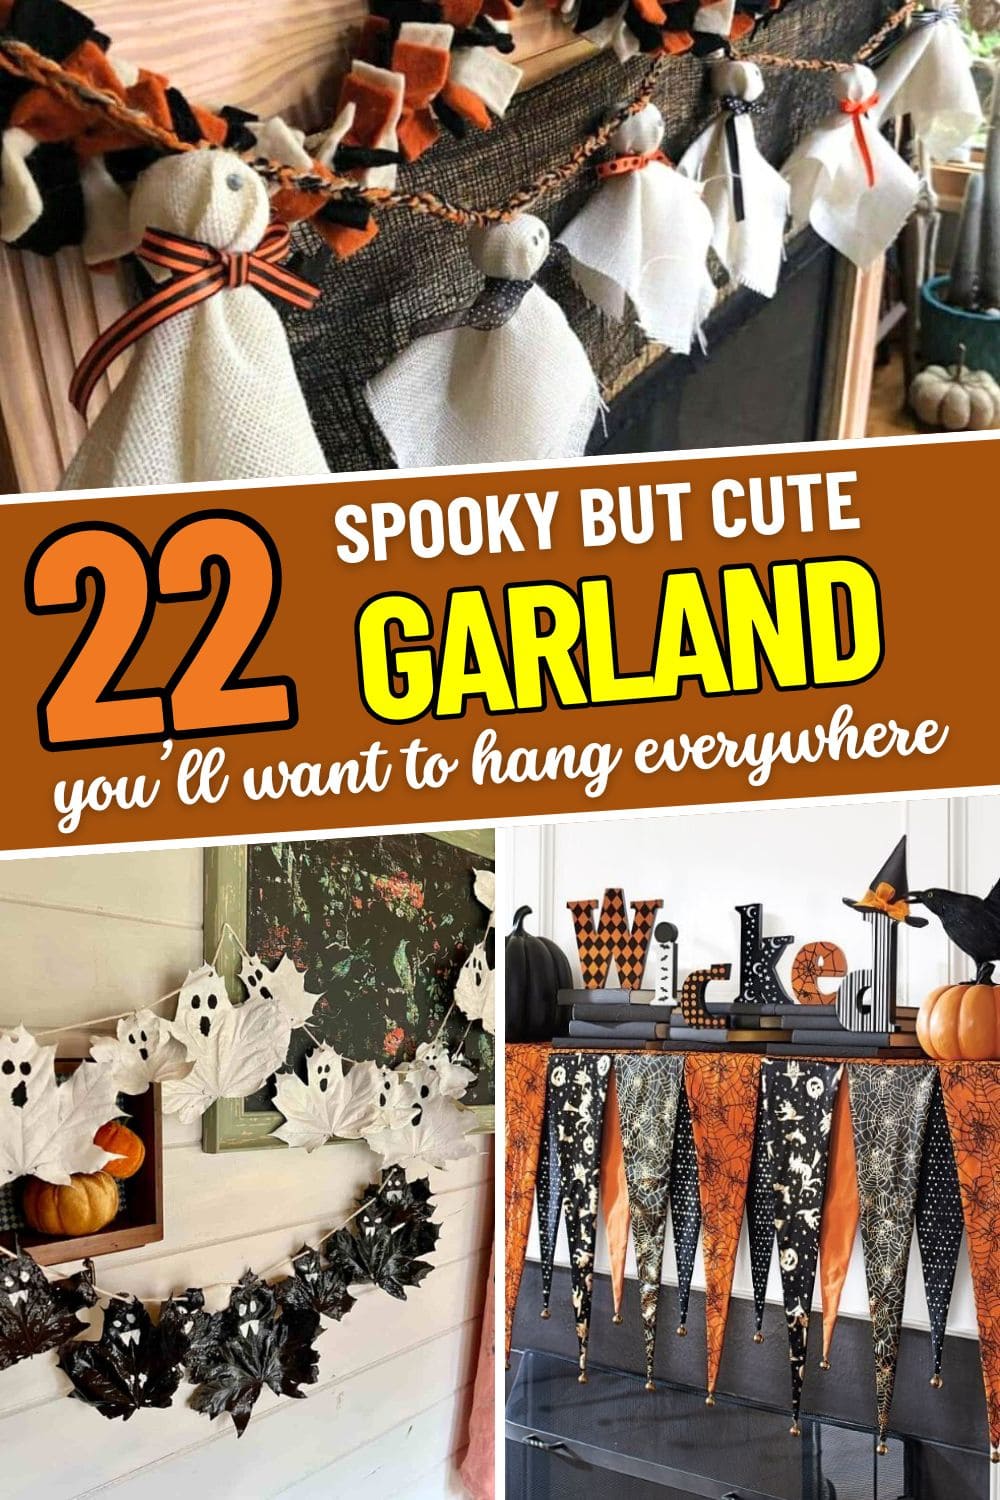
Halloween decorations don’t always need to be gory or grim, sometimes a little spookiness wrapped in charm is all you need.
These 22 DIY garland ideas are perfect for bringing a mix of whimsy and eeriness into your space. Think skeleton ballerinas, happy jack-o’-lanterns, ghostly leaves, and colorful ribbons that dance along the string.
Each project adds its own personality, handmade flair, and seasonal spirit. No crafting expertise required, just a spark of creativity and a love for Halloween magic.
Whether you’re throwing a party or just love getting festive at home, these cute garlands promise to lift the mood and make things delightfully spooky.
#1. Handprint Halloween Garland
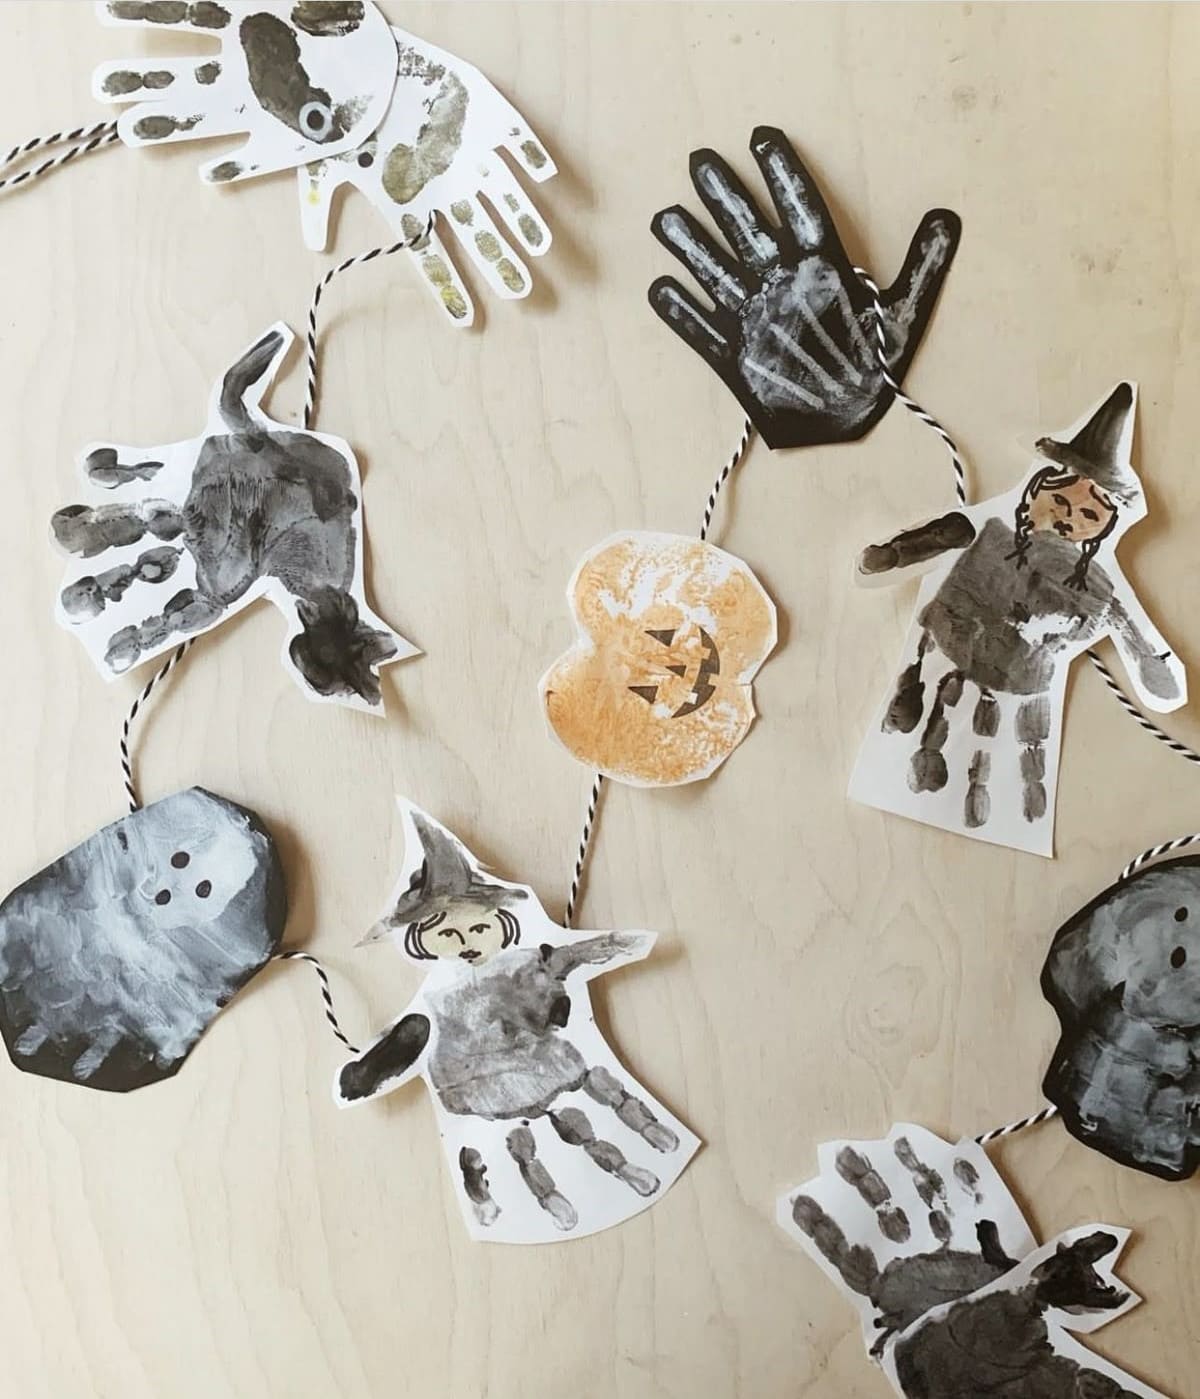
Why not turn simple handprints into an enchanting Halloween garland that feels both personal and fun?
This design uses hand-cut shapes of ghosts, witches, pumpkins, and black cats, each made from painted handprints. The mix of black, orange, and white paint creates a rustic, homemade charm that stands out beautifully when strung together with twine.
This is an excellent activity to do with kids, you’ll love how every handprint adds a unique, playful character to the garland. It’s a keepsake-worthy project that can be displayed year after year.
Materials Needed
- White and black cardstock sheets
- Washable paints (black, orange, white)
- Paintbrushes or sponges
- Scissors
- Twine or string (5-6 feet)
- Hole punch or tape
Step-by-step Guide
Step 1: Paint your hands with different Halloween shades and press them onto cardstock. Let them dry completely.
Step 2: Cut out each handprint and add details like witch hats, faces, or cat ears with markers or extra paint.
Step 3: Punch small holes at the top of each cutout and string them along the twine.
Step 4: Hang your garland across a wall, mantle, or doorway for a spooky handmade vibe.
#2. Cozy Yarn Tassel Garland
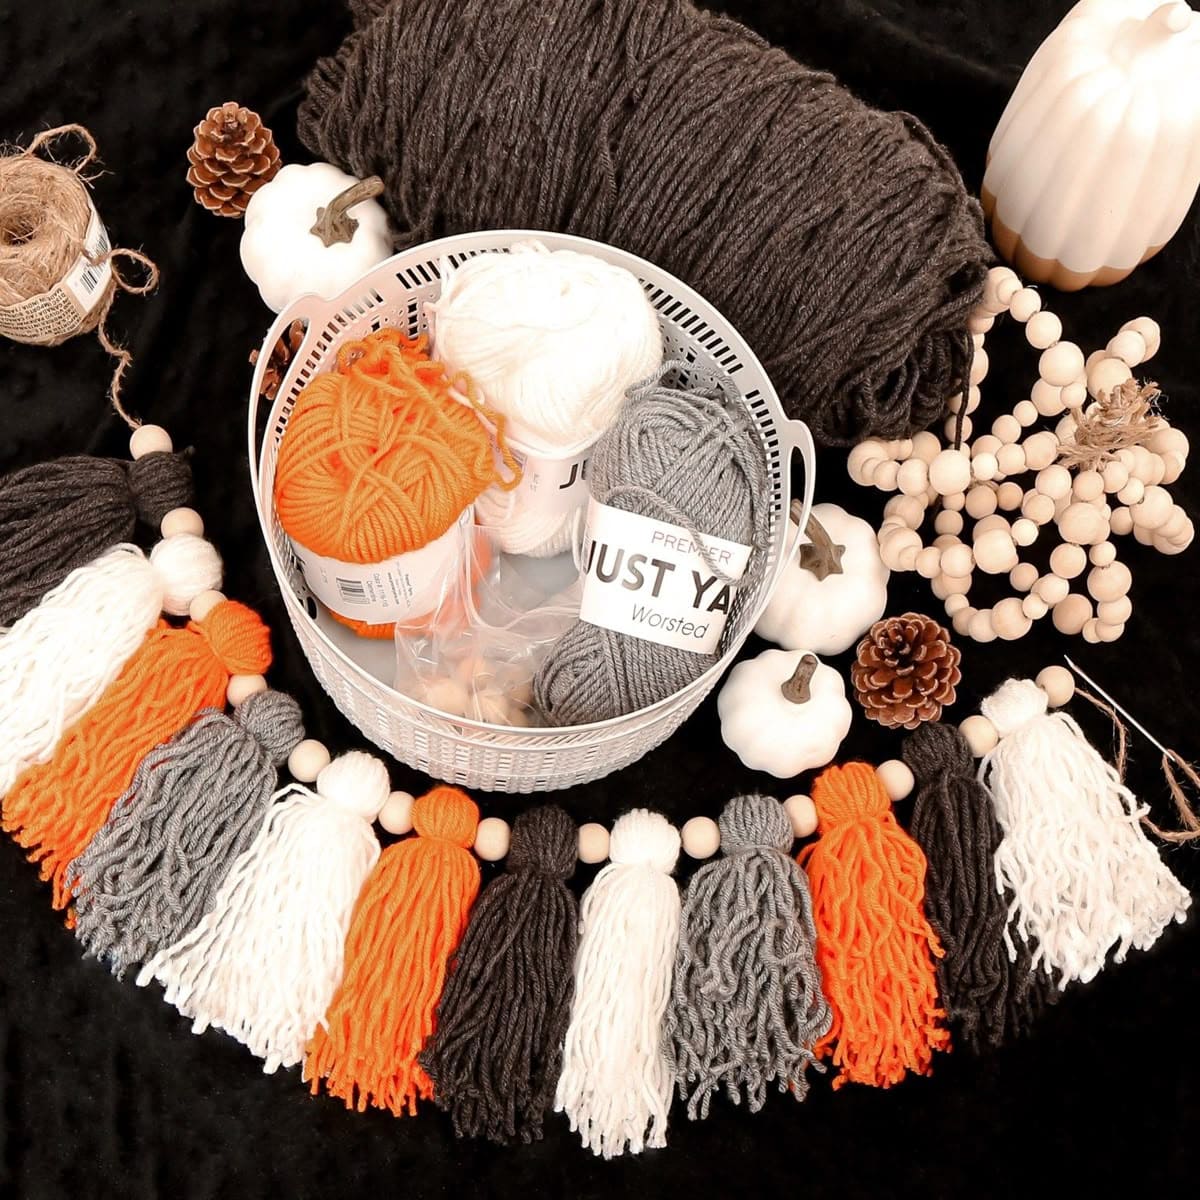 This Halloween, turn your fireplace or entryway into a warm autumn dream with a handmade yarn tassel garland.
You’ll love how the soft orange, ivory, charcoal, and grey hues come together to echo cozy sweater weather with a subtle spooky twist.
Each tassel sways gently like little ghosts dancing in the wind, and the wooden beads add that perfect rustic touch. It’s a relaxing craft you can make while sipping cider or watching your favorite Halloween classic.
Plus, once the season’s over, you can easily re-style it for fall or winter.
Materials Needed
- Yarn skeins (orange, white, grey, black – 1 of each)
- 16 wooden beads (1″ diameter)
- Twine or string (4-5 ft length)
- Scissors
- Large yarn needle (optional)
Step-by-step Guide
Step 1: Cut strands of yarn about 12 inches long. You’ll need 20-25 strands per tassel.
Step 2: Fold each group in half, then tie tightly near the fold with another yarn strand to create the tassel’s head.
Step 3: Trim the ends of your tassel evenly, then repeat in alternating colors for variety.
Step 4: Thread your beads and tassels onto twine in any pattern you like. You can use a large needle or a bit of tape wrapped around the twine tip for easier threading.
Step 5: Adjust spacing and hang it across a mantel, window, or mirror frame to bring festive warmth to your space.
#3. Felt Pumpkin and Ghost Garland
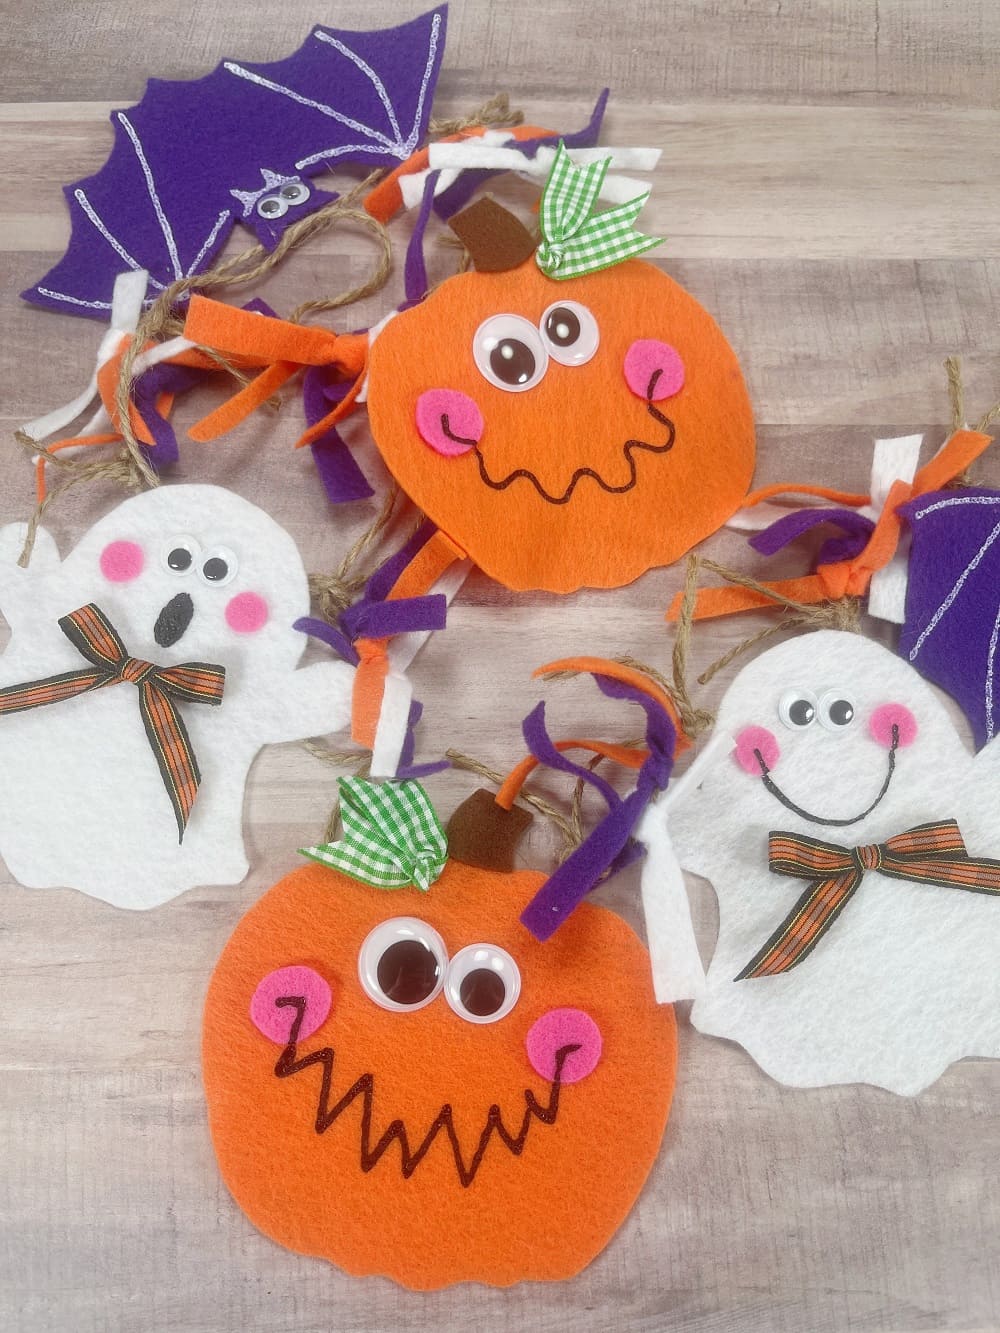
What about bringing cheerful Halloween vibes to your space with this irresistibly cute felt garland?
Googly-eyed pumpkins, rosy-cheeked ghosts, and a grinning purple bat create a playful mix that kids will love. Each felt cutout is layered with bright embellishments like bows, ribbons, and expressive eyes.
Bonus, twists of orange, white, and purple felt are tied between each shape on rustic jute, adding texture and bounce to the string.
Materials Needed
- Felt sheets in orange, white, purple, green (9” x 12”)
- Jute twine (5 feet)
- Googly eyes (1” size)
- Hot glue gun and fabric scissors
- Fabric markers or puffy paint
- Scrap ribbon for bows
Step-by-step Guide
Step 1: Cut out ghost, pumpkin, and bat shapes from felt using stencils or freehand.
Step 2: Glue on eyes, cheeks, and bows, then draw or paint the faces.
Step 3: Attach the pieces to twine using hot glue. Then you just tie strips of felt between them for a colorful touch.
#4. Double-Layered Burlap Ghost and Felt Knot Garland
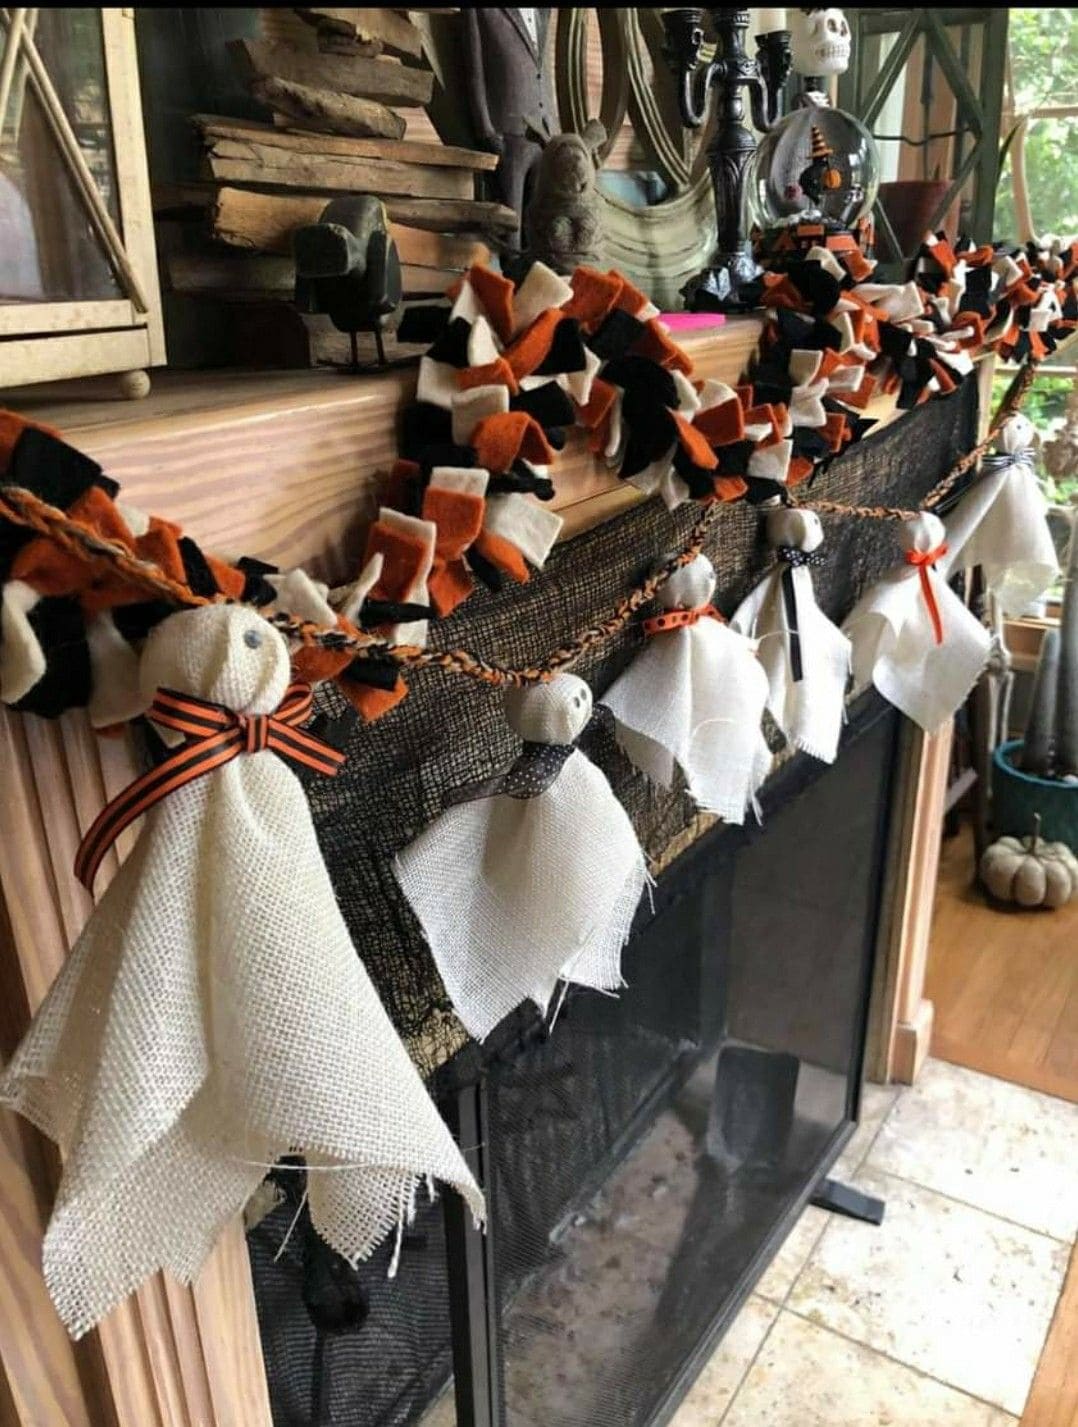
Wow, the bottom strand of this garland features adorable little ghosts made of off-white burlap, each tied off with festive ribbon bows and strung together for a sweetly spooky effect.
Above them, a chunky felt garland, made from tied strips in orange, cream, and black, adds bold color and volume.
Draped over black mesh fabric, the whole look feels layered and lush, like something lovingly assembled from a box of fall craft supplies. It’s a nostalgic and kid-friendly choice for farmhouse-style Halloween decor.
Materials Needed
- Off-white burlap fabric (cut into 10″x10″ squares, 6-8 pieces)
- Small foam or cotton balls
- 60 total orange, black, and cream felt strips (1″x5″)
- Thin ribbon (orange stripe, black gingham)
- Black mesh fabric or tulle (optional)
- String or jute cord (4-6 feet)
Step-by-step Guide
Step 1: Make the ghosts by wrapping burlap over the foam balls and tying with ribbon around the neck.
Step 2: String the ghosts along the twine, spacing them evenly.
Step 3: Create the knot garland by tying felt strips around a second length of twine, alternating colors.
Step 4: Drape both garlands over the mantle and add the black mesh as a backdrop if desired.
#5. Playful Folded Paper Halloween Garland
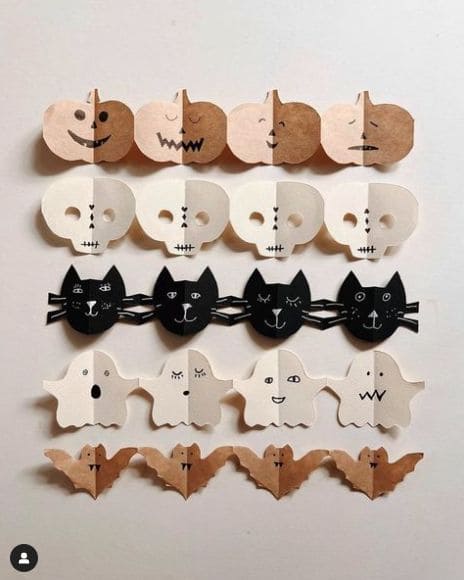
This paper garland feels like a nostalgic nod to childhood crafts. Each row brings its own tiny character to life: grinning pumpkins, wide-eyed skulls, sassy black cats, floating ghosts, and charming bats.
What makes this project shine is its imperfection, those little hand-drawn faces are what give each piece personality.
You get to decide if your ghost is shy, if your bat is sleepy, or if your cat is up to no good. It’s a budget-friendly way to decorate with your kids or wind down on a cozy autumn night.
Materials Needed
- Construction or kraft paper (black, orange, white, beige, 3 sheets each)
- Pencil and black marker
- Scissors
- Glue stick or washi tape (optional)
Step-by-step Guide
Step 1: Fold your paper accordion-style, about 3 inches wide per fold. You’ll need 5-6 folds per strip.
Step 2: Sketch a half-shape of your chosen Halloween icon, be sure part of it touches the folded edge so the chain connects.
Step 3: Cut the shape carefully without snipping the folded edges that hold the figures together.
Step 4: Unfold and flatten your paper garland gently, then decorate the faces using black marker and your imagination.
Step 5: Display across windows, bookshelves, or even taped to a door for instant Halloween cheer.
#6. Skeleton Fairy Garland
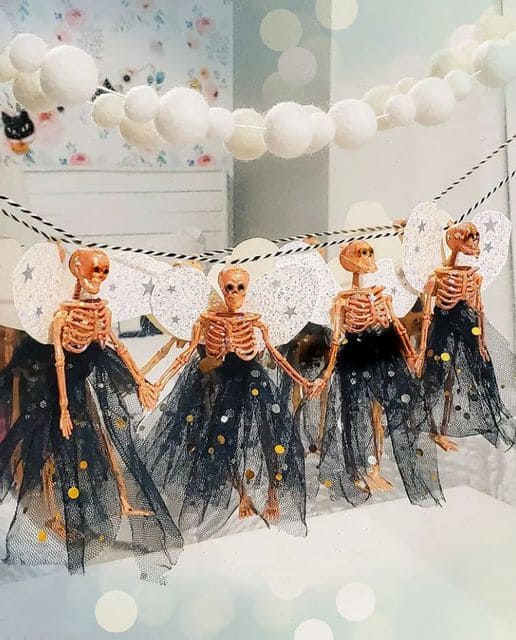
Who says skeletons can’t sparkle? This magical garland transforms plastic skeletons into glittering fairies, complete with gauzy wings and whimsical skirts.
Furthermore, the mix of gold-flecked black tulle and starry paper wings adds a charming fantasy twist to your Halloween setup, equal parts eerie and elegant.
This project feels like it crawled out of a gothic fairytale and belongs in a child’s haunted storybook room or a playful party vignette.
Materials Needed
- 5-6 mini plastic skeletons
- Black tulle with glitter (about 1 yard)
- Paper or cardstock
- Star stickers
- Baker’s twine (5 feet)
- Hot glue gun and scissors
Step-by-step Guide
Step 1: Cut small rectangles of tulle and tie or glue them around each skeleton’s waist to create a tutu effect.
Step 2: Cut out wing shapes from cardstock, decorate with stars, and glue to the skeletons’ backs.
Step 3: Finally, use hot glue or thread to attach each fairy to the twine, keeping their hands linked.
#7. Halloween Ribbon Scrap Garland
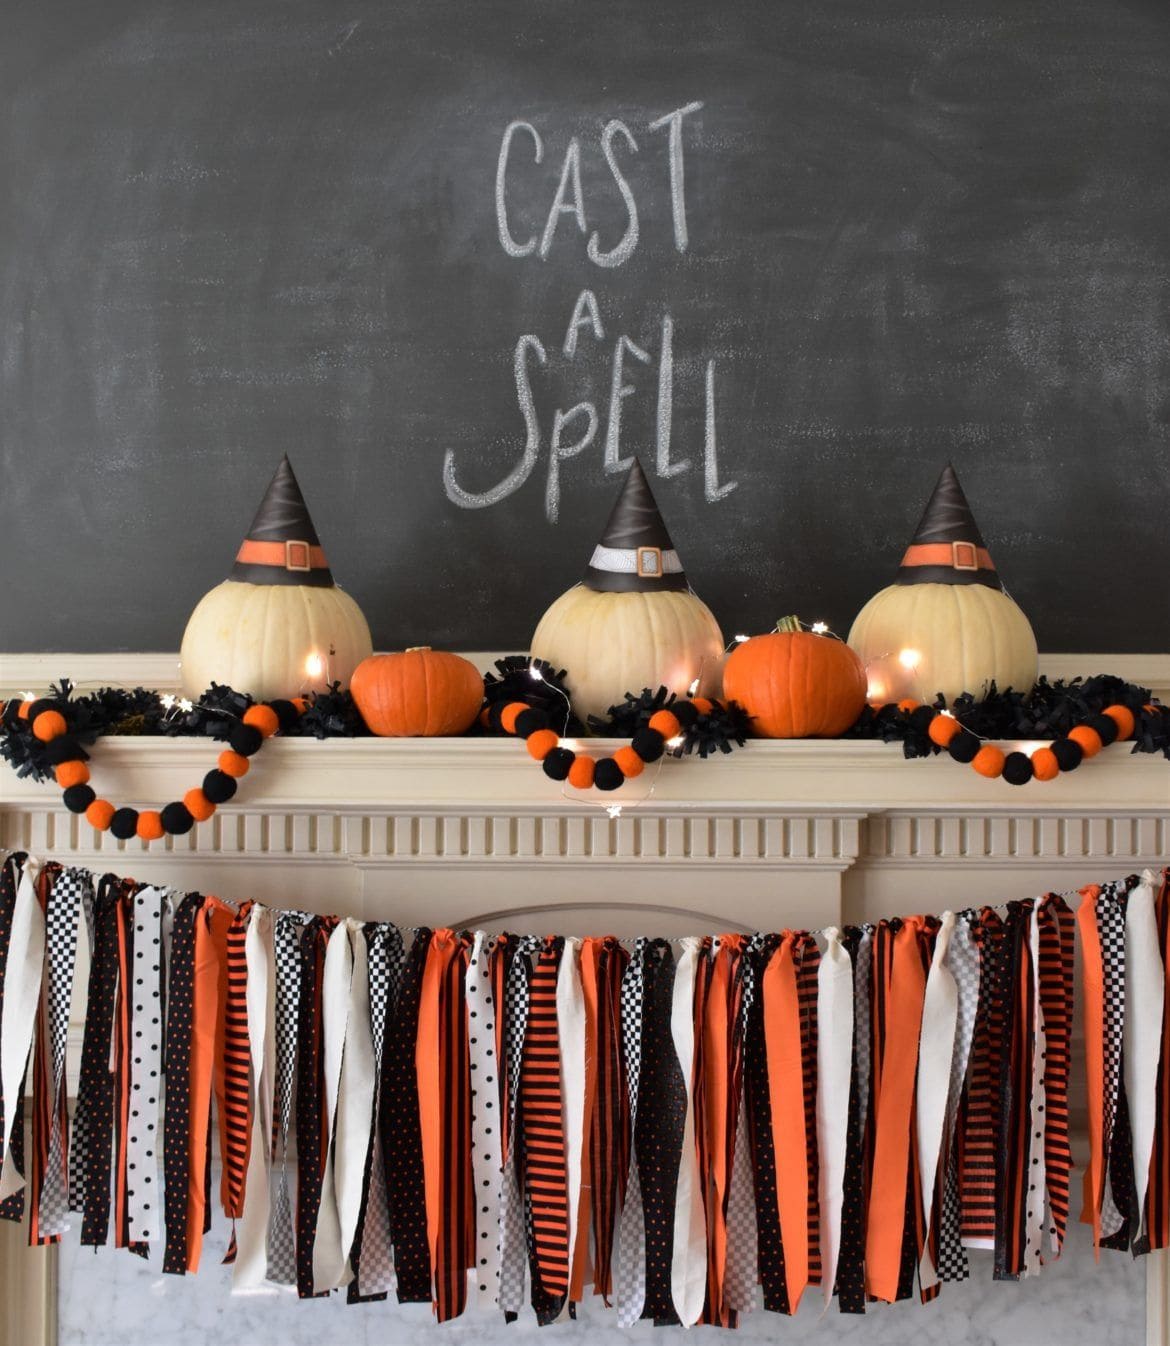
This ribbon garland feels like a playful costume party stretched across your mantel. With no sewing required, it’s ideal for bringing texture and movement to your space.
Every twist and knot adds a touch of character, especially when you choose different patterns. The result is a dancing fringe that flutters with every breeze.
If you’ve got leftover ribbons, fabric scraps, or even old Halloween costumes, this is the perfect way to repurpose them.
Materials Needed
- Assorted ribbon or fabric strips in orange, black, and white (1″ x 24″, around 40-50 pieces)
- Twine or jute string, 6-8 feet long
- Scissors
- Optional: measuring tape, hot glue (if securing ends)
Step-by-step Guide
Step 1: Cut your ribbon or fabric into equal strips. Then use pinking shears if you want a zigzag edge to prevent fraying.
Step 2: Tie each strip onto the twine using a simple loop knot, pushing them close together to create fullness.
Step 3: Alternate colors and patterns to keep the look visually interesting. You should mix solids with prints for added charm.
Step 4: Adjust the lengths or trim the ends to even them out once the garland is hung in place.
#8. Colorful Clay Ghost and Pumpkin Bead Garland
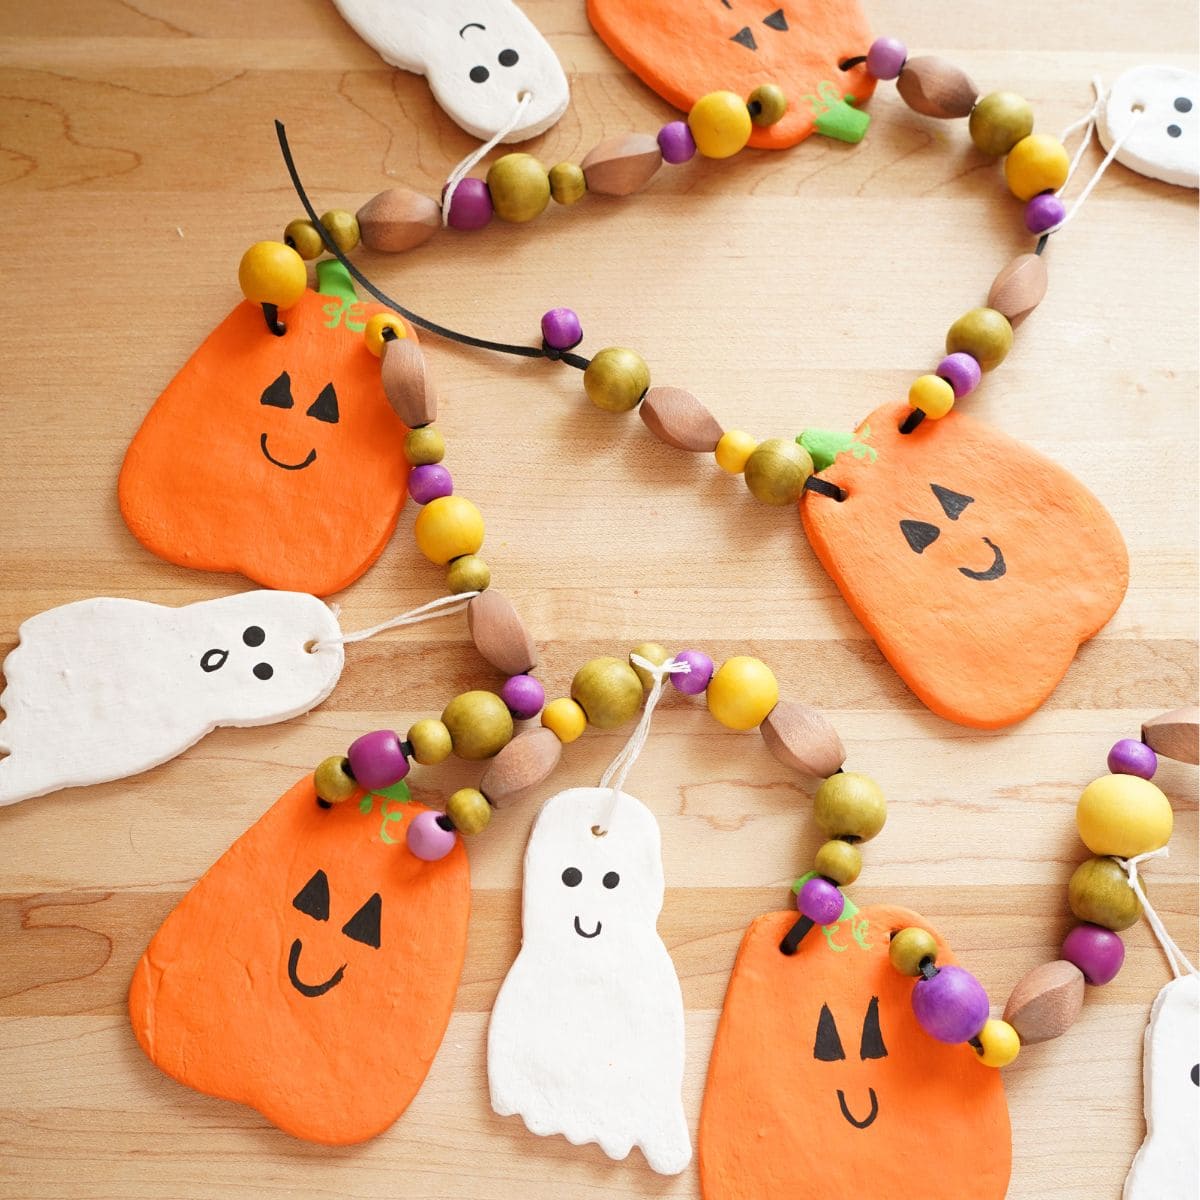
Featuring handcrafted clay pumpkins and ghosts with happy faces, this garland is the kind of decoration that makes kids light up with joy.
The interspersed wooden beads, painted in olive green, yellow, purple, and natural tones, add a whimsical, handmade feel. Whether strung across a window, shelf, or stair banister, it brings warmth and fun into any fall setup.
Materials Needed
- Air-dry clay or polymer clay (white and orange)
- Black paint pen or acrylic paint
- 25 wooden beads (varied sizes,)
- Acrylic paint in purple, yellow, olive green
- Twine or leather cord (5-6 feet)
- Clay tools or cookie cutters (optional)
Step-by-step Guide
Step 1: Shape clay into pumpkins and ghosts, adding small holes at the top for stringing. Let them dry or bake per clay instructions.
Step 2: Paint fun faces on each piece using black and detail colors.
Step 3: Paint your beads in complementary colors and let them dry fully.
Step 4: Now, you can string the beads and clay pieces onto twine, alternating for balance.
Read more: 22 Beaded Halloween Crafts That Are Almost Too Cute to Be Creepy
#9. Folded Felt Bat Garland With Gothic Charm
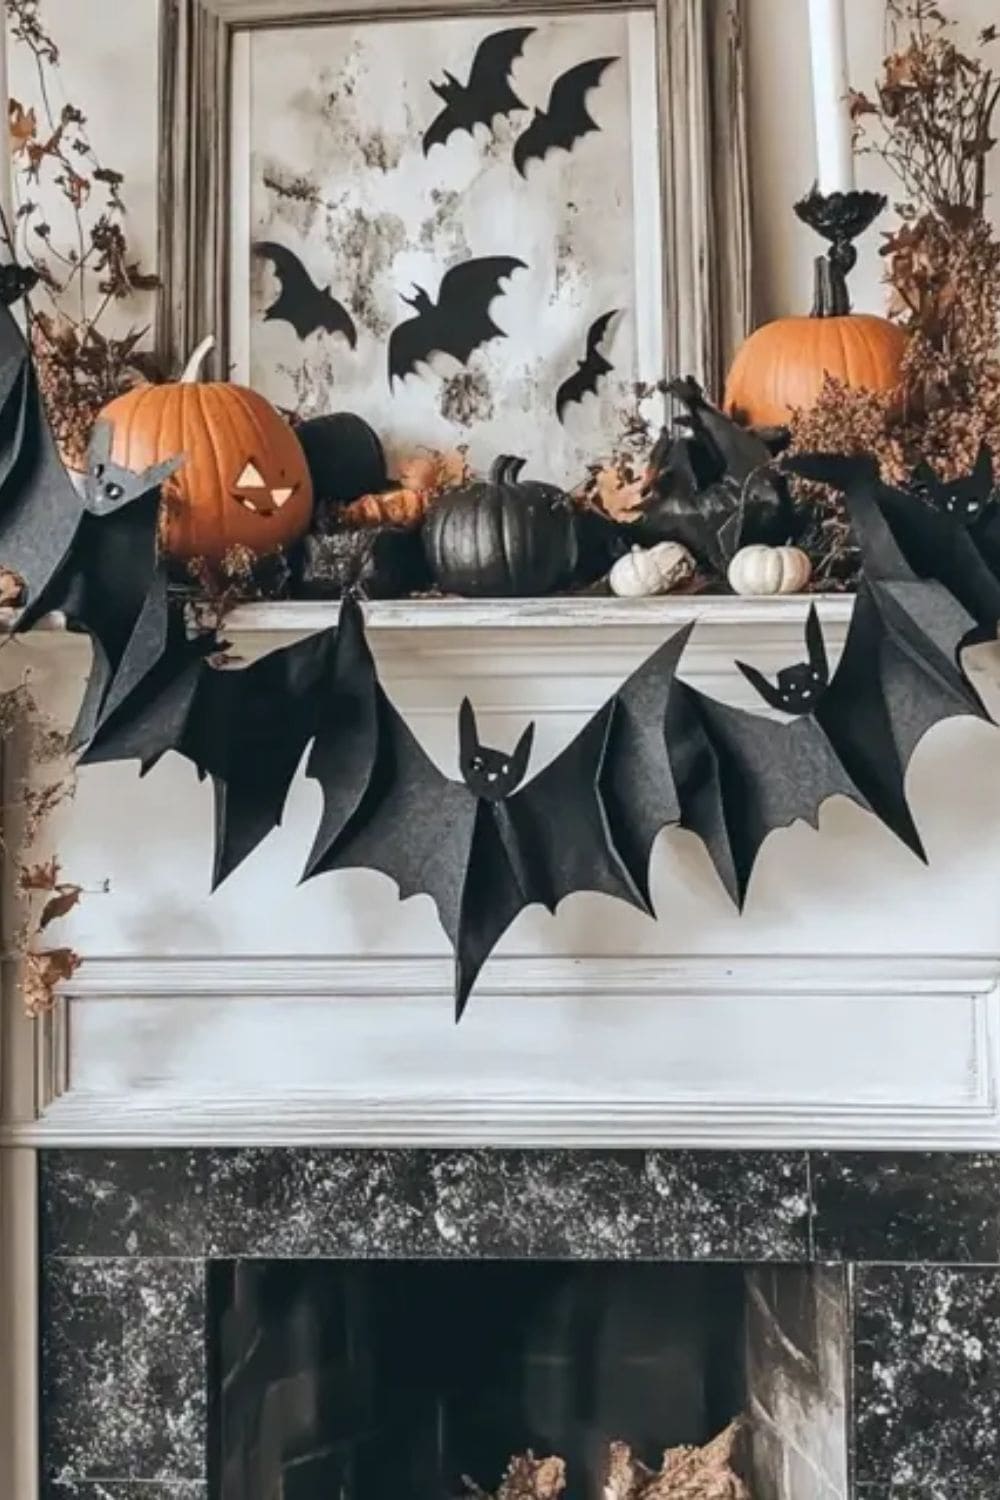
Look at this his dramatic bat garland! It adds bold texture and movement to any Halloween mantel.
The bats are made from black felt and folded accordion-style, giving them an eerie three-dimensional effect that seems to flutter mid-flight. Each one features perky ears and tiny white eyes for a hint of personality.
Plus, suspended along black string or twine, the spacing creates a sweeping, winged effect that feels alive, especially when combined with moody pumpkins and dried foliage like in the scene above.
Materials Needed
- Black felt sheets (8.5″x11″, 5-8 pieces depending on number of bats)
- White fabric paint or small googly eyes
- Thin black twine (4-6 feet)
- Scissors and hot glue gun
- Bat wing template (optional)
Step-by-step Guide
Step 1: Cut bat shapes from felt using a symmetrical bat-wing template. Then you fold each bat accordion-style from wingtip to wingtip, creating a 3D ripple.
Step 2: Add eyes with glue or paint to give them a spooky personality.
Step 3: Glue the center of each bat to the twine, spacing them evenly along the string.
#10. Cozy Pom-Pom and Pumpkin Garland
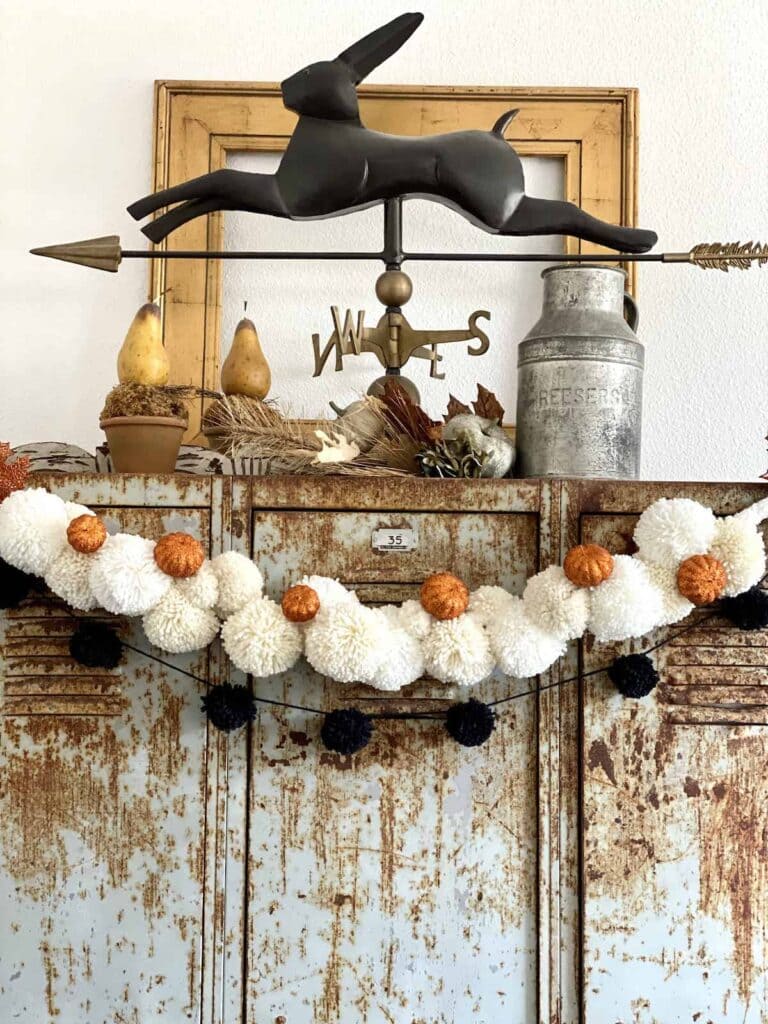
This fluffy garland blends fall charm with cozy textures by using oversized yarn pom-poms and glittery orange mini pumpkins.
You can see the contrast of soft white and jet-black pom-poms gives it a neutral yet festive tone, while the pumpkins add that unmistakable Halloween flair. It feels both farmhouse and playful, perfect for rustic mantels, vintage lockers, or even stair railings.
Also, the mix of volume and sparkle instantly draws the eye, creating a warm, welcoming statement that works from early fall through Halloween night.
Materials Needed
- Thick yarn (cream and black)
- Pom-pom maker or scissors
- 10-12 mini foam or felt pumpkins
- Black string or twine (6-7 feet)
- Hot glue gun or needle and thread
Step-by-step Guide
Step 1: Make large pom-poms using yarn, around 15-20, alternating between cream and black.
Step 2: Glue or sew mini pumpkins in between the pom-poms for a balanced look.
Step 3: Attach each piece to the twine, spacing them evenly across the strand.
Step 4: Drape your garland across a shelf, cabinet, or mirror for an instant cozy effect.
Tip: You can also add cinnamon sticks or dried orange slices for a natural scent and fall touch.
#11. Mini Skeleton and Ribbon Garland
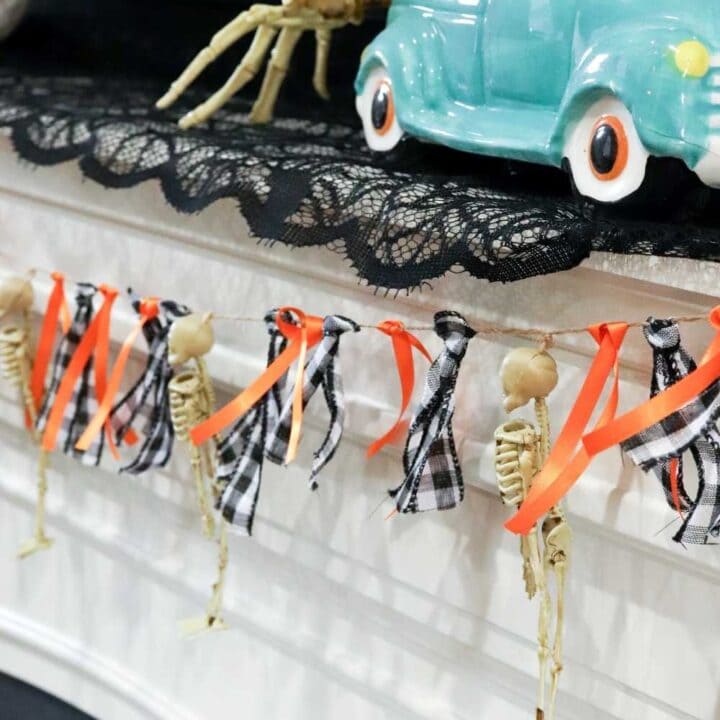
This garland nails that playful-creepy combo that makes Halloween so fun. Alternating mini skeletons dangle from a jute string, flanked by strips of orange satin and black-and-white buffalo check ribbon.
Moreover, the ribbons add movement and color, softening the starkness of the tiny bones. It’s eye-catching, slightly eerie, and so easy to customize with different ribbon colors or skeleton sizes.
Materials Needed
- 10 mini skeletons (4-6 inches tall)
- Orange satin ribbon (1/2″ wide, 2-3 feet)
- Buffalo check ribbon or fabric strips (2-3 feet)
- Twine or jute string (5-6 feet)
- Hot glue or string
Step-by-step Guide
Step 1: Tie alternating ribbons onto the twine, leaving small gaps between each pair.
Step 2: Attach the mini skeletons in the gaps between ribbon bundles using knots or hot glue.
Step 3: Now, space them evenly and trim any uneven ribbon ends for a clean look and you are done!
#12. Whimsical Mini Witch Hat Garland
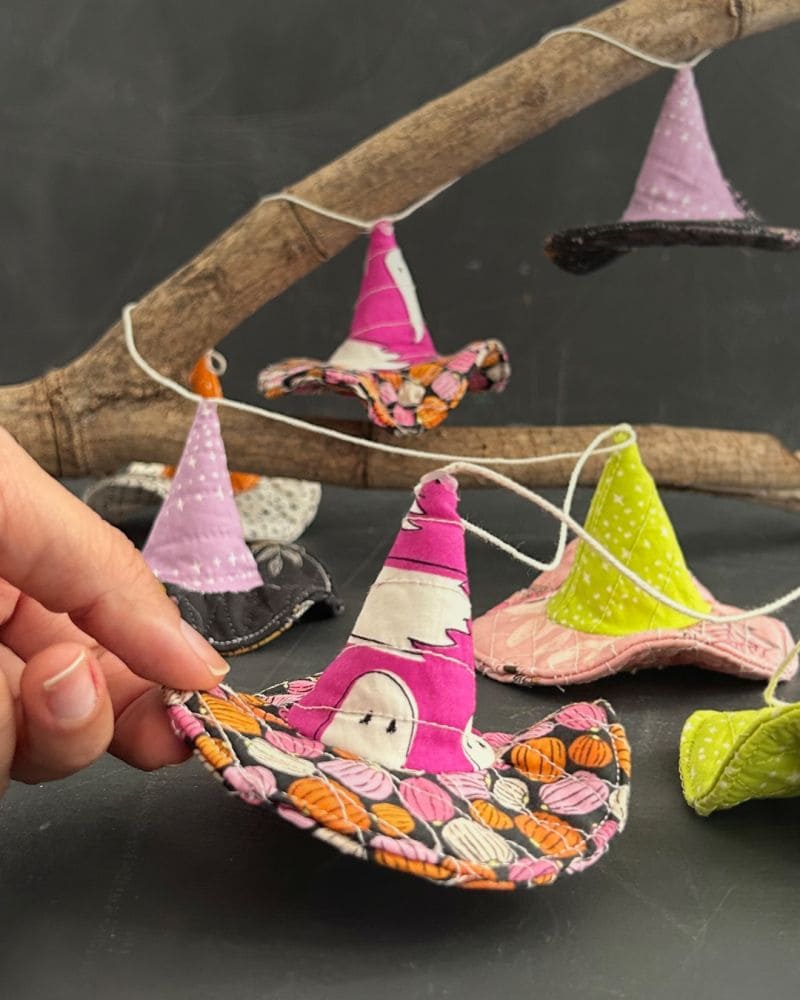
With bright pops of color, quirky patterns, and curved brims full of personality, these playful little witch hats bring a cheerful charm to any Halloween nook.
You’ll love how each one hangs like a spell just cast. Also, drape them over a mantle, twig branch, or along a window for a soft handmade touch that’s impossible to ignore.
If you’re the type who enjoys crafting with scraps and storytelling, this garland will be one of your favorites to stitch together.
Materials Needed
- Assorted fabric scraps (around 6″x6″ per hat)
- Light interfacing or felt for structure
- Twine or yarn (6-8 feet)
- Needle and thread or sewing machine
- Fabric scissors and pins
Step-by-step Guide
Step 1: Cut cone and brim pieces from colorful fabric, adding interfacing if needed for shape.
Step 2: Sew the cone closed, then attach it securely to the brim.
Step 3: Add stitching details for texture, then insert a loop of string through the tip of each hat.
Step 4: Now tie or string each one onto your twine and hang proudly.
#13. Rustic Ribbon and Twine Halloween Garland
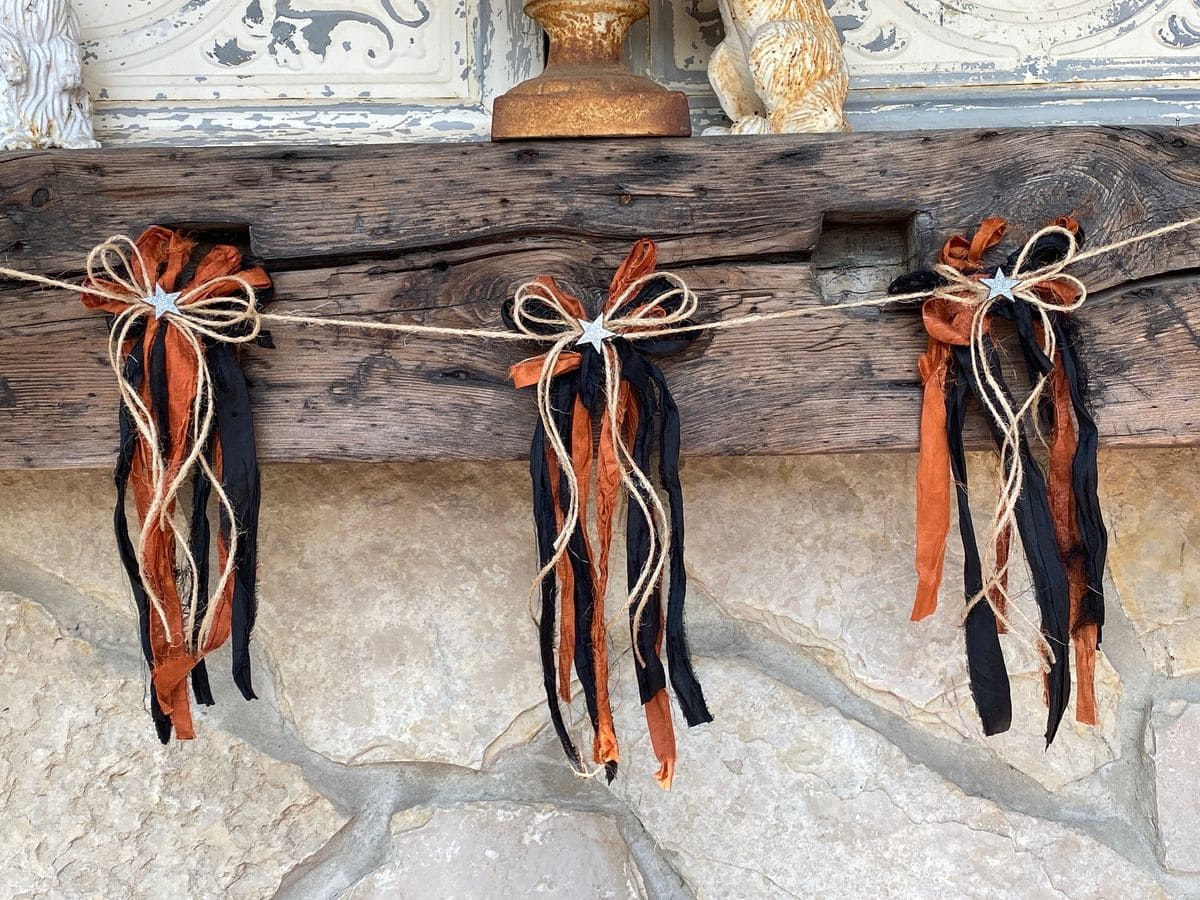
This charming garland ties together the soul of fall with the spirit of Halloween using just a few rustic materials.
Ribbons in burnt orange and deep black cascade from jute bows, accented by tiny silver stars. The layered texture feels homespun and whimsical, like something you’d see at a countryside harvest festival.
Besides, hanging this across a weathered wood mantel or stone fireplace instantly gives the room that cozy, spellbound look.
Materials Needed
- Black and orange crinkle ribbon (1-2 yards of each)
- Natural jute twine (at least 6 feet)
- Small silver star embellishments or stickers
- Hot glue gun
- Scissors
Step-by-step Guide
Step 1: Cut multiple strands of ribbon about 12-14 inches long. You need to prepare several 6-inch pieces of jute for bows.
Step 2: Tie the ribbon strips together in small bunches and add a jute bow on top of each one.
Step 3: Glue a star embellishment to the center of each bow for a magical accent.
Step 4: Finally, space the ribbon clusters evenly along the main twine and tie them securely.
#14. Soft Plush Bat Garland
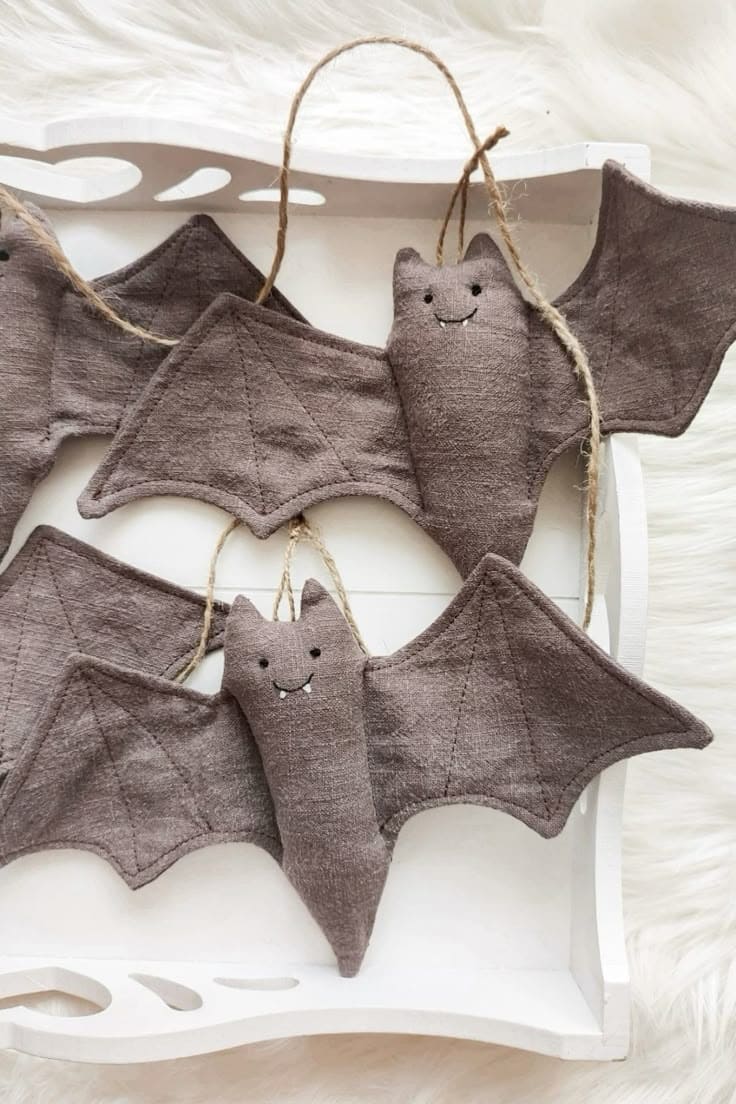
Not every Halloween creature has to be scary. These soft plush bats bring a cozy, handmade charm that instantly warms up your haunted setup.
With their floppy wings and tiny felt fangs, they look like little guardians of your autumn nights. You’ll love how their sleepy smiles add personality to your mantle, windows, or stair rails.
If you enjoy crafting decor that feels like it belongs in a children’s storybook, this garland is your sweet spot.
Materials Needed
- Brown or black cotton or linen fabric (½ yard)
- Polyfill stuffing (small bag)
- Embroidery thread (black and white)
- Jute twine (6-8 feet)
- Sewing machine or needle
- Fabric scissors and pins
Step-by-step Guide
Step 1: Cut two identical bat shapes per plush using a template and pin them together.
Step 2: Stitch around the edge, leaving a small gap for stuffing, then turn it right side out.
Step 3: Fill with polyfill and sew the opening closed.
Step 4: Finally, you just embroider the face details, then attach twine to the top of each bat for hanging.
#15. Bewitched Pennant Garland
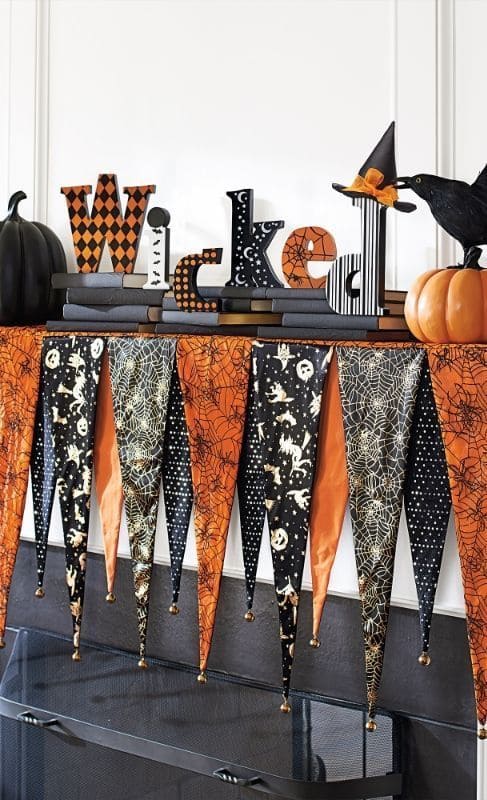
With bold triangular flags stitched in witchy fabrics like cobwebs, flying cats, enchanted moons, this pennant garland looks like something straight out of a haunted stage set.
Specially, the alternating orange and black patterns create rhythm and tension, perfect for framing a fireplace or an eerie book display.
Little gold bells dangling at the tips add whimsy with every breeze. If you’re the kind of person who loves Halloween with a side of elegance, this garland feels both refined and playfully wicked.
Materials Needed
- Halloween-themed cotton fabric (5-6 patterns, ¼ yard each)
- Matching thread and sewing machine
- Gold bell embellishments (1 per triangle)
- Bias tape or ribbon (6-8 feet)
- Scissors and pins
Step-by-step Guide
Step 1: Cut fabric into long triangles, approximately 8″ wide at the top and 18″ long.
Step 2: Sew or glue right sides together, then flip and press for a clean finish.
Step 3: Attach a small bell to the point of each pennant using thread or hot glue.
Step 4: Space your pennants evenly along the bias tape and sew or glue them in place.
#16. Upcycled Book Page Ghost Garland
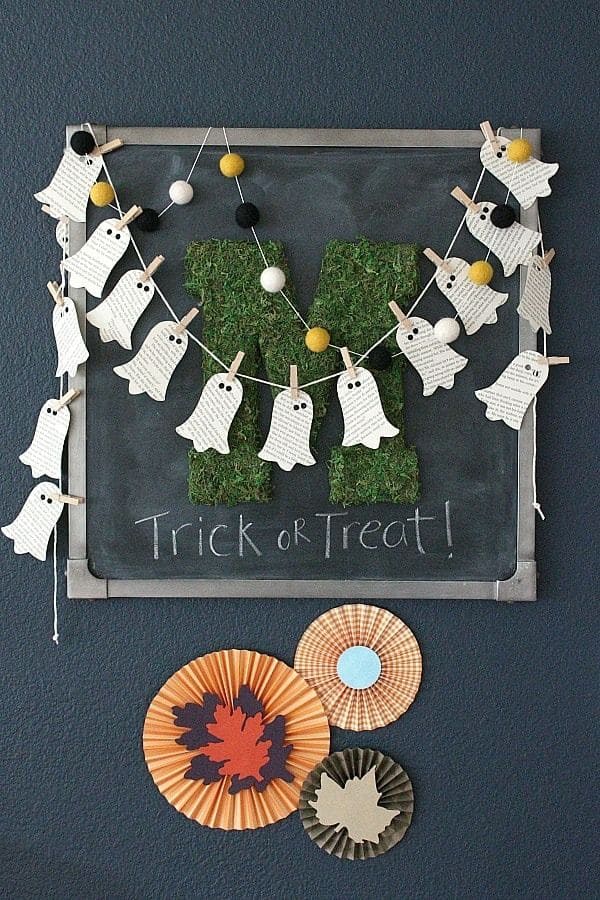
Old book pages and little clothespins bring these floating ghosts to life in the most charming way. T
here’s something endearing about their crooked eyes and soft curves, like they’re all mid-whisper. You can almost imagine them giggling over your shoulder.
This garland doesn’t scream Halloween, it softly hums it. If you love decorating with texture, mix it with pom-pom garlands or hang it over moss letters and chalkboards for a layered, cozy effect.
Read more: 5 Steps to Create Your Own Spooky Book Page Ghost Garland
#17. Gothic Lace and Gauze Spiderweb Garland
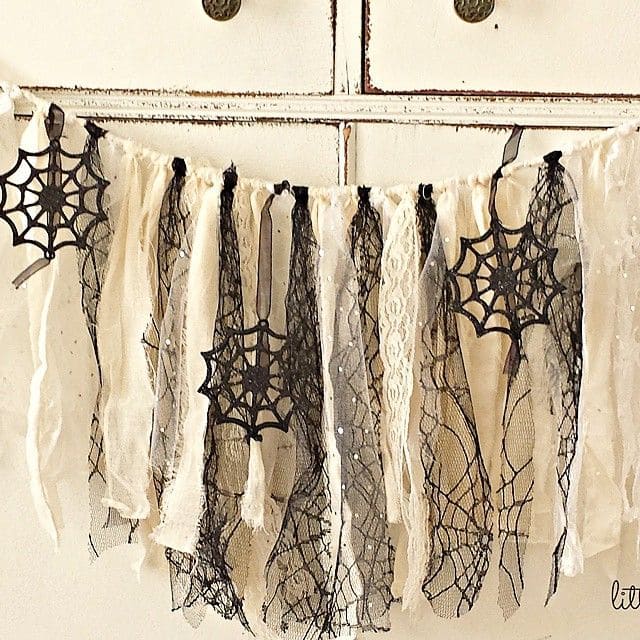
In this design, the mix of shredded white gauze, ivory lace, and black spiderweb mesh strips hang like torn curtains, fluttering with every breeze.
Draped on a simple twine or ribbon, the fabrics are tied on in layers to create a tattered, wispy fringe. Dangling black spiderweb cutouts complete the spooky scene with a dramatic Gothic flair.
Materials Needed
- White gauze fabric (cut into 2″x30″ strips, approx. 10-12)
- 10 ivory lace or muslin strips (2″x30″)
- 10 black lace or spiderweb mesh (2″x30″)
- 5 plastic or felt spiderweb ornaments
- Black ribbon (5-6 feet)
Step-by-step Guide
Step 1: Cut all your fabric into even strips and slightly fray the edges for texture.
Step 2: Tie each strip onto your twine, alternating between white, ivory, and black to create a balanced look.
Step 3: Attach spiderweb cutouts using hot glue or tie them on with ribbon between the fabric layers.
Step 4: Now you can hang your garland on a cabinet, wall, or mantel and fluff the fabric to give it a ghostly fullness.
Tip: You can also add battery-operated mini lights behind the garland for a soft, spooky glow at night.
#18. Jack Skellington-Inspired Statement Garland
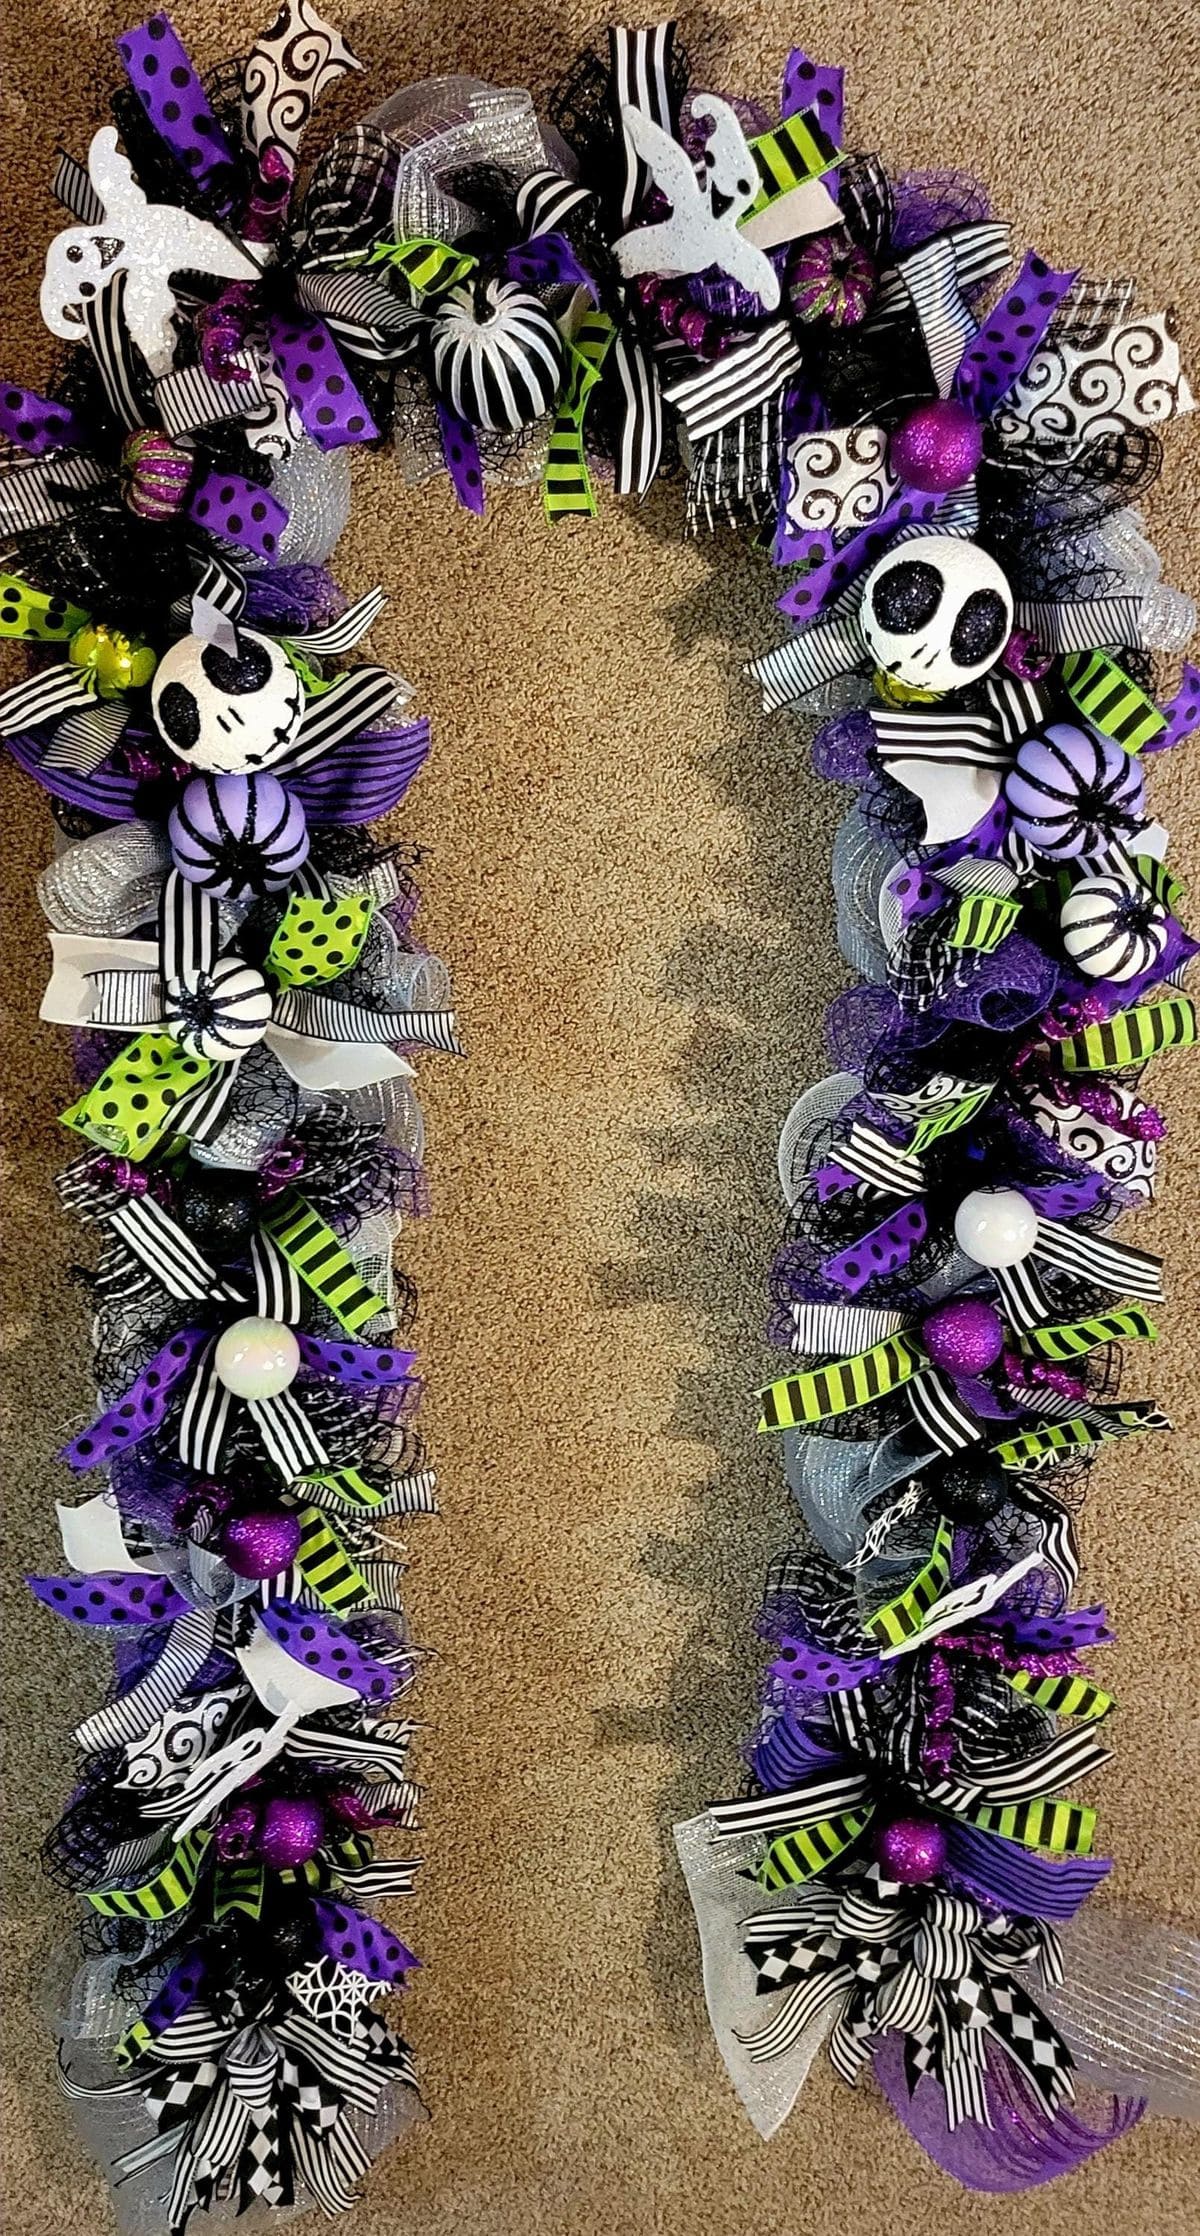
This bold and theatrical garland brings Tim Burton’s world to your hallway with flair. It’s a riot of texture, with striped ribbons, glittery mesh, and a haunting palette of purple, black, green, and ghostly white.
Plus, the playful mix of Jack Skellington faces, swirling patterns, and eerie pumpkins makes it feel like Halloween just came to life in a musical number.
Perfect for fans of spooky whimsy and over-the-top detail, this garland doesn’t whisper Halloween, it sings it.
Materials Needed
- 4-6 Jack Skellington ornaments or decals
- Wide ribbon in stripes, polka dots, and Halloween patterns (approx. 20 yards)
- Glitter mesh tubing and deco mesh (8-10 feet)
- Plastic mini pumpkins and ghosts (variety)
- Pipe cleaners
- Twinkle string lights (optional)
Step-by-step Guide
Step 1: Lay out your base mesh and attach it to a long garland rope using pipe cleaners.
Step 2: Begin adding your decorative ribbons, twisting and tying them every 6-8 inches.
Step 3: Attach your Jack faces, pumpkins, and ghost shapes securely along the garland.
Step 4: Finally, fill in gaps with smaller ribbons, mesh curls, and lights if desired.
#19. Minimalist Felt Ghost and Pumpkin Garland
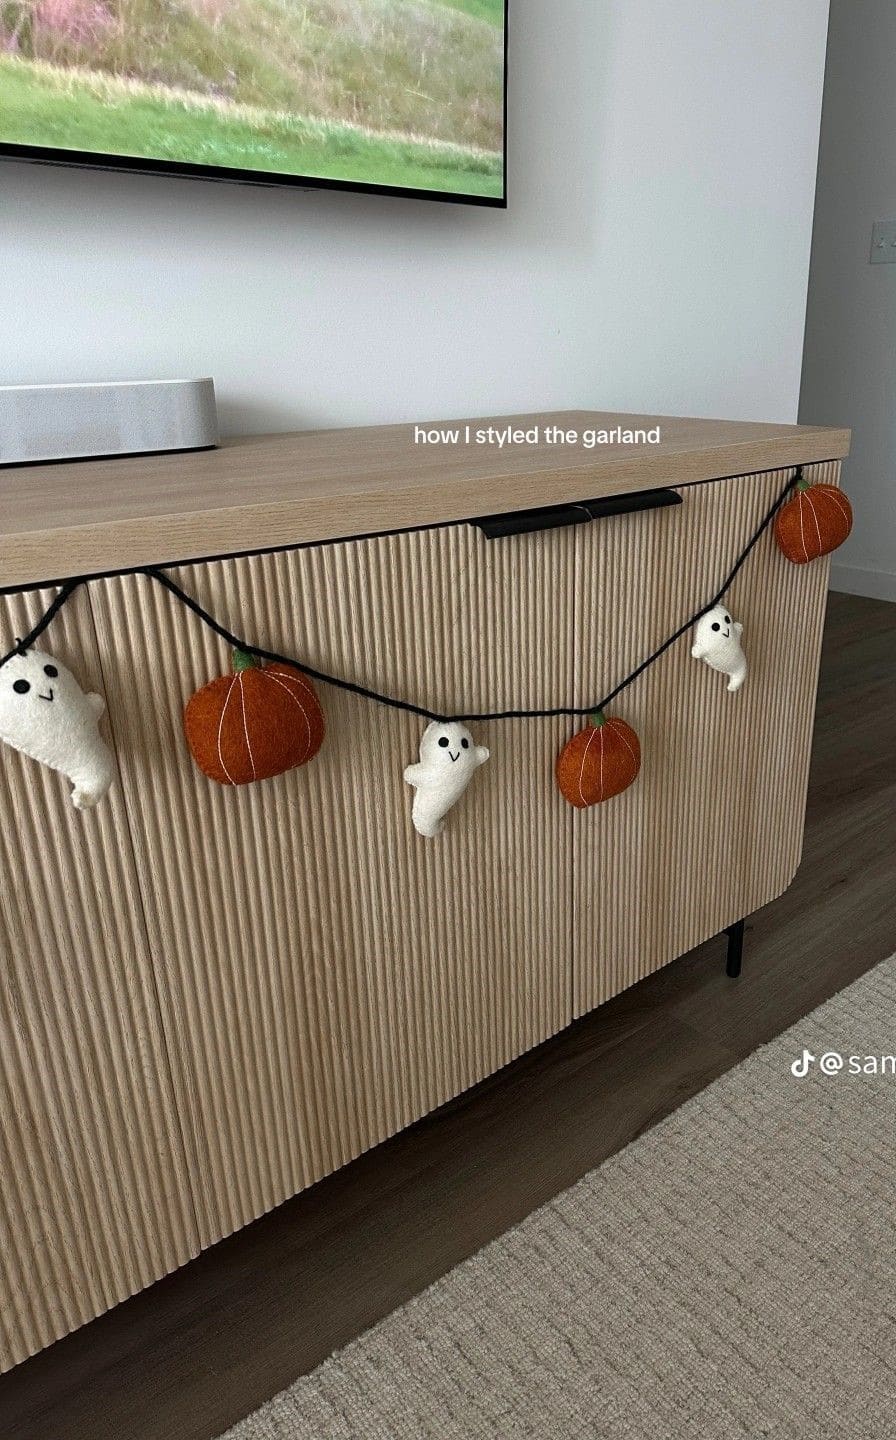
Interestingly, this minimalist garland brings cozy Halloween vibes without the visual clutter. Small hand-sewn felt pumpkins in rustic orange alternate with cream-colored felt ghosts, all strung on a basic black cord.
Moreover, the stitching and soft shapes feel homemade in the best way, making it perfect for Scandinavian or modern interiors.
Materials Needed
- Felt sheets (white and orange)
- Embroidery thread (black and white)
- Polyfill stuffing (small amount for each piece)
- Black yarn or twine (5-6 feet)
- Needle, hot glue, or fabric glue
Step-by-step Guide
Step 1: Cut out matching pairs of ghost and pumpkin shapes. Then you just stitch around each pair, leaving a small opening.
Step 2: Stuff each figure lightly with polyfill, then close the opening with neat stitches.
Step 3: Use black thread to sew on eyes and facial details for the ghosts and ridges for the pumpkins.
Step 4: Thread each piece onto black twine and knot in place to space them evenly.
#20. Sweet Ghost and Bat Felt Garland
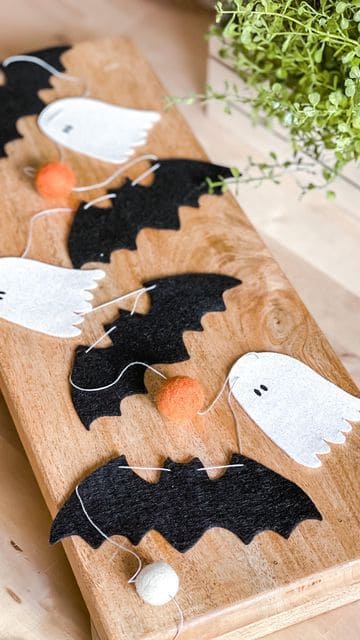
Featuring alternating felt bats and friendly ghosts, with warm orange and white wool balls strung in between, this garland creates a playful contrast that’s just right for a cozy Halloween setup.
Plus, the design feels handmade and minimalistic, but still festive enough to dress up a mantel, shelf, or kids’ room. Each shape has a whimsical simplicity which brings a sense of gentle charm to the season of fright.
Materials Needed
- 4 black felt sheets and 3 white felt sheets
- 8 small wool pom-poms (orange and white)
- White embroidery thread or thin twine (3-5 feet)
- Black embroidery floss or marker
- Needle or glue gun
Step-by-step Guide
Step 1: Cut out ghost and bat shapes from felt using templates or freehand drawing.
Step 2: Draw or stitch little eyes and smiles onto each ghost.
Step 3: Thread your needle and alternate stringing the ghosts, bats, and pom-poms along your twine.
Step 4: Finally, just adjust spacing and hang it where you want a subtle, spooky accent.
#21. Painted Leaf Ghost and Bat Garland
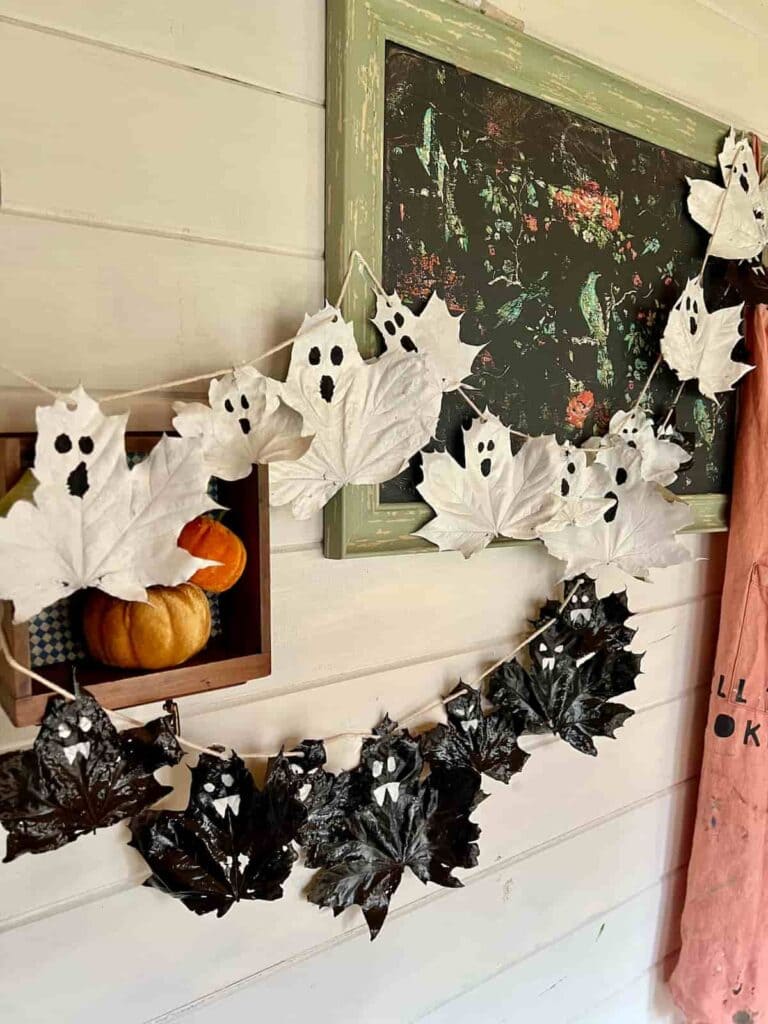
Wow, this clever garland transforms fallen leaves into playful Halloween characters with just a little paint and imagination.
Ghosts are painted in crisp white with wide-eyed expressions, while bats appear from glossy black leaves with tiny fangs and sharp silhouettes.
Specially, the texture of the leaves gives the whole garland a rustic, woodland feel that blends natural charm with a touch of spook.
Materials Needed
- 12-16 lried maple or sycamore leaves
- White and black acrylic paint
- Small paintbrushes
- White paper or paint
- Jute twine or string (5-6 feet)
- Hot glue gun or hole punch and twine
Step-by-step Guide
Step 1: Gather and press dry leaves to flatten. Then paint half white for ghosts, half black for bats.
Step 2: Use small brushes to paint faces like ghost eyes and mouths, bat eyes and paper fangs.
Step 3: Glue the finished leaves onto twine or thread them through punched holes.
See also: 24 Easy Fall Leaf Craft Projects for Preschoolers and Kids
#22. Wooden Ghost and Pumpkin Garland with Ribbon Ties
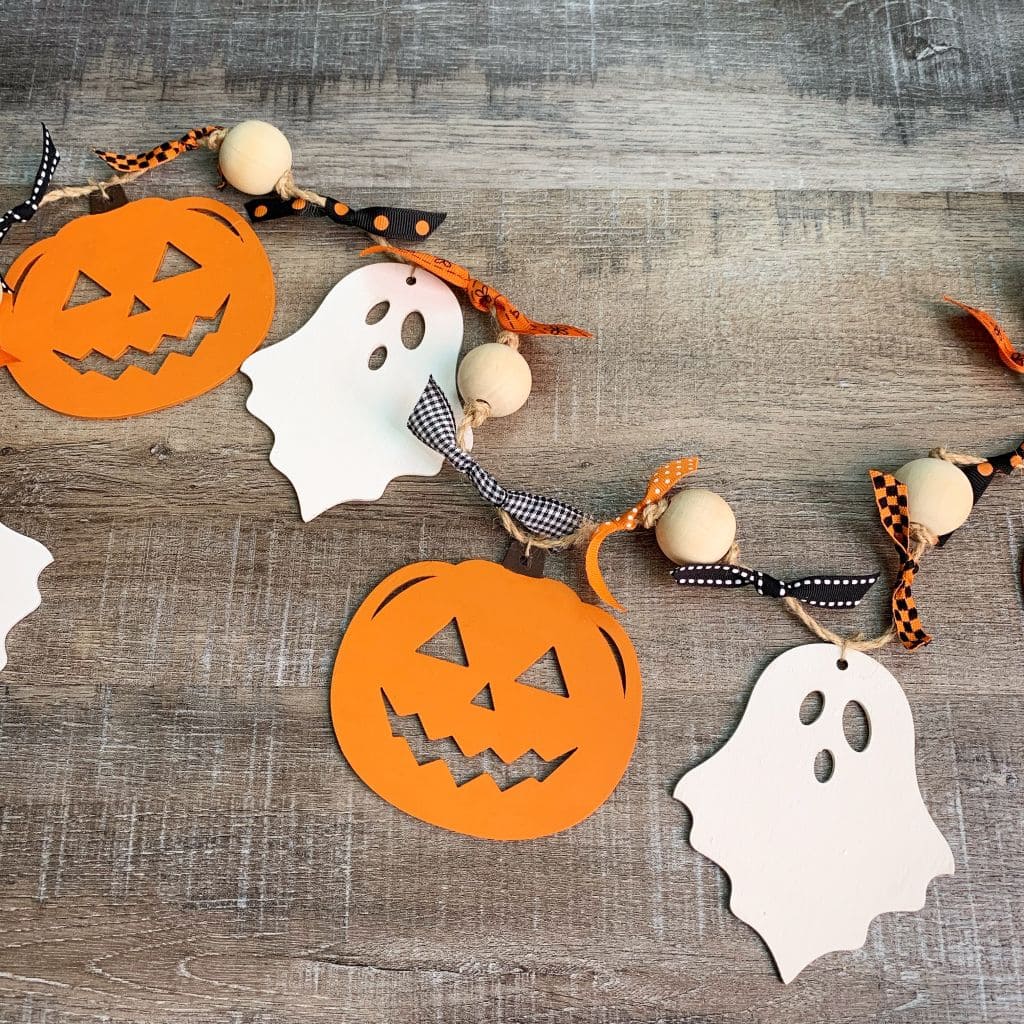
This festive garland pairs the timeless charm of Halloween icons, grinning jack-o’-lanterns and wide-eyed ghosts with fun ribbon accents and chunky wood beads.
You can see the contrast between the smooth painted wood and the textured twine, gingham, and polka-dotted ribbons gives this piece a layered, hand-touched quality.
Materials Needed
- 6 wooden pumpkin cutouts (4″ wide)
- 6 wooden ghost cutouts (4″ tall)
- White, black, and orange acrylic paint
- 12 wooden craft beads (1″ size)
- Ribbon scraps (polka dot, gingham – 10” each)
- Jute twine (6-7 feet)
- Hot glue gun or drill
Step-by-step Guide
Step 1: Paint the pumpkins orange and ghosts white. Let them dry completely.
Step 2: Drill holes or glue jute to the back for hanging. Then string the shapes onto the twine, alternating with beads and ribbons.
Step 3: Tie colorful ribbons between each shape for added texture and visual interest.
