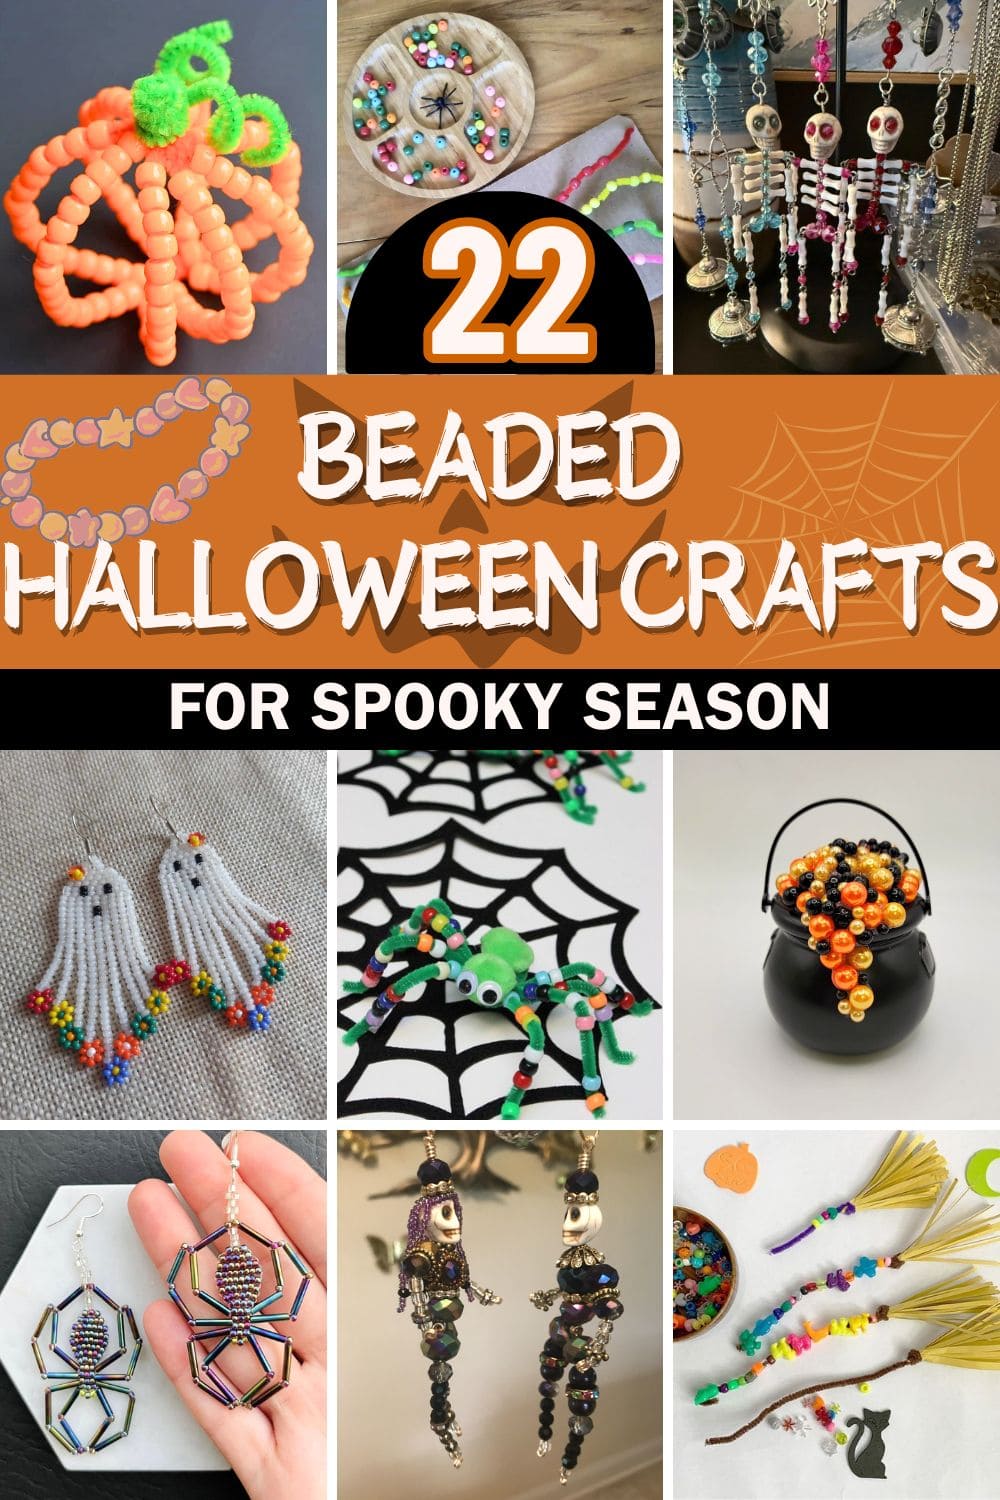
Looking to bring some handmade charm to your Halloween decor this year?
Beads might not be the first material that comes to mind when you think spooky, but trust me, these little gems pack a punch of personality.
This collection of beaded Halloween crafts is full of whimsy, weirdness, and a whole lot of “aww.”
Each project blends the festive spirit of the season with the delicate detail that only beadwork can offer. Some are sweet, others spooky, but all are ridiculously cute.
If your style leans more playful than petrifying, you’re in for a treat. Let’s dive into these hauntingly adorable ideas that are just begging to be made.
#1. Whimsical Beaded Ghost Earrings With Floral Fringe
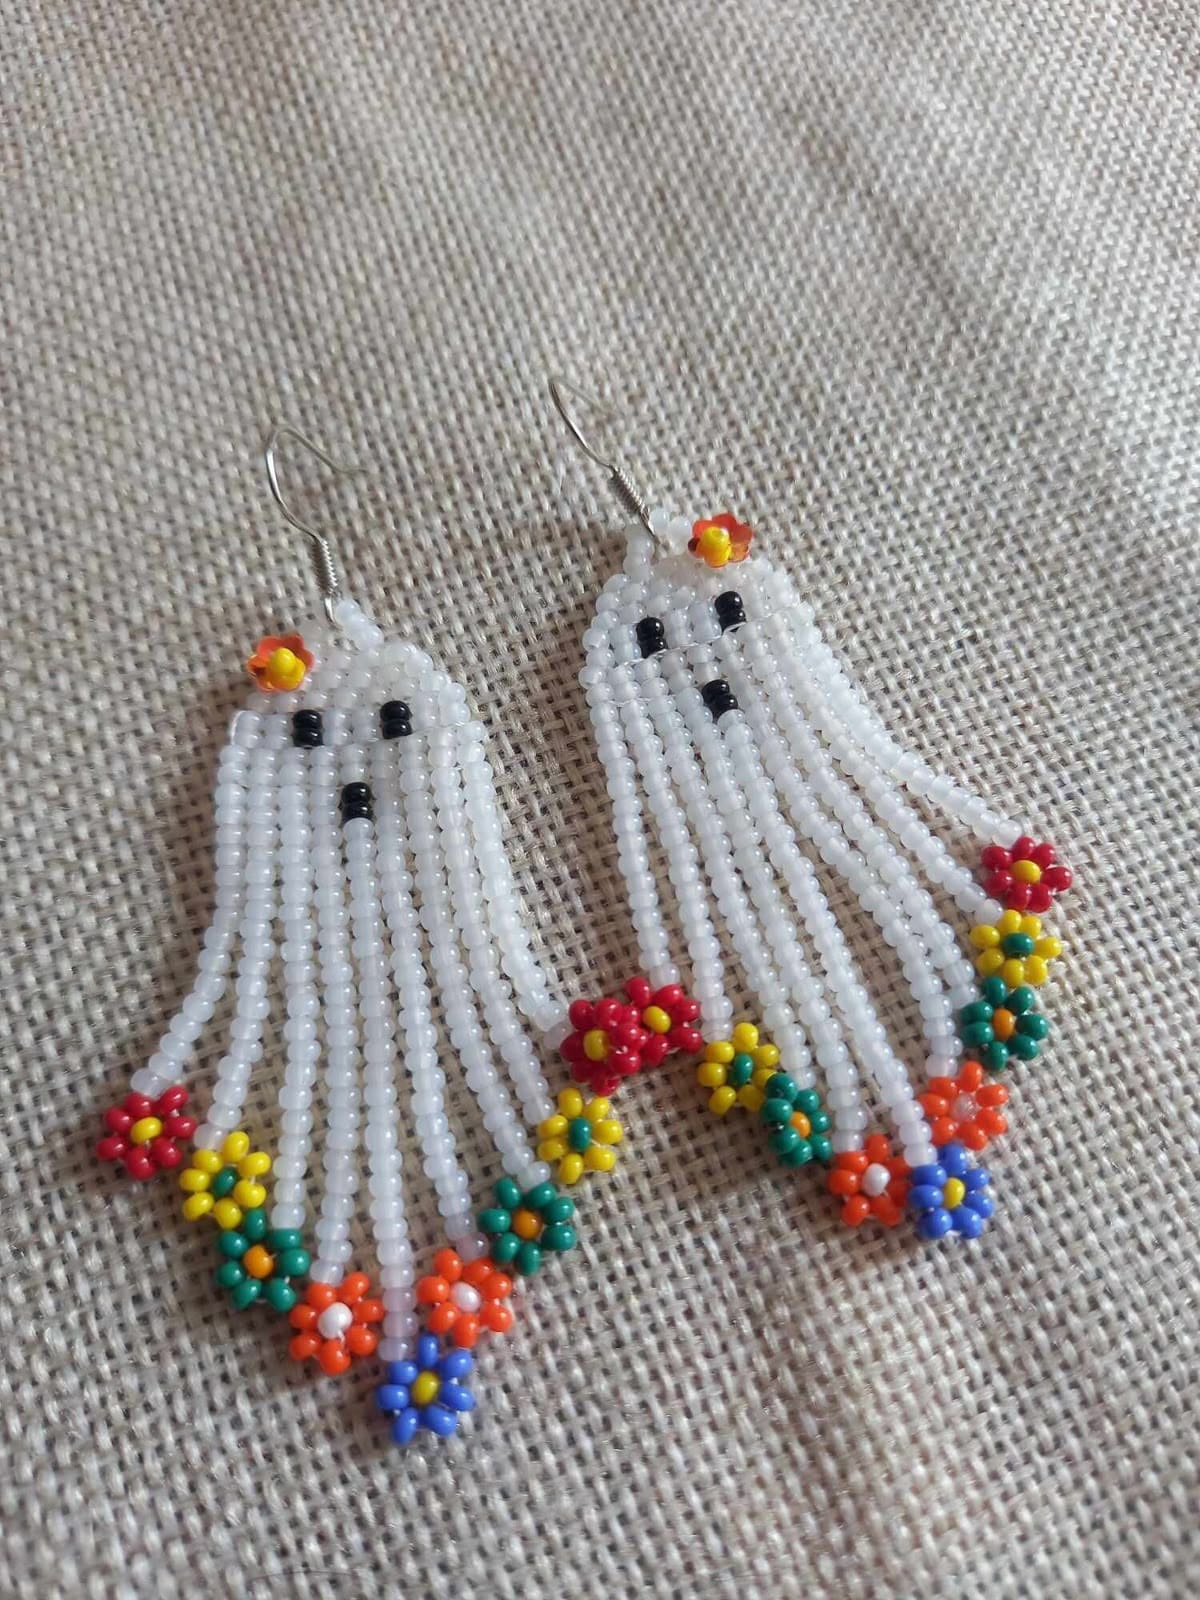
There’s something undeniably charming about these ghost earrings, they’re spooky, sweet, and wonderfully detailed.
Each ghost is formed with delicate white seed beads and adorned with tiny floral clusters along the hem, like a ghost who wandered into a garden party.
Also, these earrings are perfect if you love to add a playful, handmade twist to your Halloween outfits.
Materials Needed
- 2 earring hooks (silver or stainless steel)
- White seed beads (11/0 size, approx. 3g)
- Black seed beads (11/0 size, approx. 20 beads)
- Assorted colorful seed beads (red, yellow, orange, green, purple)
- Beading thread (3 ft, clear or white)
- Beading needle (#12)
- Small round-nose pliers
Step-by-step Guide
Step 1: Begin by threading white beads in fringe strands to create the ghost’s flowing shape, anchoring each to a base loop.
Step 2: At the end of each fringe, form tiny flowers using five same-colored beads with one contrasting bead in the center, then knot gently to secure.
Step 3: For the ghost’s face, stitch two round eyes and a small mouth using black beads placed near the top.
Step 4: Add one flower bead on the top of the ghost as a playful hair accessory, then attach the whole piece to the earring hook.
See more: 25 Cheap and Easy Upcycled Earrings That Are Perfect for Eco-Friendly Projects
#2. Colorful Beaded Spider on a Web
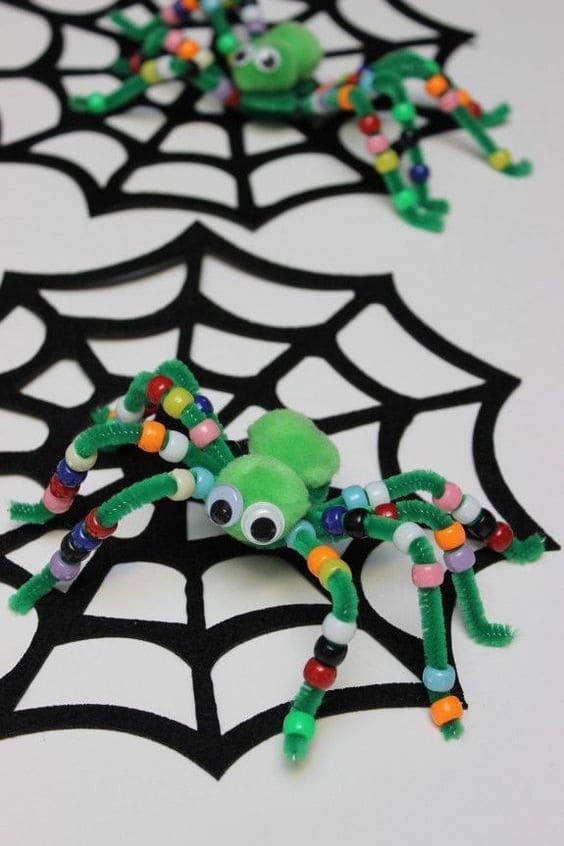
With fuzzy pipe cleaner legs and rainbow-colored beads, it’s more adorable than eerie.
If you’re crafting with kids or decorating a classroom, this playful project is a fun way to practice fine motor skills while bringing Halloween to life.
Materials Needed
- 4 green pipe cleaners (12 in. each)
- 1 large green pom-pom (1 in. diameter)
- 1 small green pom-pom (0.5 in. diameter)
- 2 medium-sized googly eyes (0.5 in. diameter)
- Assorted pony beads (6mm, around 40 beads per spider)
- Glue gun or tacky glue
- Optional: paper spider web cutout
Step-by-step Guide
Step 1: Twist two pipe cleaners together to form an “X”, then layer and twist a third and fourth over it to create 8 spider legs.
Step 2: Slide colorful beads onto each leg, leaving about 1/2 inch of pipe cleaner at the ends for bending into “feet.”
Step 3: Glue the large pom-pom at the center where all the legs intersect, this is the spider’s body.
Step 4: Add the smaller pom-pom on top for the head, then attach the googly eyes for a fun finish.
#3. 3D Beaded Pumpkin Craft
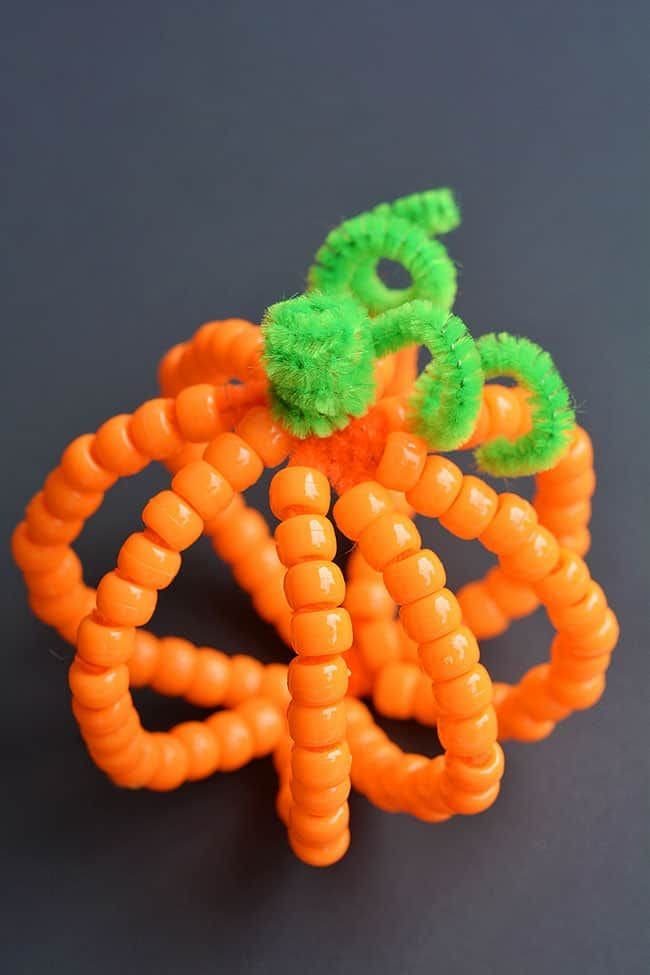
Wow, the rounded, bouncy shape brings a lovely dimensional touch to any Halloween display, plus, the bright orange beads make it pop like candy corn on your shelf or windowsill.
It’s a perfect hands-on craft for kids who love a little tactile creativity, and the curly green stem adds just the right twist of personality.
Materials Needed
- 5 orange pipe cleaners (12 in. each)
- 1 green pipe cleaner (12 in.)
- 1 small green pom-pom (1 in. diameter)
- 80-100 orange pony beads (6mm)
- Scissors
Step-by-step Guide
Step 1: Thread about 16–20 orange pony beads onto each orange pipe cleaner, leaving about 1/2 inch at each end.
Step 2: Twist all five pipe cleaners together at the center to create a starburst shape, then curve them upward to meet at the top and twist again to close the pumpkin shape.
Step 3: Wrap the green pipe cleaner around your finger to curl it, then twist it into the top as a stem. Finally, you glue the green pom-pom in the center for a cute leafy touch.
#4. Rainbow Beaded Spider Earrings
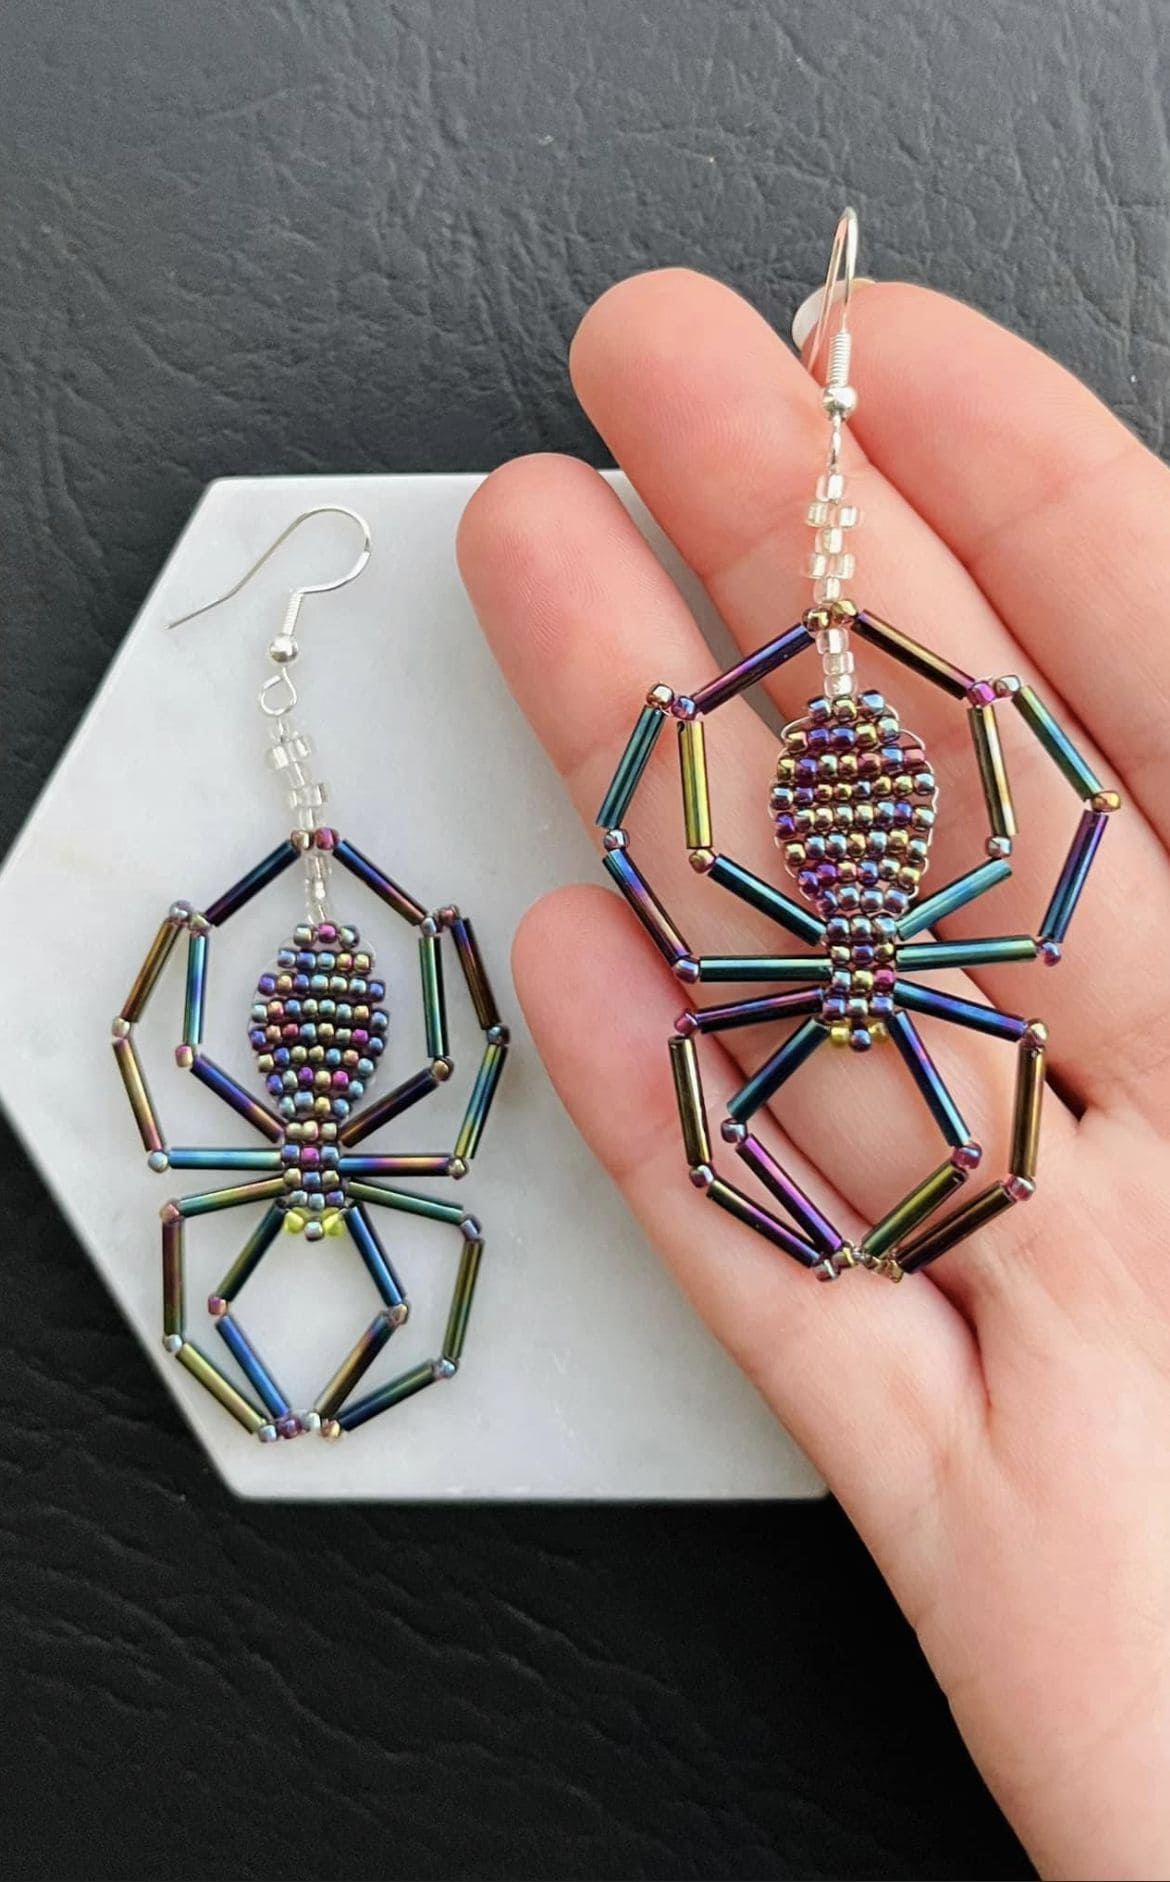
Designed with shimmering rainbow bugle beads and woven seed beads, these dazzling spider earrings bring serious Halloween vibes without losing their artsy edge.
Plus, the intricate beaded body looks like a miniature sculpture, while the angular legs give it that unmistakable arachnid shape.
They’re lightweight, eye-catching, and definitely a conversation starter.
Materials Needed
- 32 rainbow bugle beads (approx. 1″ long)
- 100 small metallic seed beads (size 11/0)
- Clear beading thread or nylon cord (30 inches)
- Beading needle (fine size)
- 2 earring hooks
- 2 jump rings
- Flat nose pliers and scissors
Step-by-step Guide
Step 1: Start by beading the spider’s body using seed beads. Then create an oval shape for the abdomen, then a smaller round head, stitching them together securely.
Step 2: Add the legs by threading four bugle beads on each side. You angle and secure them with tiny seed beads at each joint to give shape.
Step 3: Create a small loop of clear seed beads at the top for hanging and attach the earring hook with a jump ring.
Step 4: Finally, tighten the thread, secure with a knot, and trim the ends neatly.
#5. No-Face Spirit Beaded Fringe Earrings
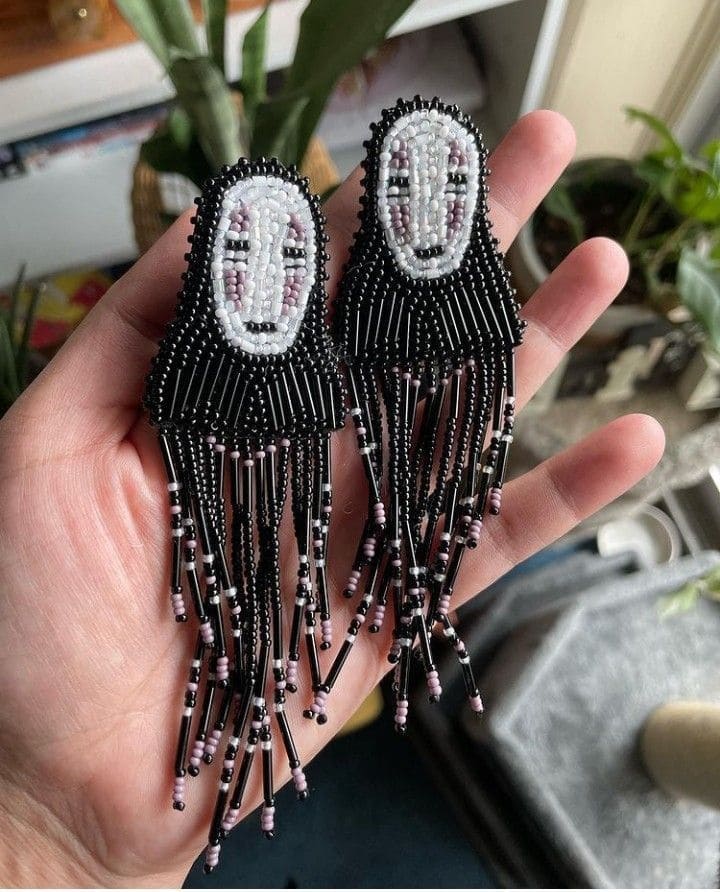
Inspired by the mysterious character from Spirited Away, these beaded No-Face earrings are hauntingly elegant.
The design captures the ghostly white mask with delicate detail, surrounded by a flowing black cloak made entirely from tiny glass beads.
Whether you’re a Studio Ghibli fan or love gothic-style accessories, these are perfect for adding a dark, artistic edge to your Halloween outfit.
Materials Needed
- Black, white, pink, and gray seed beads (size 11/0)
- 60 black bugle beads (1″ long)
- Nylon beading thread (2-3 feet per earring)
- Beading needle (size 10-12)
- 2 earring posts or hooks
- Felt backing or beading foundation
- Scissors and glue
Step-by-step Guide
Step 1: Start by creating the No-Face face design on a felt base using white, pink, and gray seed beads. Then use a backstitch to secure the shape and details.
Step 2: Surround the face with black beads to build the cloak and define the outer edge.
Step 3: Add layers of long fringe using bugle and seed beads, alternating patterns to add subtle texture and flow.
Step 4: Attach an earring post or hook to the top and glue felt to the back for a clean finish.
#6. Beaded Skeleton Earrings
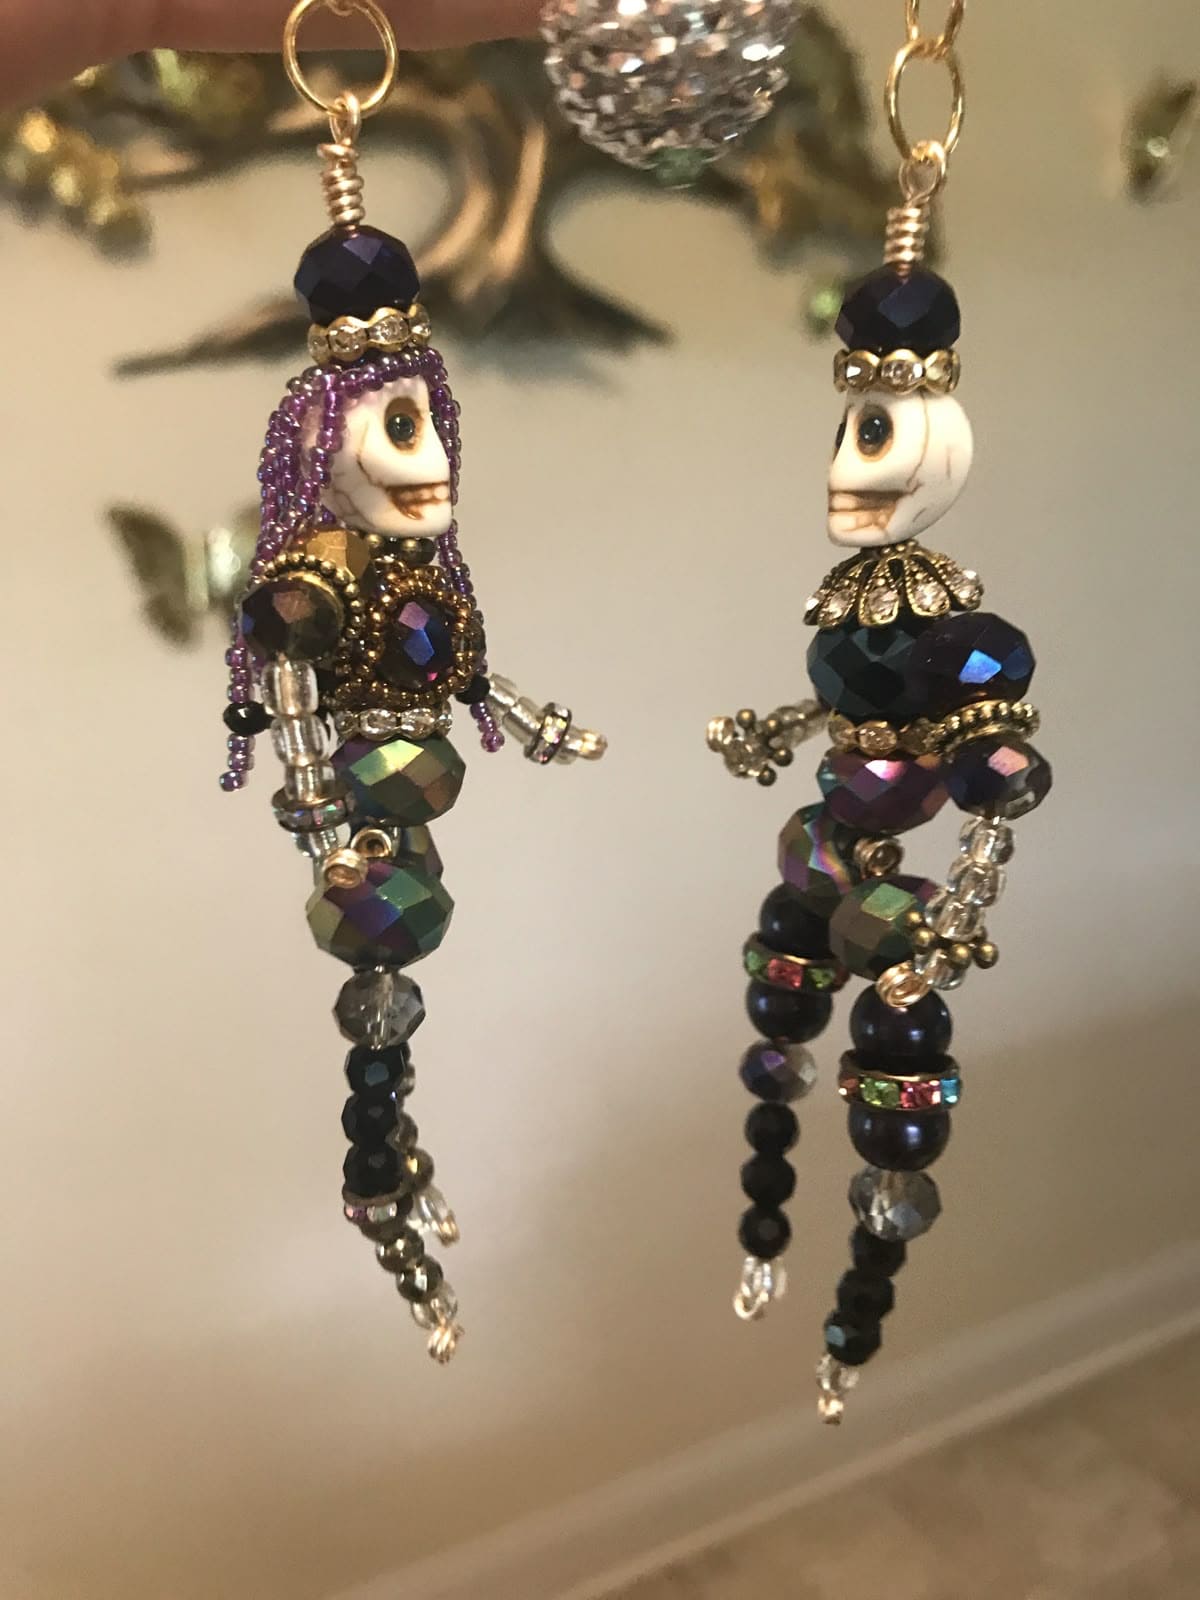
These dazzling skeleton earrings bring Halloween flair with a glint of glam. Each tiny bead tells a story from shimmering hematite legs to their quirky, expressive skull faces.
You can almost imagine these bony friends dancing under a full moon, gossiping about witches and lost souls.
Bonus, they’re lightweight, full of personality, and surprisingly easy to assemble once you’ve gathered the materials.
Materials Needed
- 2 skull beads (approx. 0.75″)
- 40-50 assorted seed beads (purple, silver, black – 2mm)
- 8 faceted glass beads (8-10mm size, iridescent or black)
- 6 rondelle spacer beads (4mm)
- 2 headpins (2″) and 2 eye pins (2″)
- 2 earring hooks (gold or silver tone)
- Jewelry pliers set (round nose and wire cutters)
Step-by-step Guide
Step 1: Slide a skull bead onto a headpin. Add a round spacer or rhinestone rondelle just under it to create a necklace.
Step 2: Stack a mix of glass and seed beads below the skull to form the torso. You finish the torso with a loop using round-nose pliers.
Step 3: For arms and legs, use eye pins threaded with small seed beads and mini crystals. You need to make a loop at each end to hold them in place.
Step 4: Connect limbs to the torso loop with jump rings, making sure they dangle freely like little skeleton marionettes.
Step 5: Attach your earring hooks to the top of each skeleton. Then give them a gentle shake to admire the spooky shimmer.
#7. Day of the Dead-Inspired Skull Tassel Earrings
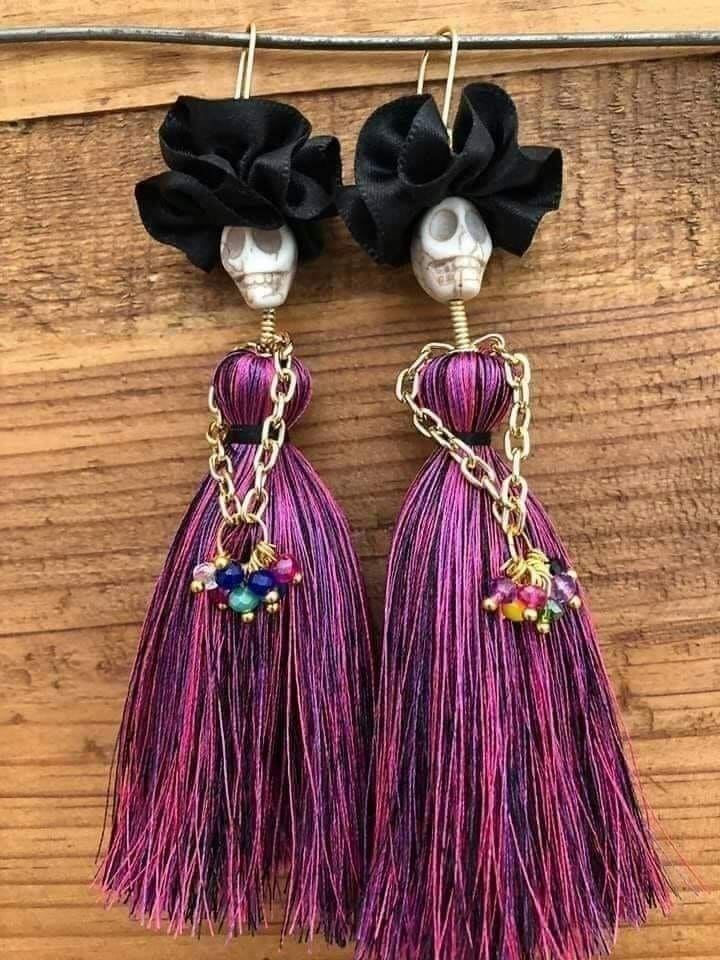
With delicate white skull beads nestled beneath dramatic black fabric roses, these bold and sassy earrings capture the spirit of Día de los Muertos in the most fashionable way.
The real eye-catcher is the silky magenta tassel, flowing with movement and charm, wrapped in a gold chain that adds texture and shine.
Plus, a tiny bunch of colorful beads completes the look with a fun pop of energy. They’re hauntingly elegant and playful at the same time.
Materials Needed
- 2 skull beads ( approx. 0.5″)
- Black satin ribbon
- 2 magenta tassels (approx. 3-4″ long)
- Gold chain (2 lengths, 6″ each)
- Colorful seed beads (about 10 pieces)
- 4 gold jump rings
- 2 gold earring hooks
- Jewelry pliers and glue
Step-by-step Guide
Step 1: Create a small rosette from black ribbon and glue it securely to the top of each skull bead.
Step 2: Attach the skull bead to the top of the tassel using wire or a strong jump ring.
Step 3: Wrap the gold chain around the tassel top and secure with a jump ring. Then add mini beads or charms as accents.
Step 4: Finish by attaching each piece to an earring hook and adjust placement for balance.
#8. Halloween Daisy Chain Bracelet
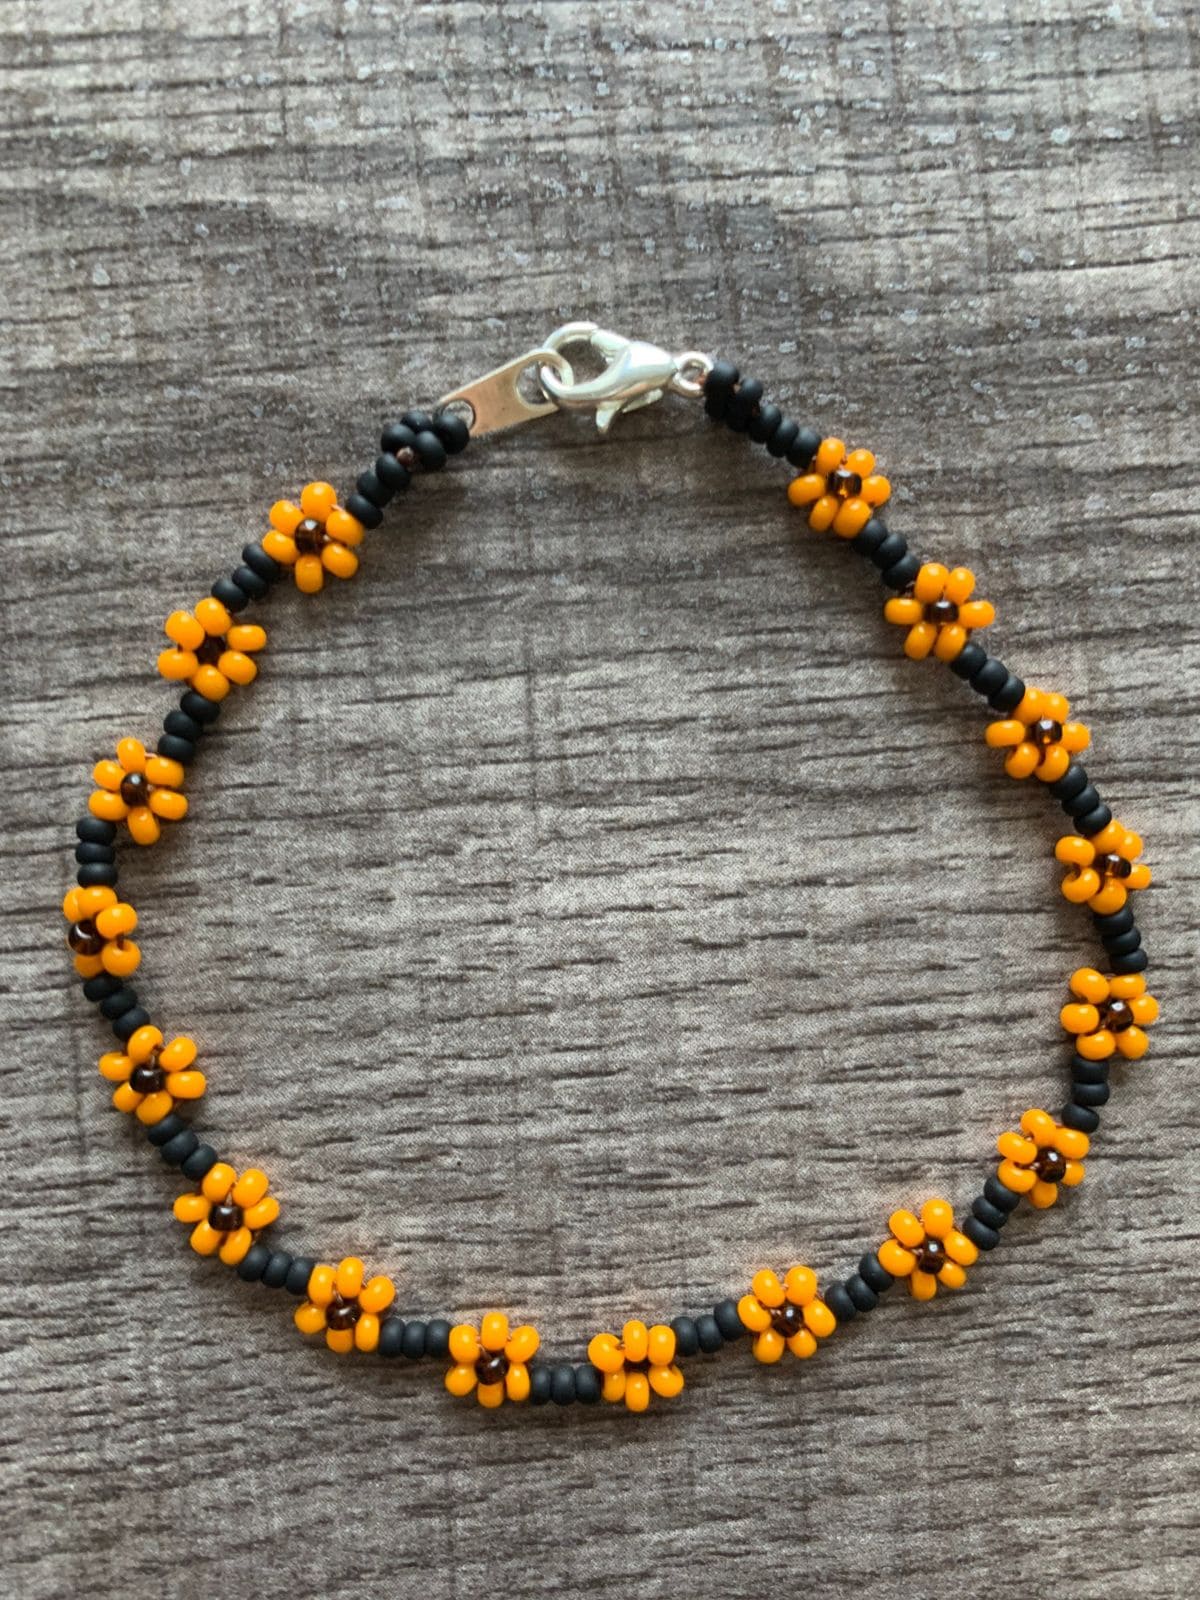
This delicate daisy chain bracelet gives Halloween a softer side. Tiny orange petals paired with jet-black centers form cheerful floral links that wrap sweetly around your wrist.
Perfect for autumn or spooky season, it’s subtle yet festive and so lightweight, you’ll forget you’re wearing it.
Moreover, the silver lobster clasp gives it a polished finish, making it a great handmade gift or charming accessory for your seasonal outfits.
Materials Needed
- Seed beads in orange, black, and brown (size 11/0, approx. 100-120 beads total)
- Beading thread or nylon cord (1 strand, 18″ long)
- Lobster clasp (12mm)
- Jump ring (4mm)
- Beading needle (fine size)
- Scissors and glue (optional)
Step-by-step Guide
Step 1: Thread your needle with about 18″ of beading thread. Then tie a small knot 2″ from the end.
Step 2: String one black bead (flower center), then alternate six orange beads for the petals around it. You now loop the thread back through the center bead to form a flower.
Step 3: Add a few black spacer beads between each flower and repeat the process to create a daisy chain until you reach your desired length (about 6.5″-7″ for a bracelet).
Step 4: Attach the lobster clasp to one end and a jump ring to the other using tight knots. Then add a dab of glue for extra security.
#9. Dangling Beaded Skeleton Charms
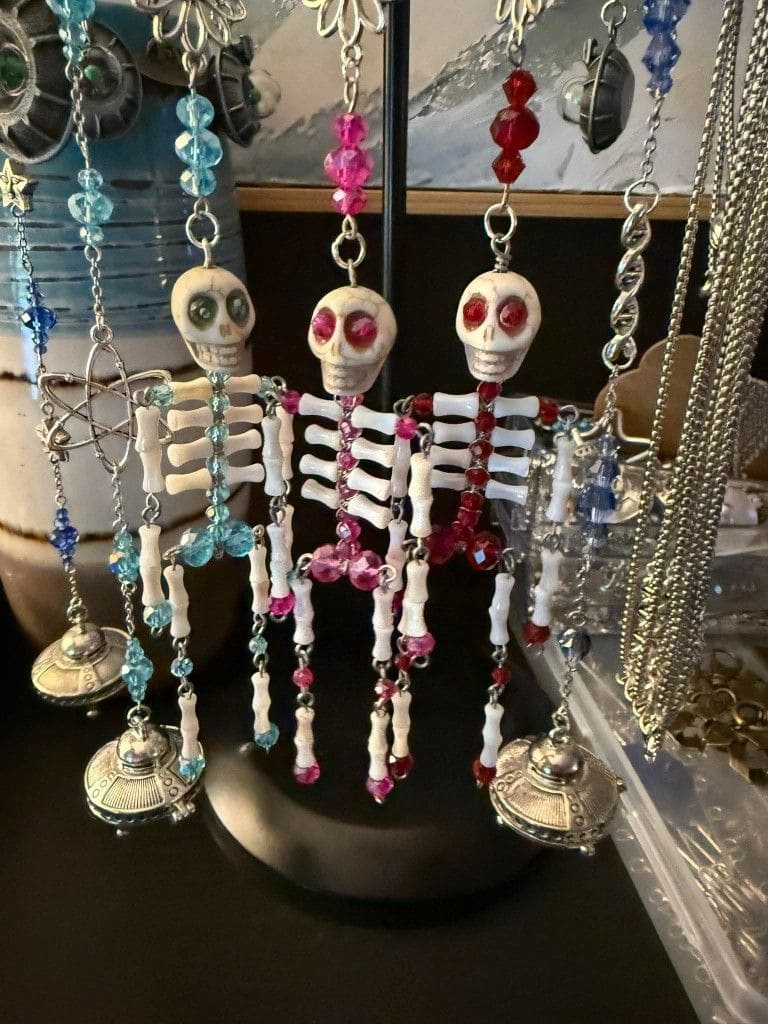
Made from a mix of skeletal beads and colorful faceted ones, each charm hangs with personality like a festive Halloween dance frozen in time.
You can use them as keychains, rearview mirror decor, or quirky party favors.
Specially, the addition of UFO-like metal bells at the base adds a delightful jingle and a sci-fi twist to the spooky season.
Materials Needed
- Skeleton bead sets (including skulls and bone segments, approx. 2″–3″ total length)
- 10-15 colored acrylic or glass beads (6mm–8mm)
- Jewelry wire or head pins (3″ length)
- Jump rings and metal chains (3″-6″ sections)
- Metal charms (1 per skeleton)
- Round-nose pliers
Step-by-step Guide
Step 1: Arrange your beads, alternating between skeleton parts and colored accent beads on jewelry wire or head pins.
Step 2: Use pliers to loop and secure each segment, connecting arms, legs, and heads with jump rings.
Step 3: Attach the charm to a short chain and finish it off with a dangling metal bell or charm at the bottom.
Step 4: Add a keyring or clip at the top if you want to turn it into a keychain or hanging ornament.
Tip: You can give each skeleton its own personality by varying the bead colors or eye accents.
#10. Beaded Witch’s Broomstick Fine Motor Activity
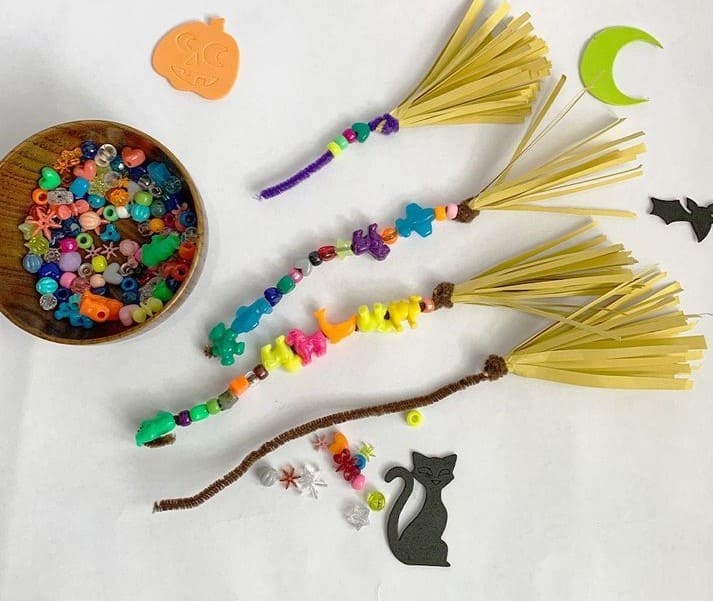
If you’re looking for a spellbinding Halloween craft that’s also secretly educational, this witch’s broomstick beading activity is pure magic.
Kids will light up as they decorate their own broomstick with colorful beads and playful Halloween charms.
Not only does it spark creativity, but it helps strengthen fine motor skills and hand-eye coordination.
Materials Needed
- 4 brown or black pipe cleaners (12″)
- ½ cup plastic beads (variety of colors and shapes, approx. 9mm)
- 4 bundles of raffia strips (each 6-8″ long, about 10 strips per bundle)
- Glue gun
- Small rubber bands
Step-by-step Guide
Step 1: Start by gathering a bundle of raffia and securing one end with a small rubber band, this will form the broom bristles.
Step 2: Twist one pipe cleaner around the rubber-banded end of the raffia to create the broom handle. Then secure with a dot of glue if needed.
Step 3: Thread beads onto the pipe cleaner, letting little fingers pick colors and patterns. You can add spooky shapes like pumpkins or cats for extra fun!
Step 4: Once filled with beads, fold the end of the pipe cleaner to keep them from sliding off.
#11. Bubbling Witch’s Cauldron Bead Decor
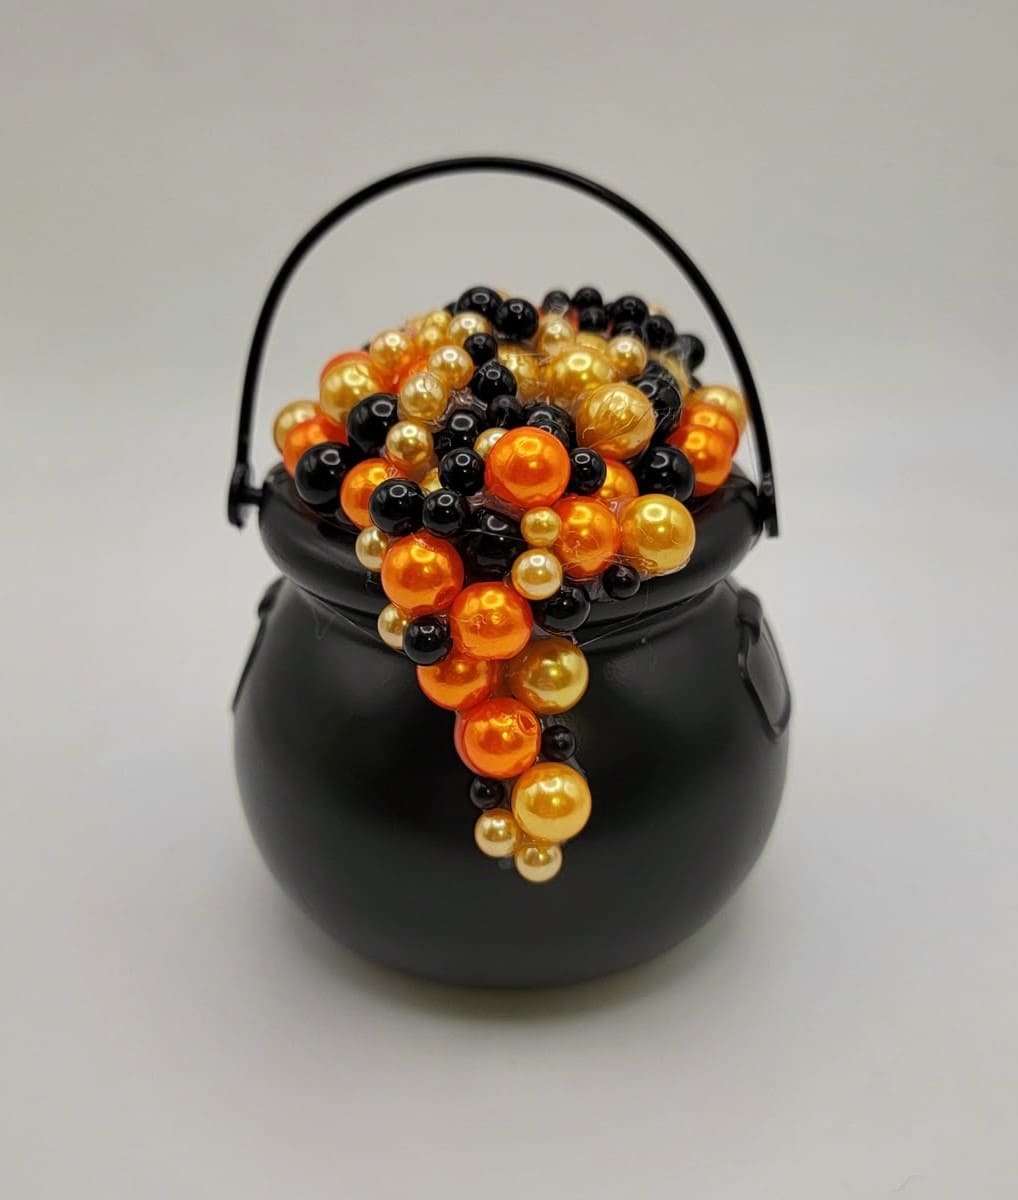
Made with a mix of glossy beads in Halloween hues like orange, gold, and black, this spooky little cauldron gives off the illusion of a brewing spell just about to bubble over.
You can place it by your candy bowl or on a bookshelf for a festive pop of texture and shine.
This craft is quick to make, but the result looks like something straight from a witch’s cabinet.
Materials Needed
- Mini black plastic cauldron (approx. 3.5″ diameter)
- Assorted pearl beads (6mm-14mm in orange, gold, black)
- 2-3 black pipe cleaners
- Hot glue gun & glue sticks
- Scissors
Step-by-step Guide
Step 1: Twist pipe cleaners into a wavy cluster to form a base. This will help you control the bead flow.
Step 2: Thread beads onto the pipe cleaners in a random order, layering different sizes to create a boiling look.
Step 3: Secure the pipe cleaner inside the cauldron and bend the rest to spill over the edge. Then glue in place.
Step 4: Add extra beads with glue to fill in gaps and create a more rounded, overflowing effect.
#12. Pearl and Blood Drip Choker Necklace
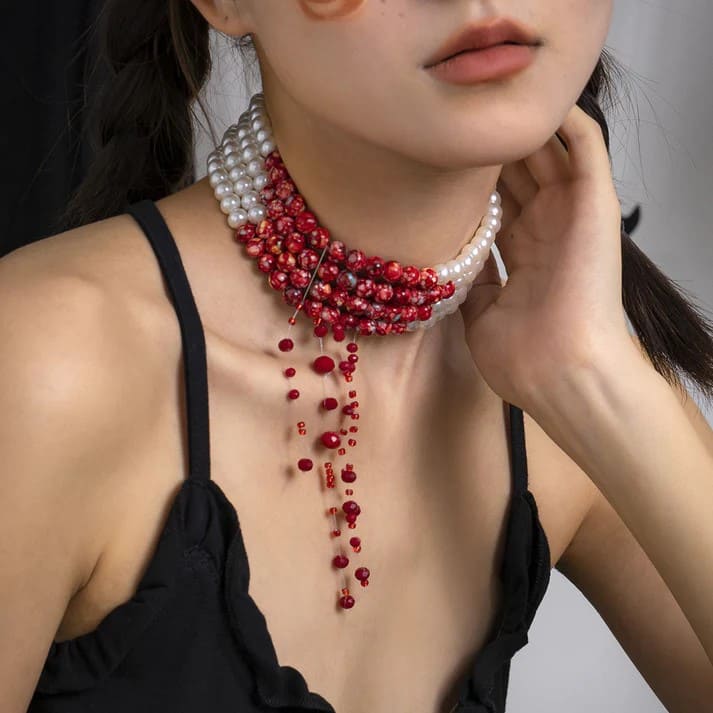
You can see pearlescent strands are wrapped tightly around the neck, gradually giving way to bold red marbled beads and a sharp metal stab detail.
Dangling from the center is a dramatic blood-drip illusion made of cascading red beads in various shapes and sizes, creating a visual that’s as eerie as it is captivating.
I believe this piece turns heads and tells a story without saying a word, making it ideal for Halloween parties or edgy fashion statements.
Materials Needed
- White pearl beads (8mm, approx. 40 pcs)
- Red marbled beads (6-10mm, approx. 40 pcs)
- Small red seed beads and crystal beads
- Jewelry wire (20-22 gauge)
- Necklace clasp and jump rings
- Needle or faux safety pin accent
- Crimp beads and beading tools
Step-by-step Guide
Step 1: String alternating rows of pearl and red beads onto wire to fit snugly around the neck.
Step 2: Use crimp beads to secure each strand and attach them to the clasp hardware.
Step 3: Create the dangling “drips” by threading seed and crystal beads in descending lengths, securing them to the center underside of the choker.
Step 4: Finally, add a decorative needle or pin element to enhance the stabbed effect for a theatrical finish.
#13. Delicate Beaded Bat Earrings for a Chic Halloween Touch
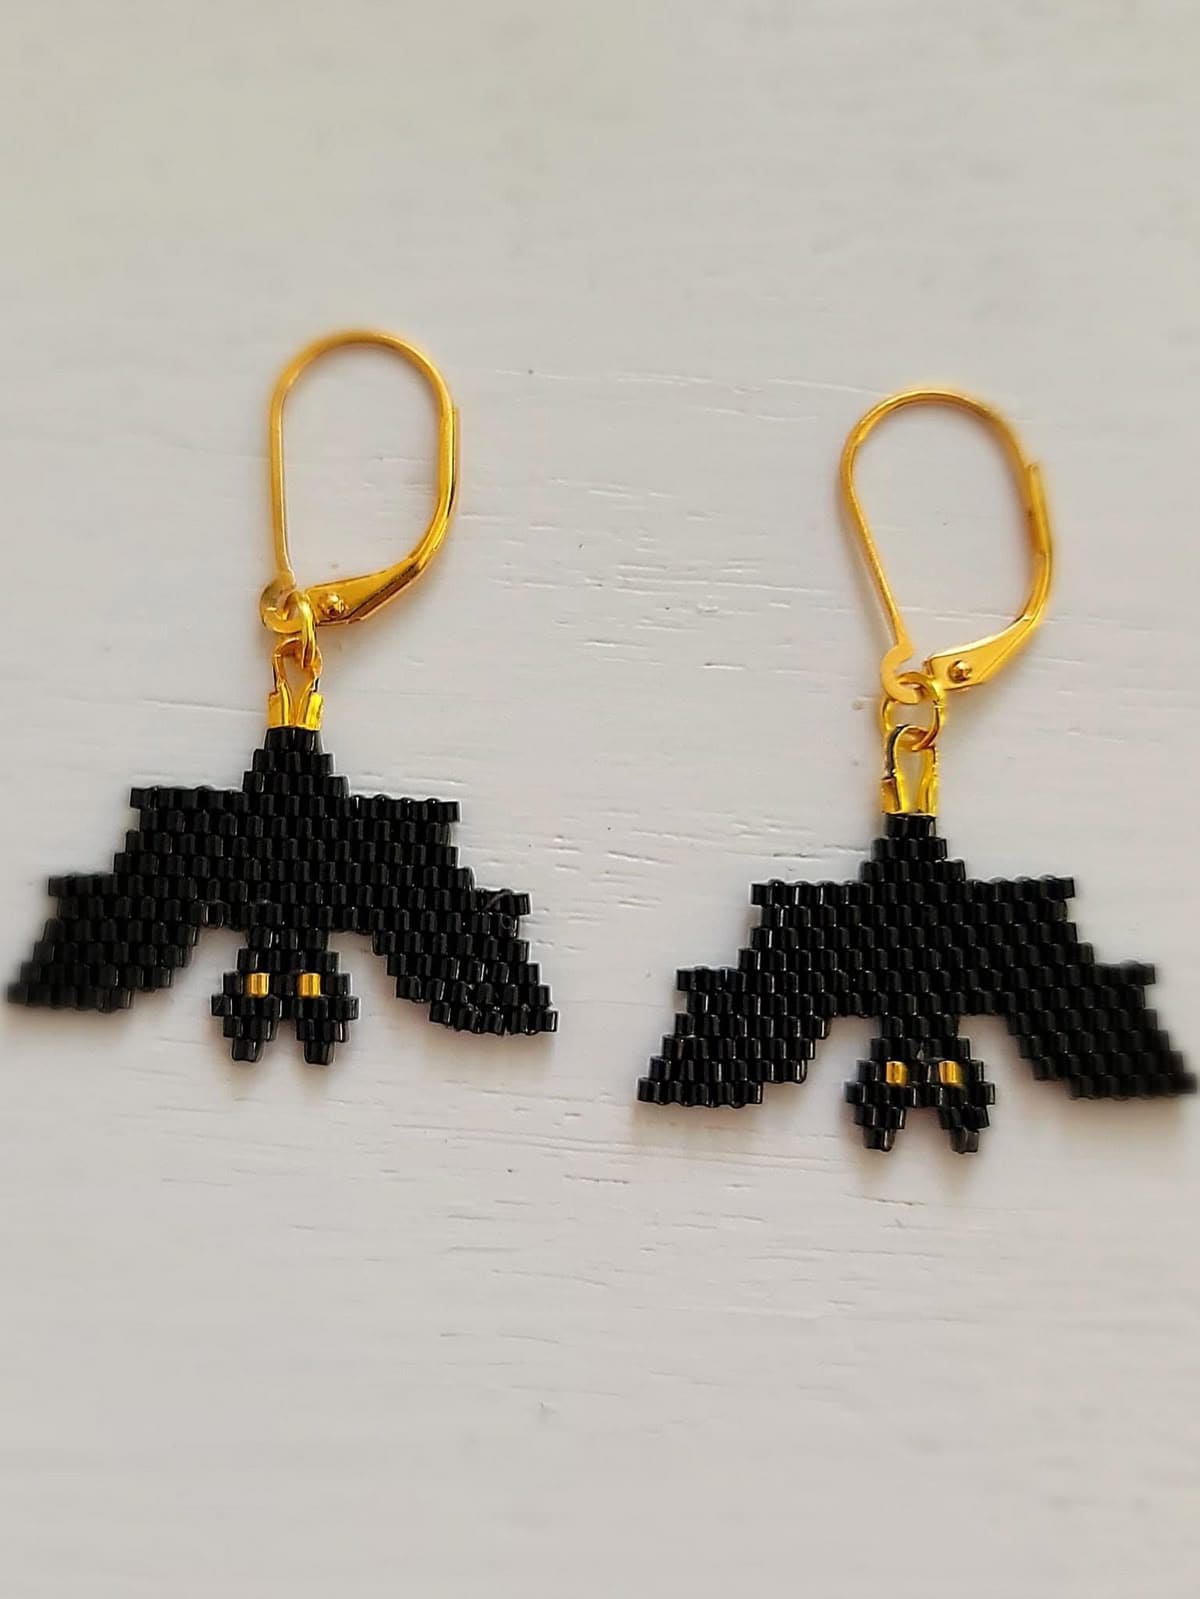
Crafted with tiny black seed beads and just a hint of gold, these stunning bat earrings flutter with elegant Halloween energy.
Whether you’re dressing up for a costume party or simply adding subtle festive flair to your outfit, these earrings won’t go unnoticed.
Also, the precision in the beading work creates an intricate silhouette that echoes the graceful shape of a bat in flight.
Materials Needed
- 2 earring hooks (gold lever-back)
- Black Miyuki Delica seed beads (11/0 size, approx. 1g)
- Gold Miyuki Delica seed beads (11/0 size, approx. 10-12 beads)
- Beading thread (Nymo D or FireLine, 3 ft)
- Beading needle (#12)
- Small jewelry pliers
Step-by-step Guide
Step 1: Sketch or follow a pixel pattern of a bat, making sure it’s symmetrical for both earrings.
Step 2: Begin weaving your beads using the brick stitch technique, starting from the center of the bat’s body and working outward toward the wings.
Step 3: Add two small gold beads near the center to represent the bat’s eyes or fangs, depending on your design.
Step 4: Finally, secure your final thread ends and attach the top center bead to your earring hook using jewelry pliers.
#14. Skeleton Hand Earrings with Blood Drop Beads
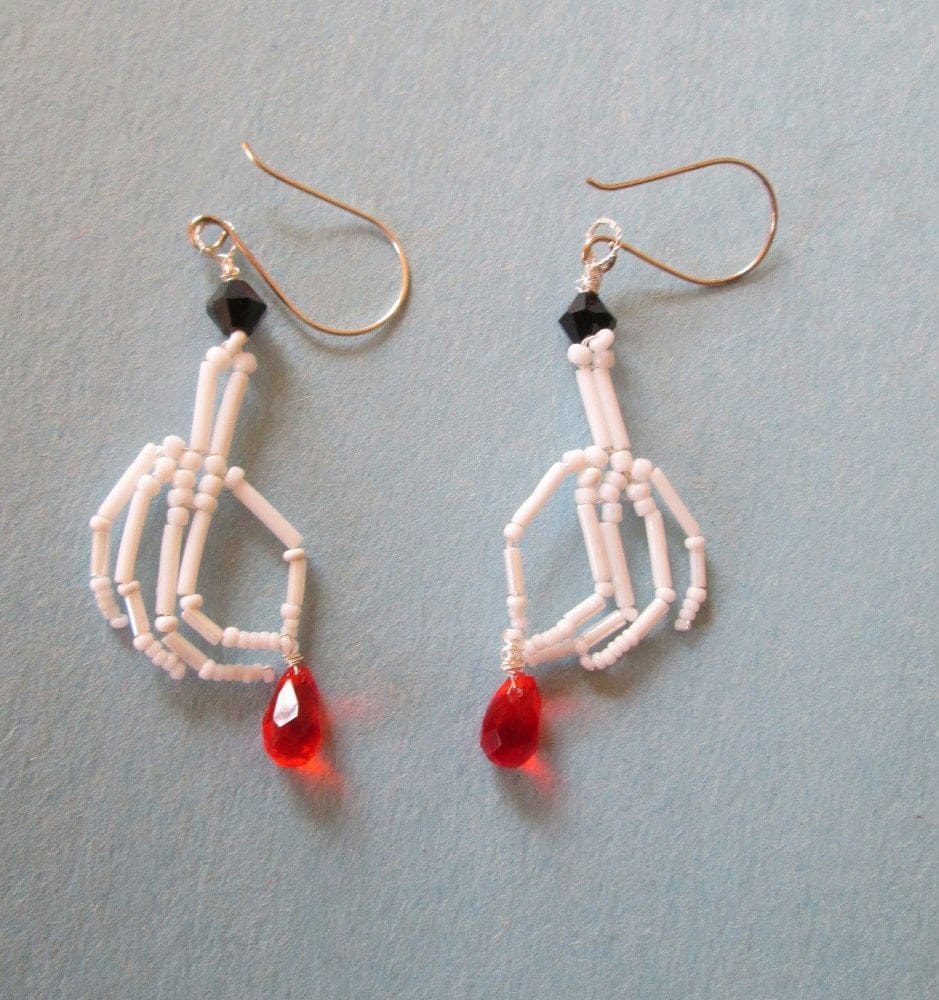
Interestingly, these eerily elegant earrings feature skeletal hands crafted from delicate white seed beads and tubular bugle beads, shaped to mimic bony fingers grasping crimson teardrop gems.
The bold red drops dangle like fresh blood, adding the perfect finishing touch for a creepy-chic Halloween accessory.
Materials Needed
- 200 white seed beads (size 11/0)
- 20 white bugle beads
- 2 red teardrop glass beads
- 2 black crystal beads (faceted 6mm)
- Jewelry wire (fine gauge)
- 2 fish hook earring findings
- Jump rings and wire-wrapping tools
Step-by-step Guide
Step 1: Using fine jewelry wire, shape each finger with alternating seed and bugle beads, attaching them to a central “palm” bead cluster.
Step 2: Add a black crystal bead above the palm for contrast and structure.
Step 3: Attach a red teardrop bead to the tip of the middle finger using a headpin or wrapped loop.
Step 4: Now, you just secure the top of the skeleton hand to an earring hook with a jump ring or wire loop.
#15. Beaded Spiderweb Sun Catcher
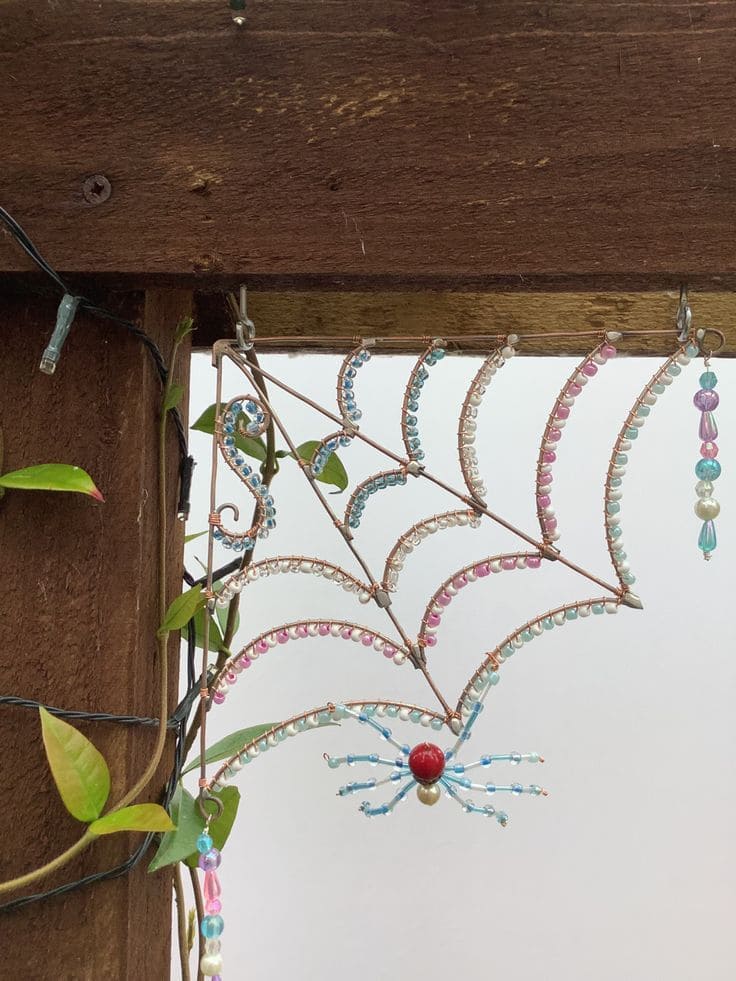
This isn’t your average spooky décor, it’s a sparkling twist on the classic cobweb!
Imagine sunlight filtering through delicate strands of glass beads, casting rainbow sparkles across your porch or garden.
This Halloween spiderweb blends eerie and elegant in the most delightful way. The handmade spider adds personality, with its playful legs and bold red bead body.
Materials Needed
- 6 pieces of copper or silver craft wire (10″-14″ long, 16-18 gauge)
- 80-100 assorted seed beads (3mm-4mm, pink, blue, white)
- 1 large round bead (12mm)
- 1 pearl or round bead (8mm)
- 16 small bugle or seed beads (1″ wire pieces)
- Wire cutters and round-nose pliers
- Jump rings or eye screws
Step-by-step Guide
Step 1: Bend your wires into curved arcs to form the web’s radial arms. Then twist together at one point to form the center.
Step 2: String beads along each arc, then wrap thinner wire between the curves to connect them and build the web’s structure.
Step 3: For the spider, thread beads onto short wire segments to shape legs, then attach them to a central body/head combo.
Step 4: Position the spider hanging from the web using a bit of fishing line or thin wire for a floating effect.
Step 5: Finally, use jump rings or screws to hang your creation where it can catch the light like porch beams, trellises, or sunny windows work beautifully.
Tip: You can use transparent or iridescent beads to get that extra sparkle when sunlight hits.
#16. Glam Beaded Pumpkin Brooch With Bow
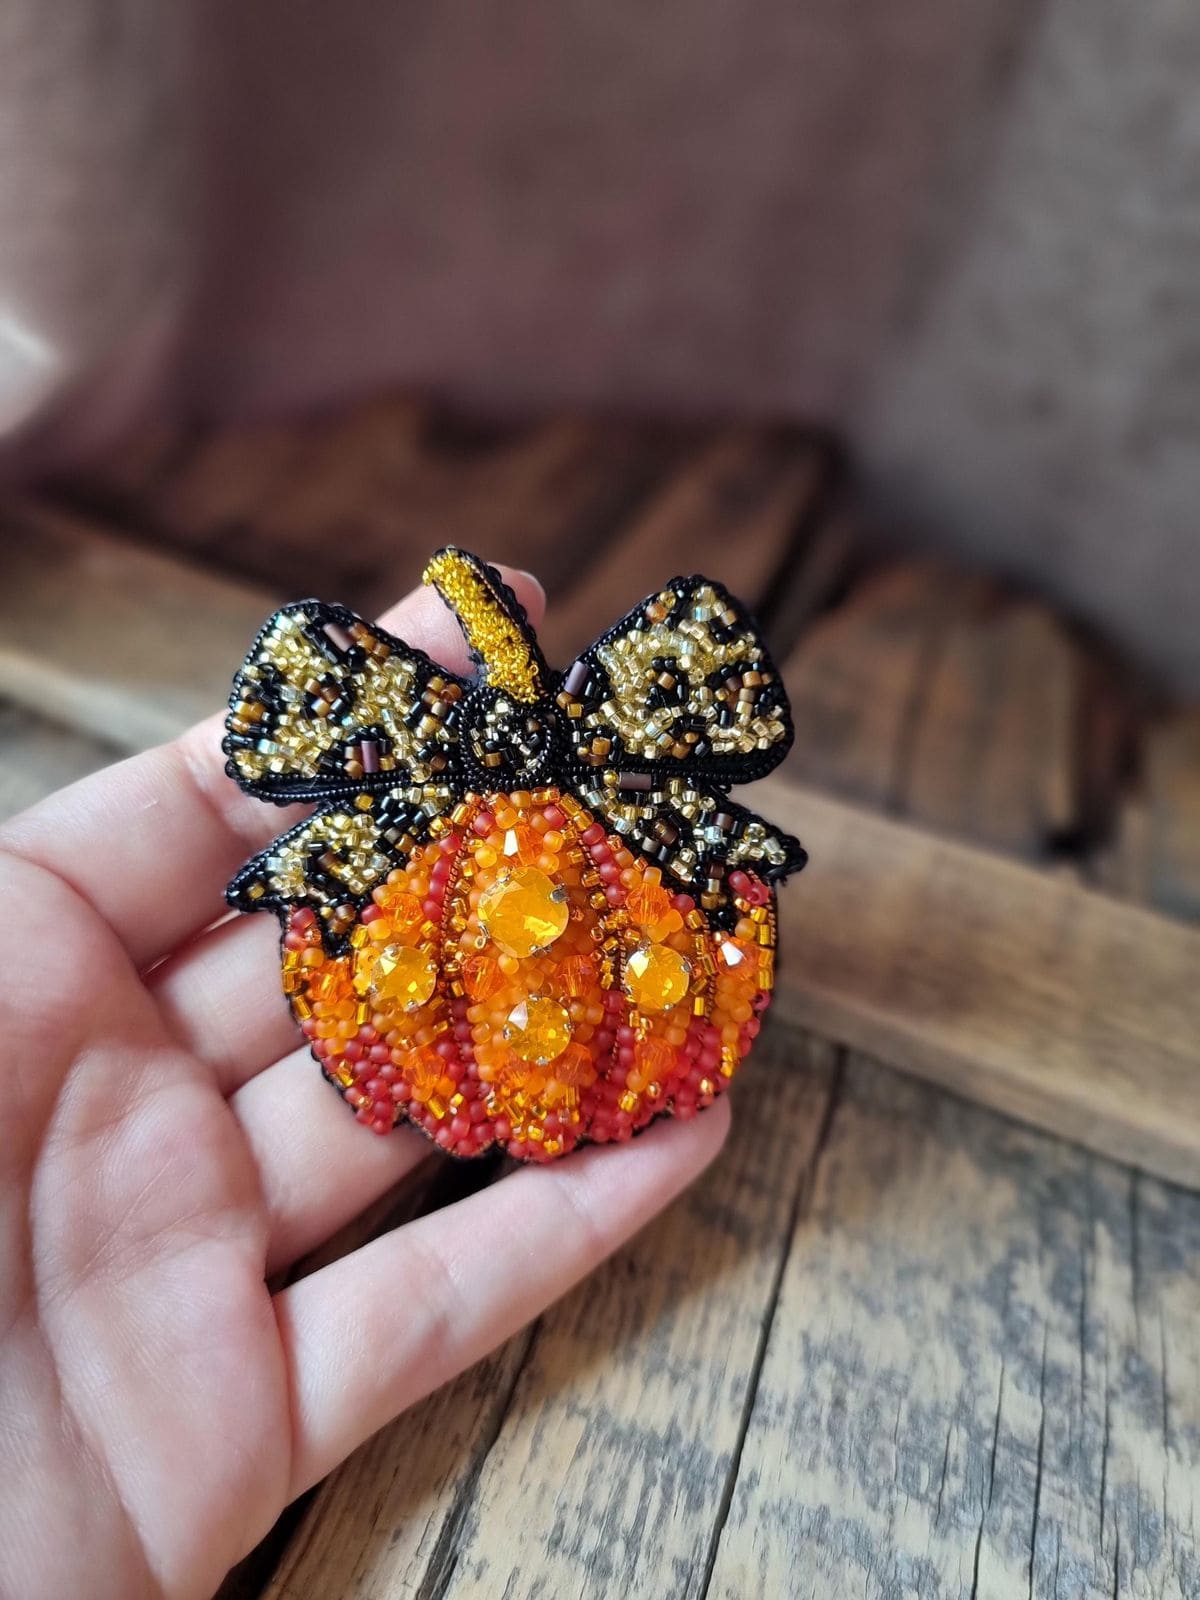
This sparkly pumpkin brooch is a showstopper! Rich in autumn tones and covered with seed beads, tube beads, and orange gems, it’s like fall in jewelry form.
What truly makes it pop is the oversized bow crafted with gold and black beads, giving it a classy yet playful vibe.
Specially, pin it onto a denim jacket, fall scarf, or even your trick-or-treat tote for a handcrafted accessory that instantly feels festive and luxe.
Materials Needed
- Black felt sheet (4″ x 4″)
- Seed beads and tube beads (orange, red, black, gold – approx. 2mm)
- 5-6 faceted rhinestones (6-8mm in orange)
- Beading thread and needle
- Fabric glue
- Brooch pin clasp (1.5″)
- Embroidery hoop (optional)
- Scissors
Step-by-step Guide
Step 1: Lightly sketch a pumpkin with a bow onto your felt using chalk or a fabric pencil.
Step 2: Start stitching beads along your outlines. Then use the brightest orange beads and gems to fill the pumpkin body, working in rows or small sections.
Step 3: Embellish the bow with gold and black seed beads. You should mix tube beads for contrast.
Step 4: Cut out the finished shape carefully and glue or stitch a brooch clasp on the back.
#17. Colorful Beaded Indian Corn
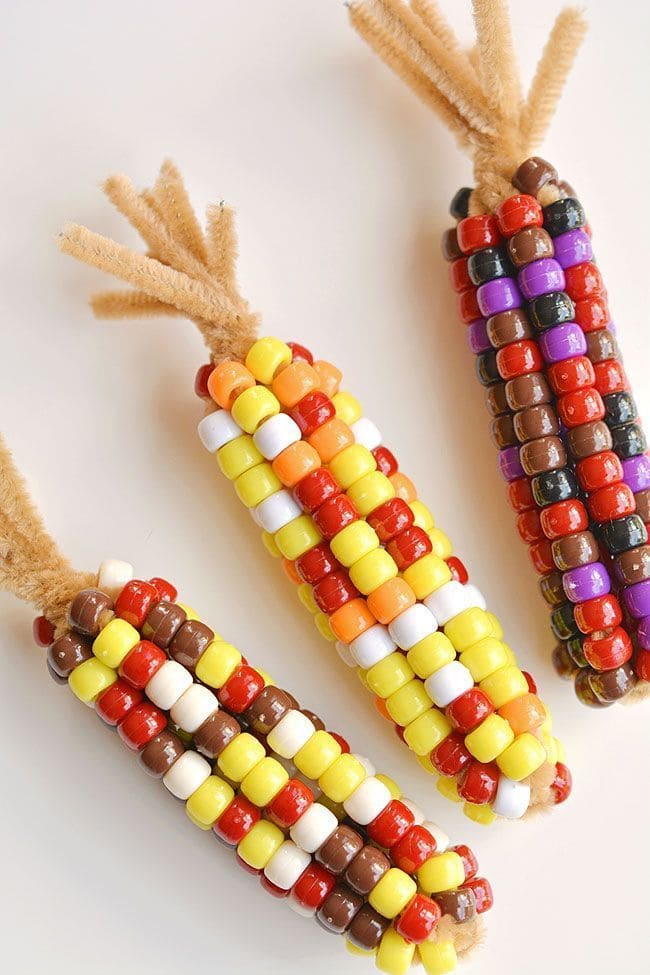
These adorable Indian corn decorations bring a touch of harvest charm using nothing but pony beads and fuzzy pipe cleaners.
With warm autumn hues like golden yellow, deep brown, pumpkin orange, and crisp white, each one mimics the cheerful randomness of real corn kernels.
Plus, they’re fun, fast, and perfect for kids or anyone looking for a mess-free fall craft.
Materials Needed
- Pony beads in assorted fall colors (approx. 60-70 beads per ear of corn)
- 2 tan or brown pipe cleaners
- Scissors
Step-by-step Guide
Step 1: Twist two pipe cleaners together in the middle to create a cross shape, then bend the four arms upward to form the corn base.
Step 2: String beads onto each pipe cleaner row, mixing up the colors randomly for a natural look. You stop just before the tip.
Step 3: Twist the ends together and bend them slightly to shape the cob. Finally, fan out the untwisted ends on top to resemble the corn husk.
#18. Flat Jack-O-Lantern Bead Craft
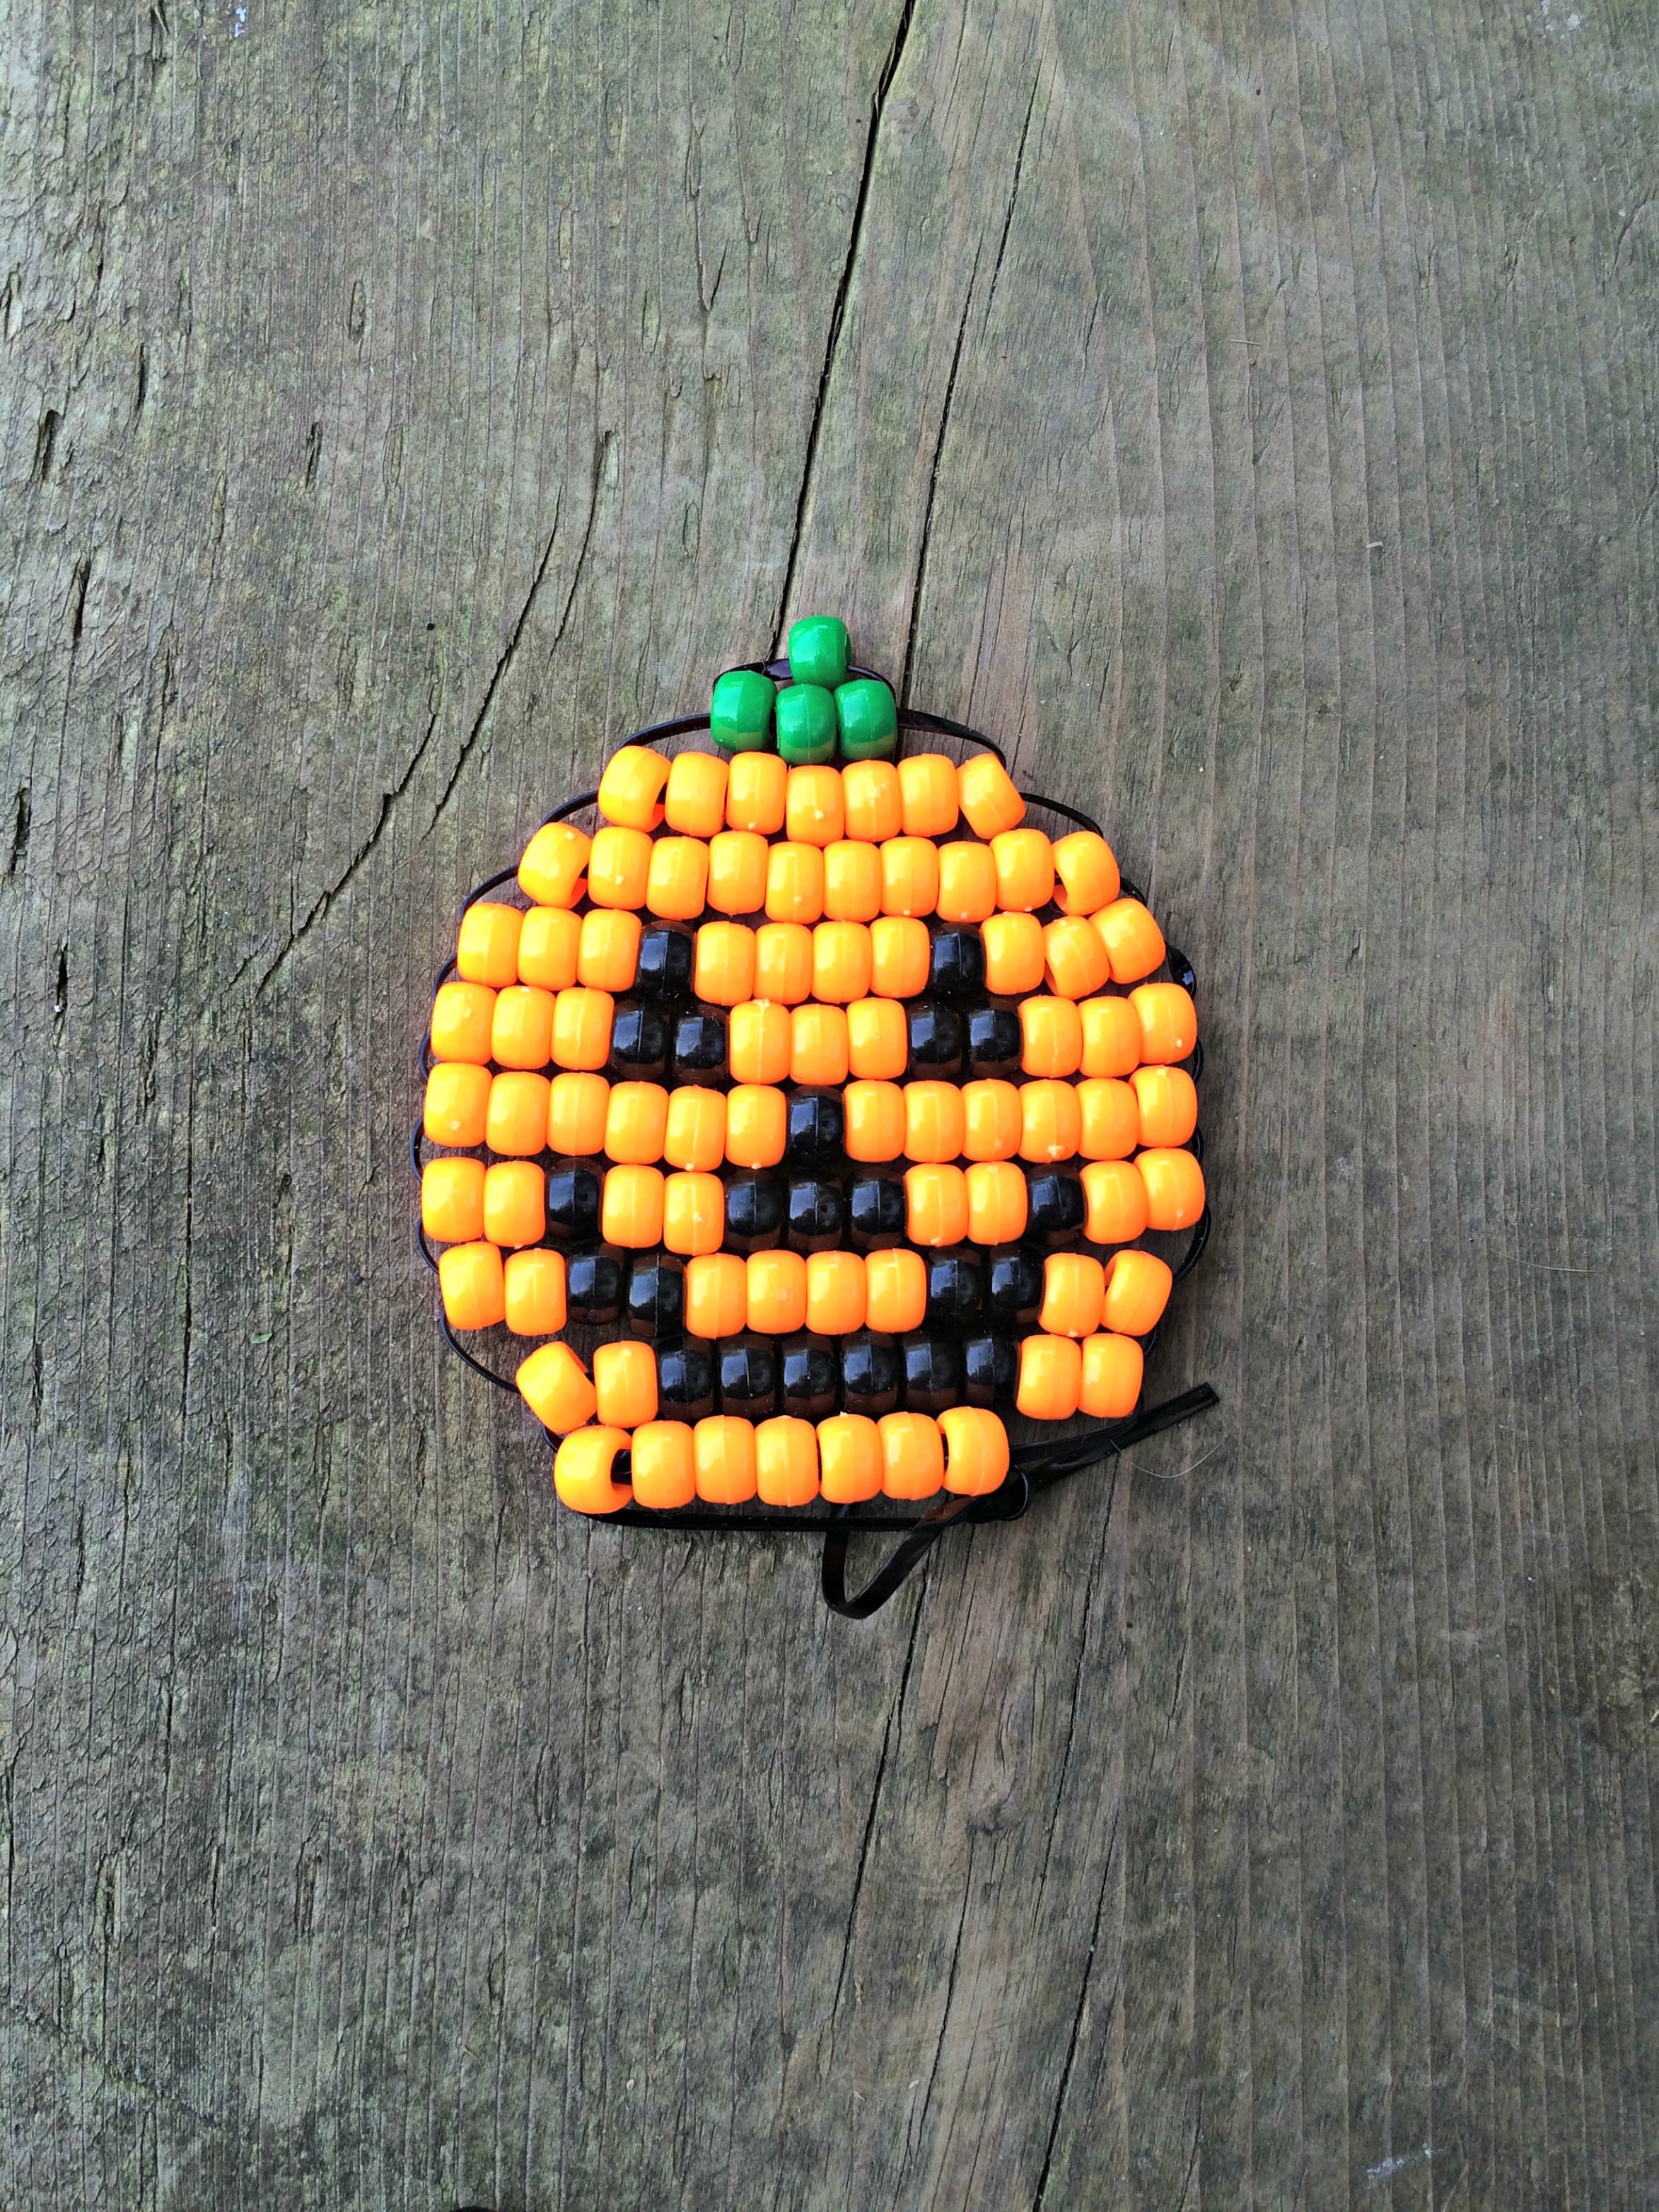
Simple yet iconic, this flat jack-o’-lantern bead design gives off classic Halloween vibes with its grinning face and bright colors.
Using pony beads and a pattern-based approach, you can create this cheerful pumpkin using just a bit of patience and a string.
Plus, it makes a great little keepsake or decoration for bags, walls, or doors!
Materials Needed
- Orange pony beads (approx. 45-50)
- Black pony beads (approx. 20)
- 6 green pony beads
- Sturdy craft string (about 36 in.)
- Scissors
Step-by-step Guide
Step 1: Cut a piece of string around 36 inches and fold it in half to find the center.
Step 2: Begin threading the beads row by row, starting from the bottom. Then use both ends of the string to lace through each bead from opposite sides to keep the pattern tight and centered.
Step 3: Continue the pattern, using black for the face details and green for the top stem. Now, tie off the ends securely when you finish the top row.
Tip: You can turn this pumpkin into a Halloween necklace, keychain, or magnet by attaching a jump ring or small adhesive magnet to the back!
#19. Beaded Spider Craft for Kids
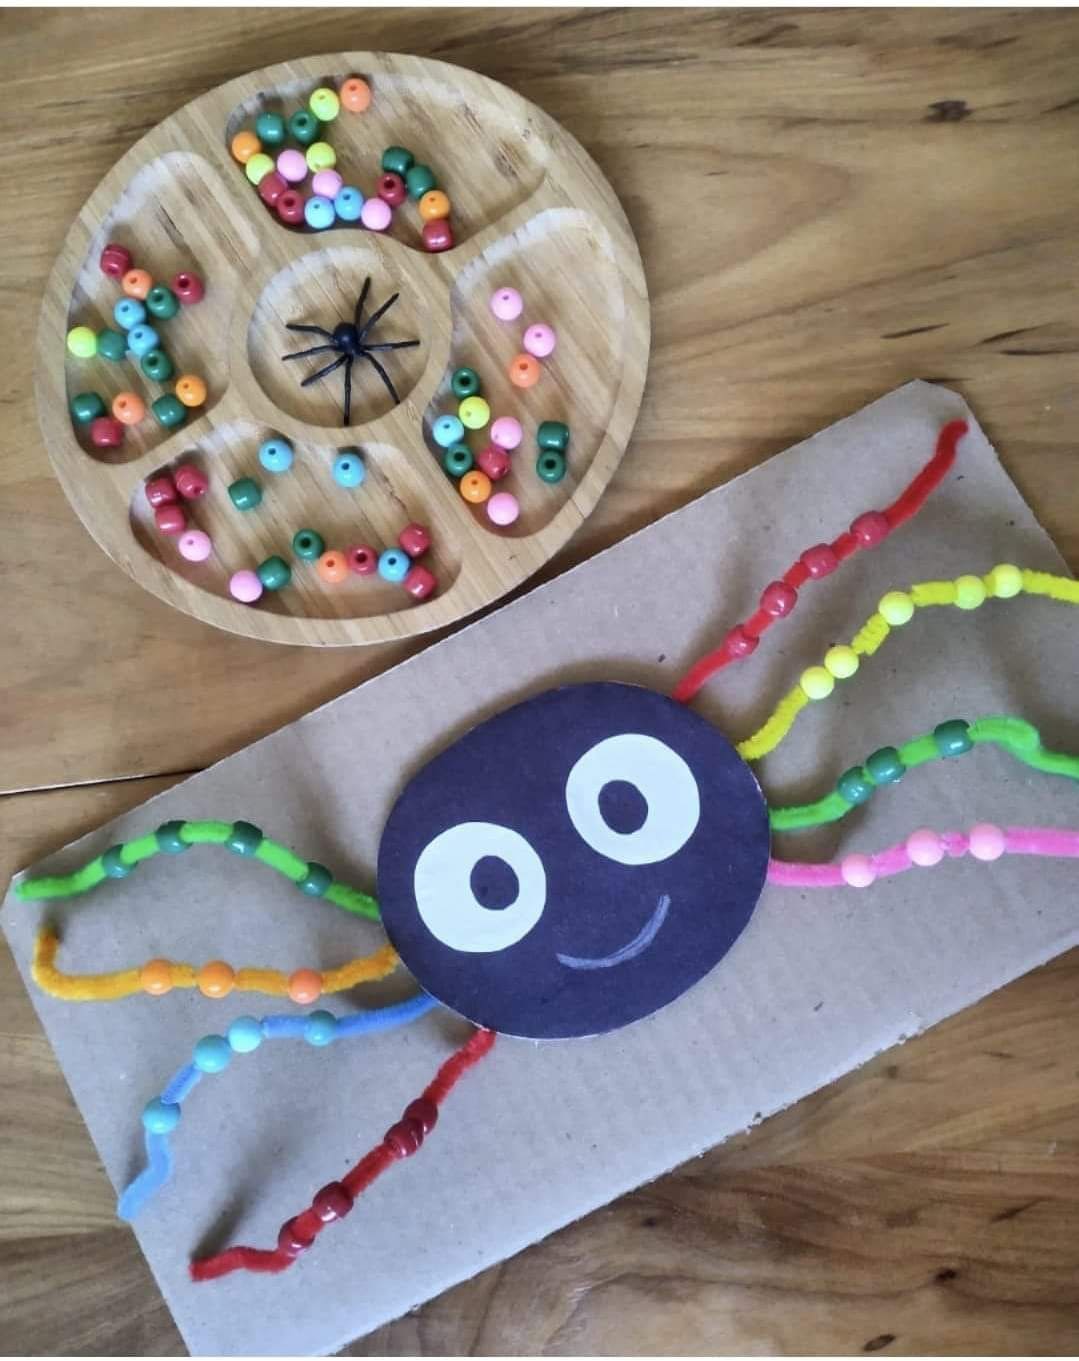
Here’s a Halloween craft that brings more giggles than goosebumps! This beaded spider is all smiles and color, turning spooky season into a cheerful, hands-on moment for little ones.
Additionally, you can make it with everyday supplies, and kids get to express their creativity while working on color sorting and counting without even realizing it.
Materials Needed
- 1 piece of cardboard (5″×8″)
- 4 pipe cleaners (12″ each)
- 32 plastic pony beads (assorted colors, 9mm)
- 1 black or purple cardstock (3″ oval)
- White and black paper (1″ and ½” circles)
- Glue stick
- Scissors
Step-by-step Guide
Step 1: Cut an oval from cardstock to form the spider’s head. Then glue on paper eyes and draw a smile to bring it to life.
Step 2: Fold each pipe cleaner in half and twist lightly in the middle for structure. You now attach them to the back of the head with glue or tape.
Step 3: Thread pony beads onto each leg. You should mix up the colors or follow a pattern.
Step 4: Tape the finished spider onto the cardboard for display or play.
#20. Halloween Beaded Garland with Twine Tassels
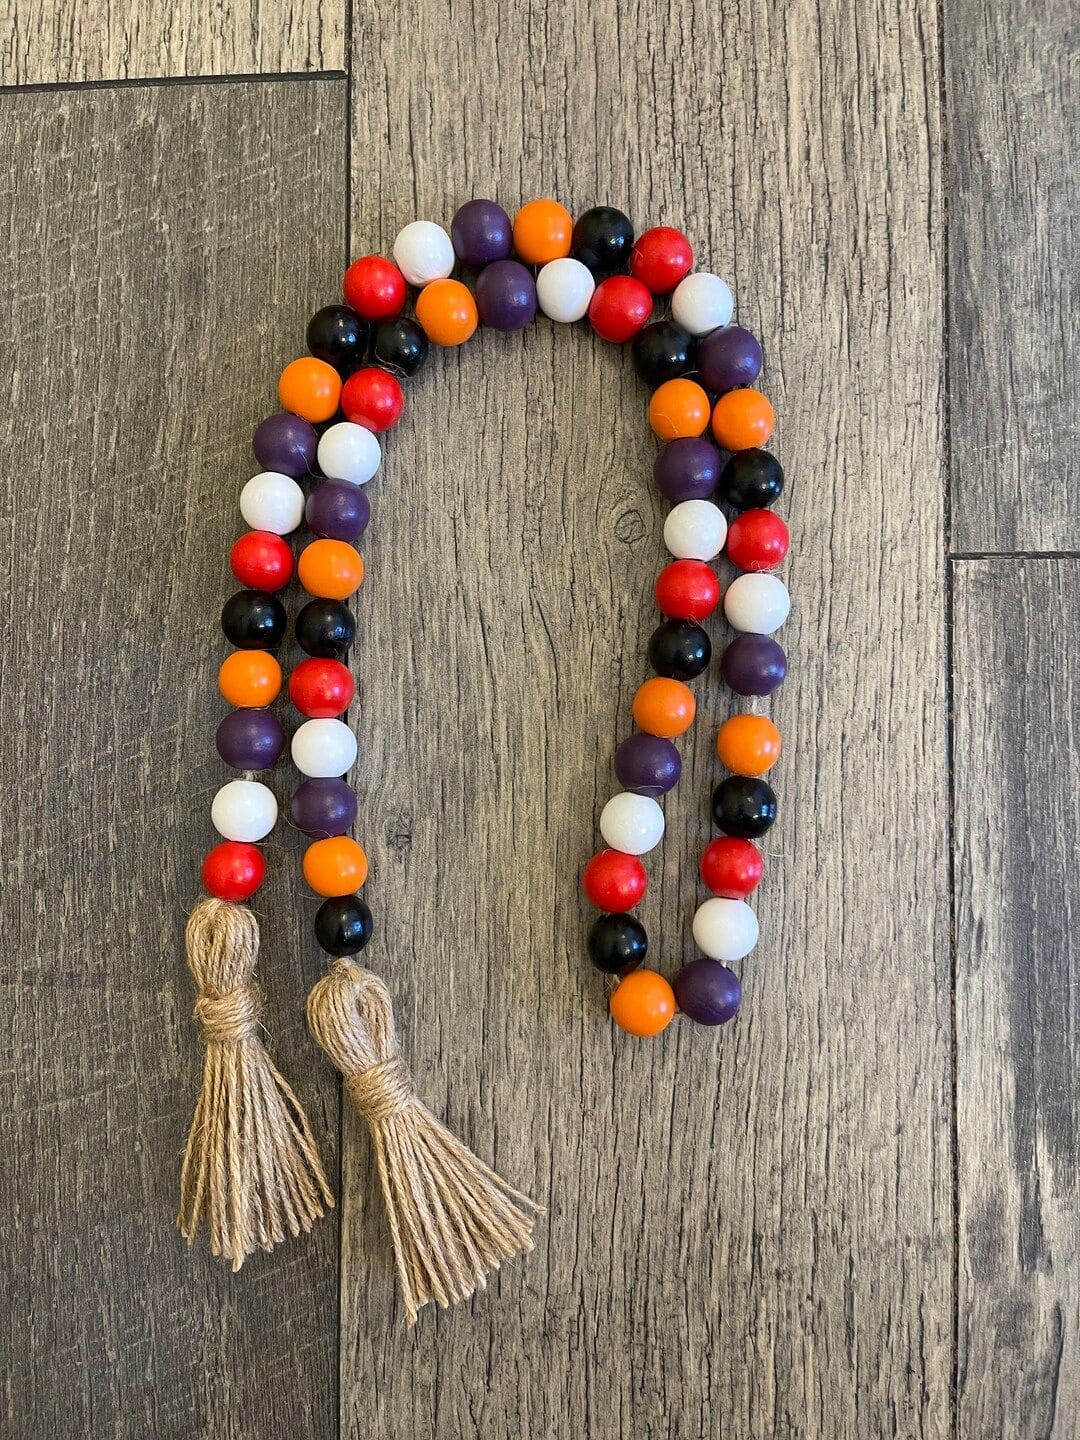
Wow, this colorful beaded garland is a perfect touch for Halloween shelf styling, tiered trays, or mantel displays.
It blends Halloween’s signature palette including orange, purple, black, red, and white into a vibrant strand that feels playful and warm.
Each bead brings a pop of charm, while the rustic twine tassels at both ends give it a lovely handmade finish.
Materials Needed
- 40 wooden round beads (in orange, black, red, purple, and white)
- Natural jute twine (approx. 3 ft)
- Scissors
- Large-eyed needle (optional)
Step-by-step Guide
Step 1: Cut a long piece of twine and begin threading the beads in a mixed color pattern of your choice.
Step 2: Once you’ve added all the beads, tie a knot to secure them in place at both ends.
Step 3: Create two tassels from twine by wrapping it around your fingers, tying at the top, then snipping the loops. Then attach one to each end of the garland.
Tip: You can scent the wooden beads with a few drops of essential oil to make your décor smell like fall!
#21. Beaded Sugar Skull Spider Ornament
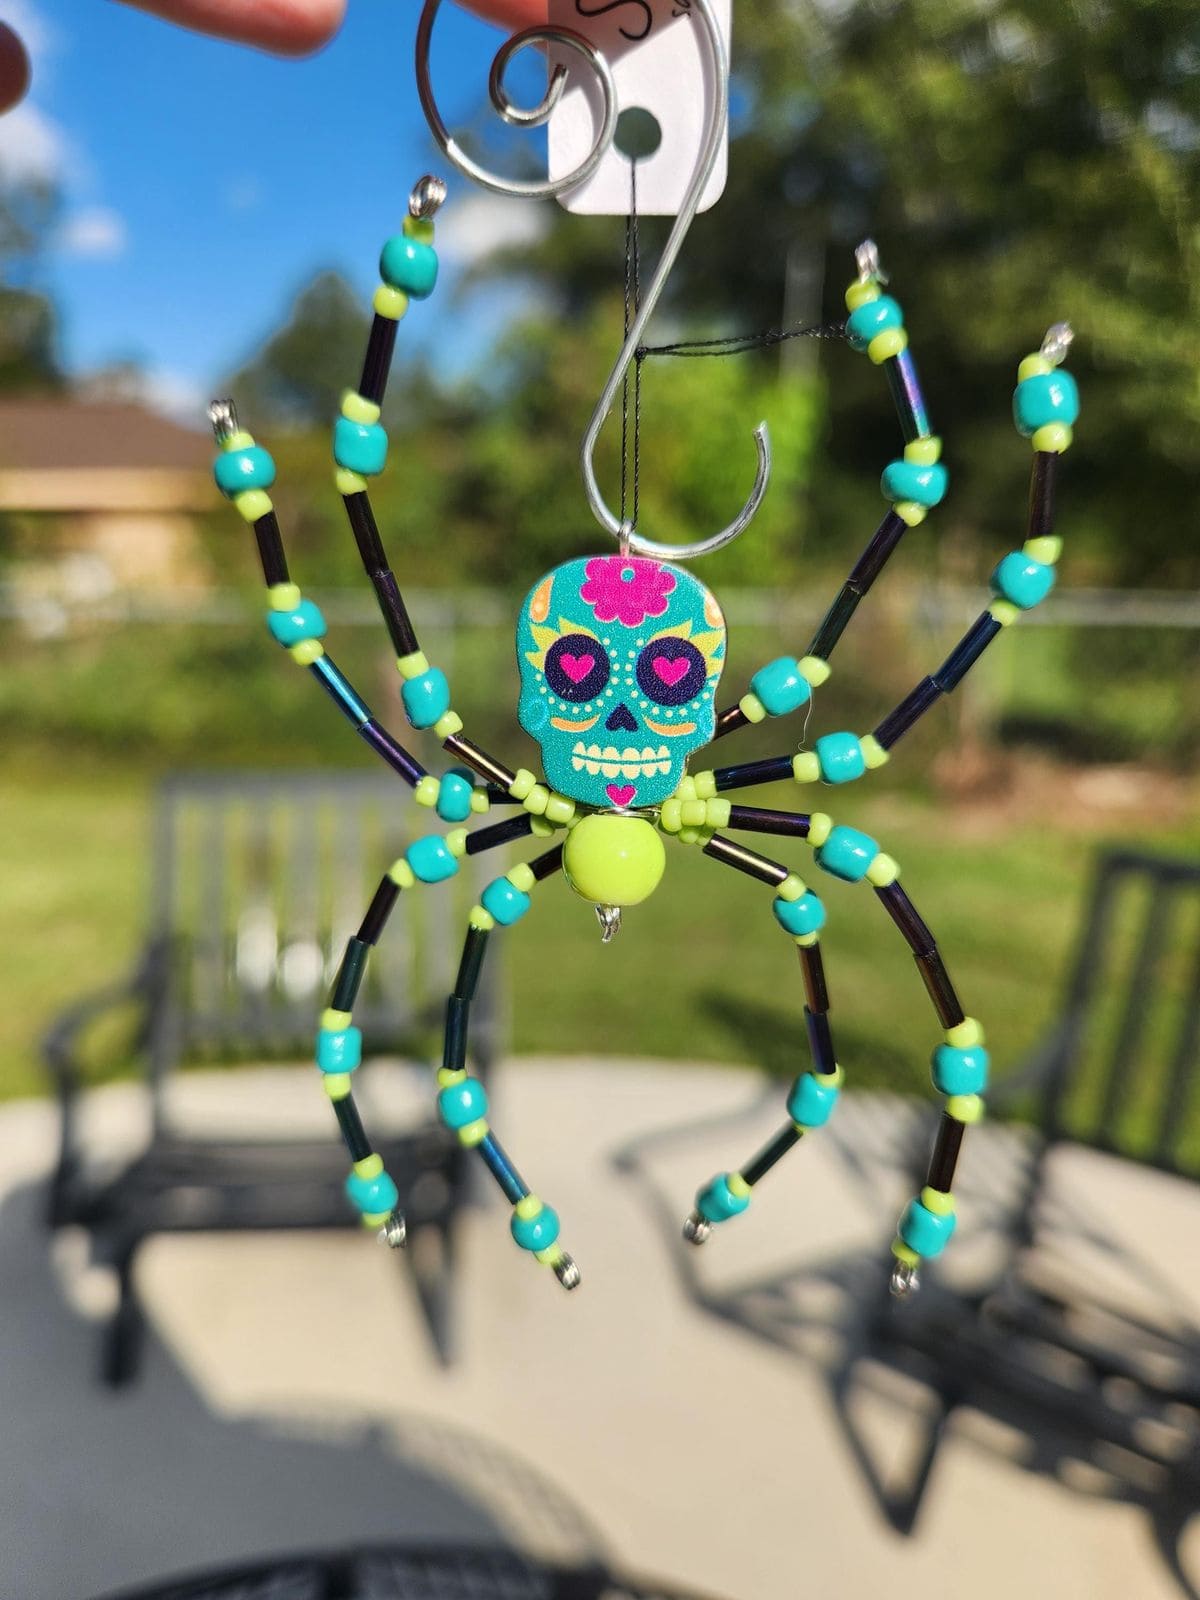
This playful yet spooky spider blends Day of the Dead flair with Halloween spirit. Its eight segmented legs are strung with shiny black bugle beads and vibrant turquoise and lime seed beads.
At the center sits a bright sugar skull bead, complete with pink heart eyes and a floral forehead.
Moreover, dangling from a spiral hook, this beaded spider is perfect for Halloween trees, windows, or festive garlands.
Materials Needed
- Sugar skull bead or charm (approx. 1 inch)
- Lime green round bead (10-12mm)
- 32 black bugle beads
- Turquoise and lime seed beads (approx. 100 pcs total)
- 4 jewelry wire (6 inches each)
- Needle-nose pliers and wire cutters
- Hanging hook
Step-by-step Guide
Step 1: Cut four equal lengths of wire and thread each with alternating bugle and seed beads to form legs. Then bend them slightly for shape.
Step 2: Twist two legs together at the center to form one side of the spider. Repeat for the other two wires.
Step 3: Thread both leg sets through a large round bead to serve as the spider’s body. Then secure with loops at both ends.
Step 4: Attach the sugar skull bead to the top as the spider’s head using a jump ring or wire.
Step 5: Finally, add a hanging hook or loop for easy display.
#22. Witch Hat Earrings with Beaded Fringe
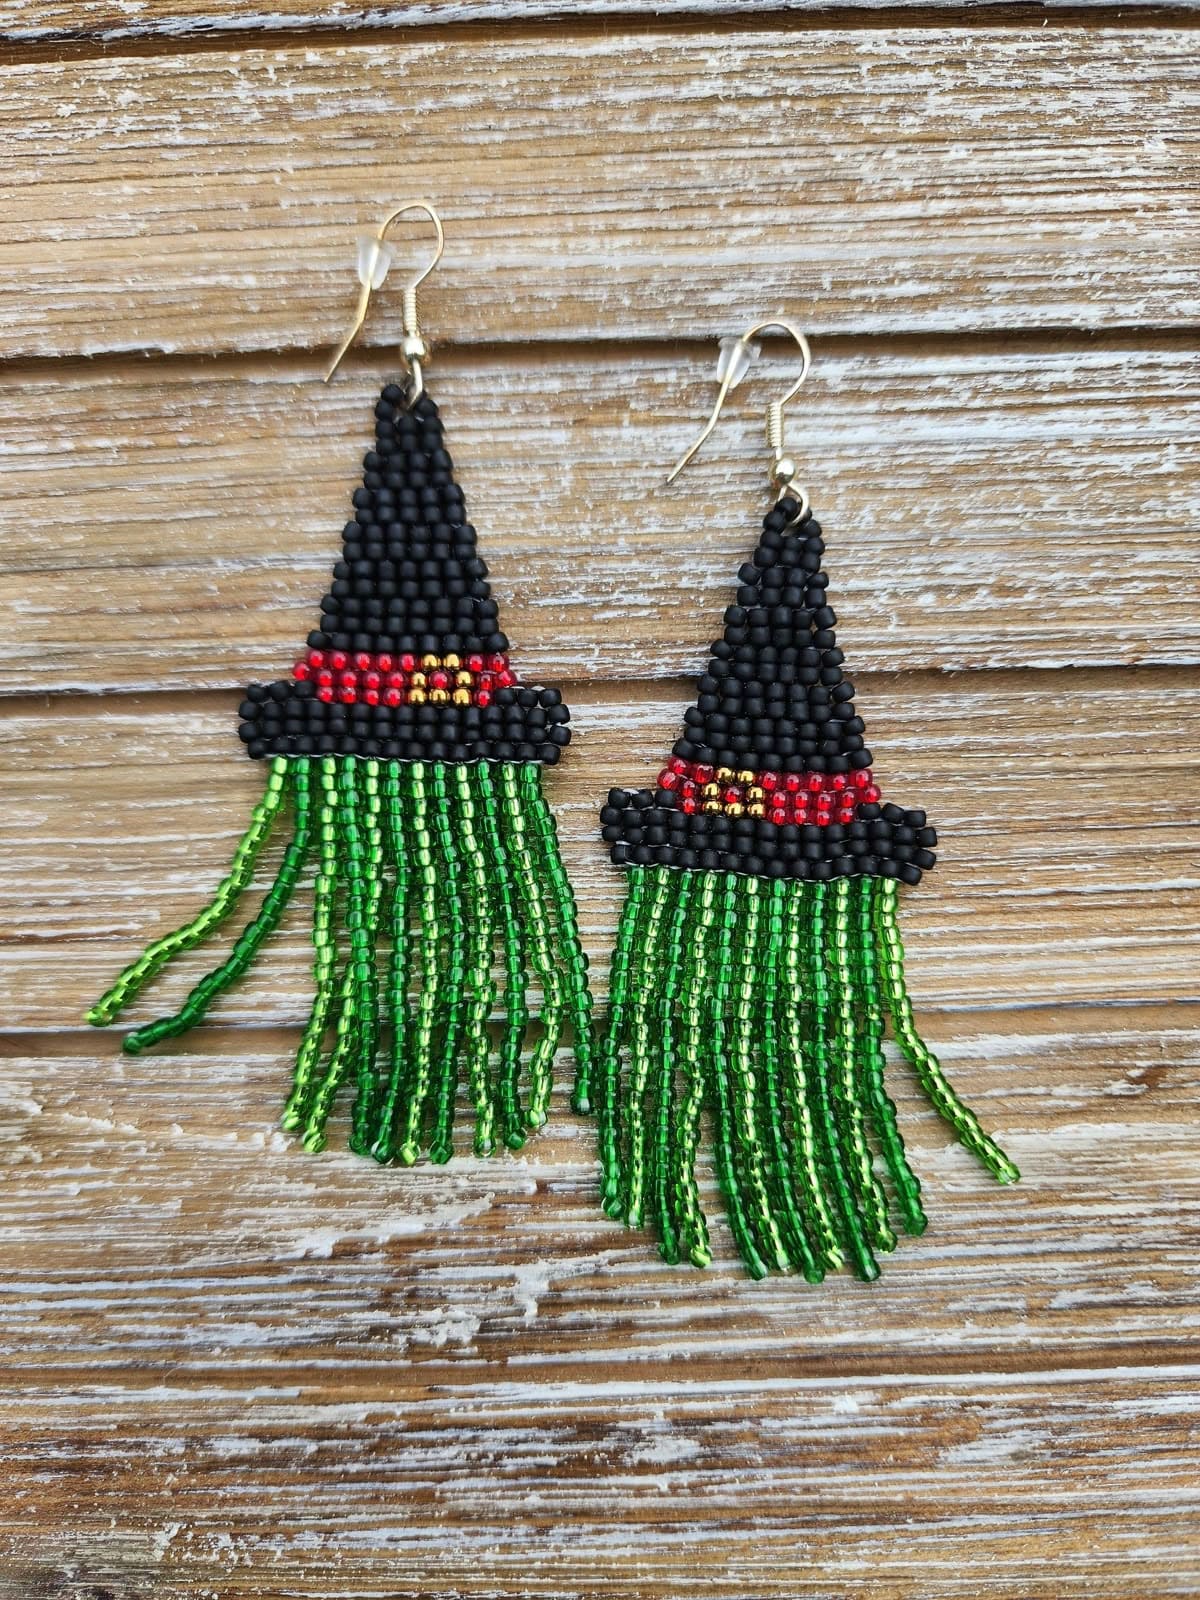
These beaded witch hat earrings are a charming way to channel your inner enchantress.
Handwoven with sleek black seed beads, each triangle-shaped hat features a bright red band with tiny yellow accents that hint at a glowing magical buckle.
What makes them extra fun is the cascade of green bead fringe, mimicking witchy locks of hair blowing in the wind.
Materials Needed
- Black seed beads (approx. 300 pcs, size 11/0)
- Red seed beads (approx. 50 pcs, size 11/0)
- Yellow seed beads (approx. 20 pcs, size 11/0)
- Green bugle or seed beads (approx. 160 pcs)
- Beading thread (1 strand, 3 feet)
- Beading needle (size 10 or 12)
- 2 fishhook earring findings
- 2 jump rings (5mm)
Step-by-step Guide
Step 1: Start by stitching the triangular hat shape using black beads with a brick stitch technique. Then add red and yellow beads midway for the buckle band.
Step 2: Once the triangle is complete, attach 8-10 strands of green beads to the bottom using simple fringe beading. Each strand should vary between 1.5-2 inches for flow.
Step 3: Secure the top of the hat with a jump ring and attach it to the fishhook earring finding.
Step 4: You repeat for the second earring, and you’re ready to cast a stylish spell!
