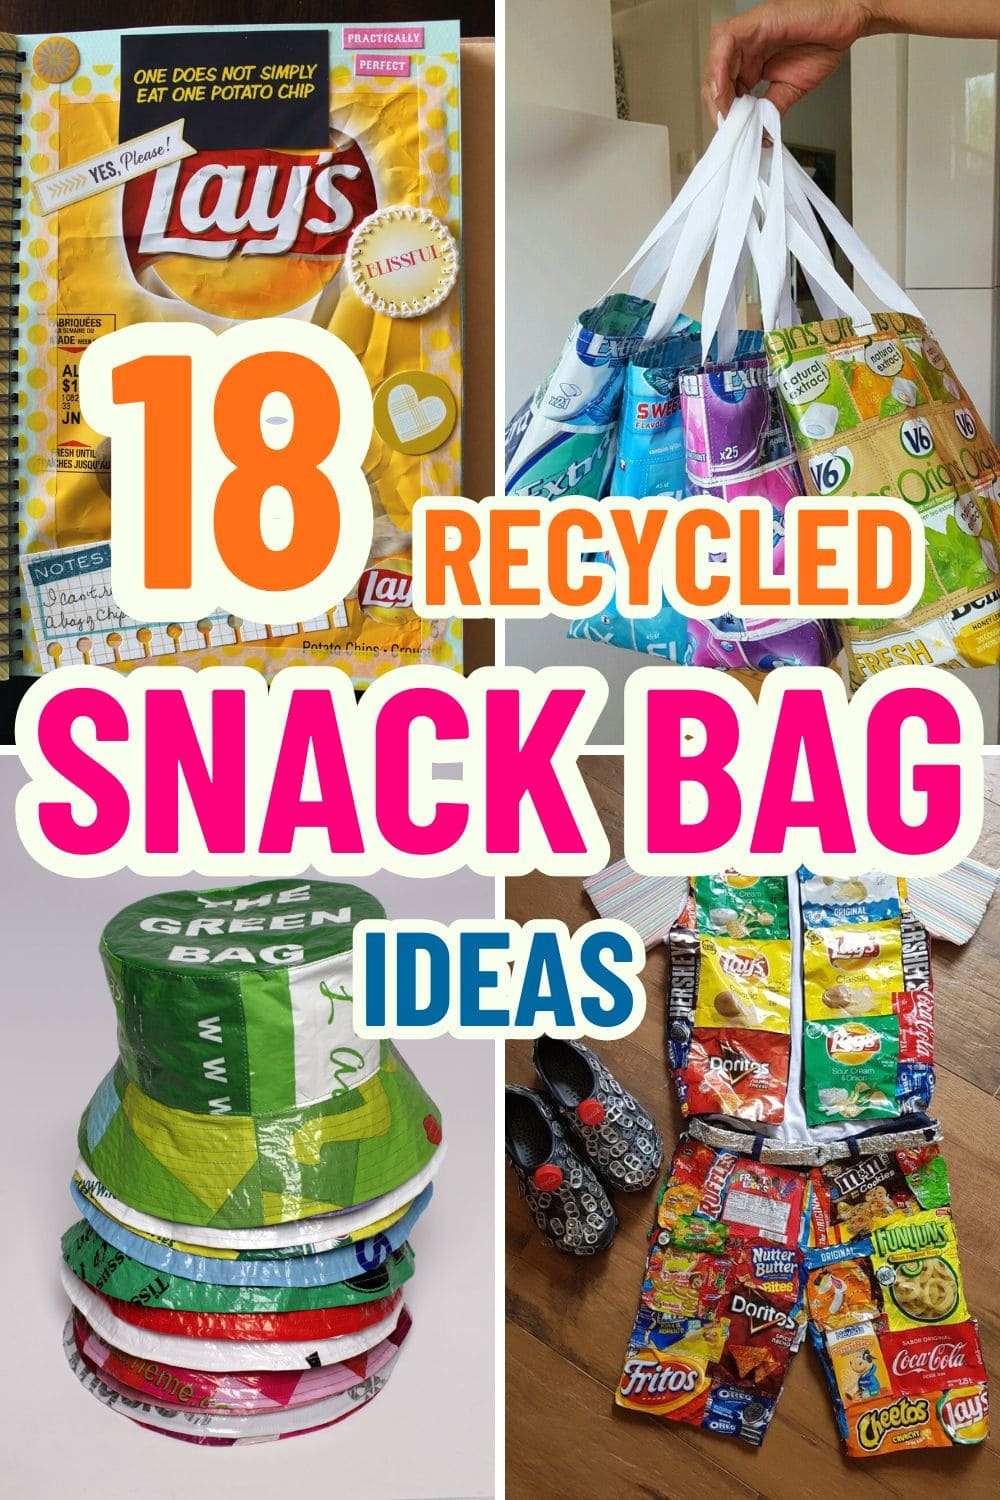
Ever wondered what you could do with all those shiny snack bags piling up after movie nights or lunch breaks?
Instead of tossing them straight into the trash, why not turn them into something surprisingly useful or even stylish? Those colorful wrappers aren’t just waste; they’re untapped craft gold waiting to be transformed.
With a bit of creativity and a few supplies, you can upcycle chip bags, candy wrappers, and gum packets into eye-catching bags, accessories, or even home décor.
Ready to give your snack bags a second life? These 18 clever ideas will definitely spark your creative side.
#1. Snack Bag Kitchen Apron
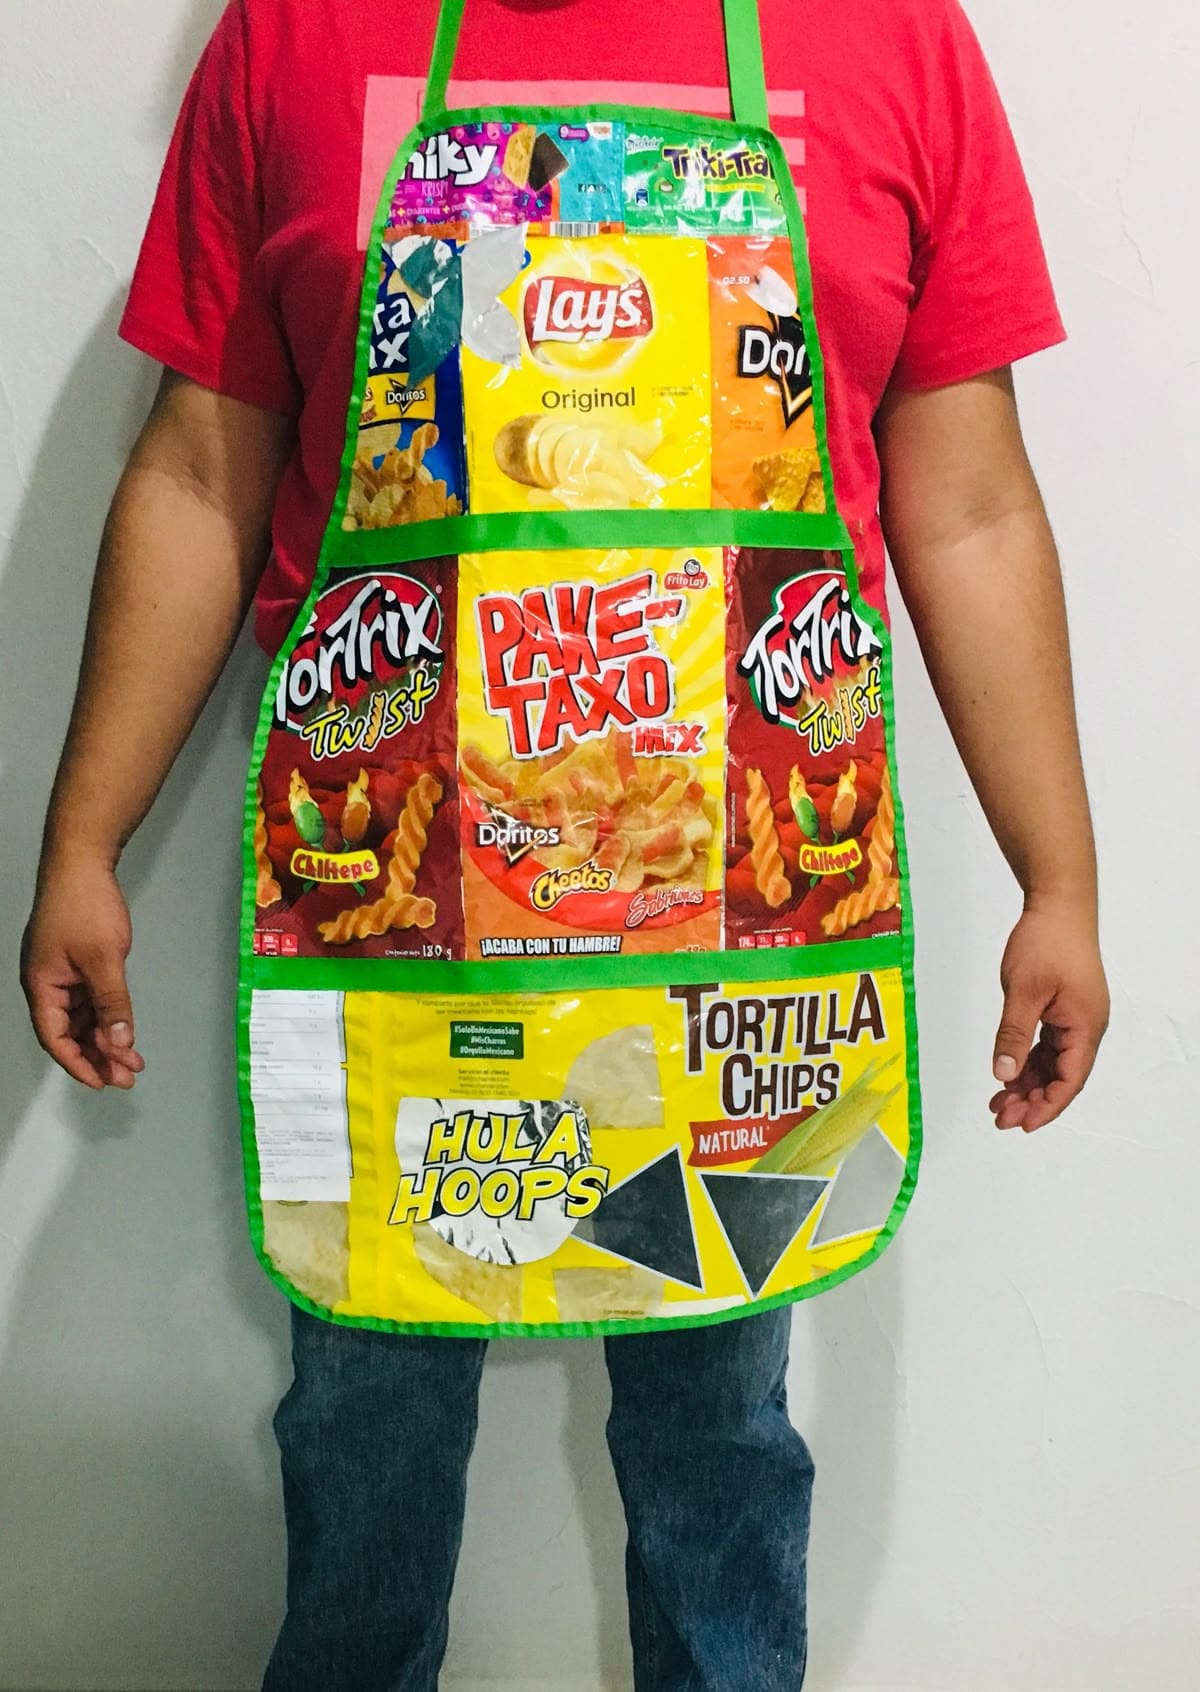
If you’re a snack lover and proud of it, why not wear it? This upcycled apron is a cheerful tribute to chips and crunchy cravings.
Bright snack wrappers stitched into neat rows bring a pop-art vibe to your kitchen routine. It’s fun, functional, and surprisingly durable with a waterproof finish that’s ideal for messy prep sessions.
Materials Needed
- 10-12 assorted snack bags (cleaned and flattened)
- 1 yard of bias tape
- Backing fabric (18″×24″)
- Sewing machine or strong fabric glue
- Scissors, pins, ruler
- Optional: iron-on vinyl
Step-by-step Guide
Step 1: Cut the snack bags into rectangular panels and arrange them in the desired apron shape.
Step 2: Sew or glue them onto your backing fabric, overlapping slightly for a quilted effect.
Step 3: Attach bias tape around the edges and add neck and waist straps for wearing.
Step 4: (Optional) Cover with vinyl or a clear plastic layer for waterproofing and longevity.
#2. Crisp Packet Bucket Hats
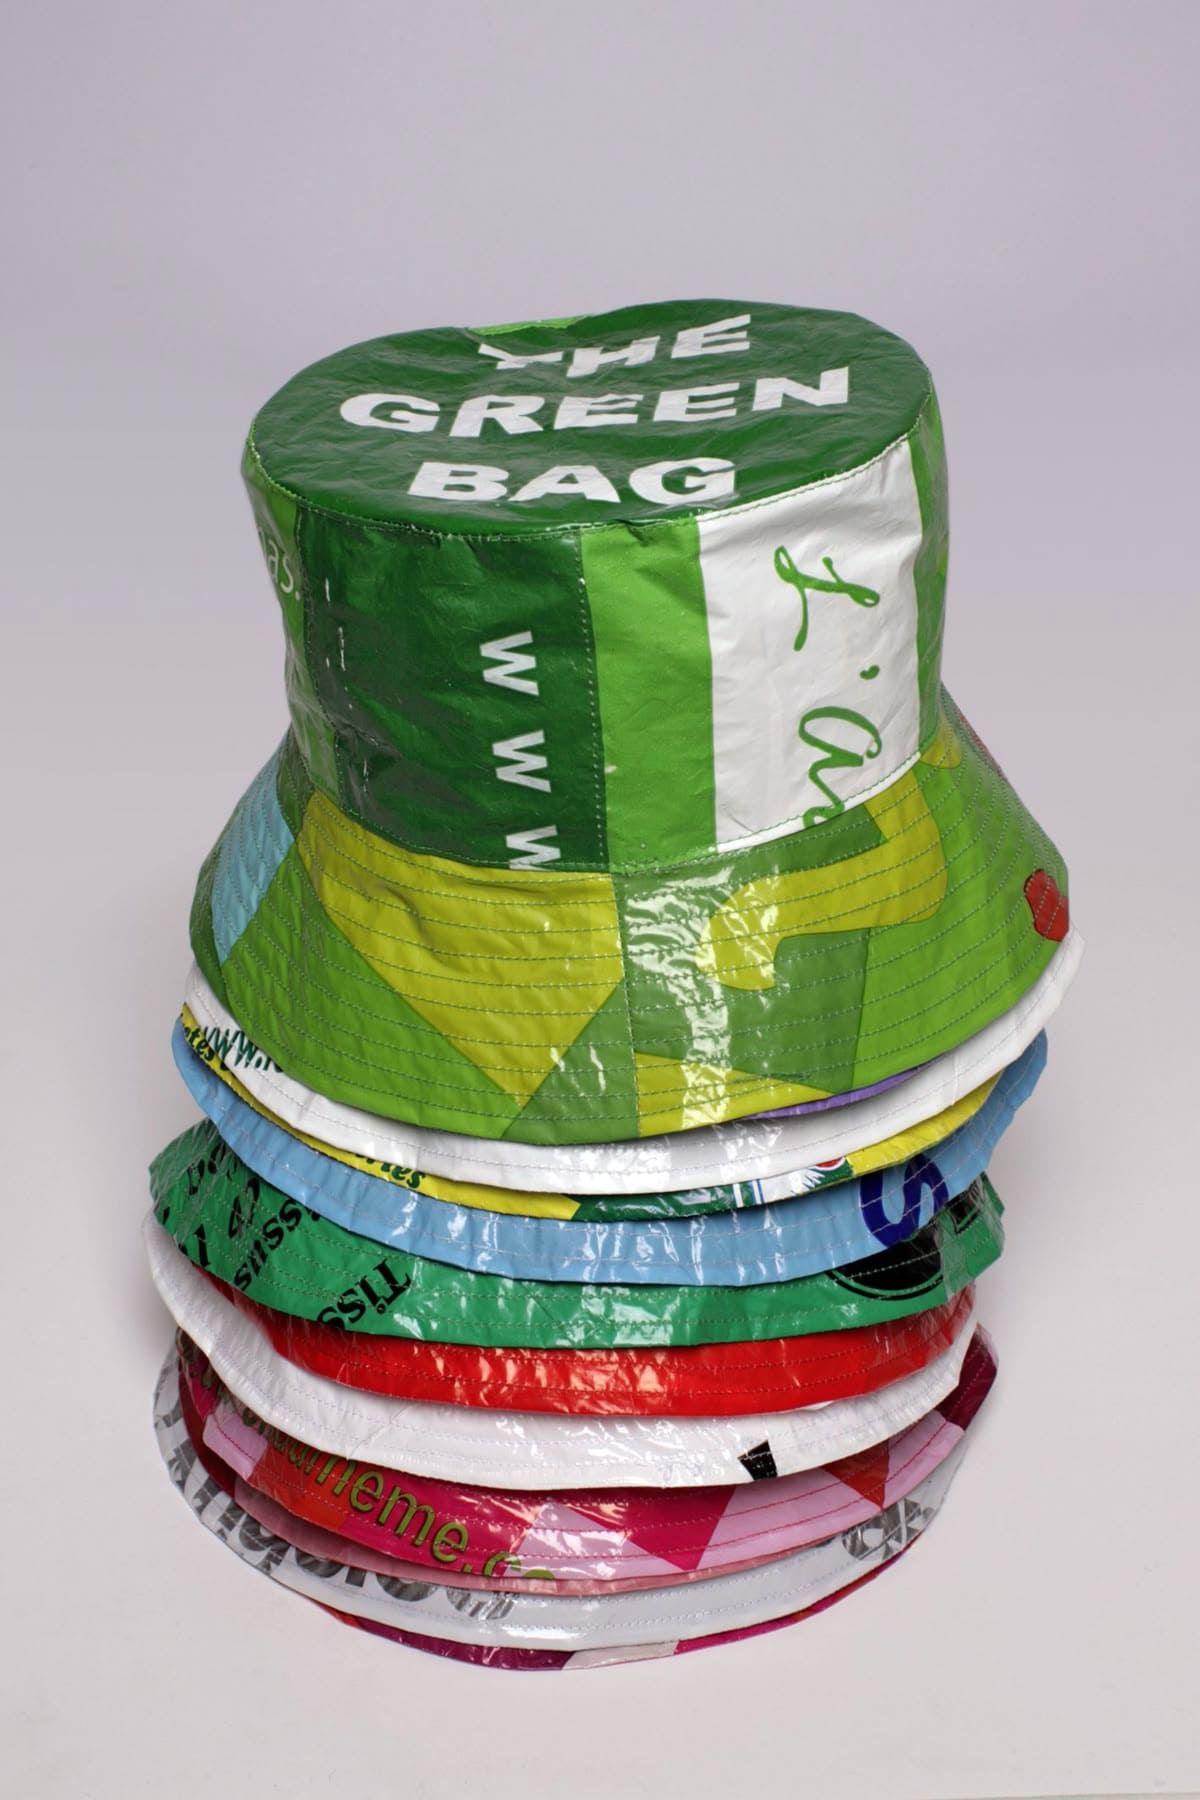
These bold and brilliant bucket hats are the perfect marriage of sustainability and street style. Created entirely from laminated snack or crisp packets, each one tells its own story in vivid, glossy colors.
Plus, the slick finish and visible stitch lines give them a fashion-forward edge while keeping waste out of landfills.
Materials Needed
- Clean and flattened crisp or chip packets (at least 6-8 per hat)
- Iron-on vinyl
- Bucket hat sewing pattern
- Sharp scissors and clips
- Sewing machine with heavy-duty needle
- Optional: cotton liner fabric
Step-by-step Guide
Step 1: Cut your crisp packets into panels according to your bucket hat pattern—crown, sides, and brim pieces.
Step 2: Laminate each piece with iron-on vinyl to reinforce and waterproof the material.
Step 3: Stitch the crown and side panels together using a slow sewing speed to avoid tearing the material.
Step 4: Finally, attach the brim pieces and topstitch around the edge to secure the shape. Add lining if desired for comfort.
#3. Snack Bag Statement Outfit
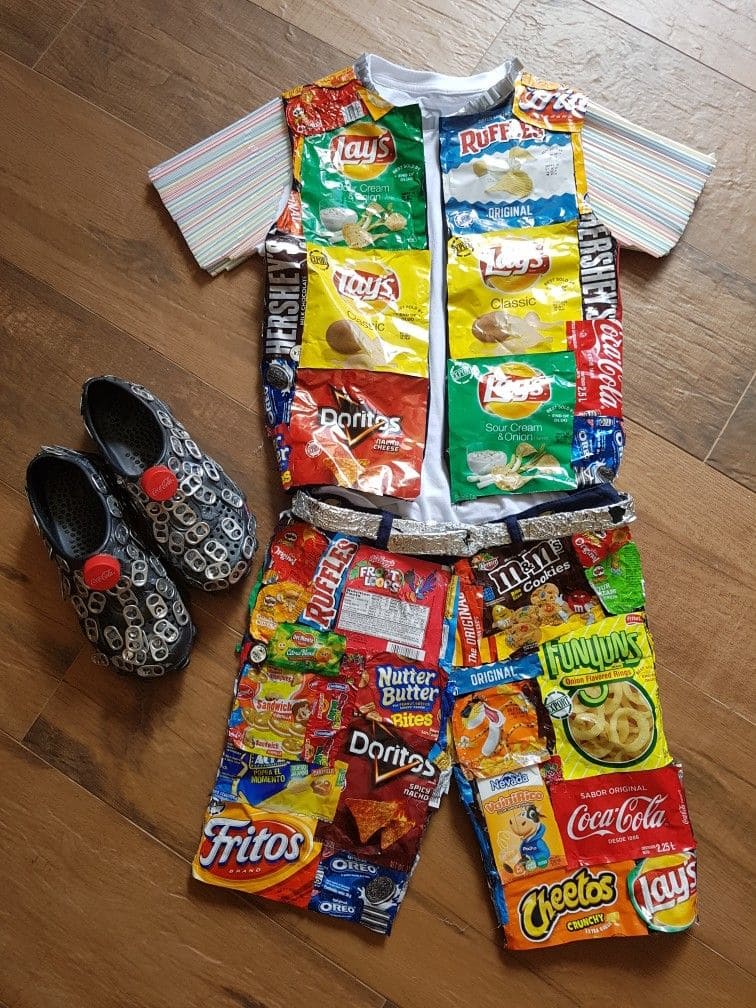
How about turning your junk food obsession into a bold fashion statement with this snack bag outfit that’s full of personality and pop culture charm?
If you’ve got a stash of colorful crisp packets, you’re halfway there. It’s flashy, fun, and surprisingly wearable for costume parties or Earth Day events.
Each panel becomes a tribute to your favorite treats, stitched or glued onto a fabric base for comfort and durability. Even the shoes got an upcycled twist with bottle caps as accents.
Materials Needed
- 30-40 clean, dry crisp/snack bags (various brands)
- Old t-shirt and shorts as base
- Clear tape
- Hot glue gun and glue sticks
- Fabric scissors
- Sewing machine (optional)
- Decorative trims or accessories (e.g. bottle caps)
Step-by-step Guide
Step 1: Rinse and dry all chip bags thoroughly, then cut them open to lie flat.
Step 2: Arrange the packets in rows or a patchwork design to fit over your shirt and shorts base.
Step 3: Secure the bags using clear tape or iron-on vinyl to give them a laminated, flexible texture.
Step 4: Attach the packets to the clothing using hot glue or stitching around the edges for better hold.
Step 5: Add creative details like a foil waistband, matching accessories, or bottle cap embellishments.
Tip: If you want the outfit to be reusable, consider adding Velcro strips or snaps so you can remove the snack panels for cleaning.
#4. Lay’s Chip Bag Scrapbook Page
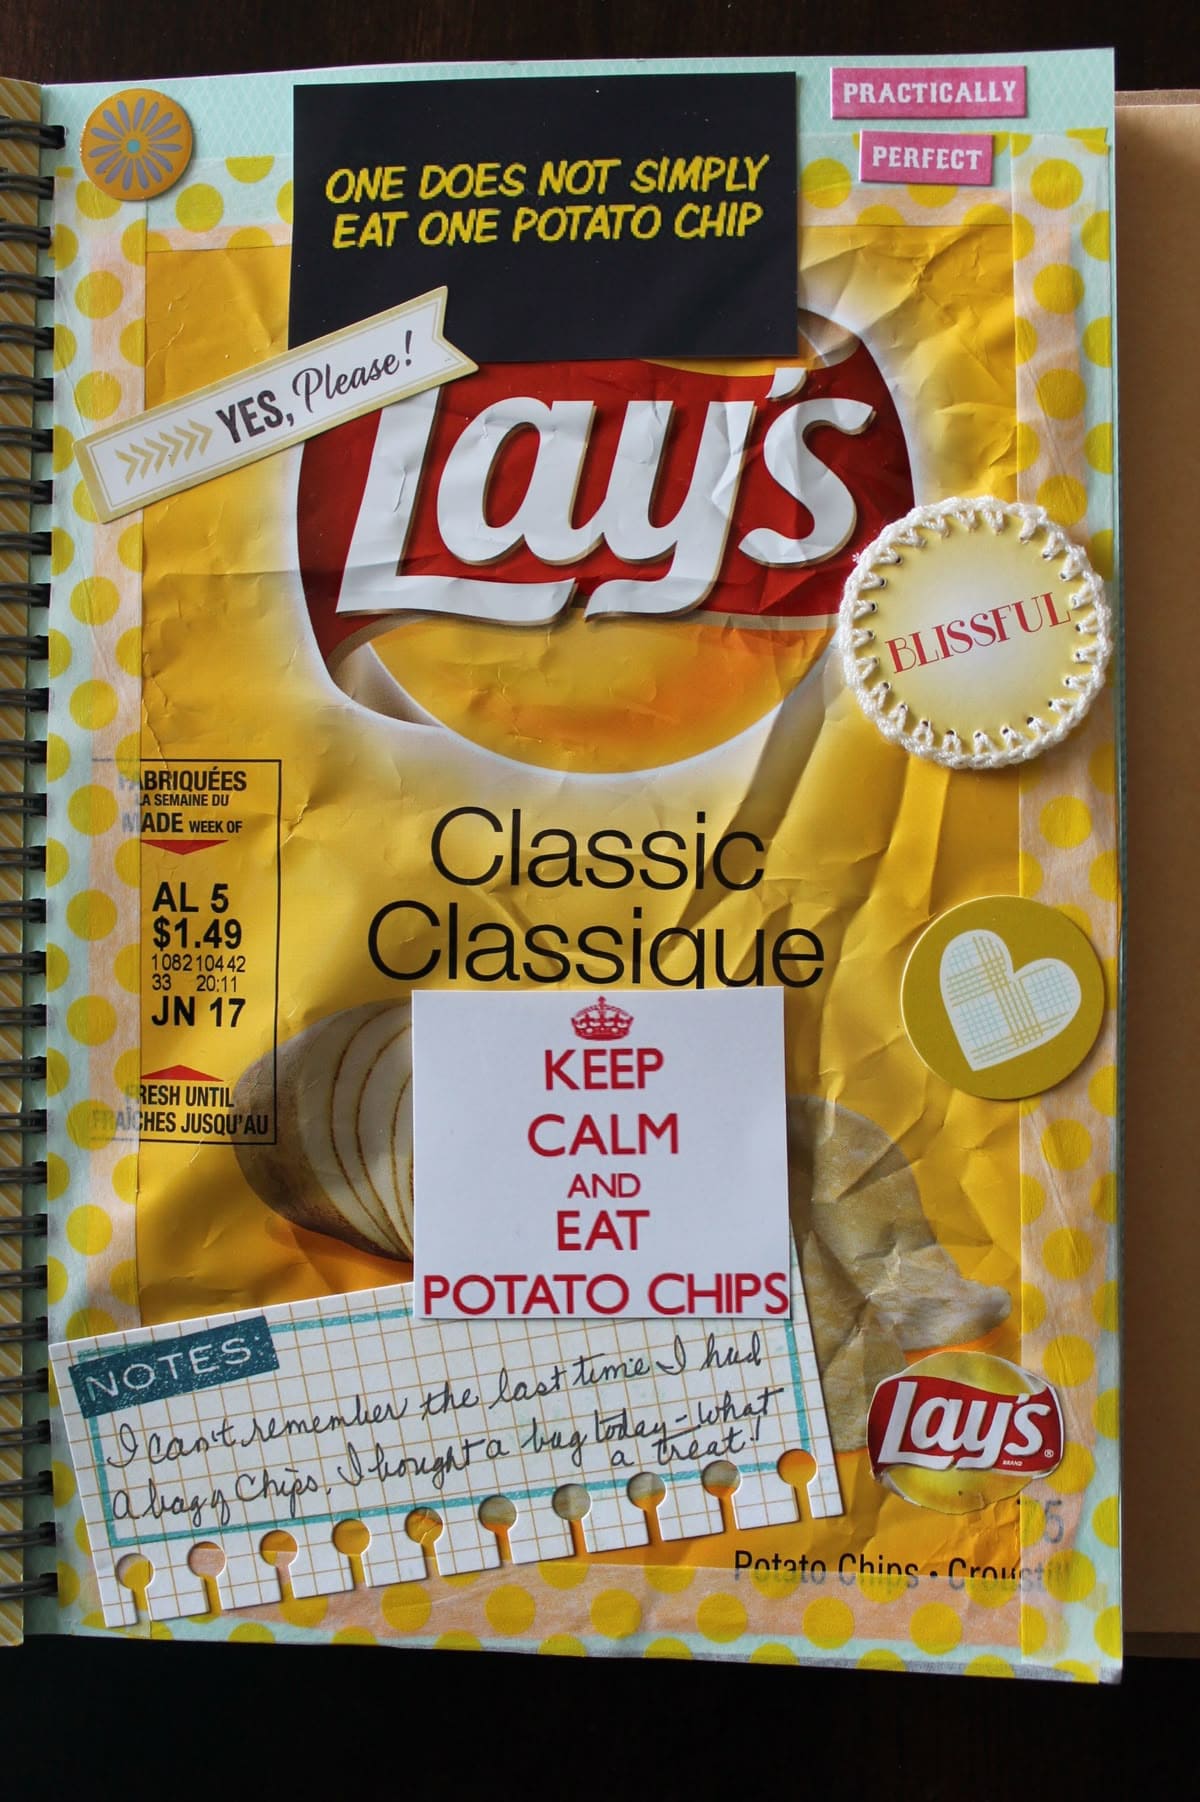
Sometimes, the simplest indulgences deserve a page in your memory book.
This playful scrapbook layout features a glossy Lay’s Classic potato chip bag turned into a bold backdrop for journaling, quotes, and cheerful embellishments.
Moreover, the stitched paper doily, layered labels, and handwritten note add charm and personality that pop off the page.
Materials Needed
- 1 empty Lay’s chip bag (rinsed and flattened)
- Scrapbook paper
- Stickers, labels, and decorative cutouts
- Glue or double-sided tape
- Journal pen
Step-by-step Guide
Step 1: Cut the chip bag open, flatten it, and trim to fit your scrapbook page layout.
Step 2: Glue the wrapper onto your background paper, allowing space for notes and decorations.
Step 3: Add fun quotes, stickers, or printed sayings to build the visual story.
Step 4: Handwrite a short journal entry or memory related to the snack or moment.
#5. Whimsical Butterfly Clips from Crisp Foil
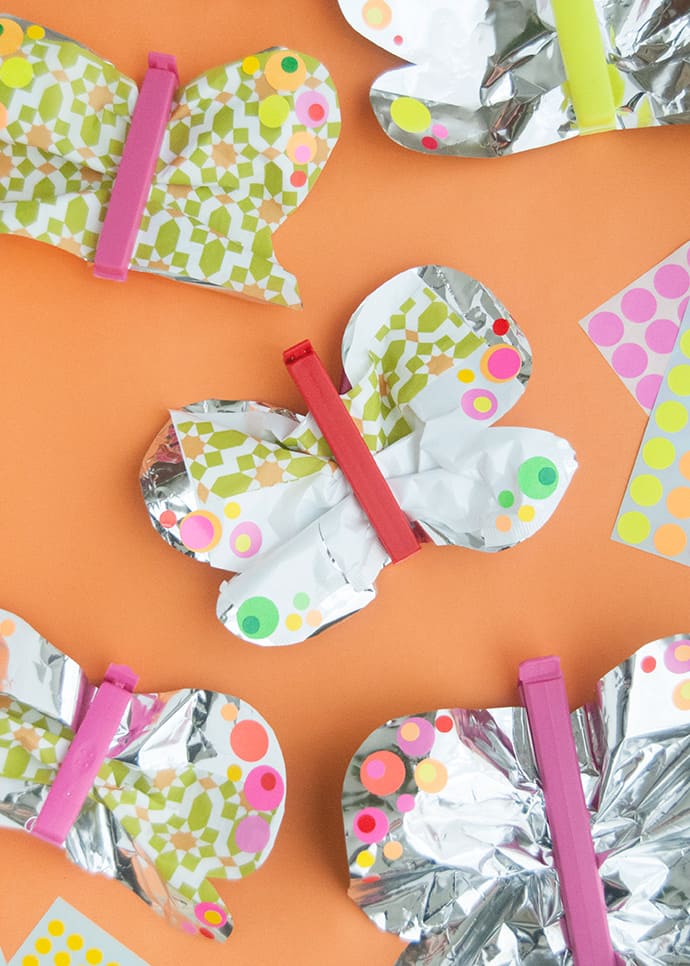
Sometimes the simplest things can lift your mood and these charming butterfly clips do just that. Created from colorful crisp packets and metallic snack wrappers, they flutter with life and personality.
You can use them as cheerful chip bag clips, party favors, or decorations on a springtime gift. Their shimmery wings catch the light beautifully, and adding playful stickers gives them an extra burst of joy.
Materials Needed
- Empty foil or crisp packets
- Colorful dot stickers
- Clothespins
- Scissors
- Glue or tape
Step-by-step Guide
Step 1: Cut crisp packets into butterfly wing shapes using a folded template for symmetry.
Step 2: Decorate the wings with vibrant stickers or paper cut-outs to give them personality.
Step 3: Pinch the wings in the middle and secure with a clothespin or clip to form the butterfly’s body.
Step 4: Gently fluff the wings outward for a more dimensional effect.
#6. Gummy Candy Shorts
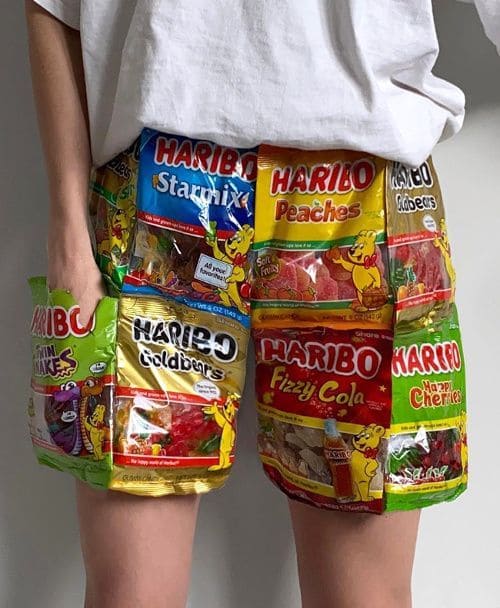
When fashion meets sweet nostalgia, you get these quirky Haribo candy bag shorts. They’re colorful, cheeky, and scream summer festival vibes.
Bonus, each gummy wrapper tells its own flavor story from Fizzy Cola to Goldbears and stitched together, they turn your favorite sugar rush into wearable art.
These shorts are surprisingly sturdy when laminated and backed properly. Plus, the see-through windows on some of the bags add an unexpected touch of whimsy.
Materials Needed
- 8-10 large Haribo bags
- Iron-on vinyl
- Scissors and sewing pins
- Shorts sewing pattern or old shorts
- Sewing machine or needle and strong thread
- Optional: cotton fabric lining
Step-by-step Guide
Step 1: Cut open the bags and lay them flat. Then wipe down any sticky spots and allow to dry fully.
Step 2: Laminate each piece with iron-on vinyl or a clear adhesive sheet for flexibility and durability.
Step 3: Arrange the bags in panels that match your shorts pattern. You can sew them together carefully along the edges.
Step 4: Stitch the front and back panels together, then add an elastic waistband or zipper.
#7. Gum Wrapper Tote Bags That Pop with Personality
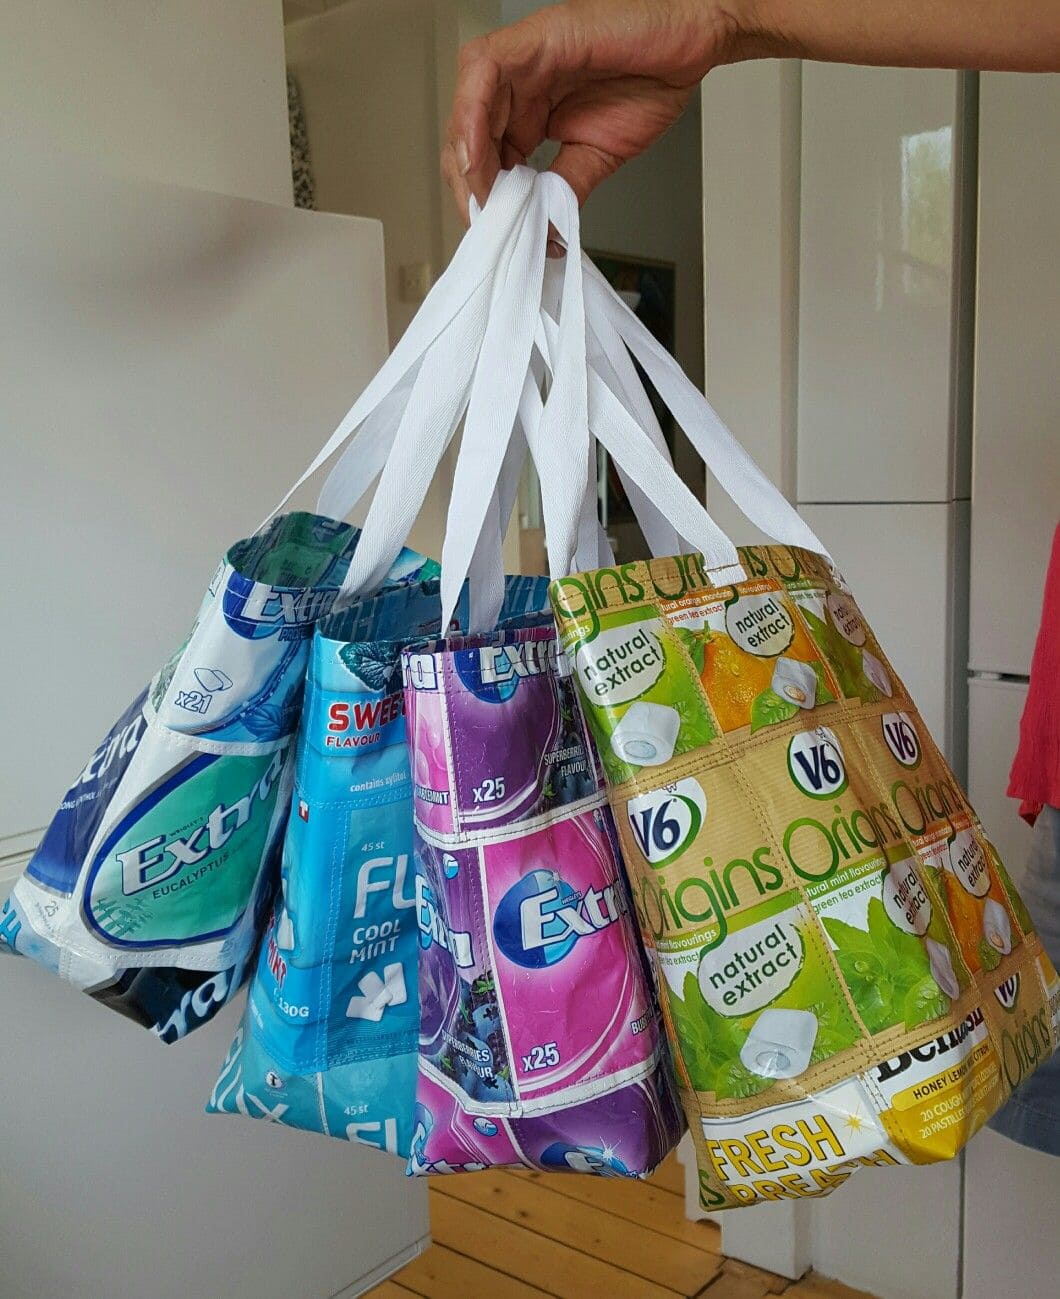
These vibrant tote bags are made entirely from gum and mint packets, transforming everyday packaging into something bold and functional.
With strong white handles and bright patchwork panels, each bag becomes a walking statement of creativity and eco-consciousness.
They’re surprisingly durable, lightweight, and ideal for carrying small groceries, accessories, or lunch on the go.
Materials Needed
- Empty gum and mint packaging (8-10 per bag)
- Clear tape
- Strong fabric or nylon strapping (2 pieces, 12″ each)
- Scissors and sewing machine
- Optional: inner lining fabric
Step-by-step Guide
Step 1: Clean and flatten all wrappers, then reinforce them with clear tape or iron-on vinyl.
Step 2: Stitch or glue wrappers together in rows to form front and back panels of your tote.
Step 3: Add a lining or backing fabric if needed, then stitch up the sides and bottom of the bag.
Step 4: Attach handles securely to the top edge using strong stitches or fabric glue.
Step 5: Now you turn inside out if lined, and enjoy your flashy, waste-free bag!
#8. Doritos Chip Bag Recycle Vest
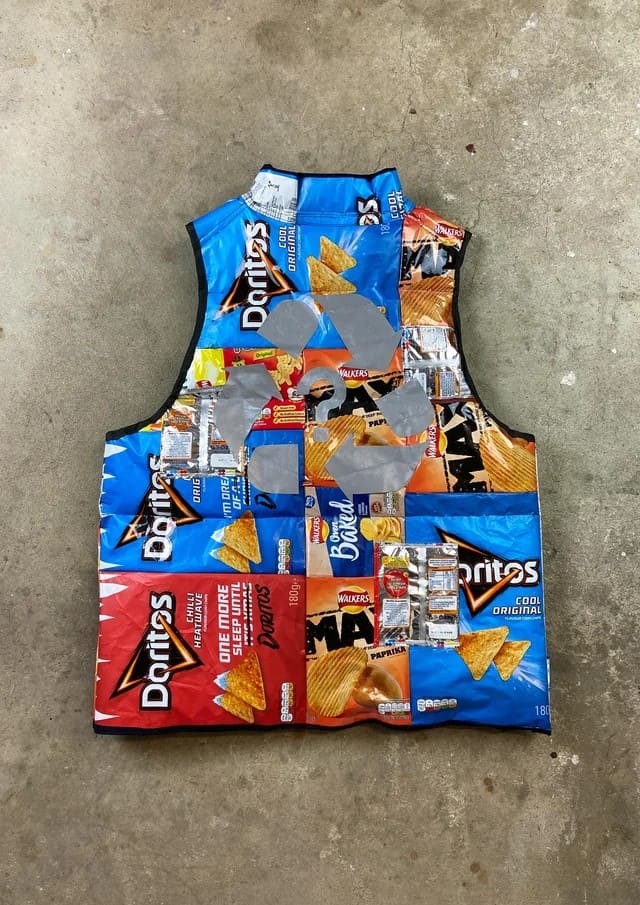
You can turn your favorite snacks into wearable statements, this bold vest crafted from Doritos and Walkers chip bags brings eco-fashion to a whole new level. The reflective silver recycling symbol stitched across the back is a message.
You’re not just upcycling waste; you’re wearing your values. It’s edgy, loud, and surprisingly functional.
Materials Needed
- 10-12 clean Doritos, Walkers, or similar chip bags
- Recycled silver vinyl
- Vest sewing pattern
- Iron-on vinyl or fusible interfacing
- Sewing machine with non-stick needle
- Optional: cotton lining
Step-by-step Guide
Step 1: Flatten and clean all chip bags. Then use a vest pattern to cut matching front and back panels.
Step 2: Fuse a vinyl or fabric stabilizer to each bag piece for structure. You can stitch the panels together at shoulders and sides.
Step 3: Create armholes and neckline, trimming edges cleanly and finishing with bias tape or fold-over elastic.
Step 4: Cut and attach a large recycling symbol using reflective vinyl or silver tape for extra flair and meaning.
#9. Snack Pack Statement Jacket
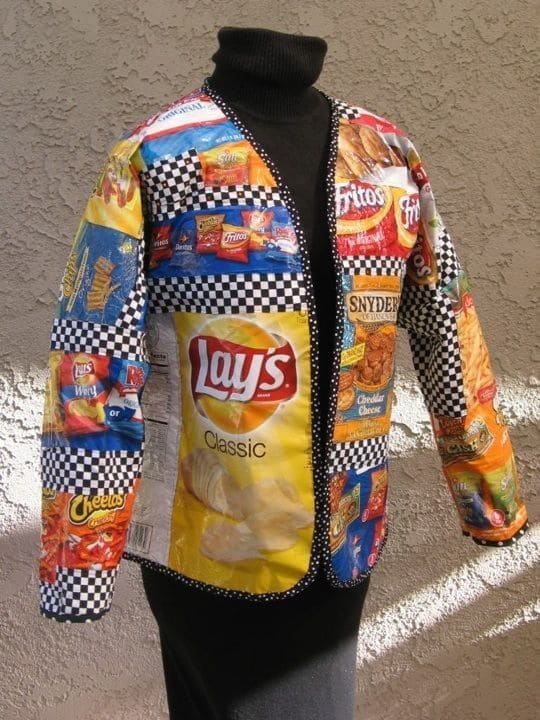
If runway fashion met recycling day, this jacket would be the showstopper. It’s loud, unapologetic, and packed with nostalgia from every aisle of the snack section.
Plus, the black-and-white checkered accents add a street-style flair, balancing chaos with structure.
You can wear it to your next costume party, fashion show, or Earth Day rally and watch people snack on your style with their eyes, of course.
Materials Needed
- 15-20 empty snack bags
- Old zip-up jacket
- Iron-on vinyl sheets
- Sewing machine or fabric glue
- Optional: checkered fabric
Step-by-step Guide
Step 1: Cut open and flatten your crisp packets. Then wash and dry thoroughly to remove oils or crumbs.
Step 2: Laminate them with vinyl or use interfacing to make the material more flexible and durable.
Step 3: Use a jacket pattern or cover an old jacket piece-by-piece, attaching each packet with a sewing machine or adhesive.
Step 4: Add black-and-white accents for visual balance, and reinforce seams for extra strength.
Step 5: Finish with a zipper or snaps, and press seams flat for a clean, structured look.
#10. Upcycled Chocolate Wrapper Journal Spread
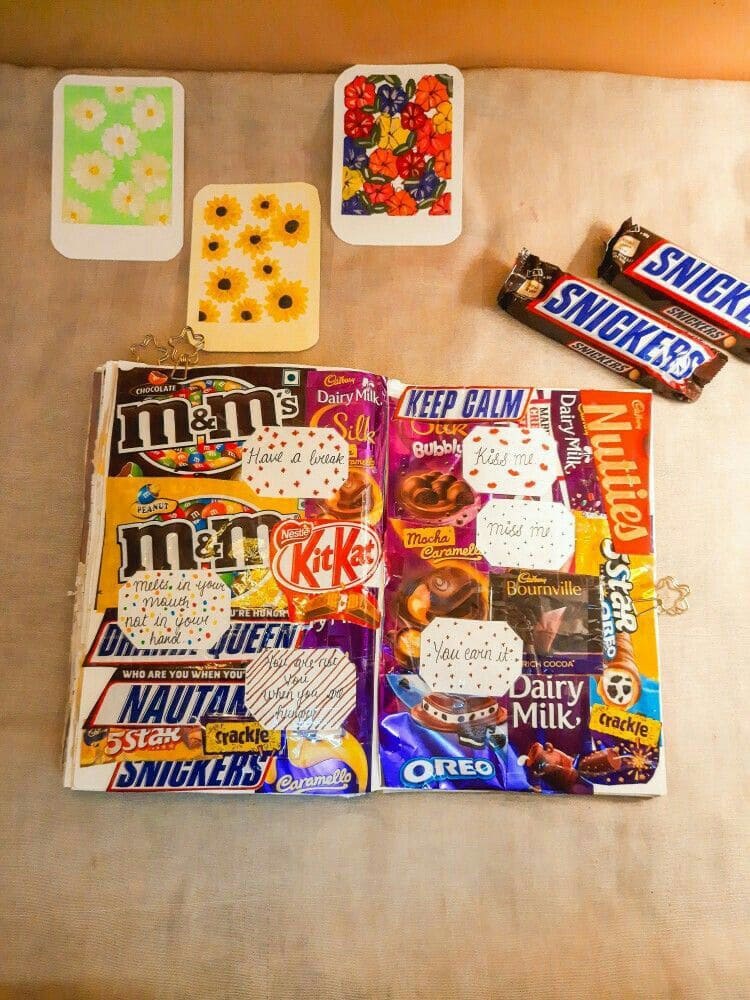
Sweet memories meet sustainable creativity in this playful journal layout made entirely from chocolate bar wrappers.
I believe it’s a delightful way to preserve wrappers you love while turning them into a fun, nostalgic visual story.
You can also add tiny quotes, candy slogans, or even handwritten notes on top to personalize the page even more.
Materials Needed
- 10-15 clean, flat chocolate bar wrappers
- Notebook or blank journal
- Glue
- Decorative paper scraps
- Markers or pens
Step-by-step Guide
Step 1: Trim your wrappers into neat shapes or collage-style fragments. Then glue them onto journal pages, arranging by color, theme, or brand.
Step 2: Add stickers, washi tape, or fun captions to create a vibrant, layered look.
Step 3: Finally, use fine-tip pens to write personal thoughts, candy quotes, or dates over the wrappers.
#11. Milka Chocolate Bar Coin Pouches
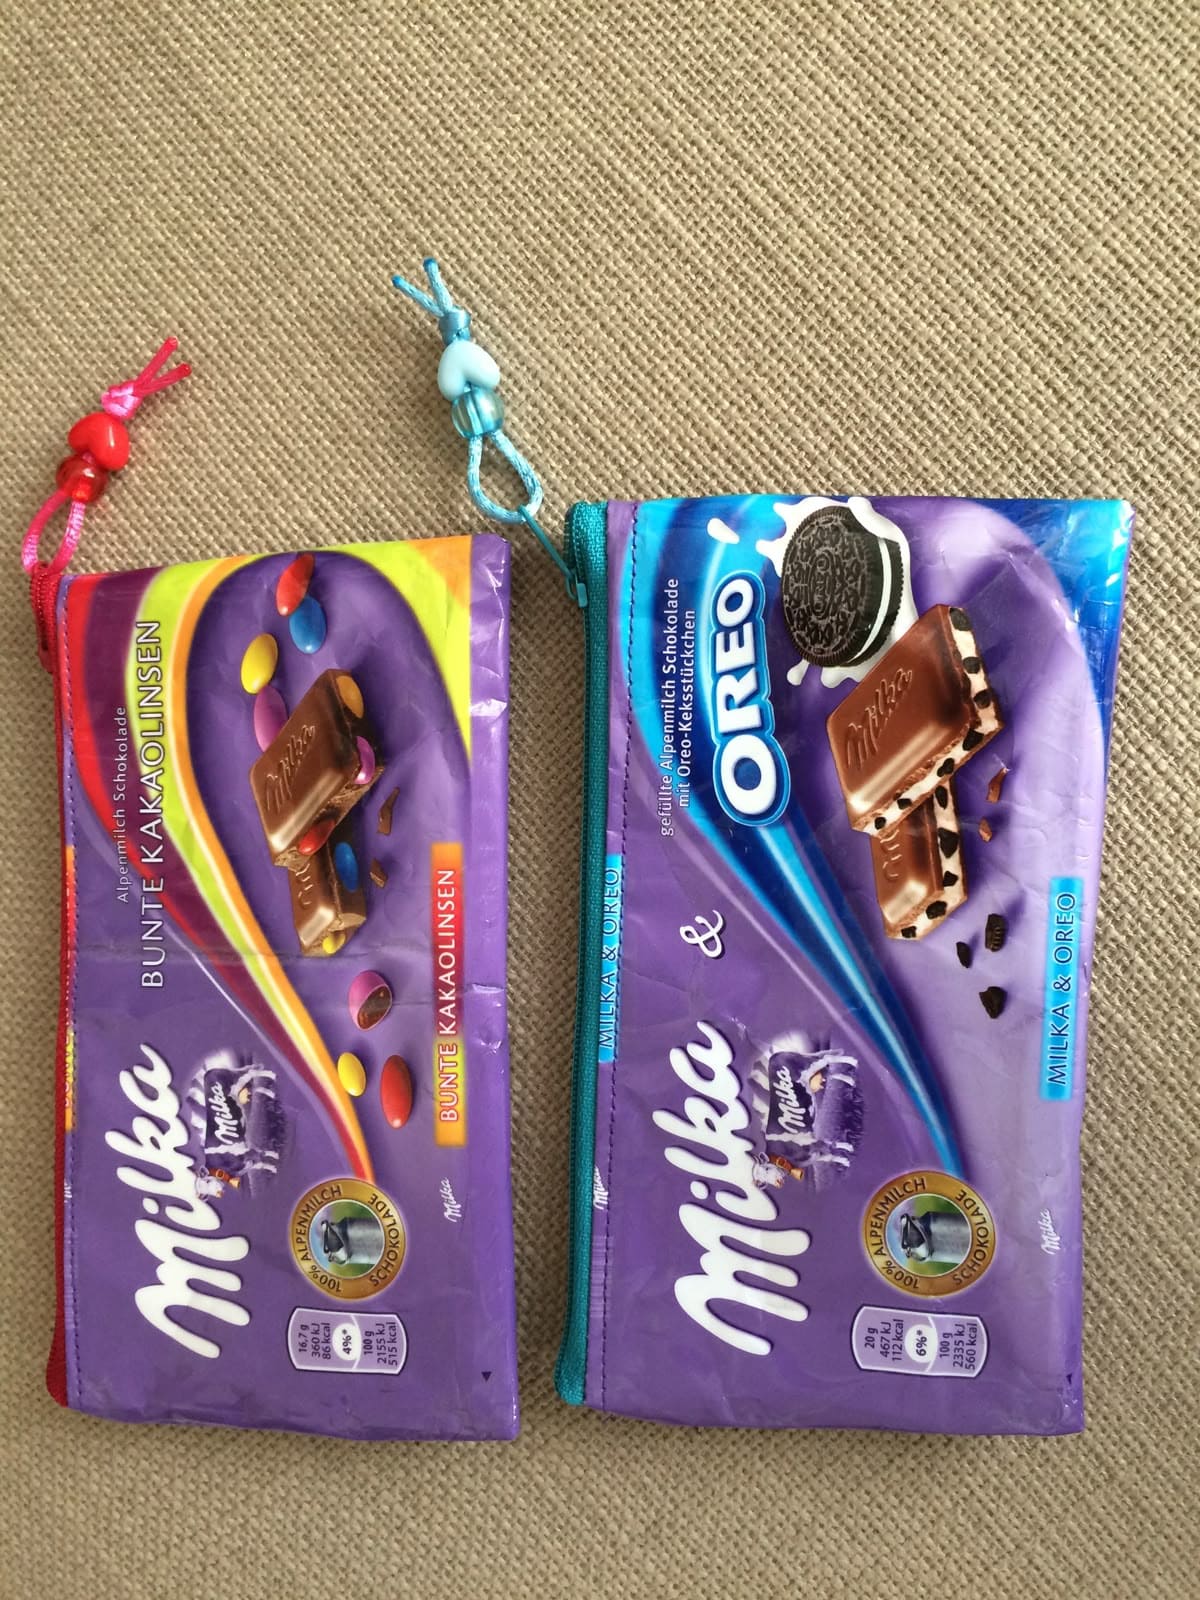
Instead of tossing out your empty candy wrappers, you can turn them into something both functional and fun.
These zipper coin purses keep loose change, lip balm, or earbuds stylishly tucked away in a nostalgic candy-coated case.
Materials Needed
- Empty chocolate bar wrappers (washed and dried)
- Zippers (7″-9″) in fun colors
- Fabric lining (cut to size)
- Clear vinyl or fusible interfacing
- Beads or string (optional)
- Sewing machine or fabric glue
Step-by-step Guide
Step 1: Carefully cut the chocolate wrapper to the desired pouch size. Then reinforce it with vinyl or interfacing for strength.
Step 2: Attach the zipper to the top edge using a sewing machine or fabric glue. Now, add the lining to the inside for extra durability.
Step 3: Sew or glue the sides shut. If sewing, stitch with care around the wrapper’s edges to avoid tearing.
Step 4: Decorate the zipper pull with beads or small charms to add a personal flair.
#12. Woven Candy Wrapper Umbrella Sleeve
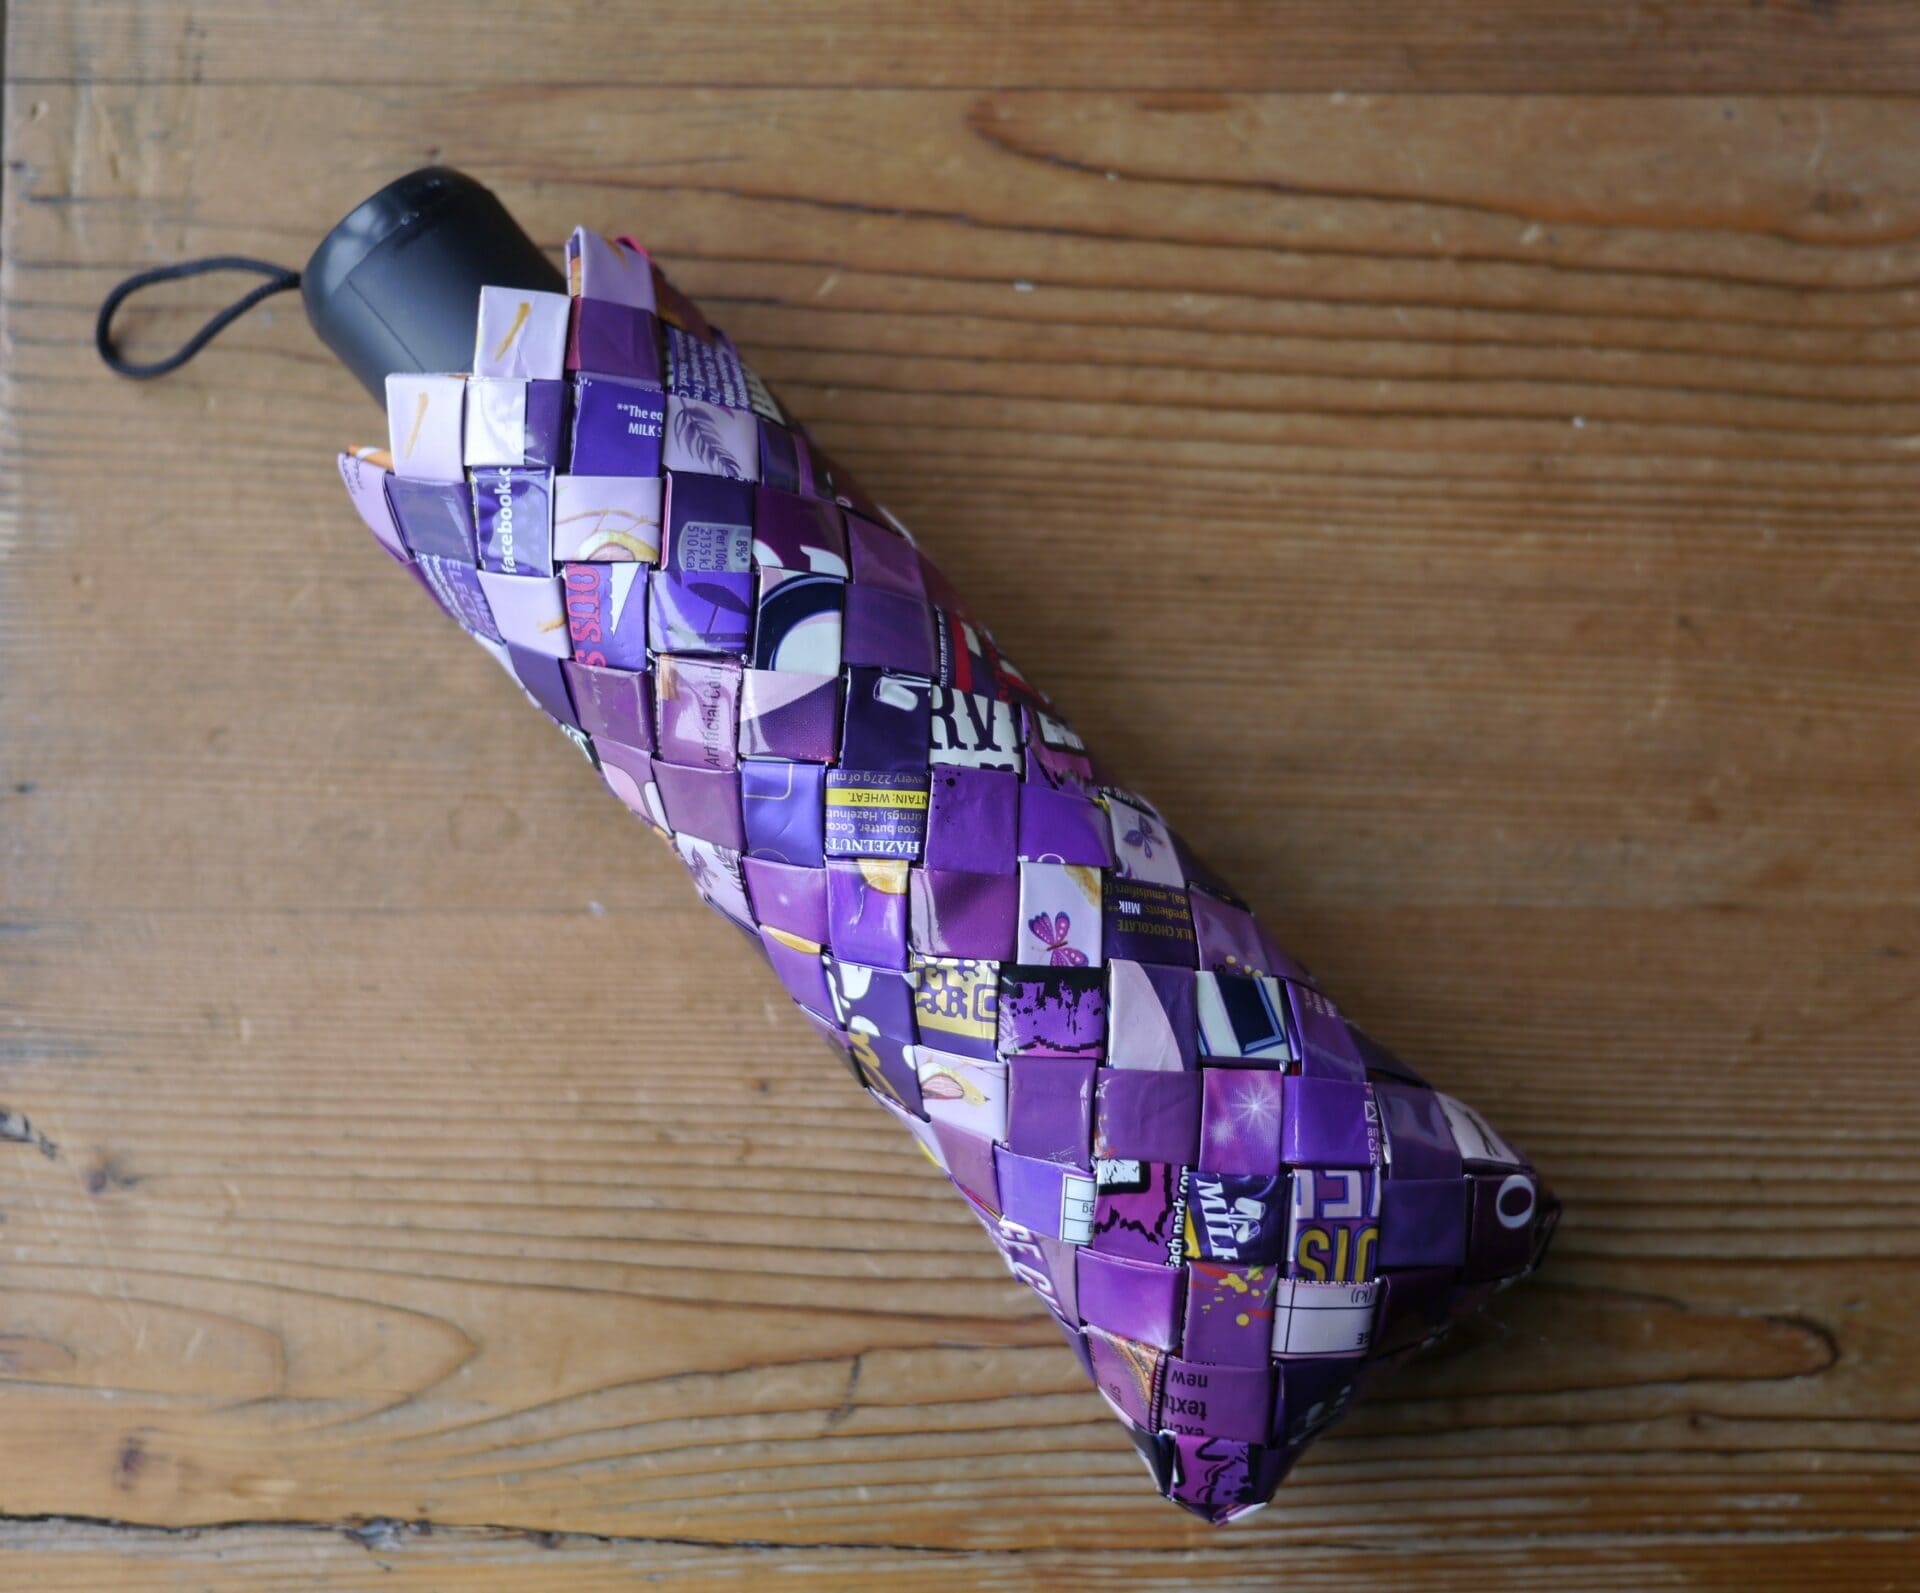
Here’s a brilliant way to protect your umbrella and reduce plastic waste, this woven sleeve is handmade entirely from recycled candy and snack wrappers, mostly in delicious shades of purple.
Moreover, the intricate weave doesn’t just look stylish; it creates a surprisingly strong and flexible shell for keeping your bag dry after the rain.
Materials Needed
- 40-50 candy or chocolate wrappers
- Clear packing tape
- Scissors
- Sewing machine or strong craft glue
- Metal eyelet and cord (optional)
Step-by-step Guide
Step 1: Cut wrappers into identical strips and laminate or tape both sides for strength.
Step 2: Fold each strip into narrow links, then interlock in a diagonal weave pattern to form long chains.
Step 3: Weave the long chains together to form a flat rectangle, then shape it into a tube that fits your umbrella.
Step 4: Stitch or glue the seam securely, then add a bottom patch to close the base.
#13. Woven Candy Wrapper Tote Bag
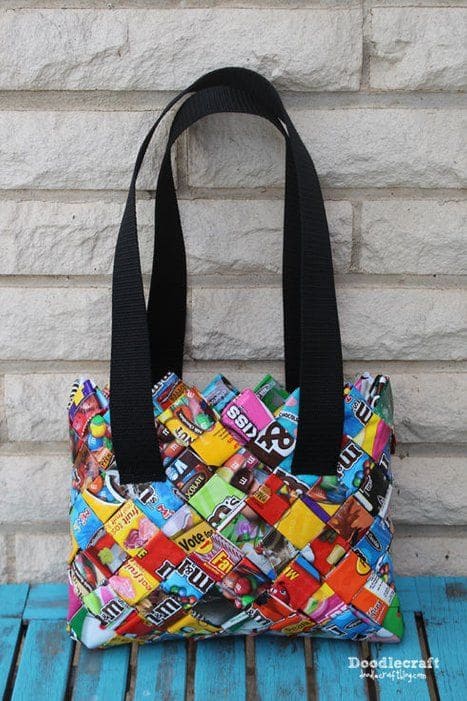
Interestingly, this tote is a brilliant example of how candy wrappers can be reborn into something strong, stylish, and completely unexpected.
Each colorful square you see was once a sweet treat wrapper, now woven together like a technicolor quilt that carries your groceries, books, or everyday essentials.
Materials Needed
- Dozens of cleaned candy or chip wrappers
- Clear tape (optional)
- Black webbing straps (1.5″ wide, 20″-24″ long each)
- Sewing machine or heavy-duty thread and needle
- Scissors, ruler, clips
Step-by-step Guide
Step 1: Cut your wrappers into uniform strips (approx. 2″×7″) and fold each one into a thick band.
Step 2: Weave the bands over and under in alternating rows until you form a square or rectangle big enough for your bag sides.
Step 3: Use a sewing machine or sturdy hand-stitching to secure the edges. Now, you create and attach a liner if needed.
Step 4: Sew the handles onto the top edges of the bag, reinforcing the stitch lines for durability.
#14. Bold Ringolos Snack Corset
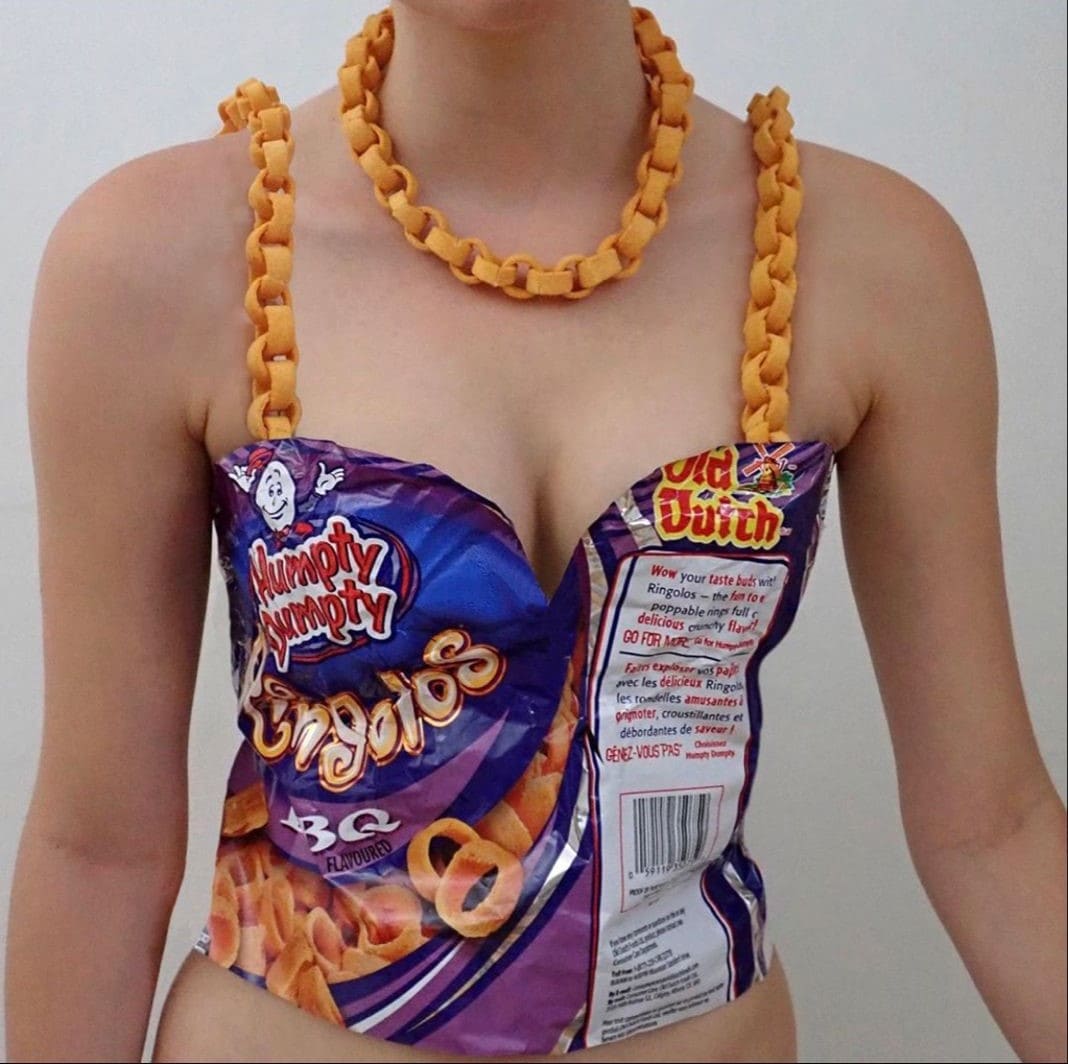
Fierce, cheeky, and undeniably unforgettable, this Ringolos snack corset flips the idea of disposable fashion on its head.
With its sculpted bodice made from crisp packets and chunky puffed snack straps, it’s performance art. You can almost hear the crunch of rebellion.
Perfect for a costume party, editorial photo shoot, or to make a bold eco-conscious statement, this daring top turns snack waste into wearable sass.
Materials Needed
- 2-3 large crisp or snack bags
- Thick snack puffs
- Needle and thread or strong glue
- Scissors
- Optional: Lining fabric
Step-by-step Guide
Step 1: Carefully cut and shape the snack bags to fit your upper torso. Now you tape or pin in place for a rough mock-up fit.
Step 2: Stitch or glue the seams together to create a contoured front. Then use fabric lining on the inside to protect your skin.
Step 3: Make the straps using either real puffy snacks or sculpted foam links painted to match.
Step 4: Attach the straps securely and test for wearability, then adjust the length to prevent slipping.
#15. Statement Earrings from Snack Wrappers
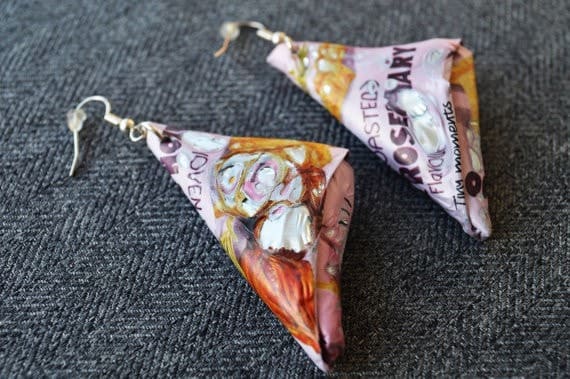
If you love bold accessories and upcycled fashion, these crisp packet earrings are a showstopper. Made by folding snack wrappers into sleek geometric shapes, they turn everyday waste into wearable art.
Specially, the glossy texture and vivid graphics give them an edgy, modern vibe that stands out in the best way. They’re lightweight, eye-catching, and surprisingly durable.
Materials Needed
- Clean, dry crisp or snack wrappers
- Scissors
- Jewelry pliers
- Earring hooks
- Hole punch (mini size)
- Optional: Mod Podge or clear sealant
Step-by-step Guide
Step 1: Cut crisp wrapper into a triangular or desired shape and fold to add structure.
Step 2: Seal with Mod Podge if needed to stiffen and protect the surface.
Step 3: Punch a small hole near the top and attach an earring hook using jewelry pliers.
Step 4: Let everything dry and set before wearing your upcycled creation.
#16. Crisp Packet Patchwork Blanket
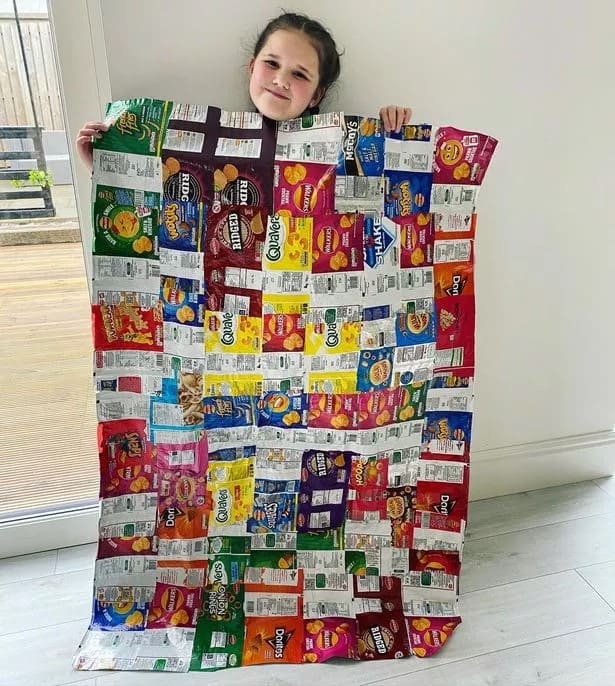
This creative patchwork-style blanket takes recycling to a whole new level, transforming empty crisp packets into a cozy and colorful quilt.
Kids love the burst of colors, and adults appreciate the environmental impact. Plus, it’s an amazing bonding craft to do with little ones while teaching sustainability in a fun, hands-on way.
Materials Needed
- 40-80 clean, empty crisp or snack packets
- Clear packing tape or a sewing machine and ironing sheet
- Scissors
- Backing fabric (optional)
- Iron and parchment paper
Step-by-step Guide
Step 1: Cut open and clean each crisp packet thoroughly, flattening them as you go.
Step 2: Arrange the packets in rows like a quilt, mixing colors and brands for a vibrant look.
Step 3: Use clear tape or carefully fuse the pieces together with an iron between parchment sheets.
Step 4: For added durability, sew onto a fabric backing or edge with bias tape.
#17. Gum Wrapper Dog Leash
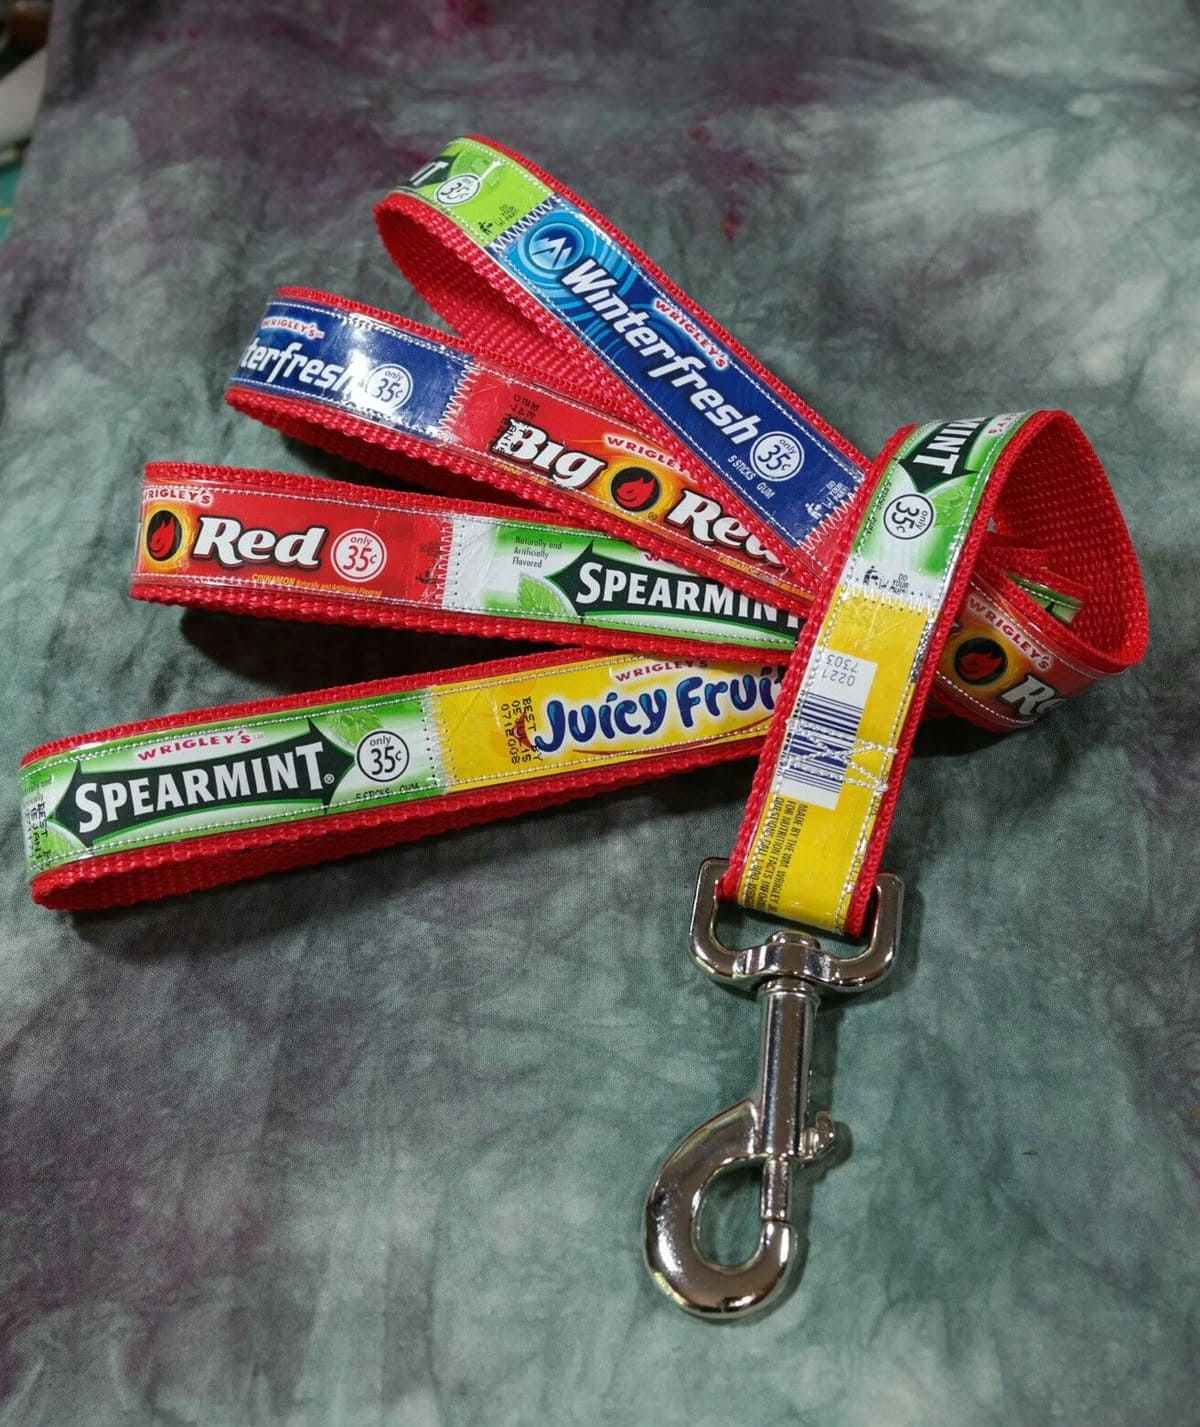
This nostalgic dog leash breathes new life into vintage gum wrappers, blending retro charm with everyday function.
Perfect for pet owners who want to turn daily walks into an eco-statement, this leash is both a conversation starter and a tribute to classic candy culture. The red webbing base ties it all together with bold contrast and strength.
Materials Needed
- Vintage-style gum wrappers
- 1″ red nylon webbing (about 5 feet)
- Clear vinyl or iron-on laminate
- Sewing machine and strong thread
- 1 heavy-duty leash clip
Step-by-step Guide
Step 1: Flatten and laminate the wrappers with vinyl or contact paper for durability.
Step 2: Next, you stitch the laminated wrappers securely onto the webbing, edge to edge.
Step 3: Fold over the end and attach the clip, sewing multiple times for extra strength.
Step 4: Finally, add a looped handle at the other end, then topstitch for a finished look.
#18. M&M Candy Wrapper Zipper Pouch
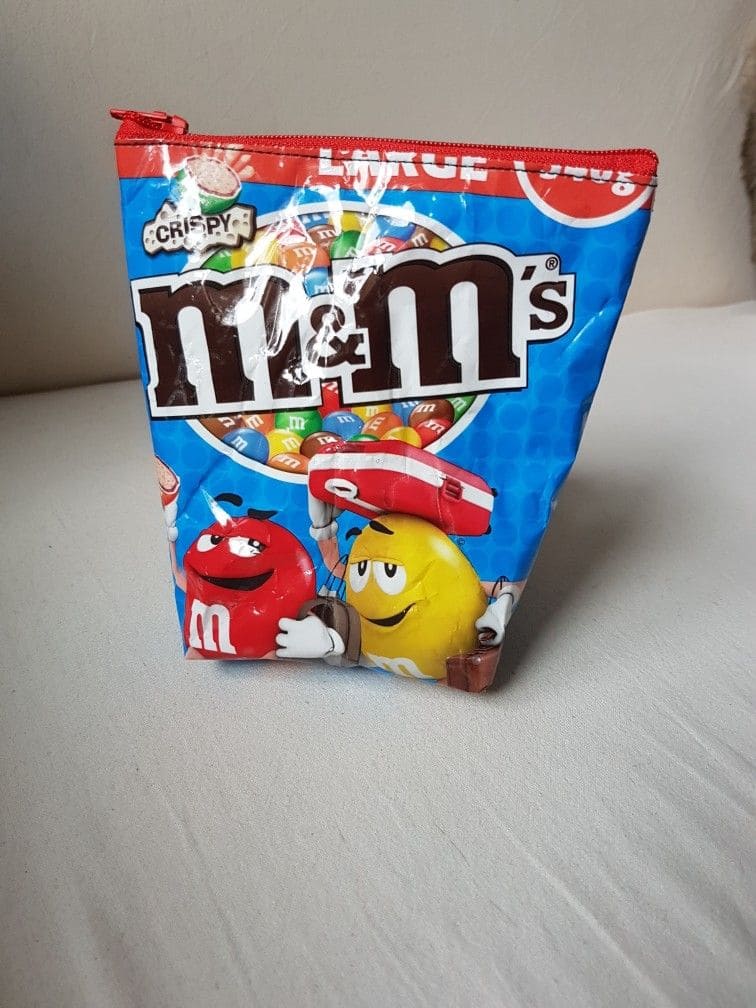
Wow, this pouch proves that even a snack bag can enjoy a second life. Created from a glossy M&M candy wrapper, it transforms into a bold, playful zippered pouch perfect for holding coins, earbuds, or tiny trinkets.
Bonus, its eye-catching colors and familiar characters give it a nostalgic touch, while the red zipper adds a clean finish.
Materials Needed
- 1 large M&M candy wrapper (cleaned and dried)
- 1 red zipper (7” long)
- Iron-on vinyl or clear contact paper
- Fabric scrap
- Sewing machine and zipper foot
Step-by-step Guide
Step 1: Laminate the wrapper with clear vinyl to give it strength and water resistance.
Step 2: Cut a matching lining piece and sew the zipper to both wrapper and fabric.
Step 3: Fold in half, right sides together, and stitch along the edges to create the pouch.
Step 4: Now, turn right-side out and press gently with a cloth over it.
