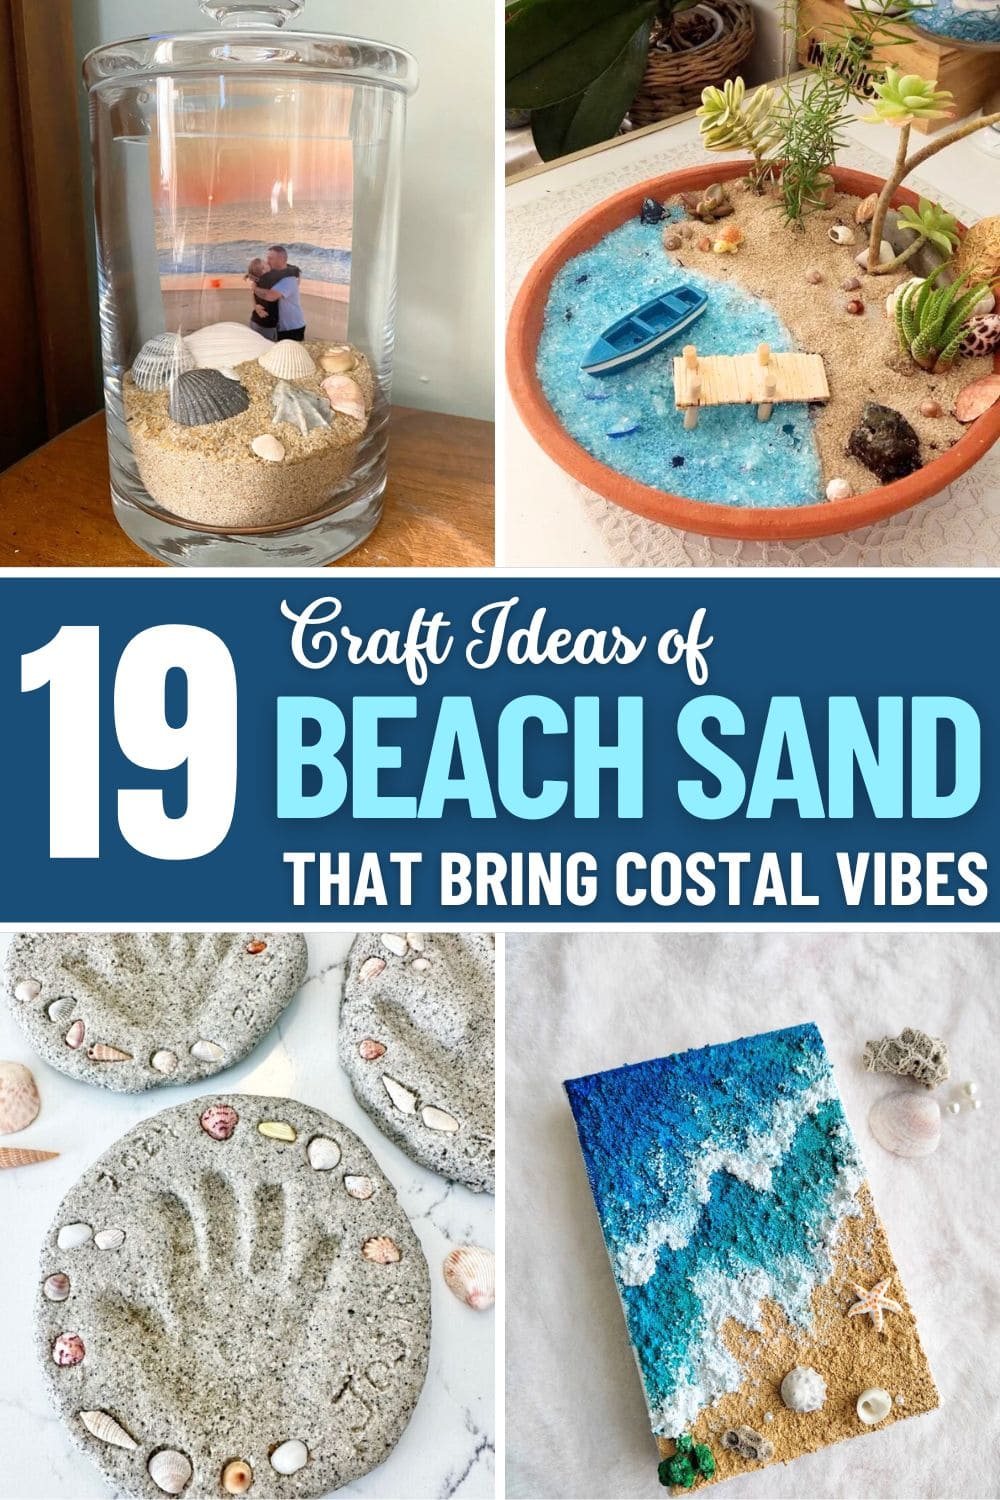
When summer fades but your heart still lives at the beach, there’s no better way to hold onto those golden days than with a handful of sand and a little creativity. These 19 beautiful beach sand craft ideas are more than just DIY projects; they’re memory-makers.
Whether it’s sand from your favorite vacation spot or a local trip to the shore, these crafts help bring the ocean’s magic into your home.
From keepsake jars and beach terrariums to sensory bottles and shell-studded art, you’ll find something calming, nostalgic, and surprisingly easy to create.
So roll up your sleeves, grab that sandy souvenir, and let’s make your home feel like summer never left.
#1. Textured Ocean Shore Canvas Art
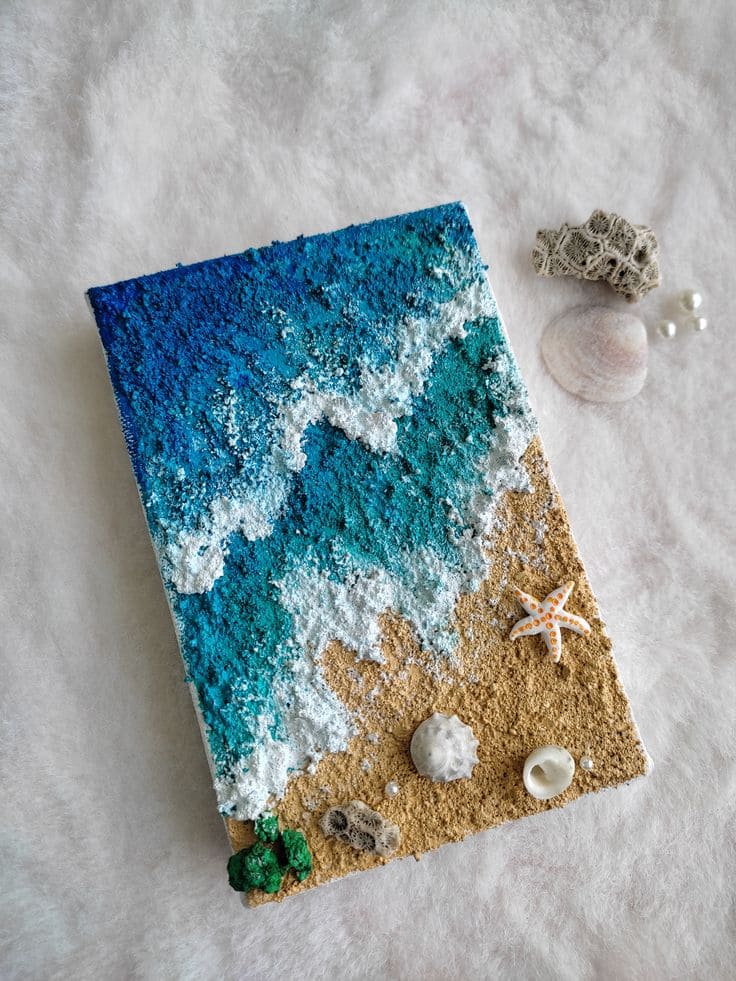
This mini canvas captures the soul-soothing moment when waves meet the shore, and you can almost hear the seafoam fizzing. It’s more than a decorative piece, it’s a pocket of calm, brought to life with real beach sand, crushed pigments, and shells you may have collected during a sunset walk.
If you love crafts that feel like a memory, this one’s for you. You’ll enjoy layering colors, shaping the surf, and placing those final seaside touches.
Materials Needed:
- 1 small canvas (5×7 inches)
- Fine beach sand (about 1/2 cup)
- Acrylic paint (shades of blue, white, beige)
- Mod Podge
- 5-6 small sea shells, starfish, coral bits
- Craft sponge
- Palette knife
Step-by-step Guide:
Step 1: Mix a bit of white glue with beach sand and spread it over the bottom third of your canvas to create the sandy shore.
Step 2: Paint the top two-thirds with layers of blue, blending darker shades outward and lighter hues near the shore. Let each layer dry slightly before adding the next.
Step 3: Dab on thick white paint or textured paste to mimic seafoam. Then use a sponge or palette knife for a natural, frothy effect.
Step 4: Once everything dries, glue on your seashells and coral pieces where the tide meets the land.
#2. Shadow Box Seashell Story Frame
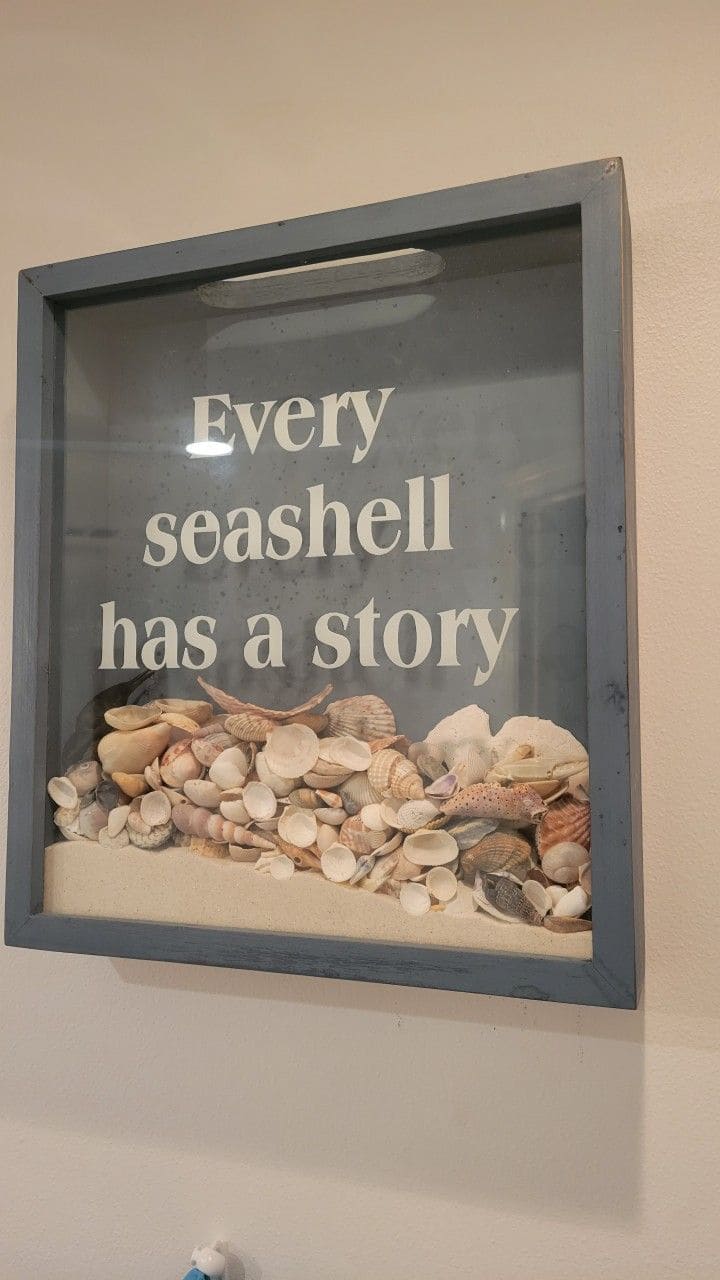
There’s something poetic about trapping a little bit of the beach behind glass, like saving a whisper of waves and a handful of memories. This shadow box is more than décor; it’s a gentle reminder of beach days, pockets full of seashells, and the stories they carry.
Whether you picked them up yourself or received them from someone special, every shell has its chapter. This project turns your collection into a calming, personal piece that brings the coast to your wall.
Materials Needed:
- 1 shadow box frame (12×12 inches)
- Beach sand (about 1 cup)
- 30-50 assorted seashells
- Hot glue gun
- Vinyl letters or printable transfer paper
Step-by-step Guide:
Step 1: Remove the backing of your shadow box and clean the glass inside and out.
Step 2: Arrange and adhere your quote on the inner glass using vinyl stickers or rub-on transfer letters.
Step 3: Pour a layer of clean, dry sand at the bottom of the box and level it gently.
Step 4: Add your shells, layer them loosely or glue a few into place for added dimension. Secure the backing and hang your beach memory with pride.
#3. Beach Memory Jar with Photo Backdrop
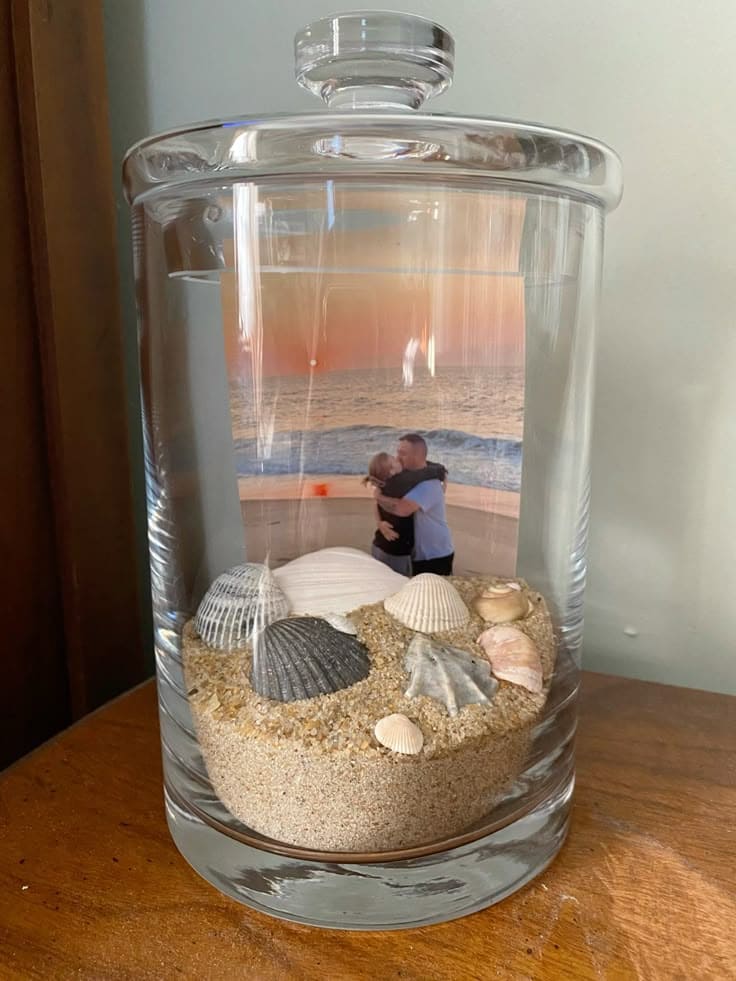
This one hits the heart. A clear glass jar filled with real beach sand and scattered shells becomes a vessel of emotion when you place a cherished photo behind it, especially one captured at sunset. It’s more than a craft; it’s a time capsule.
You can almost hear the waves, feel the breeze, and remember the laughter in that moment. Whether it’s for yourself or a loved one, this jar turns a beach day into a forever keepsake.
Materials Needed:
- 1 large glass jar with lid (about 8-10 inches tall)
- 1 printed beach photo
- Beach sand (about 2 cups)
- 10-15 assorted shells
- Double-sided tape
Step-by-step Guide:
Step 1: Clean your jar thoroughly to remove smudges.
Step 2: Place the photo against the inside back of the jar, securing it with double-sided tape.
Step 3: Slowly pour in the sand, forming a gentle slope for depth and layering.
Step 4: Gently press your shells into the sand and adjust until they look naturally placed. Then seal the lid and display it where sunlight can hit it for that extra beachy glow.
#4. Coastal Vase Filler Display
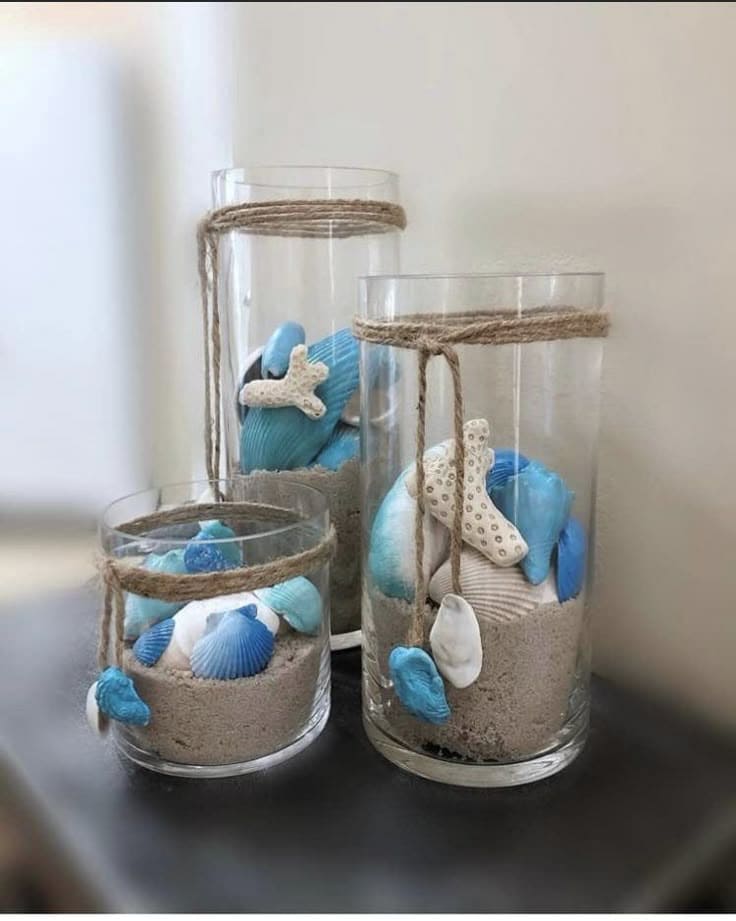
Sometimes, all you need is a little sand, a splash of color, and a few ocean treasures to turn an ordinary corner into a calming coastal nook. These glass vases, layered with beach sand and painted shells, bring beachy vibes without trying too hard.
The jute twine wrapped around the tops adds a rustic touch, while the hanging coral pieces feel like a gentle nod to the ocean’s elegance. You can use these as centerpieces, bathroom décor, or just a way to hold onto summer.
Materials Needed:
- 3 clear glass vases (varied heights, around 6″-12″)
- Beach sand (1-2 cups per vase)
- Real or faux seashells (white, turquoise, or hand-painted)
- Small faux coral or sea glass pieces
- Jute twine (2-3 feet per vase)
- Hot glue gun
Step-by-step Guide:
Step 1: Pour dry sand into each vase, filling about a third of the way up.
Step 2: Gently press your shells into the sand, arranging them so colors pop.
Step 3: Wrap twine twice around the vase top and secure with a dab of glue.
Step 4: Tie on small shells or coral pieces like charms for a coastal finish.
#5. Googly-Eyed Sand Starfish
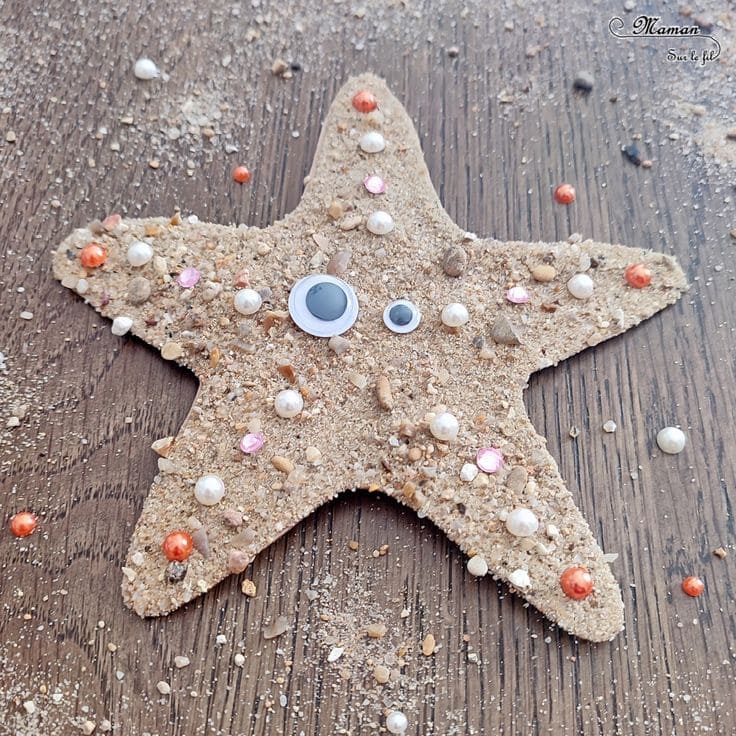
There’s something delightfully whimsical about this starfish craft. It’s a mix of sandy texture and shiny treasures, brought to life with those classic googly eyes. Perfect for a beach-themed craft afternoon or a playful summer keepsake, this cheerful star will have kids giggling while they sprinkle sand like magic.
It’s not just fun, it sparks creativity and sensory joy in equal measure. And when it’s finished, it’s so cute you’ll want to hang it on the fridge or turn it into a wall garland.
Materials Needed:
- Sturdy cardstock (1 piece, approx. 6″ wide)
- White glue
- Clean, dry beach sand (about 1/2 cup)
- 2 googly eyes (assorted sizes)
- Small beads (20-25 pieces)
- Pencil and scissors
Step-by-step Guide:
Step 1: Draw and cut out a starfish shape on your cardstock or foam sheet.
Step 2: Brush a layer of white glue all over the surface, covering every tip.
Step 3: Generously sprinkle sand over the glue, pressing lightly to make it stick. Let dry.
Step 4: Add googly eyes near the center, then decorate with beads or pearls as desired.
#6. Mermaid Silhouette Shell Art
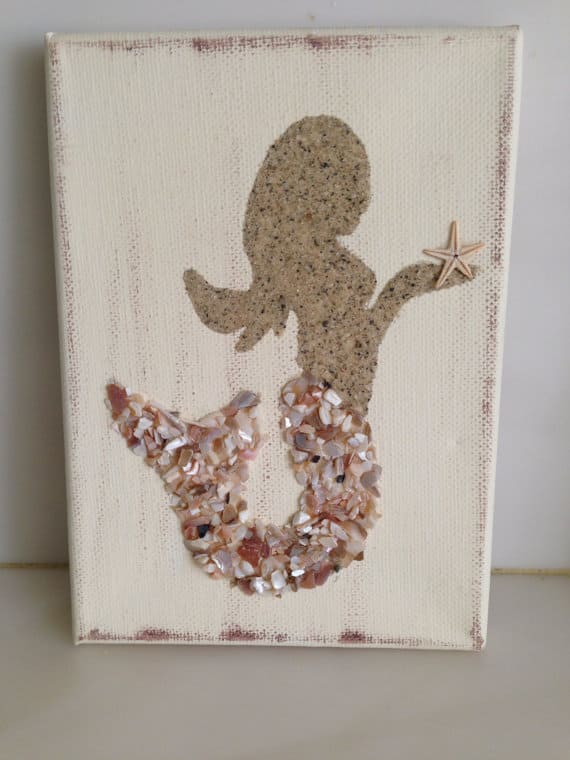
This dreamy mermaid wall art feels like a soft whisper from the sea. The contrast between textured sand and glossy shell fragments creates depth and shimmer, while the tiny starfish in her hand brings a magical finishing touch.
Whether you display it in a beach-themed nursery or your cozy reading nook, it carries a sense of storytelling and coastal nostalgia.
Materials Needed:
- Blank canvas (8×10 inches or larger)
- Craft sand (about ¼ cup)
- Crushed shells
- Mermaid silhouette stencil
- Mod Podge
- Paintbrush
- Small decorative starfish (optional)
Step-by-step Guide:
Step 1: Print or cut out a mermaid stencil and lightly trace it onto your canvas.
Step 2: Apply Mod Podge to the upper body portion, then sprinkle sand over it.
Step 3: Brush glue onto the tail area and gently press shell fragments in place.
Step 4: Once everything’s set, glue a mini starfish to the hand or tail for extra charm.
#7. Beach Memory Globe Ornament
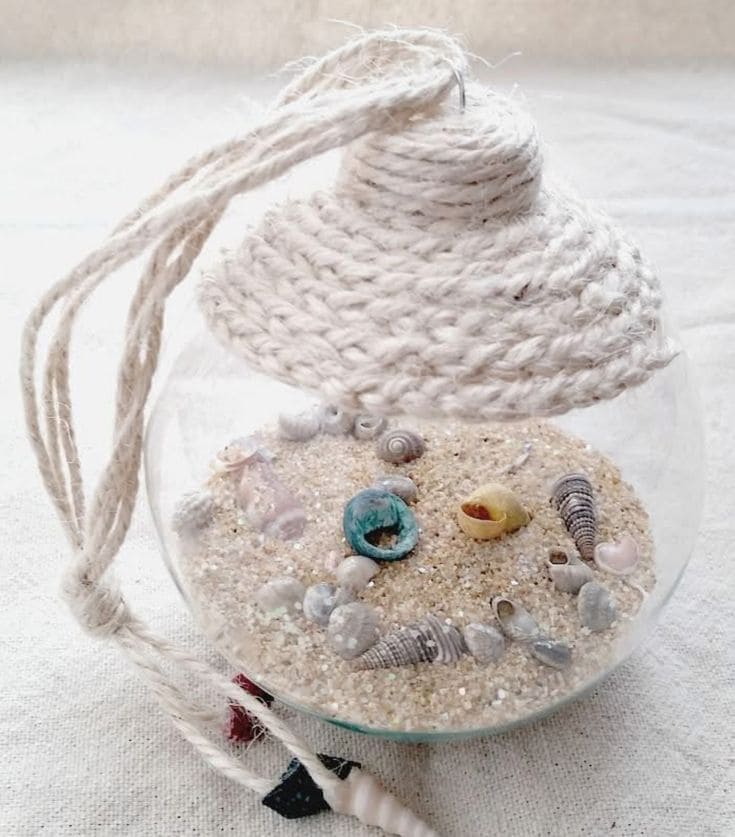
This delicate beach globe feels like holding summer in your hand. A handful of soft sand, tiny seashells, and ocean-colored trinkets rest quietly inside, like whispers from a tide long gone.
Wrapped with natural cotton rope, it brings coastal calm to your decor. Whether you picked those shells on a vacation or bought them from a craft store, this piece becomes a small time capsule of salty air and sun-kissed moments.
Materials Needed:
- Clear plastic or glass ornament ball (3″ to 4″ wide)
- Fine beach sand (2-3 tablespoons per ornament)
- Mini seashells and small beach trinkets
- Thick cotton rope (about 3 feet)
- Craft glue
- Funnel (optional)
- Scissors
Step-by-step Guide:
Step 1: Add beach sand to the ornament using a funnel or paper cone.
Step 2: Drop in small shells and arrange with a stick or skewer if needed.
Step 3: Secure the top and begin wrapping it with rope, gluing as you go.
Step 4: Tie off a loop at the end of the rope for hanging and display proudly.
#8. Sandy Handprint Keepsake with Shell Accents
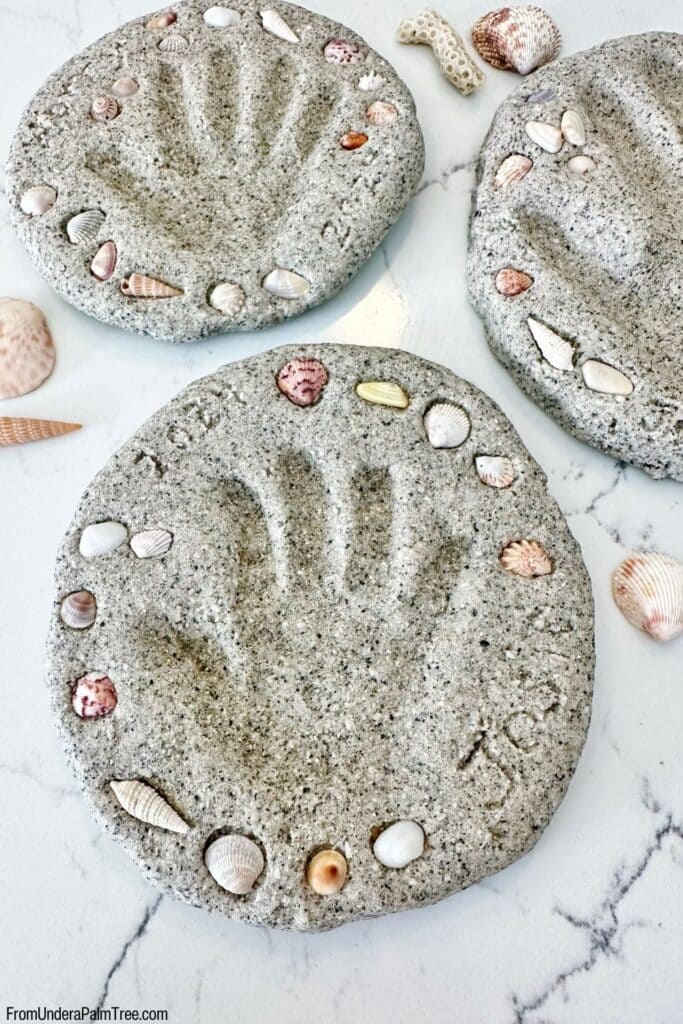
This is the kind of craft that quietly becomes a family treasure. A handprint pressed into beach sand dough and framed with seashells turns a fleeting vacation moment into something permanent.
It’s especially lovely to do with kids as watching their tiny fingers leave a mark that outlasts summer. Specially, they can write a name or date to time-stamp the memory. Years from now, you’ll hold this and remember exactly how small they once were.
Materials Needed:
- 1 cup all-purpose flour
- 1 cup fine sand (clean and dry)
- 1/2 cup salt
- 1/2 cup water
- A variety of small seashells (10-12 per plaque)
Step-by-step Guide:
Step 1: Mix flour, sand, and salt in a bowl. Then slowly add water while kneading until you get a firm but pliable dough.
Step 2: Shape the dough into a 1-inch thick circle.
Step 3: Press a hand firmly into the center to create a clear print.
Step 4: Gently push shells around the edge and carve in names or dates. Let air dry for 2-3 days, flipping once midway.
#9. Beach-in-a-Box Diorama
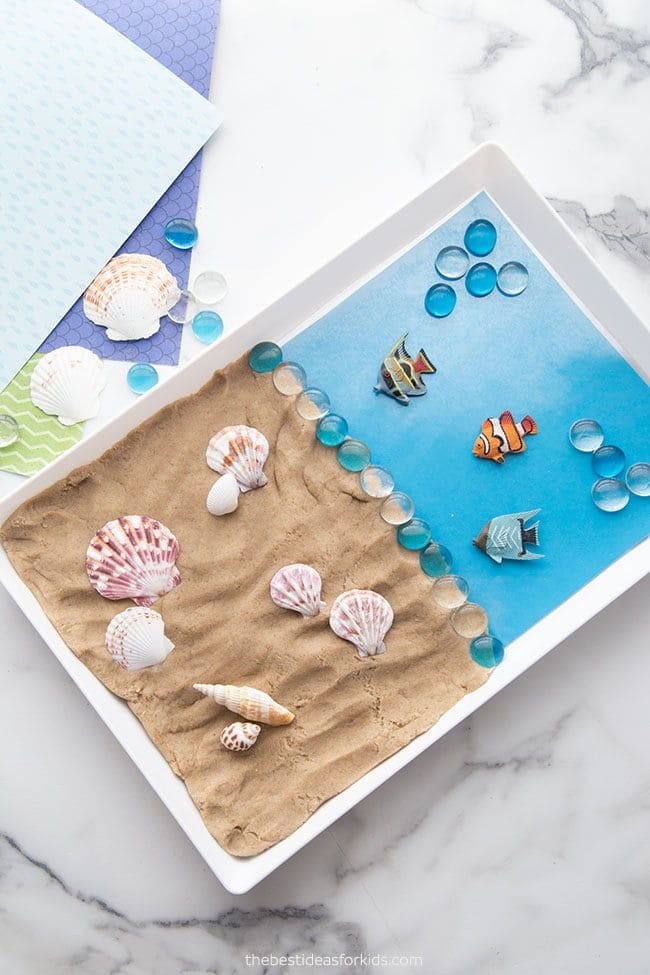
Here’s a mini beach you can build right on your table as no sunscreen needed! This beach-in-a-box diorama is half creativity, half sensory play, and all kinds of fun.
With real sand and shells, plus colorful fish and bubbles, it brings the shoreline to life and gives kids (or adults!) a peaceful slice of the ocean to explore anytime.
Materials Needed:
- 1 shallow tray or box lid (white background works best)
- Play sand (about 1-2 cups)
- Real seashells in assorted shapes and sizes
- Blue cardstock
- Flat glass gems
- Ocean-themed stickers, fish cutouts, or paper fish
- Glue stick and/or craft glue
Step-by-step Guide:
Step 1: Cut a piece of blue cardstock to fit half of your tray or lid and glue it down firmly, this will be your water.
Step 2: On the other half, pour and spread a thin, even layer of sand. You can shape it with your fingers or use a spoon to smooth it out like real beach terrain.
Step 3: Use glue to line the edge where sand meets water and place flat blue gems to create a shoreline effect.
Step 4: Decorate the sandy half with real shells, pressing them lightly into the sand or gluing for more permanent display.
Step 5: Add colorful fish to the blue section, stickers or paper cutouts work great. You can also finish with a few extra gems to look like ocean bubbles.
#10. Ocean Discovery Bottles
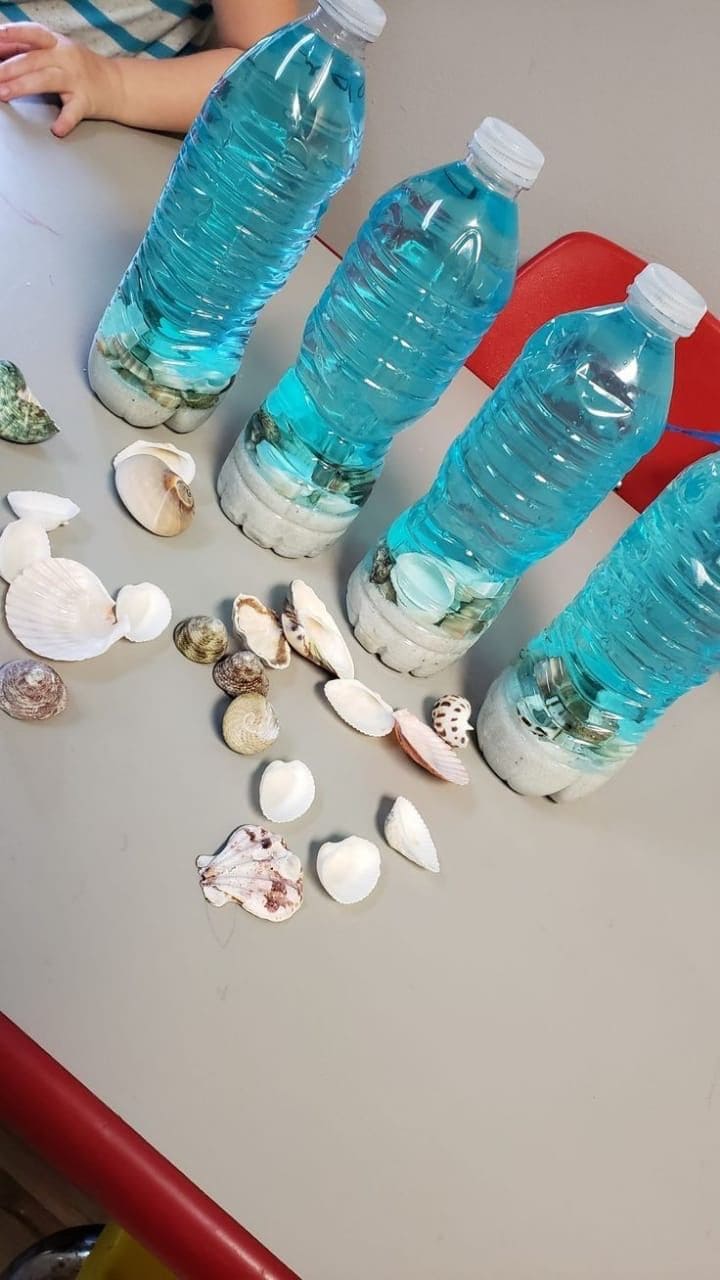
Wow this sensory craft is perfect for little hands and curious minds. These ocean discovery bottles bring the seaside indoors, capturing the calm sway of water, the soft shimmer of shells, and the wonder of the deep blue in one simple project.
Whether you’re setting up a calming corner, a beach-themed learning unit, or just want something cool to shake and explore, this one’s a hit every time.
Materials Needed:
- 1 empty clear plastic bottle
- ¼ cup clean sand
- Small seashells
- Water dyed with blue food coloring
- (Optional) A few drops of baby oil
- Hot glue gun
Step-by-step Guide:
Step 1: Begin by pouring sand into the bottom of each bottle using a funnel or folded paper. About an inch of sand works well.
Step 2: Drop in small shells, rocks, or other ocean treasures. Let kids pick their favorites, this adds a personal touch.
Step 3: Mix a drop or two of blue food coloring into water and pour it slowly into the bottle, filling it about ¾ to the top. You can also add glitter or oil for extra sparkle and movement.
Step 4: Seal the lid tightly with hot glue or tape to prevent leaks. Then shake, swirl, and admire the tiny sea world you’ve created!
#11. Beach Sand Bulb Ornaments with Starfish Charm
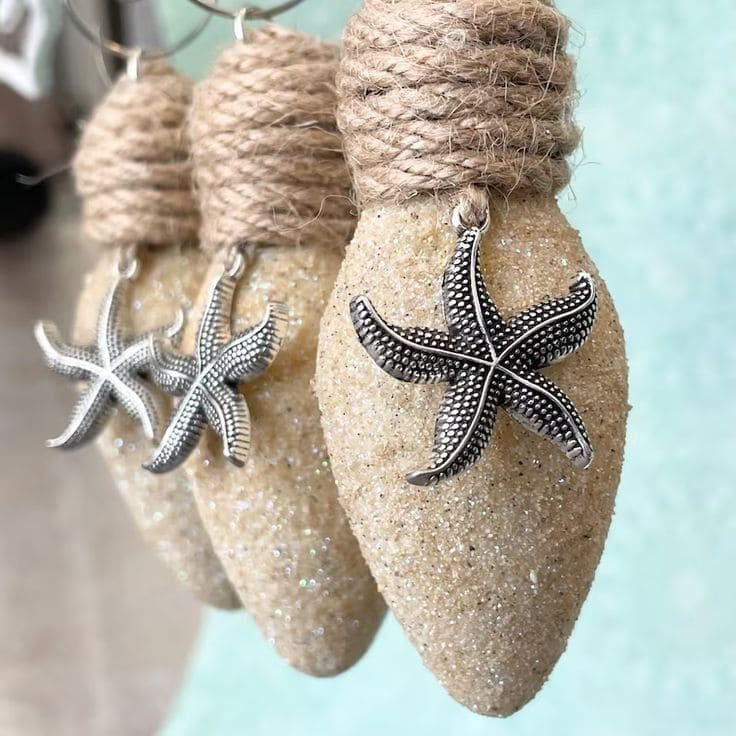
These beach bulb ornaments are a stunning way to preserve the glow of summer long after the sun sets. With a gentle shimmer of sand and the rustic touch of twine, each one carries the scent of salty breezes and quiet beach walks.
You can also add a silver starfish charm, and suddenly, it becomes a tiny vacation in your hand. Whether you’re decorating a coastal-themed tree or gifting something handmade, these ornaments feel personal and full of love.
Materials Needed:
- Clear old-style light bulbs or plastic bulb ornaments (1 per ornament)
- Fine beach sand (enough to coat each bulb)
- Mod Podge or clear craft glue
- Jute twine (about 2 feet per bulb)
- Small starfish charms (1 per ornament)
- Hot glue gun and scissors
- Small hook or string for hanging
Step-by-step Guide:
Step 1: Coat the outer bulb surface with Mod Podge or glue using a brush.
Step 2: Roll or sprinkle fine sand over the glued surface, covering completely. Then wrap jute twine tightly around the top of the bulb, securing with hot glue.
Step 3: Attach a starfish charm to the front and loop a hanging string through the top.
#12. Sandcastle Sand Art
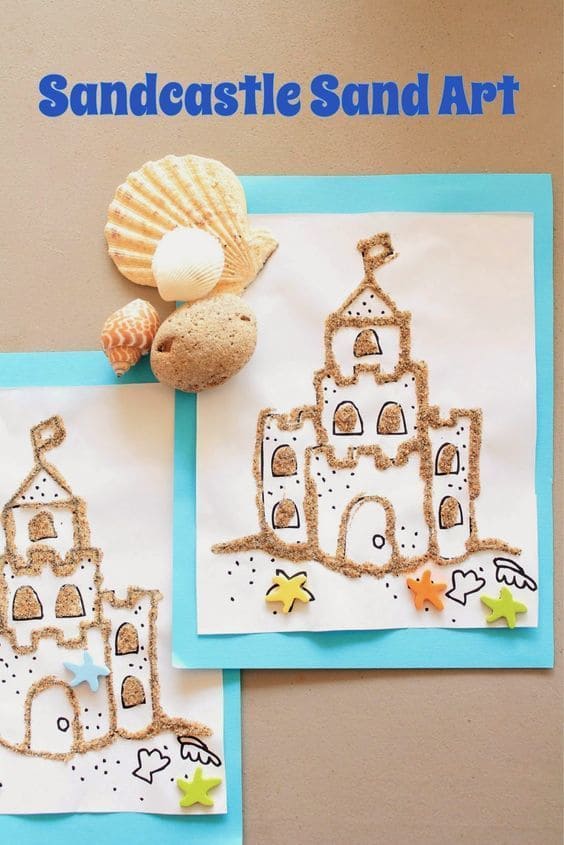
Amazingly, this cheerful craft feels like a sunny afternoon at the beach without the sunburn. It’s a playful mix of drawing and texture that turns a simple sandcastle outline into a tactile masterpiece.
I believe your kids will love watching their artwork transform as they sprinkle real sand to bring the castle to life.
Materials Needed:
- White cardstock
- Blue construction paper
- Sand (~1-2 tbsp per piece)
- Castle outline printable
- Glue stick
- Small beach-themed foam stickers (optional)
- Black marker
Step-by-step Guide:
Step 1: Start by drawing or printing a sandcastle on white paper. Let your kids help trace it with bold black lines.
Step 2: Use glue along the castle’s outer edges and sprinkle sand generously over it. Then shake off the excess and let it dry.
Step 3: Fill in windows or turrets with more glue and a second layer of sand, or color them with brown crayon.
Step 4: Decorate the bottom with foam sea creatures or shell stickers, then mount the artwork on blue paper for a beachy frame.
#13. Beach-In-A-Bottle Keepsake
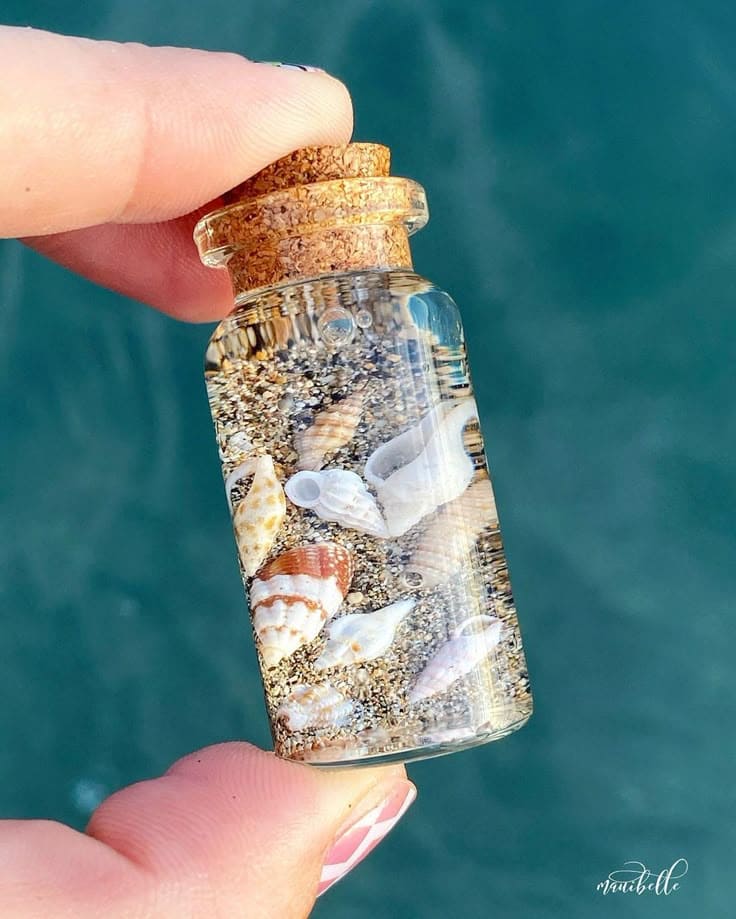
This tiny treasure bottle captures the magic of the ocean in your pocket. It’s a charming way to preserve beach memories like sand between your toes, waves in your ears, all sealed up in one delicate glass jar.
No matter how you make it to remember a trip or give it as a heartfelt gift, it’s as beautiful as it is meaningful.
Materials Needed:
- Miniature glass bottle with cork lid (1-2 inches tall)
- Clean dry sand (2-3 teaspoons)
- Tiny seashells
- Clear baby oil (optional)
- Small funnel
- Superglue
Step-by-step Guide:
Step 1: Place a funnel over the bottle opening and gently pour in sand until the bottle is about one-third full.
Step 2: Drop in your miniature seashells. Then use tweezers if needed for precise placement.
Step 3 (optional): If you want the floating effect, slowly fill the rest of the bottle with baby oil or mineral oil. Tap gently to release bubbles.
Step 4: Firmly seal the cork lid. For extra security, you can apply a thin line of superglue around the rim before closing.
Step 5: Let it sit upright to settle. You can tie a ribbon around the neck or add a tag for gifting.
#14. Beach Sand Handprint Keepsake
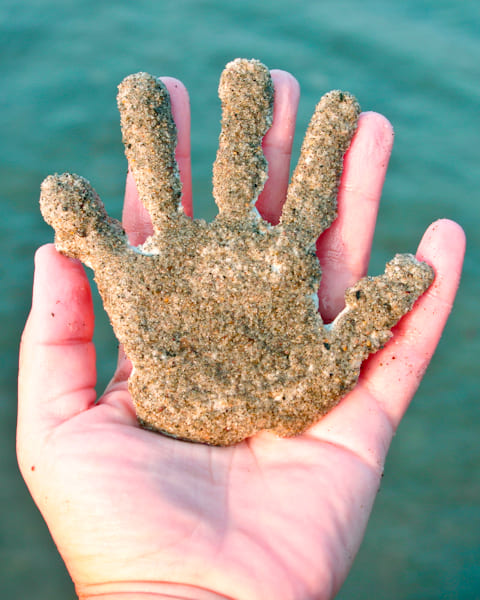
There’s something magical about holding your child’s sandy handprint in your palm, especially when it’s captured forever like this.
You can see it’s more than just a craft, it’s a moment frozen in time, grain by grain. This project is simple, fun, and turns a walk on the beach into a memory you can bring home.
Materials Needed:
- Damp beach sand
- White glue (about 1/4 cup)
- Cornstarch or flour (1-2 tablespoons, optional)
- A plastic spoon or stick
- A clean surface
Step-by-step Guide:
Step 1: Scoop damp sand into a flat pile, about 1.5 inches thick. It should be wet enough to hold shape but not dripping.
Step 2: Gently press the child’s hand into the sand to make a clean imprint.
Step 3: In a small cup, mix glue with a bit of cornstarch (if using) to thicken. Then carefully pour this into the handprint impression, filling all corners.
Step 4: Let it dry in the sun for several hours or overnight if needed until the glue sets and lifts easily. Gently peel it up, and you’ve got a sand-shaped memory to treasure.
#15. Coastal Glow Jar Terrarium
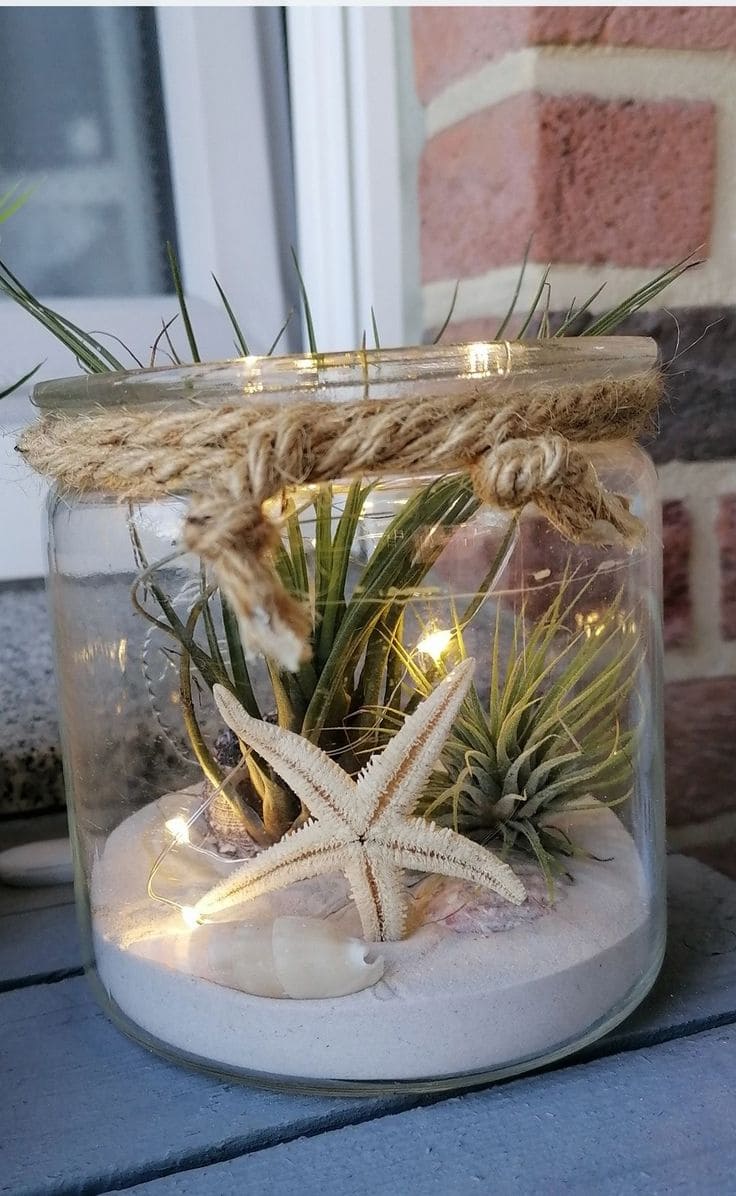
This seaside-inspired jar captures all the peace of the shore and adds a gentle, ambient glow to your space. It’s the kind of decor that quietly steals the show, perfect for a windowsill, nightstand, or summer dinner table.
Moreover, each element whispers of the beach: the soft sand, the air plants, the delicate shells, and the warm twinkle lights that feel like a sunset wrapped in glass.
Materials Needed:
- Clear glass jar with wide mouth
- 1-2 cups white craft sand
- Small air plants
- Mini starfish and seashells
- Battery-operated fairy lights
- Twine
- Hot glue gun (optional)
Step-by-step Guide:
Step 1: Pour sand into the bottom of the jar to create a soft base layer, about 2 inches deep.
Step 2: Arrange the air plants or faux greens by nestling their roots gently into the sand.
Step 3: Next, you add seashells, a starfish, or other coastal elements to build your beach scene.
Step 4: Wrap the fairy lights around the base of the plants or tuck them loosely through the design.
Step 5: Finally, tie twine around the top rim of the jar and knot it neatly. Then secure with hot glue if desired.
#16. DIY Sand Dough Keepsake Plaques
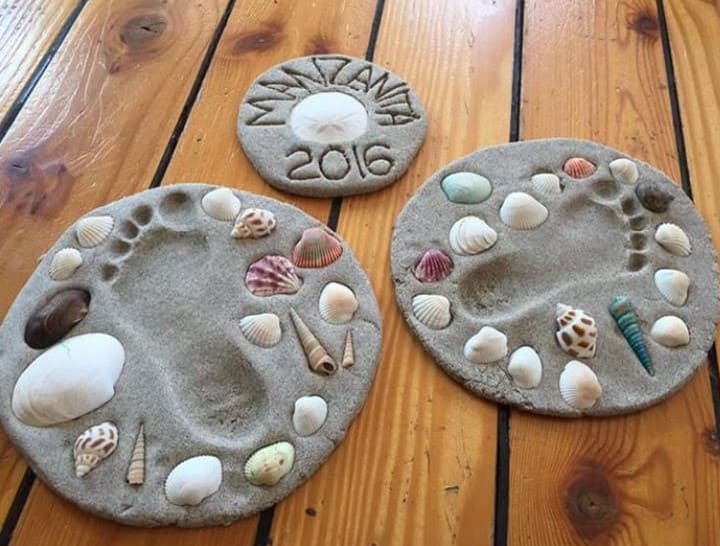
Whether it’s a tiny handprint, a little footprint, or just a sprinkle of shells from your favorite beach, these sand dough plaques make the sweetest souvenir.
Specially, you’re not just making art, you’re bottling up a memory from a family vacation, forever preserved in salt, flour, and love.
Materials Needed:
- 2 cups beach sand
- 1.5 cups all-purpose flour
- 1.25 cups salt
- 1 cup warm water
- Parchment paper
- Baking tray
- Shells, pebbles, or beach treasures for decoration
Step-by-step Guide:
Step 1: In a large bowl, mix the sand, flour, and salt. Then add warm water gradually and knead into a soft, slightly grainy dough.
Step 2: Form the dough into smaller circles and flatten each one about 1 inch thick.
Step 3: Press in handprints, footprints, or beach finds and add decorative shells around the edges. You can also carve a name or date.
Step 4: Place the plaques on a parchment-lined oven rack and bake at 250°F (120°C) for 4 hours, or until both sides are firm and dry to the touch. Let cool before displaying or gifting.
#17. Sensory Sand Dough Play for Kids
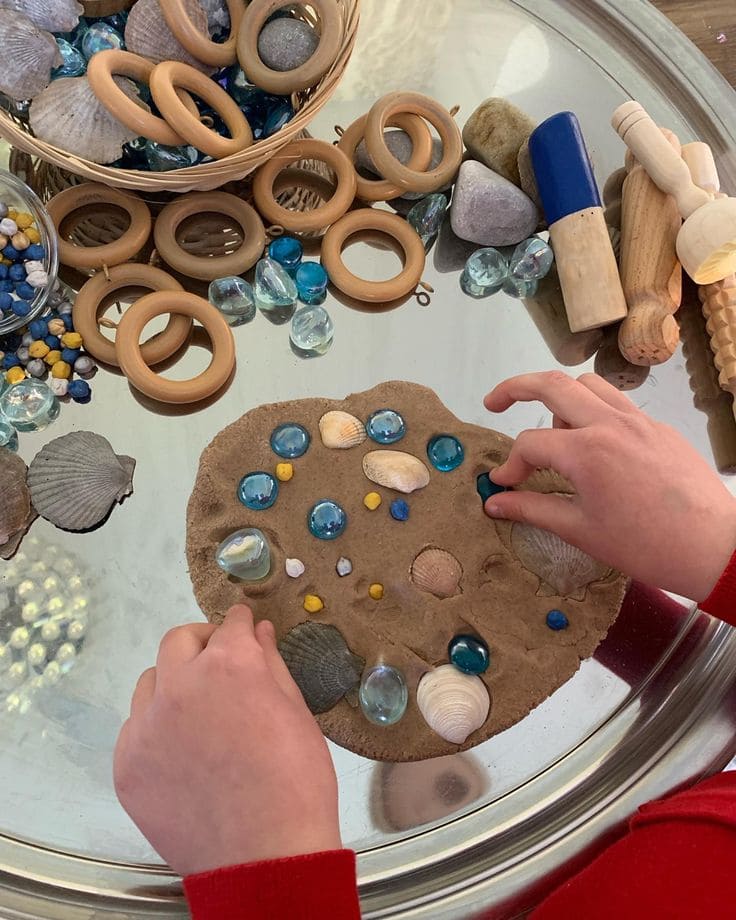
There’s something quietly magical about letting little hands create with natural textures. This project isn’t just a fun beach-themed craft, it’s also a sensory-rich activity that sparks imagination and builds fine motor skills.
Also, kids get to feel the grit of the sand, choose their favorite treasures, and press them gently into soft dough like they’re building their own tiny world.
Materials Needed:
- 2 cups play sand
- 1.5 cups flour
- 1.25 cups salt
- 1 cup warm water
- Shells, glass pebbles, and small beach stones
- Wooden rings (optional)
Step-by-step Guide:
Step 1: Mix the sand, flour, and salt in a large bowl. Gradually pour in warm water while stirring until the dough comes together. Then knead it until it’s soft and holds its shape.
Step 2: Roll the dough into small discs, about ½ to 1 inch thick. You can flatten it by hand or use small rollers.
Step 3: Let kids press in shells, sea glass, beads, or whatever treasures they love. It’s a moment for storytelling too, maybe those shells are the roof of a fairy’s beach hut.
Step 4: Leave the creations to air dry overnight, or bake at 250°F for 3-4 hours until hardened.
#18. Mini Beach Garden in a Bowl
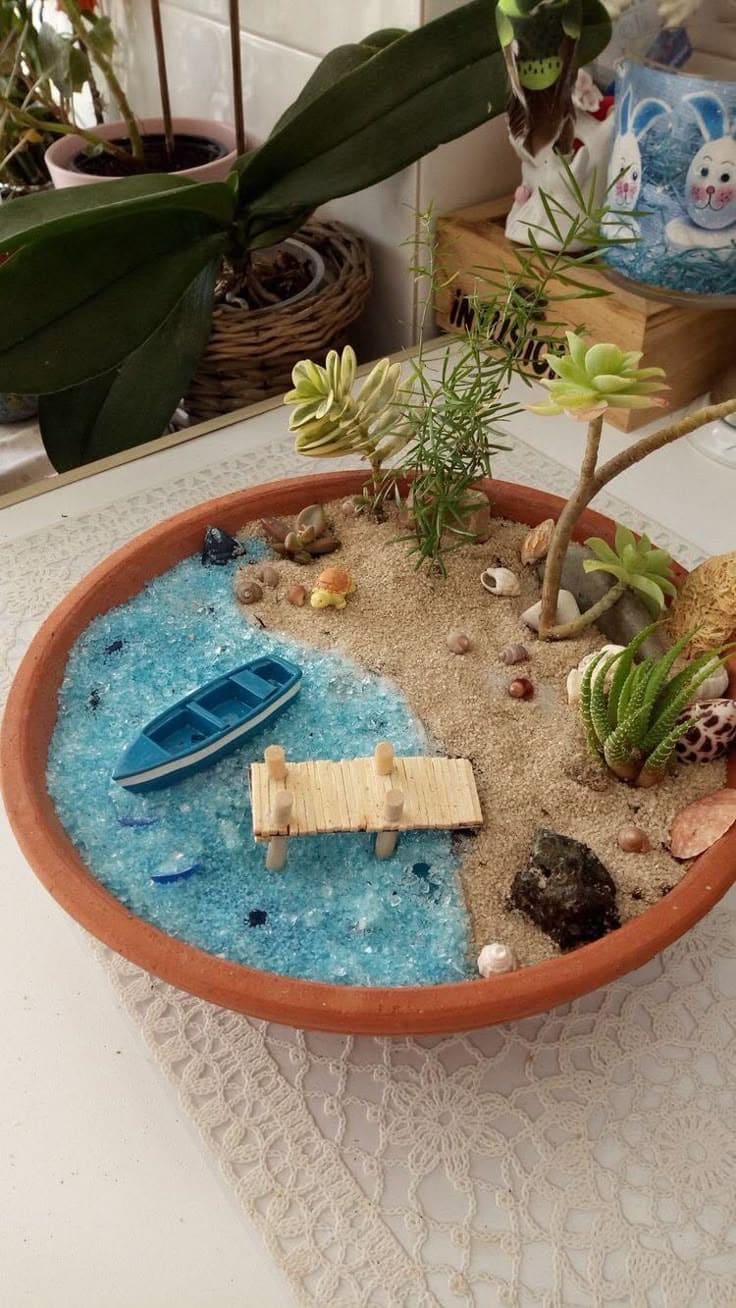
Wow, this dreamy beach garden is like bottling up a summer vacation and keeping it on your windowsill. From the crystal-blue water to the tiny dock and boat, every detail transports you to a tranquil shoreline.
It’s not just a craft, it’s a little escape in a bowl. Perfect for gifting, decorating, or simply daydreaming on a rainy day.
Materials Needed:
- Shallow terra cotta (~10-12 inches wide)
- Clean sand (about 2 cups)
- Blue crushed glass (1-1.5 cups)
- Miniature boat and dock
- Small succulent plants
- Assorted shells, pebbles, and decorative stones
- Strong craft glue
- Optional: tiny figurines, beach signs, or twigs
Step-by-step Guide:
Step 1: Start by dividing the saucer diagonally, one half for land, the other for ocean.
Step 2: Pour sand on one side and blue crushed glass or gravel on the other to mimic water, then press down gently to level both textures and secure with a bit of glue if needed.
Step 3: Add small succulents or faux plants into the sandy side, arranging them like tiny beach flora.
Step 4: Place the dock near the shoreline, then set the miniature boat on the water surface.
Step 5: Finally, decorate with shells, stones, or even a beach chair figurine to bring the scene to life.
#19. Vacation Memory Sand Jar
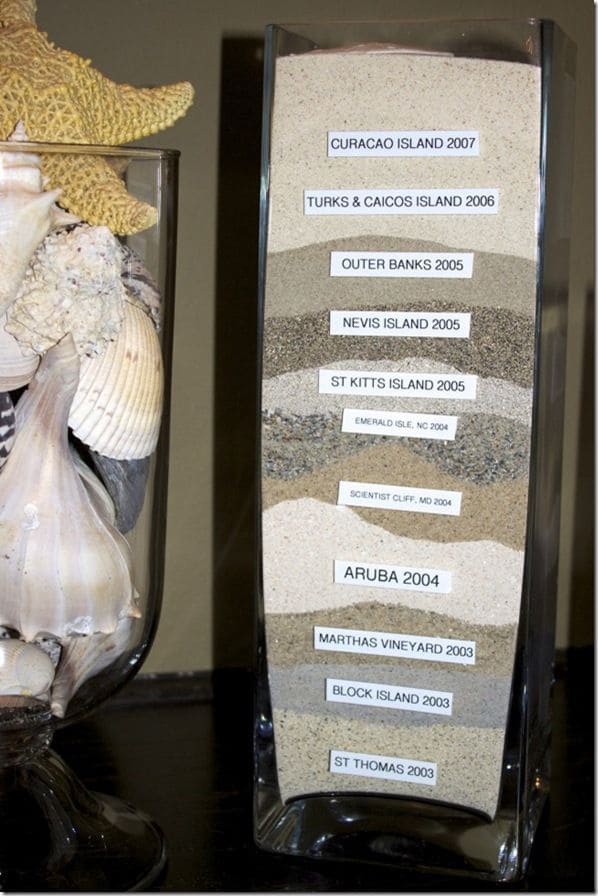
This layered sand jar is more than decor, it’s a time capsule of adventures. Each stripe of sand holds the texture and color of a place you once walked barefoot, laughed freely, or simply stood still and listened to the waves.
Whether you’re a beachcomber, a collector at heart, or just someone who savors memories deeply, this display makes your travel story visible in the most poetic way.
Materials Needed:
- Tall clear glass vase
- Sand from different beach trips
- Small blank labels
- Marker
- Funnel or spoon
- Optional: Decorative seashells
Step-by-step Guide:
Step 1: Wash and dry your vase thoroughly to ensure clear viewing of each sand layer.
Step 2: Starting from the bottom, gently pour the first sand sample using a funnel or spoon to avoid mixing.
Step 3: Use a flat tool or spoon handle to level each layer before adding the next.
Step 4: Continue layering sands from oldest trip at the base to the most recent at the top.
Step 5: Print or write labels with location names and dates, then adhere them to the front or inside of the glass using clear tape.
