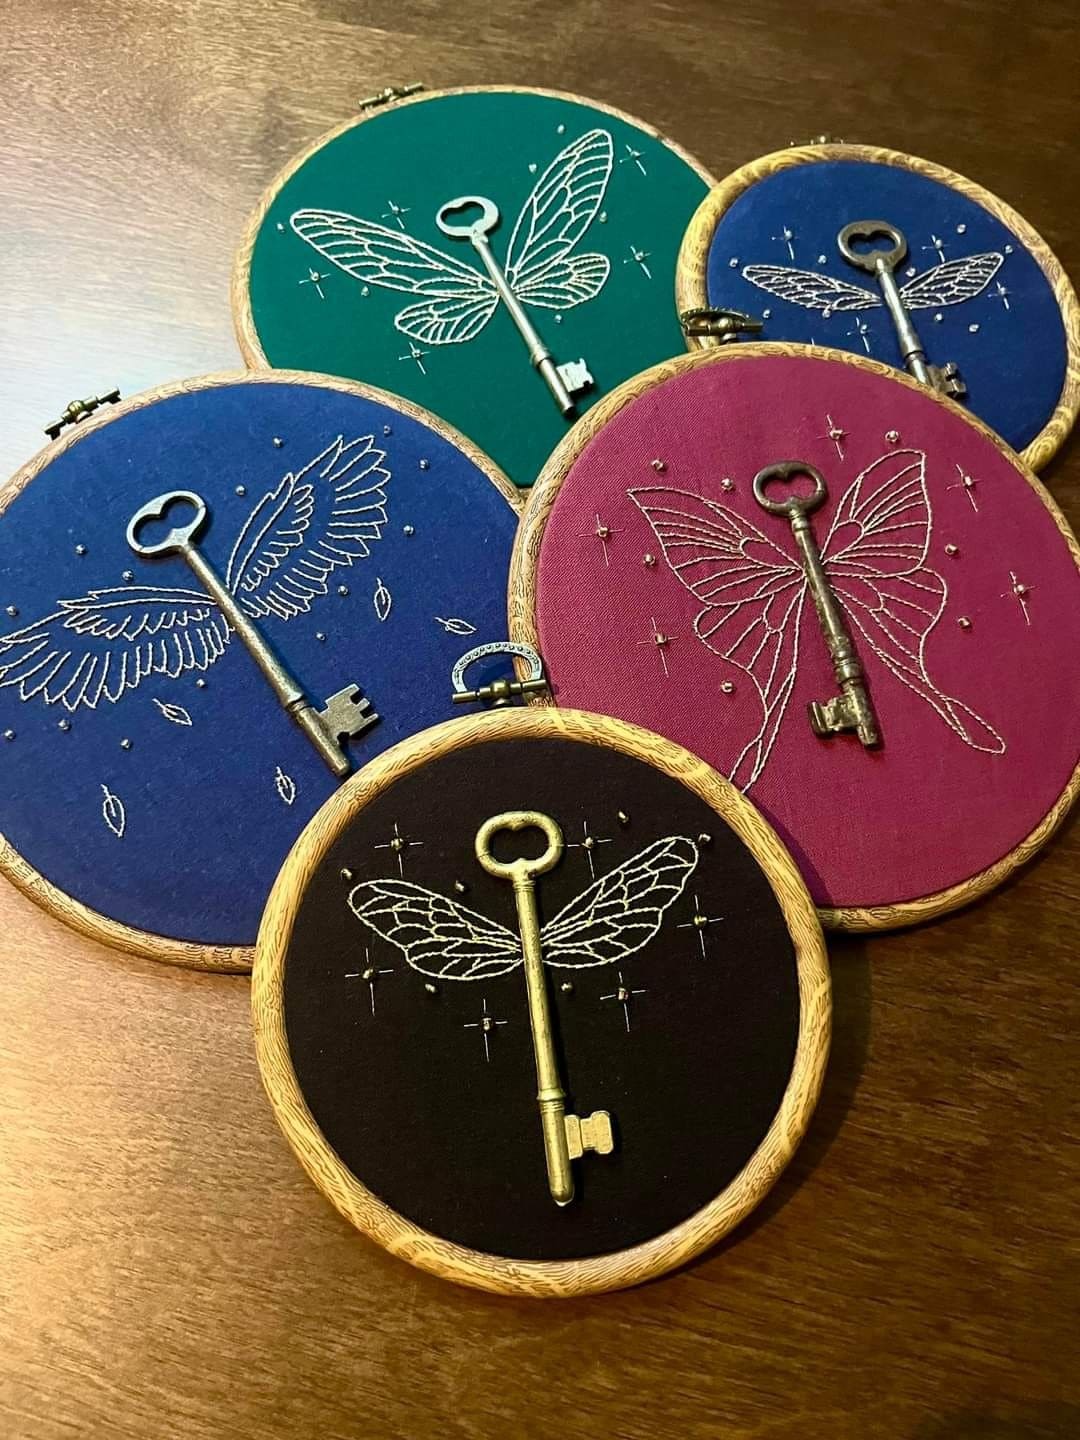
You can see this embroidery hoop project captures that feeling by giving antique keys embroidered wings, turning them into symbols of imagination and wonder.
The design is straightforward, making it perfect for beginners who want to practice line stitches while creating something stunning.
You don’t need complicated techniques, just patience and a steady hand. Each piece becomes a little treasure you can hang on the wall or gift to someone who loves fantasy, symbolism, or handmade art.
Materials Needed
- 1 embroidery hoop (6″-8″)
- Cotton fabric in a dark or jewel-tone color (cut 3″ larger than the hoop)
- Metal vintage key (real or replica, 2-3″ long)
- Embroidery floss in white, silver, or metallic tones
- Embroidery needle and scissors
- Hot glue or strong thread
- Optional: seed beads or sequins
- Felt backing
Step-by-step Guide
Step 1: Stretch your chosen fabric in the embroidery hoop until it’s tight and smooth. Darker backgrounds create a stronger contrast for the stitched wings.
Step 2: Place the key in the center of the hoop. Lightly trace the outline of wings on both sides with chalk or a fabric pencil. You can sketch butterfly, dragonfly, or feathered bird wings depending on the style you want.
Step 3: Use a backstitch or split stitch with white or metallic floss to embroider the wing outlines. For extra detail, add smaller lines inside the wings to mimic veins or feathers.
Step 4: Once the wings are complete, secure the key in place. You can stitch around it with strong thread or use a small dot of hot glue on the back so it sits firmly.
Step 5: Add embellishments around the wings such as tiny stitched stars, seed beads, or sparkling sequins.
Step 6: Finish by tying off your threads neatly at the back. If desired, cover the back with felt to hide stitches and glue.
