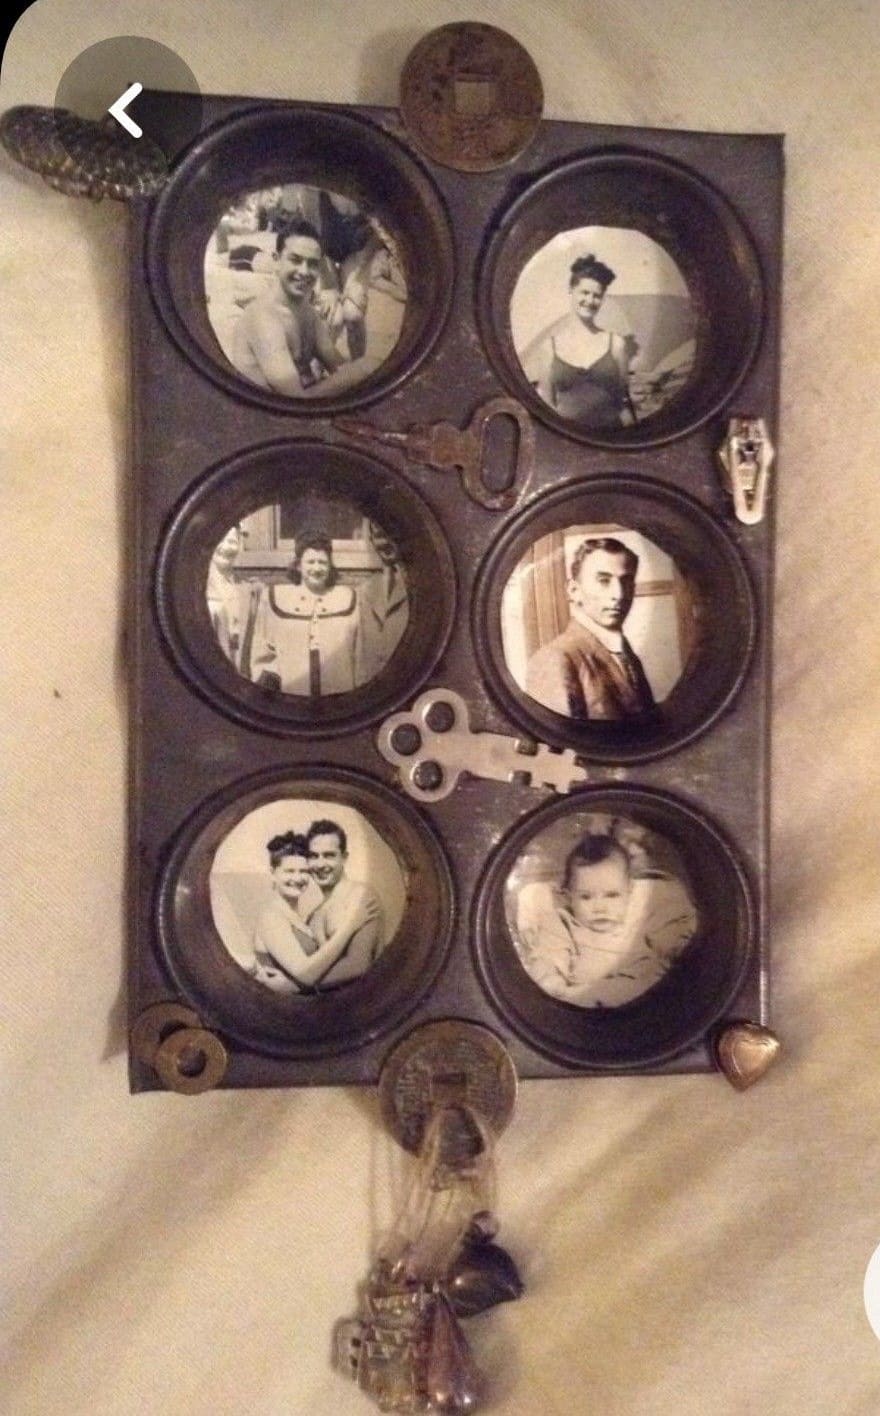
An old muffin tin doesn’t have to gather dust in the back of a cupboard. With a little imagination, it transforms into a memory keeper that feels both rustic and heartfelt.
Each round compartment becomes a window into a moment, holding black-and-white portraits or faded family snapshots.
Bonus, the worn metal adds charm, making it look as though the photos have always belonged there. It’s not just a craft, it’s a story told in six little frames.
Materials Needed
- 1 vintage muffin tin (6-cup, approx. 12” × 8”)
- 6 small round photos (about 2.5” diameter, black and white recommended for effect)
- Mod Podge or decoupage glue (1 bottle, 8 oz)
- Foam brush (1 piece)
- Scissors
- Assorted embellishments: old keys, buttons, charms, coins (6-8 pieces)
- Hot glue gun and sticks (1 set)
- Jute twine or ribbon (18-20” long)
Step-by-step Guide
Step 1: Start by cleaning the muffin tin. A quick wipe ensures no dust or grease lingers, letting your photos adhere smoothly.
If the metal is too shiny, lightly sand it for a worn, rustic look.
Step 2: Print and trim your chosen photos into circles that fit neatly inside each cup.
Black-and-white or sepia-toned prints create a timeless, vintage charm, but color photos work if you want a playful feel.
Step 3: Using a foam brush, spread a thin layer of Mod Podge inside each cup, then carefully press your photo in place.
Next, smooth out any air bubbles with your fingers or a soft cloth. Brush another layer of Mod Podge on top to seal and protect the image. Let dry completely.
Step 4: Add character with embellishments. Hot glue old keys, buttons, or coins between the cups or along the edges.
These little accents make the piece feel like a curated memory collection rather than just a frame.
Step 5: Tie a piece of jute twine or ribbon at the back for hanging. Once displayed, your muffin tin will look like a storybook page.
Notes: For a softer, shabby chic vibe, spray-paint the tin in a muted pastel or antique white before adding photos.
