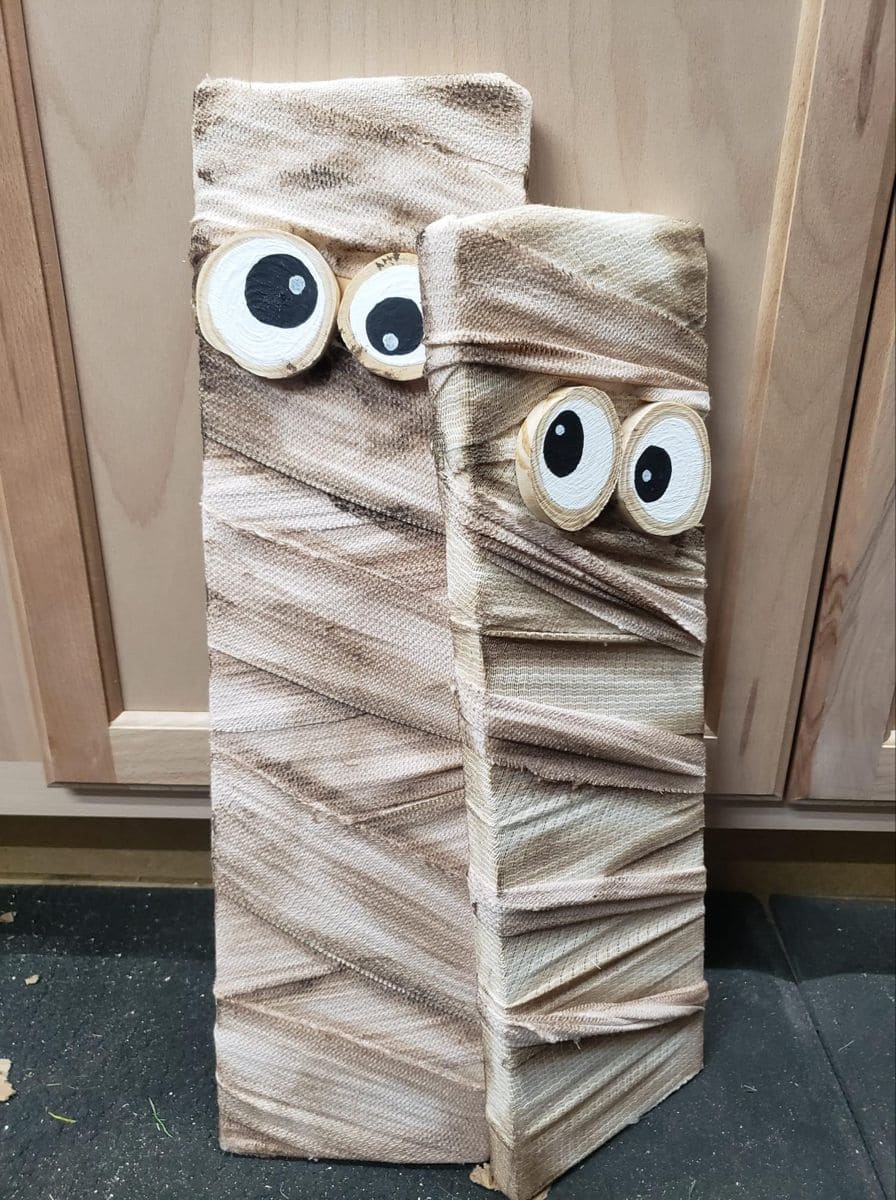
Think of these wooden mummies as Halloween’s version of scarecrows with simple, rustic, and full of character.
All you need is some leftover wood, a bit of fabric (burlap or cotton works best), and paint for the eyes.
Each block turns into its own little mummy, and no two will look the same.
They’re a budget-friendly craft you can do in under an hour, yet they add so much charm to your holiday display.
Plus, kids will love giving each one a different personality, and you’ll love how easy they are to create.
Materials Needed
- 2-3 wooden blocks or scrap planks (any size, 10-18 inches tall works well)
- Strips of fabric, gauze, or burlap (1-2 yards depending on size)
- White and black acrylic paint
- Small wood rounds or cardboard circles for eyes
- Hot glue gun and glue sticks
- Scissors
Step-by-step Guide
Step 1: Sand your wooden blocks to remove rough edges. You don’t need them perfectly smooth, a little texture adds to the rustic mummy look.
Step 2: Cut strips of fabric and lightly stain or smudge them with brown/black paint to give an aged effect.
Step 3: Wrap the strips around each wooden block, securing the ends with hot glue.
Step 4: Paint two large white circles on wood rounds or cardboard, add black pupils, and glue them near the top of the block for big googly eyes.
Step 5: Prop them against a wall, add them to your porch display, or group a few together for a mummy family effect.
Tips:
If you want a spooky twist, insert a small battery-operated tea light behind the fabric so the mummies glow at night.
