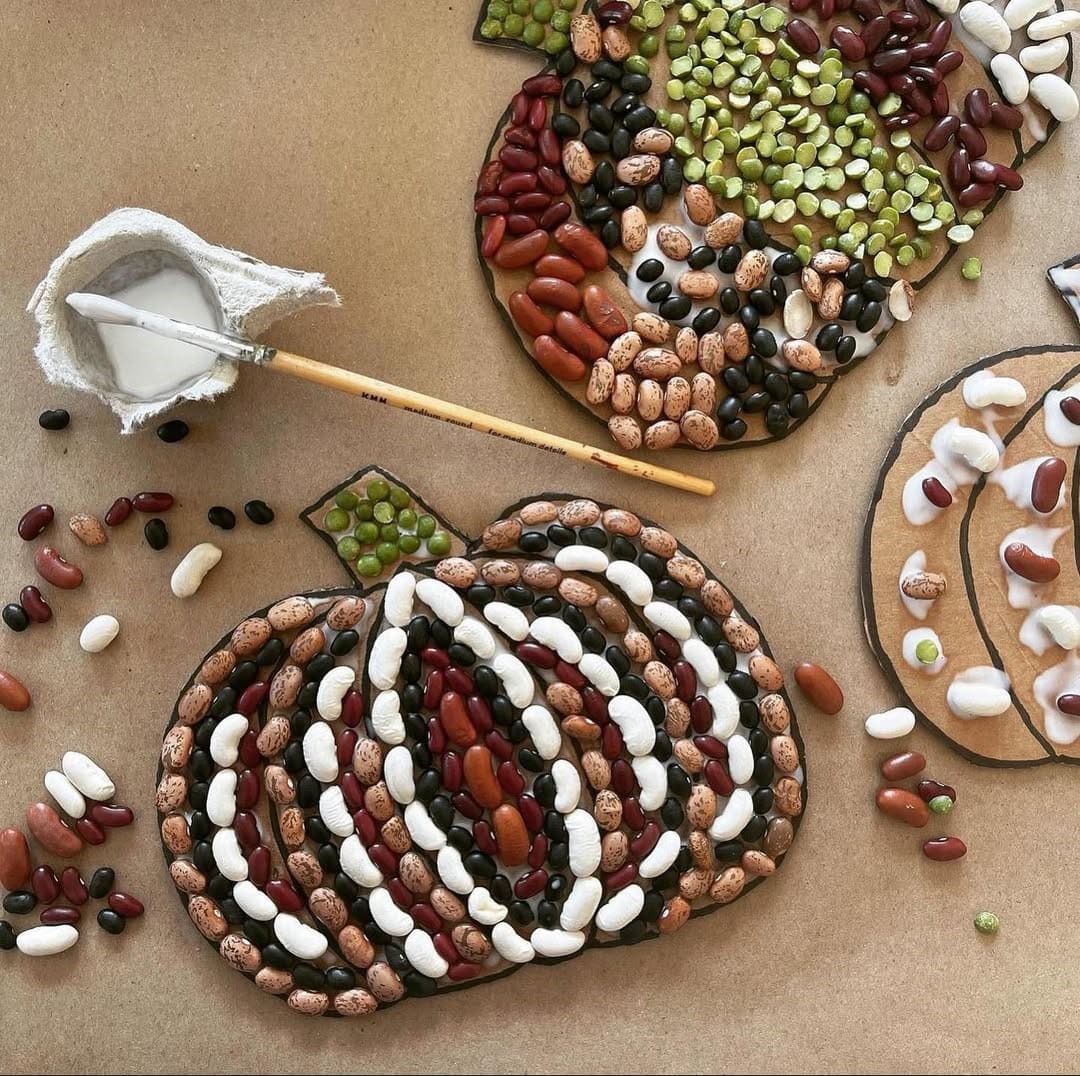
 Pumpkins don’t just belong in pies, they can live on your walls too!
This bean pumpkin mosaic is a great way to use leftover beans and lentils in a creative project.
With its bold colors and 3D texture, it’s a fun alternative to traditional autumn decorations.
You can make several in different sizes and cluster them together for a striking seasonal display.
Materials Needed
- Cardboard or thick chipboard (cut into pumpkin shapes, approx. 8”–10” wide)
- 1 cup white beans (cannellini or navy)
- 1 cup red kidney beans
- 1/2 cup black beans
- 1/2 cup pinto beans
- 1/4 cup green lentils (for the stem)
- Craft glue (4 oz bottle)
- Small paintbrush
- Pencil
- Clear acrylic spray (optional)
Step-by-step Guide
Step 1: Draw a pumpkin outline on your cardboard. Then add a stem and light curve lines to guide where the bean sections will go.
Step 2: Begin with the stem. You can apply glue and place green lentils close together for a solid textured look.
Step 3: Work on the pumpkin body. You can use kidney beans, pinto beans, white beans, and black beans in alternating rows to create stripes and depth.
Step 4: Continue filling until the pumpkin is fully covered. Then adjust the beans slightly to follow the natural roundness of the pumpkin shape.
Step 5: Let dry completely, then seal with clear spray for durability.
Notes:
You can make smaller pumpkin versions as ornaments or even glue a ribbon to the back for easy wall hanging.
