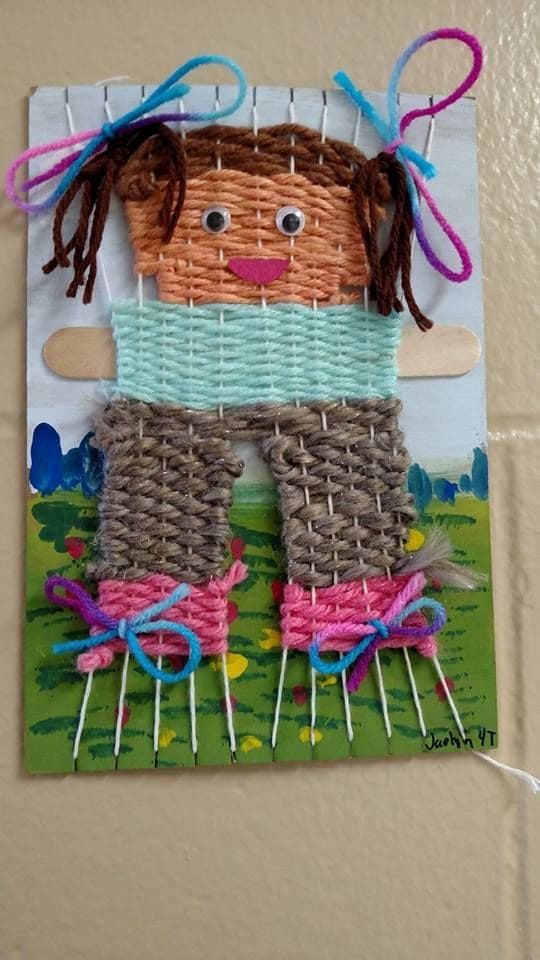
 Creating this woven yarn doll feels like crafting a childhood memory.
There’s something delightful about giving her shape and color as the yarn wraps back and forth, her smile forming from your own hands.
It’s not just about making a doll; it’s about slowing down and remembering the joy of simple play.
This project is also a lovely way to teach weaving to little ones, helping them create something both handmade and heartfelt.
Materials Needed
- 1 piece of sturdy cardboard (about 8”×10”)
- Assorted yarn (skin tone, brown for hair, pink, blue, gray, etc.)
- 2 craft sticks (for arms)
- 2 googly eyes
- Hot glue gun or strong craft glue
- Scissors
- Marker for mouth
- Paint or paper for background (optional)
Step-by-step Guide
Step 1: Cut vertical slits about ½ inch apart along the top and bottom edges of your cardboard.
Then thread yarn through the slits to create a base warp (these vertical lines will hold your weaving).
Step 2: Start weaving with your first color to form the doll’s face.
You can use peach or tan yarn and weave over and under the warp threads until you reach your desired head height (about 2 inches).
Step 3: Switch to a new color for the shirt, bright blues or greens work wonderfully.
Continue weaving across the body area. Then insert two craft sticks between yarn rows to form the doll’s arms.
Step 4: For the legs, weave each section separately using gray or brown yarn. When you reach the bottom, switch to pink or red to form little shoes.
Step 5: Add hair by looping brown yarn at the top and gluing in place. Finish with small bows, googly eyes, and a yarn mouth.
Step 6: For extra charm, paint or decorate the background behind your doll, a grassy field, blue sky, or anything that matches her story.
Tips:
You can personalize your doll by changing the outfit colors or adding accessories like a scarf or hat.
If making this with children, let them name their doll, it instantly turns the craft into a keepsake!
