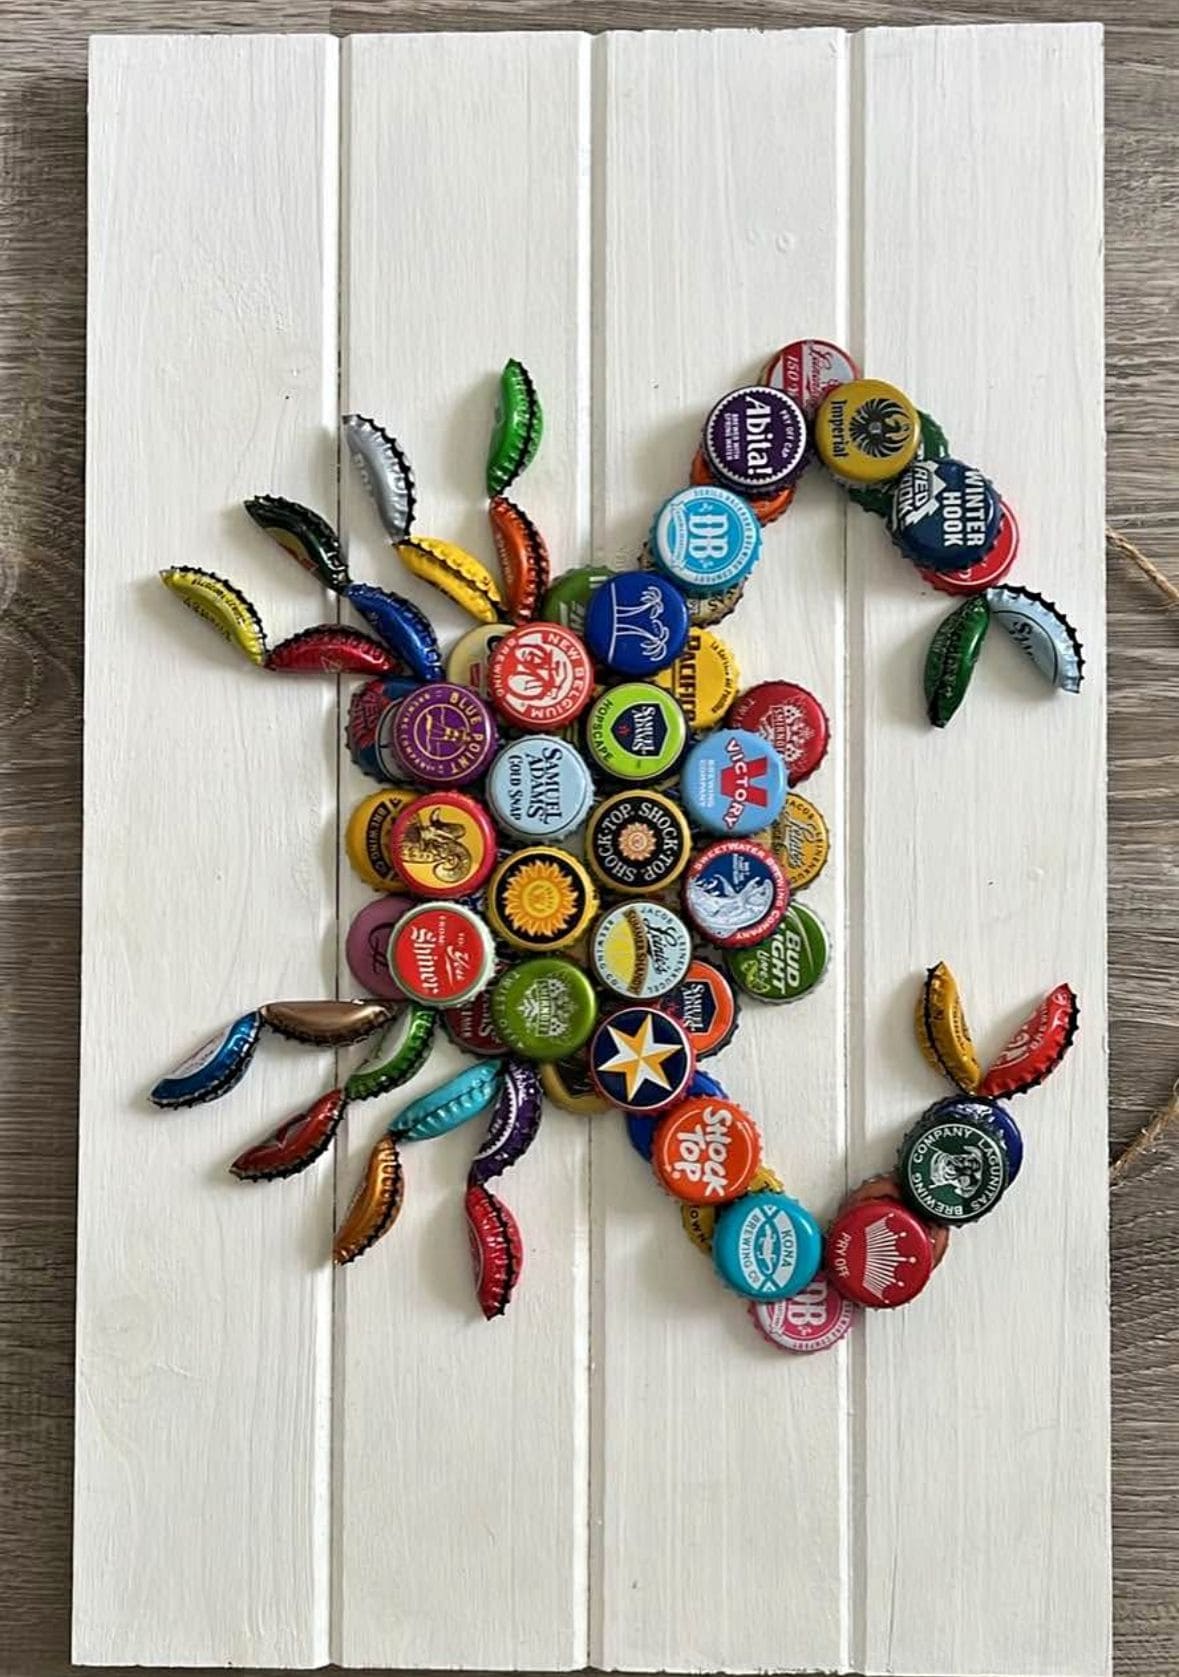
 Every bottle cap tells a story, of laughter, conversations, celebrations, and quiet evenings.
Bring those stories together and you get more than a collection, you get art.
Arranged like a mosaic, these caps transform into a vibrant lizard, crawling across a wooden board with character and charm.
It’s part sculpture, part memory board, and entirely your own. Each cap becomes more than packaging; it’s a little stamp of history captured forever in playful color.
Materials Needed
- 40-60 assorted bottle caps (different colors and brands)
- 1 wooden board (approx. 12”×18”)
- Strong adhesive (E6000 or hot glue)
- Pencil and paper
- Optional: spray sealer
Step-by-step Guide
Step 1: Gather your bottle caps. Wash and dry them thoroughly to remove any residue.
Step 2: Sketch your design (like a lizard, fish, or flower) lightly onto the wooden board with pencil.
Step 3: Lay the caps over the sketch before gluing, playing with color placement to create contrast and flow.
Step 4: Begin gluing caps one by one, pressing firmly so they adhere well. You can bend a few caps slightly for leaf or scale accents as shown.
Step 5: Once the design is complete, let the glue dry overnight.
Step 6: Hang your finished bottle cap lizard on the wall for a bold, conversation-starting piece of upcycled art.
Tips:
Don’t limit yourself to lizards as this technique works beautifully for making fish, owls, or even abstract shapes.
The more caps you collect, the more patterns you can explore.
