Garden & Crafty - Garden, DIY, Home
No Result
View All Result
  • GARDEN
    • Garden Tips
    • Garden Guide
    • Garden Care
    • Garden Ideas
  • DIY
    • Diy Project
    • Crafty Ideas
  • HOME
    • Decoration
    • Cleaning
    • Tips & Hacks
  • About Us
  • GARDEN
    • Garden Tips
    • Garden Guide
    • Garden Care
    • Garden Ideas
  • DIY
    • Diy Project
    • Crafty Ideas
  • HOME
    • Decoration
    • Cleaning
    • Tips & Hacks
  • About Us
No Result
View All Result
Garden & Crafty - Garden, DIY, Home
Home Guide

How to Sew Giant Pencil Pillows for Kids and Creative Spaces

Lois Capone by Lois Capone
August 20, 2025
in Guide
Reading Time: 2 mins read

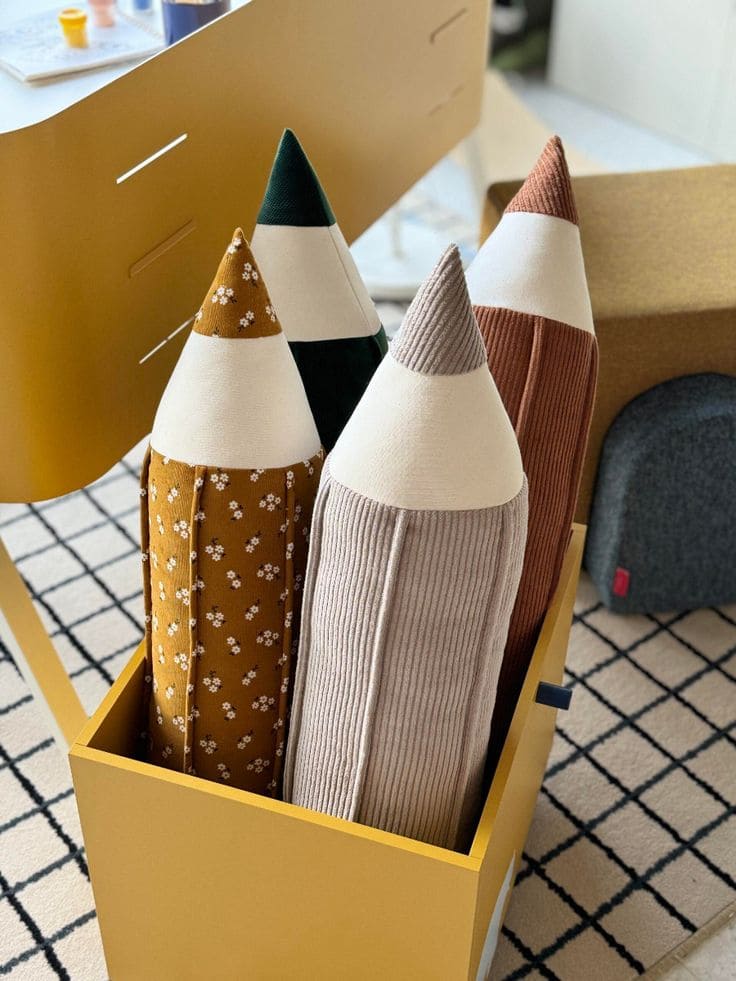
How to Sew Giant Pencil Pillows for Kids and Creative Spaces

Every drawing begins with a pencil, and every pencil begins with a spark of creativity.

By stitching one into a plush, oversized form, you bring that spark into the real world. It’s like holding a symbol of imagination you can cuddle.

Also, these pillows feel like a bridge between work and play, soft sculptures reminding you that inspiration doesn’t have to stay on the page.

Materials Needed

  • 1 yard of main fabric (cotton, corduroy, or patterned fabric, 20” wide for one pencil)
  • ½ yard cream fabric
  • ¼ yard black fabric
  • ¼ yard pink or metallic fabric (for the eraser section)
  • Matching thread
  • Polyester stuffing (about 300-400 g per pillow)
  • Fabric scissors and measuring tape
  • Pins or clips
  • Sewing machine (straight stitch works fine)
  • Hand sewing needle

Step-by-step Guide

Step 1: Measure and cut your main pencil body fabric into a long rectangle (about 16”×24” for a medium pillow or larger if you want an extra-long pencil).

You now fold it lengthwise and sew along the long edge to form a tube.

Step 2: Cut a piece of cream fabric into a triangle shape, this will be the sharpened section of the pencil.

Then attach it to one end of the tube with right sides facing. Once sewn, it should look like the wood part tapering into a point.

Step 3: For the pencil tip, cut a small triangle of black fabric.

You stitch it carefully to the cream section to complete the point. Make sure the seams align smoothly so it looks neat.

Step 4: On the opposite end, cut a strip of pink (or metallic) fabric wide enough to wrap around the tube.

This becomes the eraser section. Then sew it onto the open edge, leaving a small gap for turning and stuffing.

Step 5: Turn the pencil right-side out.

Begin stuffing firmly from the tip, making sure to pack stuffing evenly so the pencil holds its shape. Work your way up toward the eraser end.

Step 6: Hand-stitch the gap closed neatly. If you want to add detail, stitch a thin silver strip just above the eraser to mimic the metal band on a real pencil.

Tips:

If you’re making more than one, try different fabrics such as florals, stripes, corduroy, or even denim.

Kids love them in bold, playful colors, while muted tones can make them look like modern home décor.

SharePin
Lois Capone

Lois Capone

Lois Capone is a wife and mom in her 50s who enjoys sharing gardening, DIY tips, and home decor ideas. She believes that with some inspiration, anyone can create a special feel in their home and garden.

Related Posts

Guide

Create Colorful Mini Weavings on Wooden Squares

There’s something meditative about weaving on a tiny scale. As you loop yarn over and under each strand, you start...

by Lois Capone
October 7, 2025
Guide

Craft Mini Driftwood Weavings to Add a Cozy Boho Touch

If you’ve ever admired woven wall art in cozy studios or boutique cafés, this is your chance to make your...

by Lois Capone
October 7, 2025
Guide

Create a Radiant Woven Circle from Scrap Yarn and Cardboard

This circular weaving craft brings together simplicity and joy. With just a piece of cardboard and a few strands of...

by Lois Capone
October 7, 2025
Guide

Create Adorable Pet Art with Mini Woven Blankets

Imagine your pet tucked under a handmade blanket, dreaming away after a long day of play. You’ll weave a small,...

by Lois Capone
October 7, 2025
Guide

Craft Colorful Beaded Bracelets with a DIY Cardboard Loom

This project transforms cardboard into a mini bead loom, turning small glass or plastic beads into wearable art. You’ll find...

by Lois Capone
October 7, 2025
Guide

Make a Whimsical Yarn Doll Through Simple Weaving

Creating this woven yarn doll feels like crafting a childhood memory. There’s something delightful about giving her shape and color...

by Lois Capone
October 7, 2025
Load More

Categories

  • Cleaning (6)
  • Crafty Ideas (163)
  • Decoration (164)
  • DIY (8)
  • Diy Project (229)
  • GARDEN (39)
  • Garden Care (61)
  • Garden Guide (134)
  • Garden Ideas (348)
  • Garden Tips (128)
  • Guide (687)
  • HOME (90)
  • Tips & Hacks (20)


Garden & Crafty - Garden, DIY, Home

© 2024 gardenandcrafty.com

Navigate Site

  • About Us
  • Privacy Policy
  • Terms Of Service
  • Disclaimer
  • Cookie Policy
  • Webstories
  • Sitemap

Follow Us

No Result
View All Result
  • GARDEN
    • Garden Tips
    • Garden Guide
    • Garden Care
    • Garden Ideas
  • DIY
    • Diy Project
    • Crafty Ideas
  • HOME
    • Decoration
    • Cleaning
    • Tips & Hacks
  • About Us