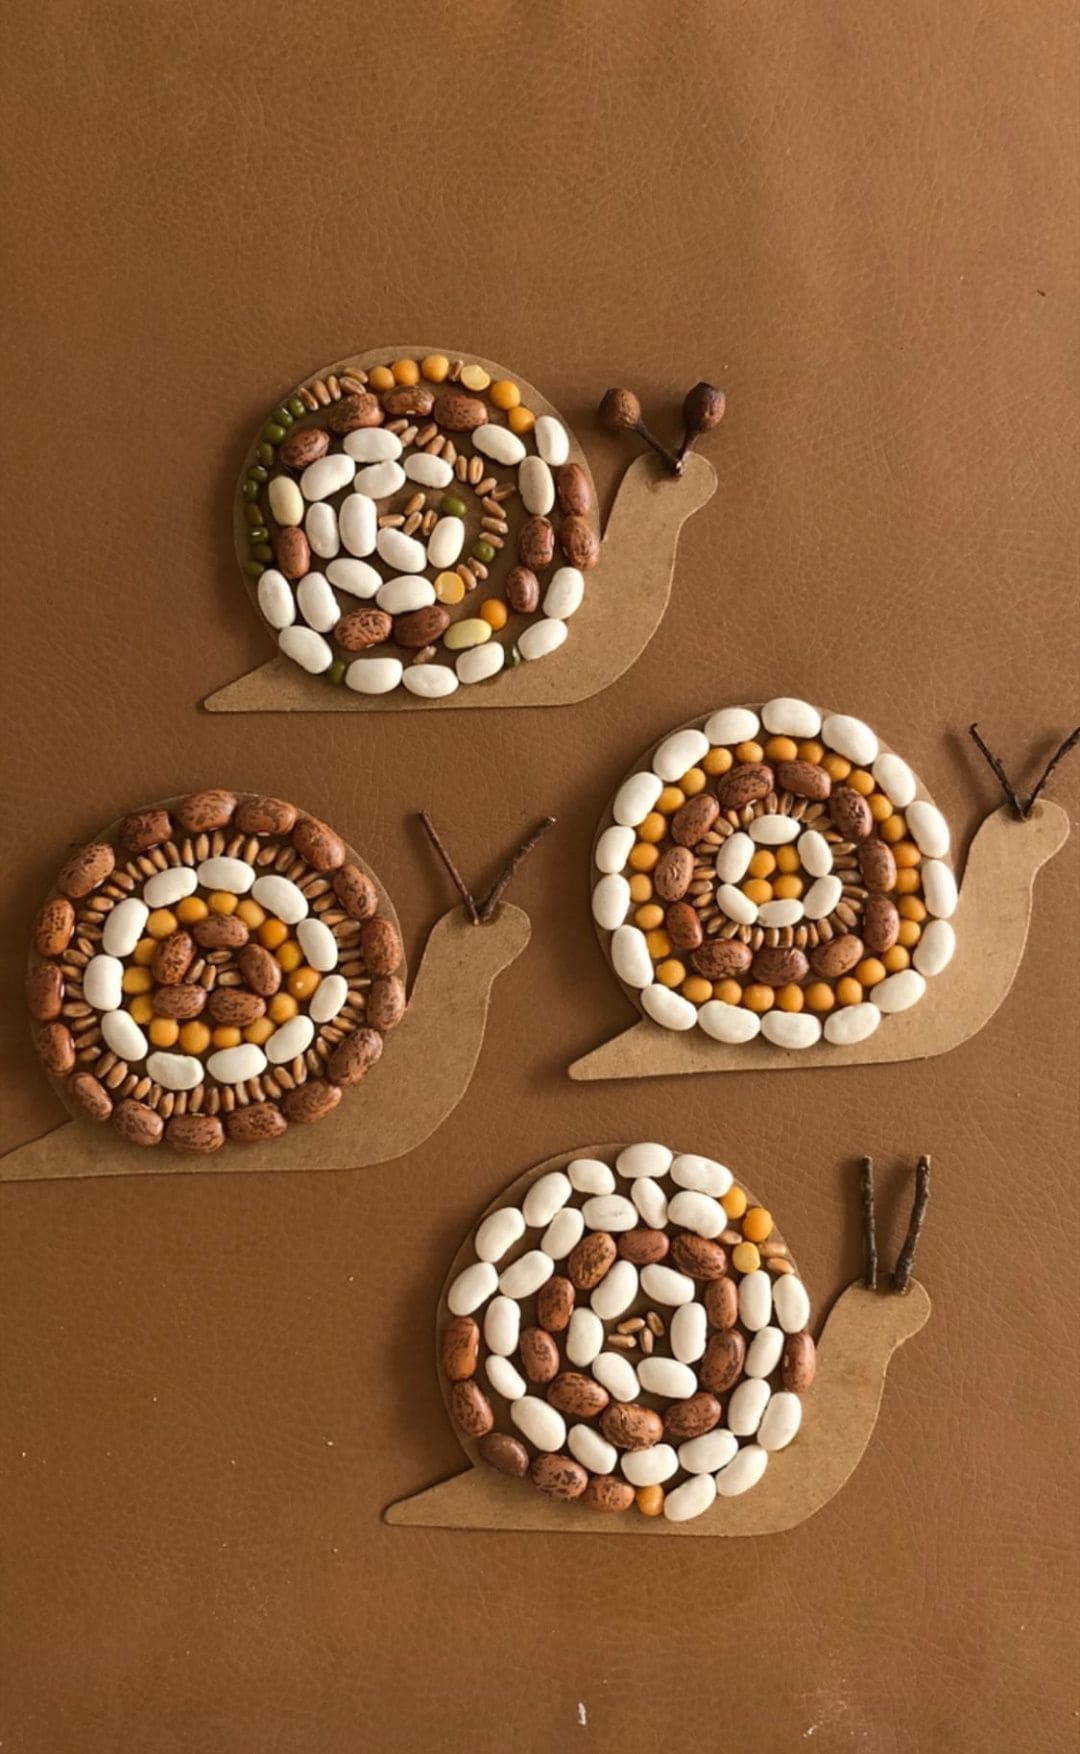
 This bean snail craft is an easy way to combine natural textures with fun design.
Using a cardboard base cut into snail shapes, you’ll fill the shell with rings of beans and seeds. The result is a durable mosaic that’s rustic yet playful.
These little snails can decorate your walls, sit on shelves, or even become handmade gifts.
With just beans, glue, and cardboard, you can create a whole family of them in under an hour.
Materials Needed
- Cardboard sheet (cut into 4-6 snail shapes, approx. 5” long each)
- White beans – 50-60 pieces
- Pinto beans – 40-50 pieces
- Yellow corn kernels – 40-50 pieces
- Green mung beans or wheat grains – 20-30 pieces (for variety)
- Twigs for antennas (2” each, 8-10 pieces)
- Hot glue gun or strong craft glue
- Pencil and scissors
- Clear acrylic spray (optional, to seal and protect)
Step-by-step Guide
Step 1: Draw a simple snail shape on cardboard (about 5” long with a spiral shell area) and cut it out. Repeat to make multiple snails.
Step 2: Apply glue in a spiral pattern inside the shell section.
Begin pressing beans into place, start at the center with small beans or corn kernels, then work outward with larger beans.
Step 3: Alternate bean colors to create contrast. For example, use yellow corn in the inner ring, then surround it with pinto beans, followed by white beans.
Step 4: Attach two short twigs to the snail’s head as antennas. Glue them firmly and let them set.
Step 5: Once the beans are set, allow the snail to dry completely.
Optionally, you can spray with clear acrylic sealer for shine and long-term durability.
Notes:
These bean snails look wonderful as a group, try making a snail family with different shell patterns.
For a kid-friendly version, you can swap beans for colorful buttons or beads.
