Garden & Crafty - Garden, DIY, Home
No Result
View All Result
  • GARDEN
    • Garden Tips
    • Garden Guide
    • Garden Care
    • Garden Ideas
  • DIY
    • Diy Project
    • Crafty Ideas
  • HOME
    • Decoration
    • Cleaning
    • Tips & Hacks
  • About Us
  • GARDEN
    • Garden Tips
    • Garden Guide
    • Garden Care
    • Garden Ideas
  • DIY
    • Diy Project
    • Crafty Ideas
  • HOME
    • Decoration
    • Cleaning
    • Tips & Hacks
  • About Us
No Result
View All Result
Garden & Crafty - Garden, DIY, Home
Home Guide

How to Make A Monogram Photo Collage Letter

Lois Capone by Lois Capone
August 19, 2025
in Guide
Reading Time: 2 mins read

How to Make A Monogram Photo Collage Letter

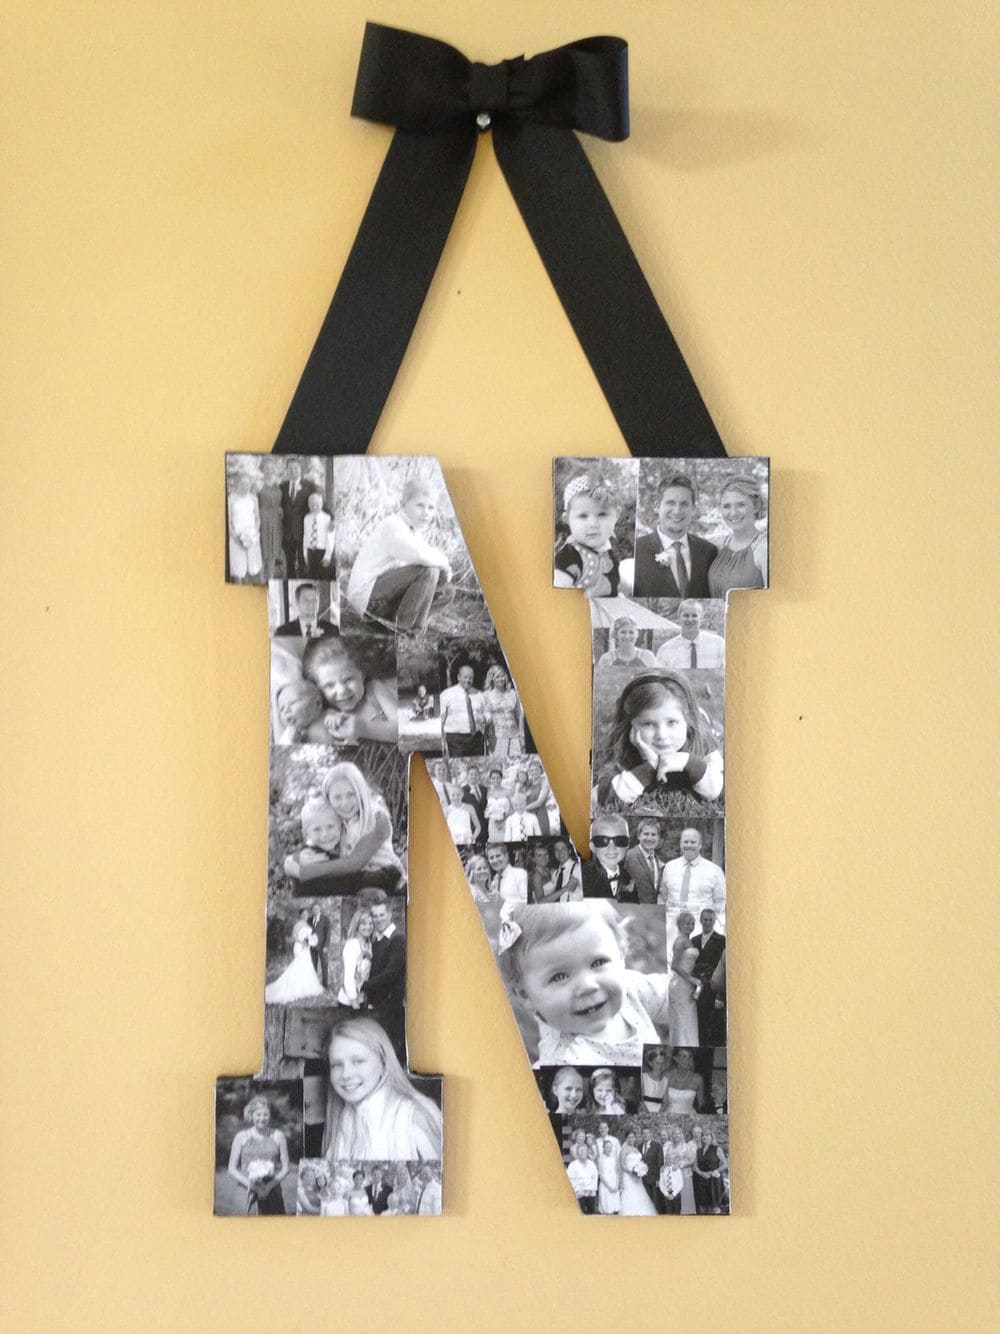
There’s something heartfelt about tying your family’s story to a single initial. A bold letter, covered in treasured photographs, becomes a snapshot of your home’s spirit.

Every angle reveals another memory, stitched together with the joy of the people who make up your life.

Moreover, it’s not just a decoration, it’s a love letter in visual form, hanging proudly where it belongs.

Materials Needed

  • 1 large wooden or cardboard letter (approx. 12-18” tall)
  • Printed family photos (mix of black-and-white or color, sized to fit)
  • Mod Podge or decoupage glue (8 oz)
  • Foam brush or wide paintbrush
  • Scissors
  • Ribbon or twine (about 18-24” length)
  • Clear acrylic spray sealer (optional)

Step-by-step Guide

Step 1: Begin with your chosen letter. Wood gives a sturdier, more permanent feel, while cardboard works if you want something lightweight. Then wipe it clean to ensure no dust interferes with the glue.

Step 2: Print and trim your family photos.

You can play with different sizes, small snapshots to fill narrow sections, and larger prints for the broader areas. Then lay them out on the letter before gluing so you can see how they overlap and fit.

Step 3: Apply a thin coat of Mod Podge directly onto the letter using your foam brush.

Start positioning your photos, pressing them down smoothly. Work in sections, overlapping edges so there are no gaps showing through.

Step 4: Once all the photos are attached, brush a layer of Mod Podge over the top.

Don’t worry about the cloudiness, it dries clear and creates a protective seal. Let it dry for about 20 minutes, then repeat with a second coat for durability.

Step 5: Attach ribbon or twine to the back for hanging. You can staple it onto wooden letters or hot glue it onto cardboard ones. Now tie it in a bow or simple knot, depending on the style you love most.

Step 6: For extra protection, lightly spray the surface with acrylic sealer. This keeps the photos vibrant and prevents peeling over time.

Tips: Use black-and-white photos if you want a classic, cohesive look, or mix colors for something vibrant and playful.

SharePin
Lois Capone

Lois Capone

Lois Capone is a wife and mom in her 50s who enjoys sharing gardening, DIY tips, and home decor ideas. She believes that with some inspiration, anyone can create a special feel in their home and garden.

Related Posts

Guide

Fun & Easy Popsicle Stick Bookmarks You Can Personalize

If you’re looking for a bookmark project that’s budget-friendly and versatile, popsicle stick bookmarks are a fantastic choice. They’re lightweight,...

by Lois Capone
September 17, 2025
Guide

Add Whimsy to Your Reading with a Carrot Bookmark

Amazingly, this whimsical design brings personality to your reading time and reminds you that books don’t always have to feel...

by Lois Capone
September 17, 2025
Guide

How to Make a Whale Bookmark That Swims Through Your Pages

Imagine your novel as an ocean and a whale swimming across its waves. That’s the feeling this handmade bookmark brings....

by Lois Capone
September 17, 2025
Guide

How to Make Beaded Charm Bookmarks That Spark Magic in Reading

This project is a chance to create bookmarks as unique as your reading style. You can mix pearls, glass beads,...

by Lois Capone
September 17, 2025
Guide

Handmade Pressed Flower Bookmarks with Beaded Words

There’s something magical about capturing a flower’s delicate form and giving it a new life inside a bookmark. With this...

by Lois Capone
September 17, 2025
Guide

How to Turn Memories into Photo Strip Bookmarks

Why buy a bookmark when you can create one that’s completely yours? Photo strip bookmarks let you bring in moments...

by Lois Capone
September 17, 2025
Load More

Categories

  • Cleaning (6)
  • Crafty Ideas (153)
  • Decoration (150)
  • DIY (8)
  • Diy Project (212)
  • GARDEN (39)
  • Garden Care (55)
  • Garden Guide (125)
  • Garden Ideas (330)
  • Garden Tips (110)
  • Guide (533)
  • HOME (90)
  • Tips & Hacks (20)


Garden & Crafty - Garden, DIY, Home

© 2024 gardenandcrafty.com

Navigate Site

  • About Us
  • Privacy Policy
  • Terms Of Service
  • Disclaimer
  • Cookie Policy
  • Webstories
  • Sitemap

Follow Us

No Result
View All Result
  • GARDEN
    • Garden Tips
    • Garden Guide
    • Garden Care
    • Garden Ideas
  • DIY
    • Diy Project
    • Crafty Ideas
  • HOME
    • Decoration
    • Cleaning
    • Tips & Hacks
  • About Us