Garden & Crafty - Garden, DIY, Home
No Result
View All Result
  • GARDEN
    • Garden Tips
    • Garden Guide
    • Garden Care
    • Garden Ideas
  • DIY
    • Diy Project
    • Crafty Ideas
  • HOME
    • Decoration
    • Cleaning
    • Tips & Hacks
  • About Us
  • GARDEN
    • Garden Tips
    • Garden Guide
    • Garden Care
    • Garden Ideas
  • DIY
    • Diy Project
    • Crafty Ideas
  • HOME
    • Decoration
    • Cleaning
    • Tips & Hacks
  • About Us
No Result
View All Result
Garden & Crafty - Garden, DIY, Home
Home Guide

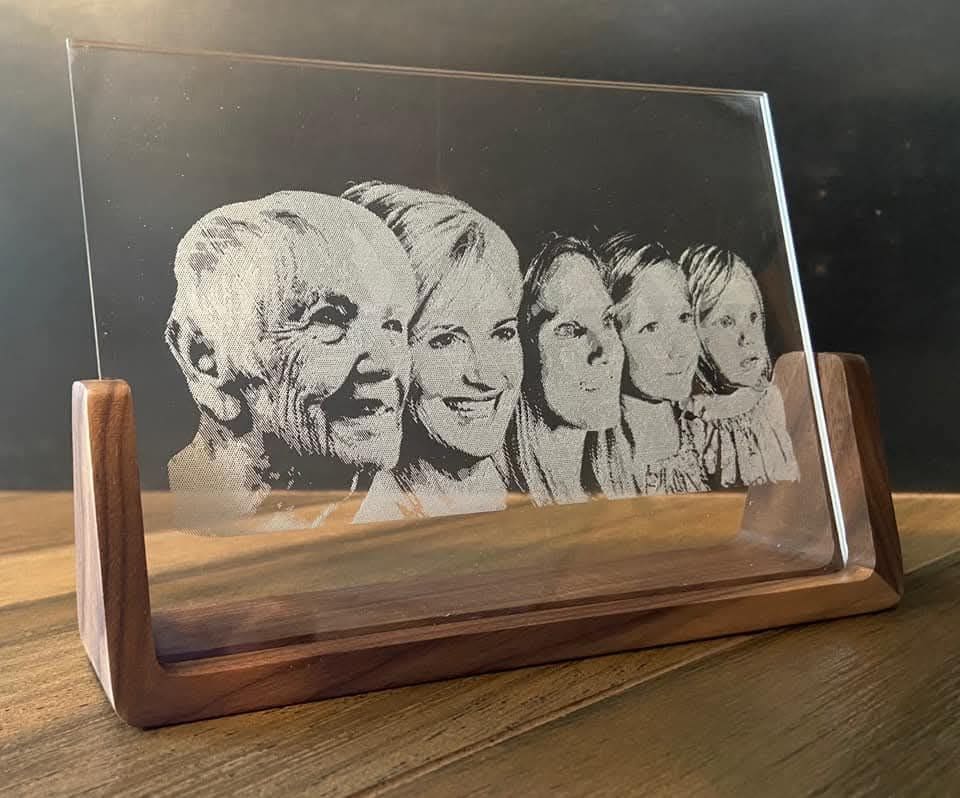
How to Make a Lasting Engraved Glass Family Portrait Display

Lois Capone by Lois Capone
August 19, 2025
in Guide
Reading Time: 2 mins read

How to Make a Lasting Engraved Glass Family Portrait Display

Imagine sunlight passing through a window and catching the engraved faces of your family, every smile, every wrinkle, every small detail glowing softly in glass. It feels like the portrait itself is alive with memory.

This kind of keepsake isn’t just about preservation; it’s about presence. Your loved ones feel near, etched into something both fragile and lasting.

It’s a piece that tells your story with quiet strength, ready to be admired for generations.

Materials Needed

  • High-resolution family photo (at least 300 DPI for clarity)
  • Glass panel (8×10 inches or larger, ¼” thickness recommended)
  • Laser engraving machine (DIY or through a professional service)
  • Wooden base or stand (ready-made or handmade to size)
  • Masking tape
  • Ruler or measuring tape
  • Soft microfiber cloth
  • Optional: LED light base

Step-by-step Guide

Step 1: Select a high-resolution photo of your family. Group photos work best when faces are clear and well-lit.

If possible, choose an image with good contrast, as this will engrave more cleanly into the glass.

Step 2: Clean your glass panel thoroughly with a microfiber cloth. Any dust, fingerprints, or smudges can interfere with the engraving process, leaving cloudy marks.

You need to take time to inspect the surface under good lighting to ensure it’s spotless.

Step 3: Prepare your engraving file. If you’re using a service, upload the photo and ask them to adjust brightness and contrast so every detail is crisp.

If you’re engraving at home, import the image into the machine’s software and size it to fit your panel. Keep margins even so the portrait looks centered.

Step 4: Secure the glass in place using masking tape along the edges. This prevents any shifting during engraving.

Double-check your alignment, once the machine starts, even a slight misplacement can throw off the entire design.

Step 5: Begin engraving. For DIY, set your laser machine to low power and slow speed, which allows the fine details to etch clearly into the glass surface.

Notes: Watch the process carefully; stopping midway can ruin the effect.

Step 6: Once engraving is complete, gently brush away any dust or residue. Use a soft cloth, not water, since moisture can smear the newly etched surface.

Now you hold it up to light at this stage, it’s a rewarding moment to see your family’s faces emerge in shimmering lines.

Step 7: Place the finished panel into your wooden base or stand. If you’re making your own, cut a groove that matches the glass thickness so it sits snugly without wobbling.

Step 8: Display your portrait where natural light can highlight the details, like a windowsill or mantel.

If you want a dramatic evening effect, use an LED light base as the glow makes every etched line sparkle beautifully.

Tips: Adding text during engraving, such as a family name or a special date, gives it extra significance. Also, try positioning the glass where it can catch both morning and evening light.

SharePin
Lois Capone

Lois Capone

Lois Capone is a wife and mom in her 50s who enjoys sharing gardening, DIY tips, and home decor ideas. She believes that with some inspiration, anyone can create a special feel in their home and garden.

Related Posts

Guide

How to Upcycle a Mirror Frame with Comic Book Art

In this design, a mirror reflects more than just your face, it captures moments, moods, and the space you live...

by Lois Capone
August 19, 2025
Guide

Brighten Your Room with a Comic-Inspired Light Switch

I always thought light switches were boring until I tried covering one with a page from my favorite comic. Suddenly,...

by Lois Capone
August 19, 2025
Guide

How to Make One-of-a-Kind Earrings from Comic Pages

Think of each earring as a folded secret, a piece of a comic’s world transformed into a jewel. The paper...

by Lois Capone
August 19, 2025
Guide

Turn Old Heels into Bold Comic Book Statement Shoes

I remember the first time I tried this project, I couldn’t stop smiling at the result. Shoes that had been...

by Lois Capone
August 19, 2025
Guide

Full Guide on Making A Comic Book Photo Frame

I made one of these frames for my nephew’s superhero-themed birthday, and it was such a hit. His picture, in...

by Lois Capone
August 19, 2025
Guide

Explore Full Guide to Making Comic Book Bookmarks

Instead of a receipt or random scrap of paper, you’re greeted with bold colors and comic energy every time you...

by Lois Capone
August 19, 2025
Load More

Categories

  • Cleaning (6)
  • Crafty Ideas (136)
  • Decoration (144)
  • DIY (8)
  • Diy Project (184)
  • GARDEN (39)
  • Garden Care (51)
  • Garden Guide (115)
  • Garden Ideas (321)
  • Garden Tips (92)
  • Guide (145)
  • HOME (90)
  • Tips & Hacks (20)


Garden & Crafty - Garden, DIY, Home

© 2024 gardenandcrafty.com

Navigate Site

  • About Us
  • Privacy Policy
  • Terms Of Service
  • Disclaimer
  • Cookie Policy
  • Webstories
  • Sitemap

Follow Us

No Result
View All Result
  • GARDEN
    • Garden Tips
    • Garden Guide
    • Garden Care
    • Garden Ideas
  • DIY
    • Diy Project
    • Crafty Ideas
  • HOME
    • Decoration
    • Cleaning
    • Tips & Hacks
  • About Us