Garden & Crafty - Garden, DIY, Home
No Result
View All Result
  • GARDEN
    • Garden Tips
    • Garden Guide
    • Garden Care
    • Garden Ideas
  • DIY
    • Diy Project
    • Crafty Ideas
  • HOME
    • Decoration
    • Cleaning
    • Tips & Hacks
  • About Us
  • GARDEN
    • Garden Tips
    • Garden Guide
    • Garden Care
    • Garden Ideas
  • DIY
    • Diy Project
    • Crafty Ideas
  • HOME
    • Decoration
    • Cleaning
    • Tips & Hacks
  • About Us
No Result
View All Result
Garden & Crafty - Garden, DIY, Home
Home Guide

How to Make a Colorful Boho Patchwork Floor Cushion

Lois Capone by Lois Capone
August 19, 2025
in Guide
Reading Time: 2 mins read

How to Make a Colorful Boho Patchwork Floor Cushion

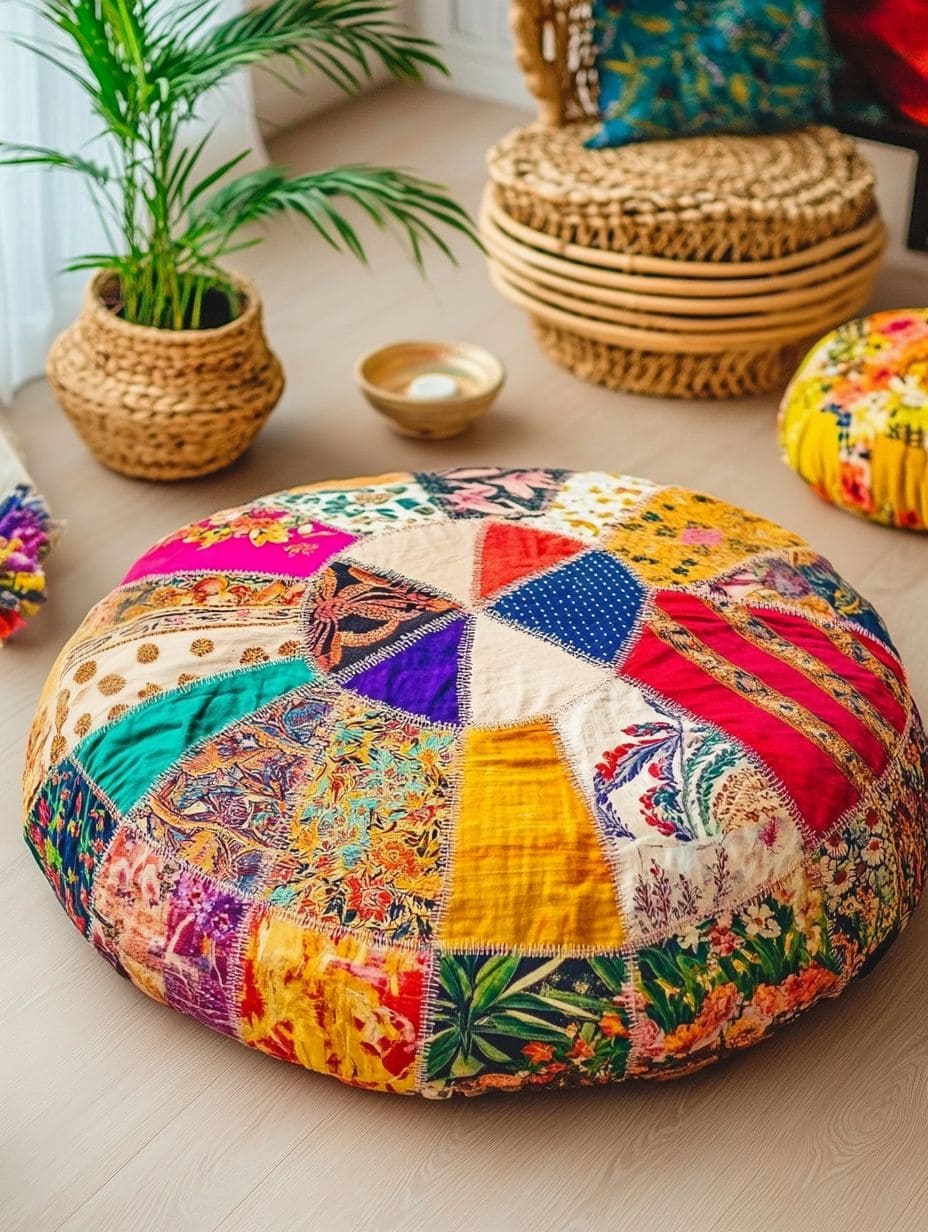
Every patch tells a tale. Maybe it’s from an old scarf, a thrifted sari, or a fabric scrap you couldn’t let go of.

When you stitch them together, they become more than cloth, they form a kaleidoscope of history, texture, and personality.

You can see a floor pillow like this doesn’t just serve as extra seating; it becomes the soul of a space.

The patchwork design feels like a festival frozen in fabric, a carnival of color waiting to welcome guests or cradle you with comfort.

Materials Needed

  • A variety of fabric scraps (cotton, linen, silk, or recycled textiles in bright, contrasting patterns)
  • Large piece of plain backing fabric (canvas, denim, or sturdy cotton)
  • Thick batting or cushion filling (polyester fiberfill, shredded foam, or even old pillows)
  • Sewing machine (or needle and strong thread if sewing by hand)
  • Fabric scissors and pins
  • Chalk or fabric marker
  • Zipper or large buttons (optional)

Step-by-step Guide

Step 1: Decide the size of your floor pillow (usually 30-36 inches in diameter works well).

Then sketch a rough circle divided into wedges or geometric shapes like triangles, squares, or strips.

Plus, each section will be cut from a different scrap of fabric, giving the pillow its patchwork charm.

Step 2: Using your sketch as a template, cut fabric pieces to size. Don’t worry about perfect symmetry as slight variations add character.

Aim for bold contrasts: mix florals with stripes, solids with paisleys, and bright tones with earthy hues. Then leave a small seam allowance (½ inch) on each side for sewing.

Step 3: Start joining the fabric pieces, sewing them together edge by edge. You now press the seams flat with an iron as you go.

Continue until you have a large circular or square patchwork piece that will form the pillow’s top. It should look like a colorful quilt.

Step 4: Cut one large piece of sturdy fabric for the back panel.

If you want the cover to be removable, cut the backing in two halves and add a zipper or button closure along the seam. This makes cleaning much easier.

Step 5: Place the patchwork top and backing right sides facing each other.

Pin around the edges, then sew, leaving a small opening for turning and stuffing. You turn the cover right side out once sewn.

Step 6: Fill generously with fiberfill, shredded foam, or recycled pillow stuffing until it’s plump and supportive.

For a firmer cushion (great for floor seating), use layers of batting or even insert a round foam cushion.

Step 7: Hand-stitch the opening closed securely. If you’ve included a zipper or button, just close it up after inserting the cushion.

Tips:

If you’re a traveler, use fabric collected from different places, it turns your pillow into a living souvenir of your journeys.

I once made one with leftover sari silk and every guest who saw it wanted to sit on it first, it quickly became the favorite seat in the house!

SharePin
Lois Capone

Lois Capone

Lois Capone is a wife and mom in her 50s who enjoys sharing gardening, DIY tips, and home decor ideas. She believes that with some inspiration, anyone can create a special feel in their home and garden.

Related Posts

Guide

Create Colorful Mini Weavings on Wooden Squares

There’s something meditative about weaving on a tiny scale. As you loop yarn over and under each strand, you start...

by Lois Capone
October 7, 2025
Guide

Craft Mini Driftwood Weavings to Add a Cozy Boho Touch

If you’ve ever admired woven wall art in cozy studios or boutique cafés, this is your chance to make your...

by Lois Capone
October 7, 2025
Guide

Create a Radiant Woven Circle from Scrap Yarn and Cardboard

This circular weaving craft brings together simplicity and joy. With just a piece of cardboard and a few strands of...

by Lois Capone
October 7, 2025
Guide

Create Adorable Pet Art with Mini Woven Blankets

Imagine your pet tucked under a handmade blanket, dreaming away after a long day of play. You’ll weave a small,...

by Lois Capone
October 7, 2025
Guide

Craft Colorful Beaded Bracelets with a DIY Cardboard Loom

This project transforms cardboard into a mini bead loom, turning small glass or plastic beads into wearable art. You’ll find...

by Lois Capone
October 7, 2025
Guide

Make a Whimsical Yarn Doll Through Simple Weaving

Creating this woven yarn doll feels like crafting a childhood memory. There’s something delightful about giving her shape and color...

by Lois Capone
October 7, 2025
Load More

Categories

  • Cleaning (6)
  • Crafty Ideas (163)
  • Decoration (164)
  • DIY (8)
  • Diy Project (229)
  • GARDEN (39)
  • Garden Care (61)
  • Garden Guide (134)
  • Garden Ideas (348)
  • Garden Tips (128)
  • Guide (687)
  • HOME (90)
  • Tips & Hacks (20)


Garden & Crafty - Garden, DIY, Home

© 2024 gardenandcrafty.com

Navigate Site

  • About Us
  • Privacy Policy
  • Terms Of Service
  • Disclaimer
  • Cookie Policy
  • Webstories
  • Sitemap

Follow Us

No Result
View All Result
  • GARDEN
    • Garden Tips
    • Garden Guide
    • Garden Care
    • Garden Ideas
  • DIY
    • Diy Project
    • Crafty Ideas
  • HOME
    • Decoration
    • Cleaning
    • Tips & Hacks
  • About Us