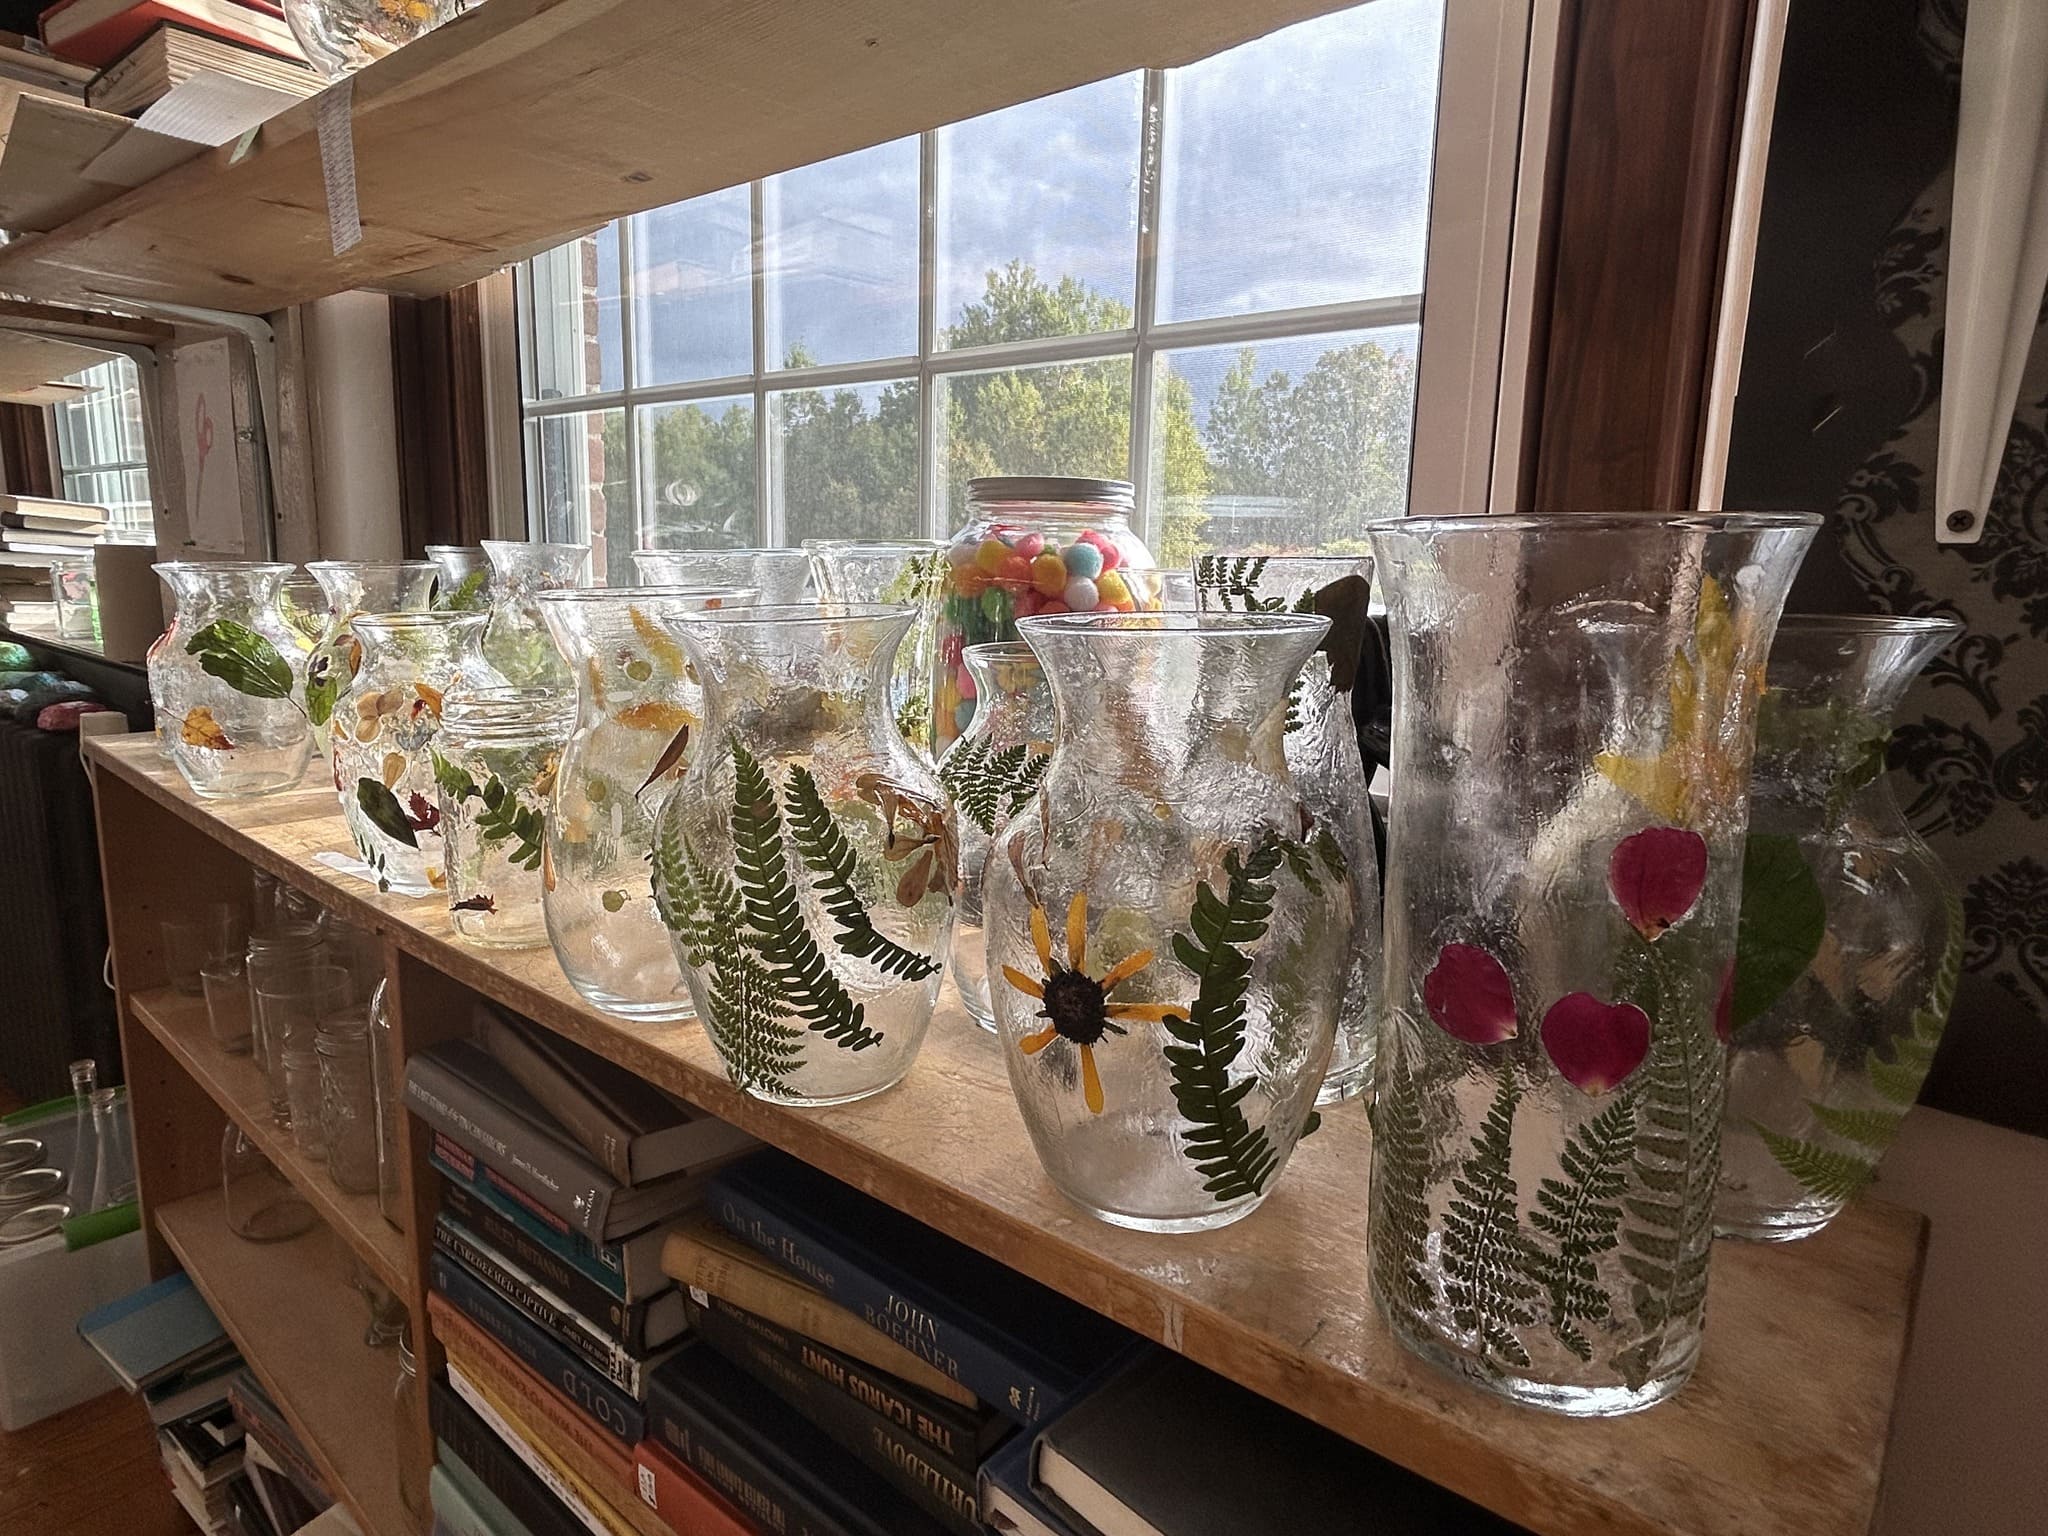
 Do you have extra vases tucked away, rarely used? This project gives them new life with pressed flowers sealed right into the glass.
Instead of being a forgotten item on a shelf, your vase becomes a showcase for petals, ferns, and stems.
With every arrangement you add, the vase tells a layered story, both of fresh flowers and the ones forever preserved on its surface.
Materials Needed
- 1-3 clear glass vases (7”-10” tall recommended)
- Pressed flowers and leaves (ferns, daisies, rose petals, or wildflowers work beautifully)
- Mod Podge or decoupage glue (8 oz bottle)
- Foam brush or soft paintbrush (1”-2” wide)
- Small bowl of water
- Paper towels
- Optional: clear acrylic spray sealant (for extra durability)
Step-by-step Guide
Step 1: Clean your vase thoroughly with soap and water, then dry it completely. Dust or oils will prevent the flowers from sticking.
Step 2: Arrange your pressed flowers on the vase before gluing.
You can play with placement, ferns can frame the base while daisies or colorful petals add a focal point in the center.
Step 3: Using your foam brush, apply a thin coat of Mod Podge directly to the vase where you’ll place the flower.
Now gently press the flower onto the glue, smoothing it out with the brush.
Step 4: Once all flowers are in place, brush another thin layer of Mod Podge over them to seal. Don’t worry if it looks cloudy at first as it dries clear.
Step 5: Let the vase dry for 1-2 hours.
If you’d like a glossier, more durable finish, lightly spray with a clear acrylic sealant once the glue has fully cured.
Step 6: Fill your vase with fresh flowers, dried grasses, or even use it as a candle holder.
The pressed flowers on the glass will add beauty in every season.
Tip:
Ferns and translucent petals look especially striking when light passes through the vase.
You can try placing your decorated piece near a sunny window to let the colors glow naturally.
