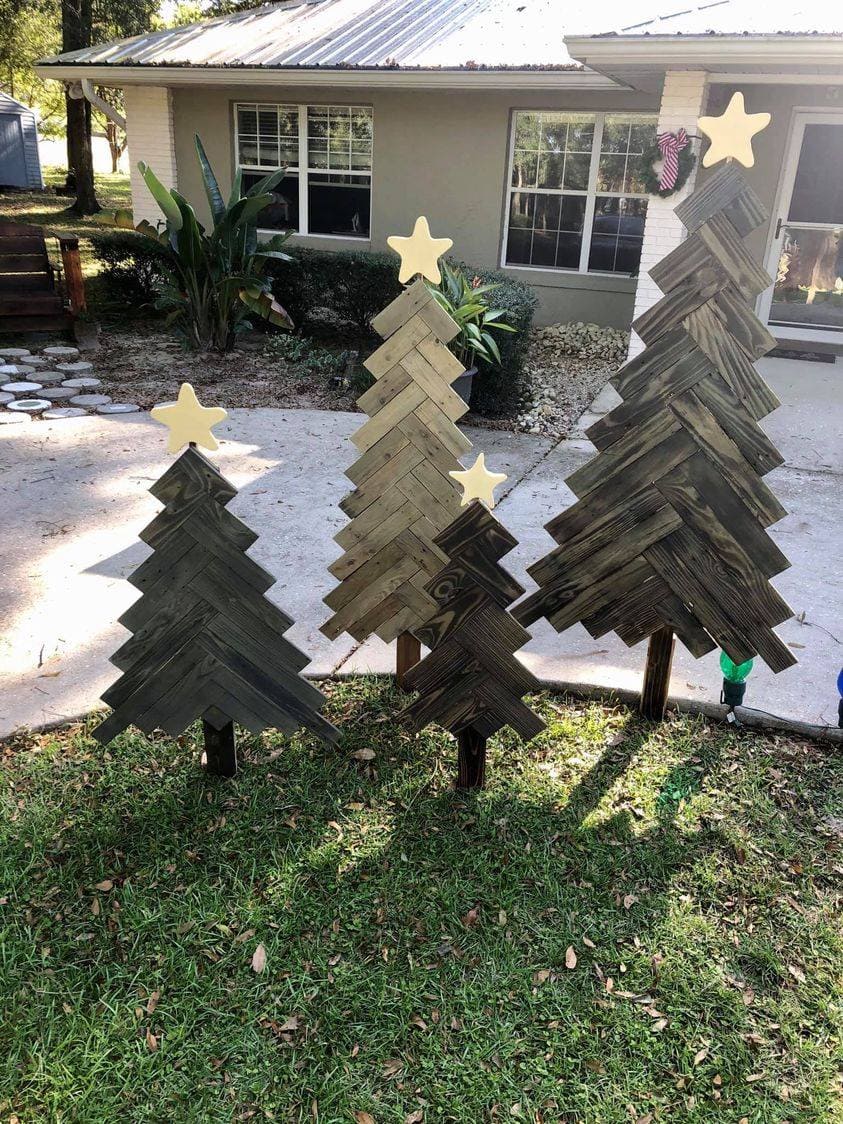
 These pallet trees are simple to build yet look so polished. By cutting pallet planks into angled pieces, you’ll stack them side-by-side, creating that tree silhouette.
Attach them to a central post for stability and finish with a wooden star on top.
You can paint them green, whitewash them for a snowy look, or leave them raw and rustic.
This project works great for outdoor holiday décor that holds up through the season.
Make a few in different sizes, and you’ll instantly have a festive forest standing tall in your yard.
Materials Needed
- 8-12 pallet planks (approx. 36” long each)
- 1 wood post (2” × 2”, height depending on tree size)
- Wooden star cutout (about 6-8”)
- Saw (miter saw recommended for clean 45° cuts)
- Wood screws (1.5” to 2”) and drill
- Sandpaper (120-150 grit)
- Wood stain, green paint, or outdoor sealer
- Optional: fairy lights
Step-by-step Guide
Step 1: Dismantle your pallet and sand down the planks to remove rough edges.
Step 2: Cut each plank into angled sections (about 45°) so they fit together like chevrons.
Step 3: Start from the bottom of your post and screw in the longest planks, gradually working up with shorter ones to form a tree shape.
Step 4: Attach your wooden star to the top using screws or wood glue.
Step 5: Finish with your choice of stain, paint, or a weatherproof sealant to protect it outdoors.
Step 6: Place it in your yard or porch, adding fairy lights if you want an evening glow.
Notes:
For added stability, you can secure the base of the post into a wooden stand or bury it slightly in the ground.
