Garden & Crafty - Garden, DIY, Home
No Result
View All Result
  • GARDEN
    • Garden Tips
    • Garden Guide
    • Garden Care
    • Garden Ideas
  • DIY
    • Diy Project
    • Crafty Ideas
  • HOME
    • Decoration
    • Cleaning
    • Tips & Hacks
  • About Us
  • GARDEN
    • Garden Tips
    • Garden Guide
    • Garden Care
    • Garden Ideas
  • DIY
    • Diy Project
    • Crafty Ideas
  • HOME
    • Decoration
    • Cleaning
    • Tips & Hacks
  • About Us
No Result
View All Result
Garden & Crafty - Garden, DIY, Home
Home Guide

How to Craft Heavenly Okra Angels for a Rustic Holiday Charm

Lois Capone by Lois Capone
September 3, 2025
in Guide
Reading Time: 2 mins read

How to Craft Heavenly Okra Angels for a Rustic Holiday Charm

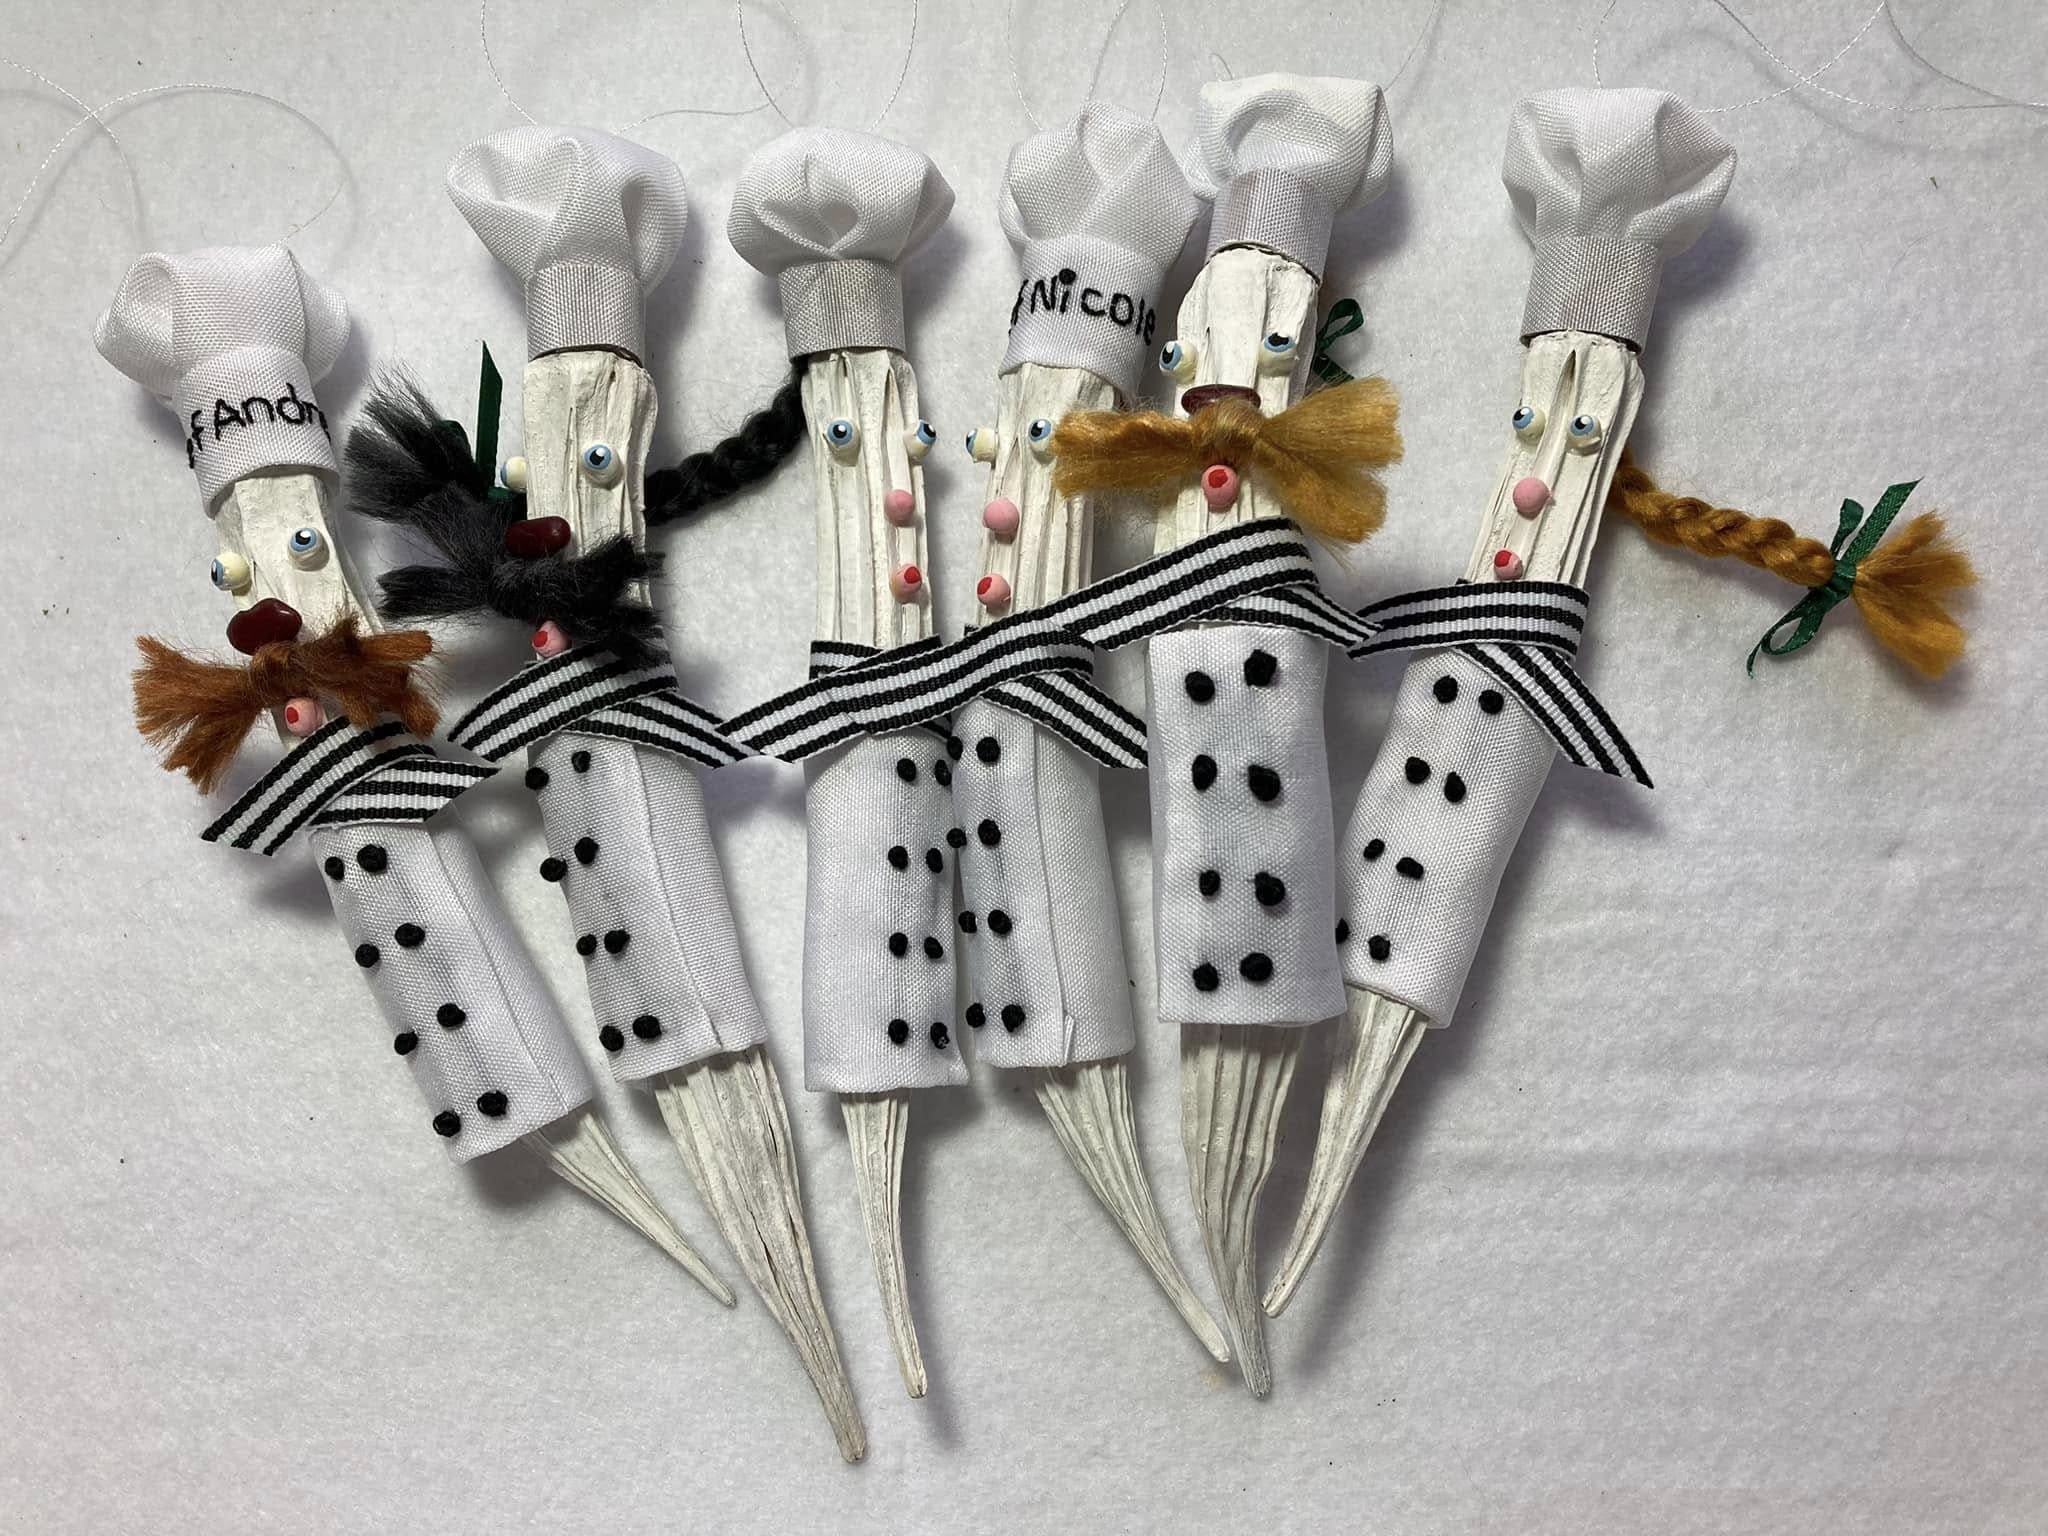
When you transform it into a graceful angel, you’re not just making a craft; you’re telling a story of transformation.

Each pod, with its unique texture and elegant taper, becomes a tiny body, ready to take flight with ribbon wings and a whispered song.

Also, these little angels carry a kind of celestial grace, turning a piece of the garden into a timeless symbol of peace and hope for the holidays.

Materials Needed

  • 10-12 dried okra pods (select long, straight pods)
  • Small wooden craft beads (approx. 1” diameter)
  • White or ivory ribbon (a mix of textures or patterns adds character)
  • Natural fiber (Spanish moss, raffia, or fine twine)
  • Fine gold wire or metallic tinsel cord
  • Small decorative sprigs (fake pine, berries, mini pinecones)
  • Fine-tipped black marker or paint pen
  • Hot glue gun and glue sticks
  • Twine or ornament hooks

Step-by-step Guide

Step 1: Start by choosing your okra pods. Look for pods that are long and have a nice, straight shape, these will be the body of your angels.

Then gently clean them with a dry cloth to make sure they’re ready for crafting.

Step 2: Glue the wooden bead to the top, narrow end of the okra pod using a dab of hot glue.

This will be the angel’s head. You hold it in place for a few seconds until the glue sets firmly.

Step 3: Next, give your angel some personality with hair and a halo. Take a small tuft of natural fiber and glue it to the top of the wooden bead for hair.

Then, create a tiny circle with your gold wire or tinsel and glue it on top of the hair to form a delicate halo.

Step 4: Now for the wings. Cut a piece of your white ribbon and tie it into a simple bow.

You use a drop of hot glue to attach the bow to the back of the okra pod, right below the head. This gives your angel a sense of graceful flight.

Step 5: Time to add the final, festive touches. Glue your small decorative sprigs such as a bit of pine, some red berries, a tiny pinecone to the front of the okra pod.

Feel free to play with the placement to create a unique look for each angel.

Step 6: Finally, give your angel a face! Use a fine black marker or paint pen to draw two small, closed eyes and a tiny ‘O’ shaped mouth on the wooden bead.

To finish, loop a piece of twine or an ornament hook through the back of the halo for easy hanging.

Tips:

When I made a set of these for my own holiday decor, I found that using different ribbons for the wings gave each angel a completely unique personality.

Don’t be afraid to mix and match. The beauty of these ornaments is in their natural, rustic feel, so remember that imperfections are part of their charm.

Making these is a perfect way to spend a peaceful afternoon, creating a whole chorus of little messengers for your holiday tree.

SharePin
Lois Capone

Lois Capone

Lois Capone is a wife and mom in her 50s who enjoys sharing gardening, DIY tips, and home decor ideas. She believes that with some inspiration, anyone can create a special feel in their home and garden.

Related Posts

Guide

Create a Dreamy Crescent Moon Using Pressed Flowers

If you’ve ever wanted to combine nature with a little touch of the cosmos, this pressed flower crescent moon is...

by Lois Capone
September 19, 2025
Guide

How to Create Vintage-Style Pressed Flower Frames for Timeless Charm

You don’t need a museum to keep your flowers alive, just a frame and a bit of imagination. With a...

by Lois Capone
September 19, 2025
Guide

How to Decorate Glass Vases with Pressed Flowers

Do you have extra vases tucked away, rarely used? This project gives them new life with pressed flowers sealed right...

by Lois Capone
September 19, 2025
Guide

How to Turn Pressed Leaves and Flowers into Storybook Art

You can give forgotten book pages a second life by layering pressed flowers and leaves over the printed text. The...

by Lois Capone
September 19, 2025
Guide

How to Craft Whimsical Mushrooms with Pressed Flowers

Pressed flower mushrooms are a creative twist on traditional botanical art. By layering petals into caps and stems, you can...

by Lois Capone
September 19, 2025
Guide

How to Turn Pressed Roses into a Framed Keepsake

By framing pressed roses and baby’s breath over a vintage book page, you create a piece of art that feels...

by Lois Capone
September 19, 2025
Load More

Categories

  • Cleaning (6)
  • Crafty Ideas (154)
  • Decoration (155)
  • DIY (8)
  • Diy Project (215)
  • GARDEN (39)
  • Garden Care (58)
  • Garden Guide (129)
  • Garden Ideas (335)
  • Garden Tips (119)
  • Guide (573)
  • HOME (90)
  • Tips & Hacks (20)


Garden & Crafty - Garden, DIY, Home

© 2024 gardenandcrafty.com

Navigate Site

  • About Us
  • Privacy Policy
  • Terms Of Service
  • Disclaimer
  • Cookie Policy
  • Webstories
  • Sitemap

Follow Us

No Result
View All Result
  • GARDEN
    • Garden Tips
    • Garden Guide
    • Garden Care
    • Garden Ideas
  • DIY
    • Diy Project
    • Crafty Ideas
  • HOME
    • Decoration
    • Cleaning
    • Tips & Hacks
  • About Us