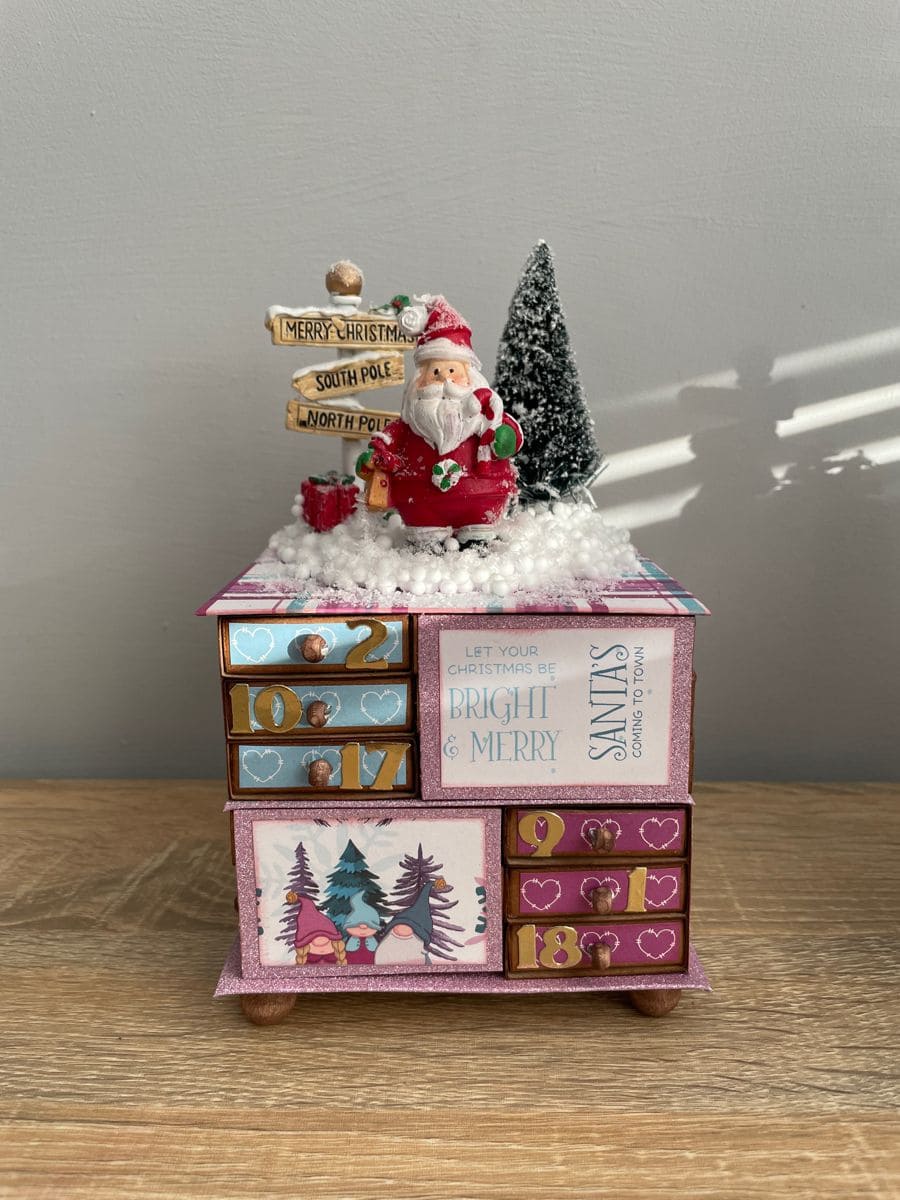
Imagine counting down to Christmas with a handmade advent calendar that looks like a tiny holiday village.
Each little drawer hides a surprise, while Santa sits on top with a snowy North Pole sign guiding the way.
Children and guests alike will love sliding open the numbered boxes, discovering small treasures day by day.
It’s more than a calendar, it’s an invitation to savor the anticipation of Christmas morning in the most delightful way.
Materials Needed
- 24 empty matchboxes (2” × 1.5” each)
- Hot glue gun and glue sticks
- Decorative scrapbook paper (red, blue, gold, and Christmas prints)
- Number stickers (1-24, approx. 0.5” tall)
- Mini Christmas figurines (Santa, bottlebrush tree, signpost)
- Artificial snow or cotton balls
- Small wood board or cardboard base (8” × 8” size)
- Acrylic paint and brushes
- Optional: wooden beads for drawer handles
Step-by-step Guide
Step 1: Assemble your matchboxes by gluing them into a stacked grid, four rows of six works nicely for a classic advent calendar.
Step 2: Wrap the outside of each drawer with decorative paper, then add numbered stickers for each day. Then attach small wooden beads as handles if you like.
Step 3: Secure the entire structure onto a sturdy board or cardboard base.
Step 4: Decorate the top with a snowy scene, glue down a small Santa figurine, a Christmas tree, and a signpost.
Next, add artificial snow or cotton around them for a frosted effect.
Step 5: Fill each drawer with candies, stickers, or little holiday notes.
Step 6: Place it on a mantel, side table, or as your dining table centerpiece and enjoy the countdown to Christmas.
Tips:
You can personalize the surprises, think small crafts for kids, inspirational quotes, or even a new Christmas activity for the family to do together.
