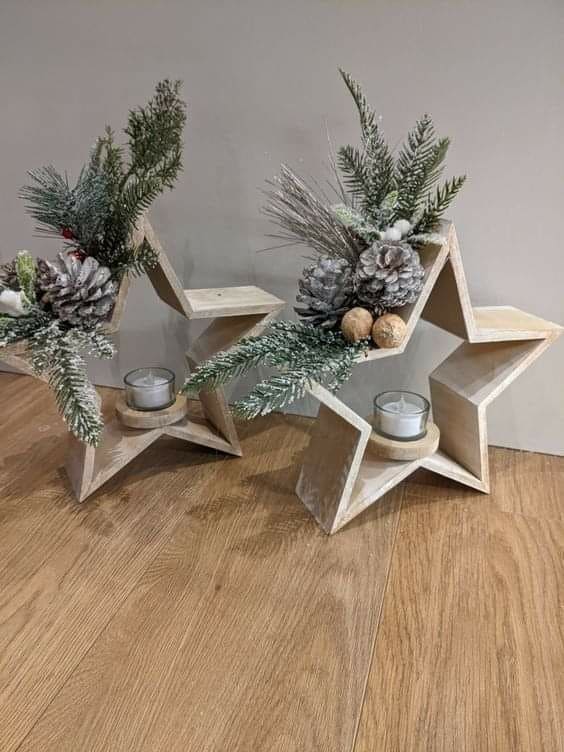
 There’s something magical about a star glowing with candlelight.
Imagine coming home, lighting a candle tucked inside your handmade pallet star, and watching as the soft flicker brings a cozy sparkle to the room.
Add a little greenery, a pinecone or two, and suddenly your star feels like it came straight out of a Christmas storybook.
This project is simple, yet it gives back warmth and beauty every time you light it.
Materials Needed
- 2 pallet boards, each approx. 36” long × 3.5” wide × 0.5” thick
- Measuring tape and pencil
- Protractor or angle ruler (for accurate star points)
- Handsaw or jigsaw
- 120- and 220-grit sandpaper
- Wood glue and 1” finishing nails (optional for extra hold)
- 2 small wood slices, 3” diameter × 0.5” thick (candle bases)
- 2 tealight candles or LED tealights
- Hot glue gun with glue sticks
- Faux greenery sprigs (6–8 inches long)
- Pinecones (2–4 medium, about 2.5” each)
- Small decorative accents: faux berries, frosted branches, or tiny ornaments
Step-by-step Guide
Step 1: Measure and cut 10 strips from the pallet boards, each 12” long. Then sand the edges thoroughly to avoid splinters.
Step 2: Using your protractor, mark the angles for star points (36° interior angles work well). Lay out five strips into a star shape.
Step 3: Glue and nail the joints for stability. Repeat the process for the second star. Let them dry completely.
Step 4: Attach a round wood slice in the center-bottom arm of each star with wood glue. This will serve as your candle base.
Step 5: Use your hot glue gun to add greenery sprigs to the top corner of each star. Layer pinecones and faux berries over the greenery for dimension.
Step 6: Place a tealight candle on each wood slice. Test the fit before lighting. LED candles are a safe alternative.
Notes:
For a farmhouse look, keep the wood unfinished and just sand it smooth.
If you want a snowy effect, lightly brush the edges with white acrylic paint or spray with faux snow.
You can also scale this project up, try 16” strips for a larger star centerpiece.
