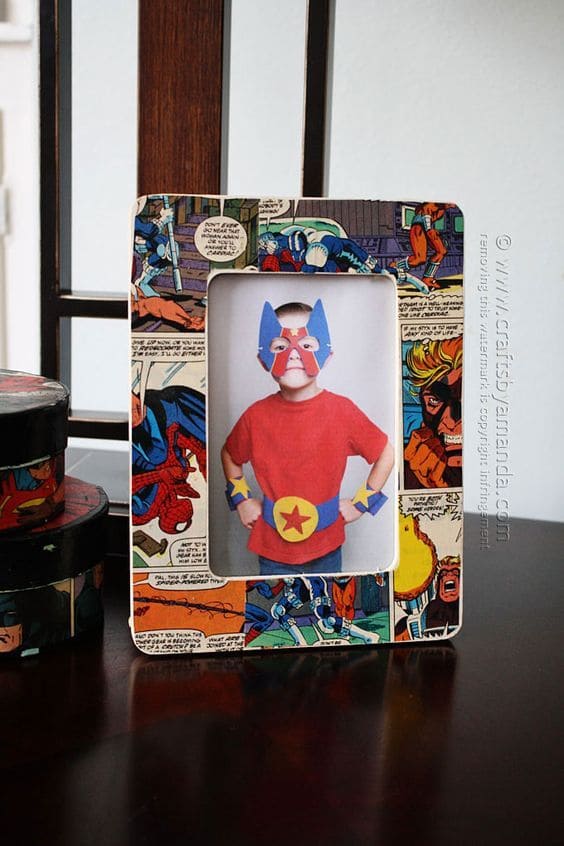
I made one of these frames for my nephew’s superhero-themed birthday, and it was such a hit.
His picture, in costume, surrounded by bold comic panels, looked like it belonged on the cover of its own issue.
Materials Needed
- 1 wooden or cardboard photo frame (8×10 inches or size of choice)
- 5-6 Comic book pages (depending on frame size)
- Scissors (for precise cuts)
- Mod Podge or decoupage glue (4-6 oz.)
- Foam brush or paintbrush (1-2 inches wide)
- Craft knife (optional)
- Clear acrylic sealer (spray or brush-on, optional)
Step-by-step Guide
Step 1: Choose a sturdy frame with a flat surface. Remove the glass and back panel so you can work easily.
Step 2: Cut comic book panels into squares, rectangles, or fun shapes. I usually mix character faces with action words like “Pow!” or “Zap!” for variety.
Step 3: Brush a thin layer of Mod Podge onto the frame and press down a comic piece. Then smooth out bubbles with your fingers or the edge of a card.
Step 4: Continue layering panels, overlapping slightly until the frame is completely covered. You can trim the edges carefully with scissors or a craft knife.
Step 5: Once the design looks balanced, apply a final coat of Mod Podge over the entire frame. Let it dry for 20-30 minutes.
Step 6: (Optional) Seal with a clear acrylic spray or brush-on sealer for a glossy, long-lasting finish.
Tips:
Try using panels that relate to the photo inside for example, Spider-Man pages for a Halloween costume photo or Batman scenes for a moody black-and-white picture.
