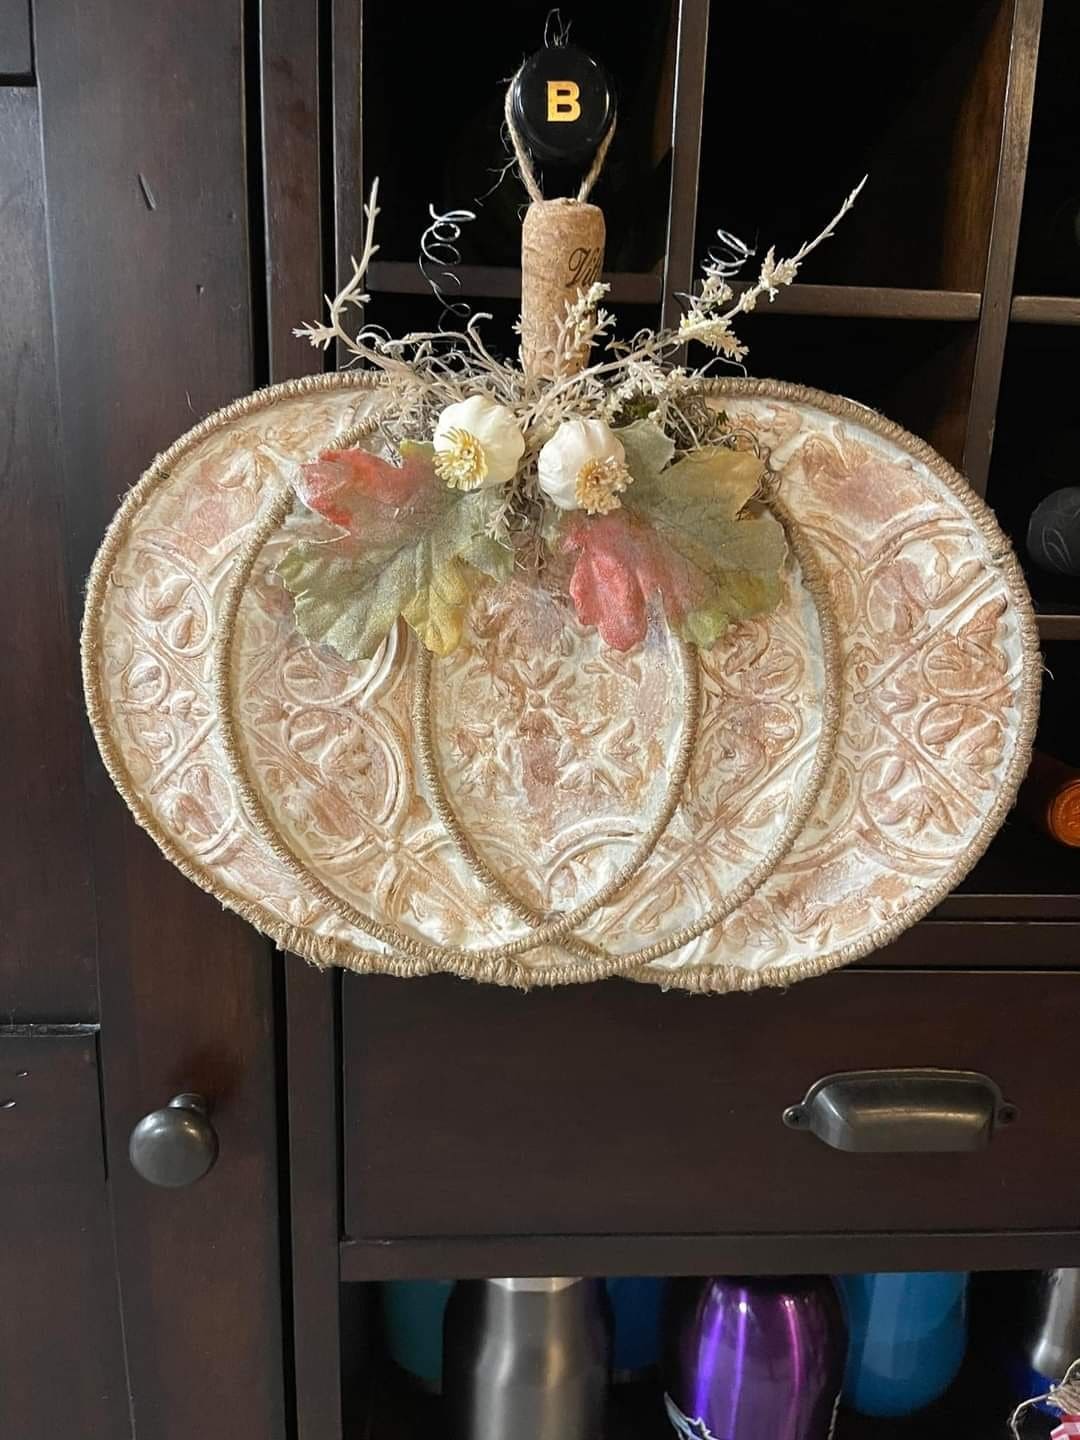
Instead of carving a real pumpkin, why not stitch one together with embroidery hoops? This project uses overlapping hoops wrapped in patterned fabric to mimic the look of a pumpkin.
Also, a wine cork makes the cutest stem, and adding faux leaves or florals transforms it into a charming décor piece that you can reuse year after year.
Materials Needed
- 3-4 embroidery hoops (various sizes to form the pumpkin shape)
- Decorative or textured fabric (damask, burlap, or patterned cotton)
- Hot glue gun and glue sticks
- Wine cork
- Artificial leaves and small faux flowers
- Twine or raffia (optional)
- Scissors
Step-by-step Guide
Step 1: Select three or four embroidery hoops of different sizes.
You now arrange them overlapping so they resemble the round curves of a pumpkin. The largest hoop should sit in the center, with smaller ones layered slightly behind to create depth.
Step 2: Cut pieces of decorative fabric to fit each hoop. Then stretch the fabric tightly and secure it inside the hoops, trimming away the excess from the back.
Step 3: Once all hoops are covered, glue them together in the pumpkin shape. Overlap the sides slightly so they look natural.
Step 4: Take a wine cork and glue it to the top center of the pumpkin as the stem. If you’d like, wrap the cork with twine or paint it for extra character.
Step 5: Add fall embellishments around the base of the stem, attach faux leaves, tiny flowers, or even small berries. Play with the arrangement until it feels balanced.
Step 6: If you plan to hang the pumpkin, glue a loop of twine or ribbon to the back. Otherwise, you can lean it against a wall or place it on a shelf.
Step 7: Display your hoop pumpkin as part of your seasonal décor. It pairs beautifully with candles, gourds, and cozy autumn colors.
