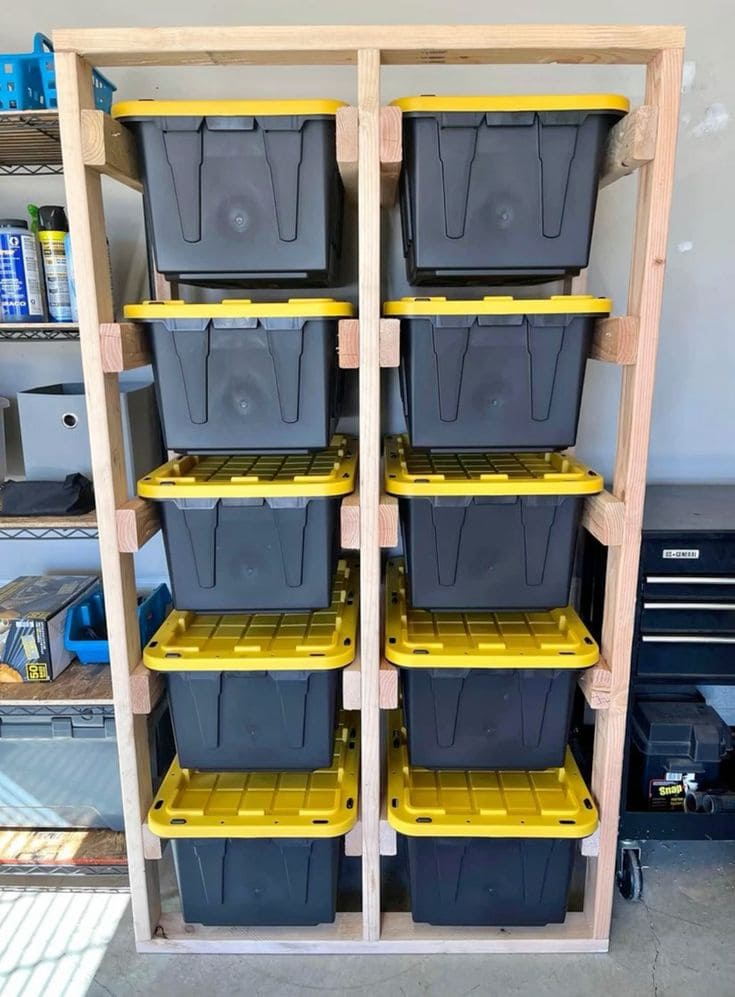
 There’s a quiet kind of power in order, especially in a garage where chaos often rules.
This dresser takes bulky storage totes, normally piled in towers that topple when you tug at the wrong one and gives them a place to breathe.
Each tote becomes a drawer, sturdy and dependable, sliding out like a secret compartment.
Bonus, the frame, though simple, feels like a backbone for your space, transforming clutter into calm rows of readiness.
It’s like taming a wild corner of your home with wood, nails, and a little patience.
Materials Needed
- 8-10 heavy-duty plastic storage totes with lids (27-gallon size works well)
- 2×4 lumber (cut to fit the height and width of your totes)
- Wood screws (2 ½″ size)
- Drill and driver bit
- Measuring tape and level
- Carpenter’s square for alignment
- Sandpaper (medium grit)
- Optional: caster wheels
Step-by-step Guide
Step 1: Measure your totes carefully including width, depth, and height. Plan the frame so each tote has its own slot, leaving at least ½″ clearance for smooth sliding.
Step 2: Cut your 2×4 lumber for the vertical supports, top, and bottom beams. Then sand the edges lightly for a clean finish.
Step 3: Assemble the outer frame first like two sides, top, and bottom. You now secure with screws and make sure everything is level and square.
Step 4: Add cross beams where each tote will sit, spacing them evenly. These beams act as slides to hold the bins in place.
Step 5: Slide in each tote to test the fit. You can also adjust spacing or sand the edges if needed so they move smoothly.
Step 6: Once the structure feels solid, load your totes with gear and label them for quick access. You now have a dresser that’s as tough as it is practical.
Tips:
I love using bright yellow or colored lids like these because they add energy to the space. Labeling each tote with bold markers makes it easy to spot what you need at a glance.
If you move often, add caster wheels to the base and watch your storage dresser roll wherever it’s needed.
