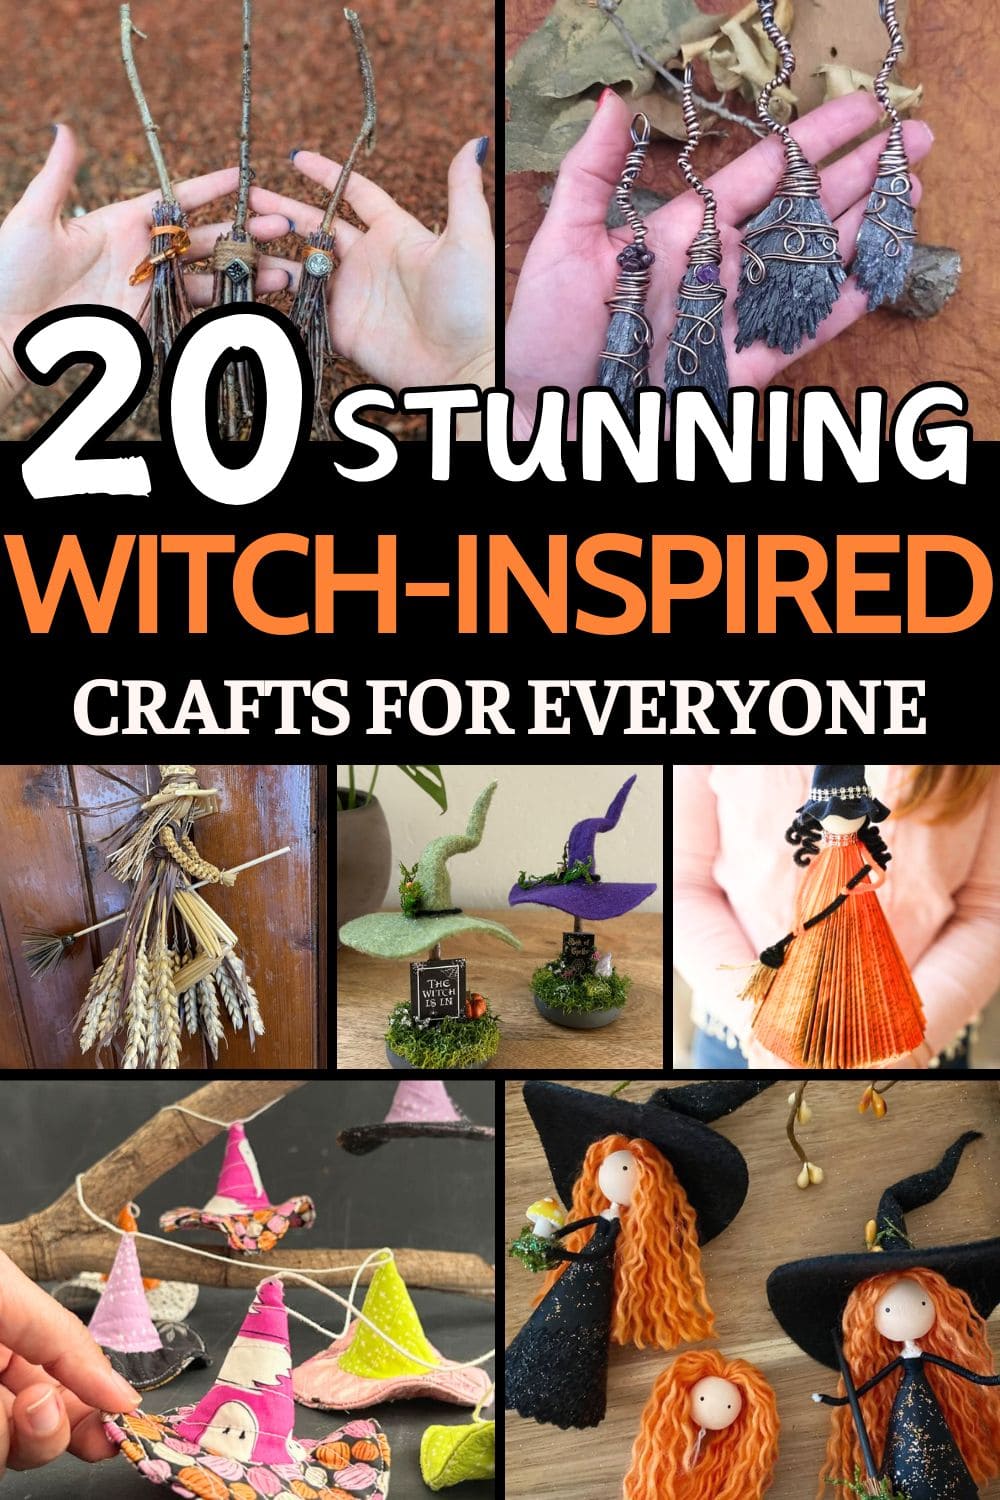
When the crisp breeze of fall rolls in, it always feels like the perfect time to dive into a new craft project. But what if your budget’s tight and you still want something that feels a little magical?
That’s where these witch-inspired crafts come in. They’re playful, spooky, and full of character without needing fancy tools or pricey supplies.
Whether you’re decorating for Halloween, sprucing up a cozy reading nook, or just adding a dash of autumn charm, these 20 craft ideas offer just the right mix of whimsy and wonder.
#1. Autumn Witches With Wild Hair
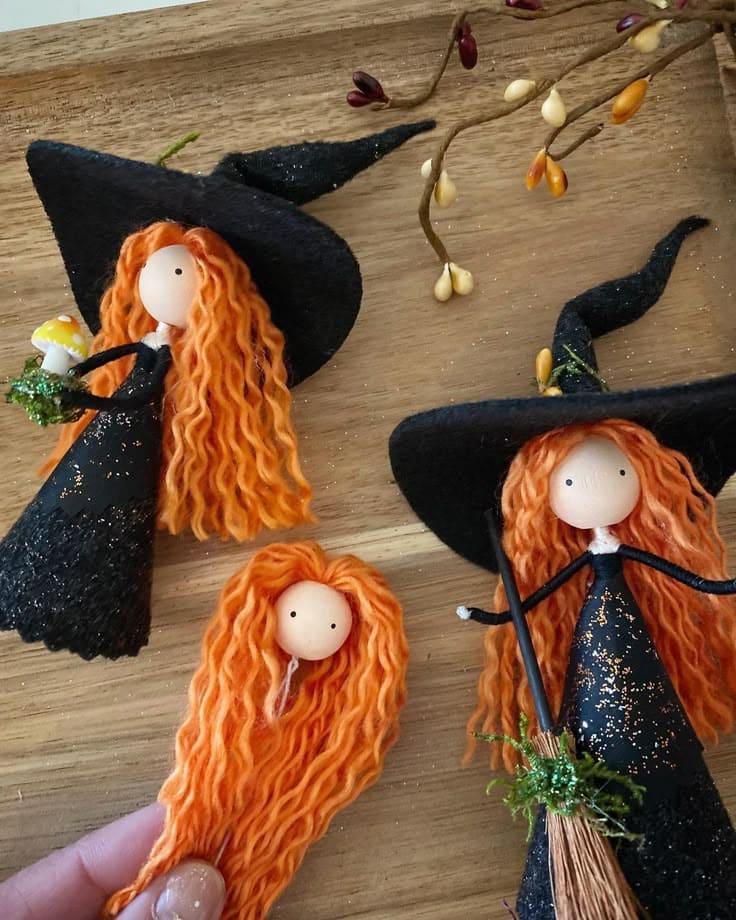
These vibrant witches look like they flew right out of a harvest fairy tale. With flowing orange yarn hair and charming little hats, they’re a perfect mix of whimsy and woodland magic.
Whether you’re decorating your Halloween tree, creating a fall centerpiece, or just crafting for the joy of it, these witches are sure to bring a smile.
Materials Needed:
- Black felt (1 sheet per 2–3 hats and dresses)
- Orange yarn (about 30 inches)
- 1 wooden bead (1″ size)
- Black pipe cleaners
- Glitter glue (optional)
- Scissors, glue gun
- Small artificial greenery, mushrooms, or mini brooms for props
Step-by-step Guide:
Step 1: Wrap yarn around your fingers 12–15 times, then slide off and cut one end to create long strands. Glue the bunch to the top of the bead to form the hair.
Step 2: Use black felt to cut out a triangle (hat cone) and a circle (brim). You want to form a cone and glue it on top of the hair.
Step 3: Roll a rectangle of black felt into a cone for the dress and glue it below the head. Then add arms using pipe cleaners.
Step 4: Add final touches with glitter, a mini broom, or a tiny mushroom.
#2. Mini Witch Broom Charms
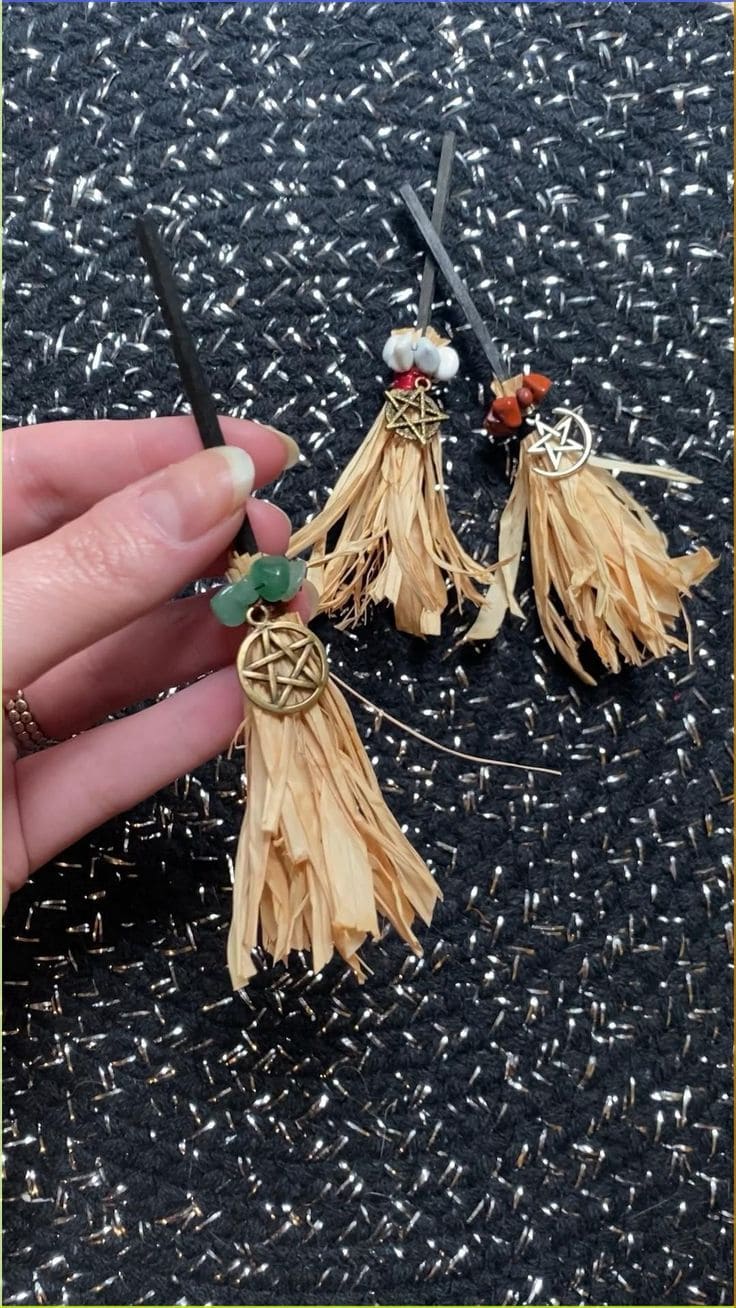
These tiny witch brooms are delicate enough to hang from a rearview mirror or tuck into a gift, but they carry a quiet power.
I made one to tie to my journal as a reminder to stay grounded, and now I can’t stop making them.
Materials Needed:
- 1 black skewer (4–5 inches long)
- Raffia strands (cut to 6–8 inches, about 10–15 pieces per broom)
- Jewelry charms (pentacles, moons, etc.)
- 1–2 decorative beads
- Hot glue gun and glue
- Thin wire
Step-by-step Guide:
Step 1: Gather your raffia and fold it in half, then wrap the fold tightly around the base of the twig and secure it with hot glue.
Step 2: Tie the raffia in place with a small length of wire or string. Trim the bottom to give it a clean shape.
Step 3: Slide a couple of beads onto the twig, resting just above the broom’s handle. You can also add your charm to hang between the beads.
Read more: 20+ Unique DIY Witch Broom Ideas to Elevate Your Halloween Style
#3. Book Page Witch Centerpiece
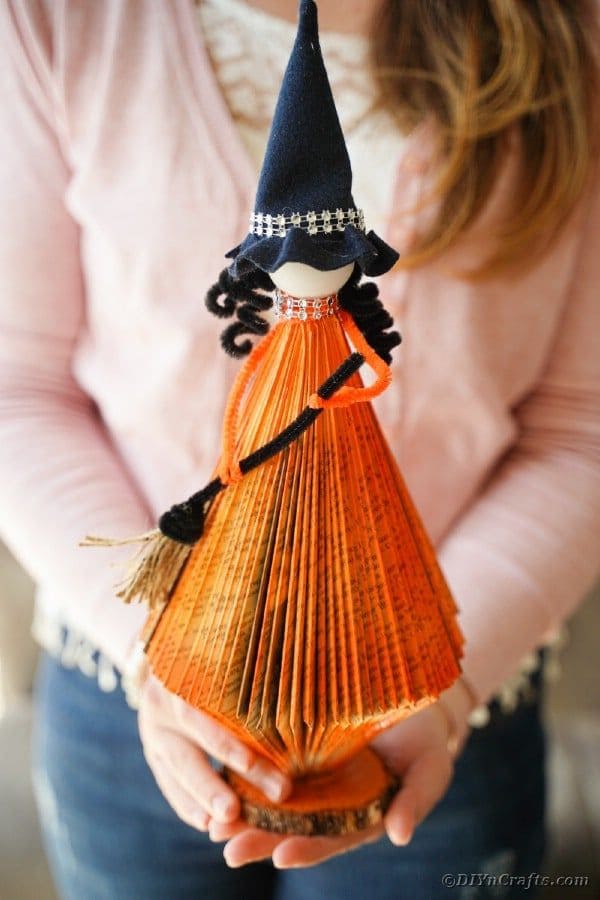
This charming witch was once a forgotten paperback, now turned into a magical fall decoration. With her pointed hat, paper gown, and tiny broom, she brings a soft, vintage Halloween feel.
Specially, you can set her on a mantel, your entry table, or gift her to someone who still believes a little magic lives between the pages.
Materials Needed:
- 1 old paperback book (100–150 pages)
- Black felt
- Orange paint
- 1 small wooden bead (head)
- Pipe cleaners (black and orange)
- Mini twig
- Glue gun
- Wood slice
Step-by-step Guide:
Step 1: Fold each page of the book inwards so the top and bottom corners meet the spine, creating a cone shape. You need to do this for the whole book.
Step 2: Lightly paint the folded pages orange. Let dry, then glue the base to a small wood slice.
Step 3: Roll felt into a cone for the witch hat, glue in place. Add pipe cleaners to the wooden bead and attach it as the head.
Step 4: Glue the head on top of the book, then twist yarn and a twig to create the broom.
#4. Recycled Bottle Witch
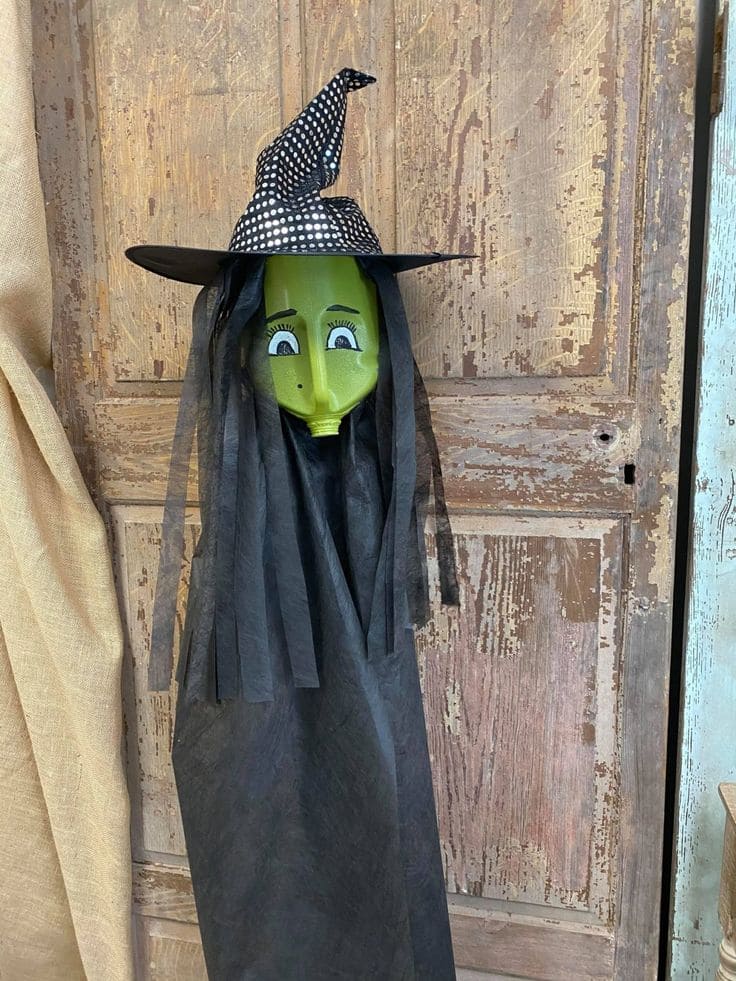
Who knew an empty bottle could make such a fabulously creepy witch? This DIY is perfect if you love budget-friendly crafts that turn ordinary trash into Halloween treasure.
With a few scraps of black fabric and a witchy hat, this project brings eerie charm to your front porch or classroom. It’s quirky, and it only takes about 20–30 minutes to make!
Materials Needed:
- 1 large plastic bottle (1.5–2L, green if possible)
- Black fabric or trash bags (approx. 1 yard)
- Tissue paper strips
- Witch hat (store-bought or homemade from cardstock)
- Googly eyes
- Hot glue gun
- Scissors and black marker
Step-by-step Guide:
Step 1: Clean and dry your bottle. If it’s not green, you can paint it or wrap it with green paper.
Step 2: Draw or glue on spooky facial features such as big googly eyes and a sharp, hand-drawn nose add personality.
Step 3: Cut strips of black tissue paper and glue them around the bottle neck to make flowing hair.
Step 4: Drape black fabric around the bottle, gluing or taping it in place to form the witch’s gown.
Step 5: Top it off with a witch hat and hang it near your doorway or prop it on a chair.
#5. Popsicle Stick Witch Puppets
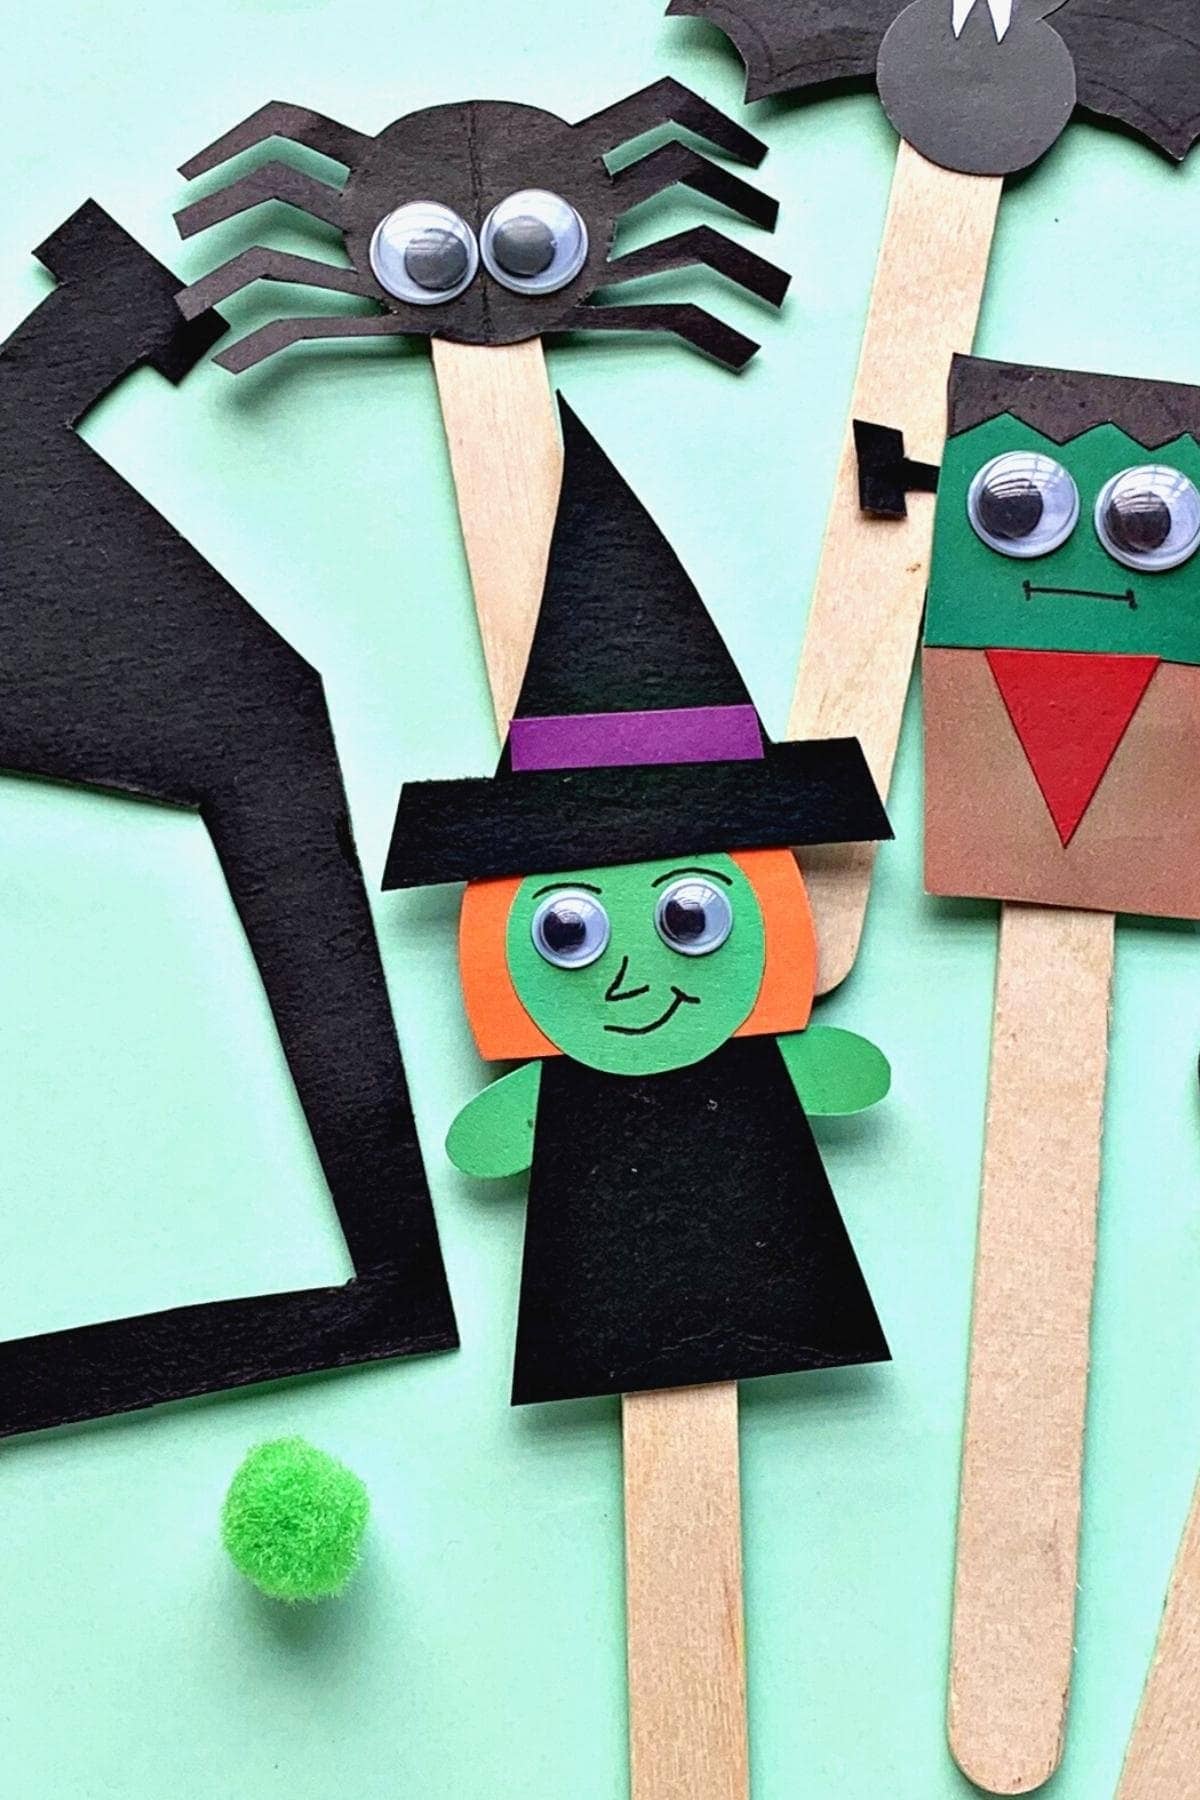
Whether you’re making Halloween puppets for story time or just want a super quick craft to keep little hands busy, this popsicle stick witch is a total treat.
Kids love mixing and matching the paper shapes, and with some googly eyes and a bit of glue, you’ll have a puppet show in no time.
Materials Needed:
- 1 wooden craft stick (4.5″ size)
- Black, orange, green, and purple construction paper
- 2 googly eyes (medium size)
- Glue stick
- Black marker
- Scissors
Step-by-step Guide:
Step 1: Cut out a black triangle for the witch’s dress, a black hat, and a purple band. You want to trim a circle for the face and small ovals for hands.
Step 2: Glue the dress to the craft stick first, then layer on the face, hands, and hat.
Step 3: Add orange strips for hair on the sides of the face, then glue on the googly eyes and draw a smile.
Step 4: Let everything dry, then grab your witch and get ready to cackle and create your own Halloween puppet show.
#6. Spooky Witch Gnomes
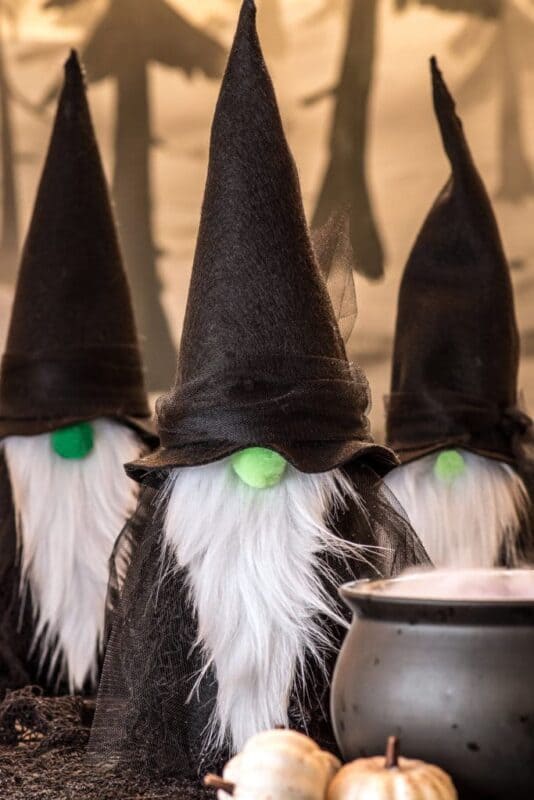
With their tall black hats, glowing green noses, and fuzzy white beards, they look like they’ve just stepped out of a haunted forest.
This is one of those crafts where the charm is in the simplicity. You can whip up a whole coven in an afternoon, and they’re budget-friendly, too.
Materials Needed:
- Black felt sheets (1 per gnome)
- White faux fur (6” x 6” per gnome)
- 1 small green pom-pom
- Cone form
- Black mesh or tulle (optional)
- Glue gun
Step-by-step Guide:
Step 1: Wrap black felt into a tall cone and glue to secure. Then wrap a strip of black mesh around it for texture if you’d like.
Step 2: Cut a triangle of faux fur for the beard and glue it to the front of your cone, just below where the brim would be.
Step 3: Add the green pom-pom right above the beard. It should peek out just beneath the hat brim.
Step 4: Sit your witch gnome on a flat surface or add a small weight inside to keep it upright.
#7. Mini Witch Hat Garland
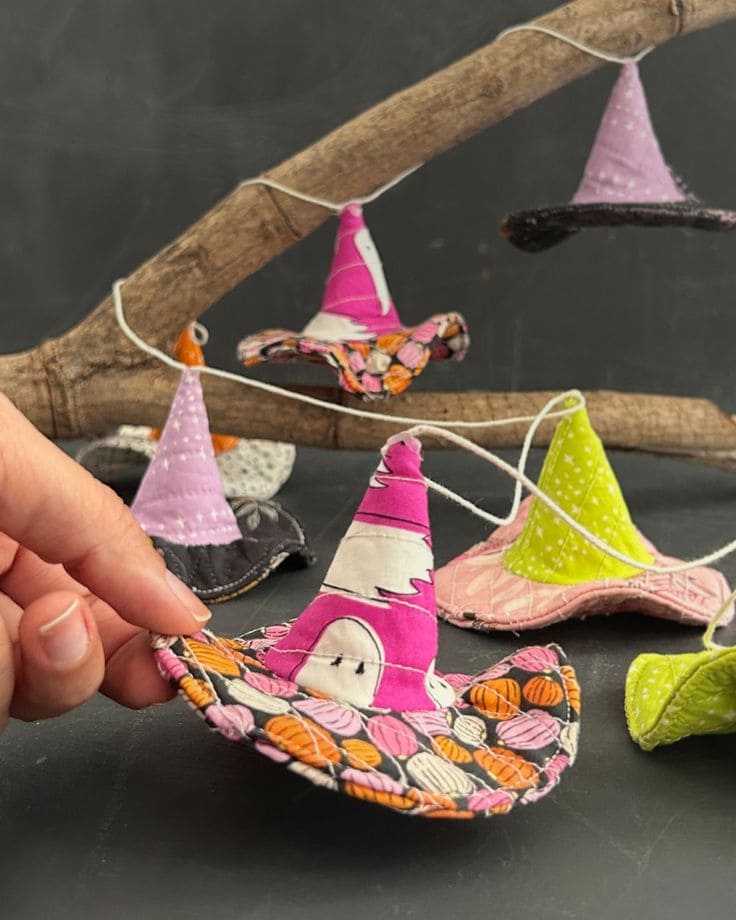
If you’ve got a few fabric scraps lying around, this project is calling your name. It’s fun, quick, and makes you feel like you’re stitching up a spell.
Besides, you should choose bold prints or soft pastels as each one becomes its own quirky character. You don’t have to be a sewing expert to pull these off.
Materials Needed:
- Fabric scraps (around 5″x5″ per hat, in assorted colors/patterns)
- 1 lightweight interfacing per hat
- Needle and thread
- Hot glue
- String or twine
- Scissors and a pen
- Optional: batting or fiberfill
Step-by-step Guide:
Step 1: Trace and cut out two fabric pieces, one for the cone and one for the brim. Then you add interfacing or felt to strengthen the fabric, especially the brim.
Step 2: Roll the cone piece into a hat shape and sew or glue the seam. You can lightly stuff it to give it body if you like.
Step 3: Attach the cone to the brim with glue or a few hand stitches. Add any embellishments (buttons, mini stars, lace) if you’re feeling extra creative.
Step 4: Thread a piece of string through the top of each hat or glue the hats to a garland string.
#8. Sparkly Standing Witch Dolls
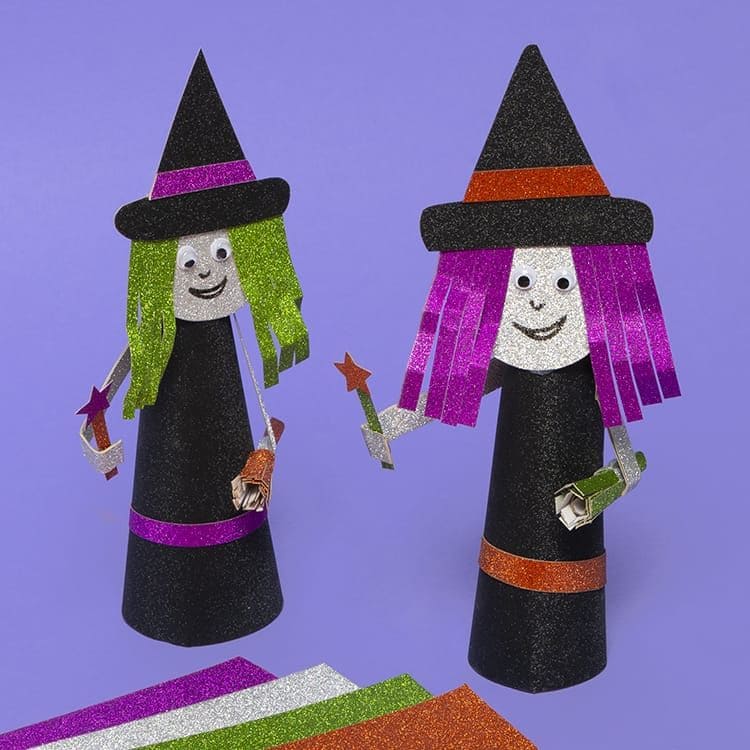
Looking for a magical way to brighten up your Halloween table or bookshelf? These sparkly standing witch dolls are packed with personality, shimmer, and a sprinkle of fun.
The best part is that you can whip up a whole coven with just a few sheets of glitter foam and a little imagination.
Materials Needed:
- 1 sheet black glitter foam
- Small scraps of glitter foam (green, purple, silver, orange, etc.)
- 2 googly eyes per witch
- Glue gun
- Scissors and tape
- Optional: paper scrolls, glitter star cutouts
Step-by-step Guide:
Step 1: Cut a black cone shape and roll it into a standing body, then tape to secure. Do the same with a triangle for the hat and add a colored strip for the hatband.
Step 2: Cut out a face from silver foam, add googly eyes, and draw a smile. For the hair, cut fringe from colored glitter foam and glue behind the face.
Step 3: Attach the head to the cone body, then create two arm strips and glue little wands or scrolls into each hand.
Step 4: Let your witches dry upright, then display your magical glitter gang with pride!
#9. Broomstick Witch Dolls
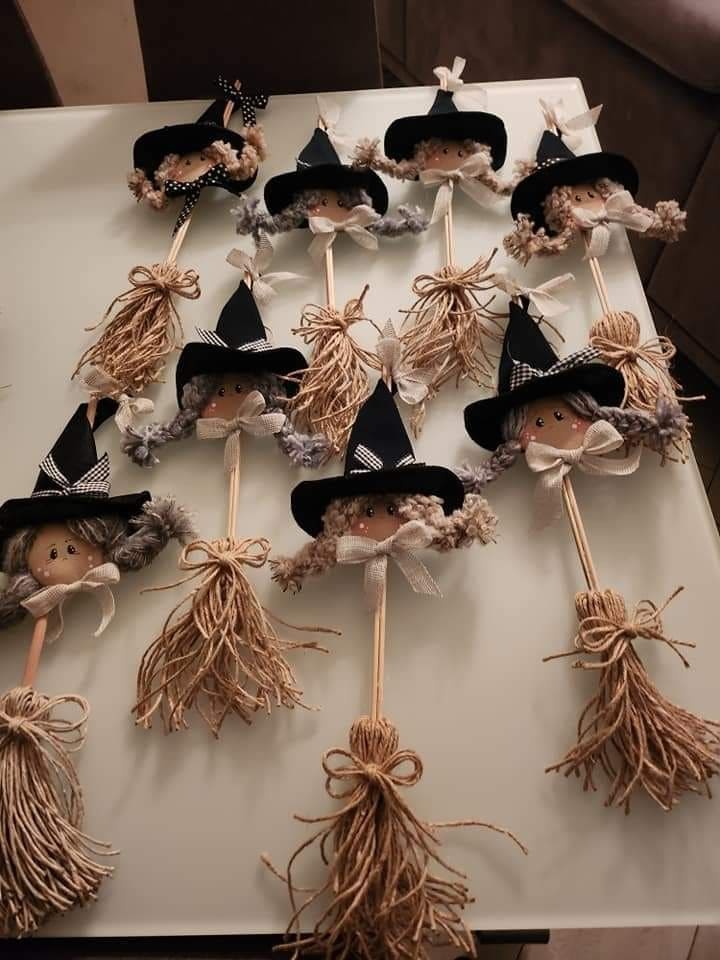
These cheerful little witches are full of rustic charm and cozy autumn magic. Their sweet faces and soft hair give off just the right mix of spooky and heartwarming like a friendly witch who bakes cookies on her broom.
Materials Needed:
- Wooden dowels (10–12″ long, 1 per witch)
- Black felt (approx. 4×4″ per hat)
- Yarn
- Small wooden balls (1–1.5″ diameter)
- Ribbon scraps, blush or paint for cheeks, black pen/marker
- Hot glue gun, scissors
Step-by-step Guide:
Step 1: Draw or paint a simple face on each wooden ball, then add pink cheeks for extra sweetness.
Step 2: Glue on strands of yarn to make the hair, then top it off with a black felt witch hat (cut triangle, roll, and glue).
Step 3: Tie the head to one end of the dowel, then wrap jute tightly around the other end to form the broom bristles and secure with ribbon or twine.
Step 4: Add finishing touches with bows on the hats, maybe tiny stars or fabric patches.
#10. Paper Plate Witch Craft
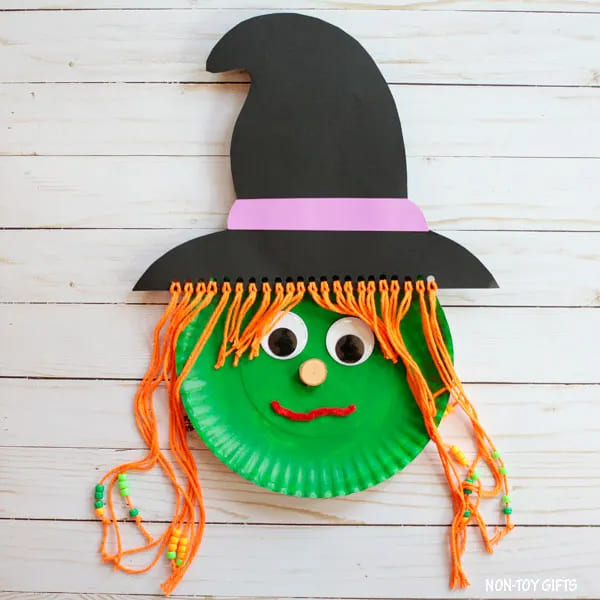
Looking for a not-so-scary Halloween project that kids can actually finish and feel proud of? This paper plate witch is it!
With bright yarn hair, a bold green face, and a big floppy hat, she’s as charming as she is easy to make. Kids can add their own flair and it only costs about $3–$5 if you grab supplies from the dollar store.
Materials Needed:
- 1 paper plate (green or painted green)
- Black cardstock (for hat)
- Pink paper strip (hatband)
- Orange yarn (about 2 feet)
- 2 googly eyes (1″ size)
- 1 small pom pom (nose)
- 1 red pipe cleaner (mouth)
- Assorted beads (optional for hair)
- Glue stick or craft glue
Step-by-step Guide:
Step 1: Paint or color the paper plate green (skip if already green), then let it dry.
Step 2: Cut out a witch hat shape from black paper and glue it to the top of the plate. You can add a pink band for a pop of color.
Step 3: Cut the yarn into strands, tie some beads on, and glue across the top for the witch’s hair.
Step 4: Glue on googly eyes, a pom pom nose, and bend a red pipe cleaner into a smile.
#11. Pinecone Pocket Witches
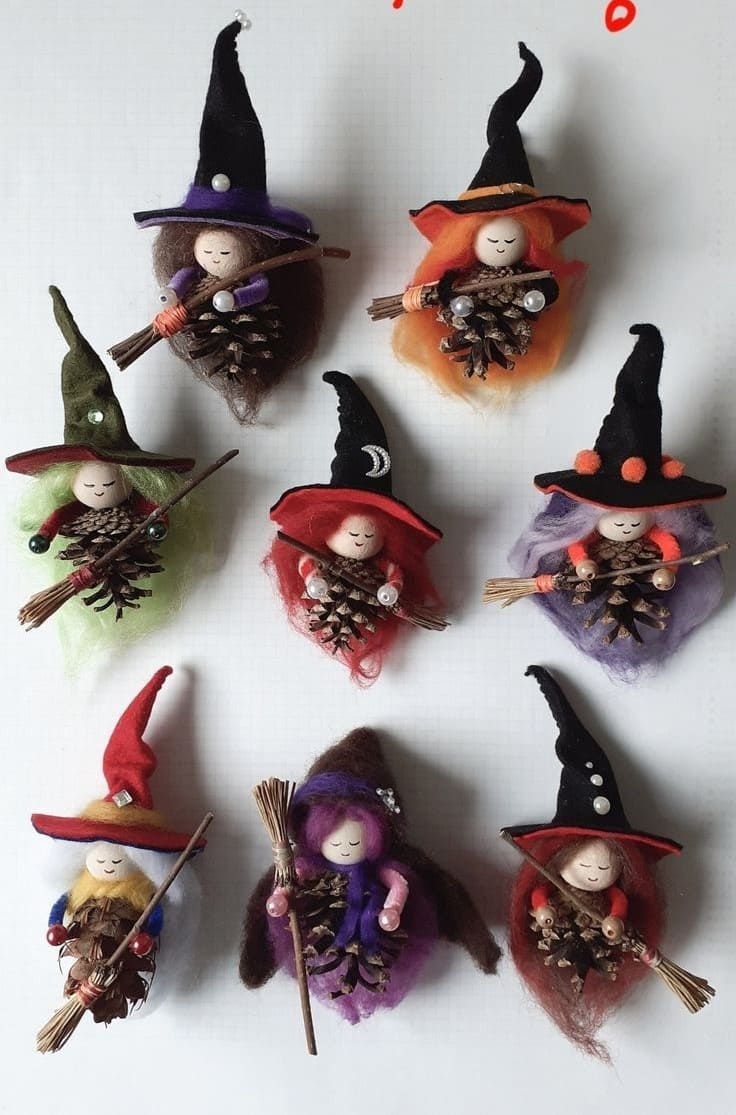
These tiny pinecone witches are pure joy in miniature form. Each one tells its own story and maybe she’s a good-luck charm, a forest guardian, or a little spell-caster who keeps your home cozy.
You can hang them on a seasonal tree, gift them as fall surprises, or let them perch on your desk. What I love most is that each witch feels alive in her own quiet way.
Materials Needed:
- Small pinecones (cleaned and dried, 1 per witch)
- Wooden beads (¾”–1″, with holes)
- Wool roving or soft yarn
- Felt sheets (black, orange, purple – 4×4″ squares)
- Small sticks
- Glue gun and glue sticks
- Fine-tip pen
- Optional: sequins, thread, tiny bells, charms
Step-by-step Guide:
Step 1: Start by adding hair to the wooden bead using glue and strands of wool roving, then tuck it behind the face area.
Step 2: Draw simple, sleepy eyes and a smile on the bead using a fine pen. You don’t need fancy details, the softness makes them feel more magical.
Step 3: Glue the wooden bead onto the top of the pinecone. Now it looks like a robed figure.
Step 4: Cut felt into triangles, roll them into cone shapes, and secure to form hats, then add little stitches, moons, or dots if you like.
Step 5: Bundle a few mini twigs and tie with thread to form brooms, then glue one to each witch’s hand.
#12. Rustic Straw Witch Decoration
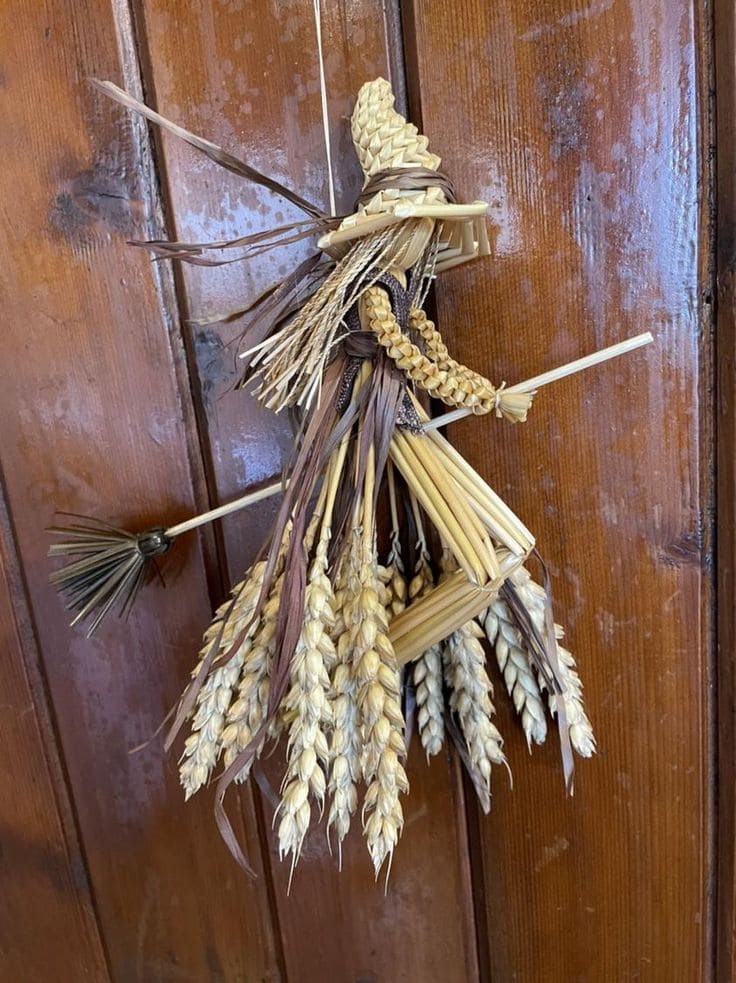
This charming little witch brings a whisper of the harvest season and folklore magic right to your door.
You don’t need fancy tools or pricey supplies, just your hands, some patience, and a fondness for textures. Then hang her on a door, a beam, or anywhere you’d like a touch of handmade warmth and Halloween spirit.
Materials Needed:
- 20-15 wheat stalks (10–12″ long)
- Dried wheat heads (6–8 heads)
- Brown raffia
- Thin jute
- 1 small stick (approx. 6–7″ long)
- 1 shorter stick (3–4″)
- Hot glue gun (optional)
Step-by-step Guide:
Step 1: Bundle several wheat stalks to form the witch’s body, then tie tightly near the top and again mid-section to shape a torso and base.
Step 2: Insert a smaller bundle of raffia sideways for the arms, tying them in the middle of the body.
Step 3: Add the wheat heads around the lower part, tucking them behind the skirt strands and securing with string.
Step 4: Use tightly braided straw or raffia to form a small cone-shaped hat, then attach it on top of the bundle with twine.
Step 5: Build a broom by tying short straw tips to one end of the long stick, then place it under her hands.
#13. Enchanted Herb Witch Broom
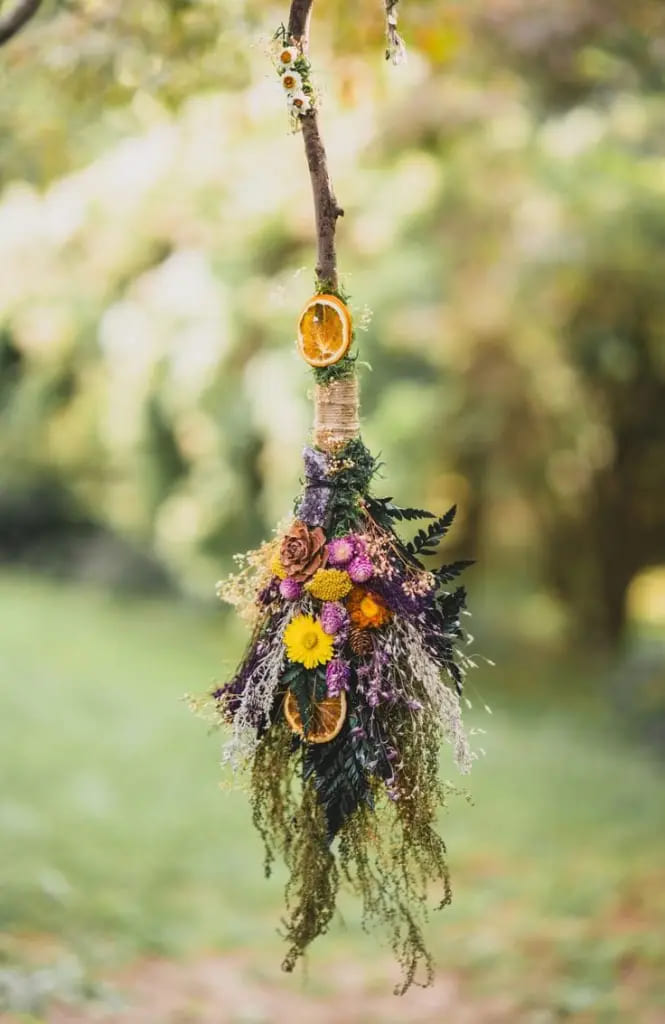
You can hang this on a door, over a hearth, or even outside on a tree for a spellbinding effect. What makes it extra special is how it blends witchy folklore with nature’s calm.
Materials Needed:
- 1 sturdy tree branch (about 20–30″ long)
- Twine or floral wire
- 2 dried orange slices
- Bundle of mixed dried herbs and wildflowers (around 20–30 stems total)
- Optional: cinnamon sticks, pinecones, feathers, or faux spider webs
Step-by-step Guide:
Step 1: Start by wrapping twine tightly around one end of your stick, leaving some space to attach the “bristles.” Secure with a knot and a dab of hot glue.
Step 2: Gather your herbs and flowers in a fanned-out shape, arranging from largest to smallest. Bind them tightly with wire.
Step 3: Attach the bundle to the wrapped end of your stick with wire or more twine, making sure it’s secure and even.
Step 4: Tuck in dried orange slices, feathers, or pinecones using hot glue for a natural, enchanted finish.
#14. Witch Hat Jar Topper
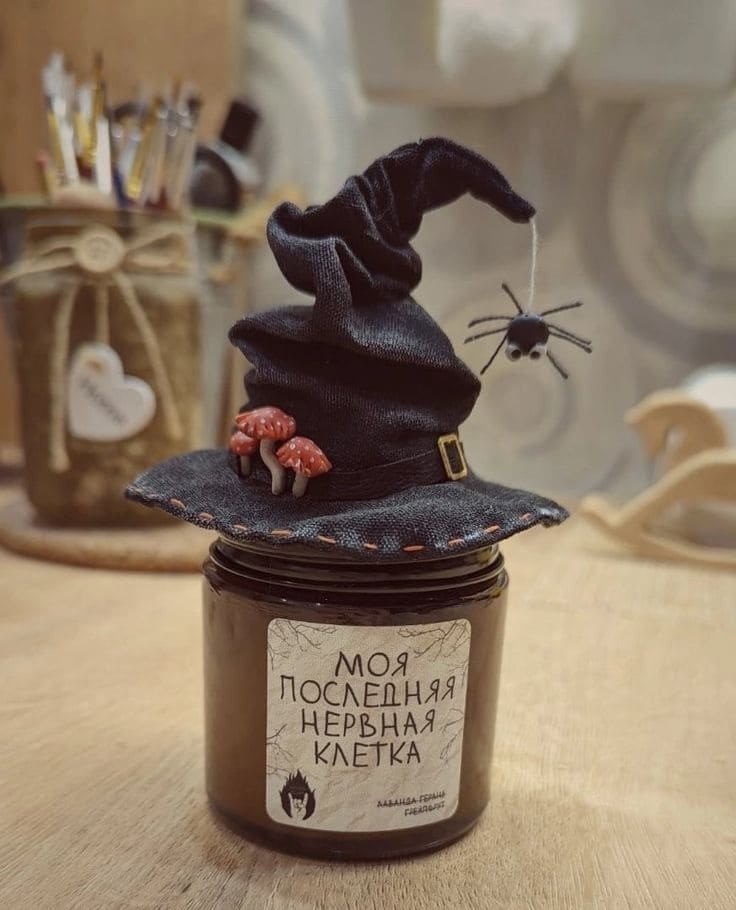
This crooked witch hat turns any jar into a Halloween showpiece. The floppy tilt, the hanging spider, and the tiny mushrooms give it so much character.
Perfect for gifts, decor, or just something fun for your shelf. And the best part is that you probably already have everything you need.
Materials Needed:
- Scrap black fabric (approx. 10” square)
- Small piece of felt
- Needle & thread
- Small jar with lid
- Polyfill
- Optional: tiny faux mushrooms, thread, googly eyes, pipe cleaner
Step-by-step Guide:
Step 1: Cut a circle for the brim (about 4–5″ wide) and a triangle for the cone. You stitch the cone into shape, stuff it lightly, then attach it to the brim.
Step 2: Sew a thin strip of black fabric around the base as a belt and add a tiny buckle cut from felt or gold paper.
Step 3: Decorate with mini mushrooms, embroidery stitches, or lace if you’d like. For the spider, attach thread to the tip of the hat and dangle a small pom-pom with glued-on googly eyes and legs.
Step 4: Sit the finished hat gently on top of your jar.
#15. Mini Witch Hat Terrariums
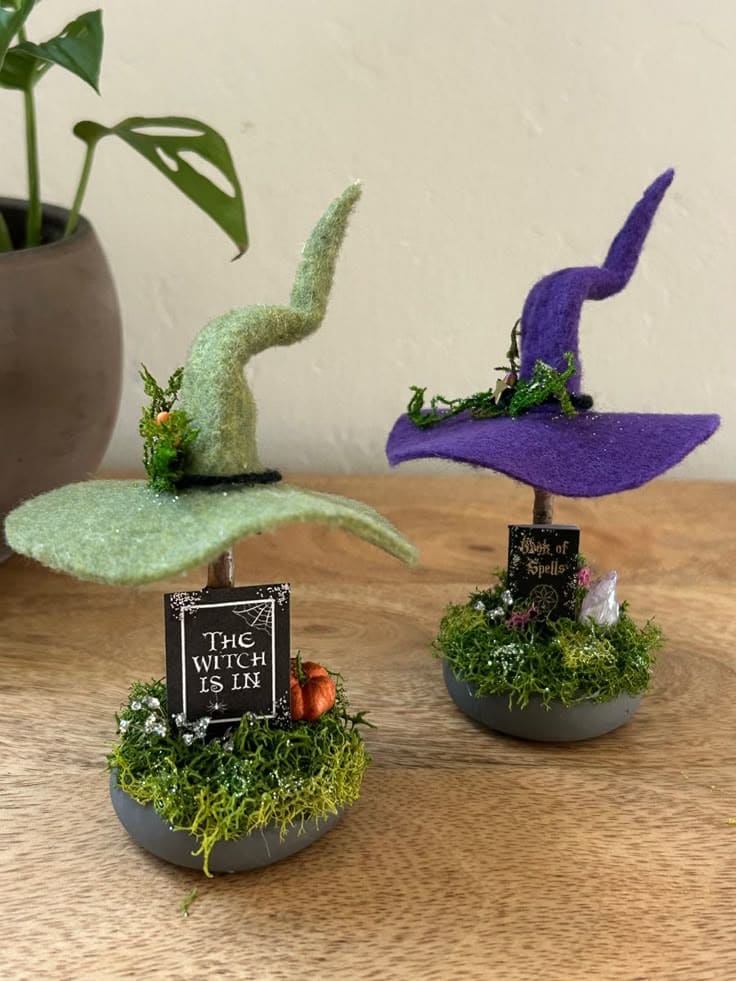
These little witch hat terrariums feel like they popped out of a fairy garden, complete with spellbooks, pumpkins, and magical signs.
Also, you can easily use them to decorate for Halloween or just love tiny whimsical worlds.
Materials Needed:
- Small round base (2″ plastic cap or wood slice)
- Felt in green and purple (approx. 6″ square)
- Faux moss, mini signs, tiny accessories (buttons, beads, clay shapes)
- Hot glue gun, scissors, stiffener (optional)
Step-by-step Guide:
Step 1: Cut a large felt circle for the brim and a matching triangle to form the cone. Glue the cone closed, slightly twist the top, and attach it to the brim.
Step 2: Cover your base with moss using hot glue, then glue the finished hat in the center.
Step 3: Decorate around the hat with mini pumpkins, mushrooms, glittery vines, or handmade spellbooks using paper scraps.
Step 4: Add a sign to bring it to life. “The Witch Is In” or “Book of Spells” works great—just a touch of magic in your everyday space.
#16. Mini Glam Witch Hat Pin
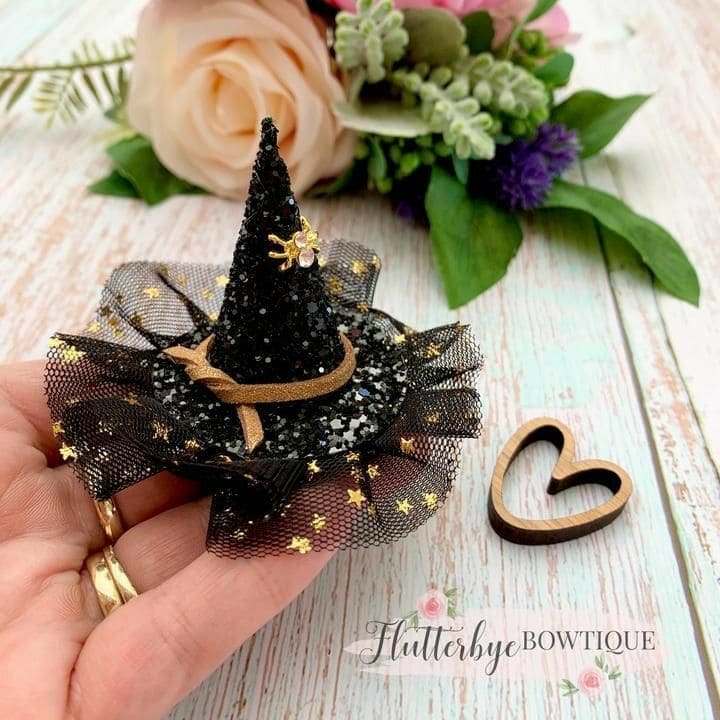
If you’ve ever dreamed of combining sparkle and spellwork, this mini glam witch hat is for you. It’s the kind of piece you’d expect a stylish little witch to wear on a tea date with her coven.
Materials Needed:
- 2 black glitter foam sheet
- Gold ribbon (1/4″ wide, 6 inches)
- Decorative spider charm
- Black mesh with star details (4″ x 8″)
- Hot glue gun
- Small circular base
Step-by-step Guide:
Step 1: Cut the black glitter foam into a cone and glue the edges together to form the hat point.
Step 2: Wrap and glue the gold ribbon around the base of the cone. Add your spider charm where the ribbon overlaps.
Step 3: Gather the black mesh into a ruffle and glue it to the circular base. Then, attach the hat cone on top of the mesh.
Step 4: Let it dry completely. Add a pin back or hair clip underneath if you want to wear it!
#17. Felt Cone Witch Doll
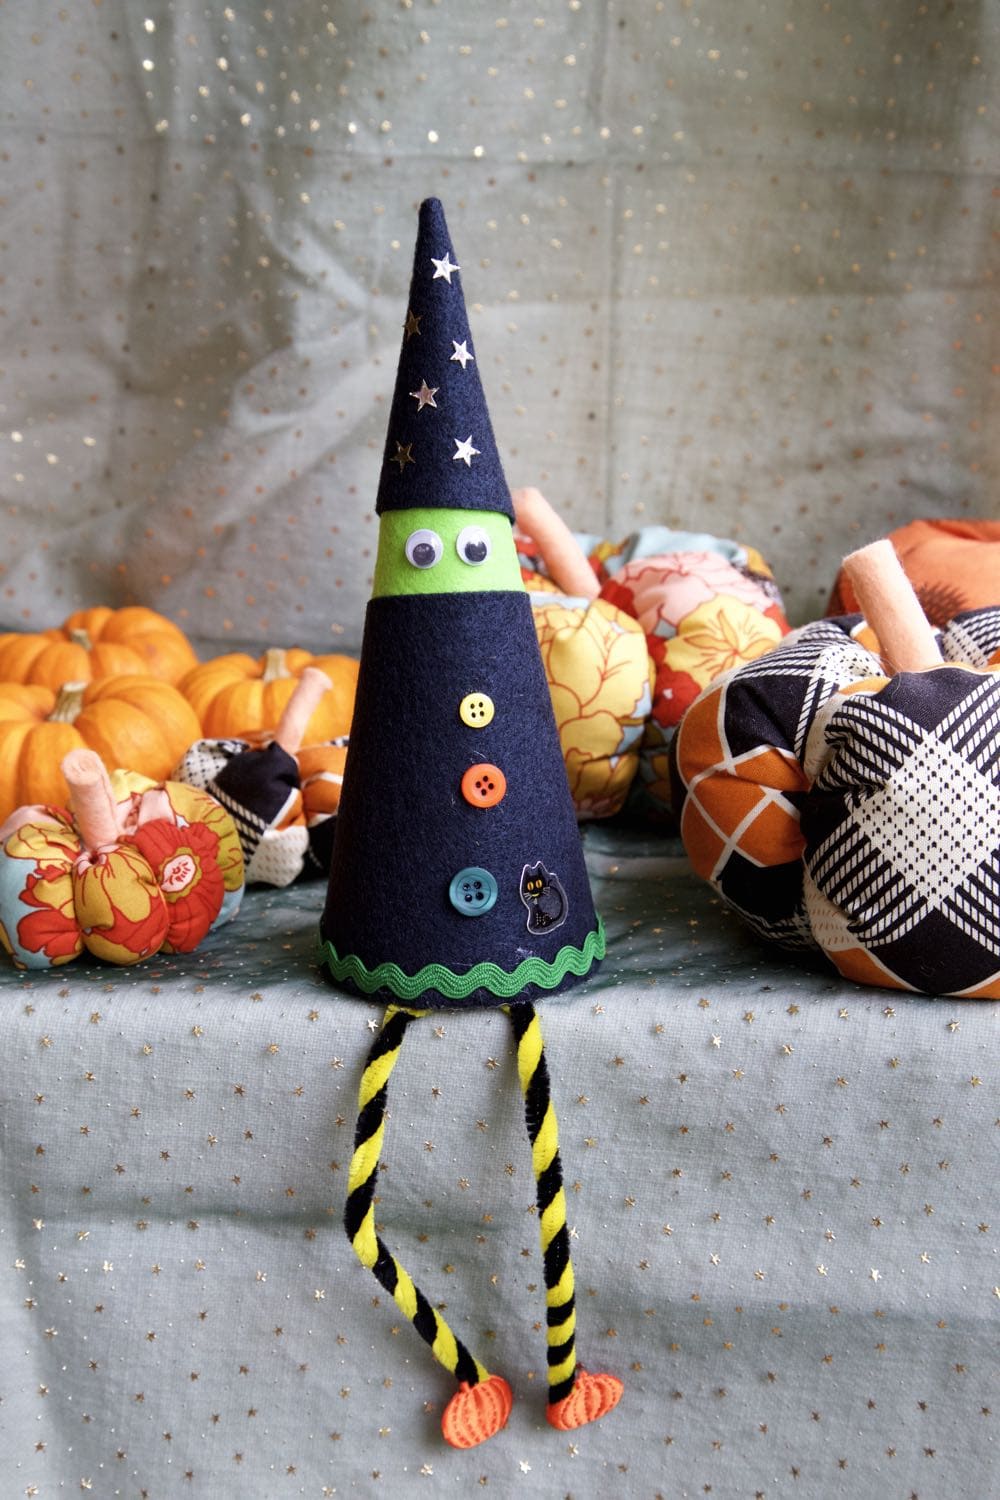
This quirky little witch is equal parts cute and spooky, perfect for a playful Halloween touch. She’s the kind of decoration that makes kids giggle and adults smile, especially with those striped legs and wiggly eyes.
Materials Needed:
- Dark blue and green felt sheets
- 2 googly eyes (medium size)
- 4 assorted buttons
- 1 pair of small yarn
- 2 yellow and black striped pipe cleaners
- Green rickrack trim (10 inches)
- Small Halloween patch
- 5-7 star stickers
- Hot glue
Step-by-step Guide:
Step 1: Cut a cone shape from the dark blue felt and glue the edges together to form the body. Then cut a small green strip to peek out as the face and glue it at the top.
Step 2: Attach the googly eyes and decorate the cone with buttons, star stickers, and a Halloween patch or sticker.
Step 3: Wrap the pipe cleaners around a pencil to curl slightly, then glue them to the base of the cone as legs and attach small felt shoes at the ends.
Step 4: Finish by gluing the green rickrack around the bottom edge as a little skirt hem.
#18. Enchanted Wire-Wrapped Crystal Broom Charms
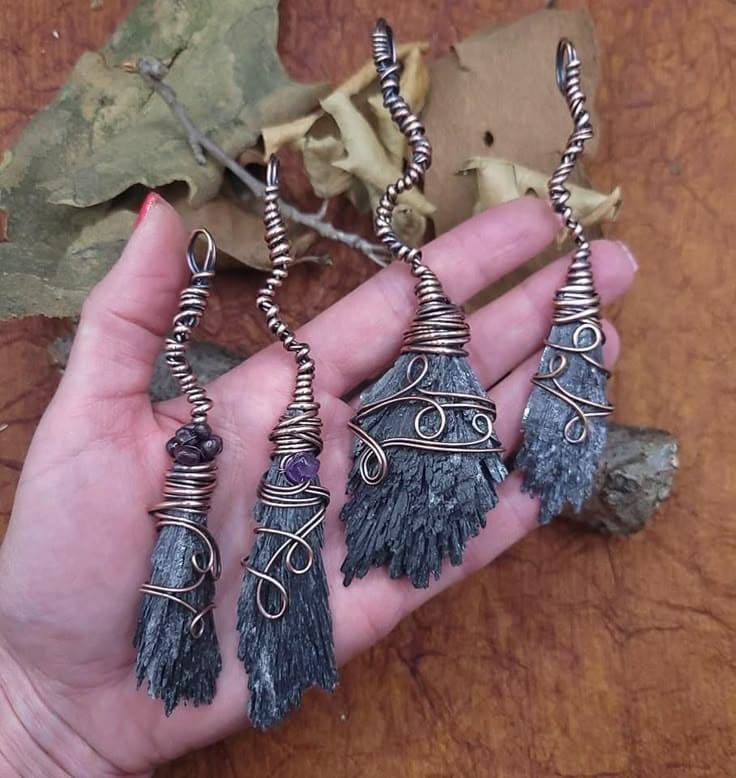
Woven from copper wire and dark raw crystal (likely black kyanite), each one feels like it holds a little enchantment of its own. So it’s best to add it to a keychain, or gift it to a witchy friend.
Materials Needed:
- Raw black kyanite blades (approx. 2–3 inches each)
- Copper wire (20-24 gauge, around 20–30 inches per broom)
- Round-nose pliers, wire cutters
- Optional: small gemstone beads (e.g., amethyst or obsidian)
Step-by-step Guide:
Step 1: Cut your wire and begin tightly wrapping the top of the crystal. You should leave extra for the broom handle.
Step 2: Use pliers to curl and shape decorative swirls.
Step 3: Add a bead near the top if desired, then spiral the remaining wire upward into a whimsical broomstick tip.
Step 4: Tuck in sharp ends, adjust for comfort, and wear your magical charm with pride.
#19. Rainbow Witch Yarn Doll
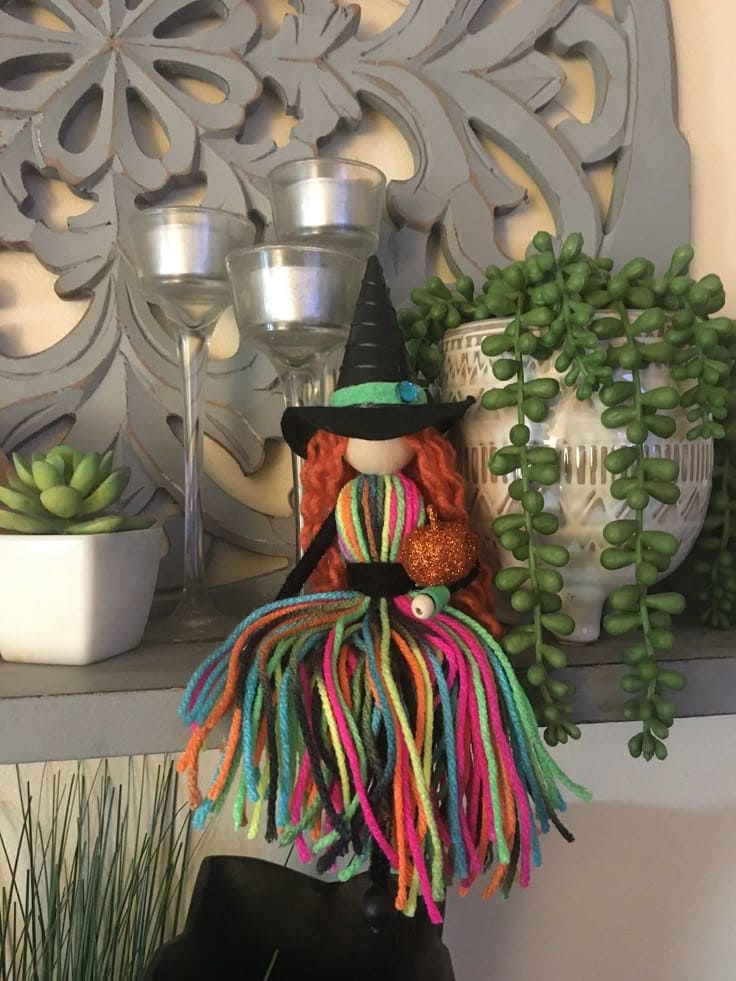
This vibrant little witch brings a burst of joy and color to any Halloween nook. It is perfect if you love color, texture, and a bit of quirky charm. Plus, you likely have most of the materials already if you’re a yarn crafter!
Materials Needed:
- 1 small wooden bead (1” for head)
- 1 black pipe cleaner
- 40–50 strands of colorful yarn (each 12” long)
- 1 small black felt triangle
- Scrap felt
- Mini Halloween accessories (like a glitter pumpkin)
- Hot glue gun and scissors
Step-by-step Guide:
Step 1: Bundle the yarn strands together and fold them in half to form the skirt. Then thread the folded end through the bead and tie securely at the neck.
Step 2: Slide the pipe cleaner through the yarn bundle just under the head, shaping the arms and bending the ends.
Step 3: Wrap and glue the black felt triangle into a cone hat. You can dcorate it with a ribbon or mini flower.
Step 4: Glue the hat to the top of the bead head, add felt details like a belt, then let your witch hold a mini prop to finish her magical look!
#20. Mini Witch Brooms From Nature
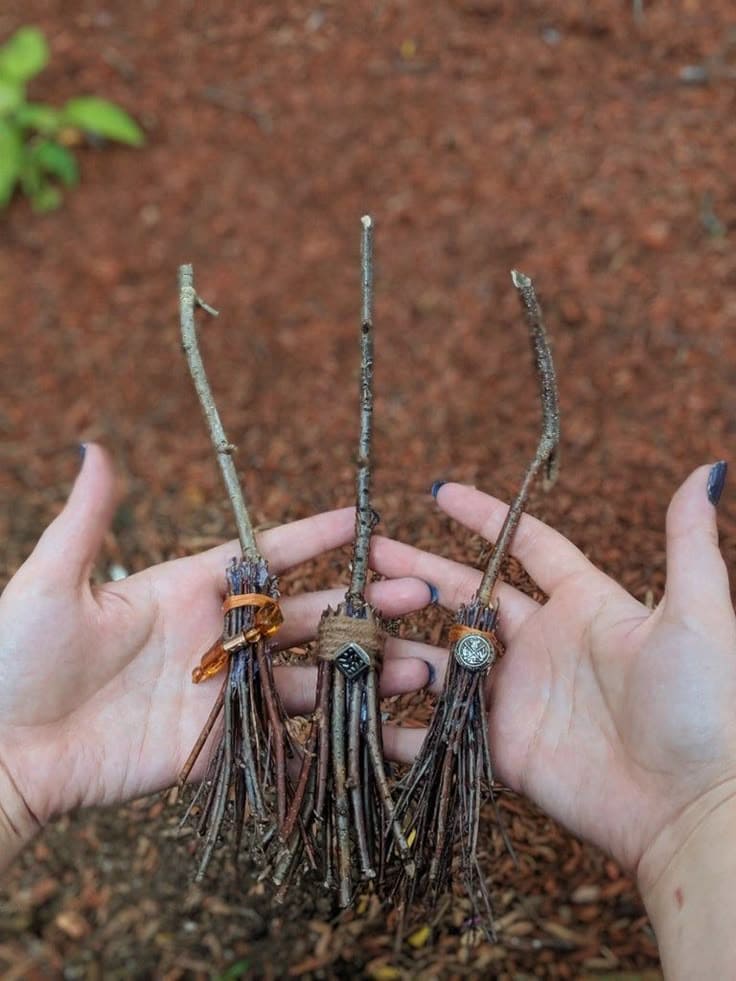
This project feels like plucking straight from an autumn fairy tale and of course, you cand your kids can do some for Halloween centerpiece, or simply gifting some woodland magic.
Materials Needed:
- 3 straight twigs (5–7″ long)
- 30–40 thin twigs per broom (4–6″ long)
- Jute twine
- Charms, beads, or crystals (optional embellishments)
- Hot glue gun (optional)
Step-by-step Guide:
Step 1: Gather small, flexible twigs and align them around the base of a longer stick.
Step 2: Wrap the jute twine tightly around the base, about 1–2 inches from the bottom of the handle, securing the smaller twigs in place.
Step 3: Add your magical touch by gluing a small crystal to the base for a personal vibe.
Step 4 (optional): Use hot glue if you want a sturdier broom, especially for gifting or display outdoors.
