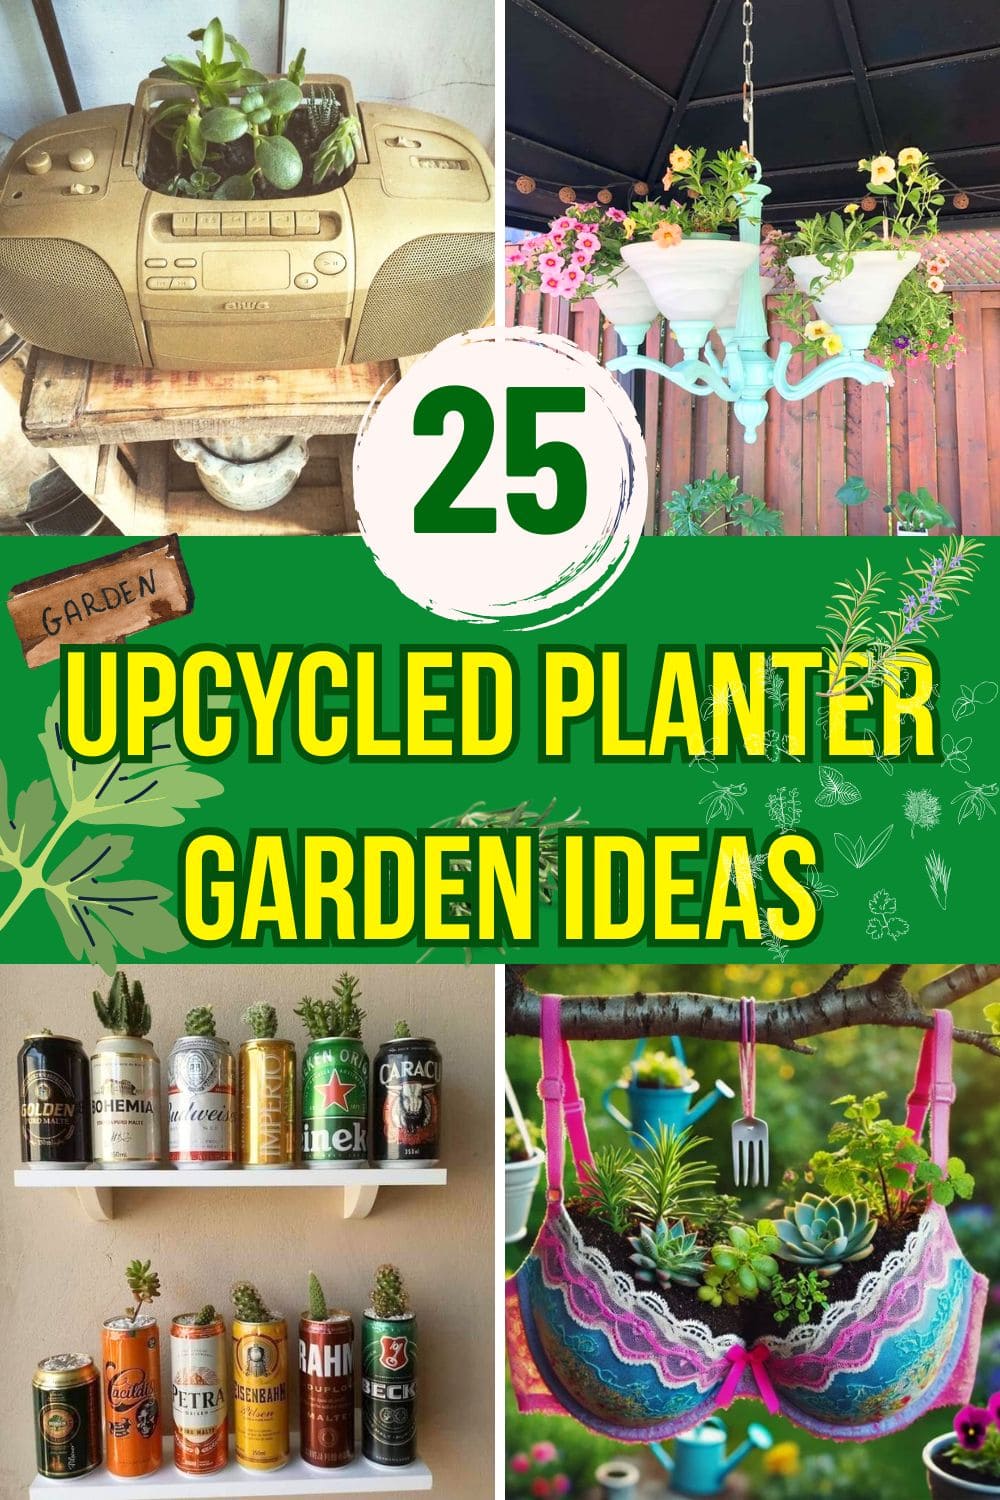
Are you ready to transform your space with lush greenery without spending a fortune? This article is your ultimate guide to eco-friendly gardening on a budget.
We’ve all got items lying around that are destined for the recycling bin or even the landfill, but what if those “treasures” could become the perfect homes for your plants?
Get ready to unleash your creativity and discover 25 ingenious ways to give everyday objects a new life as charming, unique planters.
#1. Beer Can Succulent Planters
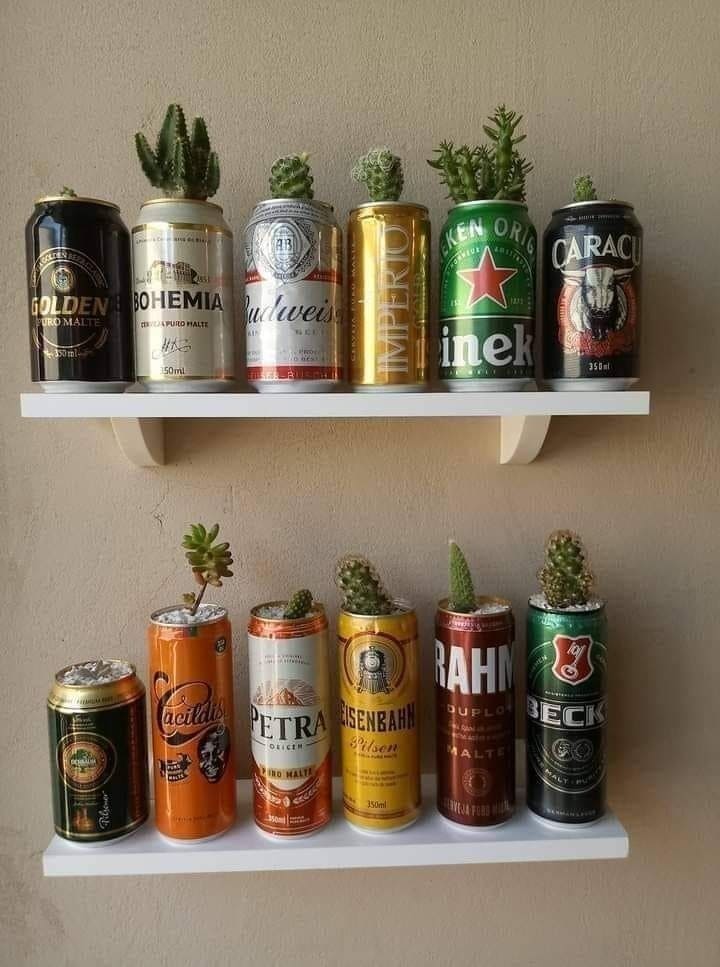
Instead of tossing out those beer or soda cans, why not turn them into eye-catching succulent planters?
Materials Needed
- 10–12 empty aluminum beer/soda cans
- Can opener
- Sandpaper (medium grit)
- Small pebbles
- Succulent/cactus soil mix
- Assorted mini succulents
- Optional: nail + hammer
Step-by-step Guide
Step 1: Rinse cans thoroughly and let dry. Carefully remove the top using a can opener or knife. Smooth sharp edges with sandpaper.
Step 2: Poke 2–3 small holes at the bottom for drainage.
Step 3: Add a thin layer of gravel, followed by soil mix. Plant your succulent and pat down the soil.
#2. Vertical Cucumber Planter in Grow Bags
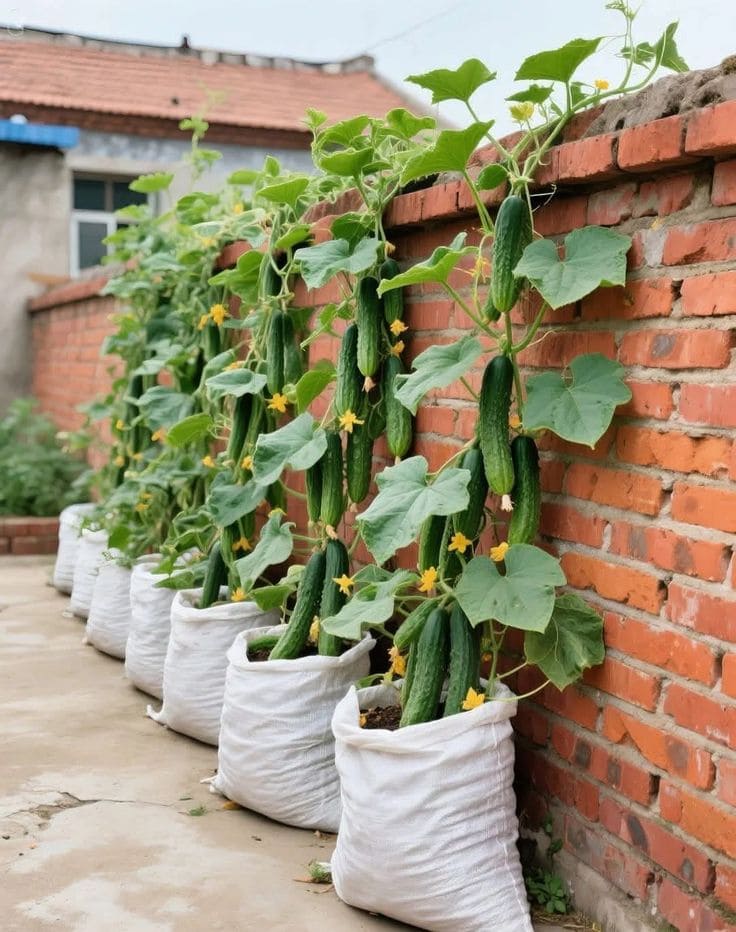
Using simple white grow bags and a nearby wall for support, you can grow a lush cucumber crop even in a narrow alley.
Materials Needed
- 5–10 white woven grow bags (40–50 cm tall, 30–35 cm wide)
- 40–50 liters of rich potting soil
- Cucumber seedlings (1–2 per bag)
- Bamboo stakes (1.5–2 meters tall)
- Zip ties or soft ties
- Fertilizer (optional)
Step-by-step Guide
Step 1: Fill each grow bag with potting soil up to 5 cm from the top.
Step 2: Plant 1–2 cucumber seedlings or sow seeds about 2–3 cm deep in each bag.
Step 3: Insert a stake into the soil or fix a string trellis against the wall behind each bag.
#3. Upcycled Bottle Water Garden
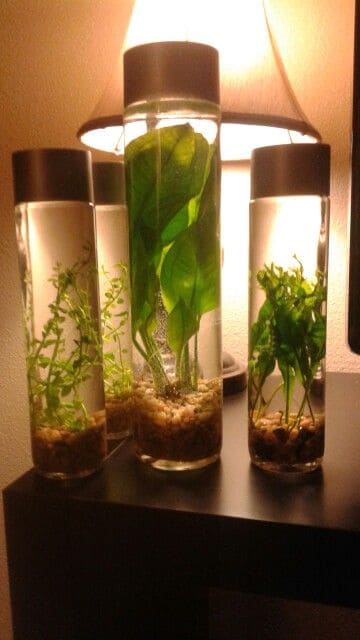
These elegant bottle gardens were born from a few tall glass bottles headed for the recycling bin.
Materials Needed
- 3–4 tall clear bottles (preferably with wide mouths, 500ml–1L)
- Washed aquarium gravel (about 1/2 cup per bottle)
- Small aquatic plants
- Tap water
- Long tweezers
Step-by-step Guide
Step 1: Clean your bottles thoroughly and remove any labels. Pour a layer of gravel into the bottom of each bottle.
Step 2: Gently insert the aquatic plants using tweezers, arranging them vertically.
Step 3: Slowly fill the bottles with water to avoid disturbing the gravel.
#4. Vintage Tin Herb Garden
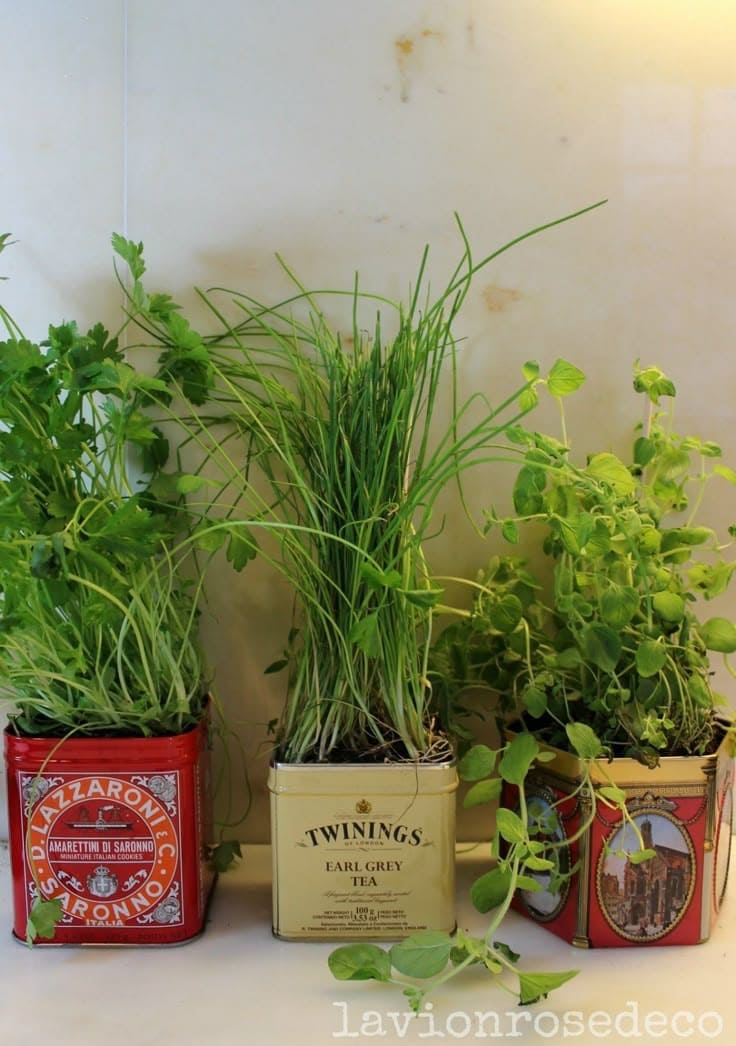
Old cookie tins and tea boxes aren’t just for nostalgia, they make surprisingly charming homes for fresh herbs.
Materials Needed
- Empty vintage tins (3.5″–5″ wide)
- Nail and hammer
- Potting soil
- Herb seedlings or cuttings (parsley, chives, oregano, etc.)
- Optional: clear sealant spray
Step-by-step Guide
Step 1: Clean each tin thoroughly and remove any paper liners or residue.
Step 2: Carefully punch or drill 3–5 small holes at the bottom for drainage.
Step 3: Add a thin layer of gravel or small pebbles, then fill with potting soil.
Step 4: Plant your chosen herbs, gently patting down the soil around the roots.
#5. Tiered Milk Jug Planter Rack
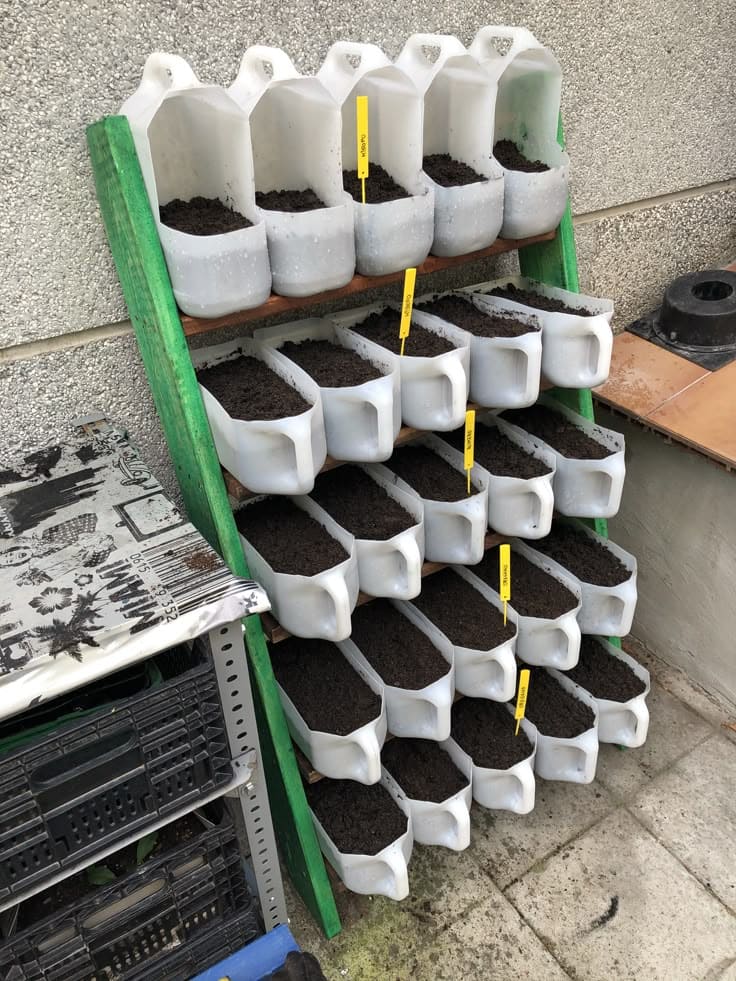
This clever upcycled planting rack transforms old milk jugs into a compact, tiered garden, perfect for herbs, leafy greens, or even flowers.
Materials Needed
- 20 empty 1-gallon plastic milk jugs
- Wooden planks (4 pieces, approx. 3 ft long each)
- Wooden A-frame (approx. 3–4 ft tall)
- Screws
- Potting soil (approx. 2 bags, 50–60 liters)
- Seeds or seedlings (lettuce, mint, parsley, spinach, etc.)
- Craft knife
- Drill (optional)
Step-by-step Guide
Step 1: Rinse and dry the milk jugs, then cut a wide U-shaped opening into each jug, keeping the handle intact.
Step 2: Drill a few small holes in the bottom of each jug for drainage.
Step 3: Assemble or repurpose a ladder-style A-frame stand. Secure wooden planks horizontally across each tier.
Step 4: Place 5 jugs per shelf with the openings facing outward. Fill them with soil, leaving a few inches from the top.
Step 5: Plant your seeds or seedlings and water them gently.
#6. Carton Garden Starters
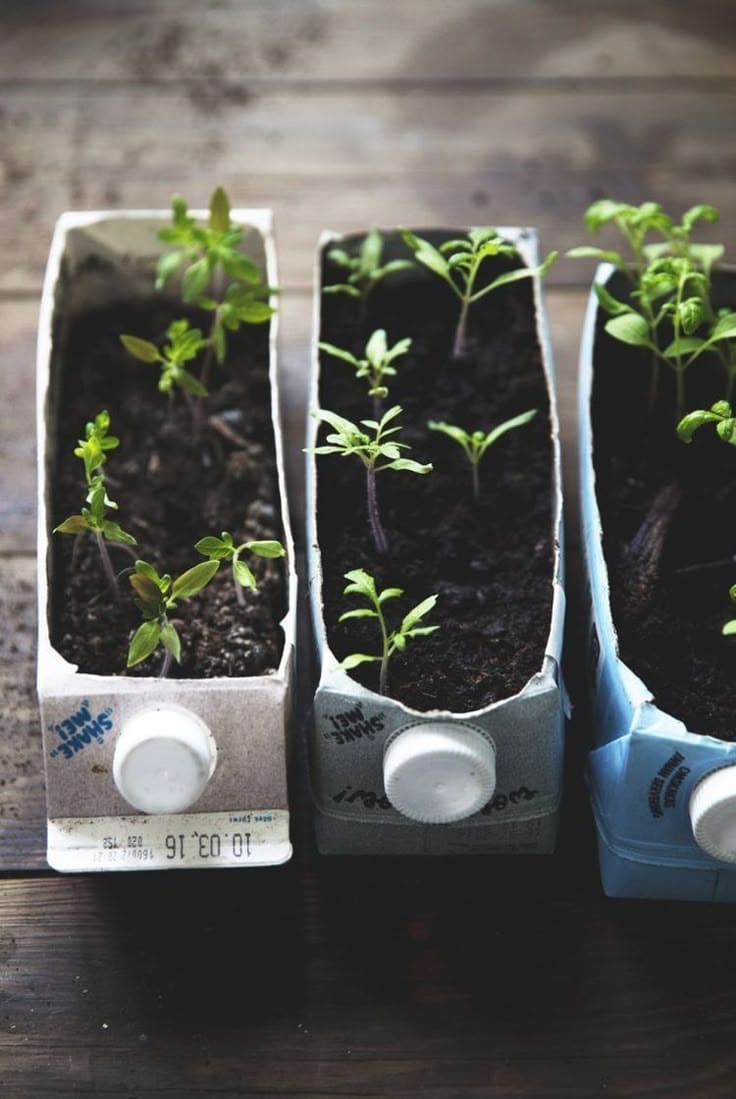
These humble milk cartons turned out to be the perfect mini nurseries for my summer veggie seedlings.
Materials Needed
- 3 used milk (1-liter size)
- Scissors
- Potting soil
- Vegetable or herb seeds
- Marker (optional)
- Nail or skewer
Step-by-step Guide
Step 1: Rinse the cartons well and let them dry. Using scissors or a box cutter, slice off the top third of each carton.
Step 2: Poke 3–5 small holes in the bottom for drainage.
Step 3: Fill each with potting soil, leaving about 1 inch from the top, then sow seeds according to packet instructions and gently water.
#7. Coconut Shell Succulent Planter
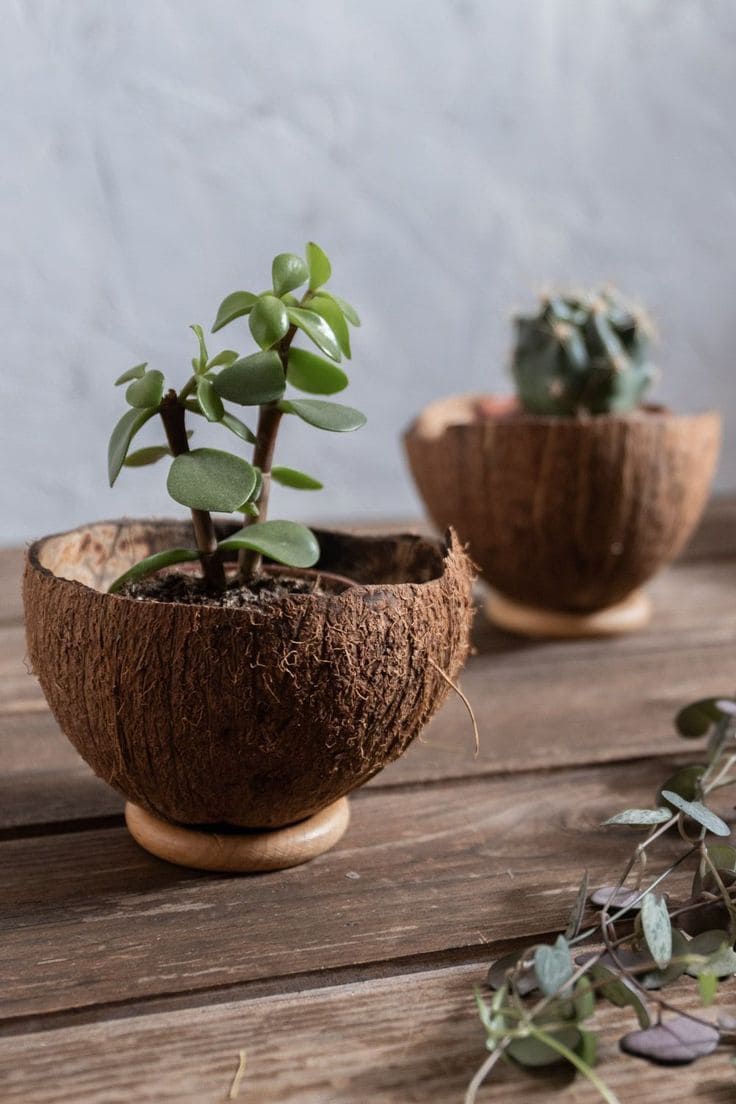
If you love minimalist décor with a touch of nature, this planter is just the thing. It’s charmingly rustic, budget-friendly, and a great way to reuse coconut shells after your smoothies or curry.
Materials Needed
- 1 whole coconut (split evenly in half)
- Fine-grit sandpaper
- Drill with small bit
- Succulent/cactus potting mix (approx. 1 cup)
- Small succulent
- Optional: wooden ring
Step-by-step Guide
Step 1: Cut the coconut cleanly in half. Scoop out the inner meat and rinse thoroughly.
Step 2: Use sandpaper or steel wool to smooth rough edges and clean the exterior.
Step 3: Drill 2–3 small holes in the bottom for drainage.
Step 4: Set the shell on a wooden ring or shallow base to keep it steady. Fill with soil and gently plant your succulent. Lightly water and display proudly.
#8. Balcony Crate Planter Garden
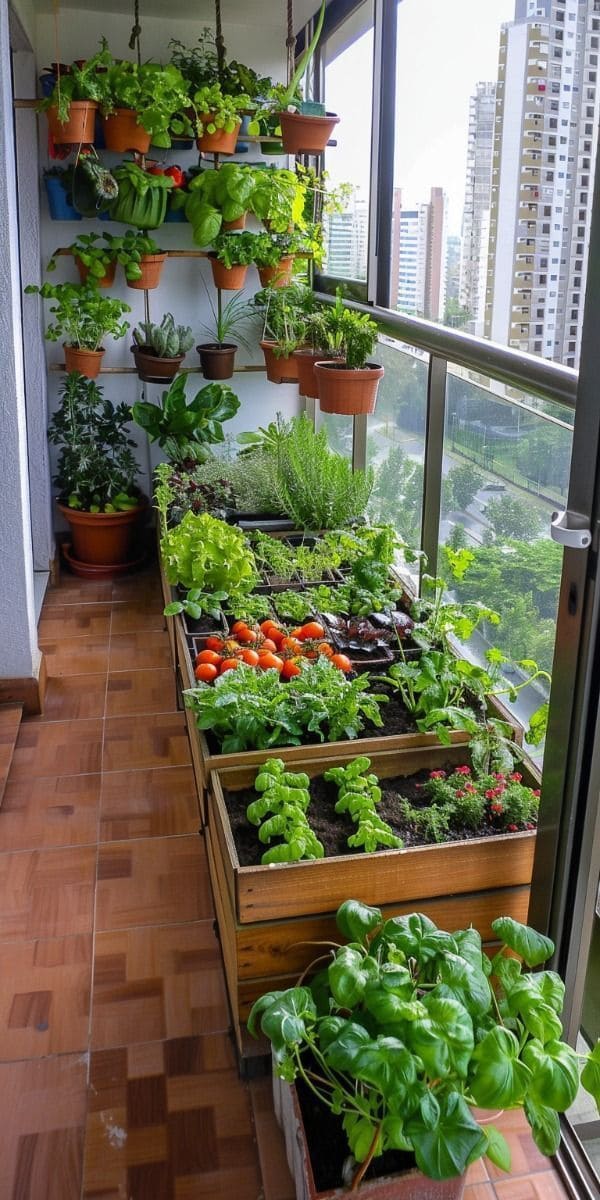
This vibrant vertical garden setup shows just how lush a balcony can become with the help of simple wooden crates.
Materials Needed
- 3–5 wooden crates (at least 16″ long x 12″ wide x 10″ deep)
- Landscape fabric
- Potting soil (1–2 bags per crate, about 40–50 liters total)
- Herb and vegetable seeds (lettuce, basil, cherry tomato, parsley, etc.)
- Screws and a drill
Step-by-step Guide
Step 1: Line the inside of each crate with landscape fabric to hold the soil and prevent leaks.
Step 2: Fill each crate about ¾ full with potting mix.
Step 3: Plant your chosen herbs and vegetables, grouping ones with similar sunlight and watering needs.
Step 4: Place the crates along your balcony where they get at least 4–6 hours of sun daily.
#9. Retro Boombox Succulent Planter
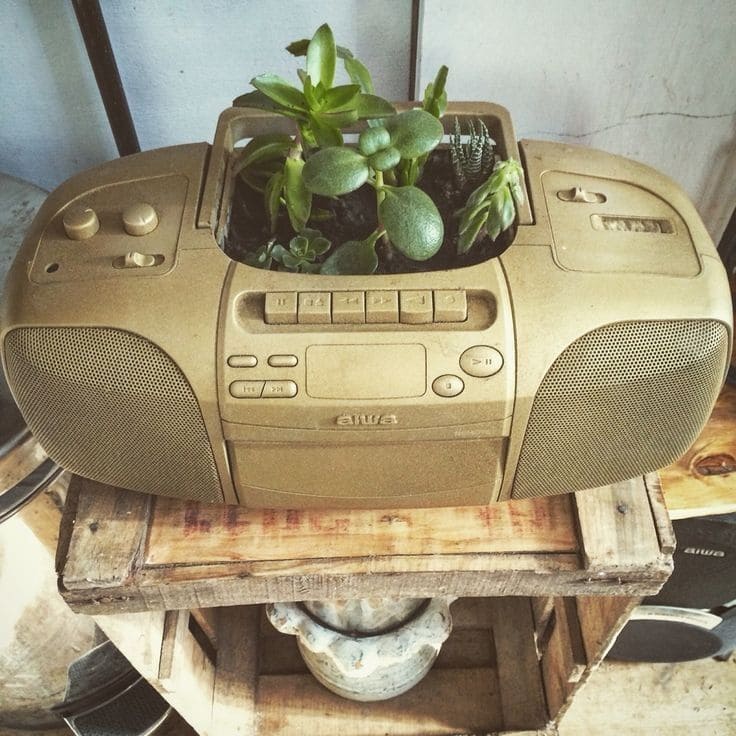
This one hits the nostalgia nerve and the plant lover’s heart in one go. An old boombox that once blasted tunes now brings calm green energy into your space.
Materials Needed
- 1 old boombox or stereo (non-functional is fine)
- Gold or any spray paint color (optional)
- Sharp utility knife
- Small plastic containe
- Potting soil suitable
- 3–5 small succulents or cacti
- Hot glue (optional)
Step-by-step Guide
Step 1: Carefully disassemble the boombox and remove inner electronics to create space.
Step 2: Spray paint the entire body if desired, and let dry completely.
Step 3: Fit a plastic liner into the open section to hold soil and prevent leakage.
Step 4: Fill the liner with succulent-friendly potting soil, then arrange your succulents inside, firming the soil around their roots.
#10. Hanging Tire Flower Planter
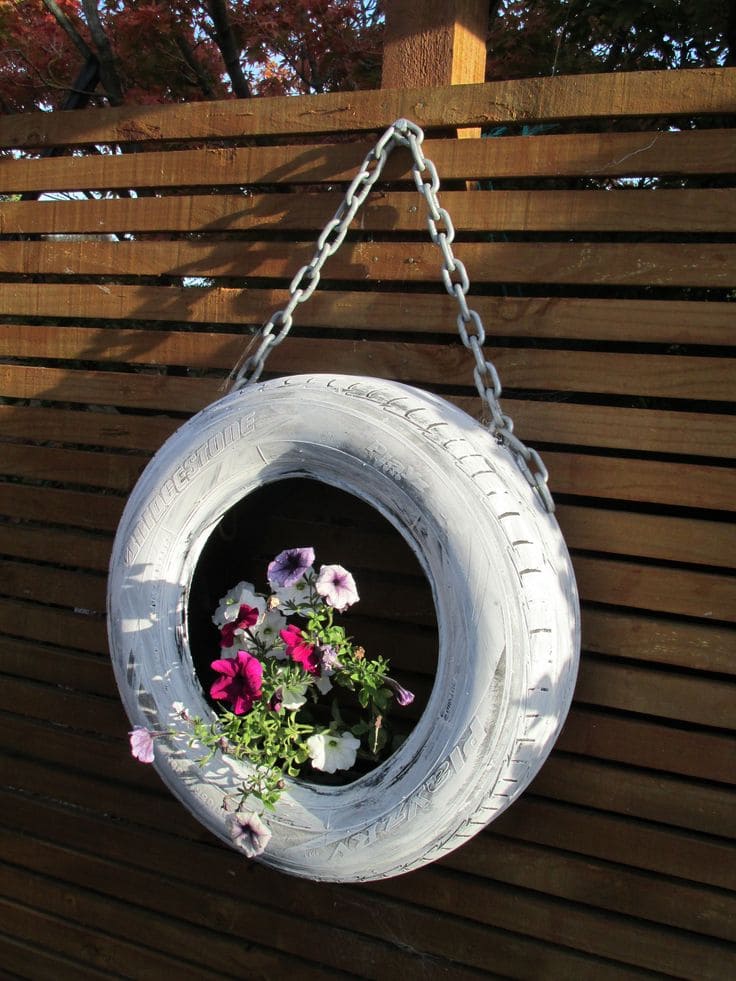
I remember doing something similar last spring, it felt like giving an old object a fresh start.
Materials Needed
- 1 used car tire (cleaned thoroughly)
- Outdoor spray paint (1 can, any color)
- Heavy-duty chain (approx. 3–4 feet long)
- 2 strong S-hooks
- Potting soil (approx. 5–7 liters)
- Flowering plants (petunias, pansies, or other trailing blooms)
- Drill
- Rubber gloves and drop cloth
Step-by-step Guide
Step 1: Wash the tire well with soap and water. Let it dry completely.
Step 2: Spray paint the tire evenly outdoors on a drop cloth. Let it dry fully.
Step 3: Drill several small drainage holes along the bottom inner edge of the tire.
Step 4: Attach a sturdy chain to the tire using bolts or hooks. Hang it securely on a fence or wall using wall anchors or strong hooks.
#11. Gumball Machine Terrarium
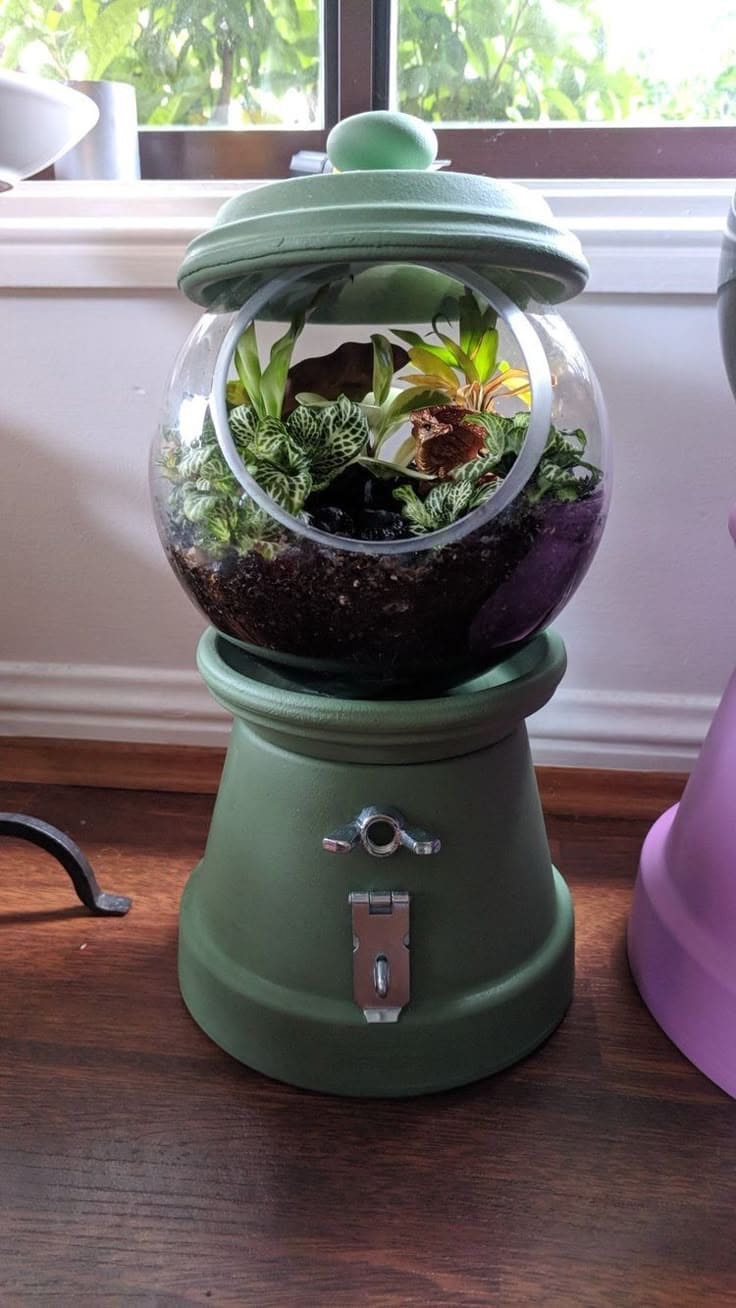
Perfect for a windowsill or entryway, this project offers a low-maintenance green touch and makes a charming conversation piece.
Materials Needed
- 1 small glass fishbowl (6–8 inches wide)
- 1 clay flower pot
- 1 clay saucer
- 1 round wooden knob (decorative lid handle)
- Small latch and nut bolt (optional)
- Spray paint
- Hot glue gun
- Potting soil
- Small humidity-loving plants (fittonia, ferns, moss)
- Pebbles
Step-by-step Guide
Step 1: Paint the clay pot, saucer, and knob in your chosen color. Let them dry thoroughly.
Step 2: Hot glue the bowl onto the bottom of the upside-down flower pot.
Step 3: Glue the knob to the center of the saucer to mimic the gumball lid.
Step 4: Layer pebbles at the bottom of the bowl, then add potting soil.
#12. Garden Pants Planter
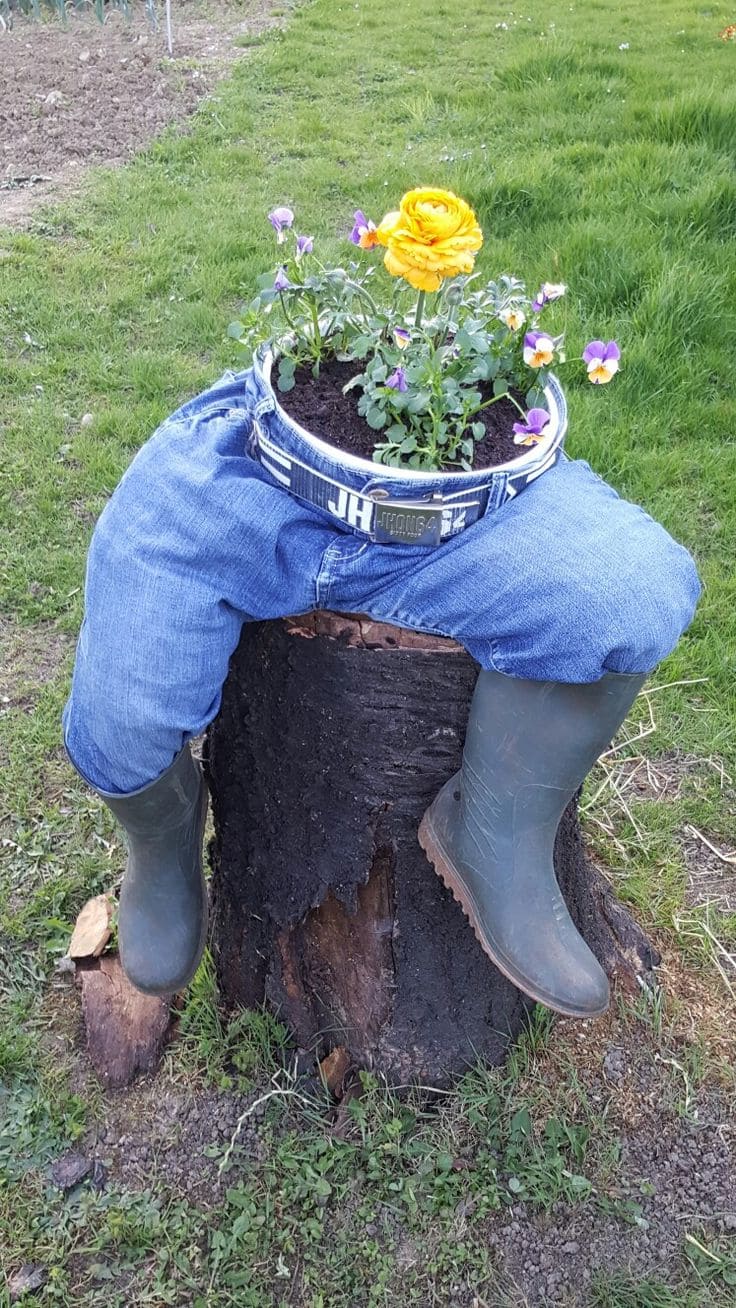
Repurposing old jeans and boots, this project transforms a tree stump into a garden guest with blooming flowers for a head.
Materials Needed
- 1 pair of old jeans
- 1 pair of rubber boots
- 1 plastic flower pot (diameter to match waistband, approx. 10–12 inches)
- Belt (optional)
- Potting soil (approx. 4–5 liters)
- A mix of flowers (pansies, marigolds, or violas work great)
- Tree stump
Step-by-step Guide
Step 1: Insert the flower pot into the waistband of the jeans and secure it with a belt if needed.
Step 2: Stuff the legs of the jeans with straw, newspaper, or fabric scraps to hold shape.
Step 3: Insert each leg into a boot, making sure the jeans sit naturally.
Step 4: Fill the flower pot with potting mix and plant your favorite colorful flowers.
#13. Fancy Heel Succulent Planter
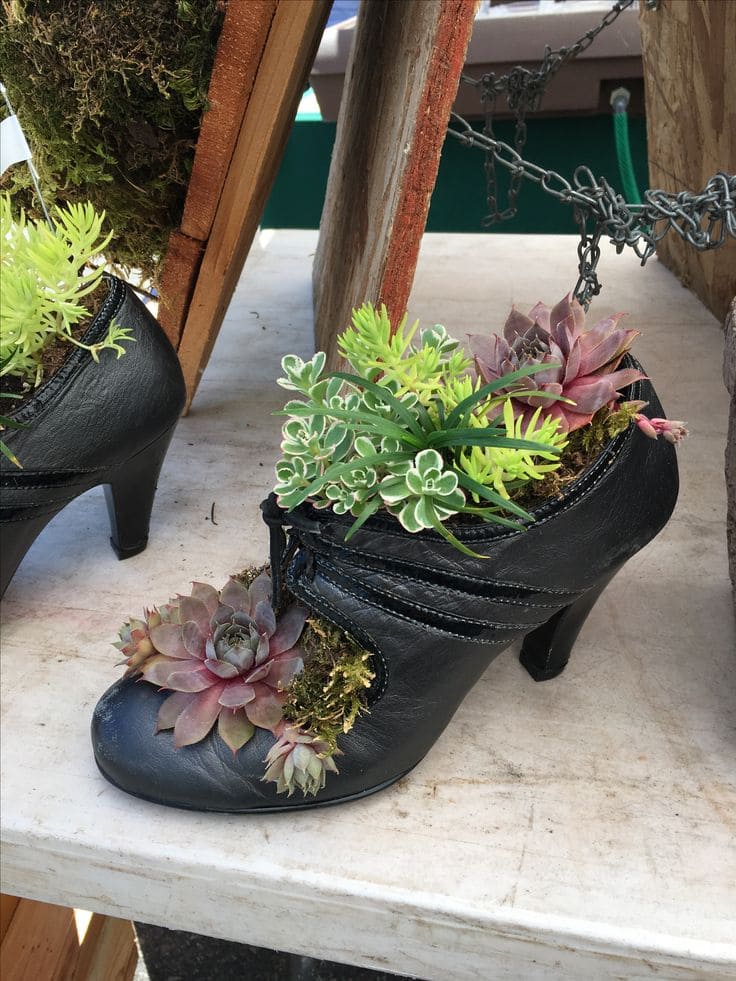
Turning a pair of vintage pumps into a succulent planter is one of the most elegant upcycled gardening ideas around.
Materials Needed
- 1 pair of high-heeled shoes
- Small succulents (hens & chicks, sedum, echeveria, etc.)
- Moss or coconut fiber
- Potting mix
- Hand drill
- Optional: decorative stones or gems
Step-by-step Guide
Step 1: Drill 3–4 holes in the sole for water drainage. Then line the interior with moss or coconut fiber to help retain shape and soil.
Step 2: Fill each shoe halfway with cactus/succulent soil.
Step 3: Gently place succulents into the shoe, arranging by height and texture.
Step 4: Top off with soil, add decorative stones if desired, and water lightly.
#14. Animal-Themed Bottle Planters
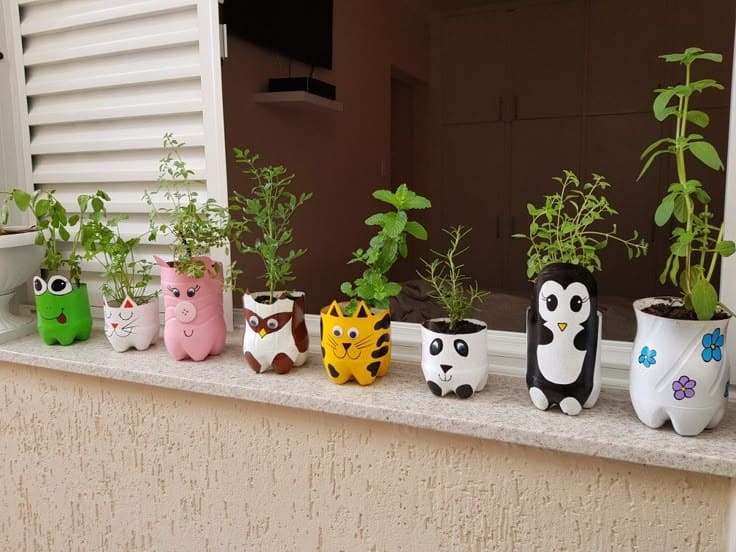
These whimsical animal planters brought a splash of joy to my windowsill and the best part? They started out as empty soda bottles destined for the trash.
Materials Needed
- Empty plastic bottles (500ml–2L, as many as needed)
- Acrylic paints and paintbrushes
- Permanent marker
- Scissors
- Potting soil
- Herb or flower seedlings (e.g., mint, basil, parsley)
Step-by-step Guide
Step 1: Cut each plastic bottle in half or about 5–6 inches from the bottom.
Step 2: Wash and dry thoroughly. Sketch your animal face shape on the bottle (ears, eyes, nose area).
Step 3: Paint the base color, let dry, and then add facial details with a smaller brush or marker.
Step 4: Fill with soil and transplant your herbs or small plants.
#15. Painted Tin Can Cactus Planter
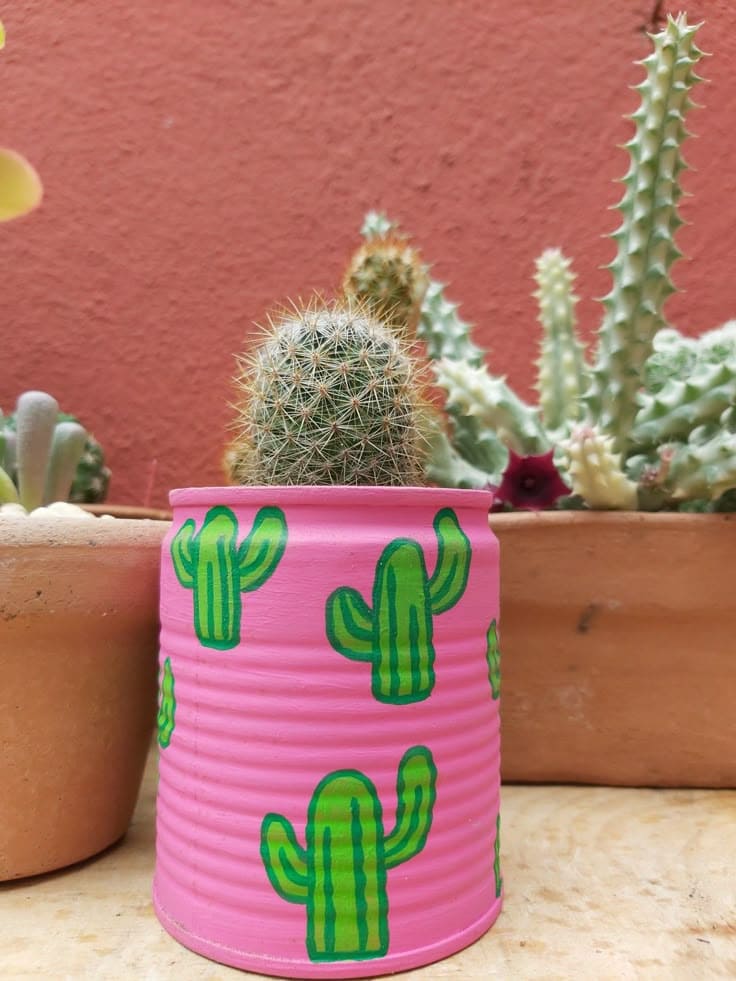
This cheerful cactus planter made from a tin can is pure joy in a tiny package.
Materials Needed
- 1 empty tin can (standard 400g size)
- Acrylic paint (pink, green, black)
- Small paintbrushes
- Nail + hammer
- Potting soil (small handful)
- 1 mini cactus or succulent
Step-by-step Guide
Step 1: Clean the can thoroughly and remove the label. Dry completely.
Step 2: Use a nail or drill to poke 2–3 drainage holes in the base, then paint the entire can in your chosen base color and let it dry.
Step 3: Add cute cactus designs using green and black paint. Fill with soil and gently plant your cactus. Water lightly and enjoy!
#16. Blooming Boots Planter
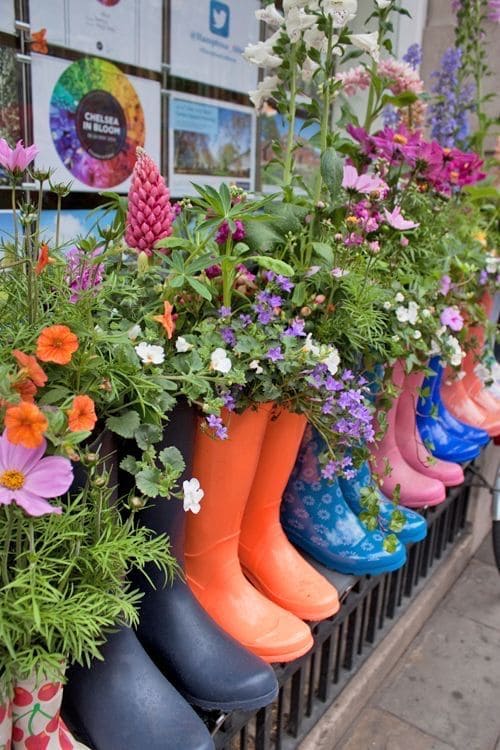
Who knew that worn-out rain boots could bring so much charm to a garden? This delightful upcycling idea turns old rubber boots into vibrant, personality-packed planters.
Materials Needed
- 4–6 pairs of old rain boots
- Potting soil (approx. 2–3 liters per boot)
- Mixed flowering plants or herbs (petunias, marigolds, pansies, basil, etc.)
- Drill with small bit
- Wire, zip ties, or hooks
- Waterproof paint (optional,)
Step-by-step Guide
Step 1: Clean boots thoroughly and drill 3–5 small holes in the sole for drainage.
Step 2: Add a layer of gravel or small stones at the bottom of each boot.
Step 3: Fill with potting soil, stopping 2 cm from the top, then plant your flowers or herbs.
#17. Vintage Wheelbarrow Flower Bed
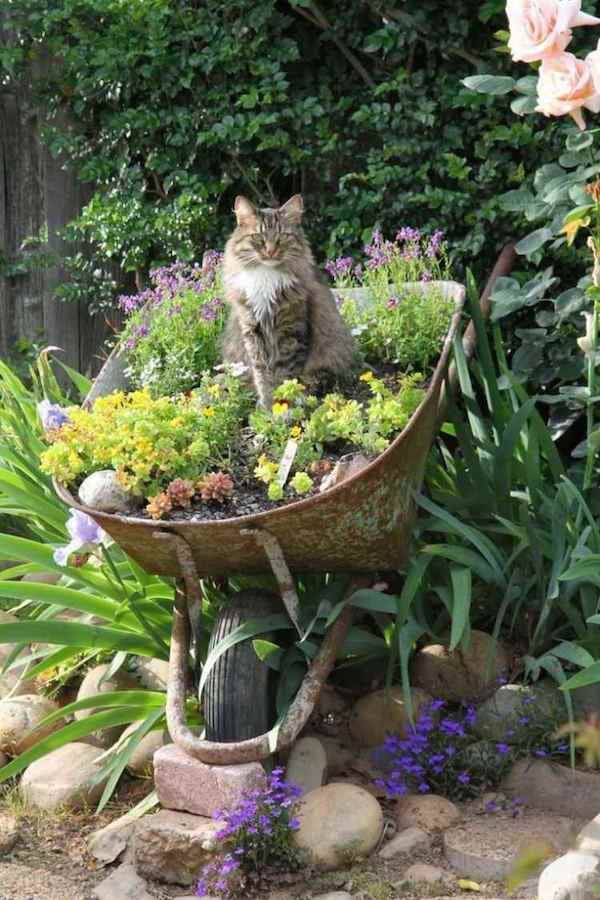
That rusty, retired wheelbarrow you’ve been meaning to toss? It’s ready for a second act as a rustic garden centerpiece.
Materials Needed
- 1 old metal wheelbarrow
- Potting mix
- Selection of low-maintenance plants (succulents, creeping jenny, calibrachoa, etc.)
- Small rocks
- Optional: bricks
Step-by-step Guide
Step 1: Choose your wheelbarrow’s final resting angle. Prop it with bricks if needed for balance.
Step 2: Add a layer of gravel or stones at the bottom to improve drainage.
Step 3: Fill with well-draining potting mix, leaving room for planting.
Step 4: Arrange plants with taller ones at the back and trailing types near the edge.
#18. Tea Pot Hanging Planters
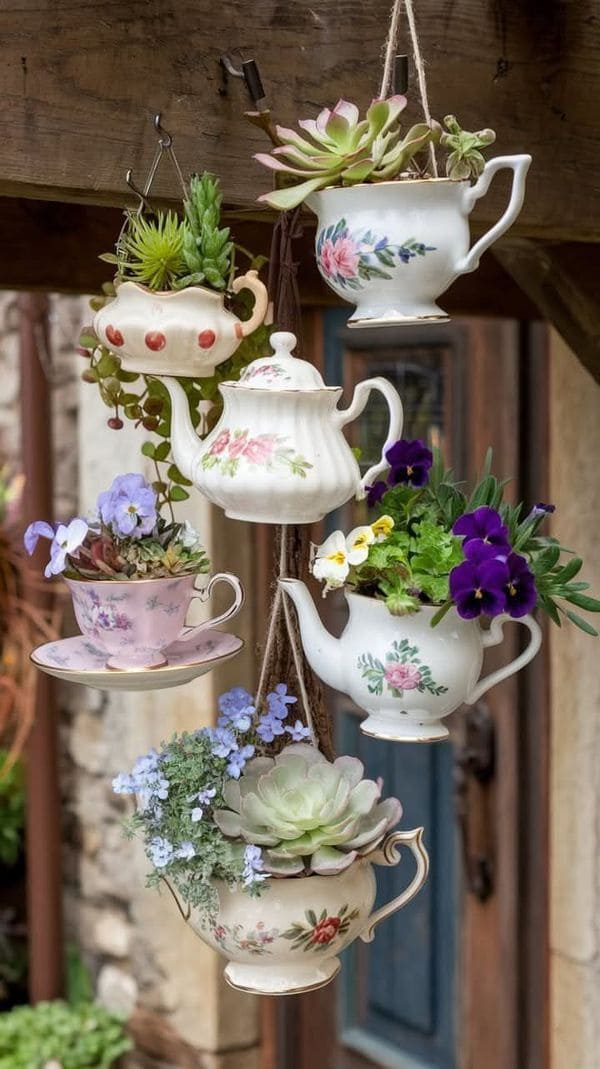
There’s something utterly magical about turning vintage teacups and teapots into dangling garden planters. It’s elegant, imaginative, and the perfect way to reuse chipped or mismatched china you can’t part with.
Materials Needed
- 3–6 vintage teacups, teapots, creamers, or sugar bowls
- Twine (3–5 ft. per hanger)
- Hand drill with a ceramic bit
- Succulents, pansies, violas, or trailing vines
- Potting mix (cactus mix or general-purpose)
- Hooks
Step-by-step Guide
Step 1: If desired, drill a small hole at the base of each for drainage. (Skip this if you’re using succulents and will water lightly.)
Step 2: Fill each teacup or pot with a bit of gravel, then add soil and your plant.
Step 3: Cut your rope or twine to size, then securely knot it around each handle and hang each piece at staggered heights from a hook or beam.
#19. Egg Carton Seedling Starter
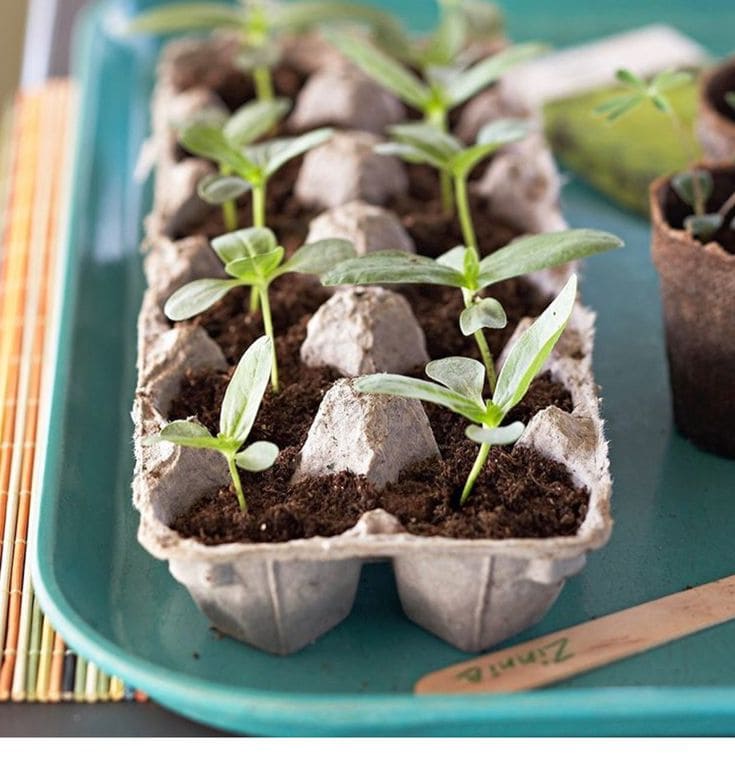
Starting seeds in an old egg carton might be one of the simplest joys of gardening. I tried this on a whim one weekend, and now I use it every spring.
Materials Needed
- 1 cardboard egg carton (12- or 18-compartment)
- Potting mix
- Seeds of your choice
- Water spray bottle
- Tray
- Toothpick
Step-by-step Guide
Step 1: Cut the lid off the carton and set it aside; place the base on a tray.
Step 2: Poke a small hole at the bottom of each egg compartment for drainage.
Step 3: Fill each compartment about ¾ full with potting mix then plant 1–2 seeds per cell according to seed packet instructions.
#20. Rustic Trash Can Planter
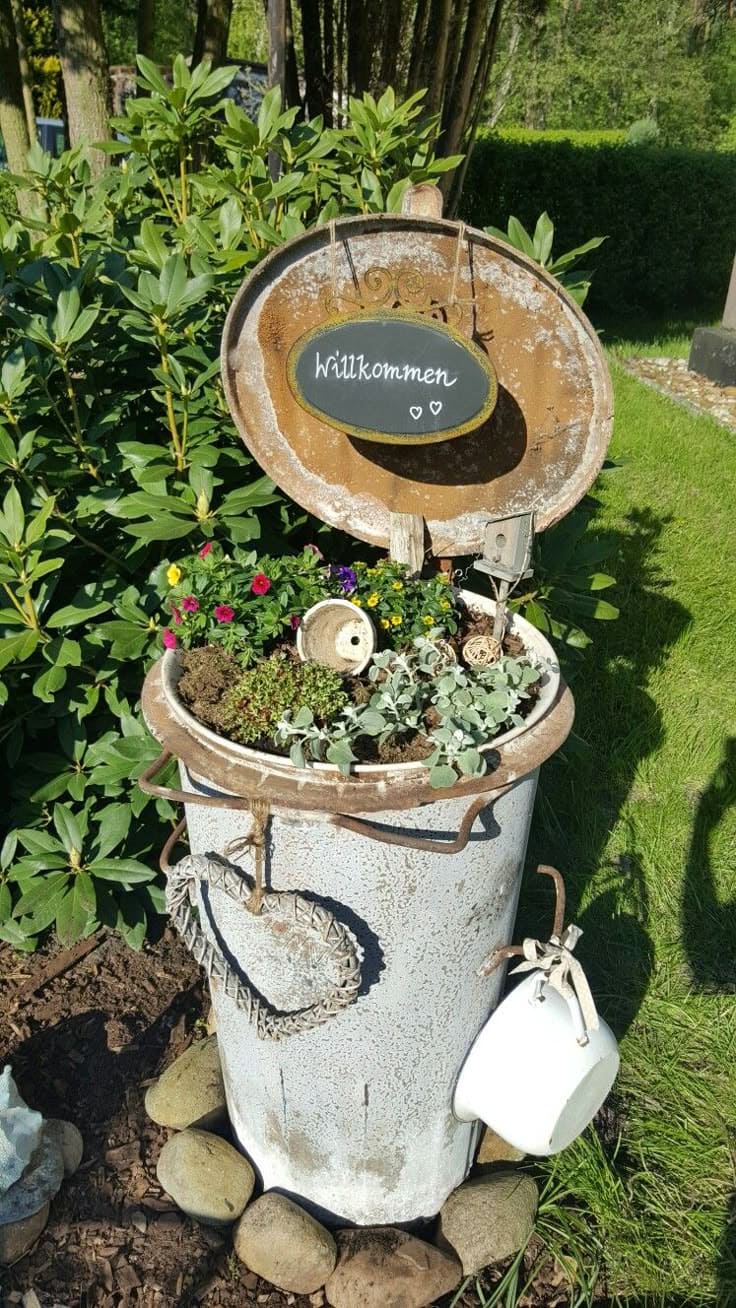
Who says trash can’t be beautiful? This upcycled metal trash can is transformed into a rustic welcome planter, complete with cheerful blooms, vintage charm, and a warm “Willkommen” greeting.
Materials Needed
- 1 vintage metal trash can with lid (approx. 24–30 inches tall)
- Chalkboard plaque sign
- Outdoor acrylic paint
- Potting soil (1–2 bags)
- A mix of flowering plants and trailing greens
- Small decorative items: teacups, birdhouses, twine hearts, etc.
- Rocks
Step-by-step Guide
Step 1: Clean the trash can and drill several drainage holes in the bottom. Optionally paint or distress the can to enhance its vintage appeal.
Step 2: Fill the bottom with a layer of stones, then top up with potting mix.
Step 3: Plant flowers densely, adding cascading types near the edge.
Step 4: Attach your sign to the lid and prop it open using a support bar or fixed hinge, then dẻoate with personal touches.
#21. Garden Throne Planters
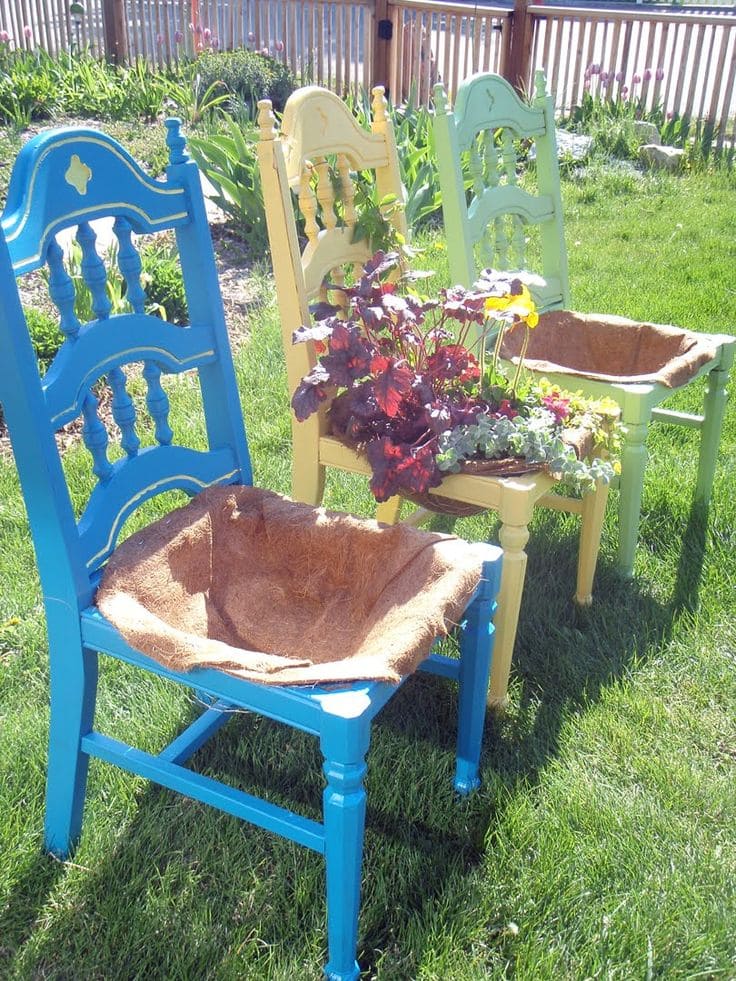
I found an old set at a yard sale, gave them a few coats of pastel spray paint, and suddenly they became the focal point of my garden path.
Materials Needed
- 1–3 wooden chairs
- Outdoor paint and paintbrush
- Coco liners
- Potting mix
- Mixed flowers or herbs
Step-by-step Guide
Step 1: Paint the chairs in bright, fun colors. Let them dry completely.
Step 2: Line the seat opening with coco liner or landscape fabric. Staple or tuck securely.
Step 3: Fill the liner with soil and plant your chosen flowers.
#22. Stacked Colander Hanging Planters
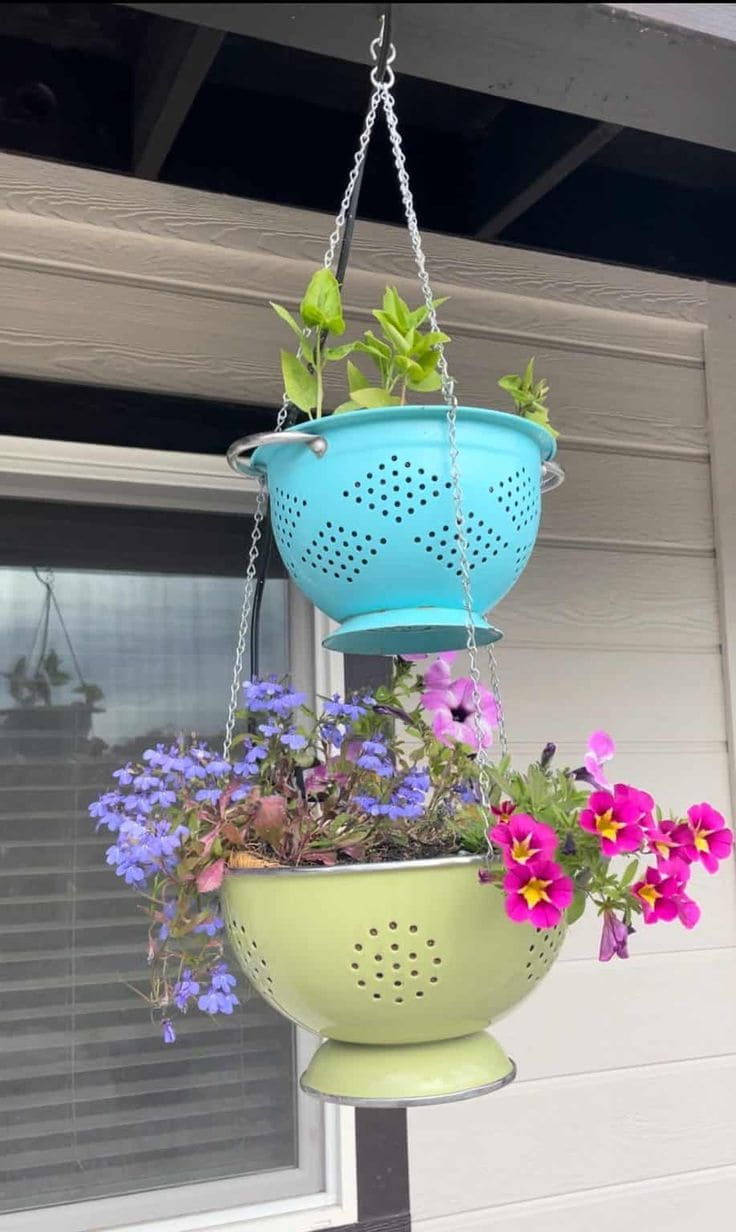
If you’ve got old kitchen colanders lying around, this playful vertical planter is a total win.
Materials Needed
- 2 metal colanders (8–10 inch diameter)
- Spray paint (optional)
- 3 metal chains (12–18 inches each)
- 1 S-hook
- Wire or pliers
- Potting soil
- Small trailing flowers or herbs
Step-by-step Guide
Step 1: Clean the colanders and paint them if desired. Let dry thoroughly.
Step 2: Attach 3 chains to the top colander, equally spaced using the handles or drilled holes.
Step 3: Connect the bottom of the top colander to the next one using more chain.
Step 4: Fill both colanders with soil and add flowers or herbs.
#23. Blooming Chandelier Planter
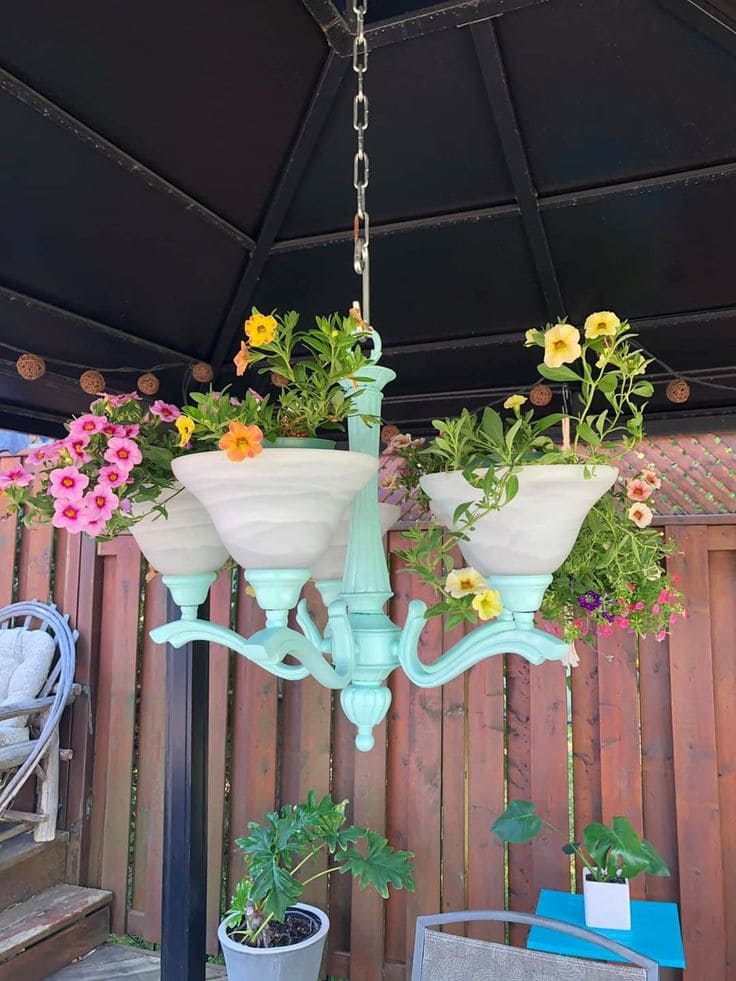
Who says chandeliers are just for dining rooms? This transformed lighting fixture now hangs proudly in the garden, turning heads with cascading flowers instead of crystals.
Materials Needed
- 1 old chandelier
- Hanging chain
- Outdoor spray paint (color of choice)
- Potting soil
- Small flowering plants (e.g., calibrachoa, pansies, petunias)
- Drill with bit (optional)
Step-by-step Guide
Step 1: Remove all wiring and bulbs from the chandelier. Clean thoroughly.
Step 2: Spray paint the frame in your chosen color and let dry.
Step 3: Drill small drainage holes in the glass cups if needed, then fill cups with soil and gently plant your flowers.
#24. Romantic Birdcage Flower Hanger
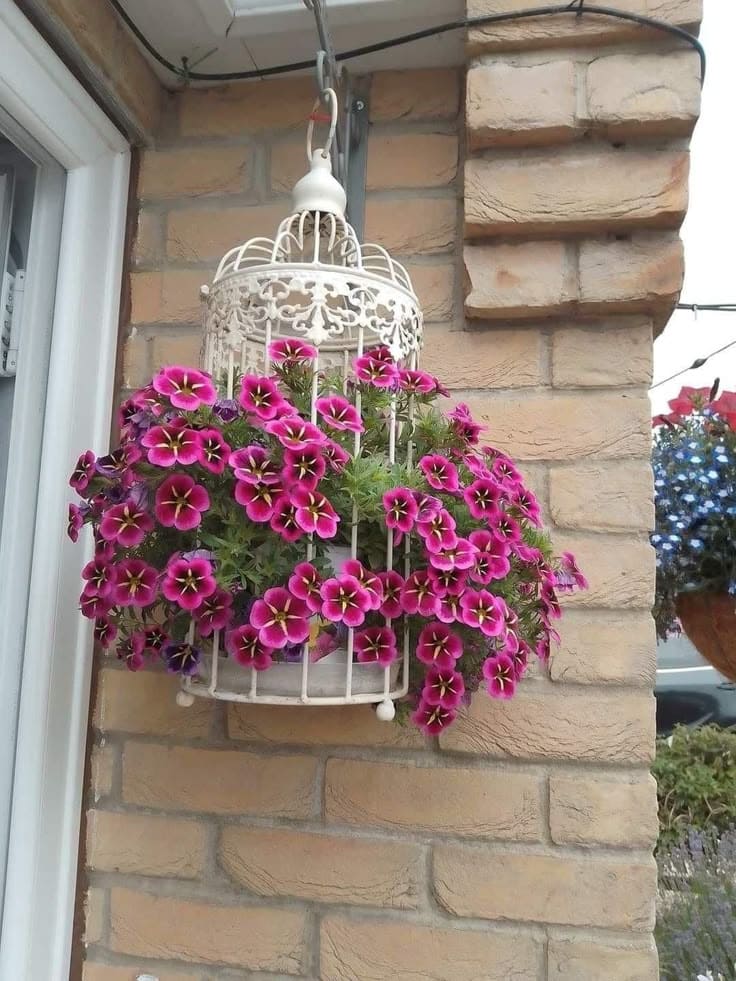
There’s something irresistibly charming about repurposing a vintage birdcage into a cascading floral display. It instantly adds a whimsical, cottagecore feel to any entryway or garden wall.
Materials Needed
- 1 vintage birdcage (metal, open bars preferred)
- Chain
- Coco liner
- Potting mix
- Trailing flowers (like calibrachoa, petunias, or lobelia)
- Optional: white spray paint
Step-by-step Guide
Step 1: Clean the birdcage and repaint if needed. Let dry completely.
Step 2: Line the bottom with coco liner or fit a small pot inside to hold the soil.
Step 3: Fill with potting mix, then plant your chosen trailing flowers.
#25. The Bra-lliant Hanging Planter
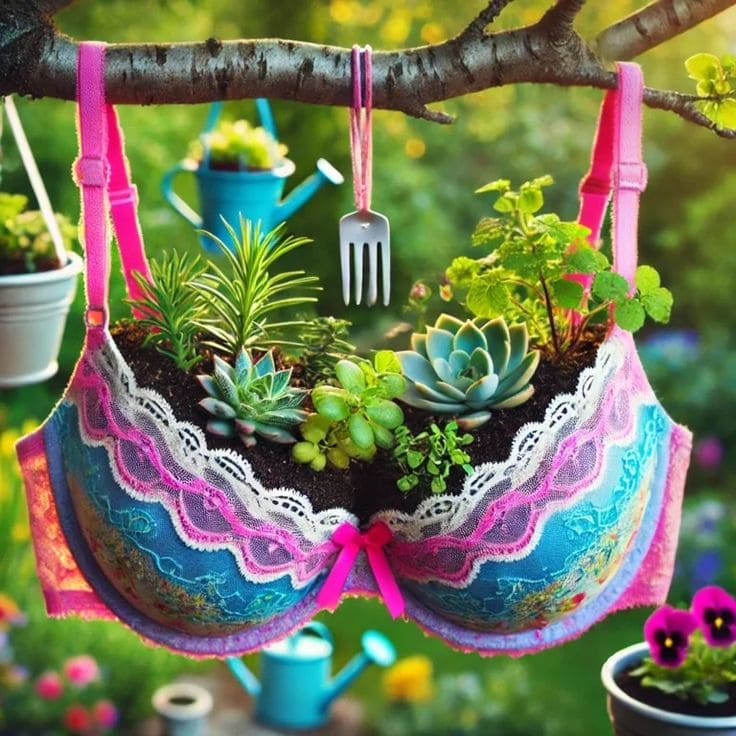
This idea is perfect for anyone with a sense of humor and a few too many bras lying around. It’s a hilarious conversation starter and an unexpected delight for any whimsical garden setup.
Materials Needed
- 1 padded bra
- String, ribbon, or zip ties
- Coco liner or coffee filters (optional)
- Potting soil
- Small succulents
Step-by-step Guide
Step 1: Choose a sturdy bra with thick straps. Clean it and line the cups with coco fiber or filters if needed.
Step 2: Fill each cup with soil, packing it gently to keep it balanced.
Step 3: Plant your succulents or herbs, arranging them snugly.
Step 4: Hang it from a strong tree branch or hook using the straps or added ribbon.
