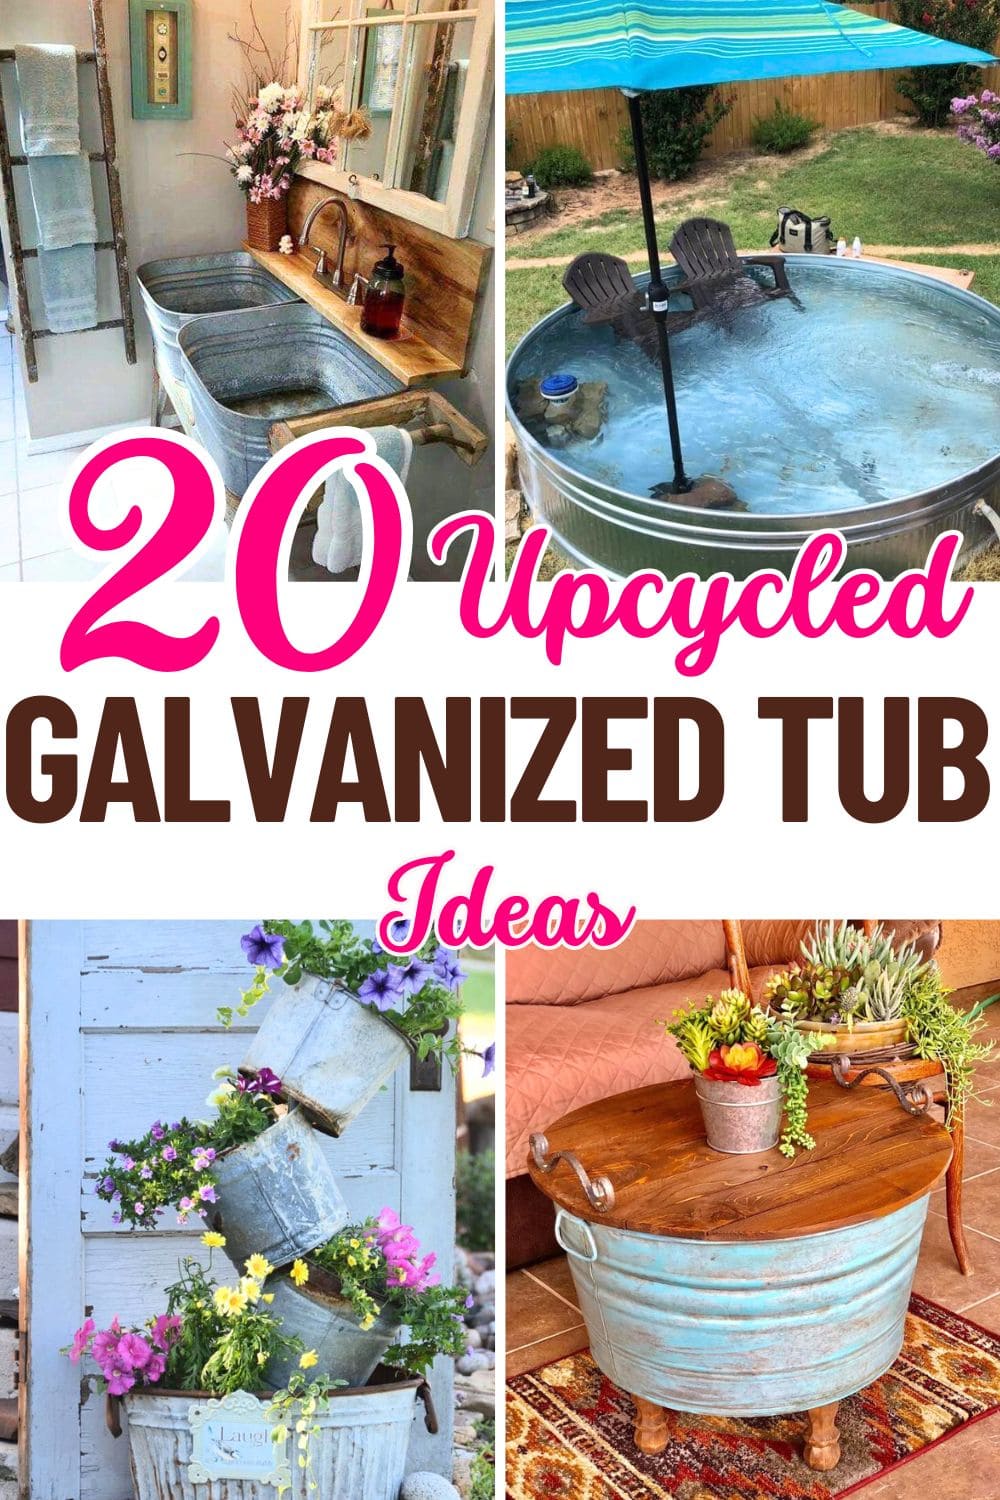
Rusty, rugged, and often forgotten, old galvanized tubs might not look like much at first glance. But with a little imagination, they can become the highlight of your home or garden.
Whether you’re going for rustic farmhouse charm or quirky modern style, these sturdy metal containers offer endless potential for DIY makeovers.
In this roundup, we’ve gathered 20 brilliantly creative galvanized tub projects that blend style, practicality, and a whole lot of personality.
#1. Rustic Farmhouse End Table from a Vintage Wash Tub
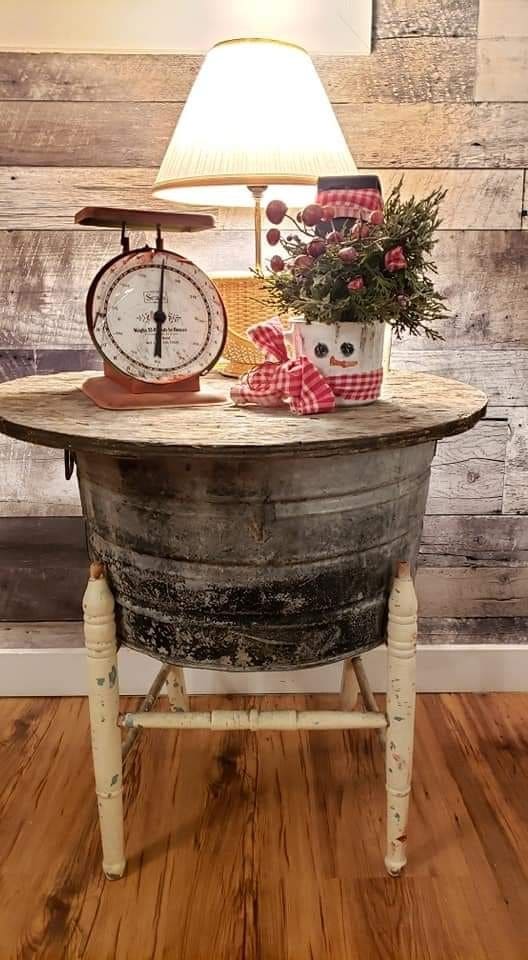
This charming side table pairs a weathered galvanized tub with antique chair legs, blending rustic soul with repurposed creativity.
Materials Needed
- 1 vintage galvanized tub
- 4 antique chair legs (approx. 28″ height)
- Screws
- 1 round or oval wooden top
- Drill and wood screws
- Sandpaper and optional wood stain
Step-by-step Guide
Step 1: Clean the tub thoroughly and lightly sand it to remove rust or flaking paint.
Step 2: Attach the legs by drilling through the tub base and securing each leg with screws or bolts; reinforce with cross-bracing if needed.
Step 3: Place the wooden top over the opening, using adhesive or screw-on brackets underneath to keep it in place.
Step 4: Finish or distress the wood top and legs for a more authentic farmhouse look.
#2. Galvanized Tub Drink Station
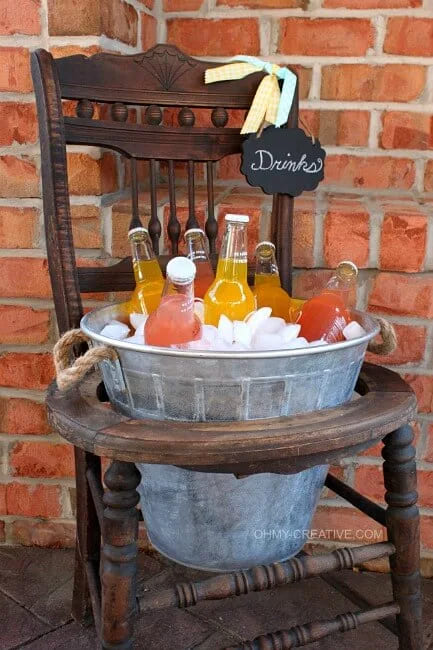
This little setup is a total crowd-pleaser at any gathering. It’s cute, functional, and ridiculously easy to pull off.
Materials Needed
- 1 vintage wooden chair
- 1 galvanized tub (about 12–14″ in diameter)
- Rope (optional)
- Ice and your favorite bottled drinks
- Small chalkboard sign
Step-by-step Guide
Step 1: If your chair has a solid seat, cut a round opening large enough for the tub to rest securely inside.
Step 2: Place the tub inside the seat frame. Wrap handles with rope for added grip and charm if desired.
Step 3: Fill with ice and arrange the drinks attractively.
#3. Stock Tank Pool Lounge Setup
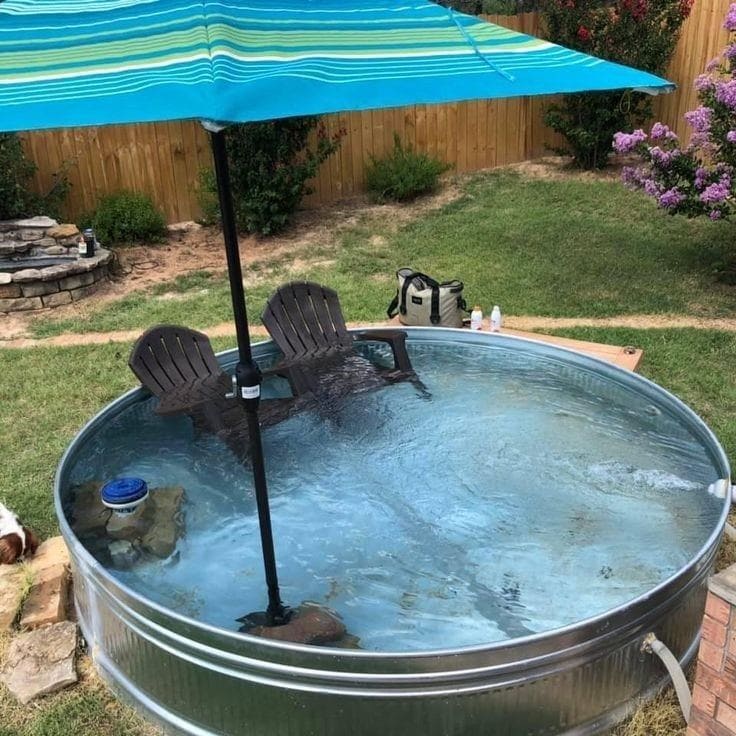
This DIY project is the definition of backyard bliss. A galvanized stock tank becomes a surprisingly elegant mini pool, deep enough to soak, wide enough for chairs, and easy enough for anyone to build.
Materials Needed
- 1 galvanized stock tank (8′ diameter, 2′ deep)
- 2 plastic or resin Adirondack chairs
- 1 large patio umbrella with base
- Hose
- Water treatment tabs (optional)
- Flat, level ground
Step-by-step Guide
Step 1: Place the stock tank and check it’s level. Add a drainage hole with valve if your tank doesn’t already have one.
Step 2: Fill with fresh water using a garden hose.
Step 3: Add chairs and secure an umbrella for shade. For longer use, consider a small filter pump or chlorine tab float.
#4. Galvanized Tub Bathroom Vanity Sink
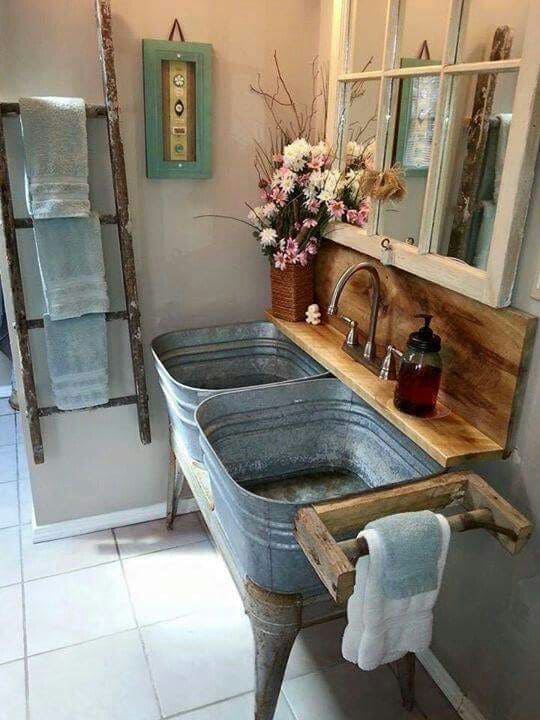
Using a pair of galvanized tubs, I created a custom double-sink vanity that feels like it belongs in a cozy farmhouse or vintage cabin.
Materials Needed
- 2 galvanized tubs (approx. 20–24″ wide, 10–12″ deep)
- Wood planks
- 2 sink drains and plumbing kits
- 1 or 2 faucet sets
- Wood screws, brackets, sealant
- Optional: towel bar, decorative ladder, faux flowers, or vintage mirror
Step-by-step Guide
Step 1: Cut holes in the wooden countertop to fit the bottom of each tub snugly. Sand and stain or seal the wood.
Step 2: Drill drain holes in the tubs (if not pre-cut). Install sink drains and secure the tubs into the countertop.
Step 3: Mount the faucet(s) into the backsplash board and connect the plumbing to each basin using standard connectors.
Step 4: Add side towel bars or accessories as desired. Decorate with flowers or repurposed ladder racks to finish the rustic bathroom look.
#5. Upcycled Galvanized Tubs as Modern Raised Garden Beds
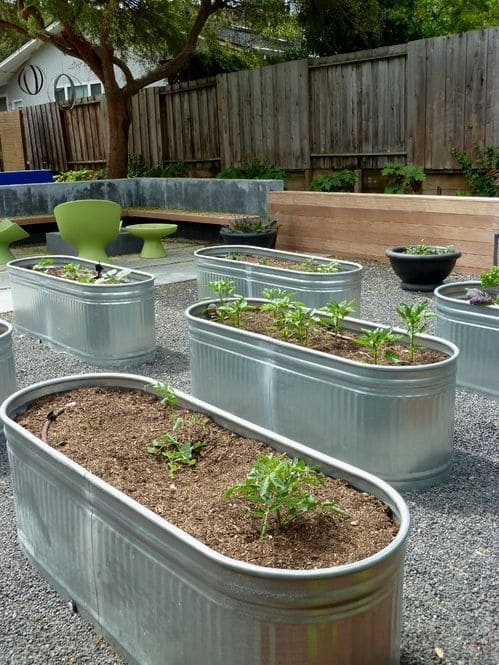
Who knew something as utilitarian as old livestock troughs could look this sleek and intentional?
Materials Needed
- Galvanized stock tanks (approx. 2–4 feet long, 18–24 inches wide, 2 feet deep)
- Drill with metal drill bit
- Landscape fabric
- Gravel
- Potting mix
- Vegetable or herb starter plants
Step-by-step Guide
Step 1: Drill 6–10 small drainage holes evenly spaced on the bottom of each tub.
Step 2: Line the bottom with landscape fabric to prevent soil from escaping.
Step 3: Add a layer of gravel (about 3–4 inches deep) to promote good drainage. Fill with rich soil, leaving a few inches at the top.
Step 4: Plant your crops, water deeply, and place tubs where they’ll receive appropriate sunlight.
#6. Galvanized Tub Garden Hose and Tool Organizer
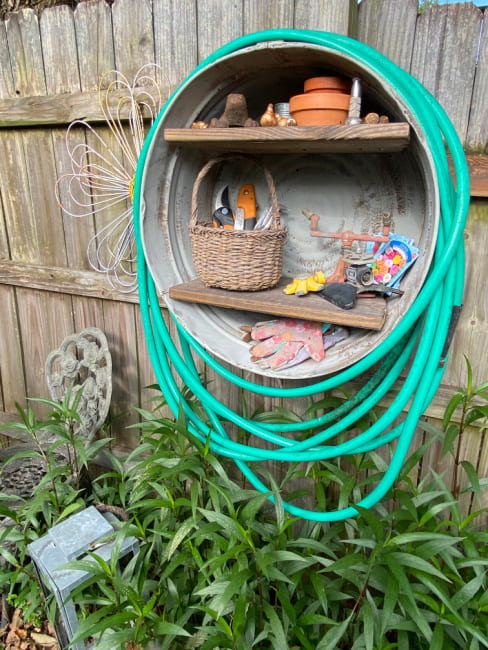
By hanging it sideways and adding a few wood shelves inside, I created a rustic garden caddy that stores gloves, tools, pots and even neatly wraps the garden hose around the outside.
Materials Needed
- 1 large round galvanized tub (approx. 20–24″ diameter)
- 2–3 wood planks
- Screws
- Mounting hardware
- 1 garden hose
- Optional: baskets
Step-by-step Guide
Step 1: Clean and dry the tub thoroughly. Choose a fence section with enough space to hang it securely.
Step 2: Mount the tub sideways against the fence using strong bolts or metal hooks. Make sure it’s level and secure.
Step 3: Add wood planks inside the tub to act as shelves, secure with L-brackets or drill through the tub sides into the shelf ends.
Step 4: Coil your garden hose around the outside of the tub. Use the shelves to store gloves, twine, tools, seed packets, or even small pots.
#7. Galvanized Tub Coffee Table with Wood Top
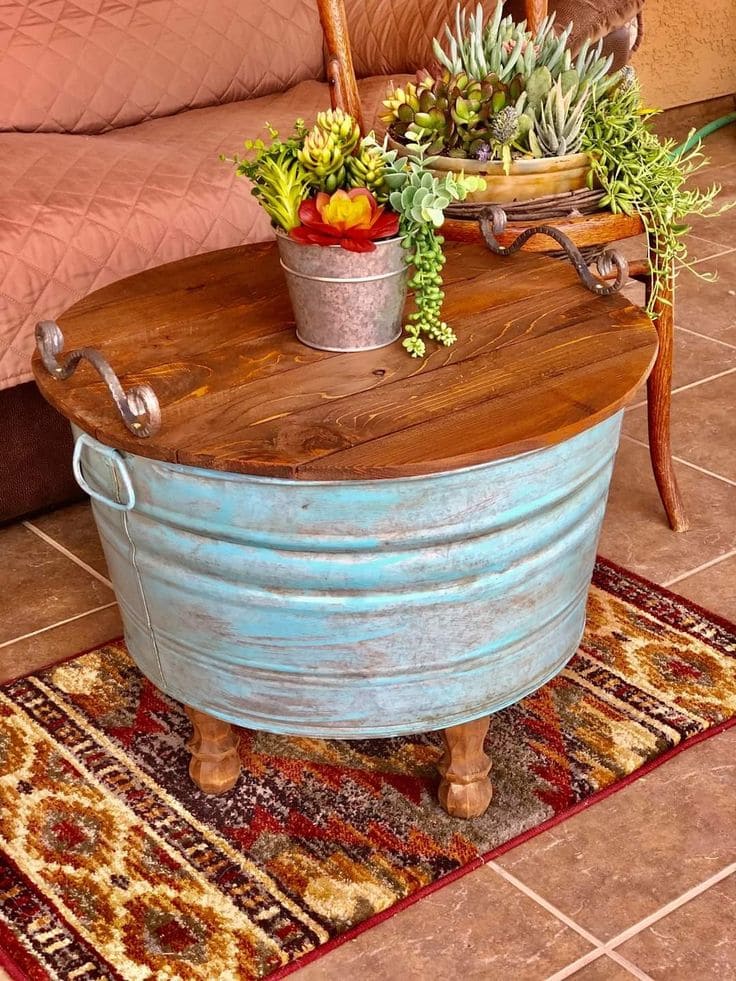
I transformed an old galvanized tub into a charming coffee table with a stained wood top and short furniture legs.
Materials Needed
- 1 large galvanized tub (approx. 18–22 inches tall, 24–30 inches wide)
- 1 round or oval wood tabletop
- 4 wooden furniture legs (approx. 6–8 inches tall)
- Screws and brackets
- Wood stain (optional)
- Power drill, screwdriver
Step-by-step Guide
Step 1: Clean and prep the galvanized tub. If you love the patina, keep it; otherwise, lightly sand and paint.
Step 2: Cut and sand a wood round to fit the top. Stain or seal the surface, then let it dry fully.
Step 3: Flip the tub and attach furniture legs using brackets or a scrap piece of wood as a base support.
Step 4: Secure the tabletop to the rim of the tub using screws or adhesive, making sure it’s centered and stable.
#8. Galvanized Tub Birdbath Garden
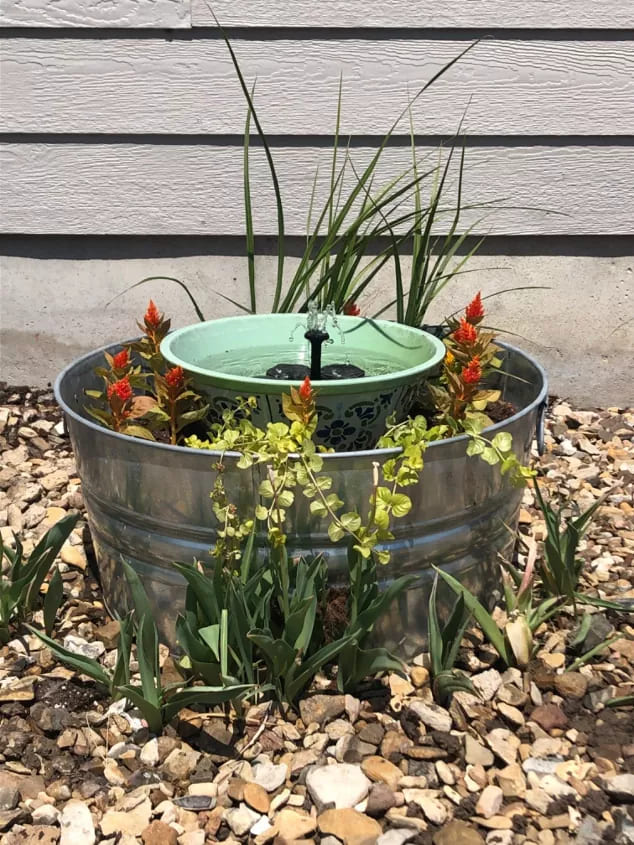
Nestled in a galvanized tub, the raised birdbath adds height and charm, while the surrounding blooms create a lush, inviting look.
Materials Needed
- 1 galvanized tub (18–24 inches wide)
- 1 shallow planter
- Potting soil
- Assorted plants (e.g., celosia, trailing vines, ornamental grasses)
Step-by-step Guide
Step 1: Fill the bottom of the galvanized tub with soil, leaving a flat area in the center for the birdbath bowl.
Step 2: Place the bowl in the center and fill it with clean water. Make sure it’s stable and level.
Step 3: Plant colorful flowers and trailing greenery around the bowl, letting some drape over the tub’s edges.
#9. Galvanized Tub Ottoman Seat
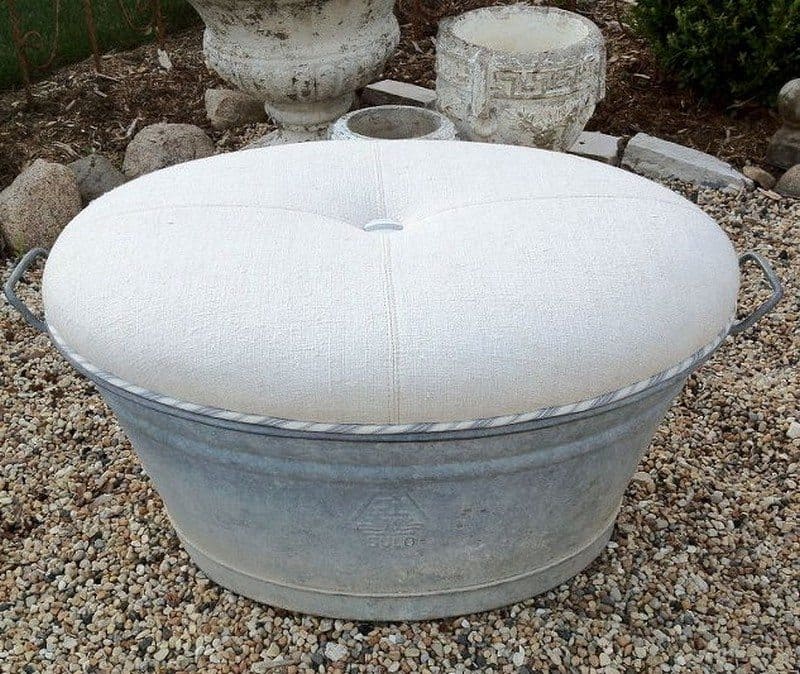
The plush upholstered top adds a touch of elegance, while the galvanized metal keeps the rustic vibe alive. It’s sturdy enough to double as extra seating or a footrest and adds hidden storage underneath if you leave the cushion liftable.
Materials Needed
- 1 round galvanized tub (18–22″ diameter)
- 1 round wood panel
- 2–3 inches thick foam cushion
- Upholstery fabric (approx. 1 yard)
- Upholstery stapler + staples
- 1 button tuft kit (optional)
- Adhesive spray
- Optional: rope trim
Step-by-step Guide
Step 1: Cut a wood circle to fit snugly on top of the tub rim. Place foam cushion on top and trim to match the wood shape.
Step 2: Wrap the fabric over the foam and wood base. Pull tight and staple the fabric underneath the wood, working evenly around.
Step 3: If adding a tufted button, drill a small hole through the center of the wood before wrapping, then thread and secure the button through foam and fabric.
#10. Stacked Galvanized Bucket Planter Display
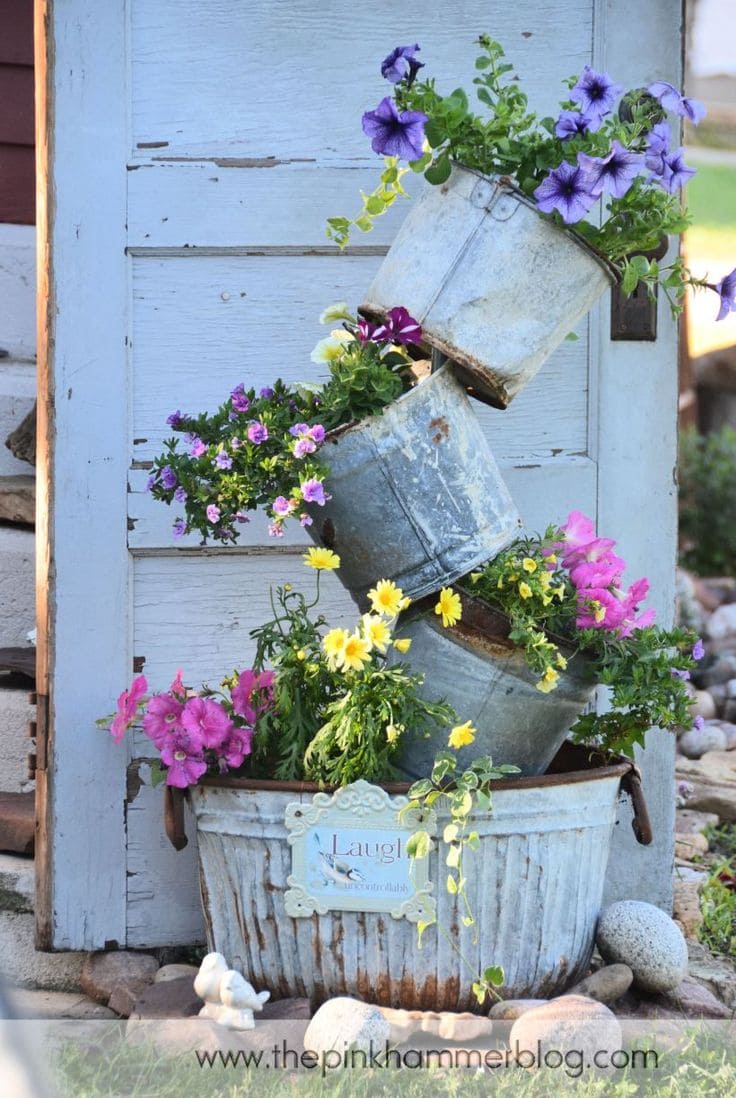
This cascading flower tower was pure fun to build and it became an instant conversation starter in the garden.
Materials Needed
- 1 large galvanized tub (base, approx. 24–28″ wide)
- 3 small galvanized buckets (each 8–12″ wide)
- 1 sturdy metal rod (about 3 feet tall)
- Potting soil (2–3 cubic feet)
- Assorted annual flowers (petunias, calibrachoa, daisies – 10–12 total)
- Optional: decorative garden sign, rocks
Step-by-step Guide
Step 1: Fill the large base tub with soil, leaving room for bucket placement. Insert the metal rod vertically into the center, anchoring it deeply.
Step 2: Thread the first bucket through the rod and tilt it at an angle, pressing it into the soil for stability. Repeat with the second and third buckets, adjusting angles to create a natural cascade.
Step 3: Fill each bucket with soil and plant flowers generously, letting some spill over the edges for a flowing look.
Step 4: Tuck in a small sign or stone decor for personality, and place the planter where it’ll get lots of sun and love.
#11. Galvanized Tub Fish Pond
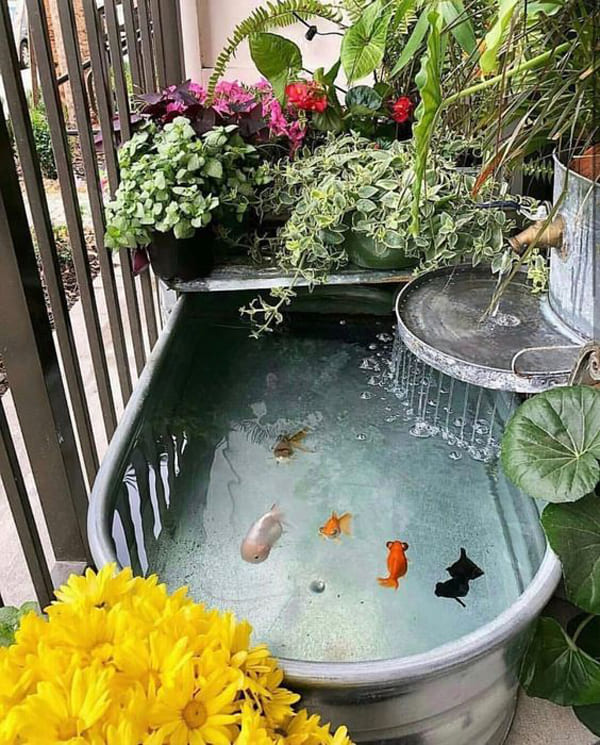
Nestled among vibrant blooms and lush trailing vines, the gentle trickle of the DIY waterfall adds soothing sound and visual movement.
Materials Needed
- 1 large galvanized tub (approx. 36–48″ long, 12–18″ deep)
- 1 small galvanized bucket
- Small submersible pump
- Flexible clear vinyl tubing (1/2″ diameter, pump-compatible)
- Assorted potted plants, trailing and upright
- Decorative rocks, water plants (optional)
- 3–5 goldfish
Step-by-step Guide
Step 1: Clean the tub thoroughly and place it on a level surface with plenty of sunlight but partial shade.
Step 2: Install the submersible pump at the base of the tub. Run tubing up the side and into the waterfall pan.
Step 3: Secure the pan slightly above the tub (on a plant stand or bricks). Let water spill gently back into the tub for a cascading effect.
Step 4: Arrange potted greenery around the edge for a lush border. Fill the tub with dechlorinated water and gently add your fish.
#12. Galvanized Tub Flower Planter
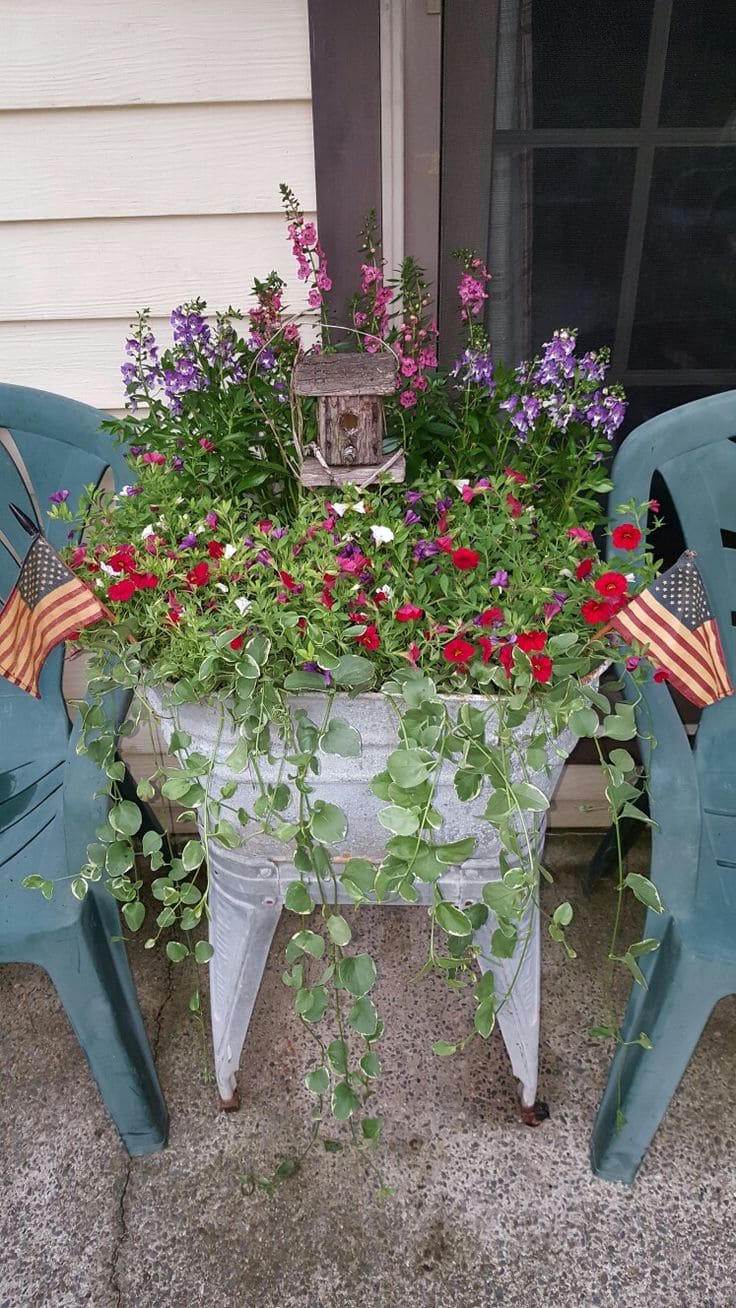
This piece became the heart of my porch, bursting with color, character, and a sweet rustic vibe.
Materials Needed
- 1 galvanized tub with legs (approx. 24–30 inches wide)
- Potting soil (2–3 cubic feet)
- Flowering annuals (petunias, calibrachoa, vinca vine, etc. – 12–16 plants)
- 1 decorative birdhouse
- 2 small garden flags (optional)
- Gravel (1–2 inches deep layer)
Step-by-step Guide
Step 1: Drill a few drainage holes in the bottom of the tub if it doesn’t already have them. Add a layer of gravel or broken pots.
Step 2: Fill with quality potting soil, leaving a couple inches below the rim.
Step 3: Plant taller flowers or the birdhouse in the center, and surround with cascading or spreading plants around the edges.
Step 4: Water thoroughly, then tuck in mini flags or accents for a personal, patriotic, or seasonal touch.
#13. Upcycled Galvanized Tub Garden Fountain
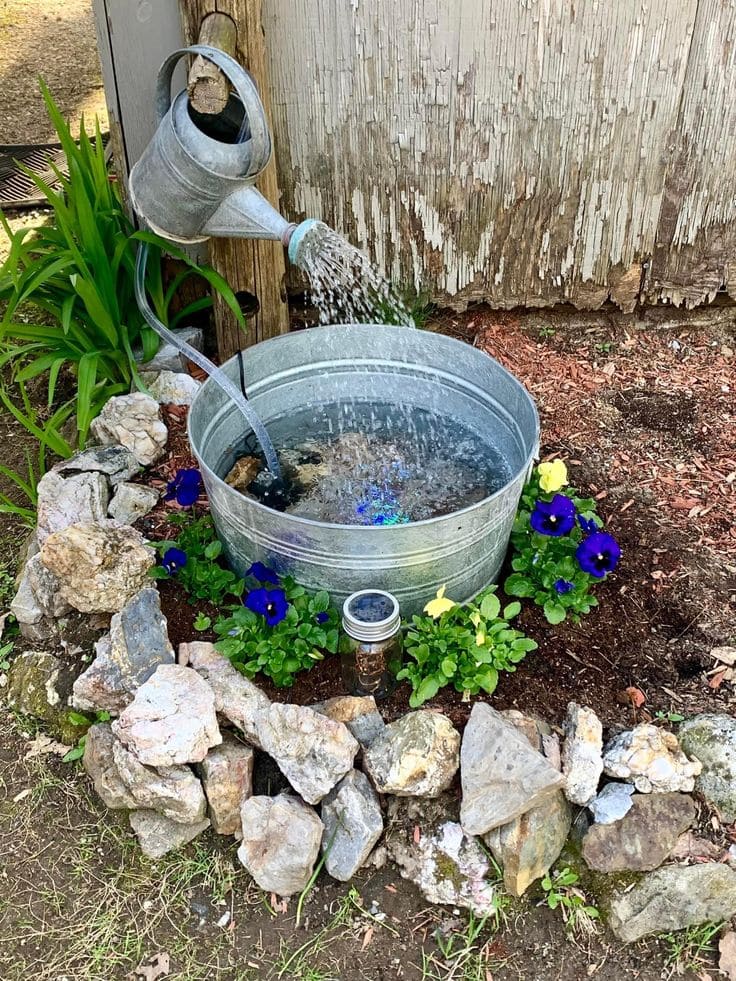
Surrounded by bright pansies and a ring of rustic stones, this fountain adds instant charm and peace to any garden corner.
Materials Needed
- 1 galvanized tub (approx. 15–20 inches wide, 12 inches deep)
- 1 old metal watering can
- 1 submersible water pump with tubing (min. 50–80 GPH)
- Decorative rocks (20–25 stones)
- 4–6 flowering plants (like pansies)
- Optional: solar light jar
Step-by-step Guide
Step 1: Place the galvanized tub where you want the fountain, level the ground if needed.
Step 2: Set the submersible pump inside the tub and connect it to the clear tubing. Feed the tubing through the spout of the watering can.
Step 3: Mount or support the watering can so it’s angled to pour into the tub. Plug in or activate the pump to circulate water.
Step 4: Surround the base with garden stones and tuck flowering plants around the edge. Add a small solar light jar nearby for a magical glow at dusk.
#14. Galvanized Tub Pendant Lights
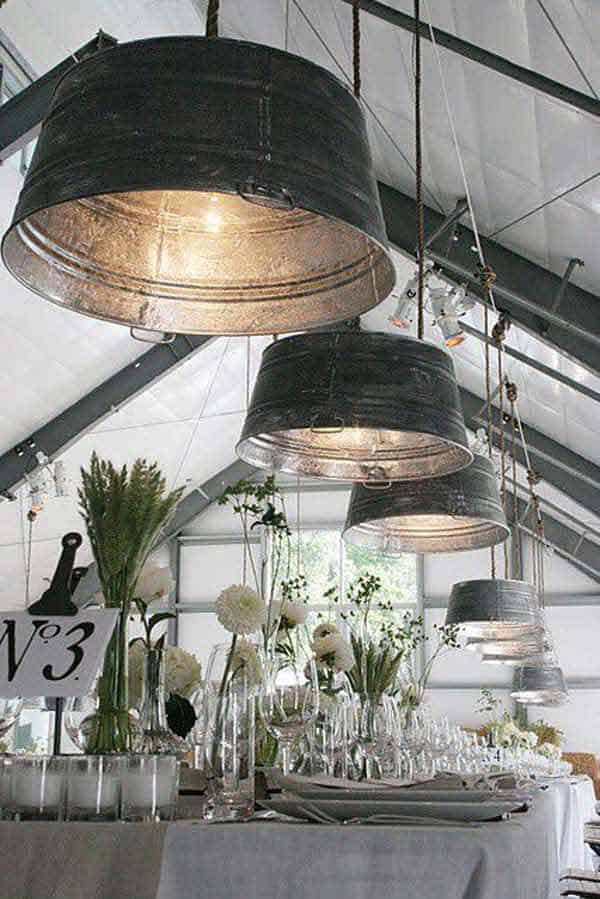
These upside-down galvanized tubs transformed a high-ceiling space into a rustic yet elegant dining area. Perfect for weddings, barns, or lofts, this lighting idea fuses country charm with contemporary edge.
Materials Needed
- 3–6 galvanized tubs (8–12″ deep, 14–18″ wide)
- Pendant light kits
- Light bulbs
- Drill with hole saw bit
- Strong rope
- Ceiling hooks
- Wire connectors, ceiling plates, and optional dimmer switch
Step-by-step Guide
Step 1: Drill a hole in the bottom center of each tub using a hole saw bit—just wide enough for your light socket to fit snugly.
Step 2: Insert the pendant light socket through the hole and secure it with a locking nut or bracket.
Step 3: Attach the wiring to ceiling outlets (or use swag hooks for plug-in versions). Be sure to follow electrical safety or consult an electrician.
Step 4: Use thick rope or metal chain to suspend each tub from the ceiling at your desired height. Plug in or switch on—and bask in the moody glow.
#15. Wall-Mounted Galvanized Sieve Candle Wreath
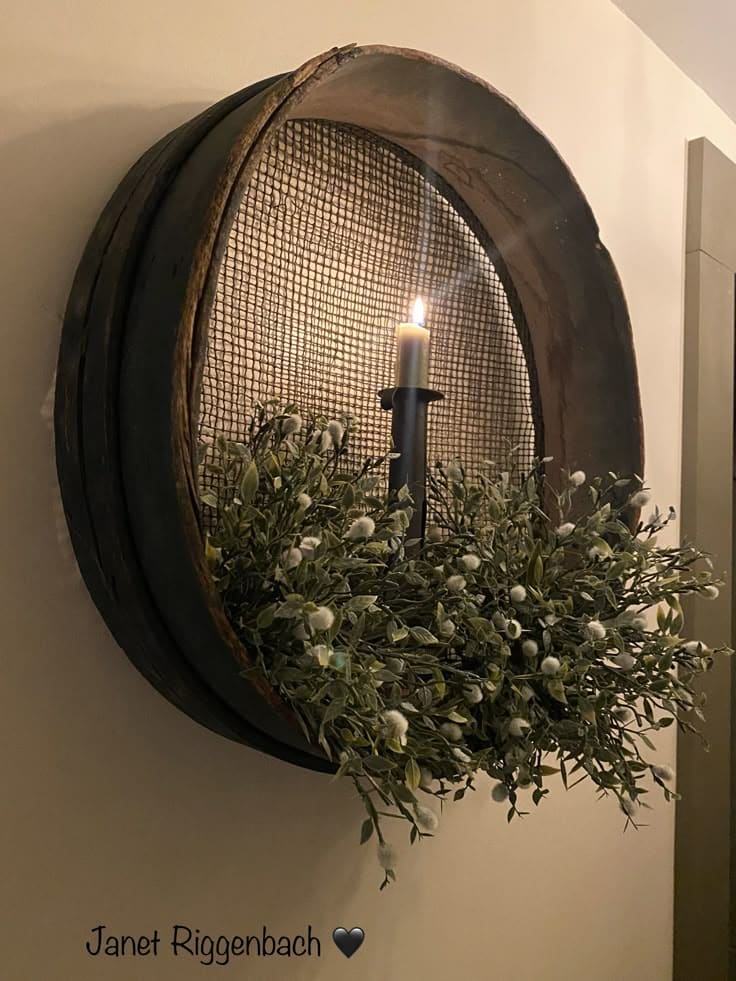
This piece feels like a cozy farmhouse evening wrapped in candlelight. The addition of a candle and faux greenery brings a soft, natural elegance.
Materials Needed
- 1 round galvanized tub lid (approx. 18–20 inches diameter)
- 1 taper candle holder with base
- 1 LED taper candle
- 1 small bunch faux greenery
- Floral wire
- Wall-mount hardware
Step-by-step Guide
Step 1: Clean the sieve thoroughly and dry. If needed, lightly sand for a worn vintage look.
Step 2: Secure the candle holder in the center using strong adhesive or screws if there’s a wooden base inside.
Step 3: Arrange the greenery around the bottom edge and sides. Attach using floral wire, hot glue, or by tucking stems into the mesh.
Step 4: Insert the LED candle, mount the sieve on the wall using a strong hook, and switch it on for instant rustic ambiance.
#16. Mini Rock Garden in a Vintage Galvanized Bucket
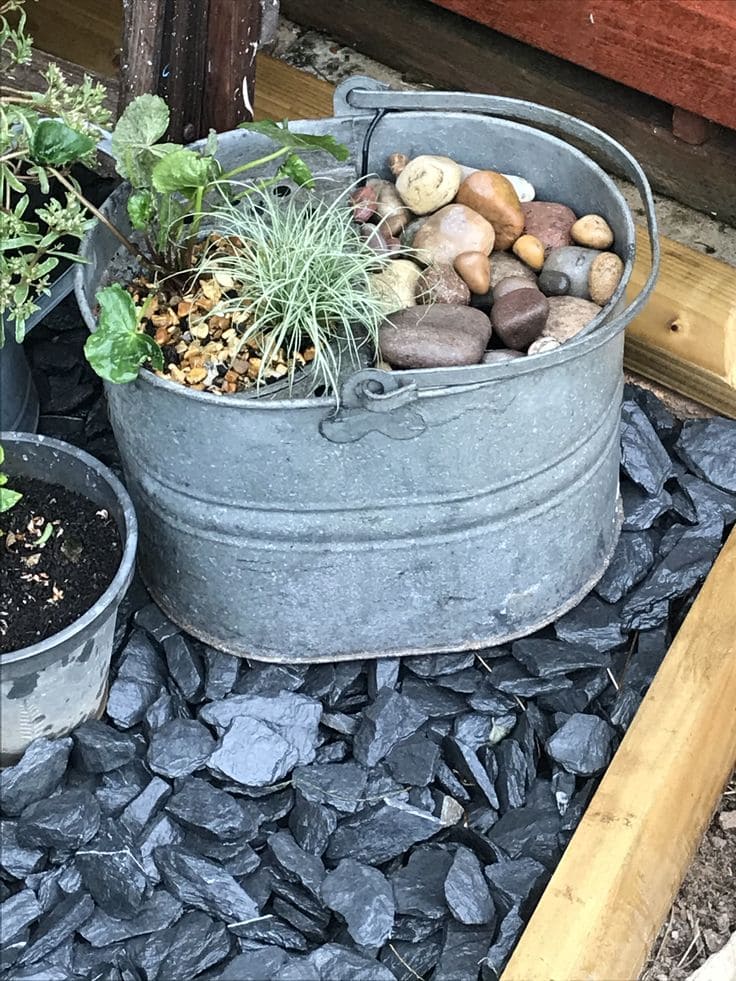
This rustic metal bucket has found new life as a charming mini rock garden planter. A mix of hardy plants, textured gravel, and smooth river rocks brings together natural beauty and easy care.
Materials Needed
- 1 vintage galvanized bucket (approx. 12–14″ diameter)
- 1 small bag of river rocks
- Cactus or succulent soil mix (1 small bag)
- Drought-tolerant plants (like blue fescue, hens-and-chicks, ivy, or sedum)
- Gravel (2–3 cups)
Step-by-step Guide
Step 1: Drill 3–4 small holes in the base of the bucket for drainage. Add gravel or sand as the first layer to help excess water escape.
Step 2: Fill with soil mix, leaving 1–2 inches of space at the top, then plant your greenery, spacing them out for breathing room.
Step 3: Top with stones, tucking them around the plants for contrast and moisture retention.
#17. Rustic Bucket Wreath Planter Display
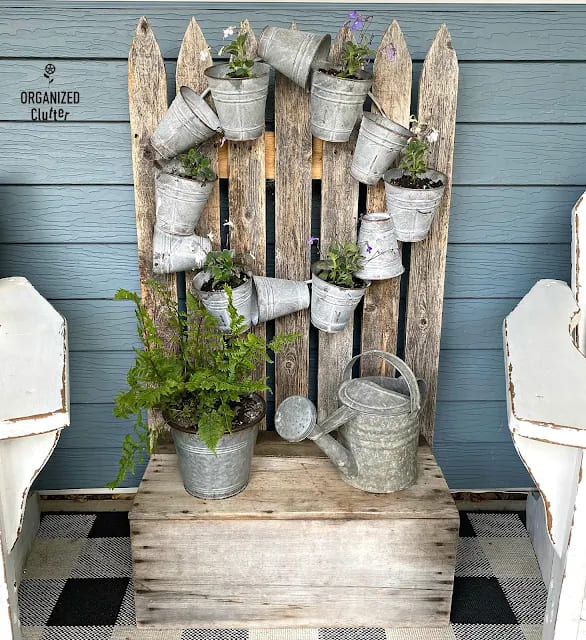
This delightful DIY wreath planter turns a plain fence panel into a rustic focal point using mini galvanized buckets.
Materials Needed
- 1 wooden pallet section (approx. 3–4 ft tall)
- 12–15 small galvanized buckets (approx. 4–5 inches in height)
- Small screws
- Potting soil and small plants
- Optional: watering can and extra planters
Step-by-step Guide
Step 1: Stand your pallet or fence upright against a wall or secure it vertically with support.
Step 2: Arrange your buckets in a circular wreath shape on the wooden backdrop. Mark each position.
Step 3: Drill or hammer screws through the handles or bucket backs to attach them securely to the wood.
Step 4: Fill each bucket with potting soil and plant your choice of annuals, herbs, or trailing greenery. Water lightly.
#18. Galvanized Trough Serving Bar on Wheels
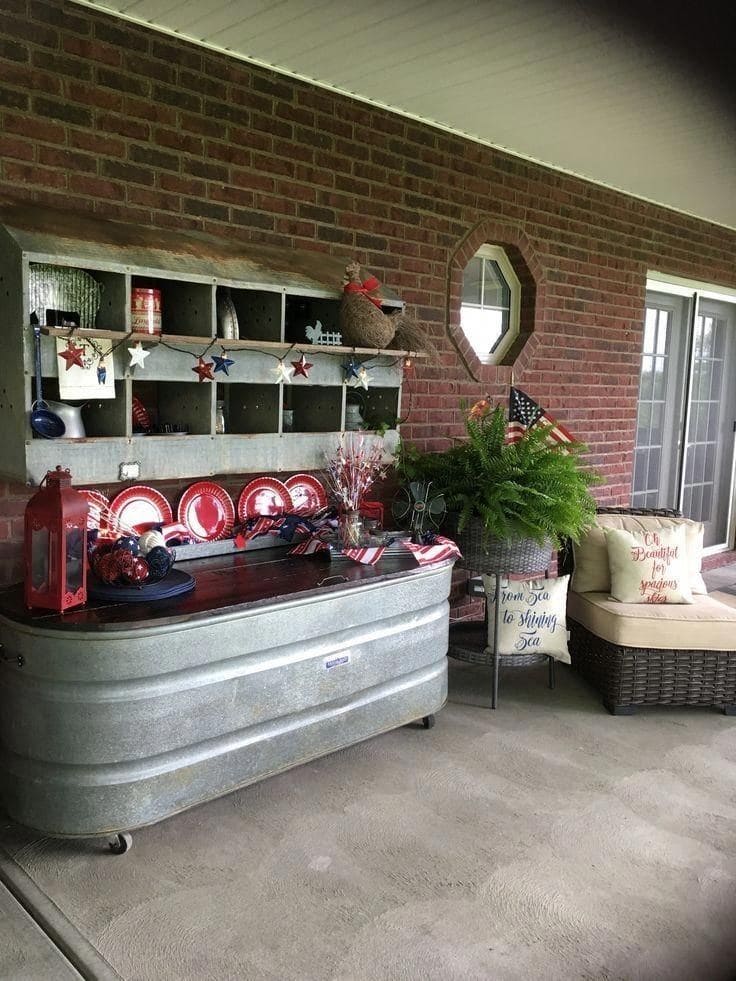
With a wooden top, caster wheels, and plenty of space, it’s the perfect addition to any porch or party setup.
Materials Needed
- 1 galvanized livestock trough (approx. 4–6 feet long)
- 1 wood plank top
- 4 caster wheels
- Screws and brackets
- Drill, screwdriver, sealant
- Optional: patriotic decor, serving trays, utensil holders
Step-by-step Guide
Step 1: Flip the trough and attach caster wheels to each corner using screws and mounting plates. Make sure they’re level and can lock if needed.
Step 2: Cut and sand the wood top to match the dimensions of the trough opening. Stain or seal the surface and let dry completely.
Step 3: Attach the wood top with hinges or leave it removable for hidden storage. Add handles if you want easy access.
Step 4: Style it with festive decor or dining essentials like plates, drinks, napkins, or even plants for a casual garden party vibe.
#19. Rustic Winter Porch Decor with Galvanized Tubs
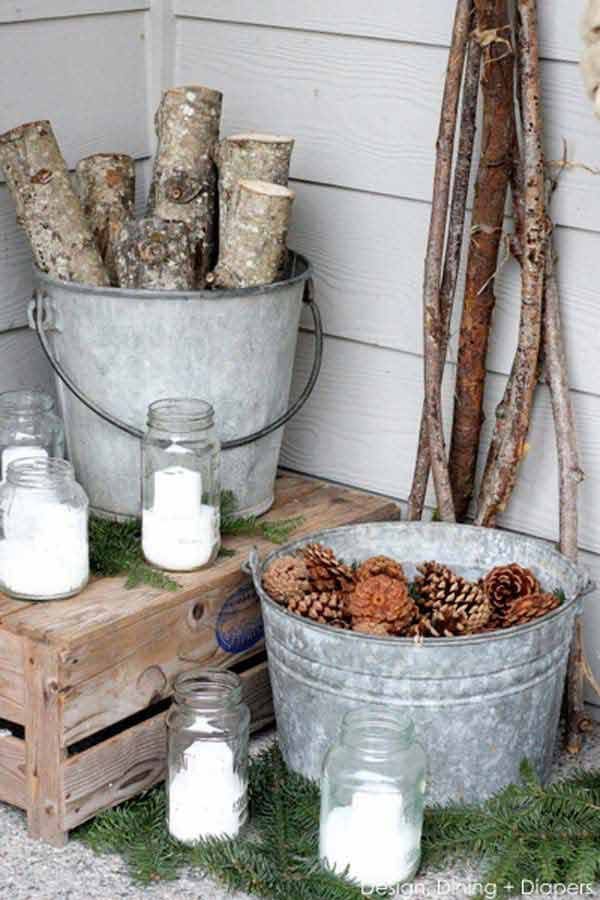
Paired with mason jar candles, scattered pine branches, and a few weathered sticks, the entire arrangement brings a handmade charm to any entryway.
Materials Needed
- 2 galvanized tubs
- Pinecones, logs, and sticks
- 4–6 mason jars + white candles
- Evergreen clippings
Step-by-step Guide
Step 1: Place one tub on a wooden crate or stand to create height. Fill it with chopped logs or bundled sticks.
Step 2: Fill the second tub with pinecones. Add a few cinnamon sticks or orange peels if you want a natural scent.
Step 3: Arrange evergreen clippings around both tubs to soften the look and add color.
Step 4: Fill mason jars with a little salt (for a snow effect) and place a candle inside each. Position them around the display for a glowing, wintery feel.
#20. Galvanized Tub Blanket Storage Basket
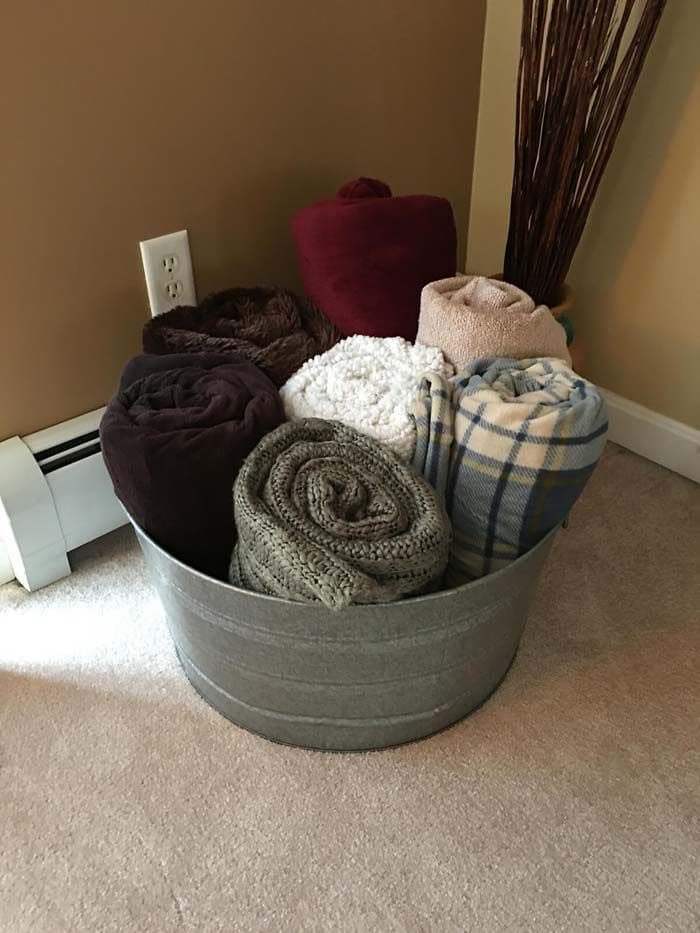
Sometimes the best ideas are the simplest. This upcycled galvanized tub became my go-to blanket station, perfect for rolled throws, cozy knits, or even dog toys.
