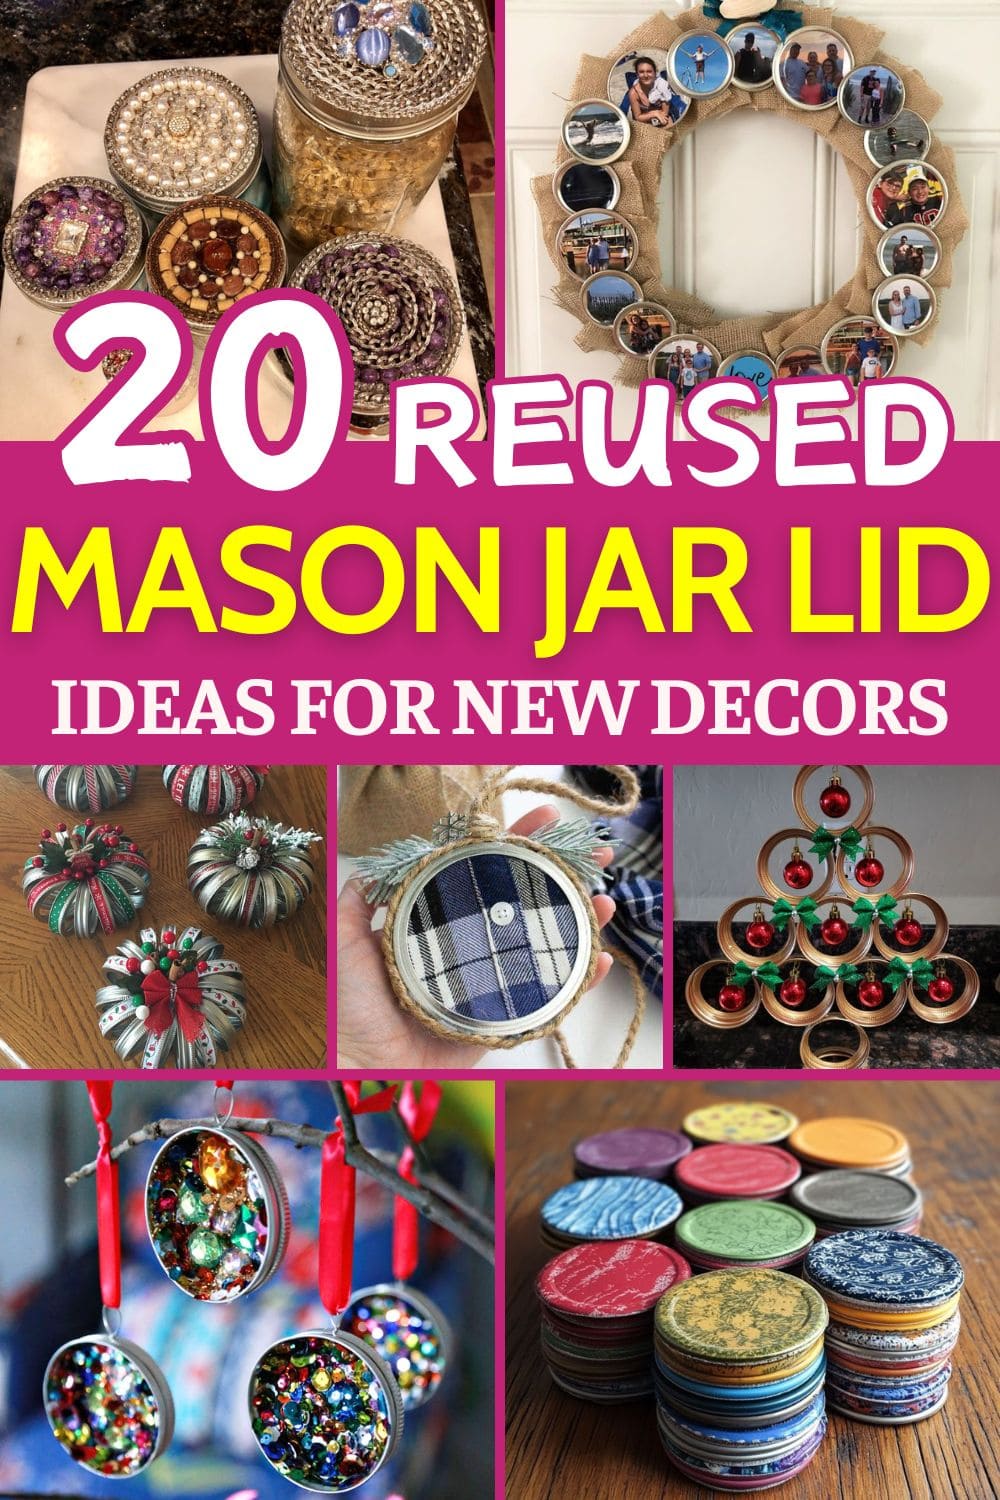
Last Christmas, I found myself surrounded by a pile of empty mason jars after a flurry of cookie gifting, homemade candles, and festive drinks. The jars were gone, but the lids? They are stacked high, too good to toss.
So, on a snowy afternoon with a mug of cocoa and zero plans, I started crafting. One lid turned into an ornament, another into a mini wreath and just like that, a new holiday tradition was born.
If you’ve ever wondered what to do with those leftover lids, you’re in for a treat. These 20 charming mason jar lid ideas are simple, creative, and absolutely worth trying no matter the season.
#1. Glam Mason Jar Lid Ornaments
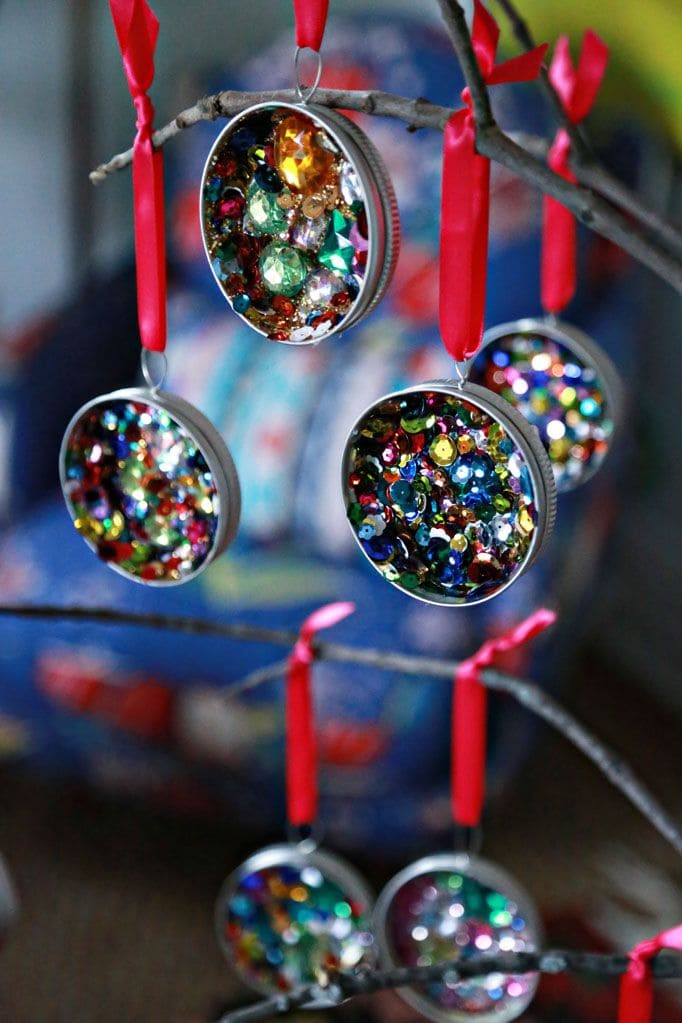
This craft is like a mini treasure hunt in a jar lid. Whether you’re decorating a holiday tree or just adding flair to a dull corner, these glam mason jar lid ornaments catch the light and turn it into magic.
Materials Needed:
- Wide-mouth mason jar rings and lids (1 lid + 1 ring per ornament)
- Clear-drying glue or resin
- Assorted sequins, gems, and beads (around 2 tbsp per ornament)
- Red ribbon (10-12 inches per ornament)
- Small paintbrush
Step-by-Step Guide:
Step 1: Place the lid inside the mason ring to form a backing. Then add a generous layer of glue or pour a thin layer of resin inside the lid’s surface.
Step 2: Sprinkle your sequins and gems into the sticky surface, arranging them or letting them fall randomly for a fun, layered effect.
Step 3: Let it dry completely (overnight for glue, 24 hrs for resin), then tie a ribbon loop through the ring to hang it.
#2. Mason Jar Lid Photo Wreath
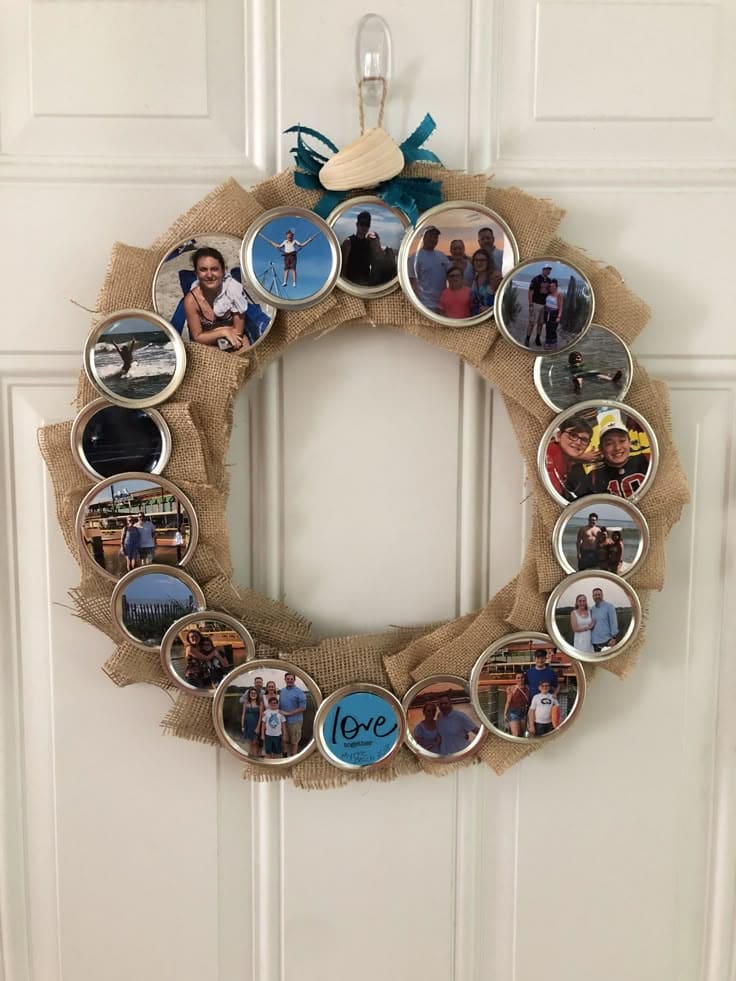
This mason jar lid photo wreath does exactly that, it turns everyday jar lids into miniature picture frames, each one holding a memory that brings you joy.
Additionally, wrapped in rustic burlap and topped with beachy ribbon and a shell, it feels personal, handmade, and full of love.
Materials Needed:
- 20 mason jar lids
- Printed mini photos (2.5″ diameter)
- Hot glue gun and glue sticks
- 1 burlap ribbon roll (2-3″ wide, ~5 ft)
- Foam wreath form (12″)
- Optional: embellishments like ribbon, seashells, buttons
Step-by-Step Guide:
Step 1: Wrap your wreath form with burlap, overlapping slightly as you go. Then glue ends down securely.
Step 2: Cut and glue your printed photos into the center of each mason jar lid ring, backing them with cardstock for stiffness.
Step 3: Arrange the photo lids around the wreath and glue them evenly onto the burlap-covered base.
Step 4: Finally, add decorative elements like ribbon bows or a seashell topper for extra personality.
#3. Christmas Mason Jar Lid Ornaments
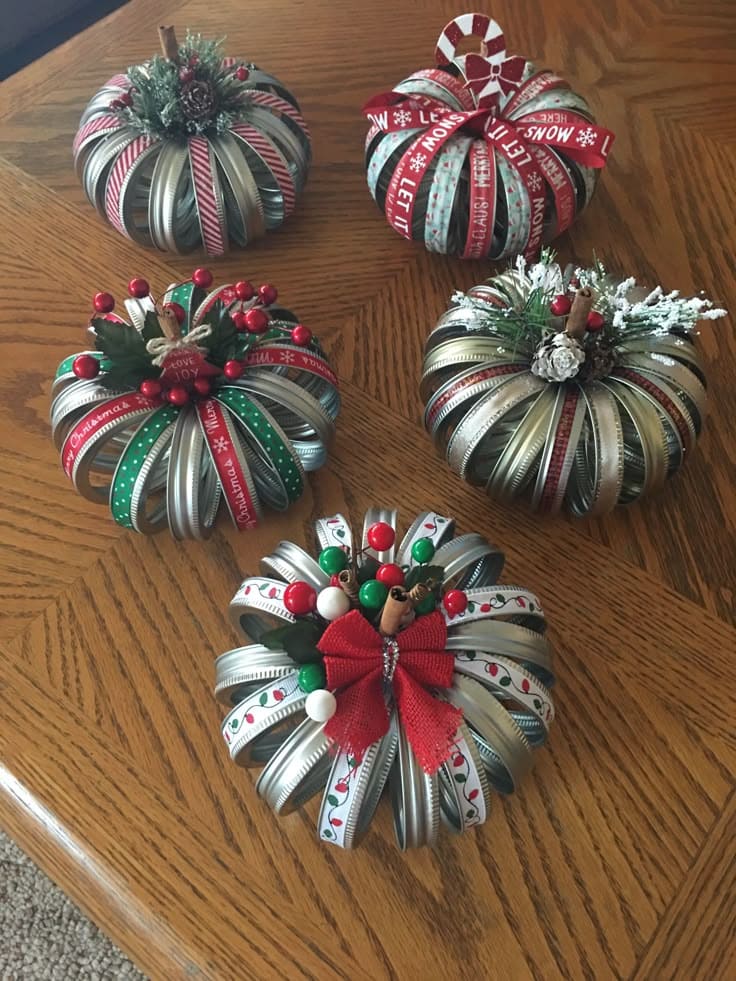
These festive mason jar lid ornaments are the kind of DIY that makes your home feel instantly cozier. Shaped like charming little holiday pumpkins, they’re a wonderful project to do with kids or friends on a wintry afternoon.
And the best part is that they reuse lids you might otherwise toss.
Materials Needed:
- 16 mason jar bands per ornament
- 1 cinnamon stick per ornament (about 3-4 inches)
- Holiday ribbon (about 3 ft per ornament)
- Decorative picks, berries, bows, or greenery
- Twine or string
- Hot glue gun and glue sticks
Step-by-Step Guide:
Step 1: String all 16 mason jar bands onto a length of twine, looping them through the center hole. Then tie the ends tightly together to form a circle, evenly spacing the bands like pumpkin ribs.
Step 2: Place the circle upright and hot glue a cinnamon stick into the center for the stem.
Step 3: Wrap ribbon around the bands or weave through, then hot glue it in place for extra color and texture.
Step 4 (Optional): You can add small embellishments like mini pinecones, faux berries, or glittery greenery to the top.
#4. Glam Mason Jar Lids
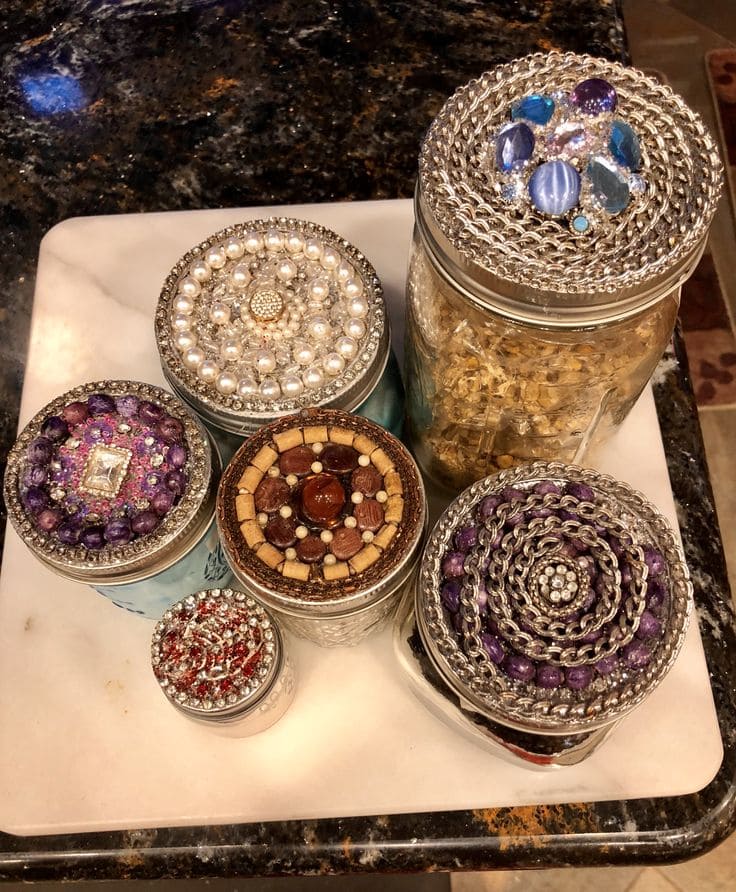
These glam mason jar lids bring a burst of personality to your pantry, vanity, or craft shelf. This is also an ideal DIY project for using up leftover jewelry pieces, rhinestones, and beads you’ve been saving for something special.
Materials Needed:
- Mason jar lids
- Assorted beads, rhinestones, old earrings, or broken jewelry
- Strong craft glue
- Optional: decorative trim
- Toothpick
Step-by-Step Guide:
Step 1: Clean your lid surface and let it dry completely. This helps the glue and decorations stay secure.
Step 2: Plan your design before gluing like spirals, mandalas, or random bursts all look great.
Step 3: Use a toothpick or precision nozzle to apply glue in small sections. You need to press each bead or embellishment gently into place.
#5. Resin Photo Coasters with Mason Jar Lids
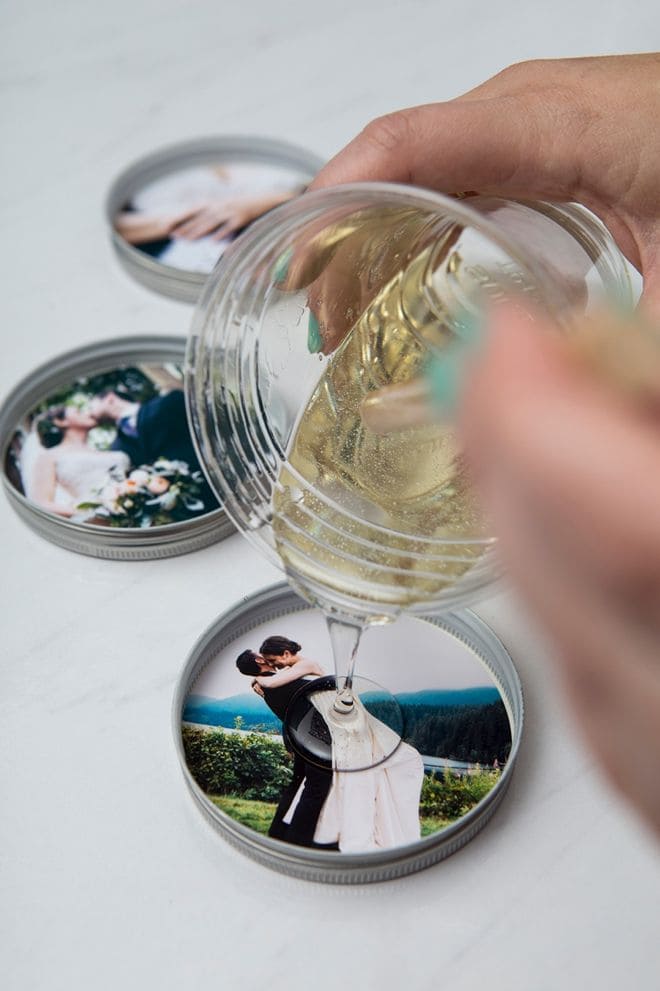
You can see these resin photo coasters are perfect for weddings, anniversaries, or even just a cozy reminder of the people you love.
Moreover, they’re surprisingly easy to make, and once finished, they add a glossy, glass-like touch that makes any snapshot feel extra special.
Materials Needed:
- Wide-mouth mason jar lids (ring + insert)
- Printed photos (approx. 3.25″ diameter)
- Clear epoxy resin
- Mixing cup and stir stick
- Mod Podge
- Gloves and a flat surface
Step-by-Step Guide:
Step 1: Start by trimming your photos to fit perfectly inside each mason jar lid insert. Then, gue them down with Mod Podge and let dry completely to avoid bubbling.
Step 2: Mix your resin according to the package instructions.
Step 3: Slowly pour the resin over the photo in the lid, filling just enough to coat the surface evenly. Now, you use a toothpick to pop any air bubbles.
Step 4: Let the resin cure undisturbed for 24-48 hours until it hardens to a smooth, clear finish.
#6. Rustic Mason Jar Lid Ornaments
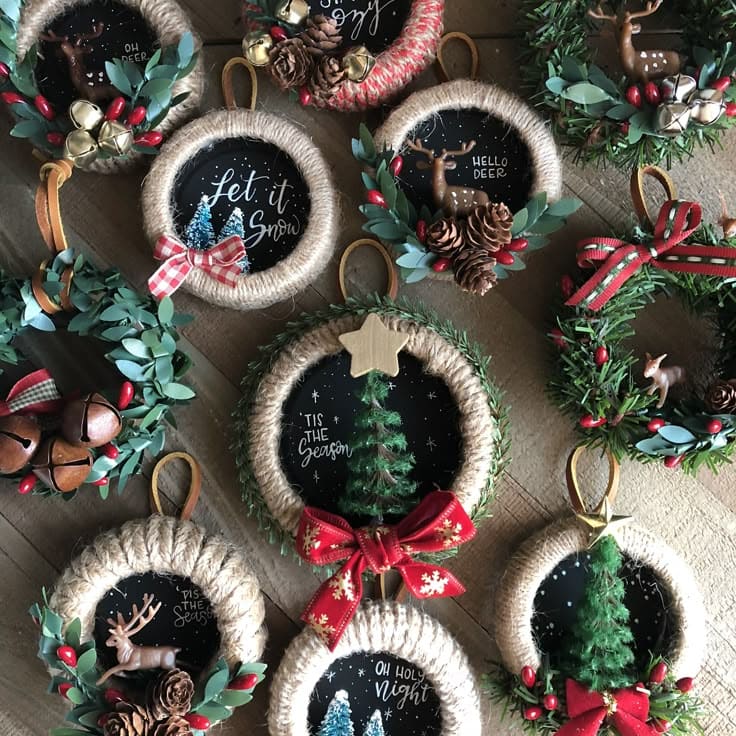
These cozy mason jar lid ornaments feel like something pulled straight out of a nostalgic holiday memory, think pine-scented evenings, warm cider, and that quiet hush right before snowfall.
Whether you hang them on your Christmas tree or gift them with love, each one carries its own festive charm.
Materials Needed:
- Mason jar lids
- Black cardstock
- Mini bottlebrush trees, deer figures, tiny pinecones, etc.
- Twine or jute rope
- Hot glue gun + glue sticks
- Chalk pen
- Ribbon, berries, bells
- Loop string
Step-by-Step Guide:
Step 1: Cut a circle of black cardstock to fit inside the lid, or paint a sturdy surface black.
Step 2: Decorate your scene by gluing in mini trees, deer, or holiday figures. You can also add wording with a paint pen.
Step 3: Wrap the outside edge of the lid with twine or jute rope, gluing as you go.
Step 4: Attach festive embellishments like small bows, berries, or faux leaves along the base or top edge.
Step 5: Finally, glue a looped piece of string or ribbon on the back for easy hanging.
#7. Scrappy Sunflowers in a Mason Jar
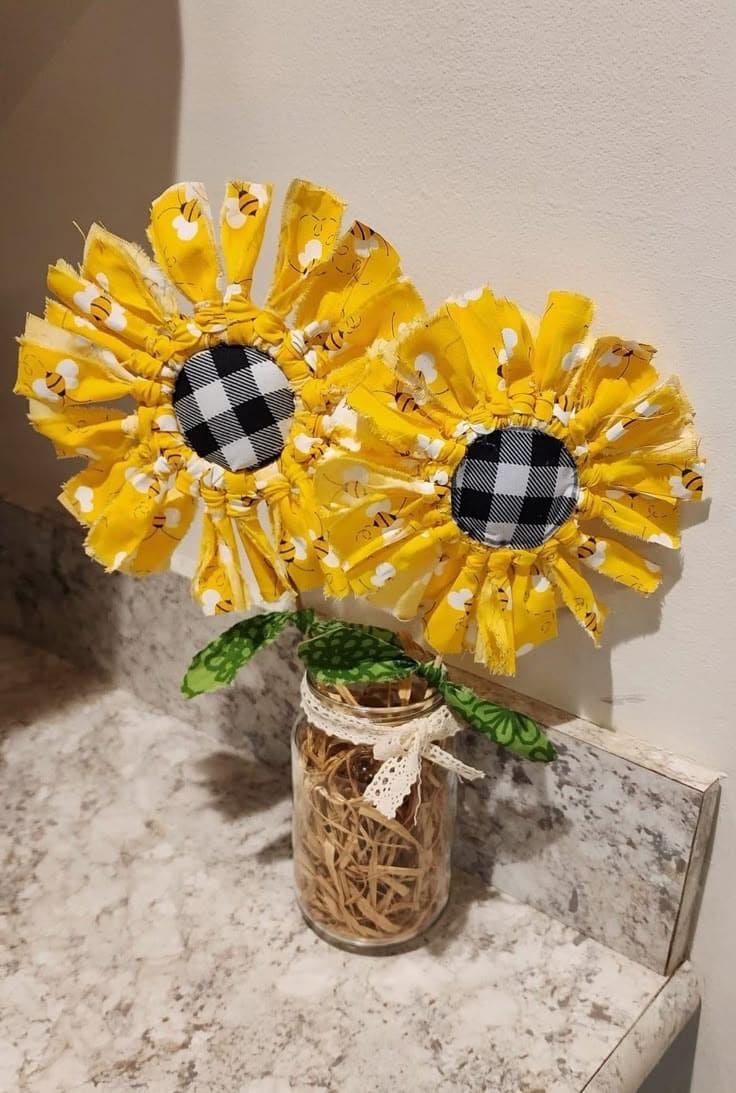
If you’re looking to brighten up a corner or create a rustic centerpiece, this project hits the sweet spot between farmhouse charm and cheerful whimsy.
Also, each petal is made from torn strips of fabric, giving it a textured, homespun feel that makes every flower perfectly unique. You can pair it with a mason jar base stuffed with raffia and tied with lace for that cozy, cottage-kitchen look.
Materials Needed
- 1 mason jar (pint-sized)
- 2 jar lids or heavy-duty cardboard circles (3-4” diameter)
- 2 pieces of black-and-white checkered fabric
- 30 yellow fabric strips (1″ x 5″ each)
- Green fabric (2-4 leaf shapes)
- Floral wire (approx. 10”)
- Hot glue gun + glue sticks
- Raffia
- Lace ribbon (10-12”)
Step-by-Step Guide
Step 1: Tie each strip of yellow fabric around the edge of your lid or cardboard circle to form petals. Then push them close together until it forms a full bloom.
Step 2: Glue the checkered fabric circle over the center to hide the knot ends and create a sunflower face.
Step 3: Attach floral wire or a small stick to the back using hot glue as your sunflower stem. You continue to add green fabric leaves along the stem.
Step 4: Fill your mason jar with raffia for a natural look. Then insert the sunflower stems into the jar and tie a lace ribbon around the mouth of the jar for a pretty finishing touch.
#8. Mini Mason Jar Lid Pumpkin Craft
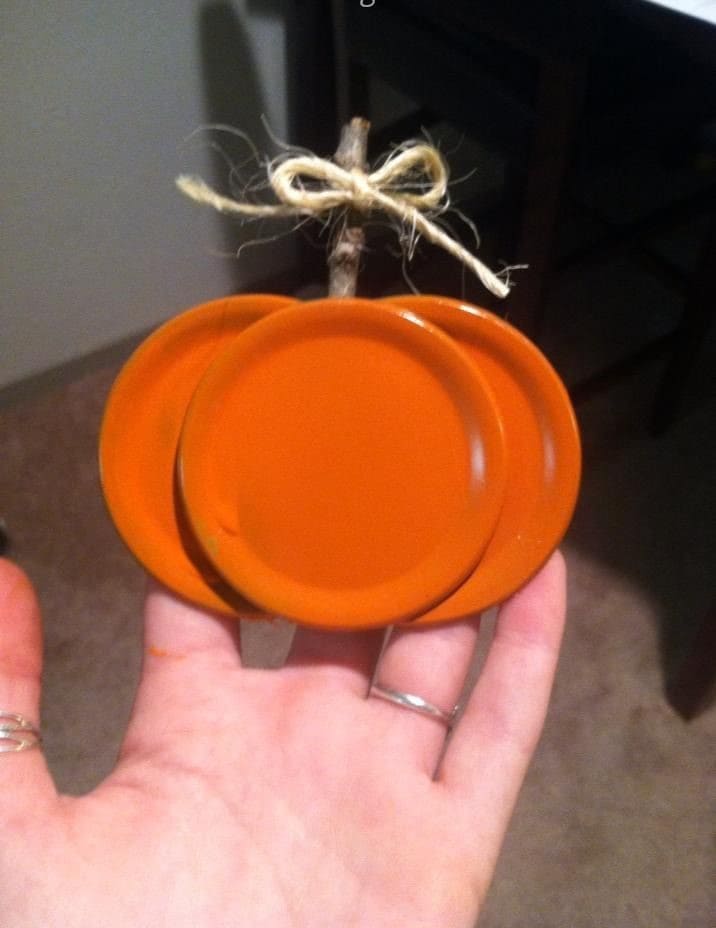
Sometimes, the most delightful projects are the simplest ones and this little pumpkin made from mason jar lids is no exception.
Perfect for fall decorating, this craft brings a warm, handmade charm to your table, mantle, or even a kid’s room. It’s quick, low-cost, and totally beginner-friendly.
Materials Needed:
- 3 regular-sized mason jar lids (flats only)
- Orange acrylic paint (1-2 oz.)
- 1 small stick (approx. 2-3” long)
- Twine (8-10”)
- Hot glue gun & glue sticks
- Optional: clear sealer spray
Step-by-Step Guide:
Step 1: Paint all three mason jar lids with orange acrylic paint. Let them dry completely, then add a second coat if needed.
Step 2: Arrange the lids slightly overlapping each other in a pumpkin shape and glue them together at the edges using hot glue.
Step 3: Glue the twig upright behind the top center to serve as the stem.
Step 4: Tie a small bow from twine and glue it at the base of the twig for a rustic, finished touch.
#9. Snowman Mason Jar Ring Decoration
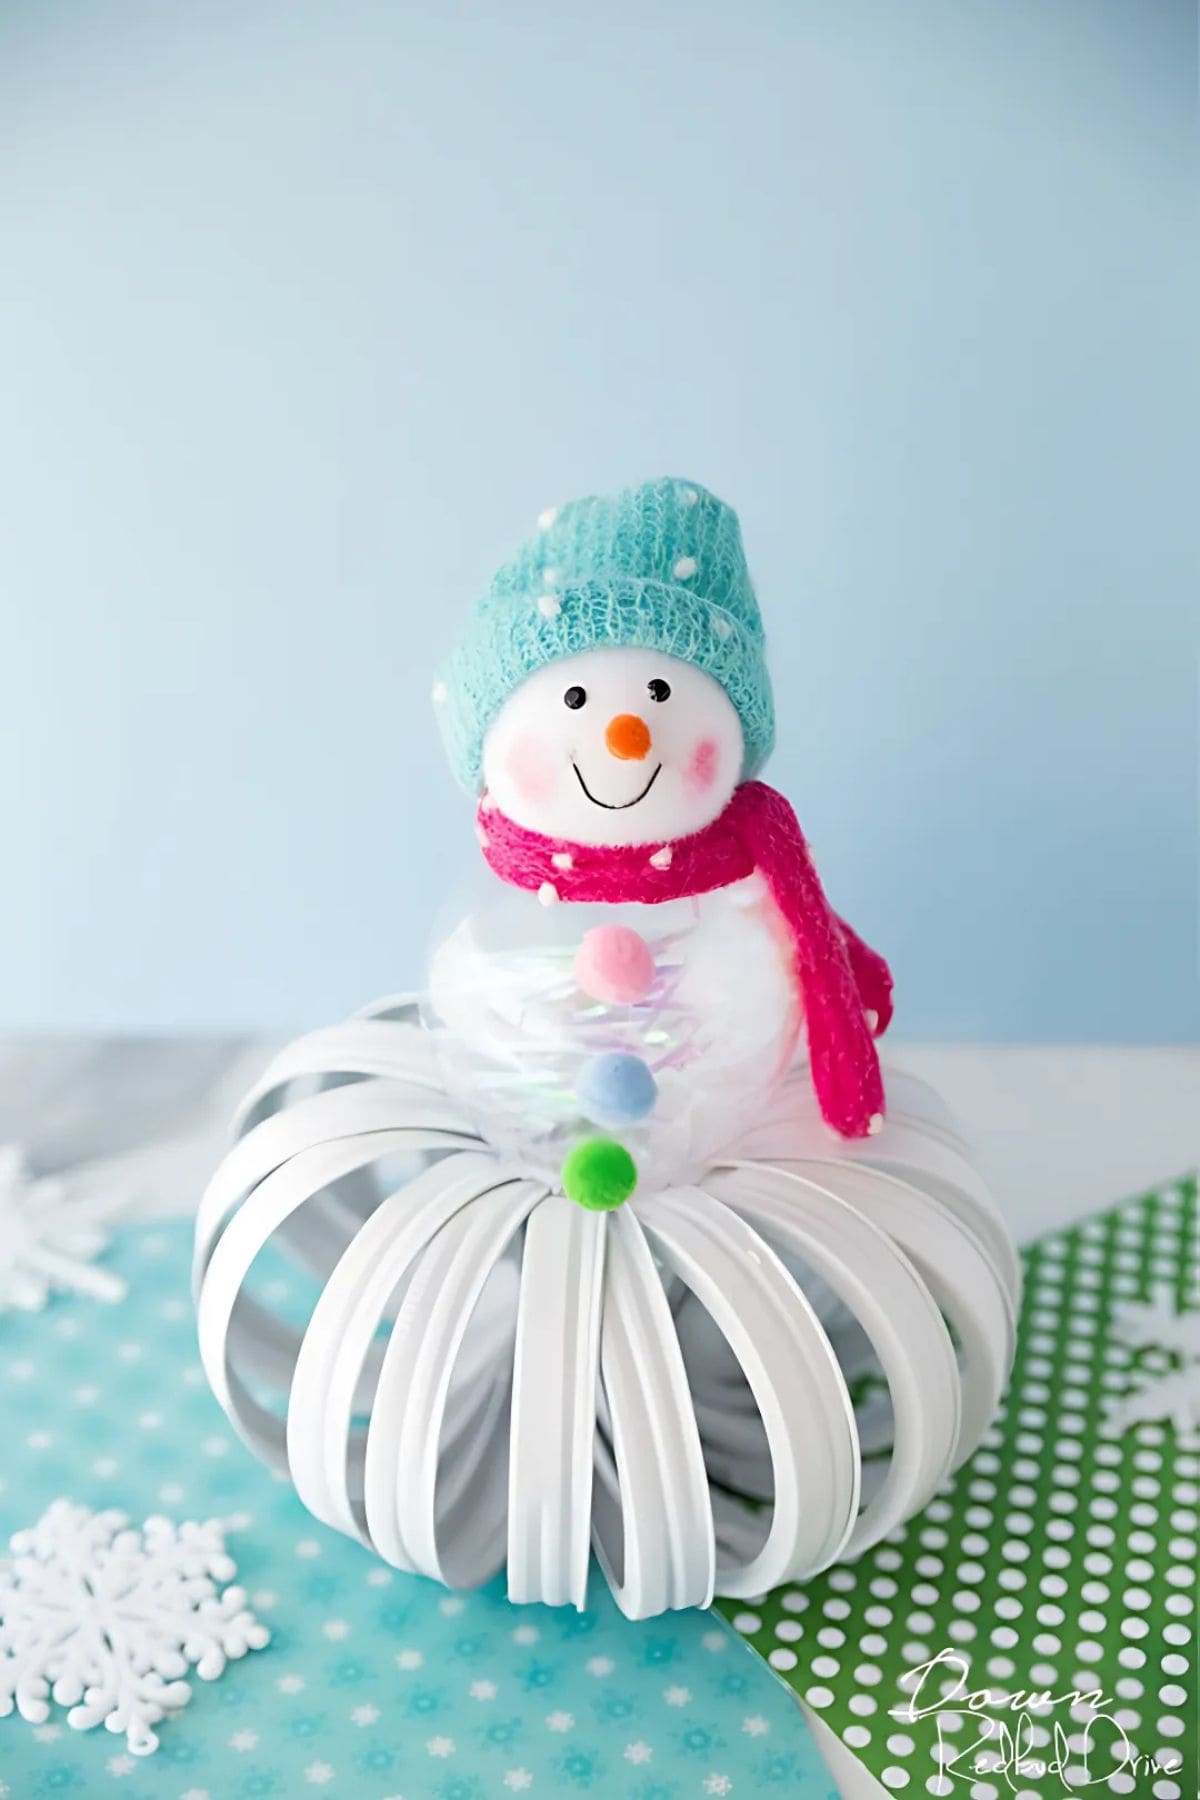
This decoration is pure winter magic with a dash of whimsy. The base, made from painted mason jar rings, forms a charming pumpkin-like shape that supports an adorable snowman.
Moreover, with a bright scarf, cozy hat, and cheery smile, this frosty friend adds joy to any mantel, table, or shelf.
Materials Needed
- 16 mason jar rings
- 2 clear plastic ornaments
- 1 large white pom-pom (approx. 2″)
- 1 mini hat
- 1 felt strip (6″ long)
- 3 small colorful pom-poms
- Orange craft foam
- Black marker
- Pink blush
- Hot glue gun and glue sticks
- Twine or ribbon (optional)
Step-by-Step Guide
Step 1: Lay out 16 mason jar rings in a circle, flat side down. Then secure them tightly together in the center with twine or a strong dab of hot glue.
Step 2: Glue the medium clear ornament in the center as the snowman’s body.
Step 3: Add the white pom-pom or small clear ornament on top to form the snowman’s head. Now, you attach the mini hat and scarf for warmth and cuteness.
Step 4: Use a marker to draw on the snowman’s eyes and smile and add the orange foam nose and blush the cheeks for a friendly, rosy look. Finish with three mini pom-poms as buttons on the body.
#10. Rustic Mason Jar Lid Pumpkin
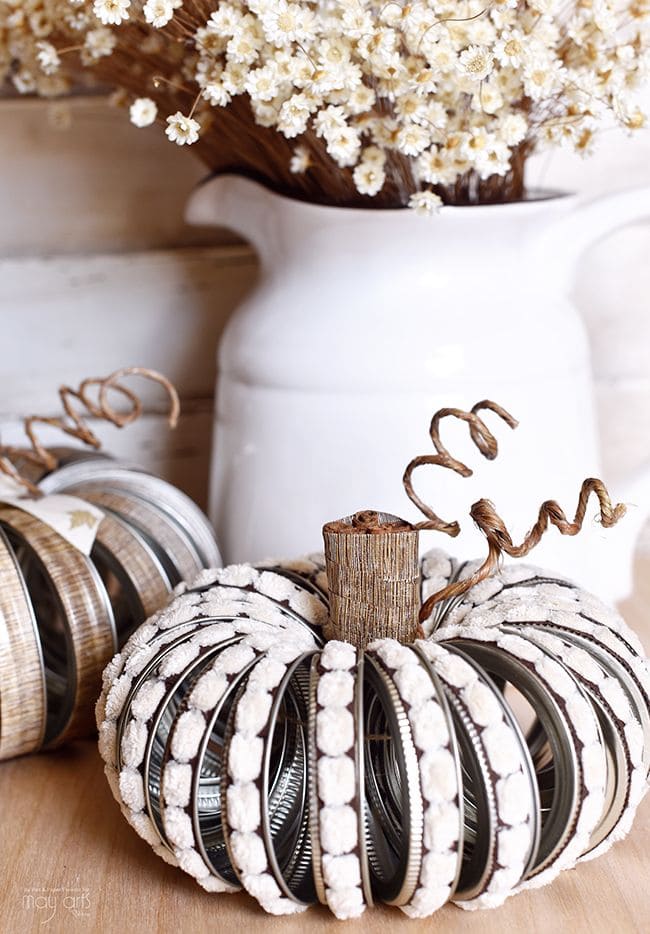
This mason jar lid pumpkin brings the sweetest touch of farmhouse charm to your fall decor. It’s the kind of craft that feels both nostalgic and refreshingly modern.
The best part is that it uses what you already have: old jar bands, leftover ribbon, and a little imagination.
Materials Needed:
- 16 wide-mouth mason jar bands
- 1 short wooden stick (2-3 inches)
- 1.5 yards of textured ribbon
- Twine (approx. 12 inches)
- Hot glue gun + glue sticks
Step-by-Step Guide:
Step 1: Thread all the jar bands onto a piece of twine, with the ribbed side facing out. Then tie it tightly into a ring so the bands form a pumpkin shape.
Step 2: Cut your ribbon into strips and hot glue them across the top of each band.
Step 3: Glue a short piece of stick into the center hole to create the pumpkin stem. Next, you wrap a small piece of wire or twine around a pencil to make a curled vine and hot glue it beside the stem.
#11. Patterned Mason Jar Lid Magnets
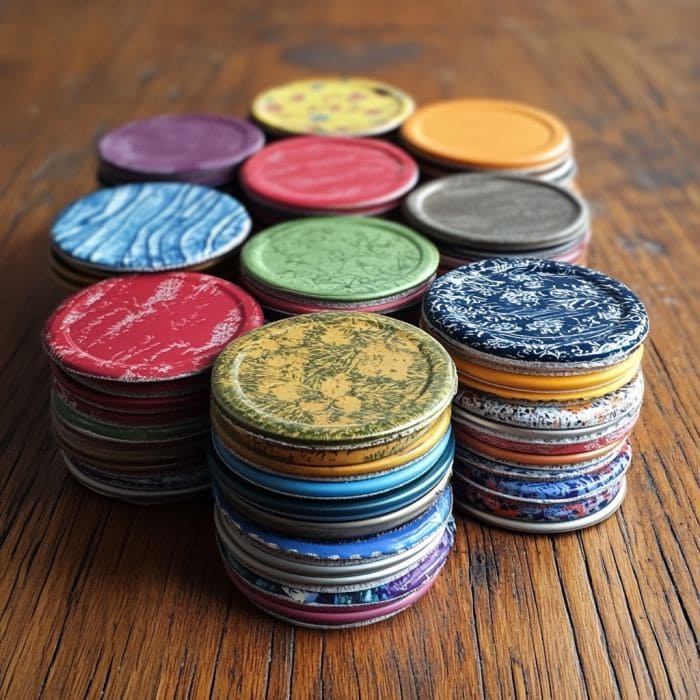
These patterned mason jar lid magnets are one of those little DIYs that sneak up on you, you start with one or two, and before long, you’re covering the fridge with tiny bursts of color.
They’re especially fun for kids who love to pick out their favorite patterns or help glue things down. Plus, they make sweet homemade gifts that feel both charming and useful.
Materials Needed:
- Mason jar lids
- Scrapbook paper or patterned fabric
- Mod Podge
- Round magnets
- Scissors
- Hot glue gun
Step-by-Step Guide:
Step 1: Cut circles from your favorite scrapbook paper or fabric to fit the inner surface of each mason jar lid.
Step 2: Apply a layer of Mod Podge to the lid and gently press the patterned paper on top, smoothing out bubbles.
Step 3: For extra durability and a subtle sheen, brush another coat of Mod Podge over the surface.
Step 4: Finally, use a hot glue gun to attach a strong round magnet to the back center of each lid.
#12. Mason Jar Ring Christmas Tree
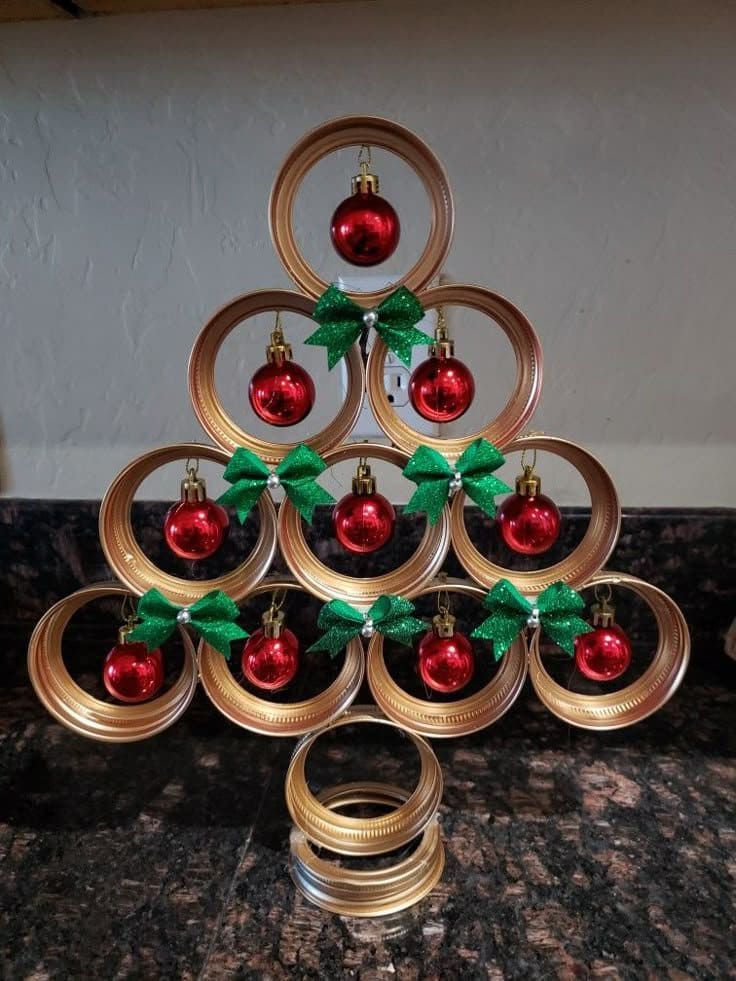
With just a pile of mason jar lids, a few shiny ornaments, and a sprinkle of imagination, you can whip up a tabletop Christmas tree that feels vintage, simple, and full of holiday magic.
I made this project with my kids during a snowy weekend, and not only was it ridiculously fun, it also gave us a sweet centerpiece for our counter.
Materials Needed:
- 11 regular-mouth mason jar rings (3″ diameter)
- 1 extra ring (optional)
- 11 small red plastic ornaments (about 1.5″ diameter)
- 11 green mini glitter bows
- Hot glue gun and glue sticks
- Strong twine, ribbon, or fishing line
- Gold spray paint (optional)
Step-by-Step Guide:
Step 1: Lay out the mason jar rings in a pyramid shape including one on top, two underneath, and so on until you have five across the bottom row.
Step 2: Hot glue the rings together where they touch. It helps to glue in layers, build the top, middle, and bottom rows separately, then attach them once stable.
Step 3: If you want a uniform finish, spray paint the whole structure gold.
Step 4: Finally, tie or glue a mini ornament inside each ring using twine or fishing line. You can add a festive bow to each top edge for a finishing touch.
#13. Plaid Mason Jar Lid Ornament
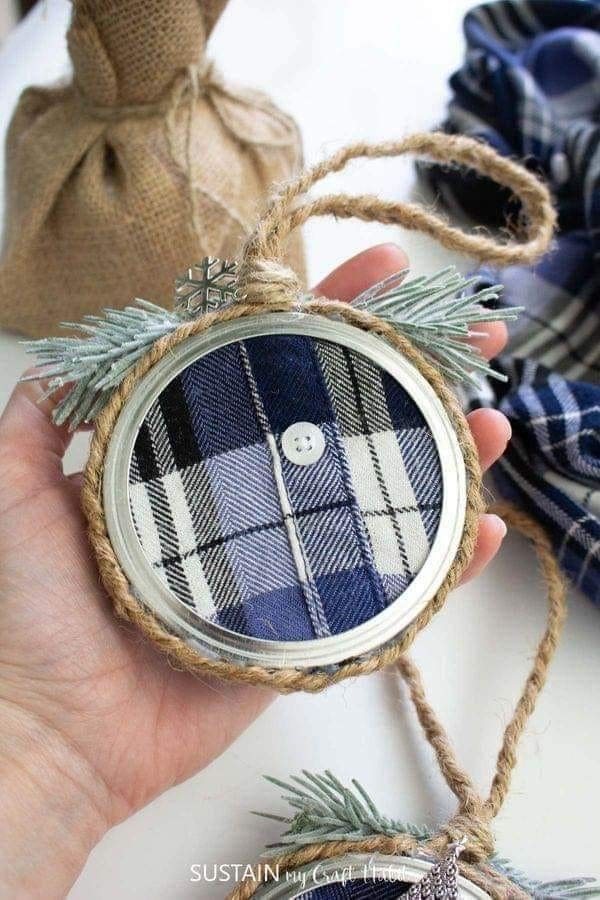
This cozy plaid ornament brings cabin-in-the-woods charm to your tree. If you’ve got scraps of an old flannel shirt or leftover fabric, this is a perfect way to give them a second life.
Materials Needed:
- 1 mason jar lid (ring + insert)
- A square of plaid fabric (approx. 4″ x 4″)
- 1 small button (white or matching)
- Hot glue gun
- Twine (around 12 inches)
- Small faux pine branches
- Optional: mini snowflake charm
Step-by-Step Guide:
Step 1: Cut your fabric square to slightly larger than the jar lid insert. Then center it over the metal disc and pull it taut as you glue the edges to the back.
Step 2: Glue the button in the center of the fabric. Next, place the covered insert back inside the jar ring.
Step 3: Wrap twine around the edge of the ring and secure it with hot glue as you go. You should leave enough extra twine to create a loop for hanging.
Step 4: Add a small sprig of faux greenery and a festive charm or embellishment at the top with a dab of glue.
#14. Pressed Flower Mason Jar Lid Suncatcher
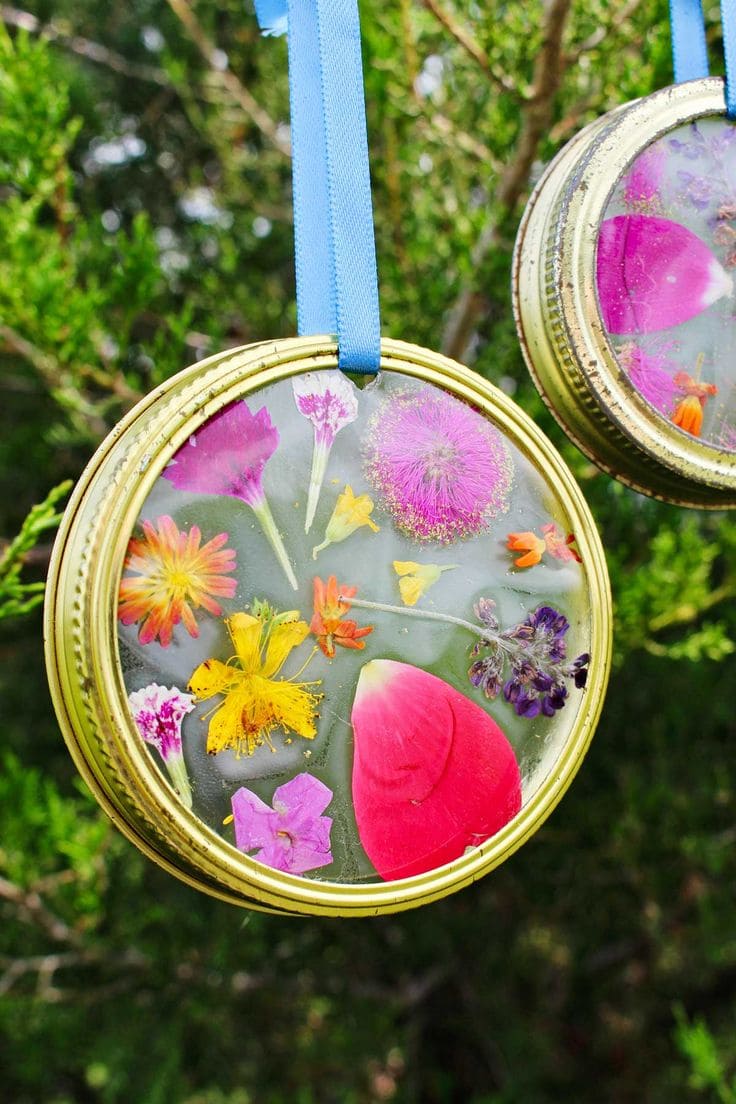
If you’ve ever picked petals with your kids or pressed flowers between book pages, this mason jar lid suncatcher will bring that magic into the light.
Specially, each one becomes a little frozen moment of wild beauty, perfect for hanging in a sunny window or gifting to someone who needs a dash of handmade joy.
Materials Needed:
- 1 wide-mouth mason jar ring and lid
- Clear casting resin (about 2 oz per suncatcher)
- Pressed flowers
- Blue ribbon (12 inches)
- Hot glue gun + glue sticks
- Small disposable cup and stir stick
Step-by-Step Guide:
Step 1: Place the flat lid into the ring to create a backing, then arrange your pressed flowers however you’d like inside the ring.
Step 2: Mix your clear resin according to the package directions and slowly pour it over the flowers.
Step 3: Let it cure completely (usually 24 hours), then hot glue a ribbon to the top and hang it where it can catch sunlight.
#15. Mason Jar Lid Bird Feeder
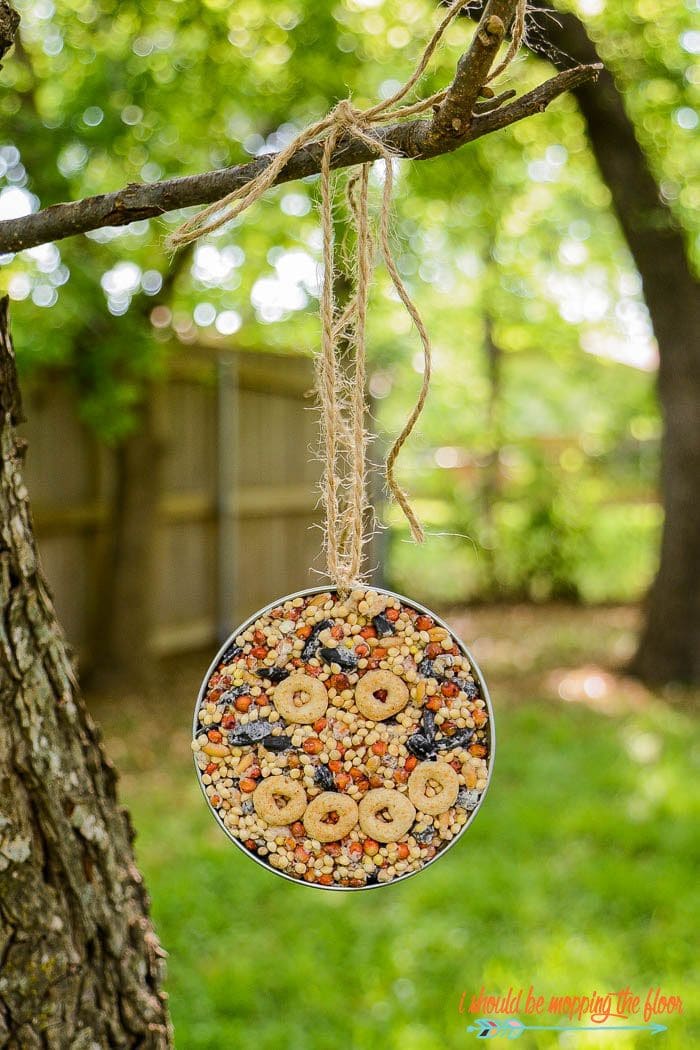
Whether you’re teaching kids about nature or simply hoping to add some life to your morning coffee view, this easy project gives you a satisfying blend of rustic charm and wildlife kindness.
Materials Needed:
- 1 mason jar lid
- 1⁄2 cup birdseed mix
- 1 tablespoon peanut butter
- A handful of Cheerios
- Twine or jute string
- Wax paper
Step-by-Step Guide:
Step 1: Mix your birdseed with peanut butter or gelatin until it holds together like cookie dough.
Step 2: Press the seed mixture firmly into the mason jar ring, filling it up and smoothing the surface. You can press in a few Cheerios or berries for fun.
Step 3: Thread a long piece of twine through the top of the ring and tie a knot for hanging.
Step 4: Let the feeder sit and firm up (in the fridge for gelatin or at room temperature for peanut butter), then hang it from a tree branch.
#16. Beach-Inspired Mason Jar Lid Coaster
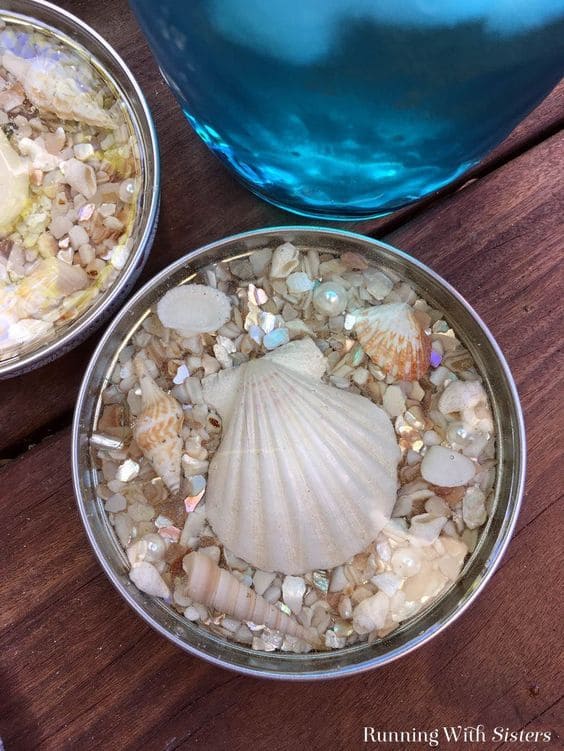
This dreamy mason jar lid coaster captures the calm and sparkle of a perfect day at the beach. You’ll feel the warmth of sunlit sand and crashing waves each time you set your drink down.
With just a few coastal treasures and a bit of resin, you can turn an ordinary lid into a mini shoreline memory that makes you smile every time.
Materials Needed:
- 1 wide-mouth mason jar lid
- Assorted tiny seashells
- Craft sand
- Clear casting resin and hardener (about 1 oz per coaster)
- Mixing cup and stir stick
- Gloves and a flat work surface
Step-by-Step Guide:
Step 1: Place the flat insert back inside the jar ring to create a shallow base. Then arrange your shells and sand inside, play around until it feels like your favorite beach.
Step 2: In a disposable cup, mix your resin and hardener according to package instructions. You should stir slowly to avoid bubbles.
Step 3: Carefully pour the resin into the lid, covering your beach scene. Then tap gently to release trapped air.
#17. Hand-Painted Mason Jar Lid Herb Marker
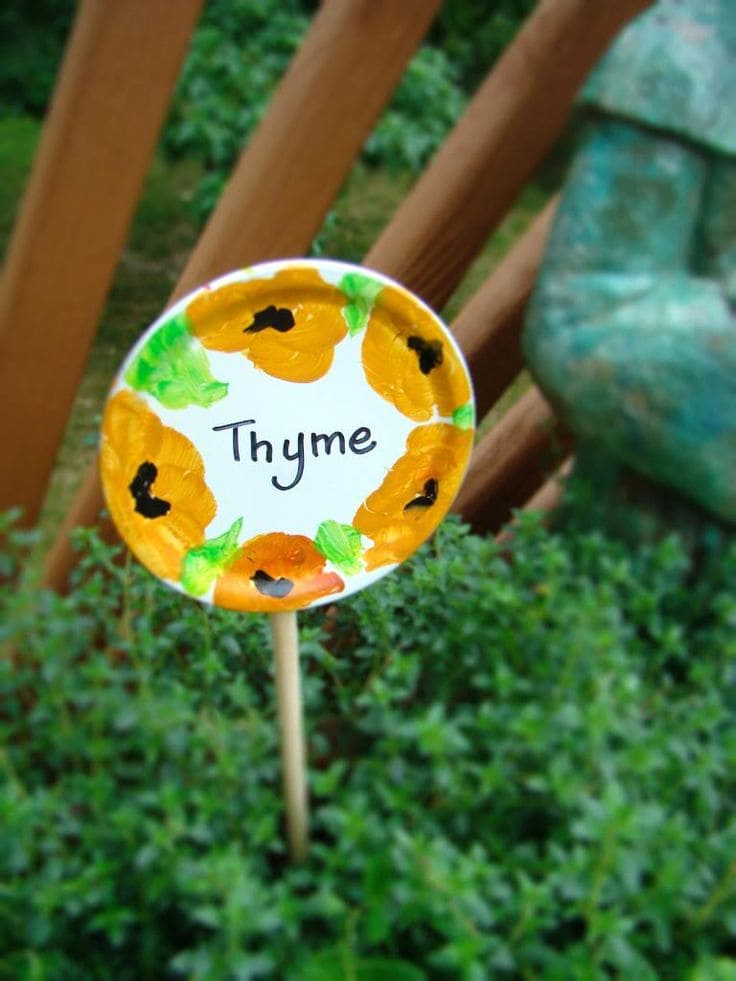
This hand-painted mason jar lid marker is more than just functional, it’s a tiny piece of art nestled in your thyme patch. It’s a fun weekend project for you or the kids, and it only takes a few minutes to add a lot of character.
Materials Needed:
- 1 wide-mouth mason jar lid
- Acrylic paint
- Wooden dowel (about 10″ long)
- Hot glue
- Clear outdoor sealer (optional)
Step-by-Step Guide:
Step 1: Paint the lid white and let it dry completely, it’ll make your design pop.
Step 2: Use yellow and black paint to create cheerful flowers around the rim. Then add green dabs for leaves.
Step 3: In the center, write the herb name in bold black letters. Now, you can glue the lid securely to the top of a wooden dowel.
#18. Rustic Mason Jar Lid Christmas Ornaments
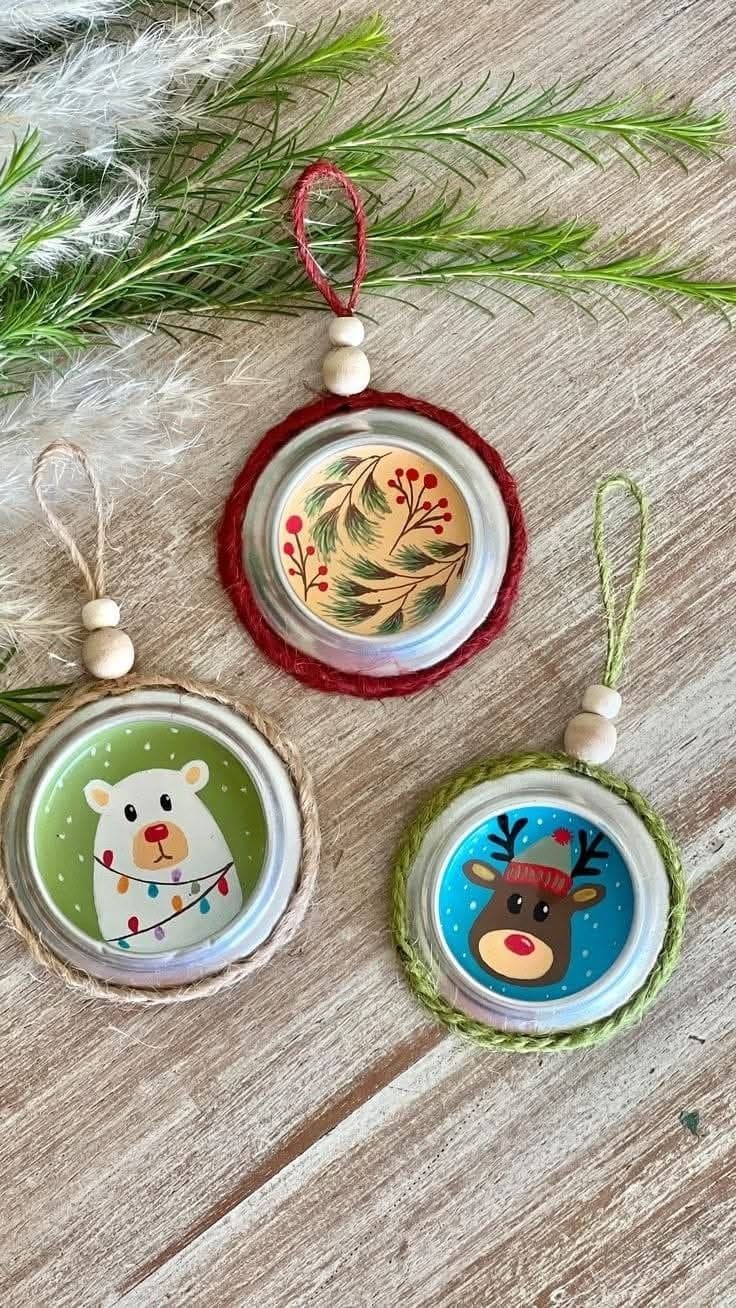
Whether you go with whimsical illustrations like reindeer and polar bears, or nature-inspired patterns like pine branches, you’ll find yourself smiling with every twist of the string.
You can even personalize them with photos or hand-drawn doodles to make them truly one-of-a-kind.
Materials Needed:
- Mason jar lids (inner flat discs + rings)
- Holiday-themed cardstock (2.5″ diameter)
- Twine, jute, or yarn (about 18″ per ornament)
- Small wooden beads
- Hot glue gun + glue sticks
- Scissors
- Hole punch (optional)
Step-by-Step Guide:
Step 1: Cut your decorative paper to fit the flat inner lid. Then glue it in place using hot glue or craft glue.
Step 2: Wrap the outer mason ring with twine, yarn, or jute for a rustic frame. You need to secure the ends with a dab of hot glue.
Step 3: Insert the decorated disc into the wrapped ring and glue securely.
Step 4: Finally, tie a loop with twine, adding a wooden bead for extra charm, and glue it to the back of the lid for hanging.
#19. Rustic Mason Jar Ring Spring Wreath
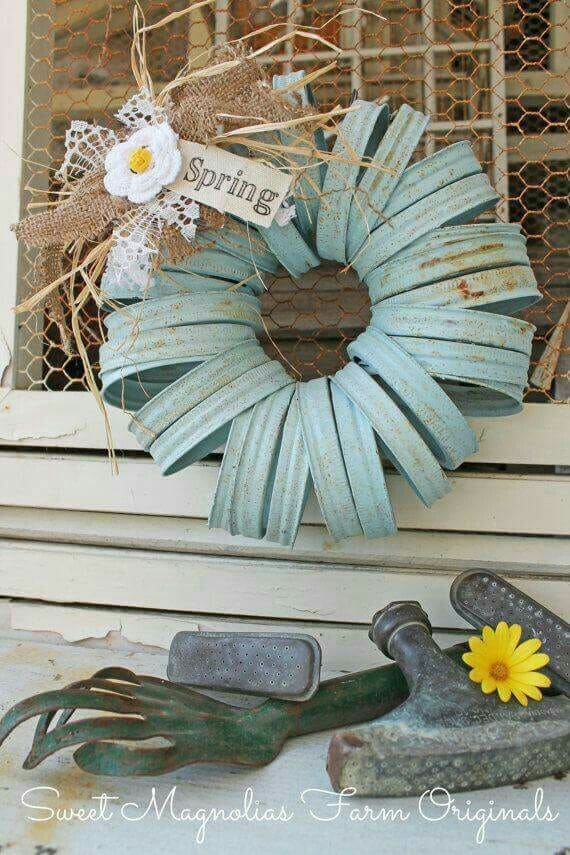
This wreath made from mason jar rings is the kind of project that brings charm and cheer to any farmhouse-inspired corner of your home.
Plus, its weathered blue finish, paired with natural burlap, lace, and a sweet crochet daisy, whispers “spring is here” in the softest, most nostalgic way.
Materials Needed
- 20-25 mason jar rings
- Light blue spray paint
- Burlap strip (approx. 6” x 2”)
- Lace trim (6-8 inches)
- Raffia strands
- 1 crochet flower
- Cardstock/tag and pen
- Hot glue gun and glue sticks
- Twine or ribbon
Step-by-Step Guide
Step 1: Spray paint the mason jar rings in a soft, weathered blue. Then tie the rings together tightly with twine to form a circular wreath.
Step 2: Glue on the burlap, lace, and raffia to one side of the wreath for a touch of rustic flair. You can add your flower on top and secure well with hot glue.
Step 3: Write Spring on a small tag or piece of cardstock and attach it beneath the flower using hot glue or twine.
#20. Ribbon Woven Mason Jar Lid Pumpkin
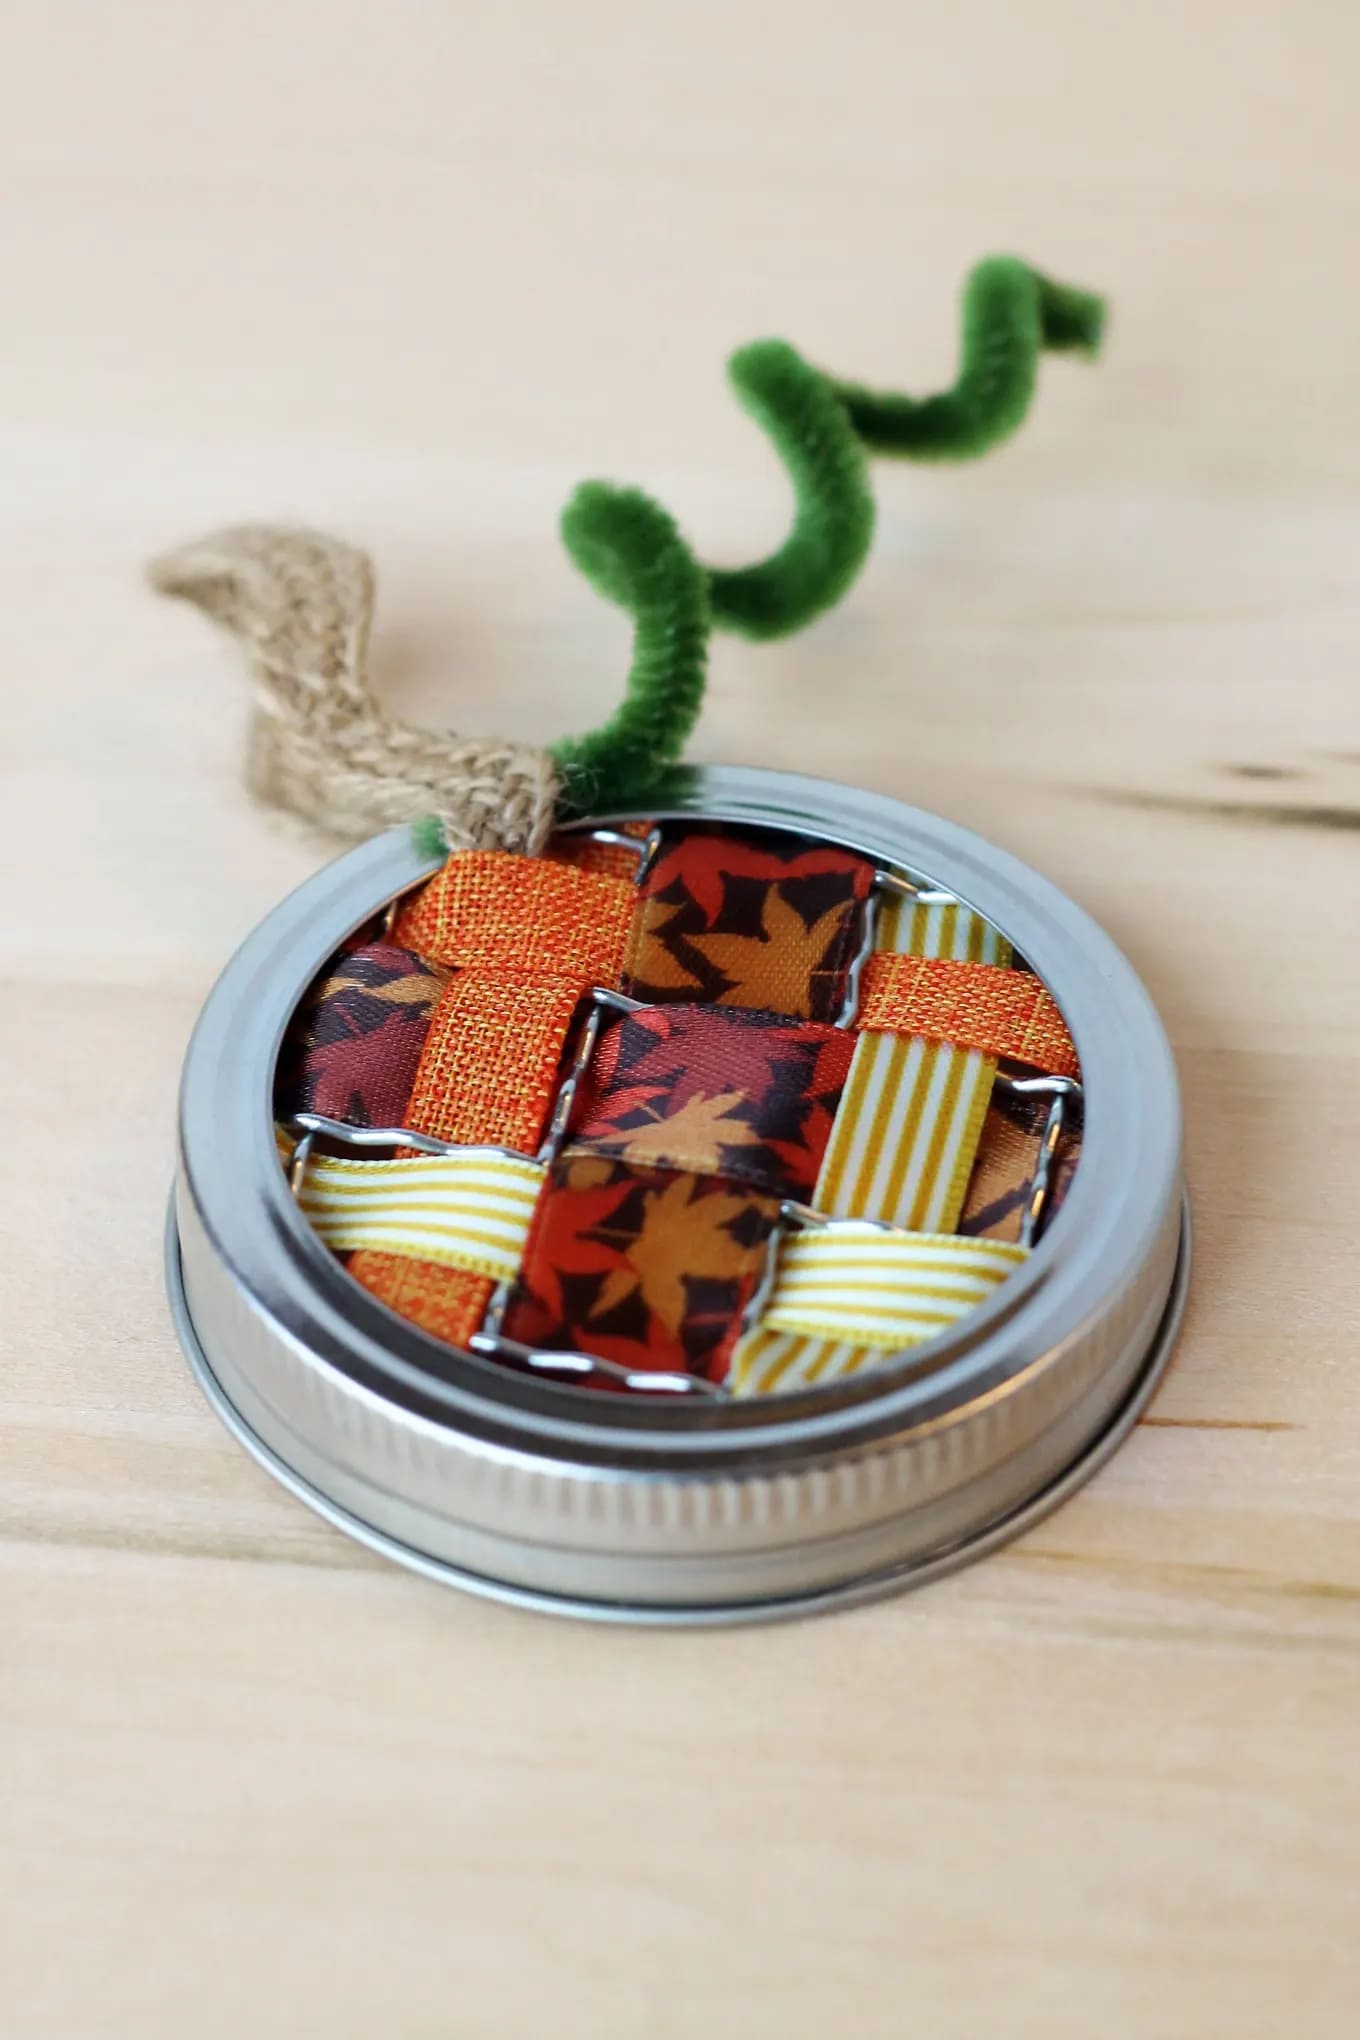
This lid pumpkin is a cozy little nod to fall, perfect for decorating tiered trays, classroom crafts, or even Thanksgiving place settings.
Moreover, this craft is budget-friendly and a great use of scrap ribbon, plus, it’s quick enough for an afternoon session with kids.
Materials Needed
- 1 regular mason jar lid
- 5 strips of ribbon (each approx. 6″ long)
- 5 contrasting strips of ribbon (6″ long)
- 1 green pipe cleaner
- Small piece of burlap
- Hot glue gun
Step-by-Step Guide
Step 1: Lay out your first set of ribbons vertically across the mason jar ring, securing the ends to the inside of the ring with hot glue.
Step 2: Weave the second set of ribbons through horizontally, going over and under the first set, alternating with each row.
Step 3: Once you’ve finished weaving, secure the ends of these horizontal ribbons to the inside of the lid ring as well.
Step 4: Twist a green pipe cleaner into a curl and glue it to the top of the lid. You can also add a burlap stem to complete your mini pumpkin.
