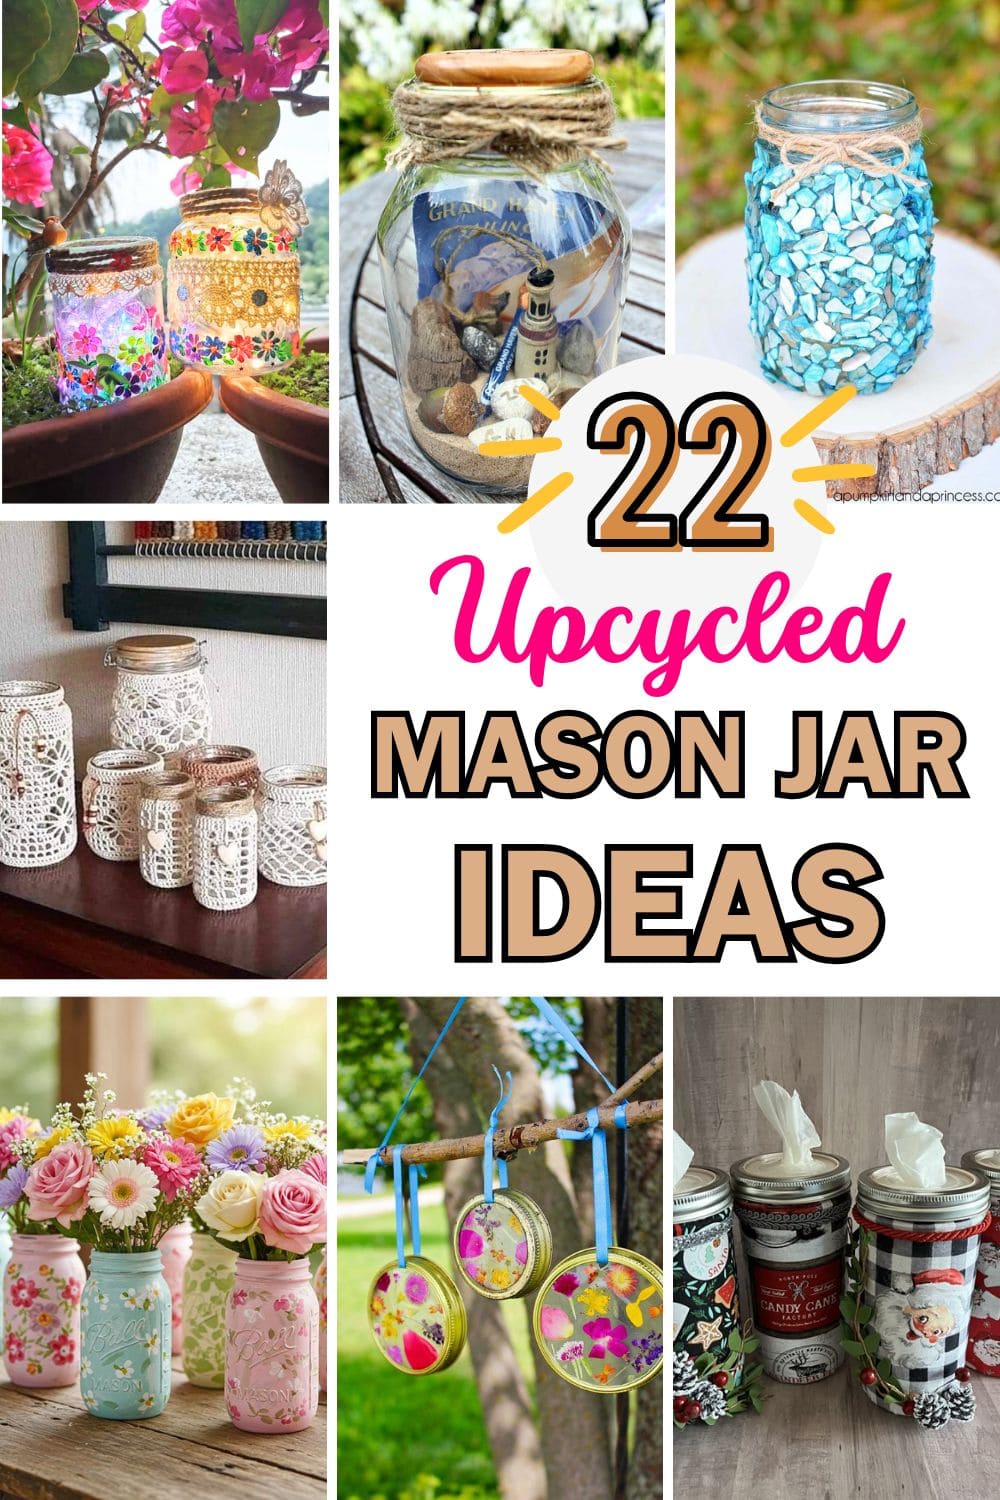
Before you toss that empty mason jar into the recycling bin, take a second look, it might just be your next favorite DIY project.
Whether you’re looking to add a rustic touch to your home or craft something meaningful without spending much, mason jars are the perfect starting point.
In this article, you’ll discover 22 brilliant, practical, and beautiful ways to repurpose them, giving each jar a second life that’s both functional and fun.
#1. DIY Beach Memory Jar
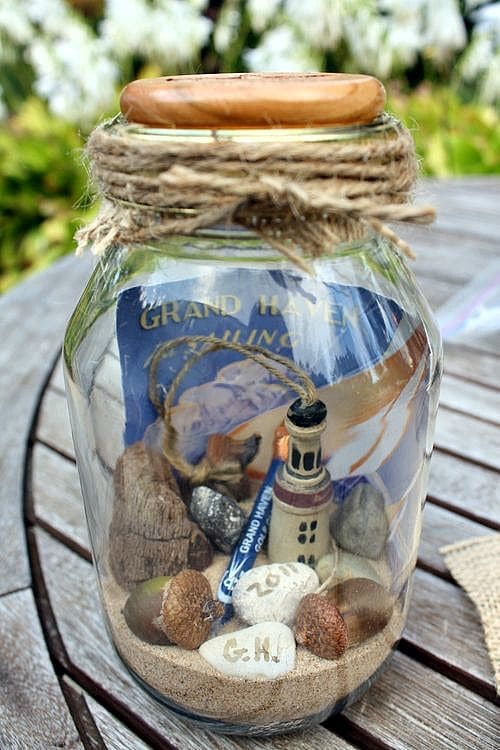
Capture the spirit of your seaside escape with a beautiful beach memory jar. It’s like bottling the joy of the waves, sun, and salty air into one elegant keepsake.
Materials Needed
- 1 large mason jar or recycled glass jar with lid (1 quart size)
- Clean beach sand (½ cup)
- Assorted pebbles, shells, driftwood, or beach finds (6–10 pieces)
- Mini souvenir items (e.g. lighthouse figurine, keychain)
- Twine or jute rope (12–18 inches)
- Optional: small photo or map clipping from the location
Step-by-Step Guide
Step 1: Pour a layer of sand into the bottom of the jar, about ½ to 1 inch deep.
Step 2: Arrange your beach treasures—shells, stones, driftwood—inside the jar. Place the largest pieces in the back and build forward.
Step 3: Add a small item like a keychain or figurine as your focal point. You can also roll a photo or map clipping to fit as a background.
Step 4: Tie twine around the jar’s neck and knot it with a bow. You’re done! Display your jar where it can spark warm memories year-round.
#2. DIY Mason Jar Terrarium
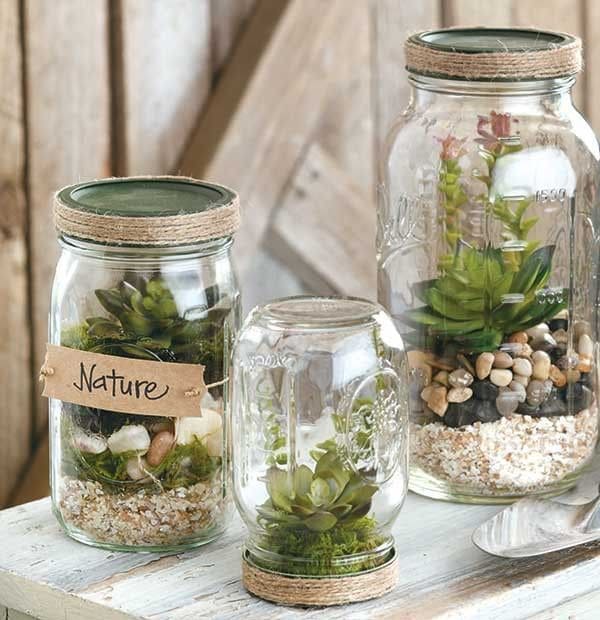
This charming mini terrarium in a mason jar is the kind of project that reconnects you with nature, right from your windowsill.
Materials Needed
- 1 large or medium mason jar (with lid)
- Decorative sand (2–3 tbsp per jar)
- Pebbles or aquarium gravel (1/4 cup)
- Faux or real moss (a small handful)
- Mini succulents or faux greenery (1–2 pieces per jar)
- Optional: label tag, twine, hot glue
Step-by-Step Guide
Step 1: Pour a layer of sand into the bottom of the jar for drainage and texture.
Step 2: Add pebbles or gravel on top to help separate layers and add contrast.
Step 3: Place moss and gently nestle in your faux or real succulent for a natural, lush look.
Step 4: Screw on the lid or leave it open. Decorate the outside with twine, tags, or wooden signs if desired.
#3. Holiday Mason Jar Tissue Holders
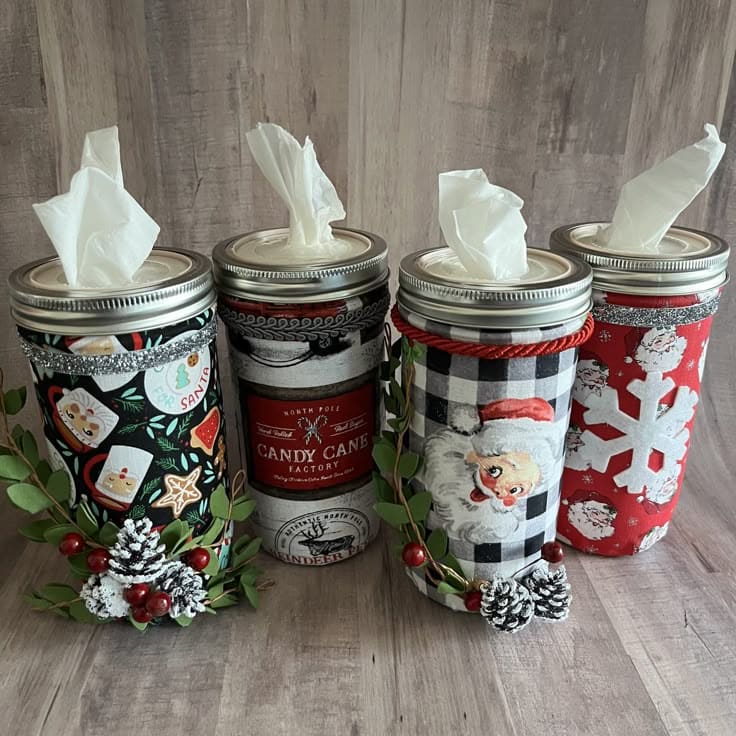
These Christmas-themed mason jar tissue holders are the kind of festive touch I love adding to every room during the holidays. They’re functional, adorable, and seriously budget-friendly.
Materials Needed
- 1 large mason jar with lid and ring
- 1 roll of tissues (travel size or folded to fit)
- Holiday-themed fabric (approx. 10″ x 4″)
- Hot glue gun
- Ribbon, mini pinecones, berries, or faux greenery for embellishment
- Scissors or craft knife
Step-by-Step Guide
Step 1: Cut your holiday fabric to wrap around the jar, then glue it in place smoothly.
Step 2: Use a craft knife to carefully cut a small “X” in the mason jar lid center.
Step 3: Fill the jar with tissues, folding them neatly so they pull easily from the top.
Step 4: Add ribbon around the lid ring and glue on pinecones, berries, or faux leaves as accents.
Step 5: Place the lid on top, gently pulling one tissue through the opening—and you’re done!
#4. Fairy Garden Floral Mason Jar Lanterns
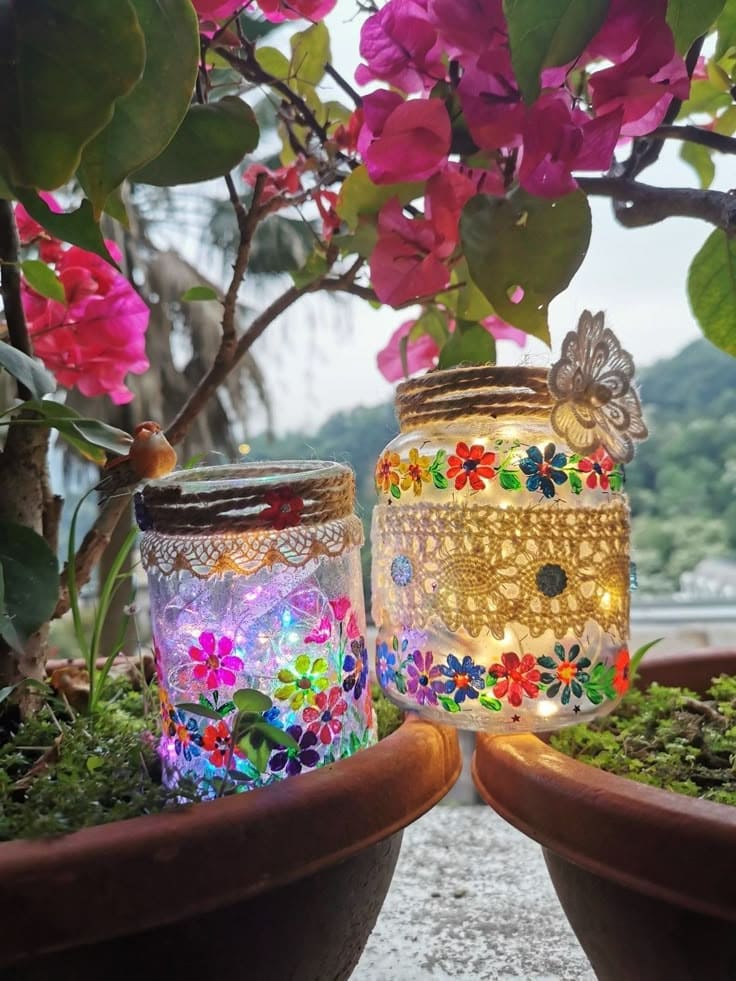
These dreamy floral mason jar lanterns are pure garden magic. Perfect for balconies, patios, or a summer dinner table, they’re made with dollar-store items and a lot of joy.
Materials Needed
- 2 clean mason jars
- 1 sheet of floral stickers or acrylic paint pens
- 2 battery-operated LED fairy lights
- Small lace trim (12–15 inches per jar)
- Jute twine, 1 butterfly charm (optional)
Step-by-Step Guide
Step 1: Decorate the jar’s outer surface with flower stickers or hand-painted floral designs. Let paint dry completely if used.
Step 2: Glue lace trim around the jar’s top and middle sections using a hot glue gun or strong craft adhesive.
Step 3: Wrap twine around the neck of the jar and tie it in a bow. Add a charm or embellishment if desired.
Step 4: Place a fairy light string inside the jar, switch it on, and set it somewhere cozy to shine!
#5. Mason Jar Sewing Kit with Built-In Pincushion
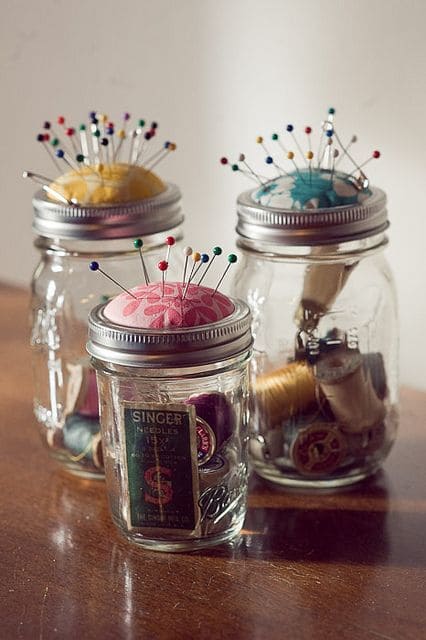
This charming sewing kit is one of my favorite upcycled mason jar ideas, simple, practical, and oh-so-cute!
Materials Needed
- 1 mason jar with lid and ring
- Scrap fabric (approx. 4″x4″)
- Polyester stuffing or cotton balls
- Hot glue gun
- Needle, thread, thimble, and small spools of thread for filling
Step-by-Step Guide
Step 1: Cut your fabric into a 4″ circle. Add a small amount of stuffing in the center, then place it over the lid insert (top side down).
Step 2: Wrap the fabric around the stuffing and lid insert like a dome. Glue the edges tightly underneath.
Step 3: Place the stuffed lid back into the ring and secure it with glue.
Step 4: Fill the jar with needles, thread, buttons, or any sewing supplies. Screw the lid on, and it’s ready to use or gift!
#6. Hand-Painted Floral Mason Jar Vases
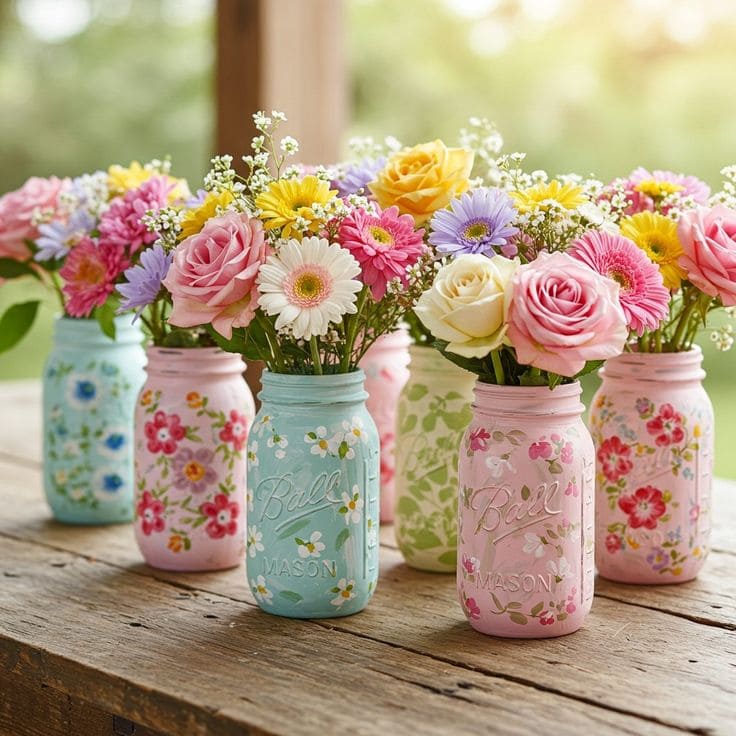
These painted mason jars instantly brighten any space and bring a sweet vintage charm to your home or garden party.
Materials Needed
- Mason jars (pint-sized, 3–6 jars)
- Acrylic or chalk paint (pastel shades)
- Small paintbrushes (fine tip for detail)
- Clear matte sealer spray
- Fresh flowers or faux stems
Step-by-Step Guide
Step 1: Paint the entire outside of each jar with your base color. Let dry completely and apply a second coat if needed.
Step 2: Using a fine-tip brush, paint floral designs—petals, leaves, vines, or blossoms. Don’t stress perfection; rustic adds charm!
Step 3: Once fully dry, spray a coat of clear matte sealer to protect the paint from moisture and chips.
Step 4: Fill with fresh-cut flowers or faux blooms, and display them on tables, windowsills, or as party decor.
#7. Enchanted Garden Mason Jar Lanterns
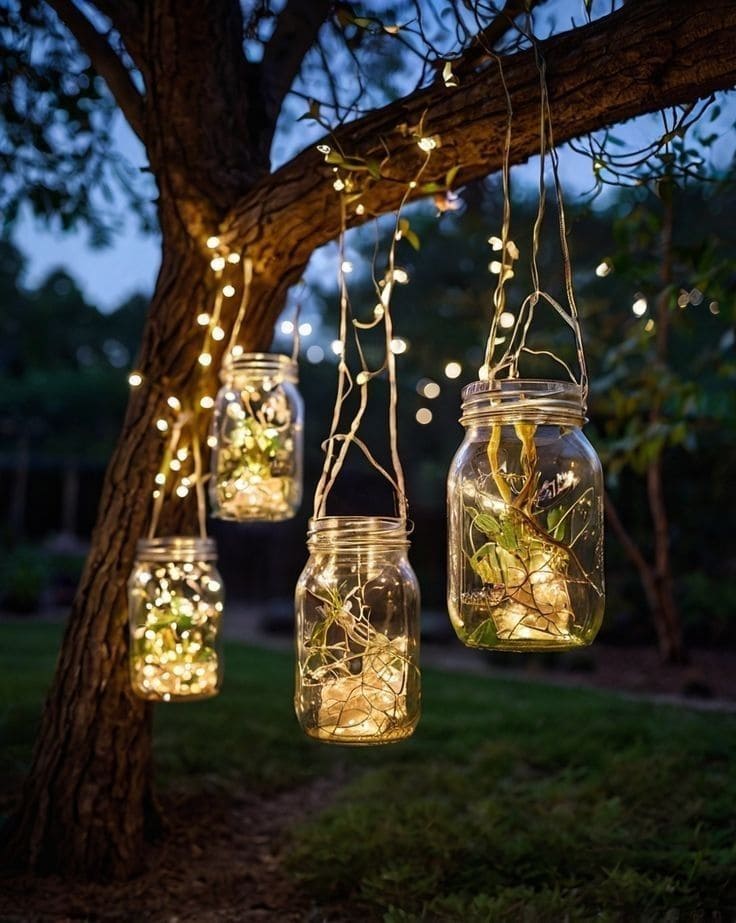
The warm glow, little leaves, and soft twinkle feel like something from a fairy tale and you can DIY them in under 30 minutes.
Materials Needed
- 3–5 large mason jars (quart size)
- Battery-operated LED fairy lights (1 set per jar)
- Twine or jute rope (2–3 ft per jar)
- Faux greenery or dried moss
- Small branches or decorative twigs
Step-by-Step Guide
Step 1: Coil the LED fairy lights and insert into the mason jar, leaving the battery pack near the lid for easy access.
Step 2: Add small twigs and sprigs of greenery around the lights for a rustic, natural effect.
Step 3: Close the jar loosely or leave open for more light diffusion. Tie twine securely around the jar’s neck.
Step 4: Hang the jars from tree branches or shepherd hooks, and switch on the lights for a cozy glow.
#8. Button-Covered Mason Jar Lantern
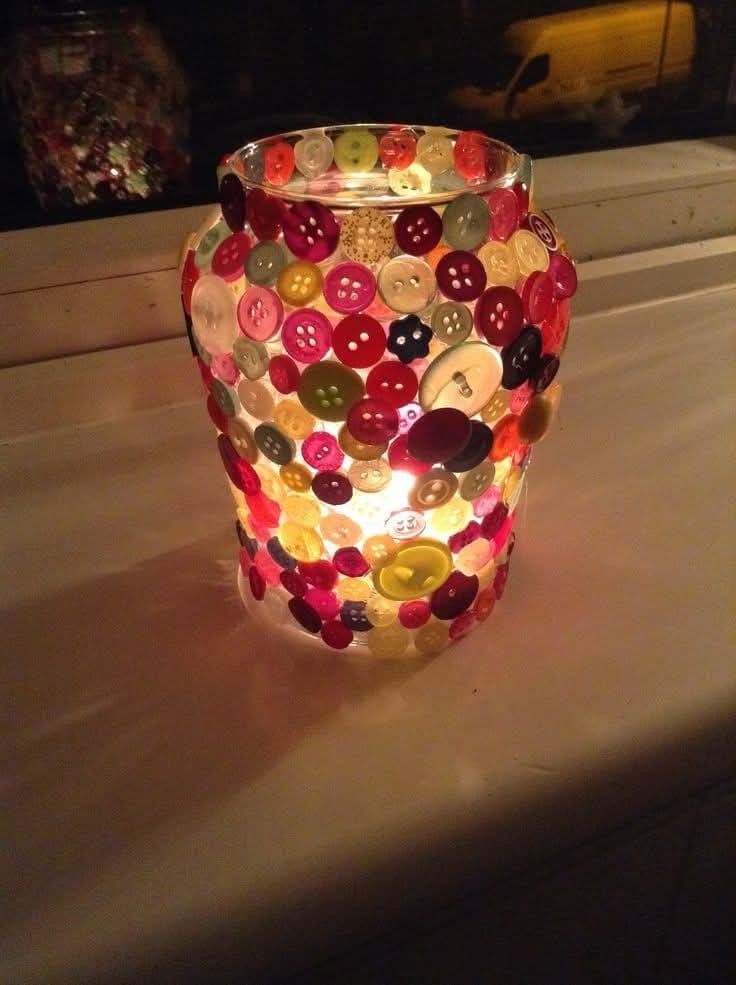
This upcycled mason jar project turns a plain glass container into a glowing button lantern full of charm. It’s a warm, low-cost creation made from leftover buttons and simple materials you might already have at home.
Materials Needed
- 1 mason jar (16 oz or larger)
- 60–100 assorted buttons (varied colors and sizes)
- Strong clear-drying craft glue or hot glue
- 1 LED tealight or flameless candle
Step-by-Step Guide
Step 1: Clean the mason jar thoroughly and dry it completely to ensure the glue adheres well.
Step 2: Sort buttons by size and color if desired. Begin gluing them around the jar starting at the bottom, working your way up in overlapping or scattered patterns.
Step 3: Allow the glue to fully dry (about 1–2 hours for craft glue, quicker with hot glue).
Step 4: Place an LED tealight inside the jar. Turn it on and watch the colors glow warmly through the button design.
#9. Boho Crochet Mason Jar Covers
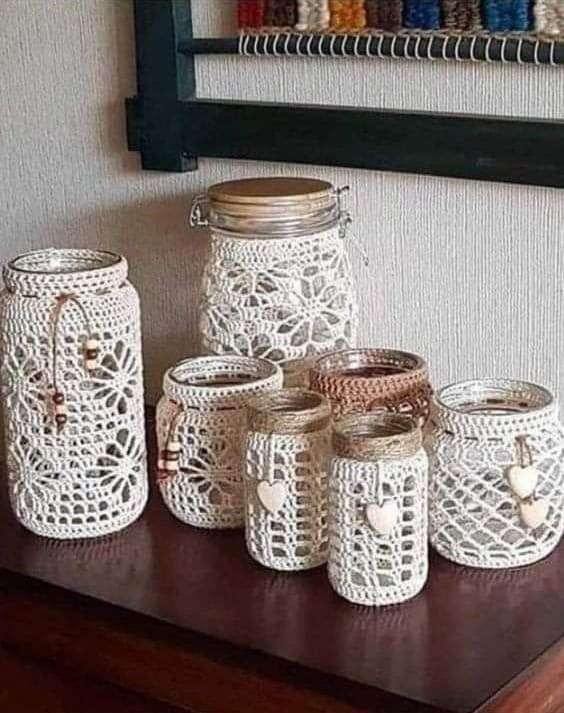
These crochet-covered mason jars bring an old-world, cozy elegance to any shelf or table. Whether used as candle holders, vases, or organizers, they add warmth with their handmade lace texture.
Materials Needed
- Mason jars (assorted sizes)
- Crochet doilies or lace fabric (enough to wrap jars)
- Jute twine or string
- Hot glue gun or fabric glue
- Small wooden charms or beads (optional)
Step-by-Step Guide
Step 1: Measure and cut the crochet doilies or lace to wrap around the jar snugly.
Step 2: Glue the ends of the lace together (not to the jar) for a removable cover, or glue directly onto the glass for a permanent version.
Step 3: Wrap twine around the jar neck and tie a bow. Add beads, hearts, or buttons for embellishment.
Step 4: Use them as lanterns by placing LED candles inside, or as decorative vases for dried flowers.
#10. Gothic Glam Mason Jar Decor
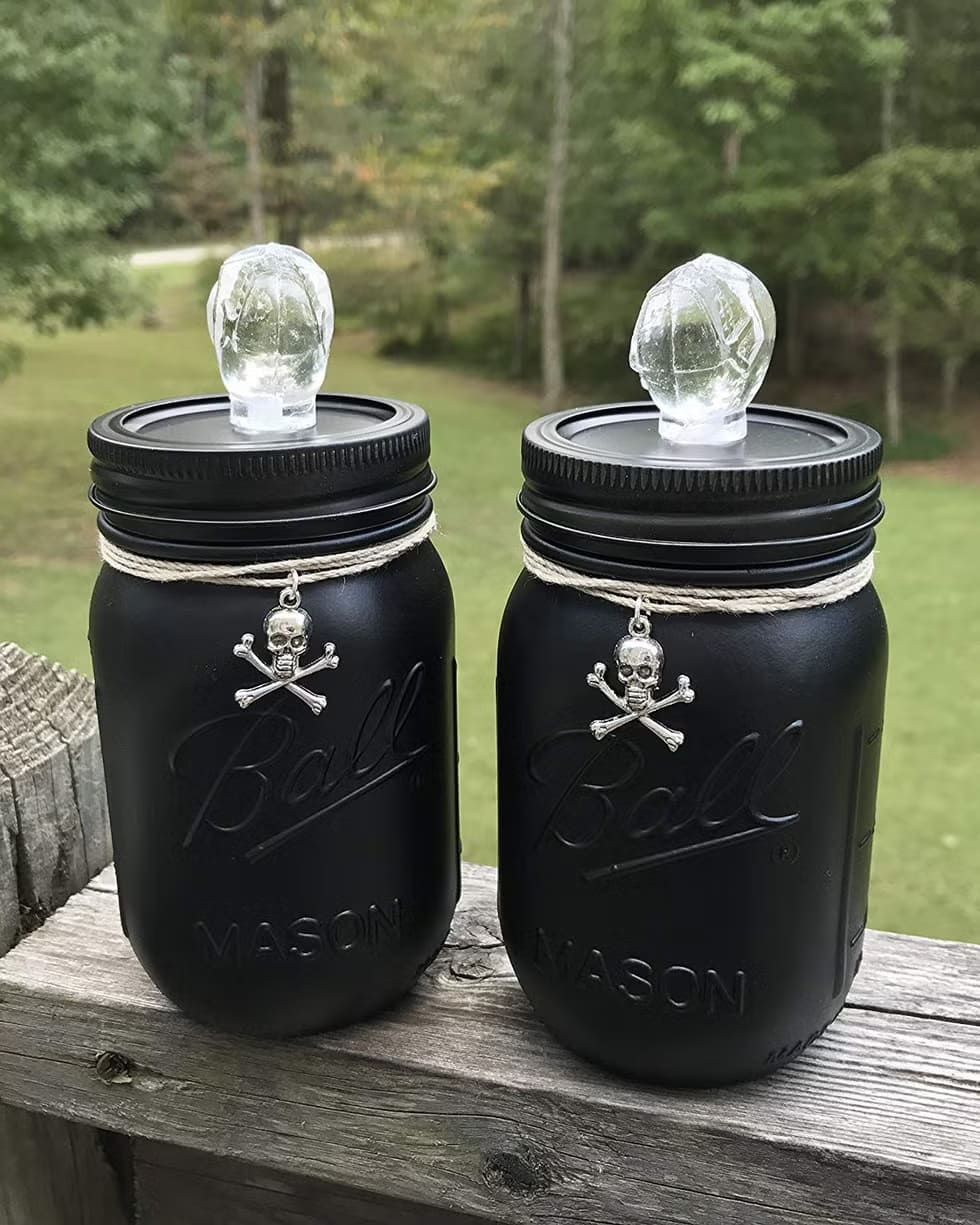
The skull-and-crossbones charm gives them an ominous touch, while the crystal-clear knob on top adds a dash of unexpected sophistication.
Materials Needed
- 2 pint-sized mason jars (Ball or any brand)
- Matte black spray paint (1 can, suitable for glass)
- Twine or jute string (about 1 ft per jar)
- Skull charm pendants (2 pieces, lightweight)
- Clear acrylic or glass drawer knobs (2 pieces, flat-base style)
- Hot glue gun or E6000 glue
Step-by-Step Guide
Step 1: In a well-ventilated space, spray paint the jars with matte black paint. Apply 2–3 thin coats for full coverage. Let them dry completely.
Step 2: Wrap the neck of each jar with twine a few times and tie securely. Attach the skull charm so it dangles in the front.
Step 3: Glue the clear knob to the center of each lid. Allow the adhesive to set thoroughly.
Step 4 (Optional): Use these jars as spooky candy containers, flower vases, or Halloween party centerpieces.
#11. Boho Fabric-Wrapped Mason Jar
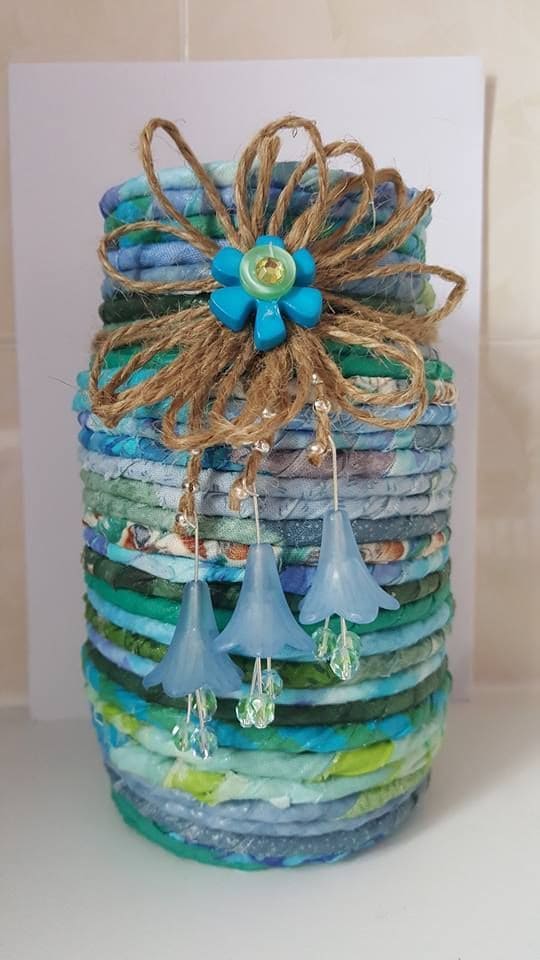
Whether you’re storing art supplies, dried flowers, or simply decorating a shelf, this textured piece blends charm with sustainability.
Materials Needed
- 1 mason jar (any size)
- 20–30 strips of fabric (approx. ½ inch wide, 10–12 inches long)
- Hot glue gun or craft glue
- Jute twine (approx. 2–3 ft)
- 1 decorative button or flower accent
- 3–5 plastic flower beads with string (optional)
Step-by-Step Guide
Step 1: Cut or tear your fabric into long, narrow strips. Slight fraying adds to the rustic look.
Step 2: Apply a small line of glue to the jar, then wrap one fabric strip around. Repeat, overlapping slightly, until the jar is fully covered.
Step 3: Tie jute twine around the top of the jar in a bow. Add a button, faux flower, or other center accent using glue.
Step 4: If using bead or flower dangles, tie or glue them to hang from the bow or twine center. Let everything dry fully before displaying.
#12. DIY Crystal Mosaic Solar Lights
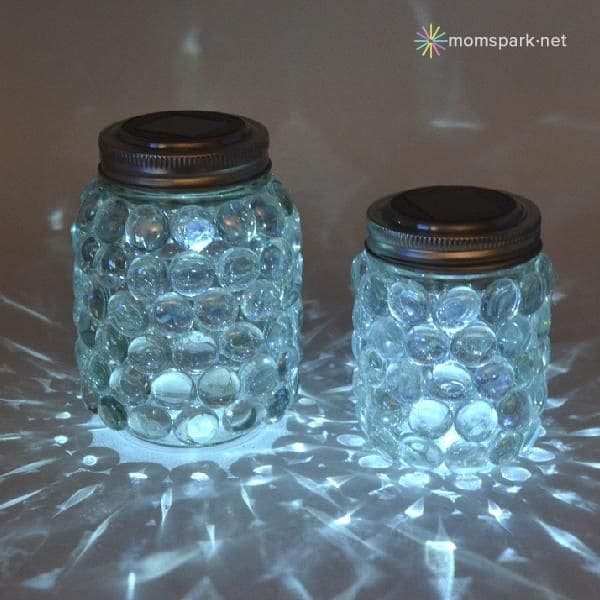
When the sun sets, the glass gems glow like scattered stars, reflecting soft beams in every direction.
Materials Needed
- 2 mason jars (regular or wide mouth)
- Solar light lids or garden stake solar lights (2 lids or modules)
- Clear flat glass marbles (approx. 40–60 per jar)
- Strong adhesive (E6000 or Gorilla Glue for glass)
- Optional: ribbon or twine for decorative finishing
Step-by-Step Guide
Step 1: Clean the outside of the mason jars thoroughly and let dry.
Step 2: One by one, glue the flat side of each glass marble to the jar, working your way from the bottom up in tight rows. Let dry overnight.
Step 3: Remove the stake portion from the solar lights if using garden versions, and place the light module into the jar lid.
Step 4: Screw the lid onto the jar. Set in the sun to charge and enjoy the dazzling, starlike display once it gets dark.
#13. DIY Fairy Glow Jars
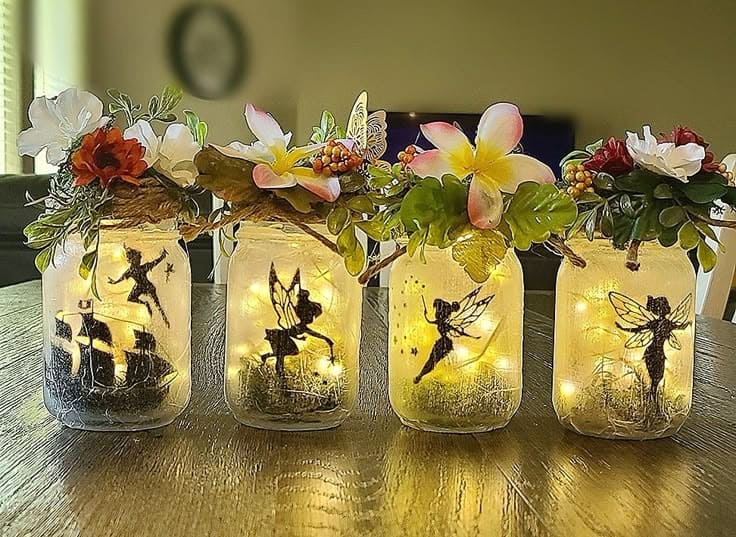
These glowing fairy jars feel like they leapt straight out of a bedtime story. They’re perfect for night lights, party centerpieces, or a whimsical gift.
Materials Needed
- 4 mason jars (pint or quart)
- 4 fairy silhouette cutouts (printed or vinyl)
- 4 sets of battery-operated fairy lights
- Spanish moss or shredded kraft filler
- Hot glue gun
- Artificial flowers and greenery
- Twine or ribbon (for the rim)
Step-by-Step Guide
Step 1: Glue the fairy silhouette on the inside or outside of the jar, depending on your desired shadow effect.
Step 2: Place a small amount of moss or shredded filler in the bottom of the jar.
Step 3: Coil and insert fairy lights inside, letting them sit loosely around the base.
Step 4: Decorate the lid or rim with twine, faux flowers, and leaves to give your fairies a garden home.
Step 5 (Optional): Add glitter spray or frost finish to the glass for extra enchantment.
#14. Coastal Gemstone Mason Jar Lantern
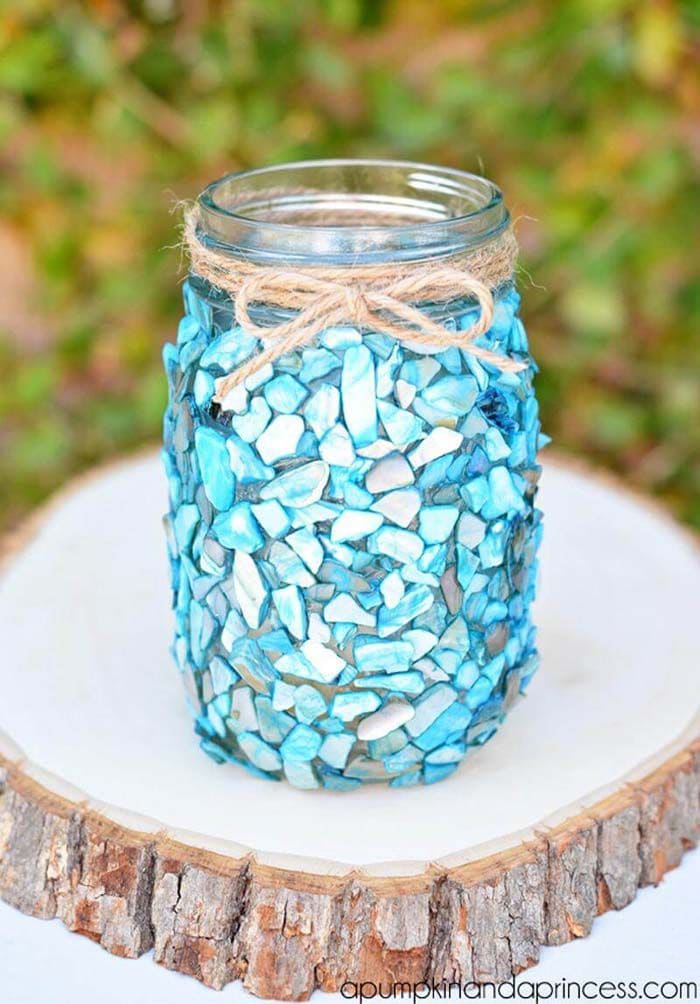
I made one for our patio table and it glows beautifully at night with a small tea light inside.
Materials Needed
- 1 mason jar (16 oz)
- 1 bag of flat-back glass stones or turquoise gravel (approx. 1–2 cups)
- Strong craft glue (E6000 or hot glue)
- Twine or jute rope (18 inches)
- Optional: tealight candle
Step-by-Step Guide
Step 1: Clean your jar with rubbing alcohol to ensure the glue sticks well.
Step 2: Apply glue to a small section of the jar and start pressing the glass stones in place, working your way around.
Step 3: Let the jar dry for several hours (or overnight if using heavy-duty glue).
Step 4: Tie twine around the jar’s mouth for a coastal touch and drop in a candle to enjoy the glow!
#15. Colorful Mason Jar Lid Magnets
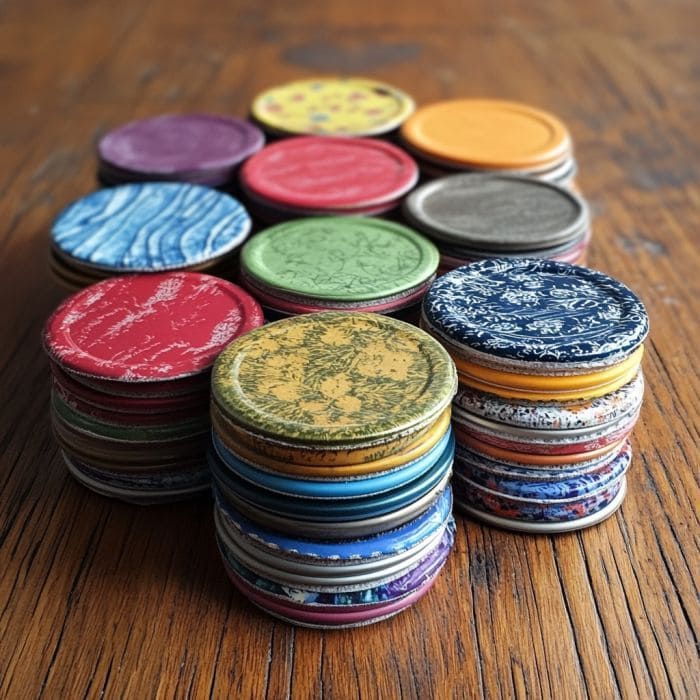
These upcycled mason jar lids are a vibrant testament to how tiny scraps and creativity can breathe new life into something ordinary.
Materials Needed
- 10–20 mason jar lids (standard or wide mouth)
- Assorted fabric or scrapbook paper scraps (cut slightly larger than lid tops)
- Craft glue or Mod Podge
- Scissors
- Small magnets or adhesive cork circles (optional)
Step-by-Step Guide
Step 1: Cut your fabric or paper into circles just larger than the lid insert. Press flat.
Step 2: Brush glue or Mod Podge on top of each lid insert, then smooth your chosen fabric/paper over it. Let dry.
Step 3: Trim the excess material around the edge for a clean look. Add a protective coat of Mod Podge if needed.
Step 4 (Optional): Attach a magnet on the back for fridge decor or a cork backing to create a cute drink coaster.
#16. Rustic Birdseed Gift Jar
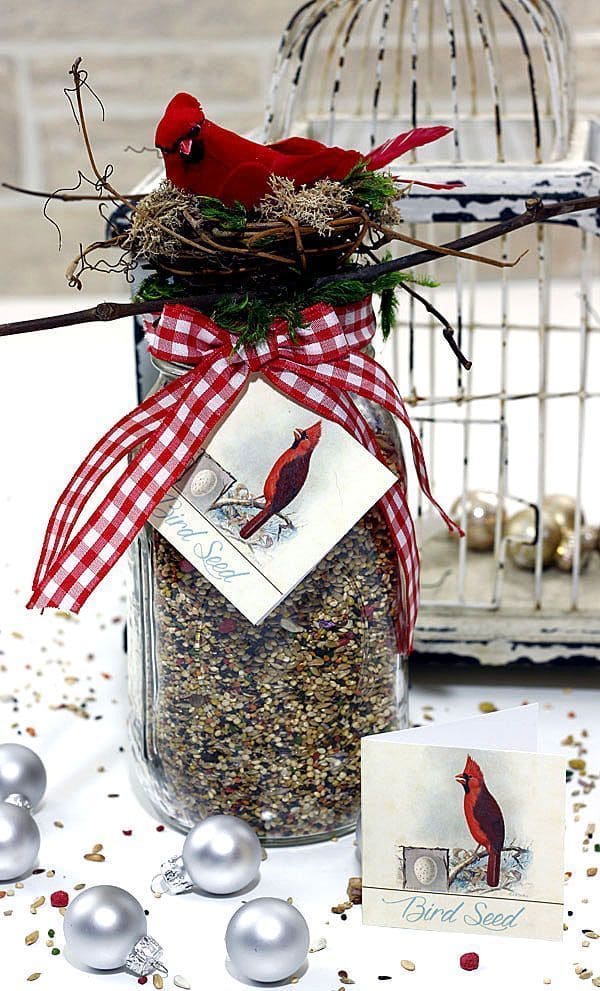
Topped with a faux cardinal perched in a nest and wrapped with gingham ribbon, it feels like a tiny winter woodland scene you can hold in your hands.
Materials Needed
- 1 large mason jar (quart size)
- 2 cups of birdseed mix
- Red gingham ribbon (about 18 inches)
- 1 faux bird, mini nest, twigs, and greenery
- Printable birdseed tag (optional)
- Hot glue gun
Step-by-Step Guide
Step 1: Fill the mason jar with birdseed, leaving about an inch of space at the top.
Step 2: Tie a wide gingham ribbon around the neck of the jar. Attach a gift tag if desired.
Step 3: Hot glue a nest, faux bird, and a few small twigs to the jar lid. Add moss or greenery for texture.
#17. Spiced Citrus Mason Jar Candle
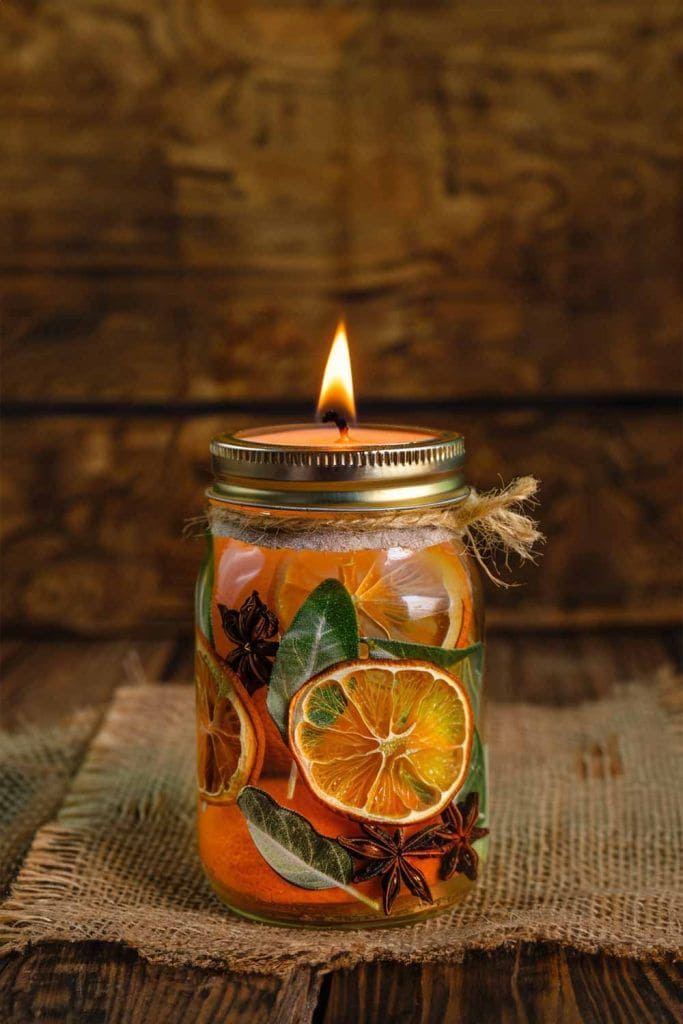
I love placing one of these on my kitchen counter in fall, it makes the whole house smell like mulled cider and crisp leaves.
Materials Needed
- 1 wide-mouth mason jar (pint size)
- 4–5 dried orange slices
- 4–5 fresh sage leaves
- 3–4 star anise pods
- 1 floating candle or tealight
- Twine for decoration
- Water to fill the jar
Step-by-Step Guide
Step 1: Layer the orange slices, sage leaves, and star anise pods inside the jar.
Step 2: Fill the jar with clean water, leaving about 1 inch of space at the top.
Step 3: Place a floating candle on the water’s surface and ensure it’s stable.
Step 4: Tie twine around the neck of the jar for a rustic touch, then light the candle and enjoy the gentle glow and subtle fragrance.
#18. Pressed Flower Mason Jar Lid Sun Catchers
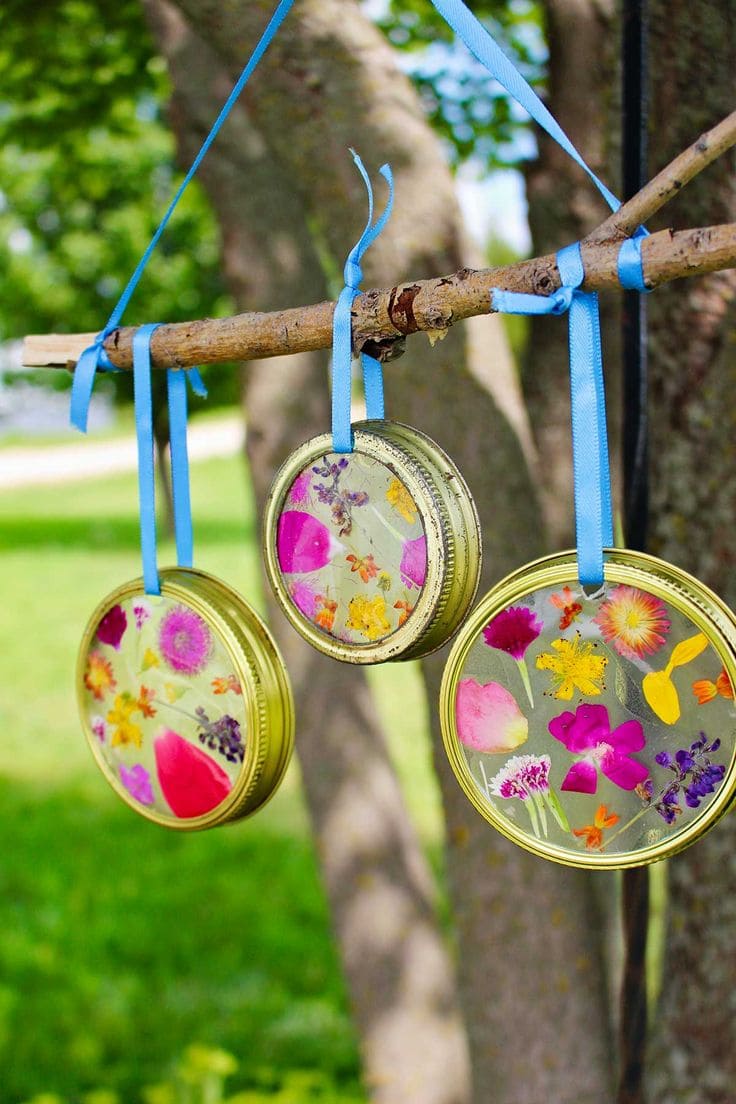
This dreamy sun catcher project gives new life to mason jar lids and brings nature indoors (or lets it sparkle outside).
Materials Needed
- Mason jar rings (3–5 wide-mouth or regular)
- Clear contact paper or packing tape (cut to fit lids)
- Pressed flowers and petals (flat, dried)
- Ribbon or twine for hanging
- Scissors
Step-by-Step Guide
Step 1: Cut two circles of clear contact paper or tape per lid. Stick one circle to the back side of the ring.
Step 2: Carefully arrange pressed flowers on the sticky surface. Keep them flat and spaced out for best effect.
Step 3: Seal by placing the second contact circle over the flowers, sandwiching them securely.
Step 4: Tie ribbon through the ring and hang from a tree branch, window hook, or porch beam to let the sunshine do its thing.
#19. Upcycled Mason Jar Wind Chime
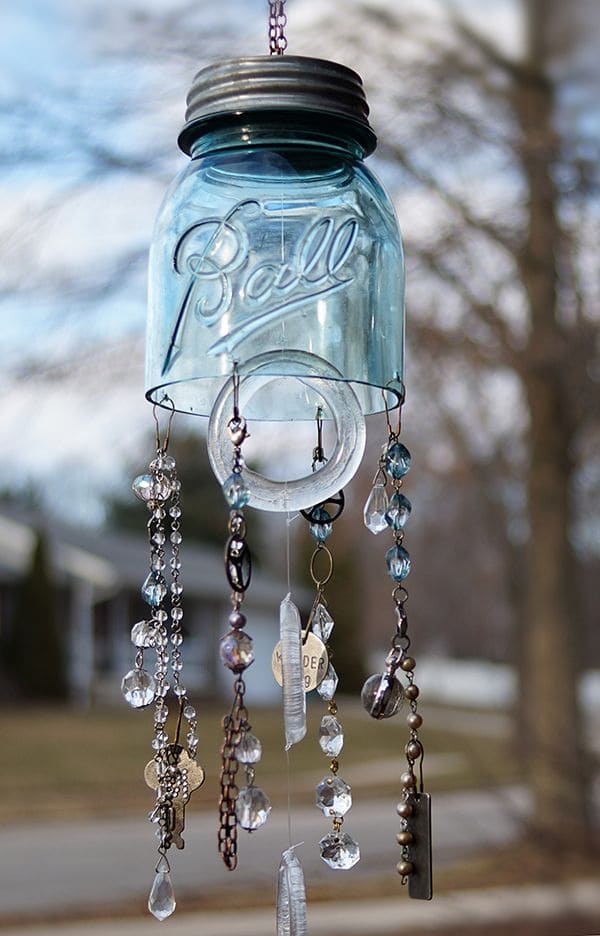
This DIY idea blends rustic charm and whimsical elegance, perfect for porches, gardens, or gifts!
Materials Needed
- 1 vintage or colored mason jar (quart size works best)
- Mason jar lid ring and chain for hanging
- Drill with small bit (for lid holes)
- Clear fishing line or strong thread
- Assorted beads, crystals, old jewelry, keys, charms (10–20 pieces)
- Jump rings or wire (optional for connecting)
- Small ring
Step-by-Step Guide
Step 1: Drill 5–7 evenly spaced small holes into the mason jar lid ring.
Step 2: Cut various lengths of fishing line (10–15 inches) and string your beads, crystals, charms, or vintage trinkets. Tie secure knots at the ends.
Step 3: Thread each string through the drilled holes and secure with knots or glue. Add a decorative ring or hoop in the center with a single hanging element for balance.
Step 4: Screw the lid onto the jar, attach a chain to the top, and hang it where it catches the light and breeze.
#20. DIY Faux Fish Aquarium Jar
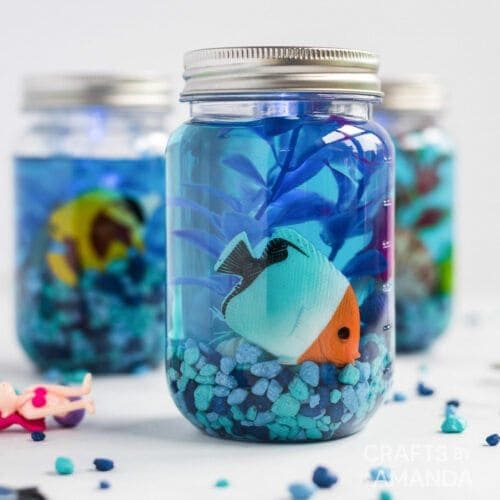
With a few basic materials and a splash of creativity, you’ll have a fun mason jar aquarium that’s bright, playful, and totally fish-friendly.
Materials Needed
- 1 clear mason jar (16 oz or quart size)
- Blue aquarium gravel or decorative pebbles (1/3 cup)
- Plastic aquarium plants (trimmed to fit inside jar)
- Small plastic fish toys (1–2 per jar)
- Clear school glue (approx. 1 bottle per jar)
- Blue food coloring (1–2 drops)
- Water
- Stir stick or chopstick
Step-by-Step Guide
Step 1: Add a layer of blue gravel to the bottom of the jar.
Step 2: Place your plastic plants inside and arrange them toward the back of the jar for depth.
Step 3: Drop in the fish toys so they appear to swim among the plants.
Step 4: Mix 2 parts water with 1 part clear glue and a drop of blue food coloring. Stir well, then slowly pour it into the jar until full.
Step 5: Seal the lid tightly. Shake gently if needed to distribute the coloring.
#21. Patriotic Swirl Mason Jars
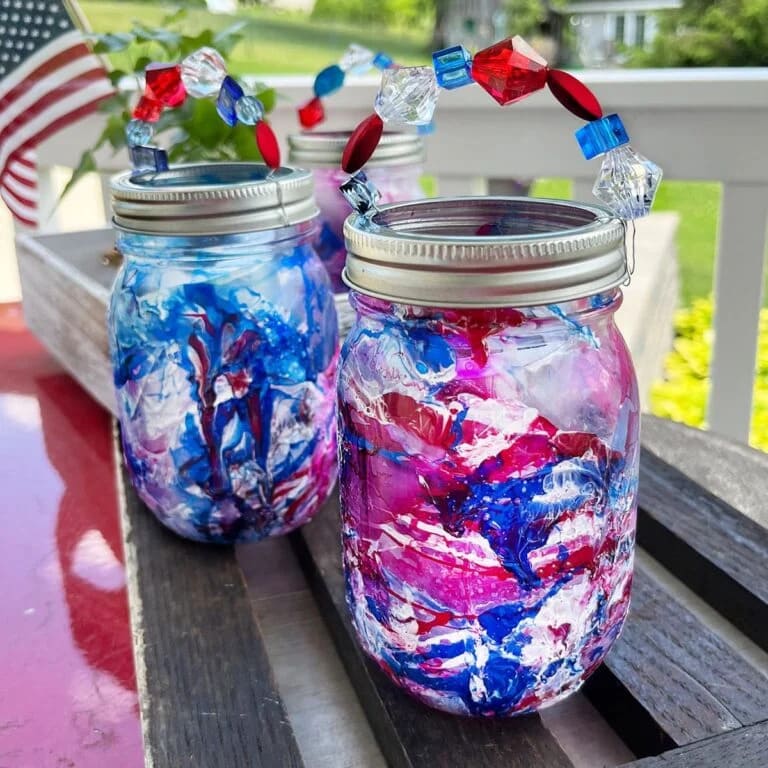
These vibrant red, white, and blue swirl mason jars are the perfect DIY project for summer picnics or 4th of July celebrations.
Materials Needed
- 2–3 mason jars (pint size)
- Red, white, and blue acrylic paint
- Ziplock bags (1 per jar)
- Large marbles or small beads (for handles)
- Craft wire or pipe cleaners
- Jar lids with hanging rings
- Parchment or newspaper (for mess control)
Step-by-Step Guide
Step 1: Pour small amounts of red, white, and blue paint into a ziplock bag. Place the mason jar inside, zip it shut, and gently rotate it to swirl the colors without fully mixing them.
Step 2: Once you achieve a marbled look, remove the jar and let it dry upside down on parchment paper.
Step 3: Thread beads onto a piece of wire to create a festive handle. Twist the ends securely around the lid ring.
Step 4: Attach the ring to the jar and tighten.
#22. Woodland Deer Terrarium Jar
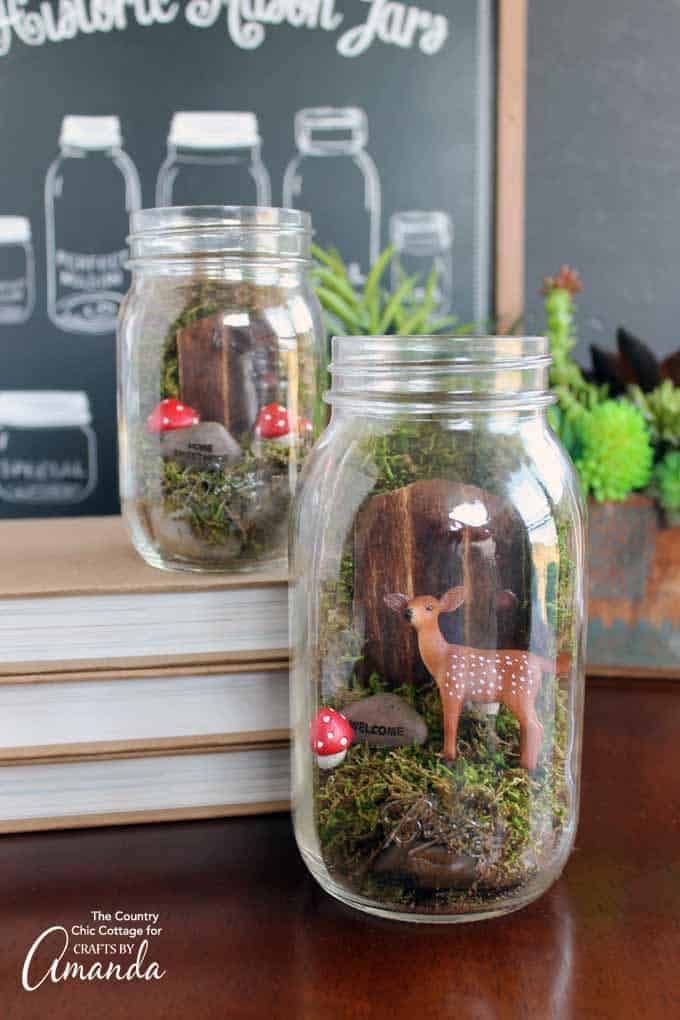
Bring the enchantment of the forest into your home with this whimsical woodland terrarium jar.
Materials Needed
- 1 large mason jar (quart size)
- Small deer figurine (approx. 2″ tall)
- Mini faux mushrooms (2–3 pieces)
- Dried moss (a handful)
- Small wood slice or bark piece (to act as a “tree” or background)
- Miniature sign or welcome tag (optional)
- Hot glue gun and glue sticks
- Tweezers (optional for arranging inside)
Step-by-Step Guide
Step 1: Layer the bottom of the mason jar with a bed of moss, creating a soft, earthy base.
Step 2: Place the wood slice or bark vertically to simulate a tree or forest backdrop. Secure with a dab of hot glue.
Step 3: Add the deer figurine standing upright near the front. Position the mushrooms and tiny sign nearby.
Step 4: Make final adjustments using tweezers if needed. Close the lid or leave open for a terrarium look.
