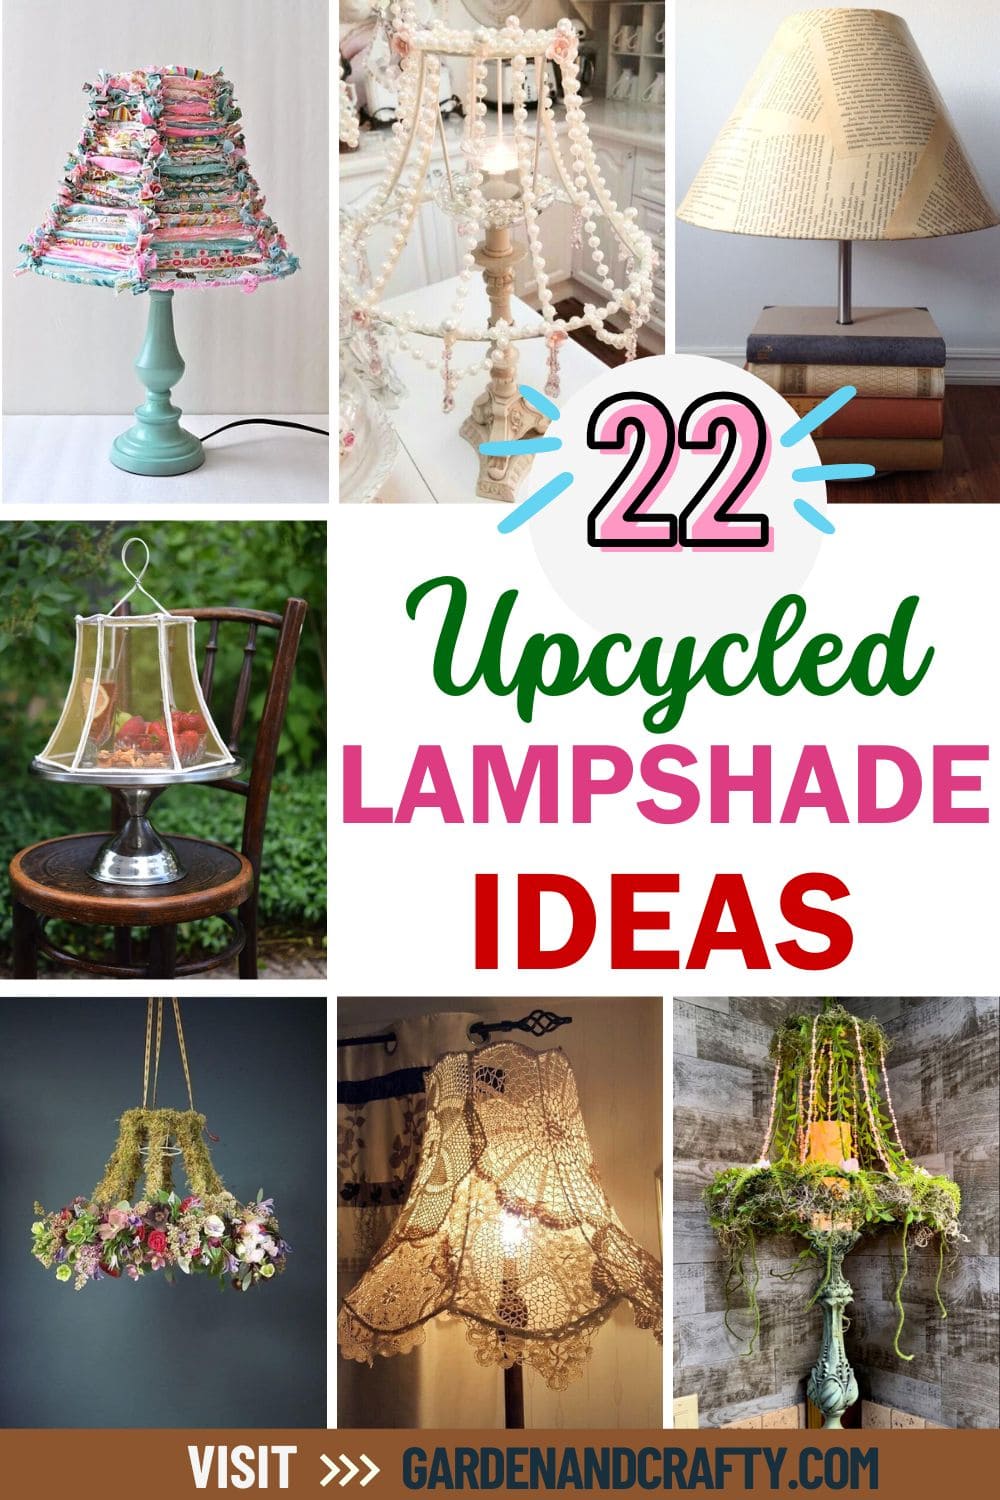
Why toss out an old lampshade when you can turn it into a show-stealing piece of decor? Whether it’s fraying at the edges or missing its fabric altogether that forgotten fixture has so much creative potential.
In this article, you’ll discover 22 brilliant upcycled lampshade ideas that blend resourcefulness with serious style. From vintage lace to playful buttons, rusty cutlery to glowing fairy lights, these transformations prove that charm doesn’t have to cost a thing.
Each project brings its own vibe, some whimsical, others rustic or romantic but all share one thing in common: they shine, literally and creatively.
#1. Garden Snack Dome from a Vintage Lampshade
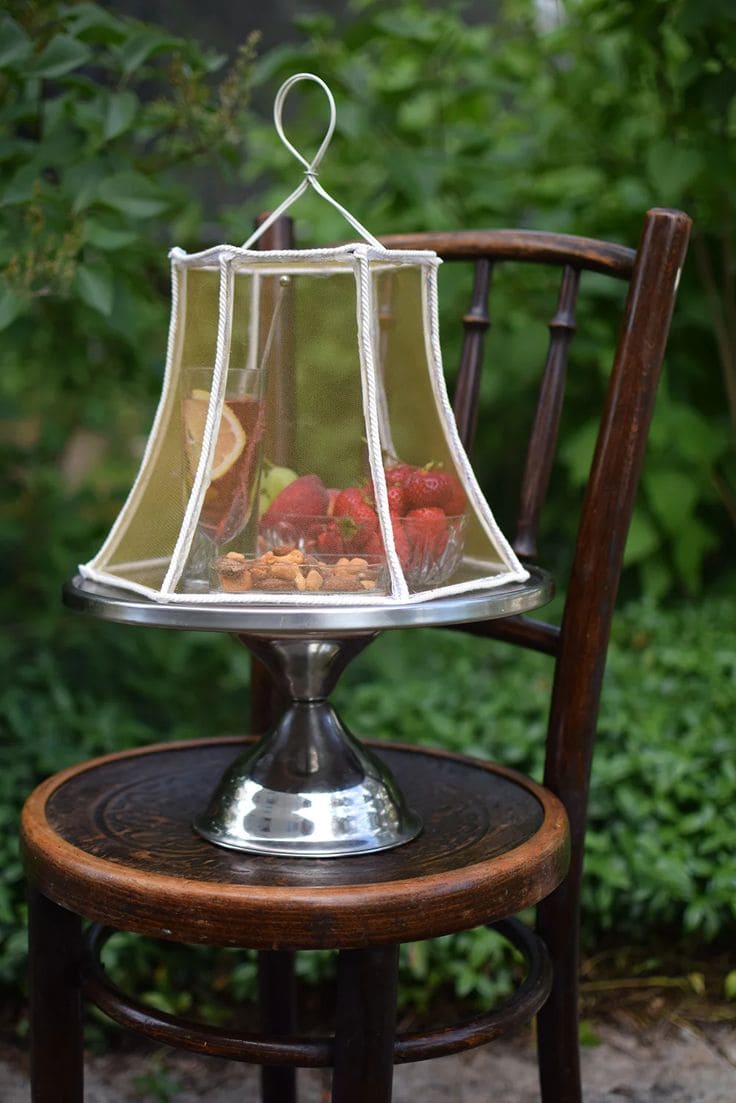
A wire lampshade frame, once meant to hold light, now stands as a graceful dome over fresh berries and summer drinks.
This clever upcycle doesn’t just protect your snacks, it adds a little cottagecore charm to your garden table. You don’t need to spend much, and the joy of bringing this to life with your hands is part of the reward.
Materials Needed:
- 1 old wire lampshade frame
- Fine mesh fabric or tulle (about 1 yard)
- Cotton rope or piping (approx. 2 meters)
- Hot glue gun and glue sticks
- Scissors
- Strong wire or twine
- Cake stand (optional)
Step-by-step Guide:
Step 1: Remove any fabric and clean the wire lampshade frame until it’s smooth and bare.
Step 2: Cut mesh fabric into panel shapes that fit your frame. Stretch each piece gently and glue it to the inside of the frame using hot glue.
Step 3: Add cotton rope or piping along each seam for a neat, decorative touch. This also helps reinforce the structure.
Step 4: Make a loop with strong wire or twine and secure it to the top so you can easily lift or hang the dome.
#2. Rag Ribbon Lampshade
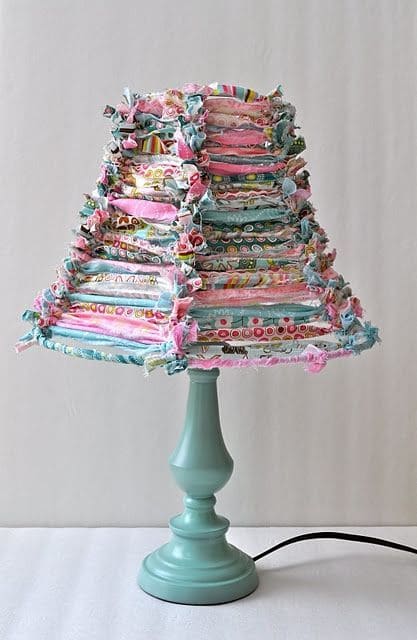
Made entirely from fabric scraps, this project transforms a plain wire shade into something that looks like a patchwork memory, each strip of cloth adding its own story.
Whether you use leftover quilting pieces, outgrown baby clothes, or thrifted fabric, this project brings warmth and personality into your space.
Materials Needed:
- 1 old wire lampshade frame
- Colorful fabric scraps (about 20–25 pieces, each ~2″ x 14″)
- Scissors
- Hot glue gun (optional)
Step-by-step Guide:
Step 1: Cut your fabric into strips around 2 inches wide and 14 inches long.
Step 2: Tie each strip around the horizontal and vertical bars of the wire frame. You can double knot for a fuller look or alternate patterns to create playful variation.
Step 3: Push and adjust the strips so they sit snugly side by side, covering the frame completely. Mix textures and colors to give it a lived-in, layered look.
Step 4: If needed, use a tiny dab of hot glue to secure any loose knots or hold fabric ends in place.
#3. Bohemian Fringe Lampshade
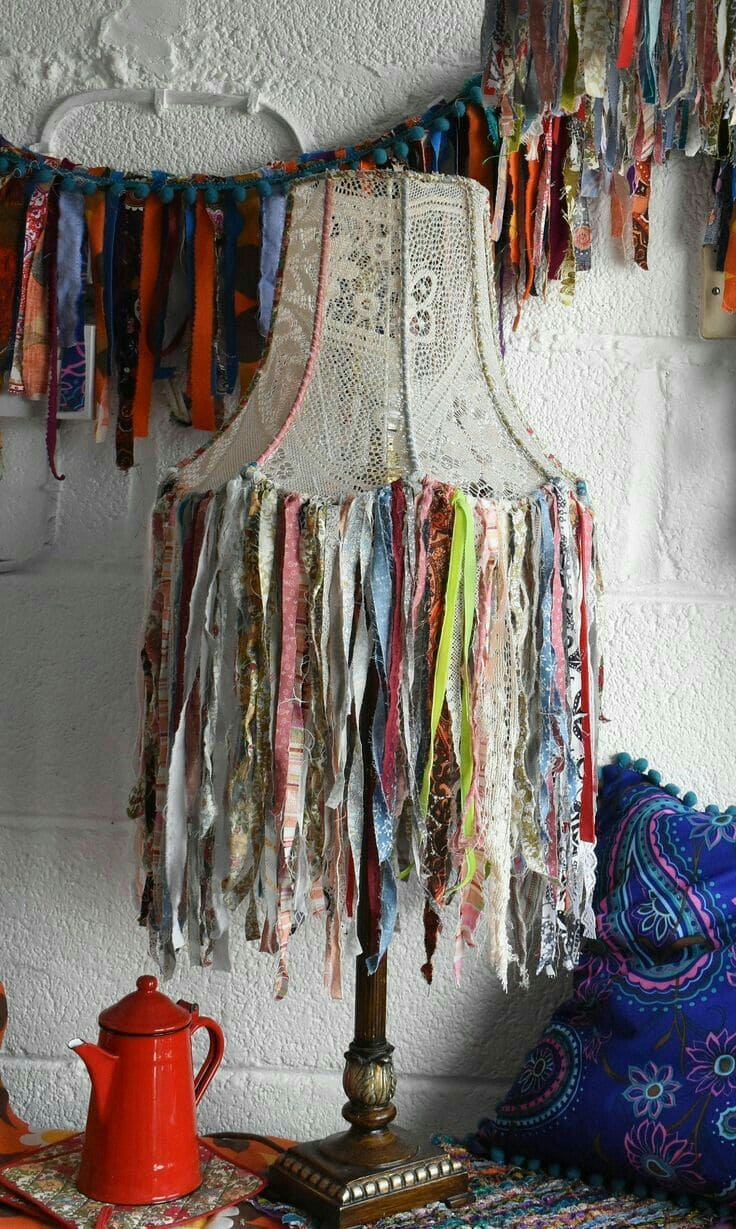
With its waterfall of colorful fabric strips cascading from vintage lace, this piece radiates joy, freedom, and that untamed boho spirit.
If your soul leans toward the eclectic and your hands love reusing scraps, this is your kind of lamp. It glows with stories, textures, and the thrill of making something wild and beautiful from what you already have.
Materials Needed:
- 1 vintage wire lampshade frame
- Lace or doily fabric
- Fabric scraps (approx. 40–60 pieces, ~20″ long)
- Hot glue gun or needle & thread
- Scissors
Step-by-step Guide:
Step 1: Wrap the top of the lampshade frame with lace or an old doily to give it structure and a dreamy base. Secure it with glue or a few quick stitches.
Step 2: Cut fabric strips into roughly 20-inch lengths. Go for variety including linen, tulle, velvet, printed cotton, lace.
Step 3: Tie or glue each strip around the bottom rim of the frame. Let them hang unevenly for a layered, relaxed vibe. Bunch some together, leave others free.
Step 4: Once you’re happy with the fullness and mix, give the strips a light trim so they dance at slightly different lengths.
#4. Blooming Garden Chandelier
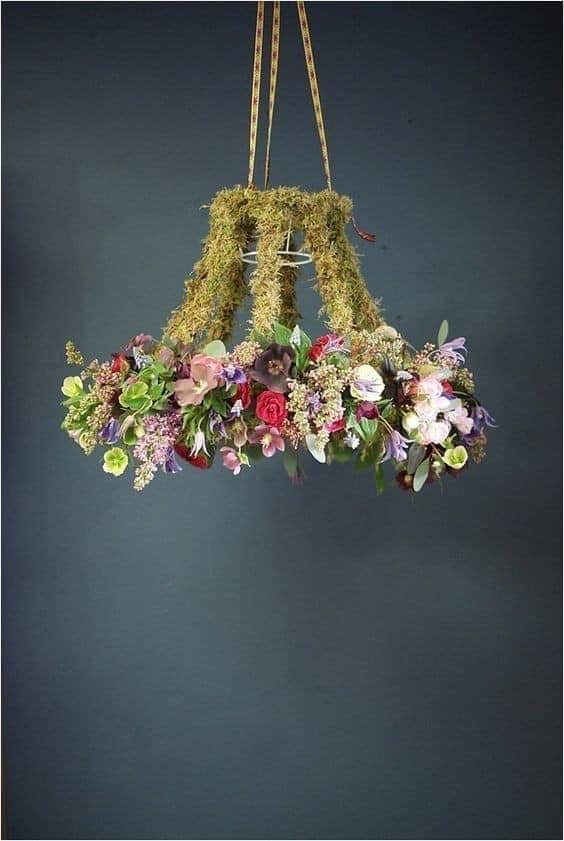
By wrapping a simple wire lampshade frame in moss and layering it with fresh or faux blooms, you can create a floating garden that lights up your home without a single bulb.
It’s whimsical, lush, and unexpectedly grounding, a perfect centerpiece for weddings, spring parties, or even a cozy reading corner where nature and creativity collide.
Materials Needed:
- 1 wire lampshade frame
- Sheet moss or preserved moss (1–2 bags)
- Faux or fresh flowers (20–30 mixed stems)
- Floral wire
- Ribbon
- Scissors
Step-by-step Guide:
Step 1: Start by wrapping the frame with sheet moss, covering all visible surfaces. Secure it using floral wire, pressing firmly so it sticks well.
Step 2: Trim your flower stems to about 4–6 inches. Begin inserting and wiring them around the bottom ring of the frame, alternating textures and colors to create a natural look.
Step 3: Continue layering flowers until the bottom is full and lush. For added drama, let some florals or greenery trail down gently.
Step 4: Attach ribbons or rope to the top of the frame and tie them together into a sturdy loop for hanging.
#5. Piano Key Chandelier
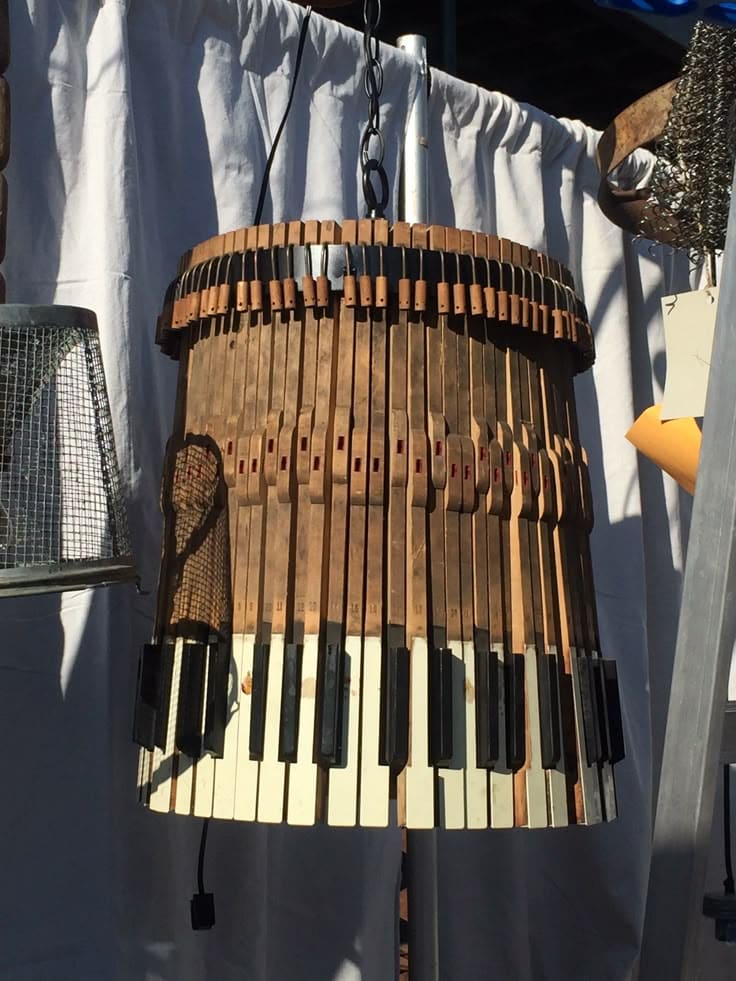
This dramatic, music-inspired lamp brings together creativity and nostalgia in one unforgettable statement piece.
If you’ve ever fallen in love with the elegance of an old upright piano or mourned its retirement, this is your chance to give it new life. It’s bold, poetic, and full of personality.
Materials Needed:
- 1 wire lampshade frame (cylindrical or barrel shape)
- 40–50 salvaged piano keys and action pieces
- Chain and hook
- Strong adhesive
- Electric cord set with bulb socket
- Drill (optional)
Step-by-step Guide:
Step 1: Find an old piano destined for the landfill. Carefully remove the white and black keys, along with their wooden hammer arms or other action parts.
Step 2: Attach the piano parts vertically around a sturdy lampshade frame using glue. Alternate black and white keys near the bottom for visual rhythm.
Step 3: Run your pendant light cord through the center of the frame and install the bulb socket.
Step 4: Attach a hanging chain and hook, then mount your chandelier in place.
#6. Photo Reel Memory Lampshade
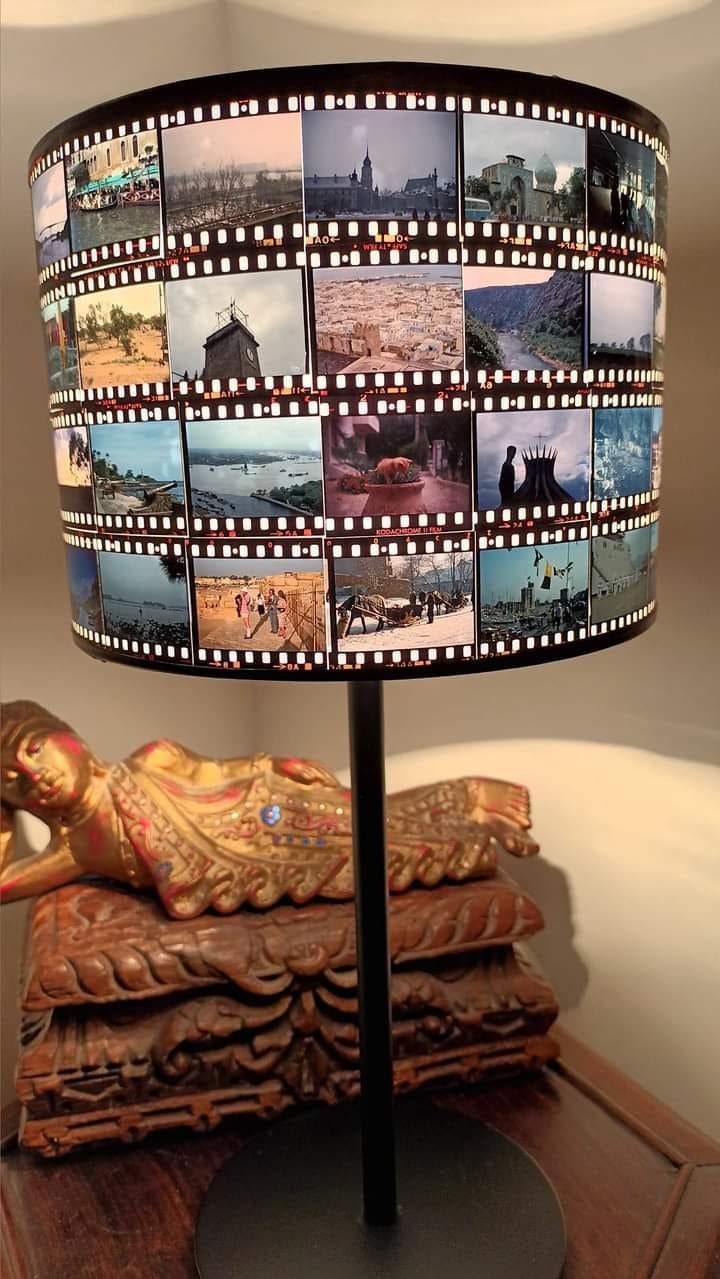
Using strips of vintage photo negatives or replica film reels, this lampshade glows like a slideshow of your life’s favorite adventures.
When lit, each image softly comes to life, snapshots of people, places, and memories wrapped around a drum-shaped frame. It’s sentimental and stylish, perfect for photography lovers or travelers.
Materials Needed:
- 1 drum-style lampshade frame
- Photo negative strips or printed film reel images
- Clear adhesive or double-sided tape
- Scissors
- LED bulb (low-heat)
Step-by-step Guide:
Step 1: Clean your lampshade frame and remove any old fabric, if needed. You want a smooth surface to work with.
Step 2: Cut your photo reels or printed strips to fit the height of the lampshade. Make sure the images face outward and align nicely.
Step 3: Attach each strip around the frame using clear adhesive or double-sided tape, slightly overlapping them for a seamless look.
Step 4: Insert an LED bulb inside and enjoy how your reel of memories flickers to life.
#7. Beaded Radiance Lampshade
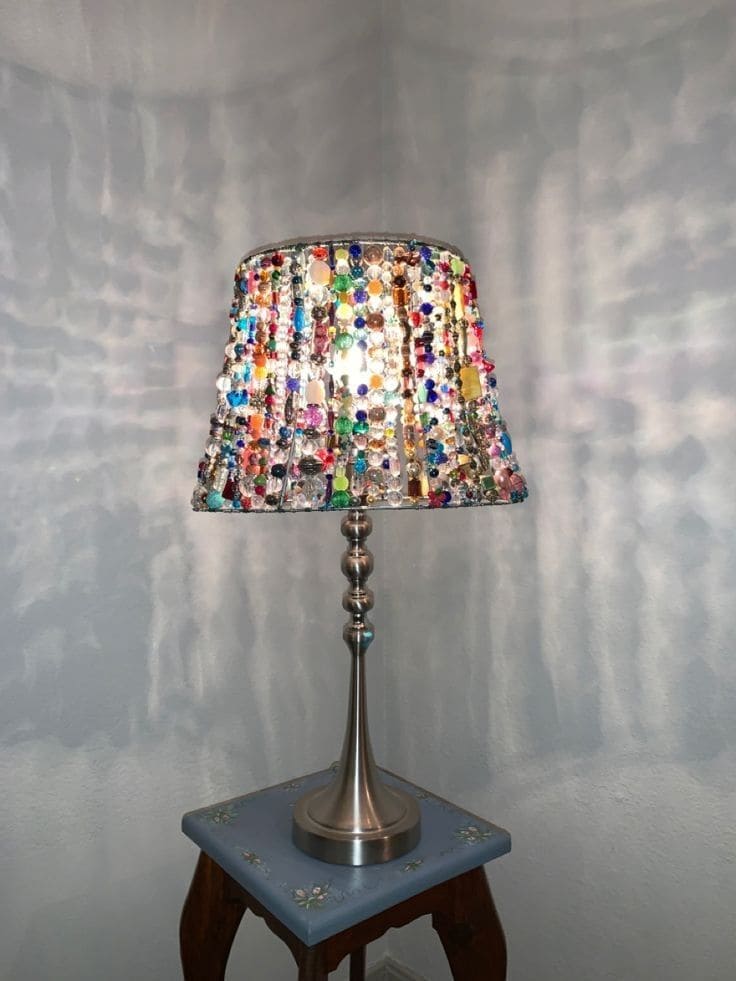
Made from dozens of colorful beads, this lampshade transforms plain light into dancing reflections, casting joyful patterns across the walls like a mini disco of color.
Whether you use thrifted necklaces, broken bracelets, or leftover craft beads, this project is a brilliant way to reuse and rejoice in a little shimmer.
Materials Needed:
- 1 old wire lampshade frame
- Assorted beads (100+ in varying sizes and colors)
- Jewelry wire
- Wire cutters or scissors
Step-by-step Guide:
Step 1: Clean the lampshade frame and remove any old fabric, leaving only the wire skeleton.
Step 2: Thread beads onto lengths of wire or fishing line, leaving a little space at the ends for tying.
Step 3: Tie or wrap each strand securely onto the top of the frame, letting them dangle freely. Space them out evenly to fill the whole frame.
#8. Sea Glass Mosaic Lampshade
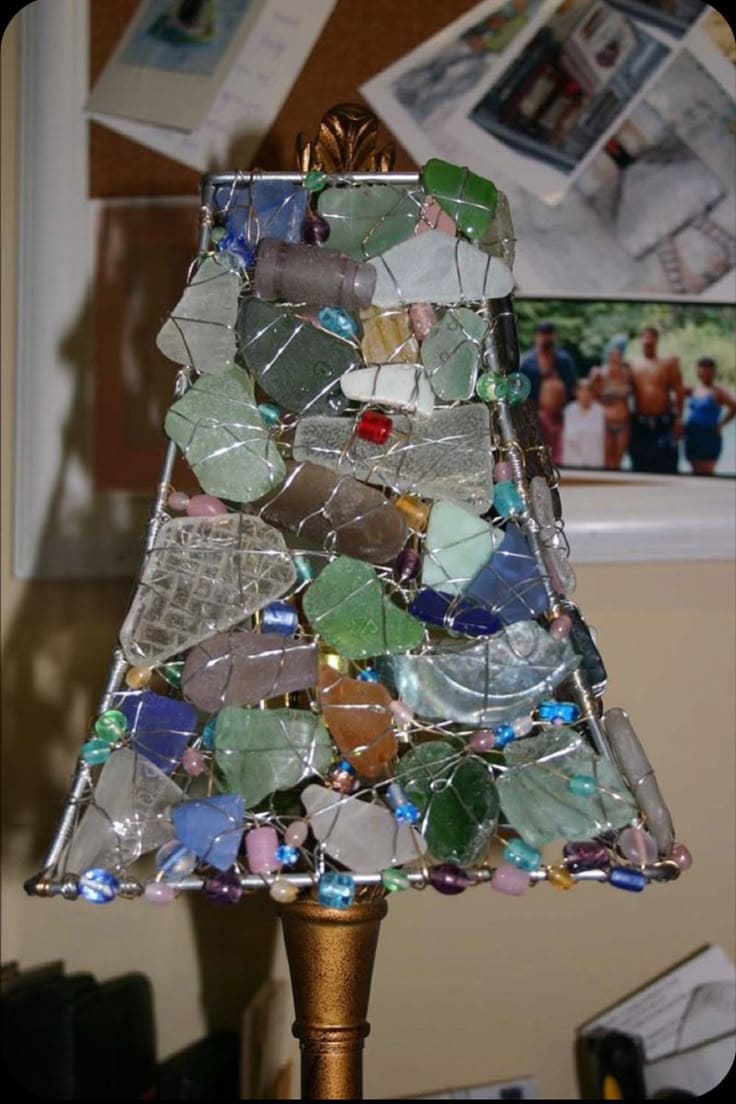
This radiant mosaic lampshade feels like a sunlit beach walk captured in time. Crafted from sea glass, beads, and wire, it turns an ordinary lamp into a sparkling mosaic of color and memory.
When lit, each piece glows like a tiny jewel, frosted greens, ocean blues, amber and lavender fragments dancing together in harmony.
Materials Needed:
- 1 wire lampshade frame
- Assorted sea glass pieces (approx. 30–50)
- Small beads (glass or plastic)
- Thin but sturdy craft wire
- Wire cutters and pliers
Step-by-step Guide:
Step 1: Choose a wire lampshade frame with wide enough spacing between bars. Clean it thoroughly and set it upright.
Step 2: Begin by wrapping wire loosely around the frame to create a crisscross net. This will hold your glass and beads.
Step 3: One by one, place sea glass pieces inside the wire structure, securing each with more wire as needed. Nestle beads between gaps for extra color and sparkle.
Step 4: Tuck in any loose ends of wire using pliers so nothing sticks out. If you like, add a final loop of beads around the bottom rim for a polished finish.
#9. Garden Gala Lampshade
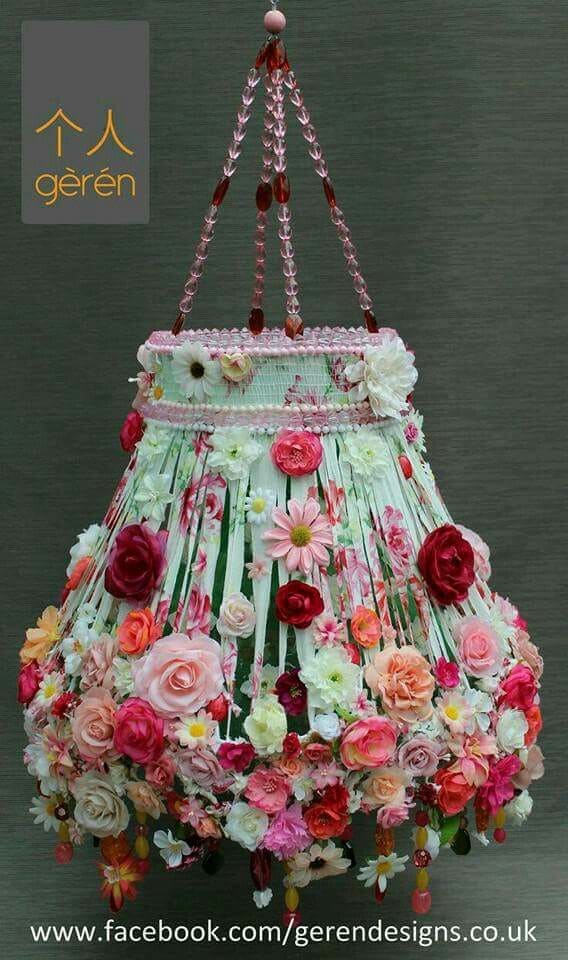
This showstopping design is part floral sculpture, part hanging art. Overflowing with faux flowers and ribbons, it turns a lampshade frame into a chandelier fit for a fairytale.
Whether you hang it above a nursery, event table, or creative studio, it instantly lifts the space into a garden fantasy.
Materials Needed:
- 1 large wire lampshade frame
- Faux flowers (60–100 mixed blooms)
- Satin or grosgrain ribbon (~10–15 meters, in soft pastels or brights)
- Hot glue gun and glue sticks
- Scissors
- Beaded garland or string
Step-by-step Guide:
Step 1: Wrap the top of the lampshade frame with ribbon or fabric to create a base. Secure it tightly with glue.
Step 2: Cut long strips of ribbon and tie or glue them around the top ring, letting them drape downward toward the bottom of the frame like cascading vines.
Step 3: Begin attaching flowers all around the ribbons and frame. Mix sizes and colors, layering large roses, small daisies, and greenery for depth.
Step 4: Add beaded strands or decorative trim to the top for sparkle, and attach a looped garland for hanging.
#10. Crochet Bloom Lampshade
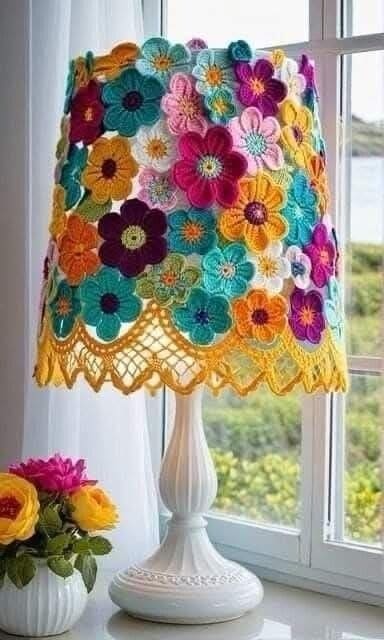
This lampshade is a joyful explosion of yarn and color like a flowerbed that decided to climb up and hug your lamp.
Made entirely of crocheted blooms, each petal feels lovingly handmade, transforming any dull corner into a happy, handmade haven. The best part? It’s not just beautiful, it’s soul-soothing to create.
Materials Needed:
- 1 old lampshade frame (drum or cone shape)
- Colorful yarn (10+ colors)
- Crochet hook (size depends on your yarn)
- Yarn needle and scissors
- Hot glue
Step-by-step Guide:
Step 1: Crochet flowers in various shapes and sizes. Use simple patterns like 5-petal blossoms or layered rosettes. Mix colors and textures for that eclectic charm.
Step 2: Once you have enough flowers to cover the frame, arrange them loosely to map out your design. Try overlapping some and clustering others.
Step 3: Attach the flowers using hot glue or stitch them directly onto a fabric or mesh base stretched over the frame.
Step 4: Add a contrasting crochet edge or picot trim along the bottom if you’d like a polished border (totally optional, but adorable).
#11. Heirloom Lace Lampshade
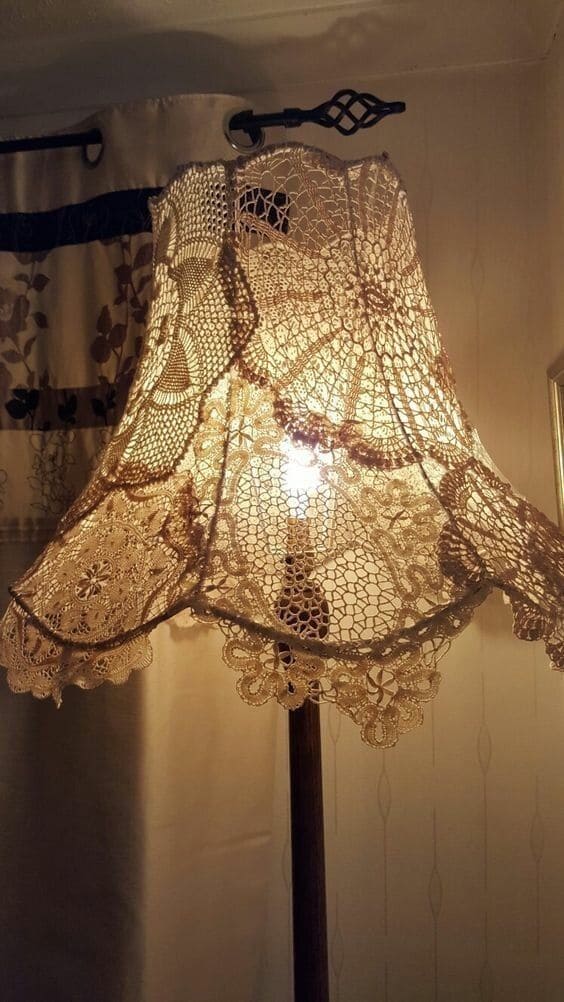
There’s a quiet romance in this lampshade, the kind that whispers memories from a different time. Using vintage doilies or inherited lace, this design drapes the frame like a delicate shawl.
Whether the lace came from your grandmother’s chest or a thrifted treasure, this project gives it new purpose, preserving history in the most beautiful way.
Materials Needed:
- 1 wire lampshade frame
- Vintage lace doilies or crochet runners (5–8 pieces)
- Hot glue gun
- Scissors
- Optional: tea dye
Step-by-step Guide:
Step 1: Gather lace pieces that vary in pattern and size. If you prefer a uniform aged look, soak them briefly in diluted tea, then dry flat.
Step 2: Lay out the lace over the frame to visualize placement. Layer the pieces to fully cover the surface, allowing scalloped edges to hang over the rim for elegance.
Step 3: Attach the lace using hot glue or sew it gently along the top and bottom rims. Let the natural curves and patterns shape the overall silhouette.
Step 4: Trim or fold any excess fabric neatly inside the frame.
#12. Memory Pin Lampshade
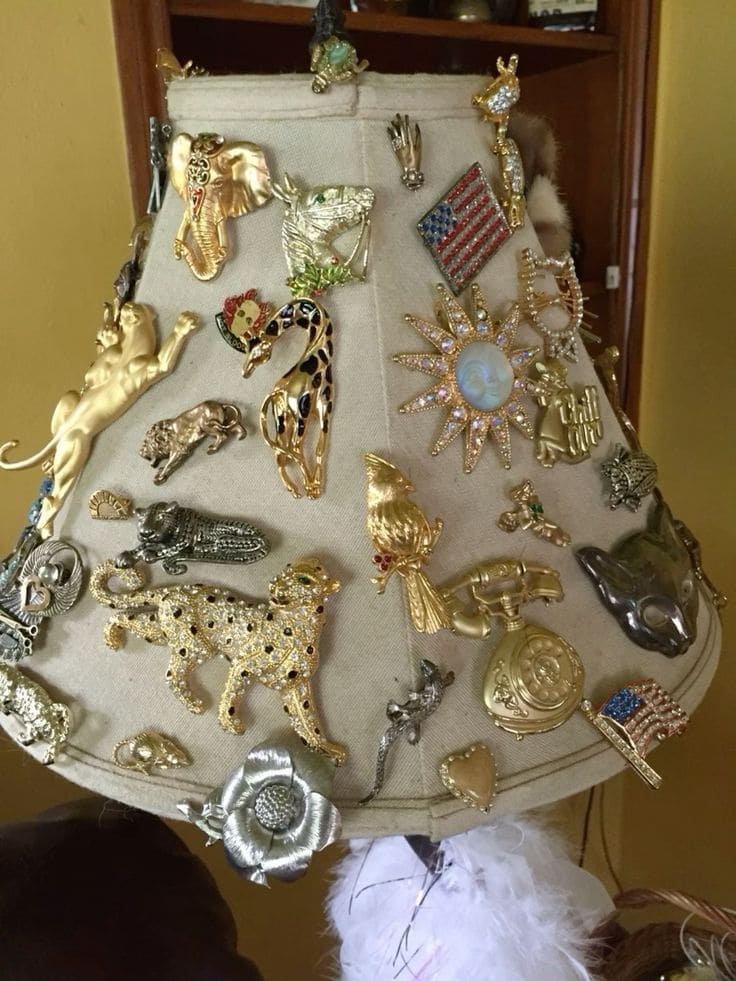
Vintage brooches, family heirlooms, flea market finds, and costume jewelry all come together to form a one-of-a-kind patchwork of personality.
Each pin is a little chapter and when the lamp glows, it doesn’t just light the room, it draws you in to explore.
Materials Needed:
- 1 fabric-covered lampshade
- Assorted brooches, pins, costume jewelry (25–40 pieces)
- Needle-nose pliers
- Optional: glue gun
Step-by-step Guide:
Step 1: Gather your jewelry, mix shiny, quirky, and sentimental. If a piece doesn’t have a pin backing, use glue or wire to attach it.
Step 2: One by one, pin each item onto the lampshade fabric. Start with larger, statement pieces and fill in gaps with smaller ones. Angle and layer them like a collage.
Step 3: Use pliers to secure pin backs so they don’t poke through or come loose.
Step 4: If desired, add a few ribbon or fabric rosettes, or even a fringe of pearls at the bottom for extra drama.
#13. Queen of Hearts Lampshade
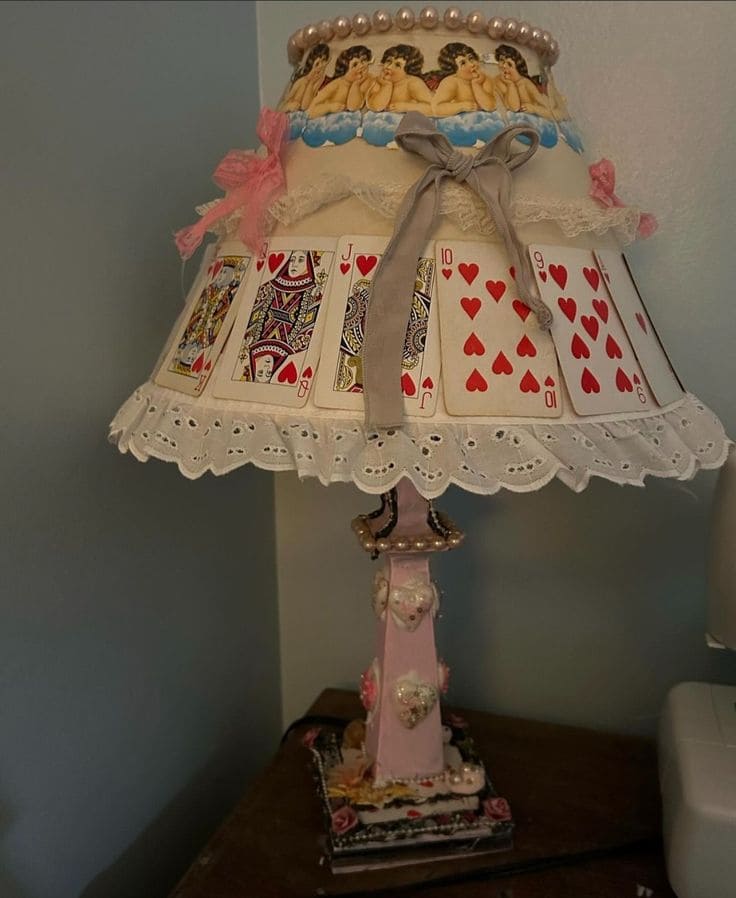
With cherubic angels, pearl trim, dainty bows, and a full royal flush of playing cards, it balances charm and cheek in the most theatrical way.
It’s the perfect blend of kitsch and nostalgia, something you’d expect to find in a Victorian tea room hosted by Alice herself.
Materials Needed:
- 1 fabric lampshade
- Full set of playing cards (you’ll use about 8–10)
- Decorative lace trim and ribbon
- Paper cherub cutouts
- Pearl string
- Hot glue gun and glue sticks
- Scissors
Step-by-step Guide:
Step 1: Choose a soft, fabric-covered lampshade and start by wrapping the top edge with pearl string or ribbon. Secure with glue as you go.
Step 2: Cut out cherub or vintage angel images and glue them evenly around the top panel of the shade, right below the trim.
Step 3: Arrange playing cards side-by-side around the main section of the lampshade. Use hot glue to secure them along the top edge, letting the bottom edge fan out slightly for flair.
Step 4: Add ribbon bows or lace at the corners or center front for an extra romantic touch. You can even add a dangling heart charm or two for good luck.
#14. Pearl Princess Lampshade
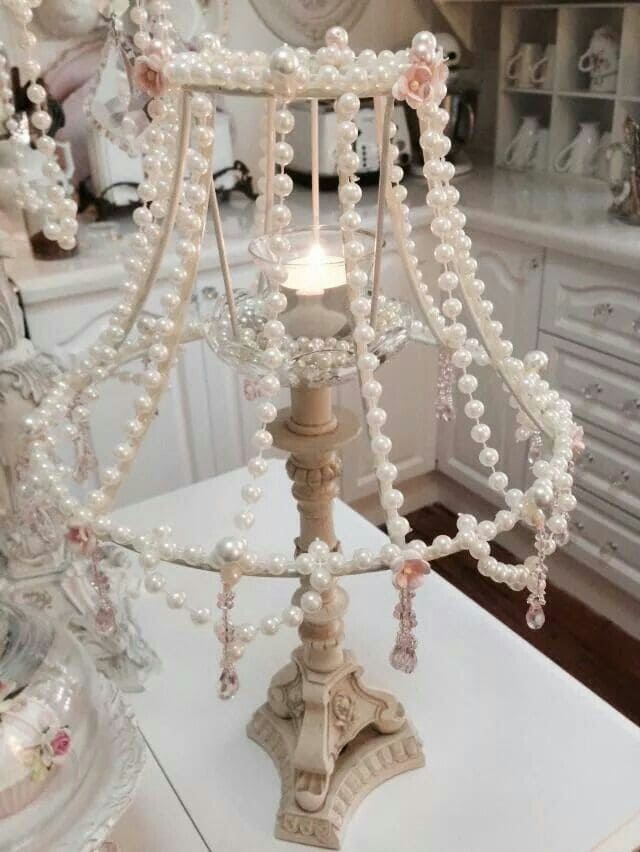
Dripping in faux pearls and soft pink accents, this open-frame lampshade is like a vintage tiara for your lamp. It’s delicate, dreamy, and a little bit royal, perfect for dressing up a corner of your vanity or guest room.
Instead of fabric, this shade lets strands of pearls do all the work, creating a sculptural effect that sparkles even when the light is off.
Materials Needed:
- 1 wire lampshade frame
- Pearl garlands (4–6 meters)
- Small artificial flowers or satin bows
- Hot glue gun and glue sticks
- Crystal or acrylic bead dangles (optional)
- Scissors
Step-by-step Guide:
Step 1: Clean and prep your lampshade frame. If the frame color doesn’t match your vision, give it a coat of soft ivory or blush spray paint and let dry.
Step 2: Drape pearl strands vertically from the top to the bottom rings of the frame, spacing them evenly. Secure with hot glue or tie them with fine thread.
Step 3: Add garlands looping between each frame section to create elegant curves. Layer some pink crystal or bead drops at the ends for shimmer.
Step 4: Top it off with tiny roses, bows, or lace tucked into the joints to soften the structure and add a hint of romance.
#15. Retro Pattern Paper Lampshade
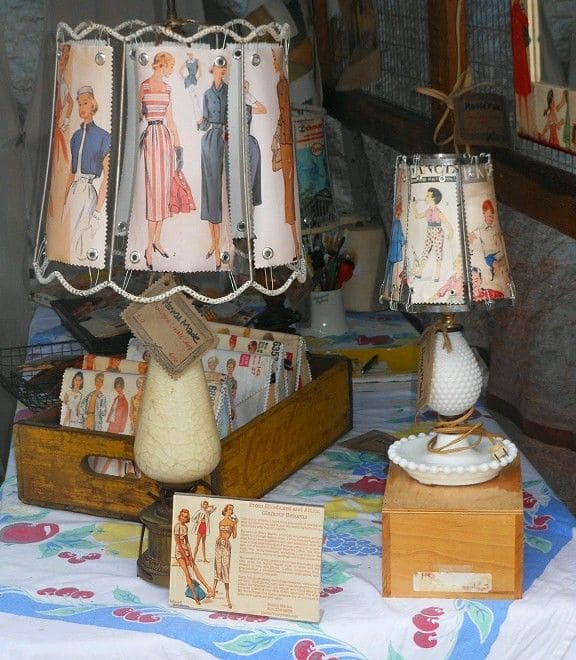
These lampshades feel like they were pulled straight from a mid-century sewing room, and we mean that in the most delightful way.
Crafted from vintage dress pattern covers or retro fashion magazine pages, they celebrate classic style with a wink of nostalgia.
Materials Needed:
- 1 wire lampshade frame
- Vintage pattern envelopes, fashion illustrations, or retro magazine pages (8–12 pieces)
- Hole punch
- Eyelets and eyelet setter
- Twine, ribbon, or jump rings
- Clear protective spray (optional)
Step-by-step Guide:
Step 1: Choose your paper images and trim them to a consistent size to create panels. You can laminate or spray them with a matte sealant for durability if you like.
Step 2: Punch holes at the top and bottom corners of each paper panel. Install eyelets for a clean, reinforced look.
Step 3: Use jump rings, string, or ribbon to attach each paper panel around the frame, allowing a slight gap between panels for a lacy, scalloped effect.
Step 4: Add decorative trim, lace, or even buttons around the top or bottom edge if you want to echo a sewing-room flair.
#16. Enchanted Forest Lampshade
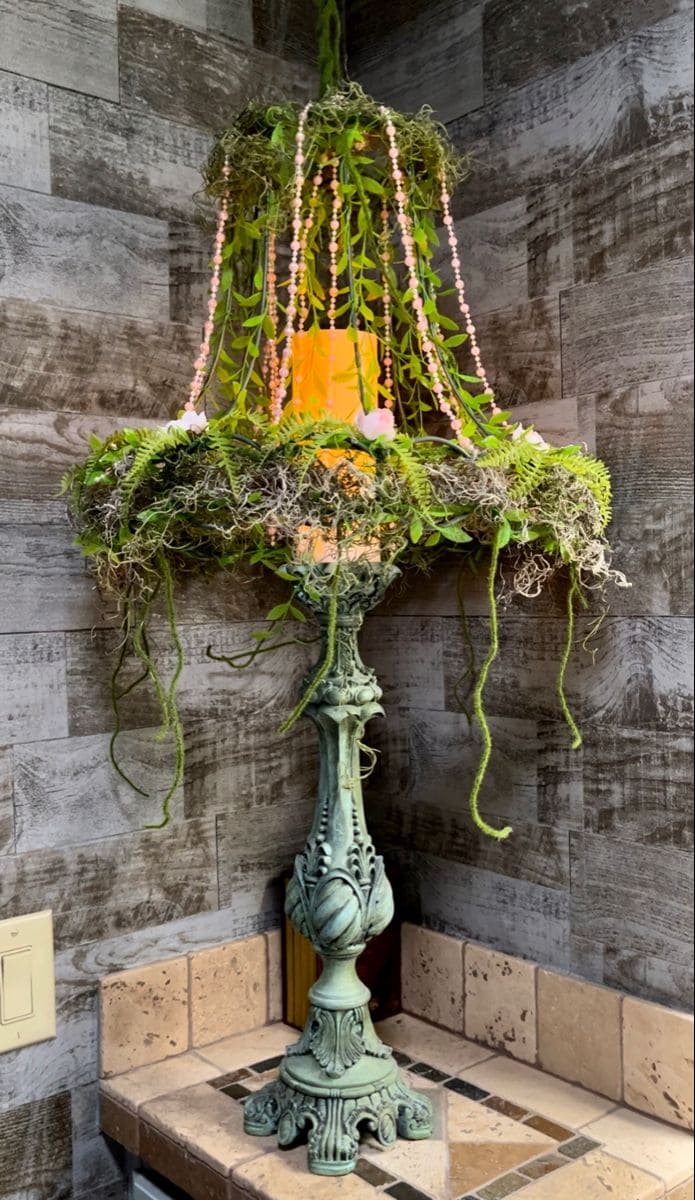
This lamp looks like it was pulled straight from a mossy glade deep in a fairytale forest. Draped in faux vines, Spanish moss, and pastel pearls, it radiates earthy whimsy with every glow.
The weathered green base gives it a timeworn feel, almost like it once belonged to a woodland witch or a garden fairy with excellent taste.
Materials Needed:
- 1 wire lampshade frame
- Faux vines and ferns (approx. 2–3 meters)
- Spanish moss
- Small faux flowers (5–8 pieces)
- Bead garlands
- Hot glue gun and glue sticks
- Optional: flameless LED candle
Step-by-step Guide:
Step 1: Start by wrapping the top and bottom rings of the lampshade frame with vines. Let them drape and spill for a natural, untamed look.
Step 2: Fill in the gaps with Spanish moss, gently gluing tufts around the frame for fullness and texture.
Step 3: Attach strands of beads or crystals from the top to the base rim. This adds sparkle and a sense of movement.
Step 4: Tuck in a few faux blooms where the vines and garlands meet. These tiny floral accents bring softness and charm.
#17. Literary Lampshade That Tells a Story
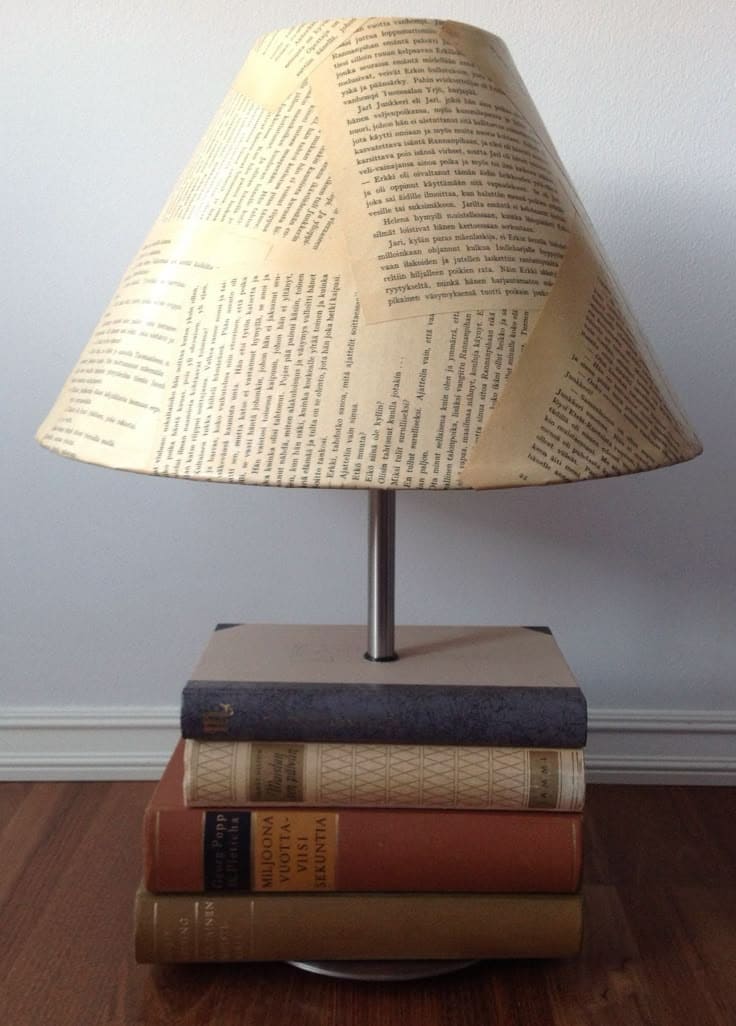
This lampshade is what happens when your love for books spills beyond the page. It’s poetic, brainy, and beautifully cozy, perfect for reading nooks, libraries, or anywhere a little paper-and-ink personality is welcome.
With vintage book pages collaged over the shade and stacked tomes as the base, it turns literature into light.
Materials Needed:
- 1 plain lampshade
- Old book pages or newspaper (10–15 pages)
- Mod Podge
- Foam brush
- Scissors
- Stack of hardcover books
Step-by-step Guide:
Step 1: Tear or trim book pages into panels or strips that fit the curve of your lampshade. Mix horizontal and vertical pieces for texture.
Step 2: Brush Mod Podge onto the back of each page and press it onto the shade, smoothing out bubbles as you go. Overlap edges slightly.
Step 3: Once fully covered, apply a thin layer of Mod Podge over the entire shade to seal it and give it a soft matte finish.
Step 4 (Optional): For a literary lamp base, glue together several hardcover books and drill a hole down the center for a lamp rod.
#18. Silverware Lampshade
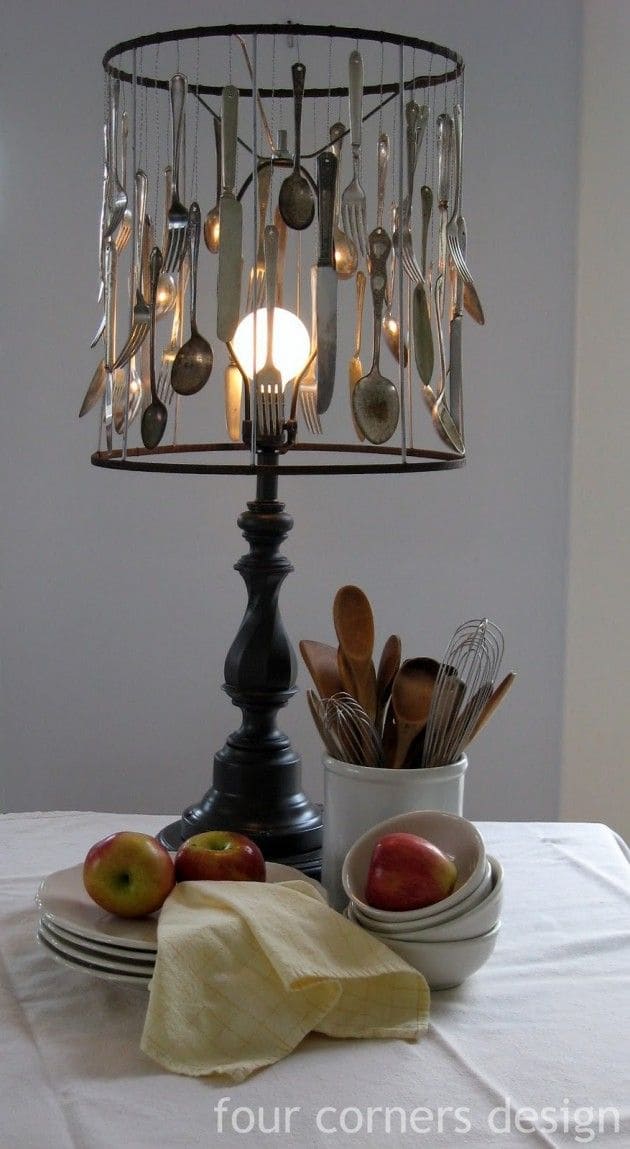
Who knew your old forks and spoons could make such a showstopper?
This lampshade is a perfect fusion of utility and whimsy, an eclectic chandelier of cutlery that casts shimmering shadows and adds a playful edge to any kitchen or dining space.
Materials Needed:
- 1 wire drum lampshade frame
- 30–50 pieces of old silverware (forks, spoons, knives)
- Thin but sturdy wire
- Needle-nose pliers
- Optional: metal polish
Step-by-step Guide:
Step 1: Gather your silverware, mix and match styles for character. If needed, give them a quick polish or leave them aged for a vintage look.
Step 2: Using wire or fishing line, tie or loop each utensil securely to the top ring of the lampshade frame. Let them hang vertically with a little space in between.
Step 3: Continue around the frame, alternating shapes and weights to create rhythm and balance. Make sure they’re evenly spaced and won’t touch the bulb.
Step 4: Once all are hung, double-check for secure attachment and hang the shade on a lamp base with a warm-toned bulb (low wattage for safety).
#19. Fairy Frame Lanterns
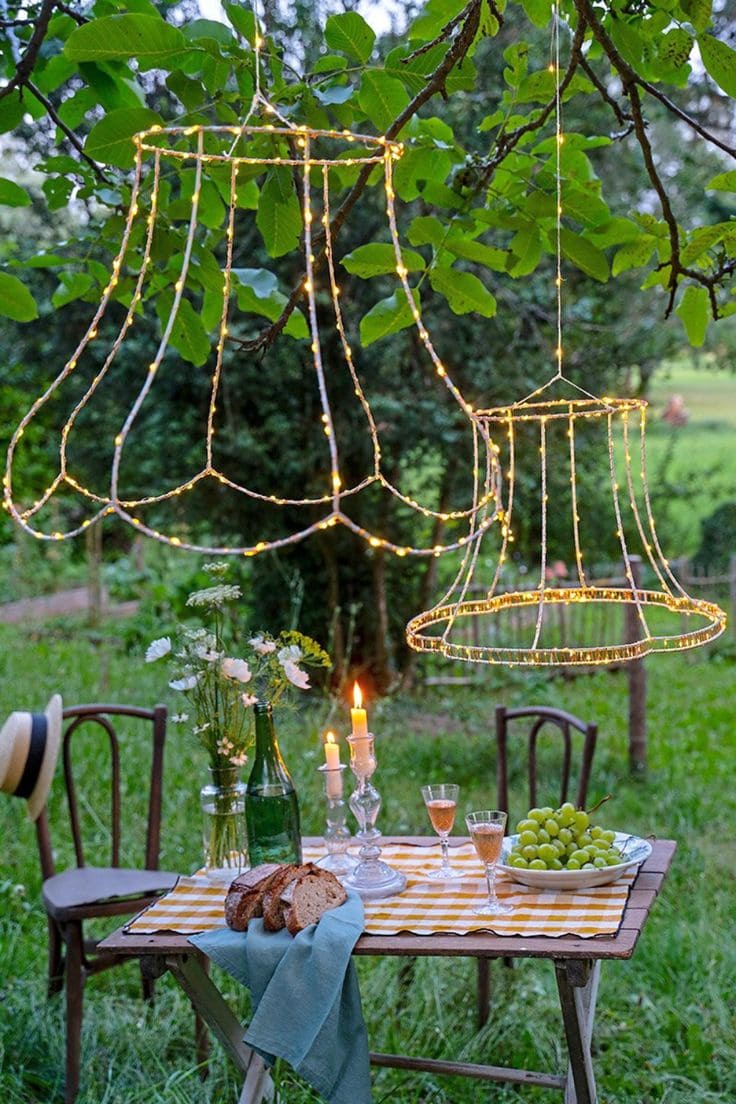
Sometimes the simplest transformations are the most enchanting. These upcycled lampshade frames wrapped in warm fairy lights bring a gentle glow to any garden gathering.
Hung from tree branches like floating lanterns, they’re ethereal yet effortless, turning old wire forms into sparkling silhouettes that feel straight out of a secret woodland dinner party.
Materials Needed:
- 1 or more wire lampshade frames (any size or shape)
- Battery-powered or plug-in fairy lights (warm white preferred)
- Floral wire
- Hanging hooks
Step-by-step Guide:
Step 1: Remove all fabric from your lampshade frames, leaving only the metal skeleton.
Step 2: Wrap fairy lights tightly around the frame, following the shape of each curve. Secure the ends with floral wire or zip ties.
Step 3: Attach a sturdy string or twine loop to the top of the frame for hanging.
Step 4: Hang your glowing shades from tree limbs or hooks. Turn on the lights just before dusk for maximum impact.
#20. Candy Bead Lampshade
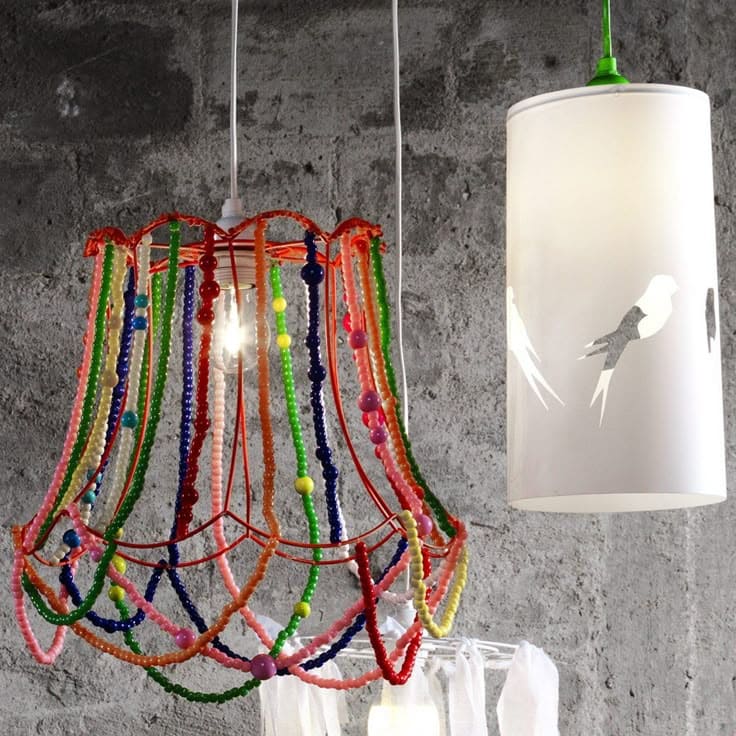
This lampshade is pure joy in chandelier form. Vibrant plastic beads in every color of the rainbow drape over a curvy wire frame, turning a simple light bulb into a playful statement piece.
Materials Needed:
- 1 wire lampshade frame (bell or tulip shape works well)
- Colorful plastic craft beads (100–200 pieces)
- Beading wire or fishing line
- Scissors
- Wire cutters
Step-by-step Guide:
Step 1: Remove any fabric from the lampshade frame, leaving just the metal structure.
Step 2: String your beads onto fishing line or thin beading wire, making strands long enough to stretch from top to bottom. Tie or twist to secure.
Step 3: Attach each beaded strand to the frame, spacing them evenly around the top. Let some hang straight while others drape in playful curves around the lower edge.
Step 4: Mix in larger beads, patterned ones, or even glow-in-the-dark styles for extra flair. Make it uniquely yours.
#21. Wanderers Map Lamp
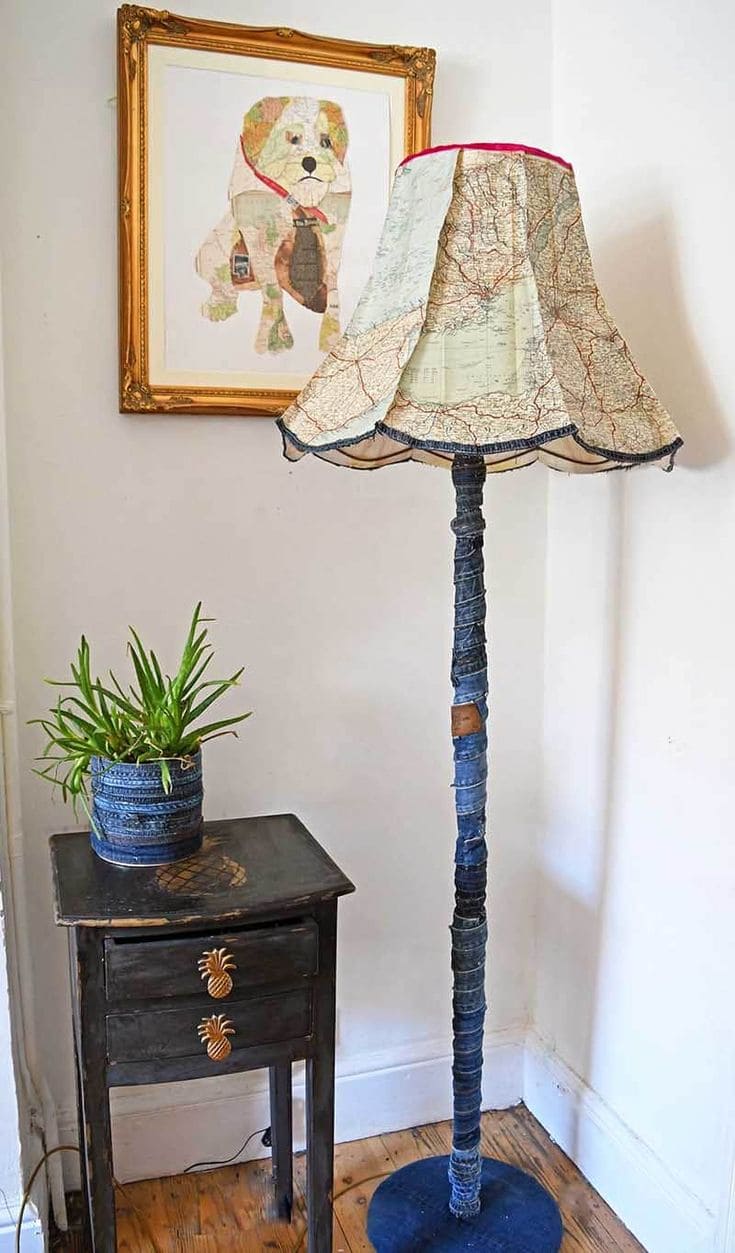
This lamp feels like it belongs in an explorer’s study, equal parts memory and adventure. Each path on the shade holds a journey; each denim layer tells of days worn and well-lived.
With a lampshade made from vintage roadmaps and a base wrapped in strips of old denim, it’s a tactile scrapbook of movement and meaning.
Materials Needed:
- 1 floor lamp with lampshade
- Old paper maps (road maps, atlas pages, etc.)
- Mod Podge
- Foam brush
- Scissors
- Old jeans or denim scraps
- Hot glue gun and glue sticks
Step-by-step Guide:
Step 1: Cut map sections to fit your lampshade panels. Overlap them slightly for a collage effect or align them for a clean, grid look.
Step 2: Apply glue to the back of each map piece and press firmly onto the shade. Smooth out wrinkles as you go.
Step 3: Once the entire shade is covered, seal with a layer of Mod Podge on top for durability.
Step 4: Tear or cut old jeans into long, narrow strips. Wrap the base of the lamp tightly, securing with hot glue at intervals.
#22. Button Burst Lampshade
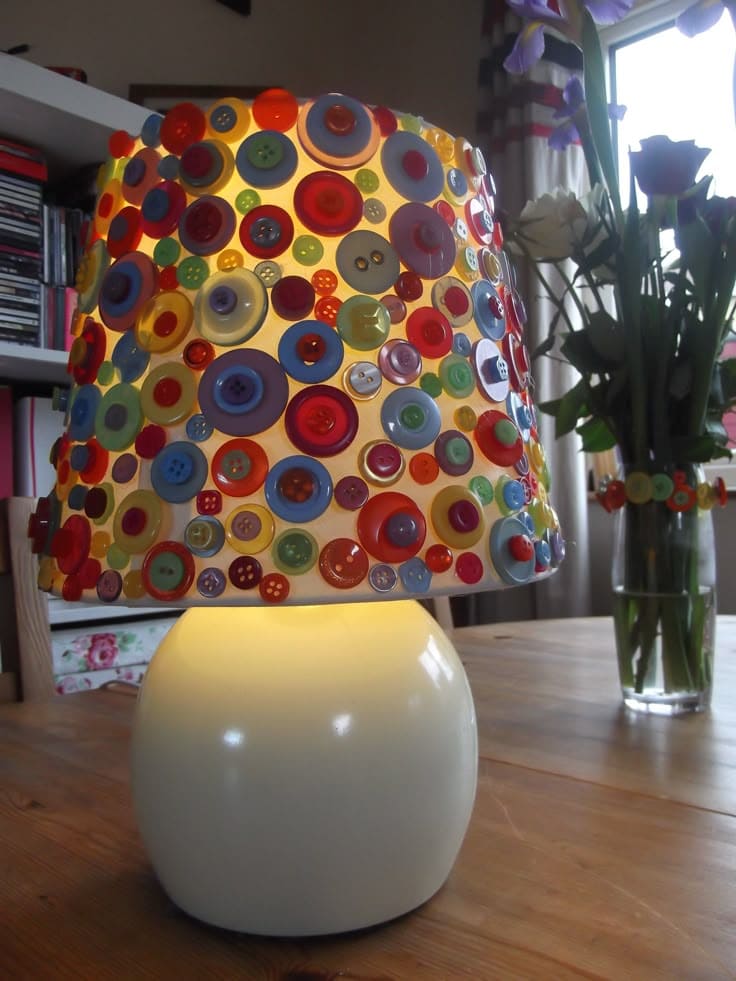
Covered entirely in mismatched, colorful buttons, it brings a dose of childhood wonder and DIY charm to any space.
When lit from within, the light dances through the gaps and glows around the buttons, turning your ordinary lamp into a playful pop of personality.
Materials Needed:
- 1 plain fabric or plastic lampshade
- Assorted buttons (100+ in varying colors and sizes)
- Hot glue gun and glue sticks
- Optional: clear sealant spray
Step-by-step Guide:
Step 1: Begin at the top of the shade, gluing buttons one at a time. Work your way down in loose rows, overlapping some to fill in the spaces.
Step 2: Continue until the entire lampshade is covered. Let some buttons spill over the edges for an extra whimsical look.
Step 3: Once dry, spray a light coat of clear sealant (optional) to keep everything secure and dust-resistant.
