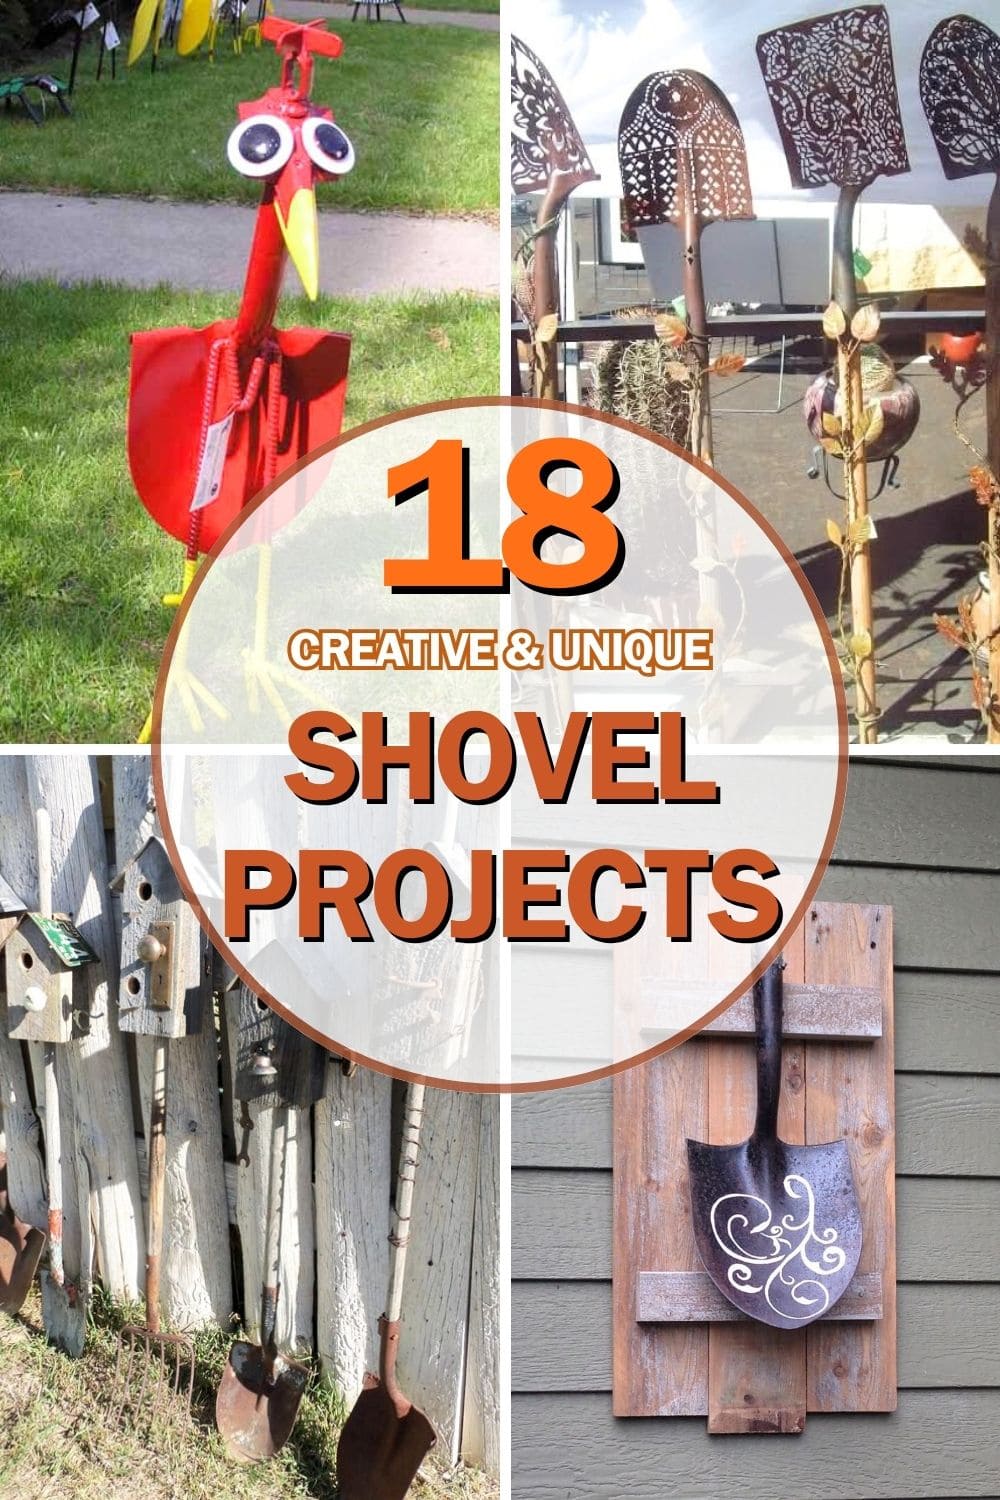
Many gardeners have an old shovel lying around, perhaps it’s rusted, worn out, and left forgotten in the shed. But what if that old shovel could be turned into something beautiful?
Instead of letting it sit there collecting dust, why not transform it into a stunning piece of decor for your garden or home? With just a little creativity, you can give that trusty tool a new life.
From unique garden sculptures to charming wall hangings, these 18 creative ways to upcycle shovels will inspire you to turn everyday items into eye-catching, functional art for your space.
#1. Shovel Birdhouse Display
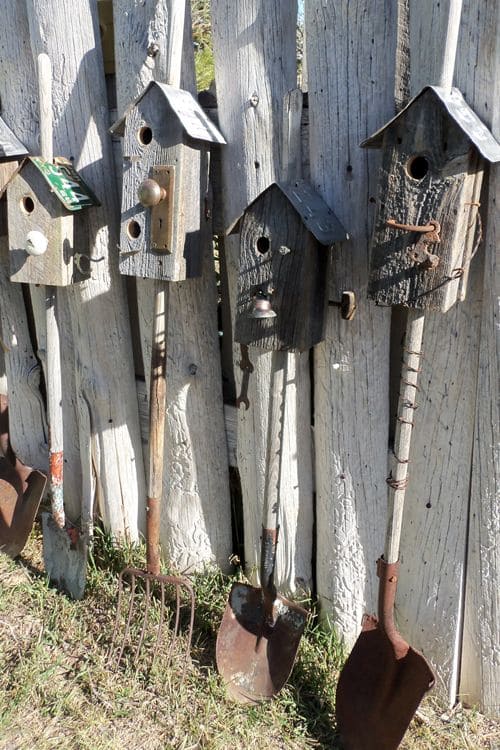
How about turning your old shovels into a charming row of birdhouses, each one a cozy haven for feathered friends against a weathered fence?
With little wooden homes perched on the handles, it’s like inviting nature to sing right in your backyard.
Materials Needed
- 4 old shovels (medium-sized, approx. 48 inches each)
- 4 small birdhouses (6 x 4 x 4 inches each)
- 1 can of weatherproof paint (8 oz)
- 1 paintbrush (1-inch wide)
- 4 screws (1 inch long)
- Drill with screwdriver bit
- Wire (16-gauge, 4 feet)
- Optional: 4 small bells
Step-by-step Guide
Step 1: Paint the birdhouses with weatherproof paint if desired, letting them dry for 2 hours.
Step 2: Attach each birdhouse to a shovel handle with screws, ensuring it’s secure and level.
Step 3: Wrap wire around the handle to stabilize the birdhouse, adding a bell or decoration if you like.
Step 4: Lean or mount the shovels against a fence, then wait for your new feathered tenants to arrive!
#2. Elegant Shovel Wall Accent
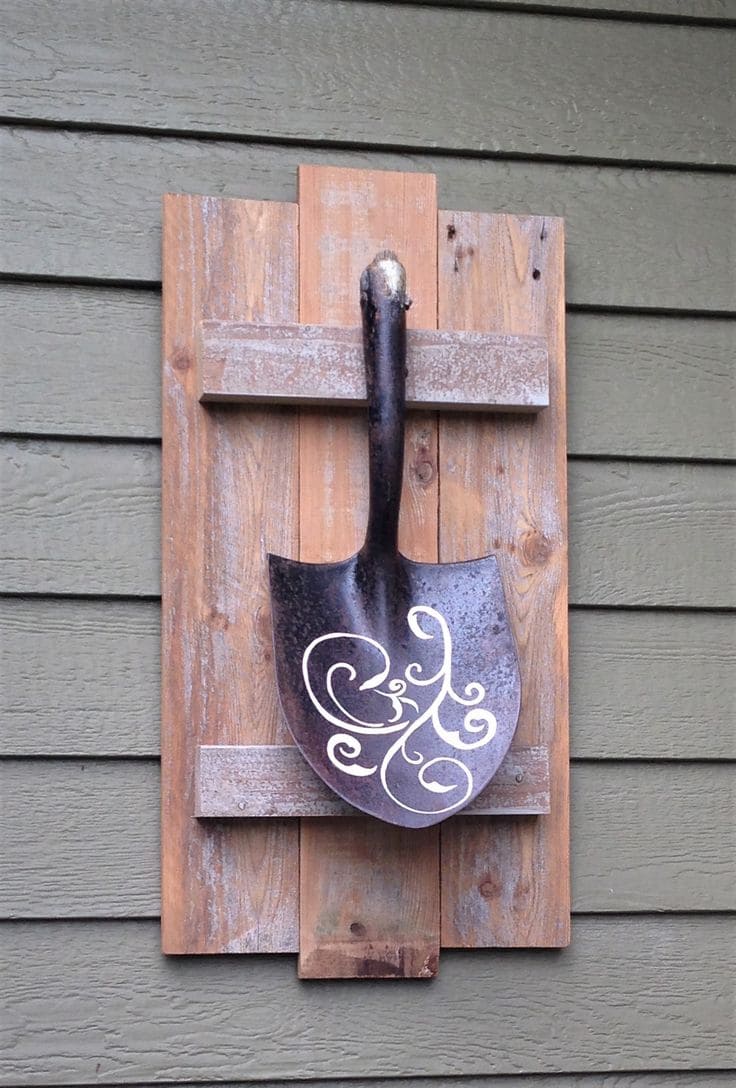
This project, costing around $15–$25, invites you to craft something elegant while respecting the earth’s worn treasures. You’ll feel a quiet joy as this piece transforms your wall into a gallery of creativity.
Materials Needed
- 1 old shovel (medium-sized, approx. 48 inches long)
- 3 wooden planks (1 x 6 inches, 12 inches long each)
- 1 can of white acrylic paint (4 oz) and paintbrush (1-inch wide)
- Wood glue (8 oz)
- 2 small screws (1 inch long)
- Drill with screwdriver bit
- Sandpaper (medium grit)
Step-by-step Guide
Step 1: Sand the wooden planks to smooth them, then glue them together in a rectangular frame, letting it dry for 1 hour.
Step 2: Paint swirling designs on the shovel blade with white acrylic paint and let it dry for 2 hours.
Step 3: Attach the shovel handle to the center of the frame with screws, ensuring it’s secure.
#3. Rustic Owl Garden Sculpture
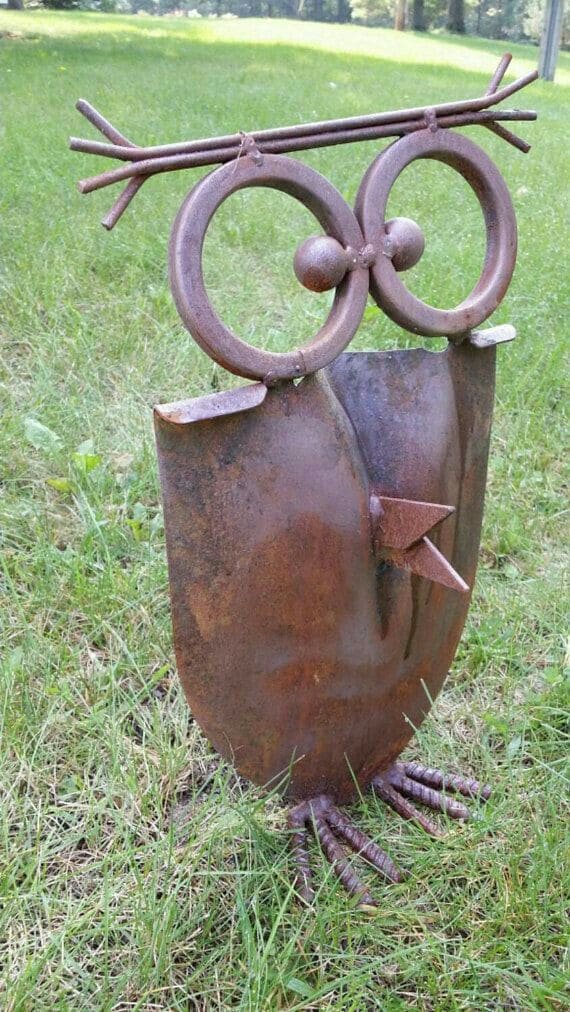
Using two shovel blades for wings and a few metal scraps for eyes and feet, you’ll create a friend that blends perfectly with nature’s green embrace.
In addition, this project feels like a playful dance with the outdoors, letting you sculpt a piece that’s both fun and earthy.
Materials Needed
- 2 old shovels (medium-sized, approx. 48 inches each)
- 2 metal rings (6 inches diameter each)
- 4 metal rods (1/2 inch diameter, 12 inches long each)
- 1 small metal triangle (3 inches wide)
- 1 can of rust-resistant spray paint (10 oz)
- Drill with 1/4-inch bit
- Wire (16-gauge, 3 feet)
- Welding tool
Step-by-step Guide
Step 1: Remove the handles from both shovels, then position one blade upright and the other horizontally as wings, securing with wire or welding.
Step 2: Attach the metal rings as eyes and the triangle as a beak to the upright blade, using wire or adhesive.
Step 3: Bend the metal rods into feet shapes and attach them to the base with wire or welding for stability.
Step 4: Optionally spray paint the owl, let it dry for 2 hours, then place it in your garden to enjoy its rustic allure!
#4. Shovel Succulent Wall Garden
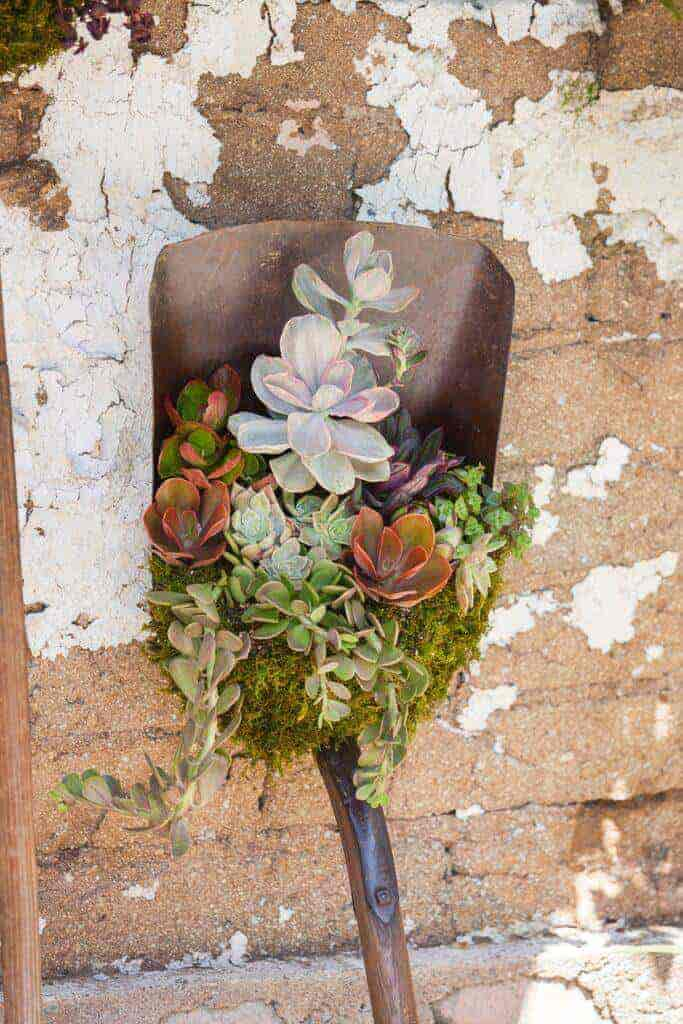
Depending on your succulent picks, this project can cost from $25 to $35 inviting you to get your hands dirty in the best way. Also, you can hang it up and watch it become a living masterpiece that celebrates the outdoors.
Materials Needed
- 1 old shovel (approx. 50 inches long)
- 1 bag of cactus potting mix (1 cubic foot)
- 6 small succulents (2–3 inches each)
- 1 bag of sphagnum moss
- 1 roll of wire (16-gauge, 5 feet)
- Hot glue gun with 2 glue sticks
- Drill with 1/8-inch bit
- 2 wall hooks or nails
Step-by-step Guide
Step 1: Drill 2–3 small drainage holes in the bottom of the shovel blade, then line it with a thin layer of sphagnum moss.
Step 2: Fill the blade with cactus potting mix, pressing it gently to create a stable base for the succulents.
Step 3: Plant the succulents into the soil, arranging them artistically, and add more moss around the edges for a natural look.
Step 4: Secure the shovel to the wall with wire and hooks, water lightly, and let your green haven take root!
#5. Playful Goose Garden Pair
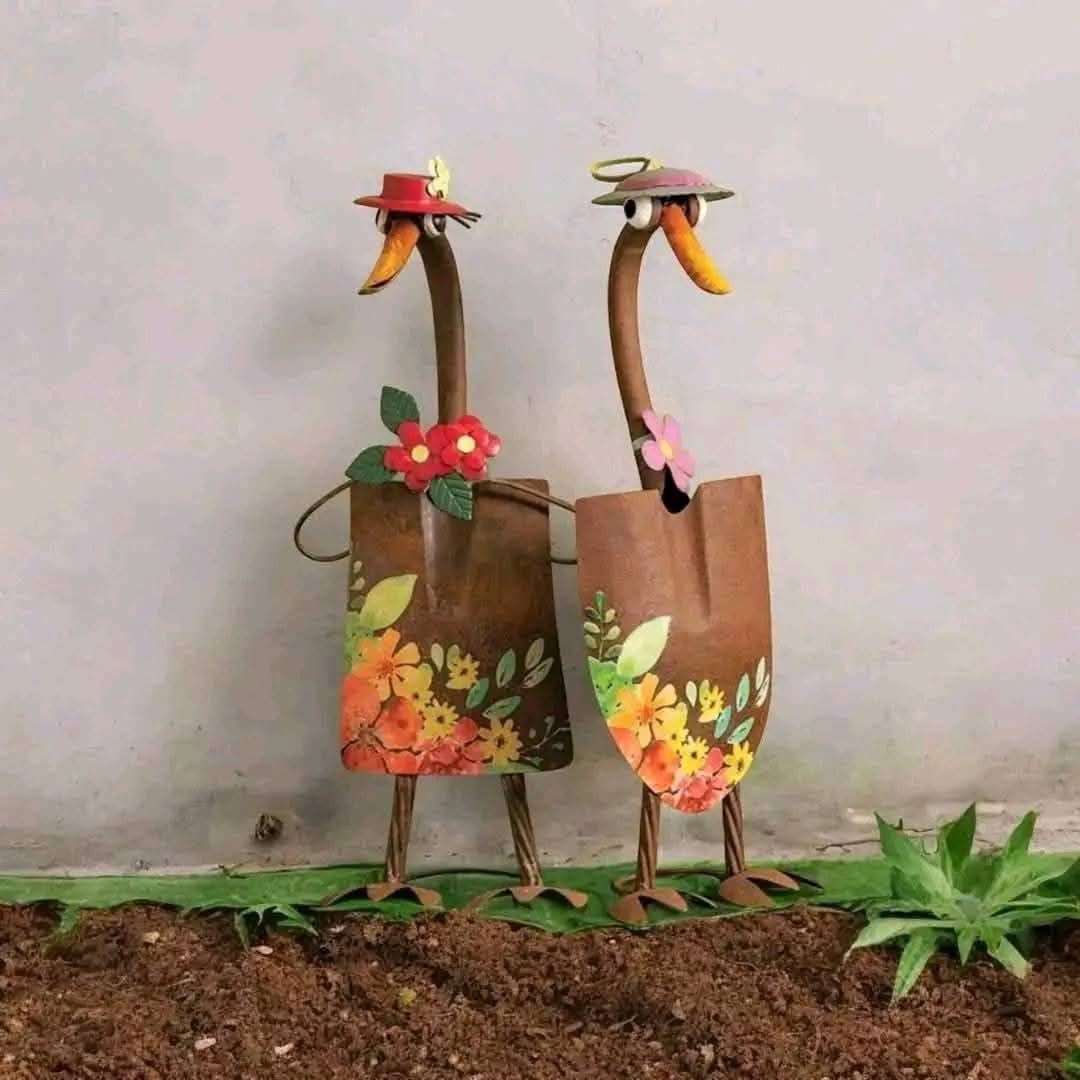
How fun would it be to see a pair of whimsical geese waddling in your garden, crafted from old shovels with colorful floral skirts and tiny hats?
These quirky creations, decked with flowers and bright accents, bring a splash of joy. You’ll grin as these delightful birds stand tall, adding character to your yard.
Materials Needed
- 2 old shovels (medium-sized, approx. 48 inches each)
- 1 can of brown acrylic paint (4 oz)
- 1 set of floral decals
- 2 small metal hats (2 inches wide each)
- 4 metal rods (1/2 inch diameter, 10 inches long each)
- Hot glue gun with 2 glue sticks
- Wire (16-gauge, 2 feet)
- 4-6 red and pink artificial flowers
Step-by-step Guide
Step 1: Paint the shovel blades brown and let them dry for 2 hours, then attach floral decals or paint designs.
Step 2: Glue the metal hats and artificial flowers to the top of each handle, shaping them into goose heads.
Step 3: Bend the metal rods into legs and secure them to the base of each blade with wire.
Step 4: Finally, place your goose pair in the garden soil, adjusting for balance, and enjoy their cheerful presence!
#6. Vertical Shovel Planter Tower
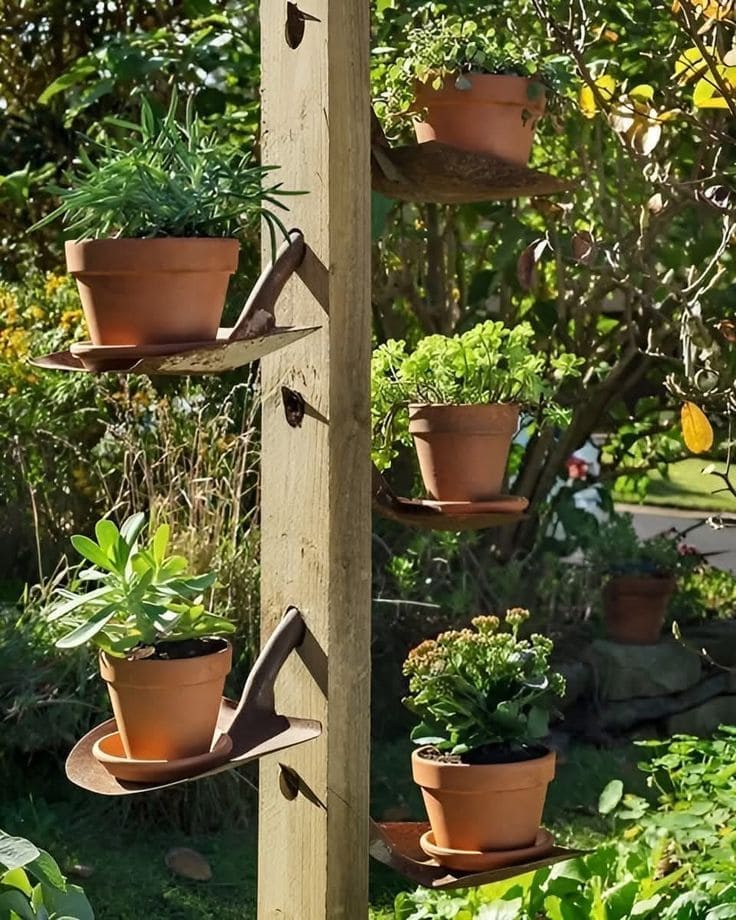
What a treat it would be to stack old shovels into a towering garden display, each blade cradling a vibrant pot of greenery!
Specially, this clever setup, nestled against a wooden post, turns your yard into a lush vertical oasis for just $20-$30.
Materials Needed
- 4 old shovels (medium-sized, approx. 48 inches each)
- 1 wooden post (4 x 4 inches, 6 feet long)
- 4 terracotta pots (6 inches diameter each)
- 8 screws (2 inches long)
- Drill with screwdriver bit
- 4 pot saucers (6 inches diameter each)
- Assorted small plants
Step-by-step Guide
Step 1: Secure the wooden post upright in the ground or to a stable base.
Step 2: Attach each shovel blade horizontally to the post with screws, spacing them evenly about 12 inches apart.
Step 3: Place a pot saucer on each blade, then set a terracotta pot with a plant on top.
Step 4: Water the plants lightly and adjust their positions, letting your vertical garden thrive!
#7. Seasonal Shovel Sign Display
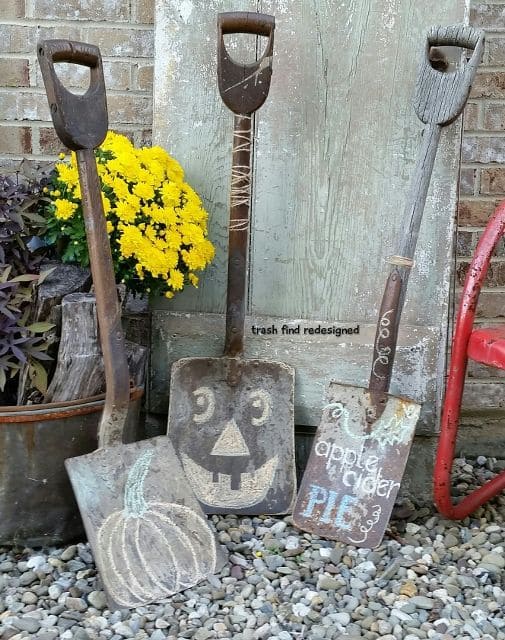
How about giving your porch a seasonal glow with old shovels turned into charming signs?
Paint a pumpkin face on one and scribble “apple cider pie” on another, then set them against a backdrop of bright mums, and you’ve got autumn in a nutshell.
Materials Needed
- 2 old shovels (medium-sized, approx. 48 inches each)
- 1 can of chalkboard paint (8 oz)
- 1 can of orange acrylic paint (4 oz)
- 1 paintbrush (1-inch wide)
- 2 yards of jute twine (1/4 inch thick)
- White chalk
- Hot glue gun with 1 glue stick
Step-by-step Guide
Step 1: Paint one shovel blade with chalkboard paint and the other with orange paint, letting them dry for 2 hours.
Step 2: Draw a pumpkin face on the orange blade with chalk and write “apple cider pie” on the chalkboard blade.
Step 3: Wrap jute twine around each handle, securing with hot glue at the ends.
Step 4: Lean them against your porch or wall, adding mums nearby to complete the autumn scene!
#8. Rustic Shovel Decor with a Heartfelt Twist
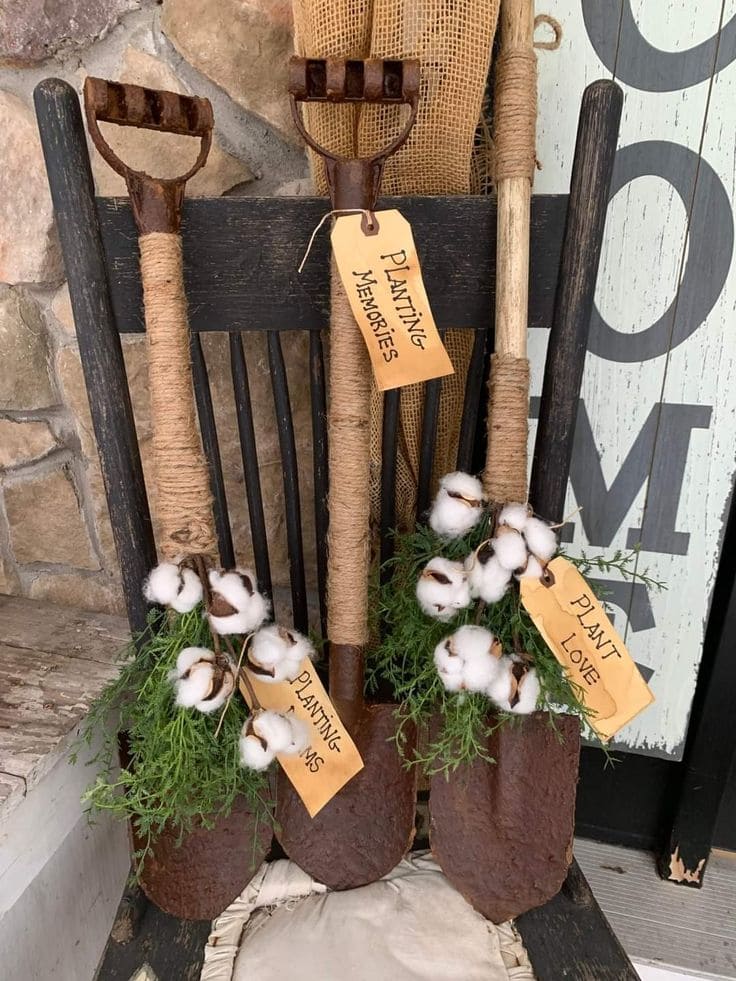
Why not breathe new life into it with a rustic decor piece that warms the soul? You can add cotton sprigs and a tag to make it personal and of course, do it with your kids.
Materials Needed
- 1 old shovel (medium-sized, approx. 48 inches long)
- 3 yards of jute twine (1/4 inch thick)
- 6 cotton sprigs (each about 4–6 inches long)
- 3 wooden tags (2 x 3 inches each)
- Black marker
- Hot glue gun with 2 glue sticks
- Optional: 3 small greenery sprigs (6–8 inches long)
Step-by-step Guide
Step 1: Wrap the jute twine tightly around the shovel handle, starting from the base and working up to the top, securing with hot glue as you go.
Step 2: Attach cotton sprigs and greenery to the shovel blade using hot glue, arranging them in a natural, clustered look.
Step 3: Write a phrase like “Planting Memories” or “Plant Love” on each wooden tag with the marker, then glue one tag to the handle of each shovel.
Step 4: Let the glue dry for an hour, then display your creation on a chair or hook.
#9. Vintage Shovel Art with Bicycle Charm
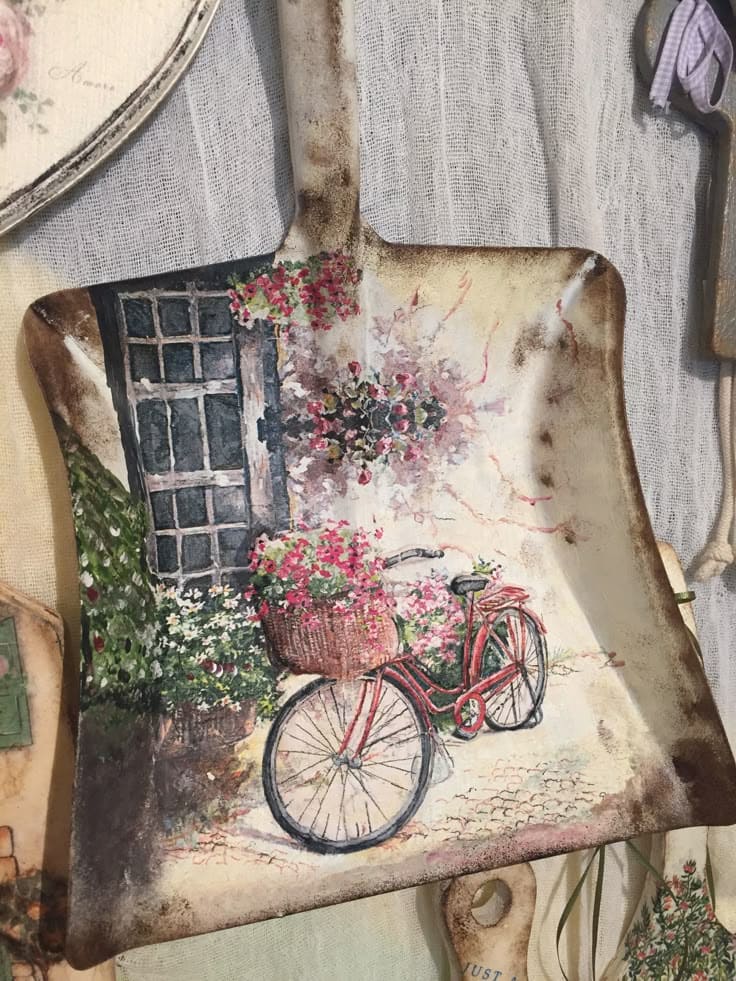
This project like a stroll through a charming countryside lets you blend art with nature’s beauty. You’ll feel a sense of nostalgia as you craft this piece, perfect for hanging on your wall as a gentle reminder of simpler times.
Materials Needed
- 1 old shovel (medium-sized, approx. 48 inches long)
- 1 decoupage paper (12 x 8 inches, bicycle design)
- 1 bottle of decoupage glue (4 oz)
- 1 paintbrush (1-inch wide)
- 1 can of clear sealant spray (8 oz)
- Sandpaper (medium grit)
- 1 wall hook or nail
Step-by-step Guide
Step 1: Lightly sand the shovel blade to smooth it, then wipe away any dust.
Step 2: Apply a thin layer of decoupage glue to the blade and carefully place the napkin or paper, pressing out air bubbles.
Step 3: Brush another layer of glue over the paper and let it dry for 2 hours.
Step 4: Spray with clear sealant and once dry (after 1 hour), hang it on your wall.
#10. Whirling Shovel Windmill
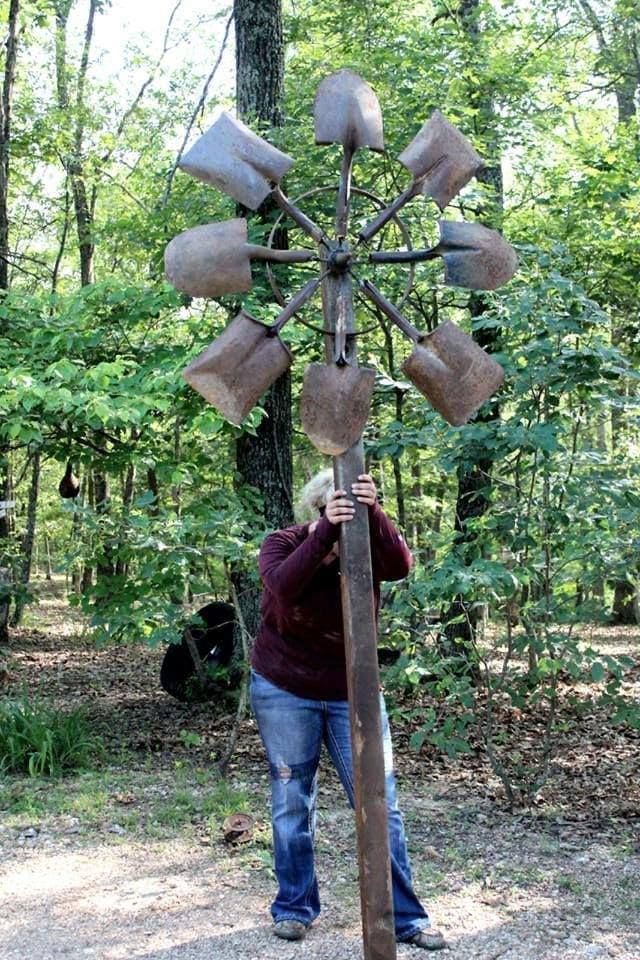
You and your grandma can together craft a stunning windmill from old shovels, their blades spinning gracefully in the breeze like petals on a giant flower.
And final, you will receive reward that you’ll revel in the ingenuity as you build this kinetic sculpture, a perfect blend of rustic charm and outdoor spirit.
Materials Needed
- 8 old shovels (medium-sized, approx. 48 inches each)
- 1 long metal pole (2 inches diameter, 8 feet long)
- 1 metal hub or wheel (12 inches diameter)
- 8 bolts (1/2 inch, 2 inches long)
- Drill with 1/2-inch bit
- Wrench
- Concrete mix (1 bag, 60 lbs)
- Optional: rust-resistant paint (8 oz)
Step-by-step Guide
Step 1: Attach each shovel blade to the metal hub with bolts, spacing them evenly like a windmill, and tighten with a wrench.
Step 2: Secure the hub to the top of the metal pole, ensuring it can rotate freely.
Step 3: Plant the pole in the ground with concrete mix, letting it set for 24 hours.
#11. Majestic Peacock Garden Sculpture
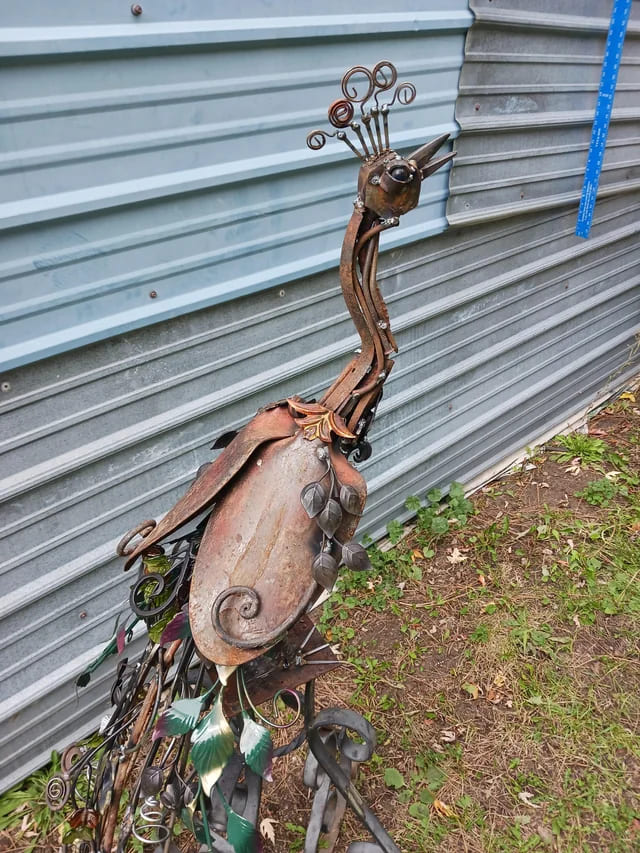
Wow, I was amazed by this picturesque peacock as I can’t believe it is just made from an old shovel as well as metal swirls and leaves.
If you also want to do the same, get started and add a touch of wilderness to your outdoor haven.
Materials Needed
- 1 old shovel (large, approx. 50 inches long)
- 1 can of bronze spray paint (10 oz)
- 1 metal sheet (12 x 12 inches, for tail base)
- 10–12 metal scraps (2-6 inches each)
- 4 metal rods (1/2 inch diameter, 12 inches long each)
- Wire (16-gauge, 4 feet)
- Drill with 1/4-inch bit
- Welding tool (or strong epoxy adhesive)
Step-by-step Guide
Step 1: Paint the shovel blade and metal sheet bronze, letting them dry for 2 hours.
Step 2: Attach the metal sheet to the blade as a tail base, securing with wire or welding, then add metal scraps as feathers.
Step 3: Bend the rods into legs and attach them to the base with wire or welding for stability.
Step 4: Place the peacock in your garden, adjusting its stance, and let it shine as a stunning centerpiece!
#12. Festive Snowman Shovel Decor
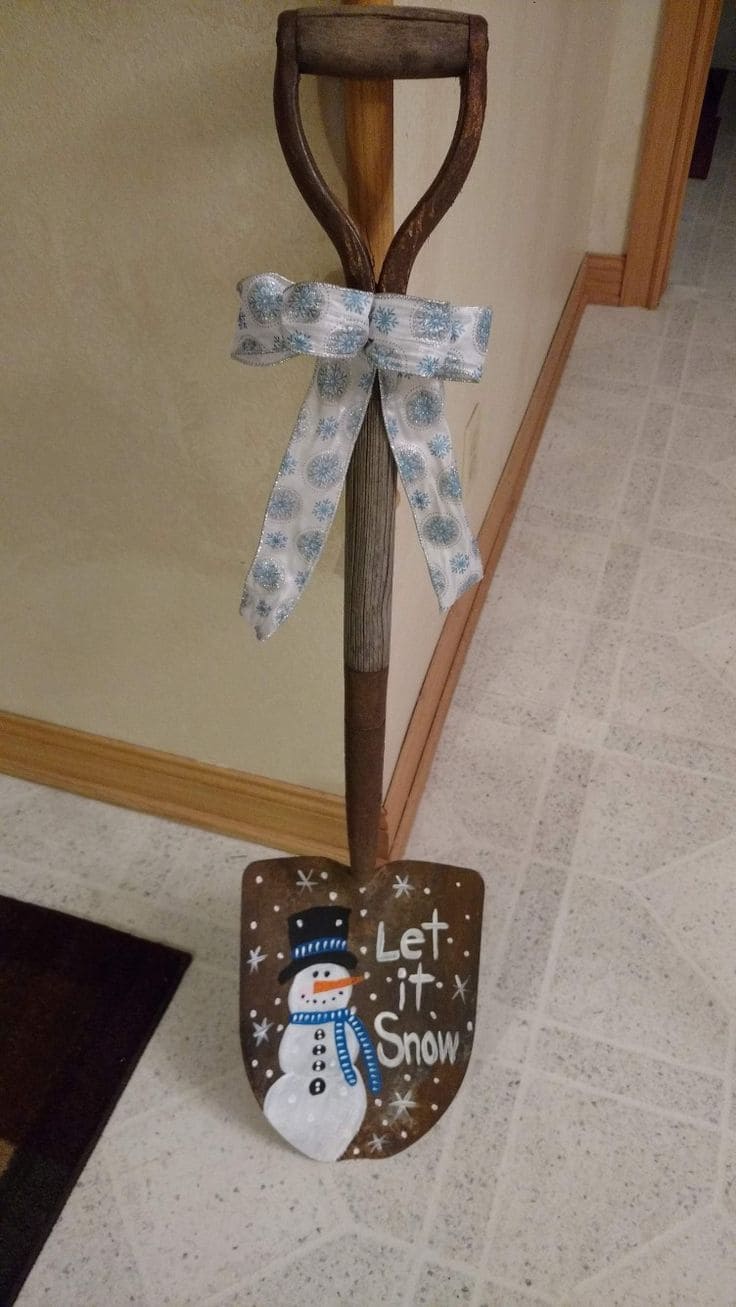
When Christmas comes, what is better than a jolly snowman waving hello from your doorstep? With a painted face, a scarf, and a cheeky message, this craft is sure to bring magic to your decor.
Materials Needed
- 1 old shovel (medium-sized, approx. 48 inches long)
- 1 can of white and brown acrylic paint (4 oz each)
- 1 paintbrush (1-inch wide)
- 1 yard of silver snowflake ribbon (1 inch wide)
- Black and orange markers
- Blue fabric strip (12 inches long)
- Hot glue gun
Step-by-step Guide
Step 1: Paint the shovel blade white and the handle brown, letting it dry for 2 hours.
Step 2: Draw a snowman face with black and orange markers, then glue the blue fabric as a scarf.
Step 3: Tie the ribbon into a bow around the handle, securing with hot glue.
#13. Heartfelt Shovel Welcome Sign
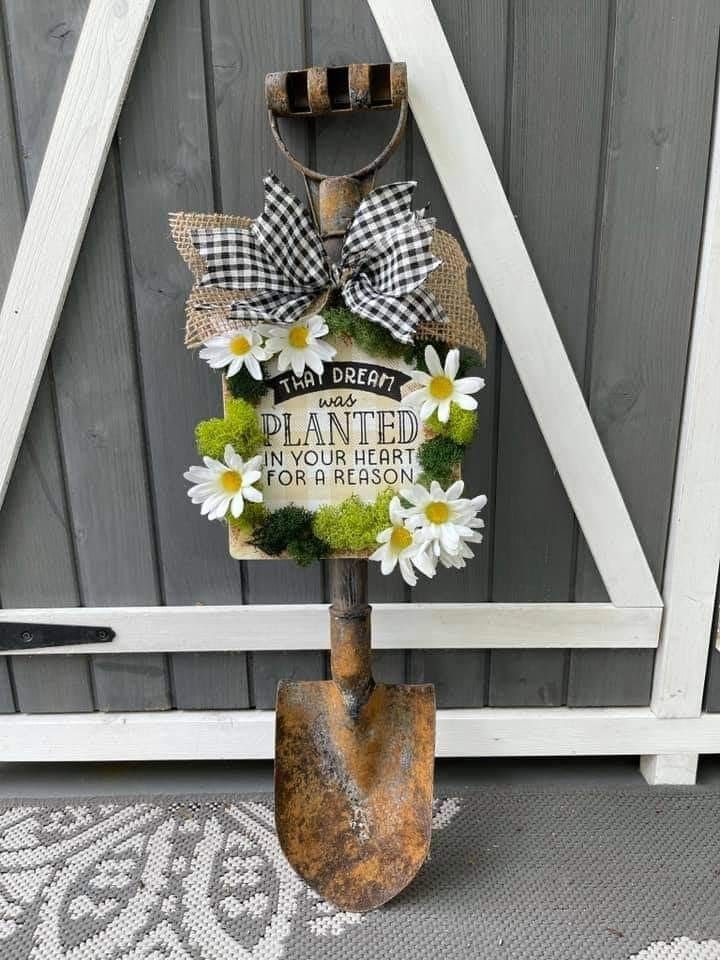
What if you could turn an old shovel into a sweet welcome sign that warms every visitor’s heart? With this project, you’ll beam with pride as this charming piece greets your home.
Materials Needed
- 1 old shovel (medium-sized, approx. 48 inches long)
- 1 wooden plaque (6 x 8 inches)
- 1 can of black acrylic paint (4 oz)
- 1 paintbrush (1-inch wide)
- 5 artificial daisies (2 inches each)
- 1 cup of preserved moss
- 1 yard of black-and-white checkered ribbon (1 inch wide)
- 1 yard of burlap ribbon (1 inch wide)
- Hot glue gun
Step-by-step Guide
Step 1: Paint the wooden plaque with black acrylic paint and let it dry for 1 hour, then write the phrase with a contrasting color or marker.
Step 2: Glue the moss around the plaque’s edge and attach the daisies evenly with hot glue.
Step 3: Tie the checkered and burlap ribbons into a bow around the shovel handle, securing with glue.
Step 4: Attach the plaque to the handle with glue, then place it by your door to share its heartfelt message!
#14. Spooky Shovel Pumpkin Decoration
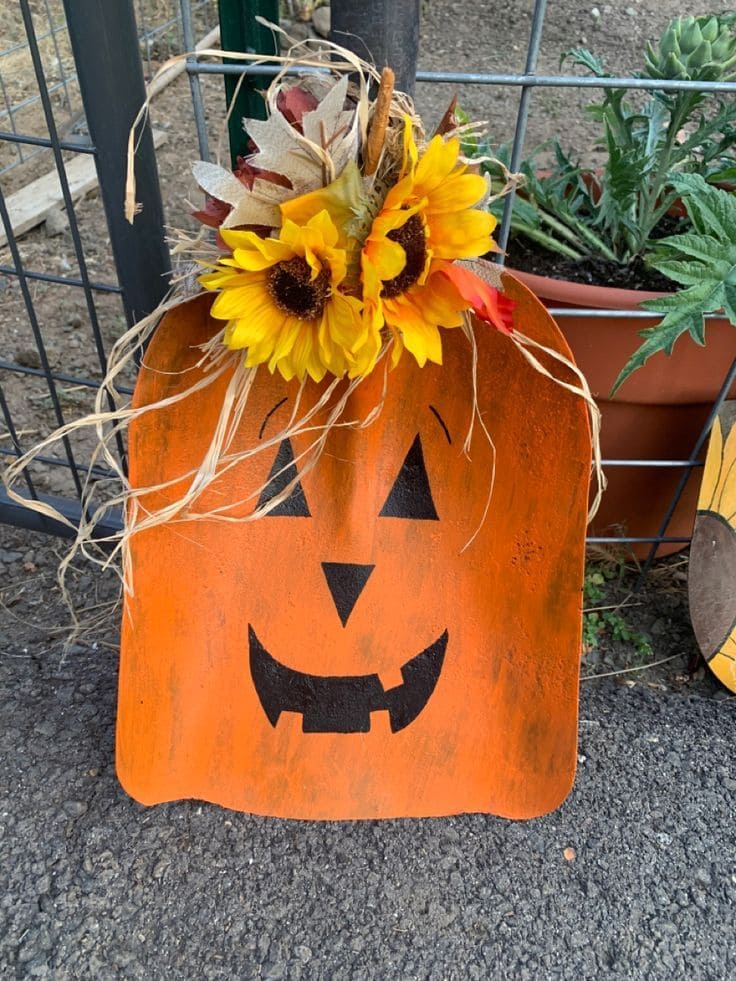
As autumn creeps in, why not grab that dusty shovel and craft a cheerful pumpkin pal to greet your guests?
You can paint its blade a vibrant orange and carve a goofy jack-o’-lantern grin, then top it with sunflowers and straw for that harvest vibe. Yes, it will bring a playful spirit to your doorstep, like a friendly scarecrow guarding your home.
Materials Needed
- 1 old shovel (medium-sized, approx. 45 inches long)
- 1 can of orange spray paint (10 oz)
- Black acrylic paint (2 oz)
- 1 paintbrush (1-inch wide)
- 3 artificial sunflowers (each 4–5 inches wide)
- 1 bundle of straw or raffia (12 inches long)
- Hot glue gun with 1 glue stick
- Scissors
Step-by-step Guide
Step 1: Lay the shovel flat and evenly coat the blade with orange spray paint, letting it dry for 2 hours.
Step 2: Use the paintbrush to create a jack-o’-lantern face with black acrylic paint, adding triangles for eyes and a toothy smile, then let it dry for 1 hour.
Step 3: Glue the sunflowers and straw bundle to the top of the blade with the hot glue gun, trimming excess straw with scissors.
Step 4: Once dry, prop it against your porch or fence to spread some Halloween cheer!
#15. Ornate Shovel Wall Art
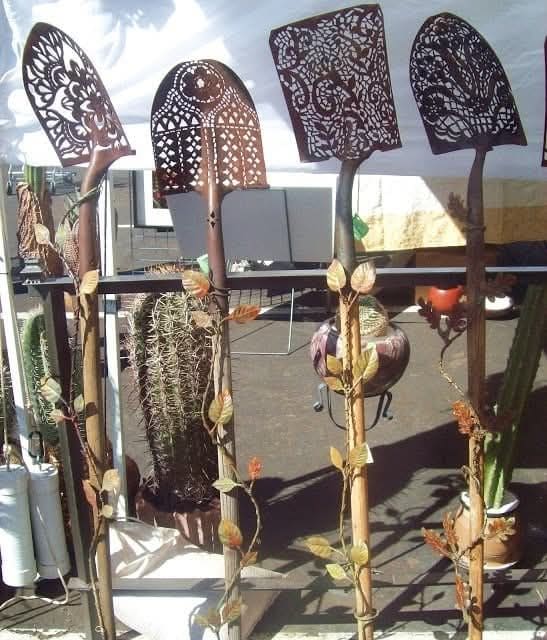
Right now, you can take an old shovel and turn it into a stunning piece of wall art, its blade etched with intricate lace-like patterns that catch the light.
Materials Needed
- 1 old shovel (medium-sized, approx. 48 inches long)
- 1 metal stencil with decorative pattern (12 x 8 inches)
- 1 can of black spray paint (10 oz)
- 1 can of metallic bronze spray paint (10 oz)
- 2 yards of artificial ivy garland (1/2 inch wide)
- Hot glue gun with 1 glue stick
- Drill with 1/8-inch bit
- 2 wall hooks or nails
Step-by-step Guide
Step 1: Place the stencil on the shovel blade and spray with black paint, then remove the stencil and let it dry for 2 hours.
Step 2: Add a light coat of bronze spray paint over the black for a metallic sheen, allowing it to dry for another hour.
Step 3: Wrap the ivy garland around the handle, securing it with hot glue at intervals.
#16. Whimsical Shovel Rooster
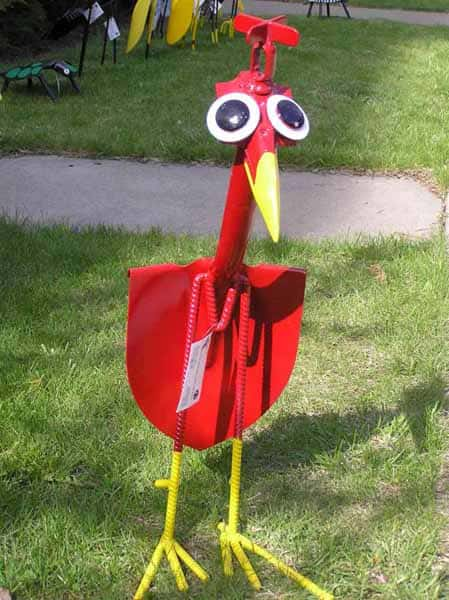
Ever thought your garden could use a splash of quirky charm? Take that old shovel and sculpt it into a bright red rooster, complete with googly eyes and wobbly yellow legs.
Furthermore, this fun project lets you unleash your creativity while honoring the outdoors. You’ll grin every time you see this cheerful guardian bobbing in the breeze.
Materials Needed
- 1 old shovel (medium-sized, approx. 48 inches long)
- 1 can of red spray paint (10 oz)
- 1 can of yellow spray paint (10 oz)
- 2 large googly eyes (2 inches each)
- 4 metal rods (1/2 inch diameter, 12 inches long each)
- 1 small metal gear or washer (2 inches wide, for the comb)
- Hot glue gun with 2 glue sticks
- Wire cutters
- Drill with 1/4-inch bit
Step-by-step Guide
Step 1: Paint the shovel blade and handle red, and the metal rods yellow, letting them dry for 2 hours.
Step 2: Drill two holes at the base of the blade, then insert and secure the painted rods as legs using wire or glue.
Step 3: Glue the googly eyes to the handle near the top and attach the gear as a comb with hot glue.
Step 4: Place your rooster in the garden, then adjust the legs for balance.
#17. Inspirational Grow and Bloom Garden Signs
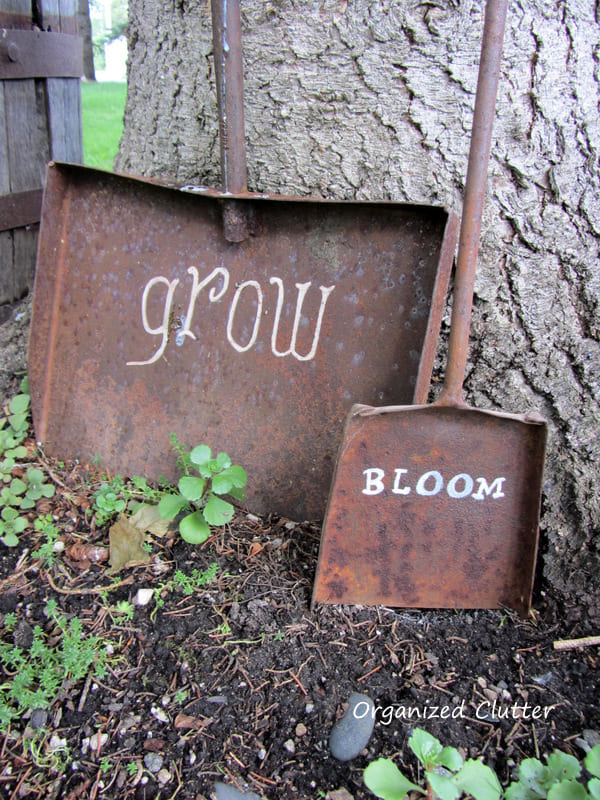
This heartfelt project inspires your planting journey. You’ll sense a quiet thrill as you transform these tools into uplifting markers, celebrating nature’s cycle with every glance.
Materials Needed
- 2 old shovels (medium-sized, approx. 48 inches each)
- 1 can of white chalk paint (4 oz)
- 1 paintbrush (1-inch wide)
- Chalk or white paint pen
- Sandpaper (medium grit)
Step-by-step Guide
Step 1: Lightly sand the shovel blades to smooth them, then wipe away dust.
Step 2: Apply a thin coat of chalk paint to each blade and let it dry for 2 hours.
Step 3: Use chalk or a paint pen to write “grow” on one and “bloom” on the other.
#18. Rustic Shovel Water Feature
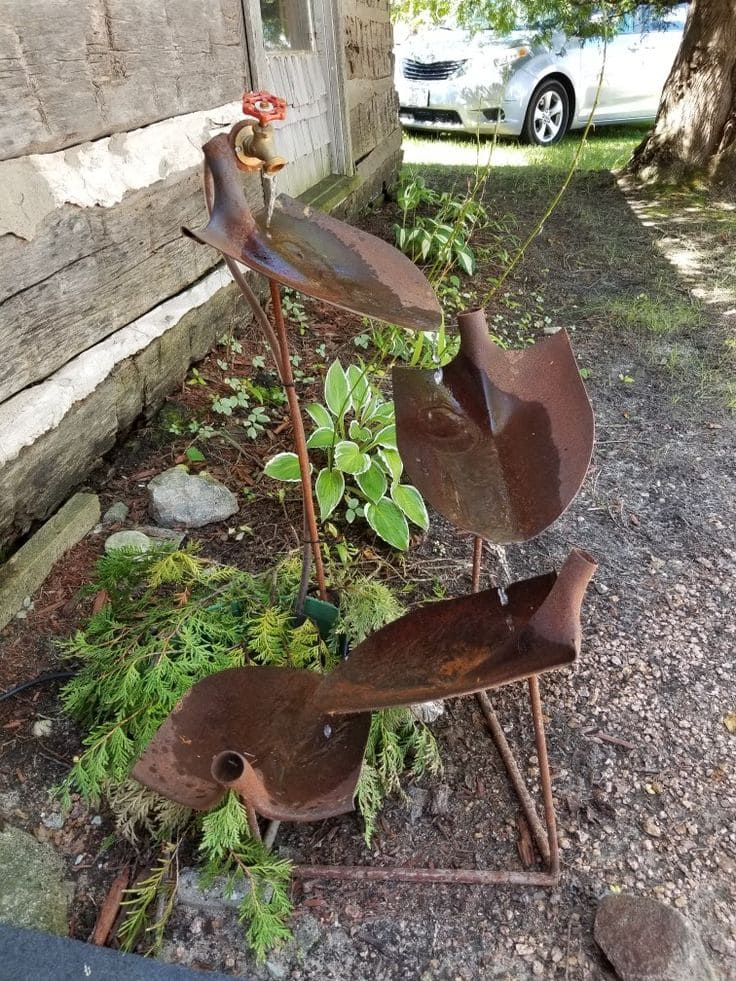
With a simple faucet at the top, this charming feature feels like a gift from nature, inviting you to relax amid the greenery. You’ll find peace as you assemble this tranquil piece, turning a quiet corner into a refreshing oasis.
Materials Needed
- 4 old shovels (medium-sized, approx. 48 inches each)
- 1 outdoor faucet (with valve, 1/2 inch)
- 5-6 metal rods (1/2 inch diameter, 24 inches long each)
- 1 submersible water pump 100 GPH)
- Flexible tubing (1/2 inch diameter, 6 feet)
- Drill with 1/2-inch bit
- Screws (1 inch long, 6 pieces)
- Waterproof sealant
Step-by-step Guide
Step 1: Drill a small hole in the top edge of each shovel blade, then attach them to the rods with screws, angling them to cascade water.
Step 2: Connect the faucet to the top rod and link the tubing from the pump to the faucet, securing with sealant.
Step 3: Place the pump in a reservoir (e.g., a buried bucket) at the base, running the tubing up to the faucet.
Step 4: Fill the reservoir with water, turn on the pump, and adjust the flow to enjoy your gentle water feature!
