Remember when all it took was a patch of grass, a few sticks, and your imagination to have the best day ever? Kids still crave that kind of play, creative, hands-on, and full of adventure.
That’s why these 20 backyard play ideas are more than just fun, they’re memory-makers.
Whether you’re working with a wide open lawn or a cozy corner, these DIY-friendly setups use simple materials like tires, wood, or rope to transform your space into an outdoor wonderland.
#1. Mini Construction Site Play Pit
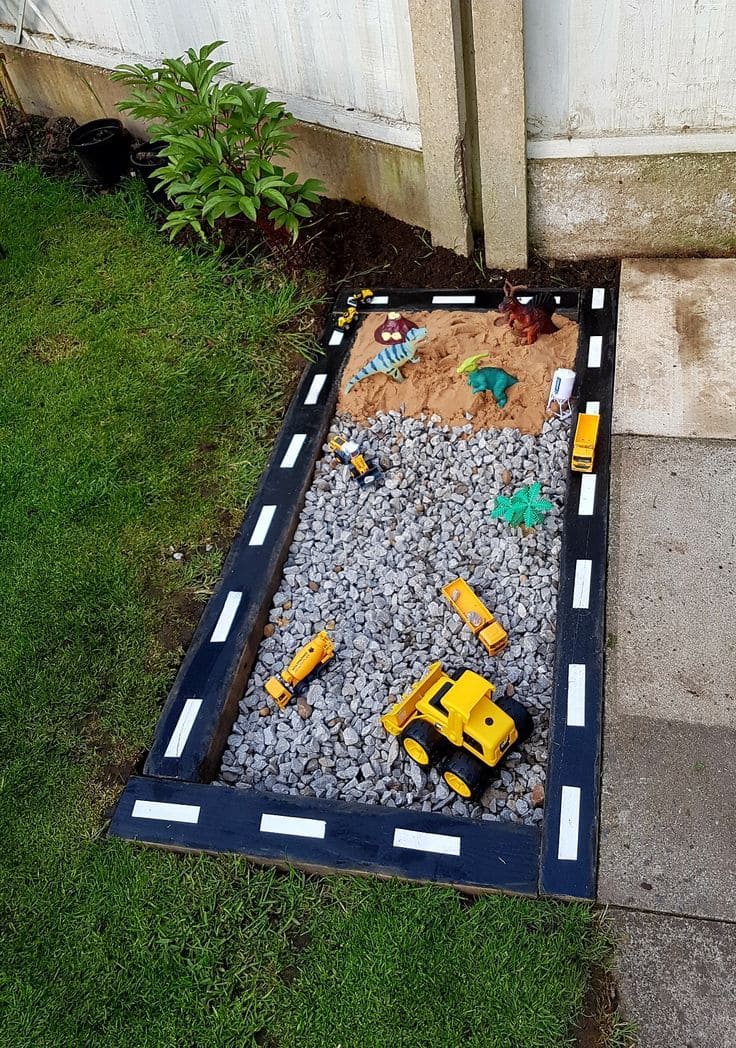
Simple, budget-friendly, and endlessly entertaining, this project turns an overlooked garden edge into an interactive world of imagination.
Materials Needed:
- 4 wooden planks (approx. 4ft long, 6″ tall, 1″ thick)
- Black and white outdoor paint
- 1–2 bags of playground sand
- 1 bag of medium-sized gravel
- Toy trucks, dinosaurs, and accessories
- Ground stakes
Step-by-Step Guide:
Step 1: Assemble the wooden border in a rectangular shape and secure it with stakes or screws.
Step 2: Paint the edges black and add short white lines to resemble a road border.
Step 3: Fill one half of the pit with gravel and the other with sand.
Step 4: Add construction vehicles, toy dinosaurs, and mini props for imaginative play.
#2. Backyard Hopscotch Path
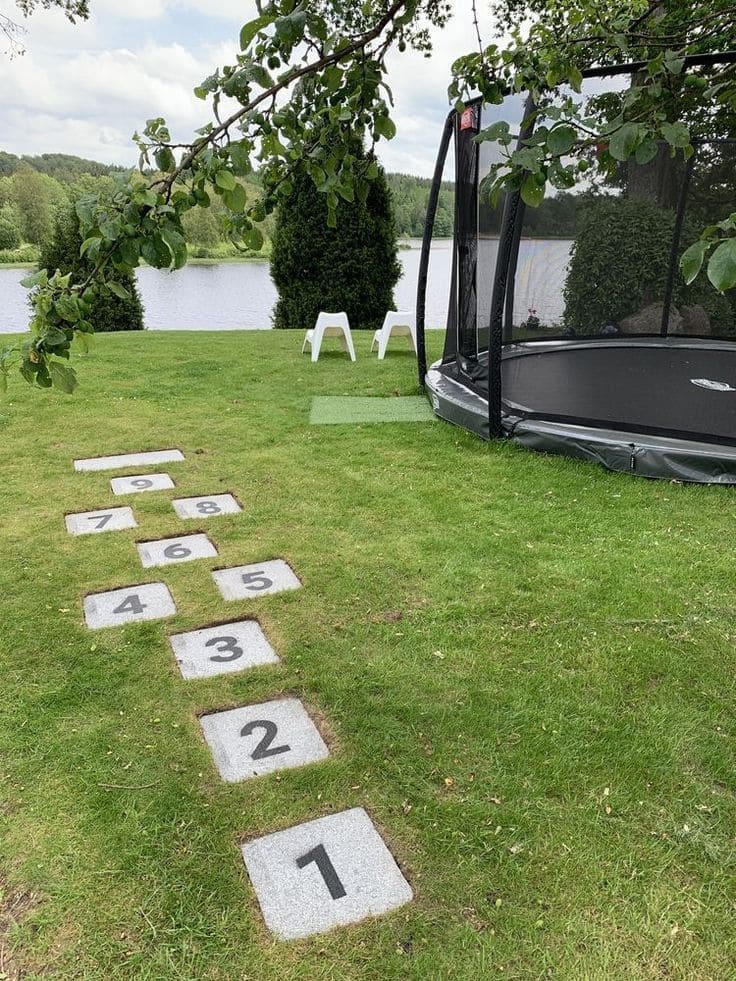
This stone hopscotch path is a beautiful blend of play and landscape design. It’s a nostalgic classic made new, offering kids an outlet for movement while subtly boosting balance, counting skills, and coordination.
Materials Needed:
- 10 concrete pavers (12″x12″)
- Outdoor-safe black paint
- Shovel
- Sand (1–2 bags)
- Level
Step-by-Step Guide:
Step 1: Mark out your hopscotch layout on the lawn to ensure even spacing and alignment.
Step 2: Dig shallow, square holes for each paver, about 1.5–2 inches deep.
Step 3: Add a layer of sand or gravel for stability and drainage, then place each paver in its hole, adjusting with a level.
Step 4: Paint numbers 1–10 using stencils and weatherproof paint. Let dry and hop to it!
#3. DIY Tire Tractor Play Station
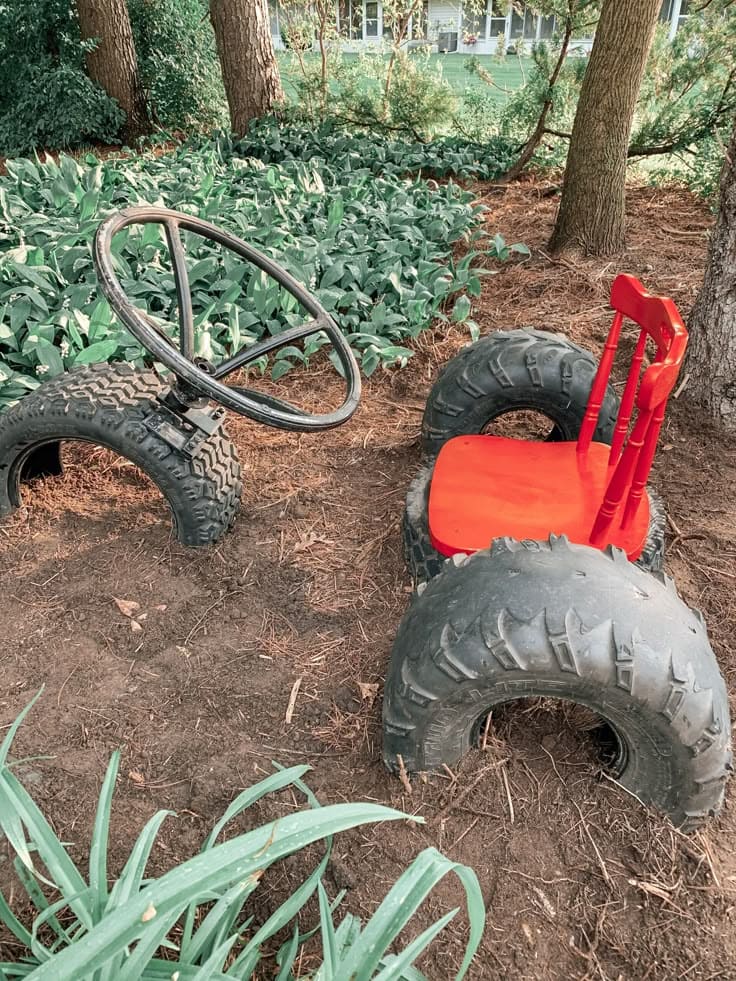
Give your little farmhand a place to rev up their imagination with this charming pretend-play tractor made from repurposed tires and a splash of creativity.
Materials Needed:
- 4 large used tractor tires
- 1 old wooden chair (child-sized)
- Red outdoor paint
- 1 metal steering wheel
- Metal rod or wood dowel
- Screws, drill, and basic tools
Step-by-Step Guide:
Step 1: Half-bury the four tires in a rectangular layout to mimic a tractor base. Secure them in place so they don’t wobble.
Step 2: Paint the chair a bright color like red and let it fully dry. Then attach it atop the back two tires with screws or mounting brackets.
Step 3: Install the steering wheel at the front using a short rod or bracket anchored into the ground or a tire. Make sure it’s safely secured.
#4. DIY Outdoor Mud Kitchen
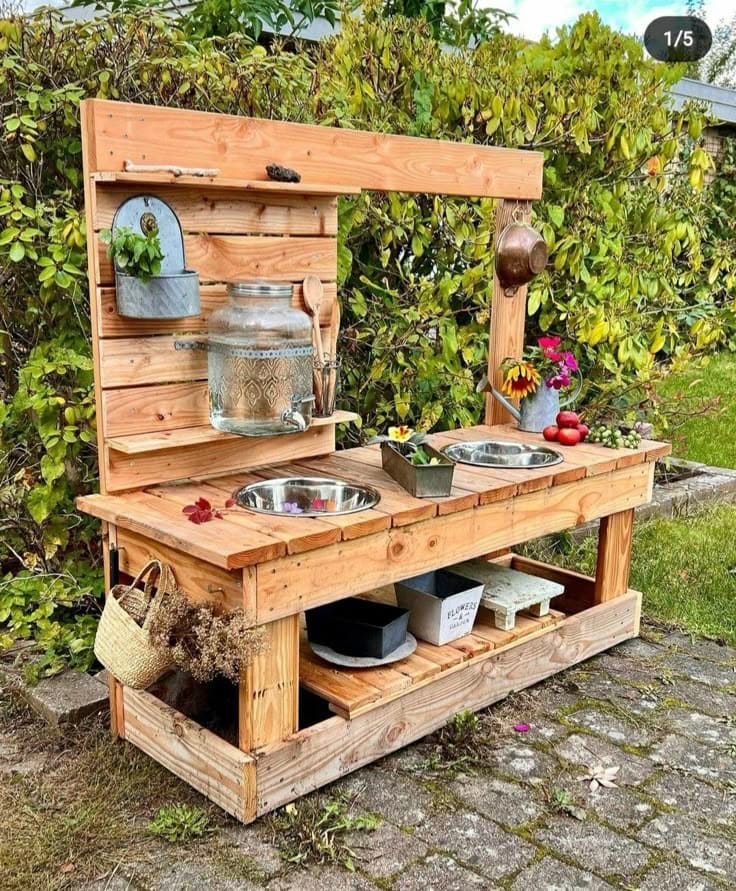
Every backyard needs a touch of magic and for kids, that often looks like muddy hands and wild creativity.
Materials Needed:
- 2–3 wooden pallets (dismantled)
- 2 stainless steel mixing bowls (diameter 9–10 inches)
- Wood screws and power drill
- Sandpaper
- Saw
- Optional: faucet-style spout, storage baskets, hooks
Step-by-Step Guide:
Step 1: Cut and sand pallet planks to create a sturdy rectangular frame. Build the table frame first, then add slats for the top surface.
Step 2: Trace the bowls on the surface, cut out the circles, and drop the bowls into the openings.
Step 3: Use additional planks to create a backing for utensils, hooks, shelves, or decoration. Attach it securely to the rear of the kitchen.
Step 4: Add extras like a mounted spout, metal cups, or bins underneath for sand, water, and nature treasures. Seal the wood if desired.
#5. Backyard Maypole Swings
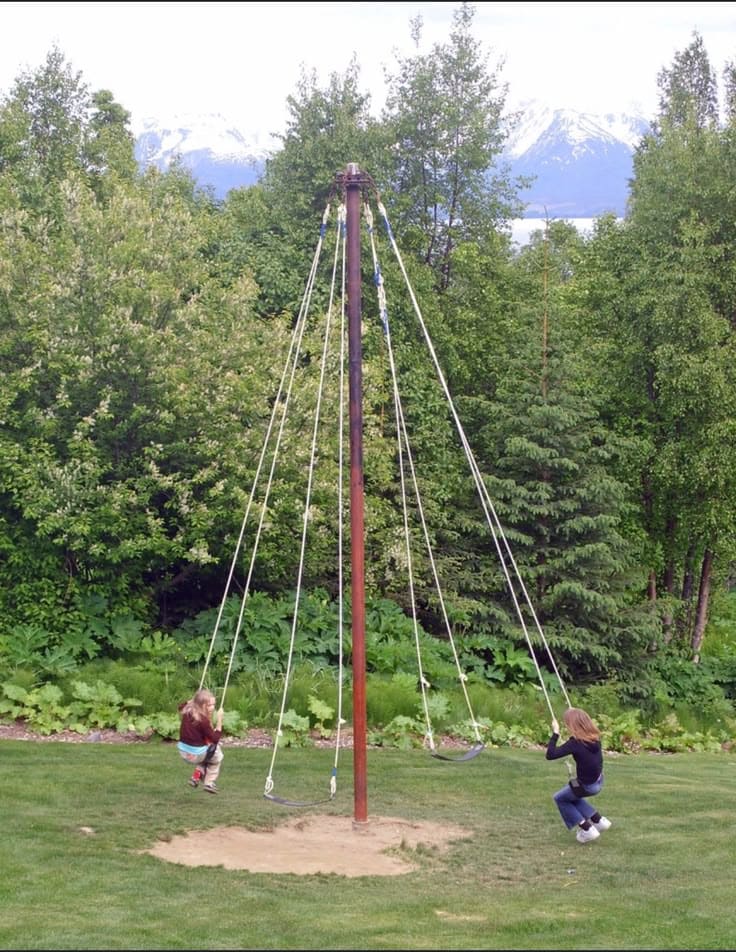
This tall post with swings circling from the top brings a playful carnival vibe right into your backyard.
Materials Needed:
- 1 sturdy metal pole (10–14 feet tall, 4–6 inch diameter)
- Cement mix
- Heavy-duty swivel/rotating top mount
- 6–8 swing seats with chains
- Heavy-duty eye bolts and carabiners
Step-by-Step Guide:
Step 1: Dig a 2–3 foot hole in the center of your yard. Set the pole vertically and anchor it with cement. Let cure for 24–48 hours.
Step 2: Install a heavy-duty swivel bracket at the top of the pole. Make sure it spins freely and securely supports the weight of multiple children.
Step 3: Attach eye bolts to the swivel’s rotating ring. Clip swing ropes or chains to the bolts using carabiners.
Step 4: Adjust swing lengths so they hover 1–2 feet off the ground. Test thoroughly before use, ensuring stability and smooth spinning.
#6. Backyard Water Wall for Kids
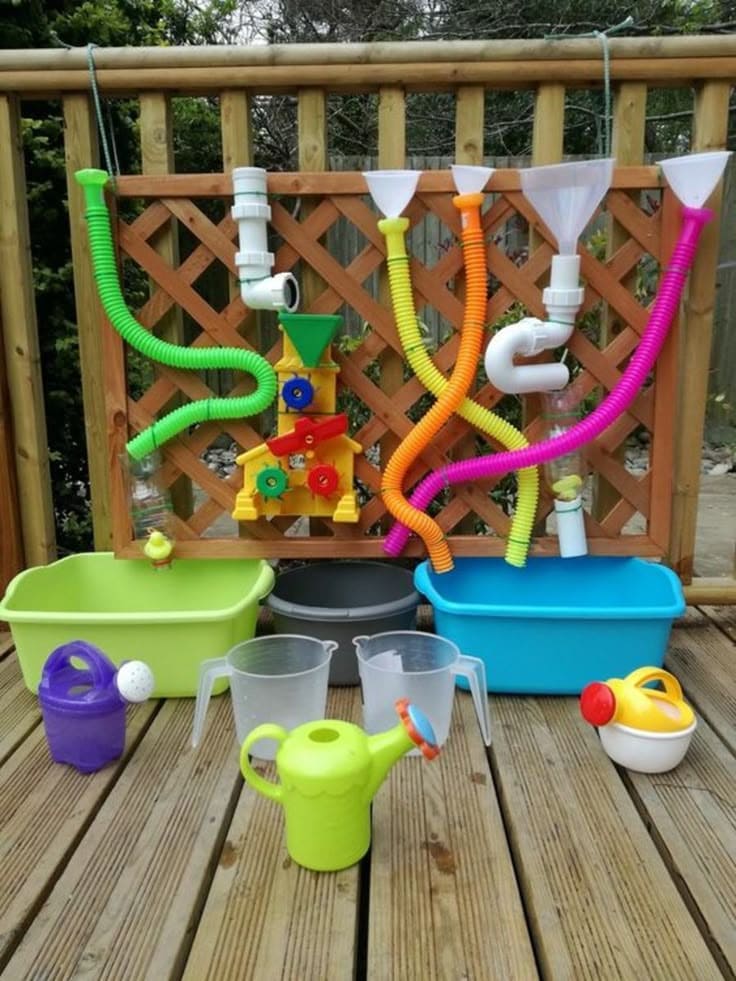
With colorful tubes, funnels, and gears, kids get hands-on with gravity, flow, and cause-and-effect without realizing they’re learning.
Materials Needed:
- Pegboard, lattice, or wooden frame
- Flexible plastic tubing
- Funnels and plastic bottles (cut in half)
- PVC pipe elbows and T-joints
- Zip ties
- Bucket
- Plastic watering cans
Step-by-Step Guide:
Step 1: Secure the pegboard or lattice vertically against a deck rail or fence. Make sure it’s sturdy and won’t tip over.
Step 2: Arrange and attach your tubes, funnels, and pipes in fun, winding patterns using zip ties or clips. Add rotating gears or spinners for extra fun.
Step 3: Place bins underneath to catch the water. Make sure they’re positioned directly below the pipe exits.
#7. Tire Teeter-Totters
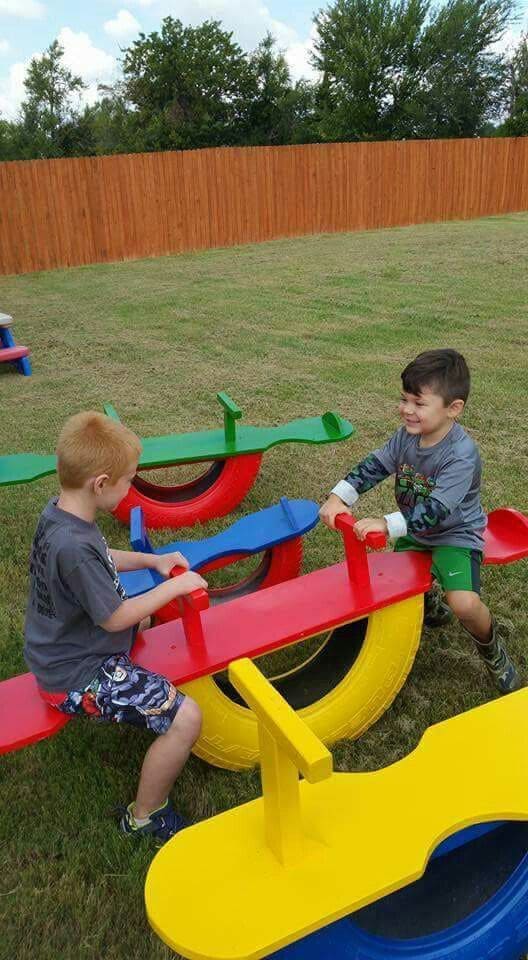
Built from repurposed tires and bright-painted wooden planks, these vibrant, DIY tire seesaws bring nostalgic fun and functional recycling together.
Materials Needed:
- Old tires (1 per seesaw)
- 2” x 8” wooden planks (approx. 5–6 feet long)
- Wood for seat handles (1” x 2” or similar)
- Exterior paint in multiple bright colors
- Screws and power drill
- Sandpaper
Step-by-Step Guide:
Step 1: Cut the tire in half and clean thoroughly. These halves will act as the base rocker.
Step 2: Sand and paint the wooden plank in bright, weatherproof colors. Let dry completely.
Step 3: Screw the plank securely to the curved side of the halved tire.
Step 4: Add two vertical hand grips near the center of the plank for safety.
#8. Backyard Soccer Goal Target Board
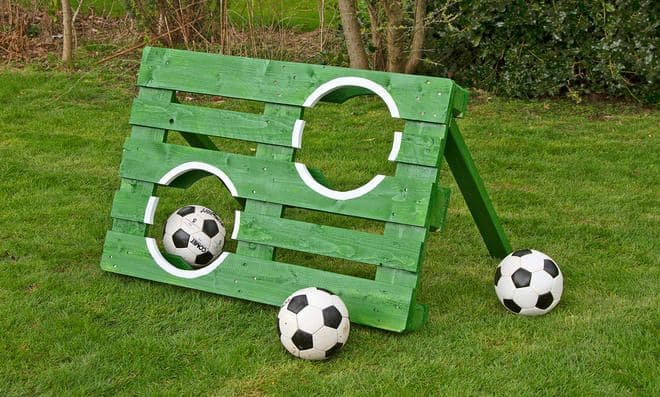
Made from a repurposed pallet and painted in vibrant green, this setup turns backyard practice into a game.
Materials Needed:
- 1 wooden pallet (approx. 40″ x 48″)
- 2 support planks (for angled legs, 36″ long)
- 3–4 hinges
- Green and white outdoor paint
- Jigsaw
- Sandpaper
- Soccer balls
Step-by-Step Guide:
Step 1: Sand the pallet thoroughly to smooth out rough edges and splinters.
Step 2: Cut 2–3 circular holes of various sizes in the pallet for target zones using a jigsaw.
Step 3: Paint the pallet green and outline the holes with white for visibility.
Step 4: Attach angled support planks at the back to prop the board upright.
#9. DIY Giant Backyard Slip and Slide
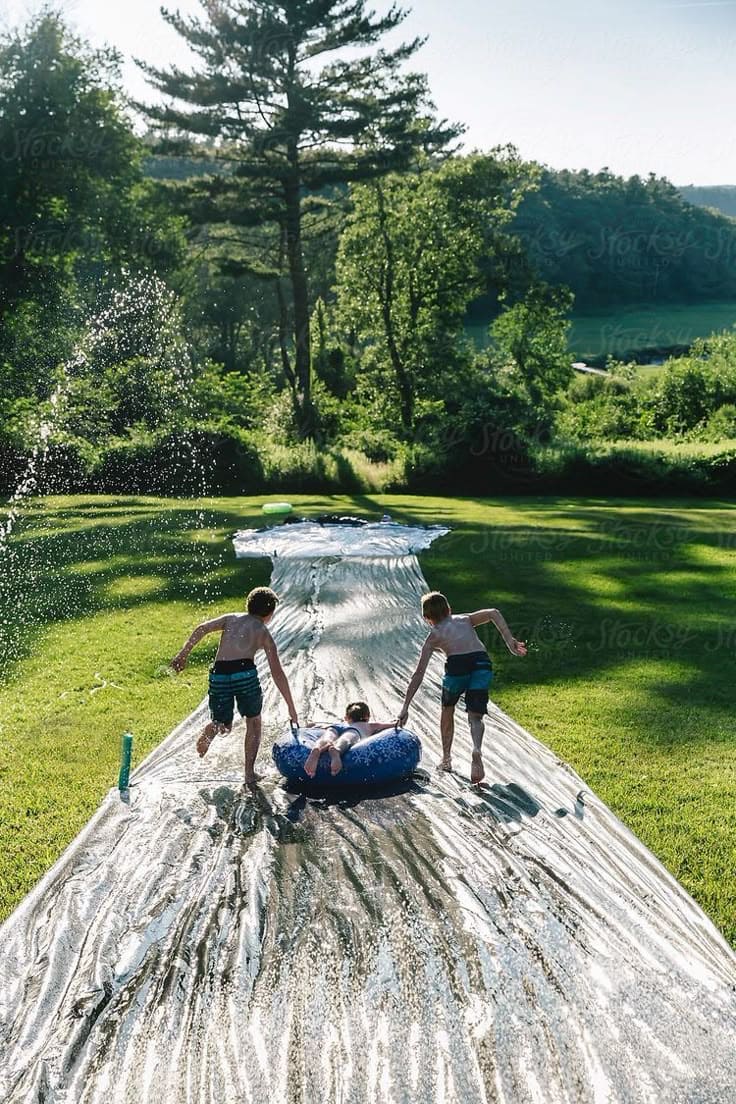
We created ours on a gentle slope, and it instantly became the ultimate summer attraction for the kids (and, let’s be honest, a few adults too).
Materials Needed:
- 100 ft x 10 ft heavy-duty plastic sheeting (6 mil thickness or more)
- 4–6 pool noodles
- Ground stakes (about 12)
- 1 bottle of eco-friendly dish soap
- Garden hose
- Inflatable tube (optional)
Step-by-Step Guide:
Step 1: Roll out the plastic sheeting down a sloped area in your yard. Tuck pool noodles along each edge for a soft barrier, and secure them with ground stakes driven through holes punched in the plastic.
Step 2: Stake down the edges of the slide at regular intervals to prevent it from shifting. Make sure the surface is smooth and wrinkle-free.
Step 3: Hook up your garden hose or place a sprinkler at the top of the slide. Add a bit of biodegradable dish soap down the middle for extra slipperiness.
#10. DIY Cardboard Ice Cream Stand
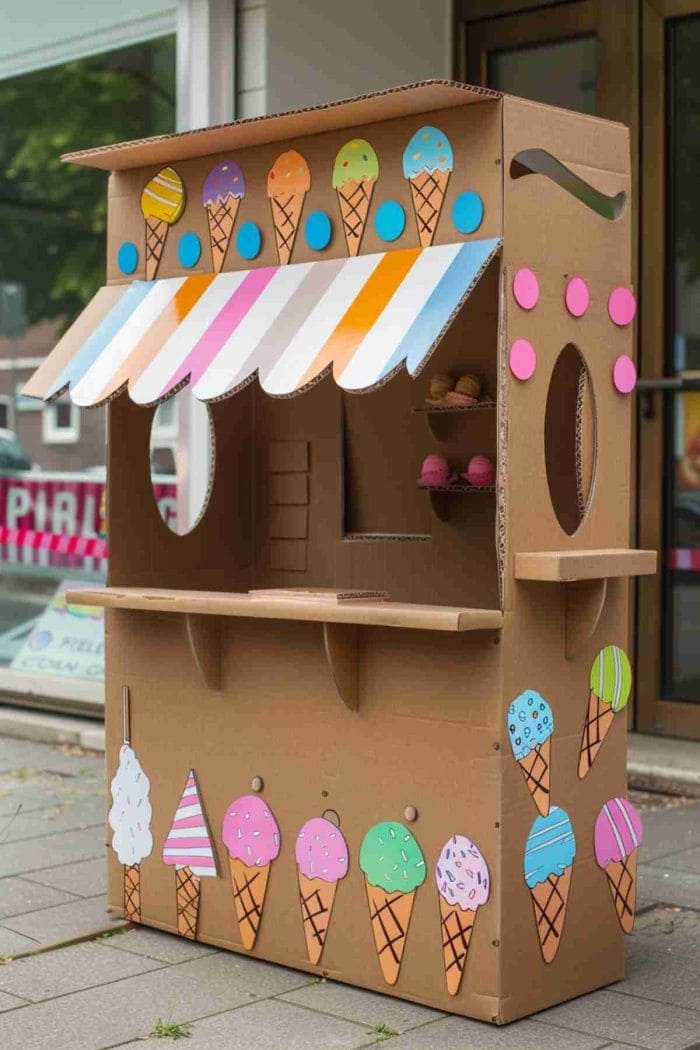
With its colorful cone decorations and playful awning, it’s the perfect setup for kids to role-play as little scoop sellers.
Materials Needed:
- 2–3 large cardboard boxes (appliance-sized is best)
- Colored paper
- Glue, tape, and a utility knife
- Paper cones
- Ruler and pencil
- Optional: string lights
Step-by-Step Guide:
Step 1: Cut the front panel of the box into a window shape and a serving counter. Add round openings on the sides as “windows.”
Step 2: Create an awning using another piece of cardboard. Paint stripes using acrylic or glue on strips of colored paper. Attach above the serving window.
Step 3: Decorate the box with cone illustrations, stickers, or colored printouts. You can even let your kids color their own cones!
Step 4: Add mini shelves inside to hold cones or cups. Fill it with pretend play treats or real ones if you’re feeling bold.
#11. DIY Rope Walk Balance Challenge
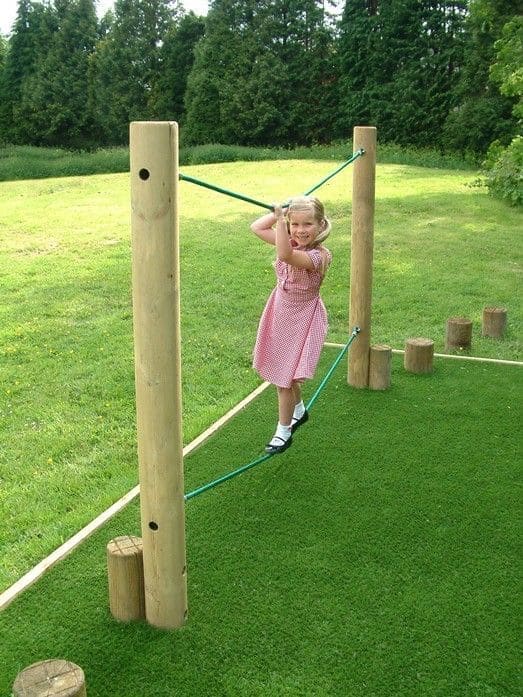
Kids will love testing their coordination on this rope walk, and it encourages body awareness and gross motor skills.
Materials Needed:
- 2 sturdy wooden posts (6 ft tall, 4×4” or round logs)
- 1 long nylon (10–12 ft)
- 1 shorter rope (same length)
- Eye bolts (4 total)
- Ground anchors
Step-by-Step Guide:
Step 1: Secure the posts firmly in the ground about 6–8 feet apart using concrete or deep anchoring, ensuring they’re level and steady.
Step 2: Install two eye bolts in each post, one about 12 inches from the ground (for foot rope), and one at chest height (for hand support).
Step 3: Thread and tightly tie the bottom rope between the lower eye bolts, creating a taut, stable line for feet.
Step 4: Repeat with the upper rope between top eye bolts for a steady grip while walking. Check tension and test before use.
#12. Giant Outdoor Ludo Table
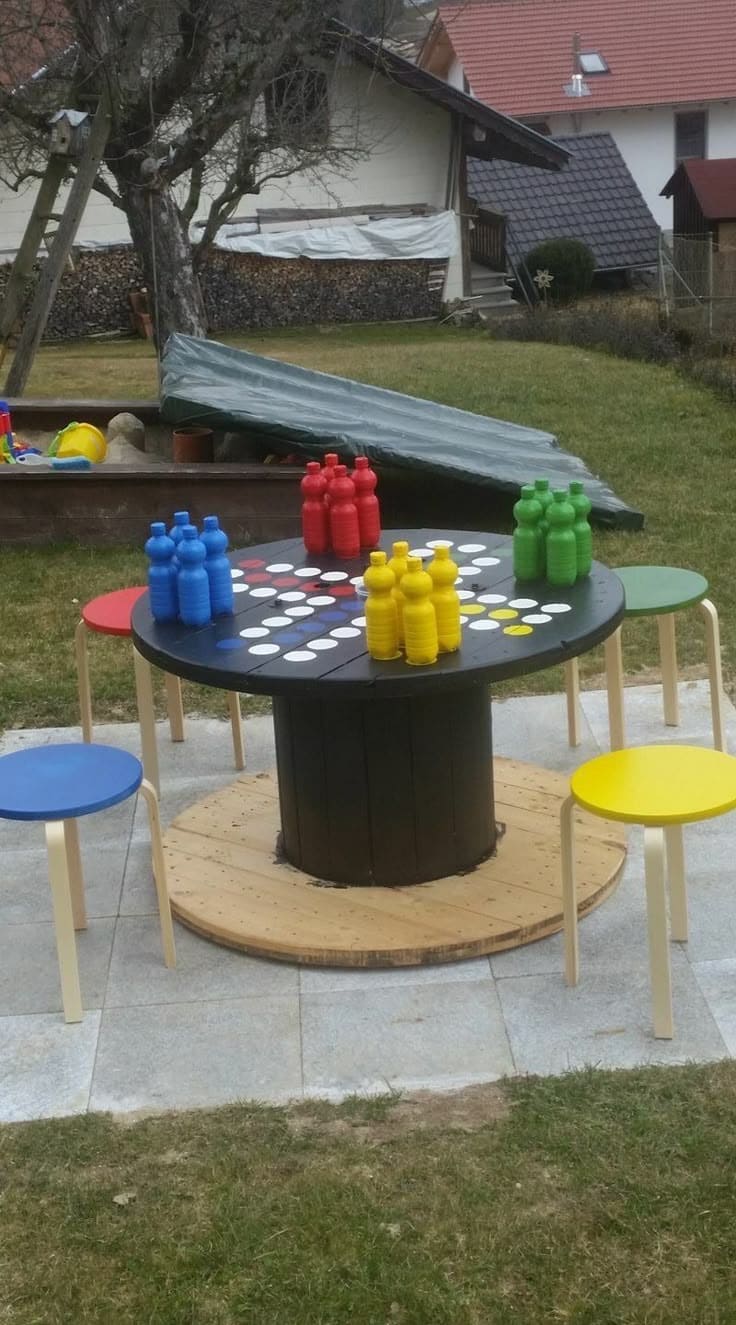
This DIY Giant Ludo setup is perfect for backyard parties or everyday play, especially for kids who love a little friendly competition.
Materials Needed:
- 1 large wooden cable spool (around 36″–48″ diameter top)
- 16 plastic bottles (4 colors, 4 each)
- Acrylic paint (red, blue, yellow, green, white, black)
- Outdoor sealer
- 4–6 colorful kid stools
Step-by-Step Guide:
Step 1: Clean and sand the spool thoroughly. Paint the entire surface black or another solid background color.
Step 2: Using white paint and a measuring tape, mark the game board layout (you can mimic a Ludo or Mensch ärgere Dich nicht board). Paint base zones and paths in respective team colors.
Step 3: Paint plastic bottles in matching sets of red, blue, green, and yellow to serve as game pieces. Let dry and seal with outdoor spray.
Step 4: Add small stools around the table for seating. You can even paint them in the same team colors to keep the theme cohesive.
#13. Tire Swing Obstacle Course
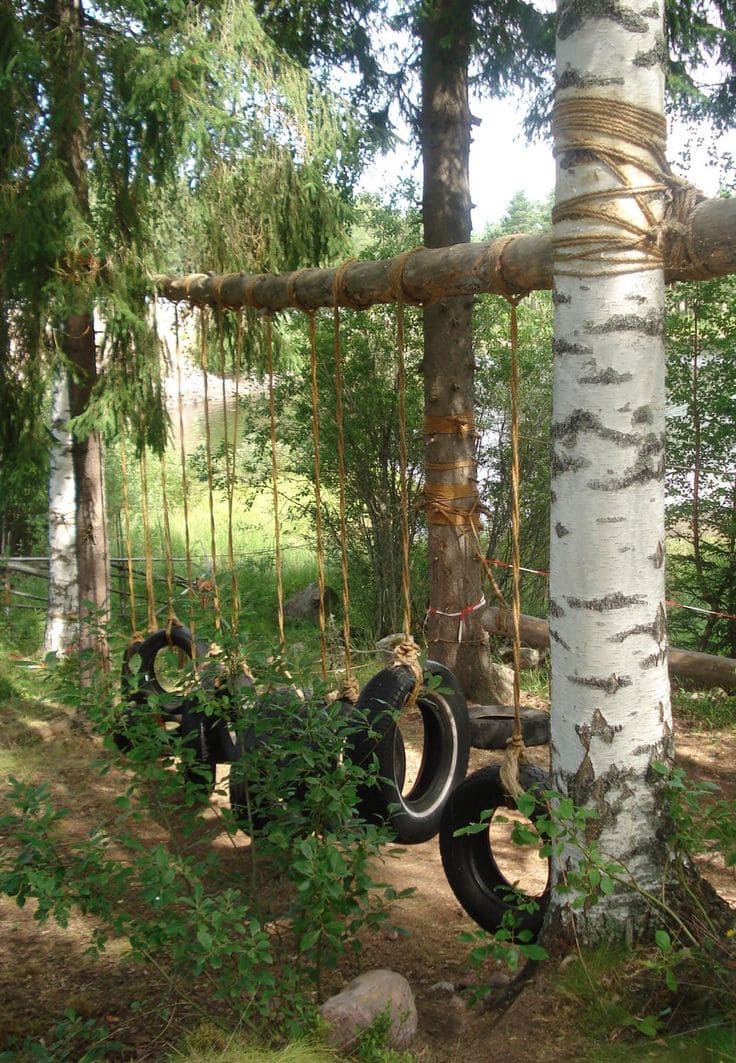
If you’ve got trees, rope, and old tires lying around, you’re halfway to building this epic backyard tire swing obstacle course.
Materials Needed:
- 6–10 used car tires
- Heavy-duty rope, approx. 100 ft
- Two sturdy trees (distance 10–12 ft apart)
- 1 strong horizontal beam
- Outdoor scissors
- Optional: metal hooks
Step-by-Step Guide:
Step 1: Secure the horizontal beam between two trees using strong rope wrapping or fasteners. Make sure it’s tightly bound and stable.
Step 2: Tie lengths of rope to the beam, evenly spaced, allowing enough length for each tire to hang 1–2 feet above the ground.
Step 3: Thread each rope through a cleaned tire and knot tightly. Test each one to ensure it holds weight safely.
Step 4: Create a path of swinging tires that kids can walk or crawl through like a wobbly bridge.
#14. DIY Rainbow Tire Tower
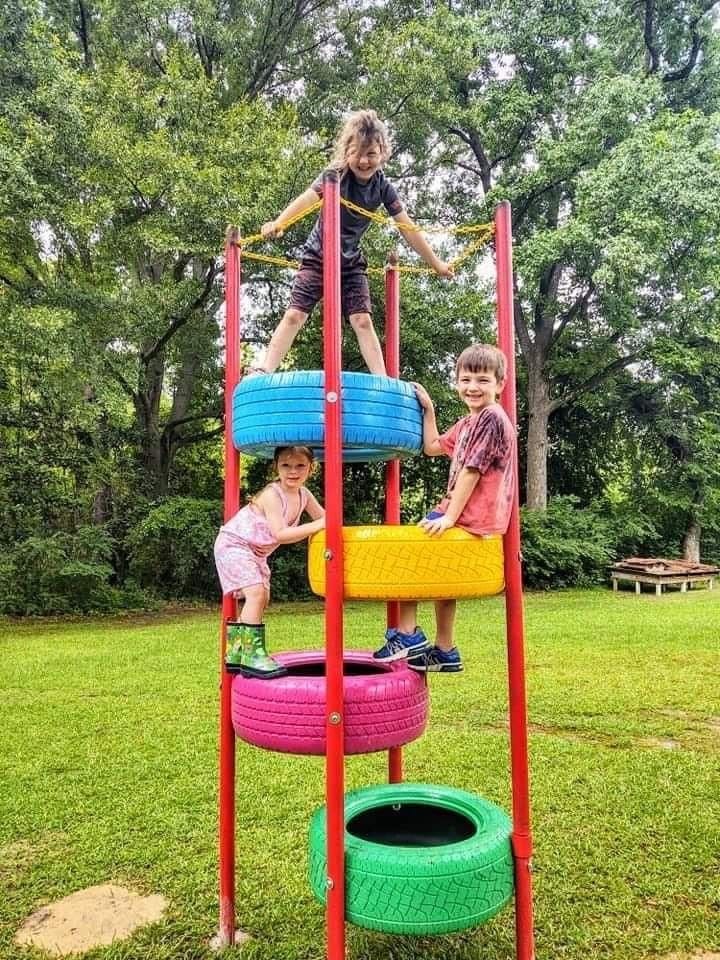
Bright, bold, and full of energy, this colorful tire tower turns old rubber into a vertical playground masterpiece.
Materials Needed:
- 5 recycled tires
- 4 sturdy metal poles (at least 8 ft tall)
- Bolts and washers (4 per tire)
- Drill with metal and rubber-compatible bits
- Spray paint in multiple bright colors
- Optional: rope
Step-by-Step Guide:
Step 1: Spray-paint each tire a different color and allow them to fully dry. This adds a fun, inviting look and protects the rubber.
Step 2: Set up the four poles vertically in a secure square frame, using cement or deep anchors to stabilize them firmly into the ground.
Step 3: Drill holes in each tire and attach them one by one to the poles using bolts and washers. Make sure they’re level and spaced evenly to allow climbing.
Step 4: Add a top support rope, optional handles, or a soft landing zone with mulch or a rubber mat underneath for safety.
#15. DIY Backyard Race Track for Kids
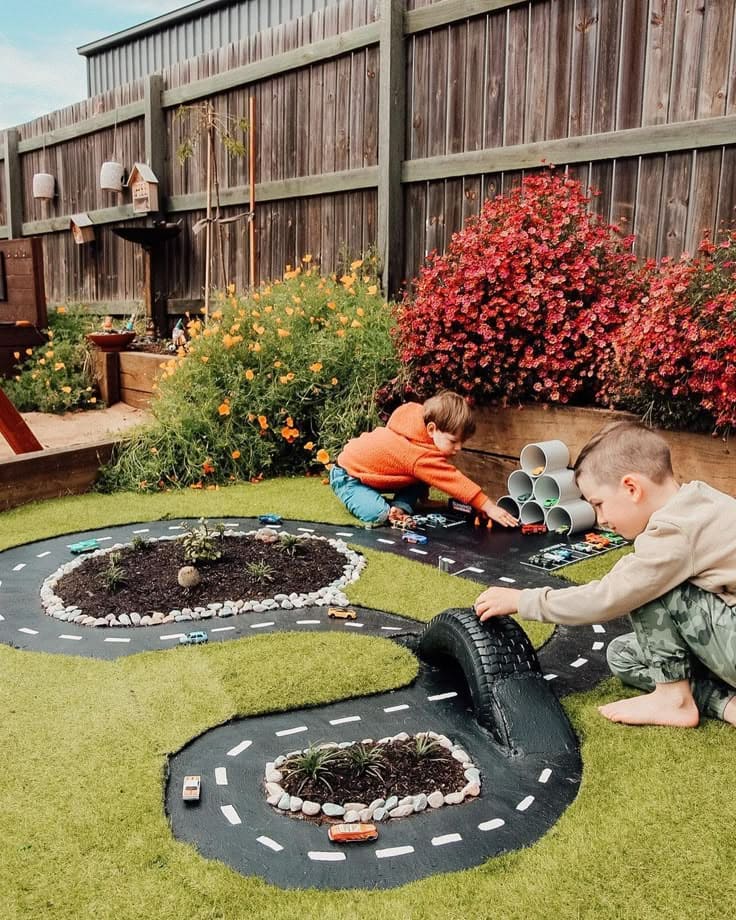
This mini car track garden might just be every little racer’s dream come true. I’ve seen many outdoor play ideas, but this one wins for creativity and charm.
Materials Needed:
- Black outdoor concrete (1–2 quarts)
- White acrylic paint
- Smooth pebbles (3–4 bags)
- Old tire, cut in half
- PVC pipes (optional)
- Mini toy cars
- Garden soil and low-maintenance plants
- Paintbrushes and masking tape
Step-by-Step Guide:
Step 1: Outline your track shape on the grass with chalk or rope. Aim for a looping or figure-eight design.
Step 2: Use masking tape to mark the edges, then paint the track surface with black outdoor paint. Let dry.
Step 3: Add white dashed lines to mimic real road markings.
Step 4: Dig shallow “islands” within loops and fill with soil and decorative plants. Surround each with pebbles.
Step 5: Bury half a tire to form a little bridge or tunnel. Optionally stack PVC pipes nearby as a toy car garage.
#16. DIY Painted Horse Swing
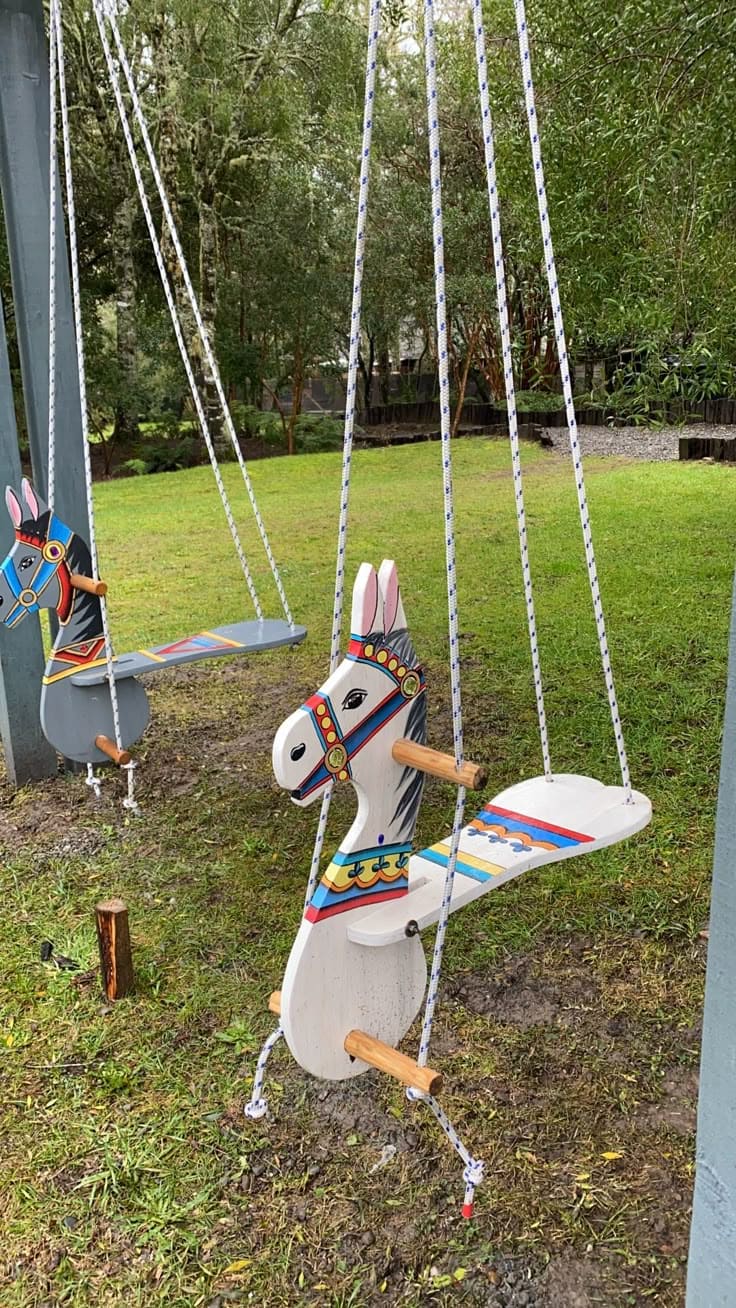
There’s something magical about a backyard swing, but this whimsical wooden horse version takes it to another level.
Materials Needed:
- 1 sheet of ¾” plywood (approx. 24” x 36”)
- Jigsaw and sandpaper
- Exterior paint (assorted colors)
- 1″ wooden dowel (3 pieces, 10″ each)
- ⅜” rope (4 lengths, about 6 ft each)
- Wood screws, washers, and strong eye bolts
- Clear outdoor sealant
Step-by-Step Guide:
Step 1: Sketch and cut the horse shape from plywood using a jigsaw. Sand down all edges to avoid splinters.
Step 2: Paint your horse body and seat with weather-resistant paint in bold, fun colors. Let dry, then seal with a waterproof topcoat.
Step 3: Drill holes to attach the dowels for handles and footrests. Secure them tightly with screws and wood glue.
Step 4: Drill rope holes, wo on the seat and two on the horse head for balance. Thread and knot securely under the seat with washers to prevent pull-through.
Step 5: Hang from a strong beam or swing frame using heavy-duty eye bolts and test for balance and security before letting kids ride.
#17. DIY Backyard Tree Slice Tic-Tac-Toe
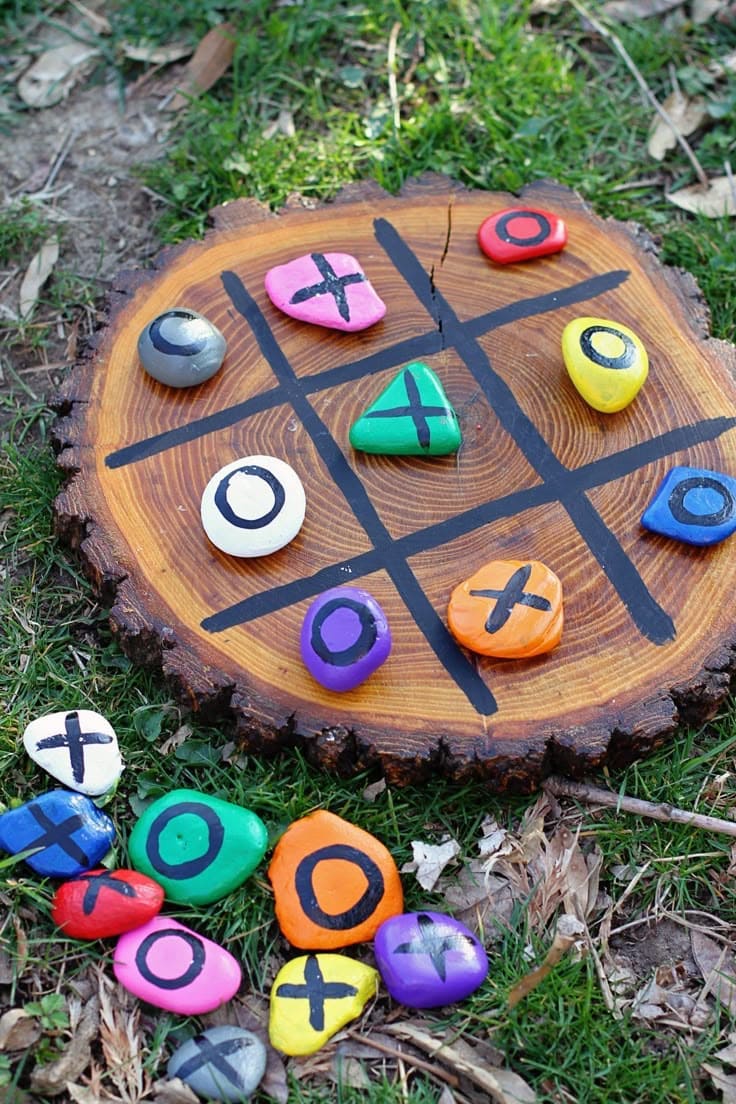
This backyard tic-tac-toe set feels like something out of a whimsical woodland story.
Materials Needed:
- 1 large tree slice (approx. 12–16 inches in diameter, 1–2 inches thick)
- 10 small flat rocks (similar size and smooth)
- Acrylic paint in multiple colors and paintbrushes
- Clear sealer (optional)
Step-by-Step Guide:
Step 1: Lightly sand the tree slice surface and paint a tic-tac-toe grid using black paint or marker. Let dry completely.
Step 2: Paint five stones with a colorful base and add X’s. Paint the remaining five stones with different base colors and add O’s.
Step 3: Once dry, seal the board and stones with a clear outdoor-safe sealer for durability.
Step 4: Set it on the grass and start your first match. It’s portable, pretty, and full of nostalgic fun.
#18. DIY Tree Log Climbing Wall
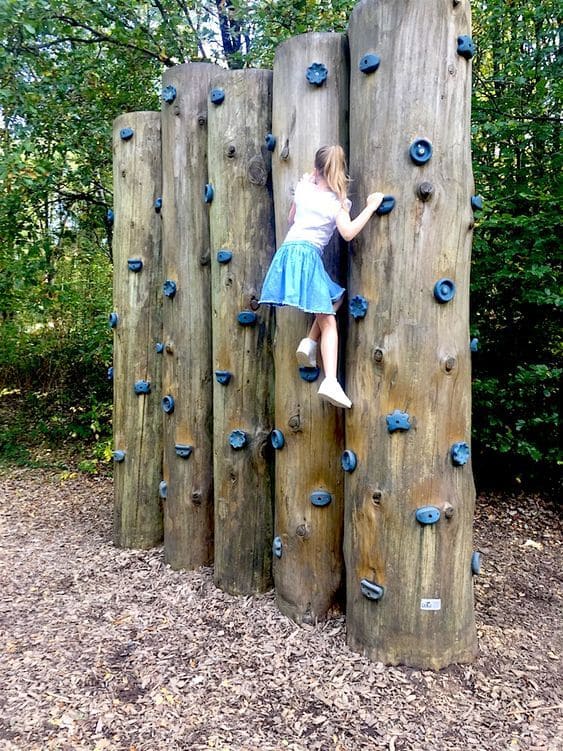
If your kids love to climb and you’ve got some large tree logs or access to cut timber, this project turns raw nature into a vertical playground.
Materials Needed:
- 4 to 6 large tree logs (6–8 ft tall, 12–18 in diameter)
- 30+ plastic or resin climbing holds
- Concrete mix
- Drill and masonry bit
- Outdoor wood sealer (optional)
Step-by-Step Guide:
Step 1: Choose logs of similar height and diameter. Secure them vertically in the ground with concrete footings or steel ground brackets spaced about 18–24 inches apart.
Step 2: Once upright and stabilized, evenly mark and pre-drill holes for climbing holds across each log’s surface. Mix up patterns for hands and feet.
Step 3: Attach the climbing holds using bolts and washers, ensuring they’re tight and secure for safety.
Step 4 (optional): Apply outdoor sealant to protect the wood from moisture and decay, especially if the structure will be used year-round.
#19. Colorful Tire Sandbox
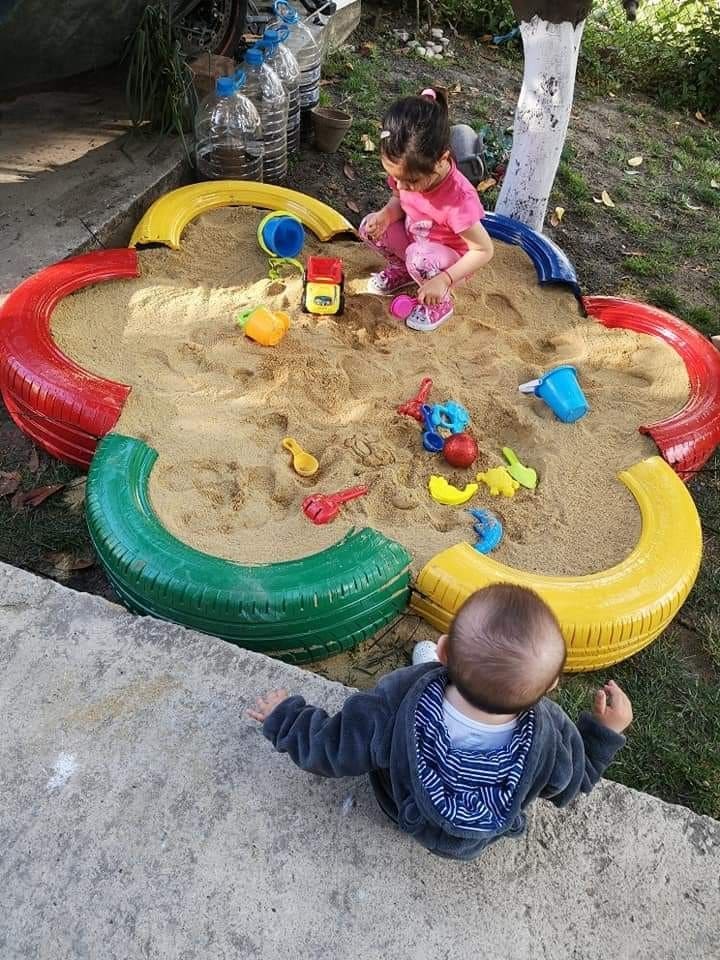
This playful tire sandbox is a backyard treasure that turns recycled materials into pure magic.
Materials Needed:
- 4–6 old car tires, halved and cleaned
- Bright, non-toxic exterior spray paint
- Fine playground sand (6–8 bags)
- Ground cover tarp (approx. 4×4 ft or larger)
- Screws and stakes (optional)
Step-by-Step Guide:
Step 1: Wash and dry the tires thoroughly. Cut them in half using a jigsaw or handsaw, and paint each one in a different bold color.
Step 2: Choose a flat area in your yard. Lay down the ground cover tarp to prevent weeds and sinking.
Step 3: Arrange the tire halves in a flower or square shape, securing them in place if needed.
Step 4: Fill the center with sand and toss in a few plastic shovels, trucks, and toys. Watch the little ones dive into joy!
#20. Backyard Spider Web Climber

This giant spider web rope climber instantly turns any patch of woods into a wild jungle gym.
Materials Needed:
- 1 heavy-duty climbing rope (100–120 feet, weather-resistant)
- 6 wooden posts (4×4 inches, 4–5 feet long)
- Concrete mix (optional,)
- 2 eye bolts per post
- Power drill
- Rubber
Step-by-Step Guide:
Step 1: Dig holes and install your wooden posts in a hexagon or octagon shape. Secure with concrete for extra stability. Let cure fully if using cement.
Step 2: Screw in the eye bolts about 3 feet high, evenly around the posts. One bolt per rope junction.
Step 3: Begin weaving the rope in a spiral pattern from the center outward. Secure each loop to an eye bolt or hook, forming the classic spider web look.
Step 4: Add extra diagonal or vertical strands for more support. Make sure the web is taut but slightly flexible.


