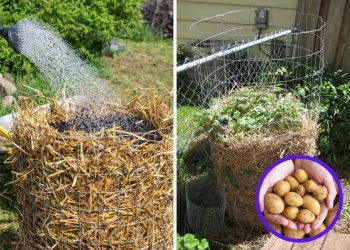
The name “milkweed” might make you think it’s just pesky weed, but it’s actually a powerhouse plant that deserves a place in your garden.
With its clusters of vibrant flowers and lush green foliage, milkweed isn’t just a garden beauty; it’s a lifeline for monarch butterflies. This resilient plant is a magnet for pollinators and offers essential nectar for these creatures.
Beyond its ecological benefits, milkweed is surprisingly easy to grow and care for, making it perfect for every gardener.
Summary:
- Milkweed can be propagated from stem cuttings.
- It is easy to grow and care for with minimal water and fertilizer.
- You need to watch for aphids, powdery mildew and rust when growing milkweed.
- Remember to wear protective gears during harvesting milkweed seeds.
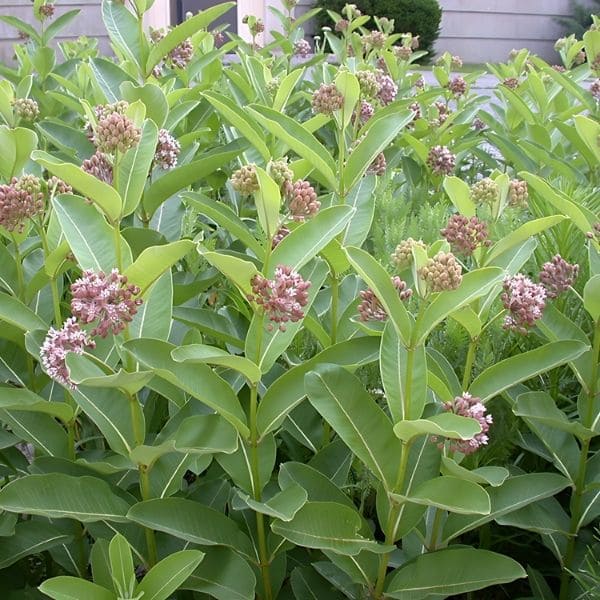
| Scientific name | Asclepias spp. |
| Common name | Milkweed, common milkweed |
| Plant type | Herbaceous, perennial |
| Height | 2 to 5 feet |
| Light | Full sun |
| Soil type | Dry, well-drained soil |
| Flower Color | Green, Orange, Pink, Purple, Red, White |
| Bloom Time | Summer |
| Native | North America |
| Toxicity | Toxic to humans and pets |
Propagation
If you’re eager to see faster results, try to propagate milkweed from cuttings instead of sowing seeds or division. I find this method particularly rewarding because it bypasses the germination stage and gives you a head start.
Firstly, take cuttings of common milkweed in the middle of the summer when stems are green. Using a sharp, sterilized garden cutting tool, cut four-inch stems with three to five leaf nodes. Remember to keep the top two pairs intact, and coat the bottom of the stems with a rooting hormone.
Place the stems standing up in a potting medium that is an 80/20 mix of perlite to peat moss. Your pots should be kept in a shady, cool spot out of direct sunlight, and ensure the soil remains evenly and continuously moist.
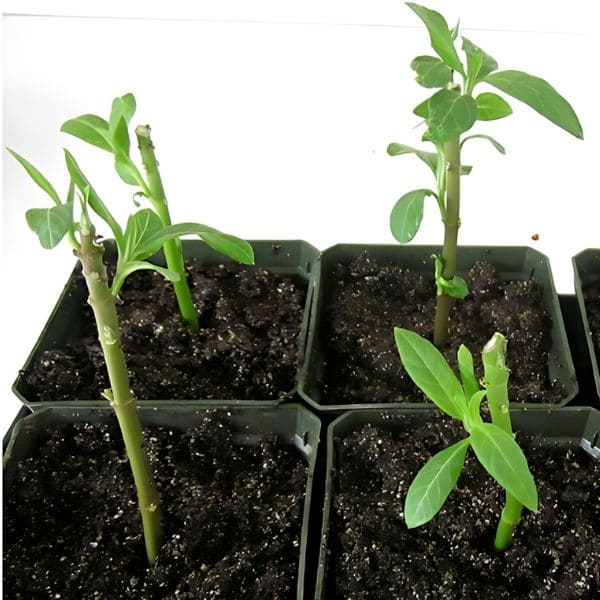
Within six to ten weeks, when the cuttings develop a robust root system, it’s time to transplant them.
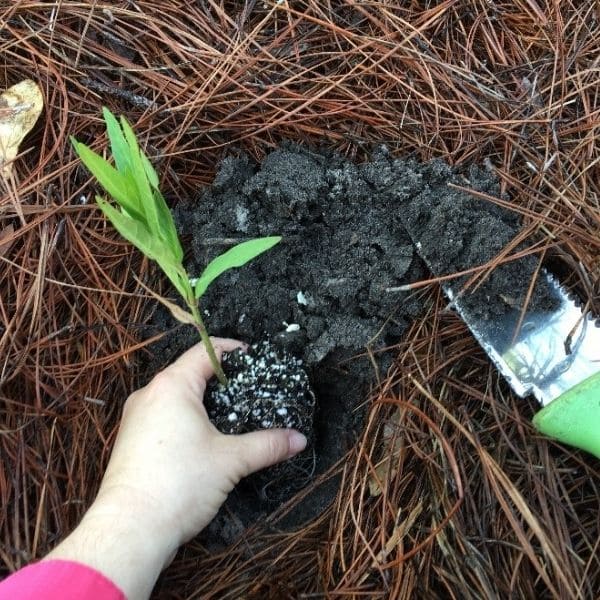
I usually transplant young milkweed plants in early spring, right after the last frost. I dig a hole that comfortably fits the root ball, and place the plant and water thoroughly to help settle the soil around the roots
Growing Milkweed
Preparation
There are over 100 species of this versatile plant. Here are some common varieties you might consider:
- Common milkweed (Asclepias syriaca) typically reaches heights of 3-5 feet. It thrives in well-drained soils and full sunlight. Its pink to purple flowers are not only beautiful but also highly robust. This variety spreads quickly, making it ideal for larger spaces.
- Swamp milkweed (Asclepias incarnata) grows to about 4-5 feet and is well-suited to wetter environments. It’s perfect for rain gardens and areas with consistent moisture. The pink to mauve flowers of swamp milkweed are particularly fragrant and attract a wide range of pollinators.
- Butterfly weed (Asclepias tuberosa) is a shorter variety, reaching only 1-2 feet in height. It prefers dry, well-drained soils and full sunlight. The bright orange flowers are vibrant and eye-catching, and this drought-tolerant plant is excellent for garden design.
- Tropical milkweed (Asclepias curassavica), typically grows to 3-4 feet. It thrives in well-drained soils and full sunlight. It gets orange and red flowers lasting from early spring through fall, making it a continuous nectar source for butterflies.

Next, aim for a spot in your garden that receives full sunlight, as milkweed thrives best with at least six hours of direct sun daily. The soil should be well-drained and I often mix in some compost to enrich the soil and improve drainage.
Growing Milkweed From Seeds
You can sow seeds either in the fall or spring, but I’ve found that fall planting has its perks.
In the fall, common milkweed naturally scatters its seeds when the seed pods burst open. These warty seed pods, two to four inches long, split and release seeds that float away on silky strands, similar to dandelion seeds.
This natural process allows the seeds to go through cold stratification over the winter which boosts germination rates.
You can replicate this by scattering milkweed seeds on a weed-free site in late fall and covering them with no more than ¼ inch of soil. This method is simple and mimics nature’s way of ensuring the seeds sprout when the conditions are right.
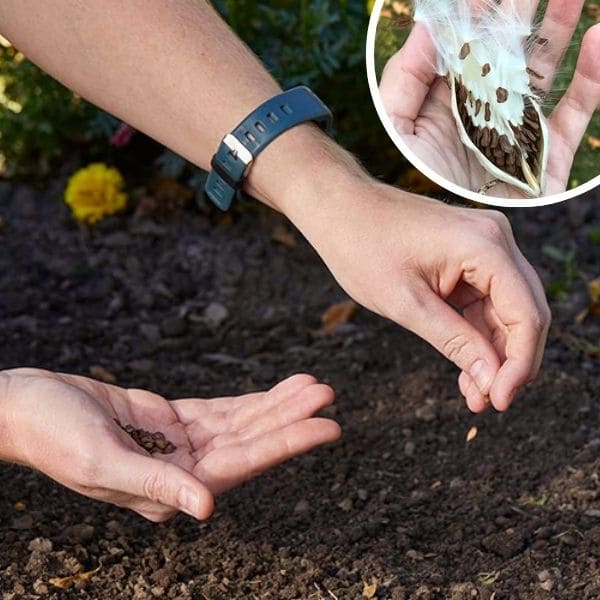
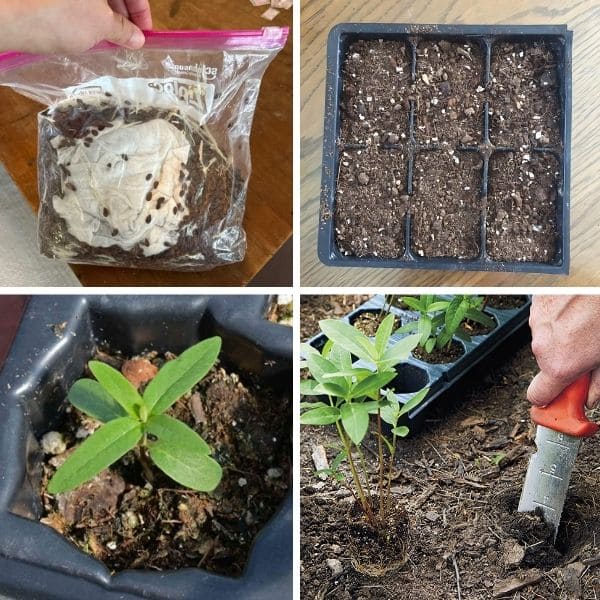
For spring planting, you’ll need to mimic the cold stratification process. Here are steps you need to follow:
- Wrap the seeds in a damp paper towel, place them in a zippered plastic bag, and store them in the refrigerator for about 30 days.
- Fill peat pots 3/4 of the way with seed-starting potting soil and moisten the soil.
- Place one or two seeds in each pot, cover them with 1/4 inch of soil, and water from the bottom up by placing the pots on a tray with 1/2 inch of water.
- Keep the pots on a sunny windowsill, under grow lights, or in a greenhouse. Expect sprouts within two weeks.
In the spring, transplant the peat pots directly into the ground. The pots will decompose naturally, protecting the roots from disruption.
Tips: Planting coneflowers and black-eyed Susans alongside milkweed provides additional nectar sources and enhances pollinator attraction. These companions create a resilient ecosystem, reduce pests, and improve overall plant health.
Care for Milkweed
Light
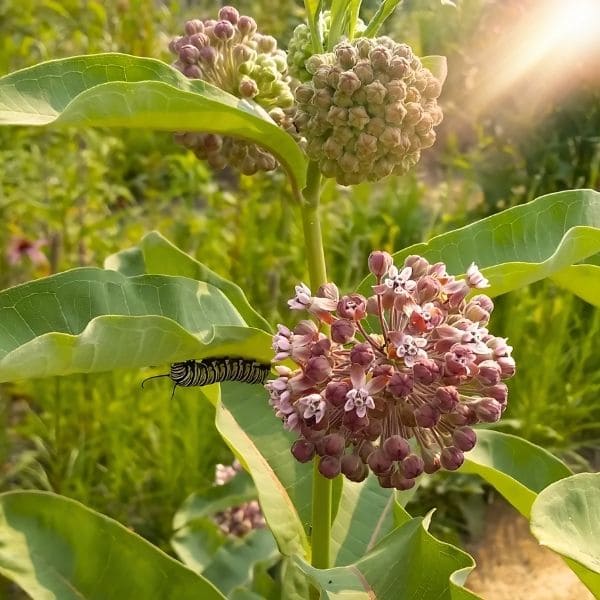
Milkweed thrives best in full sunlight with at least six hours of direct sun each day. I’ve noticed that when my milkweed gets plenty of sunlight, the plants grow taller and produce more vibrant flowers. However, too little sunlight can result in leggy plants with fewer blooms.
Soil
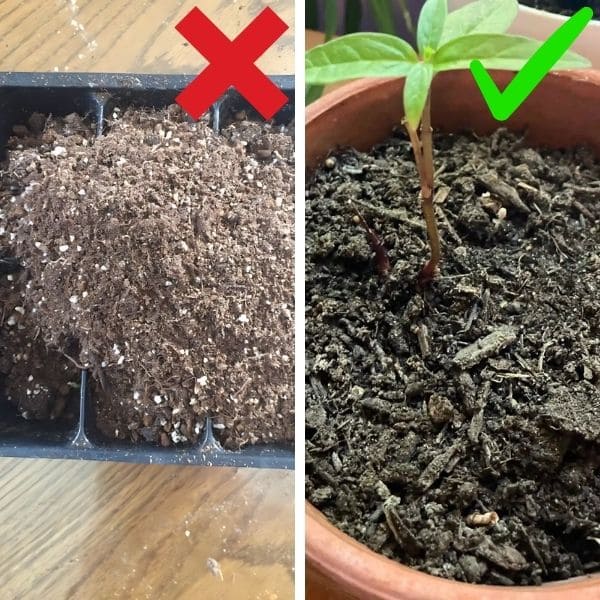
Milkweed grows in well-drained soil with a slightly sandy texture and a pH between 6.0 and 7.0. You can consider mixing compost into your garden bed to enrich the soil and improve drainage.
Avoid heavy, clay soils that retain water, as this can lead to root rot. You can test your soil’s drainage by digging a small hole and filling it with water; if it drains within a few hours, it’s suitable for milkweed.
Water
Young milkweed plants need consistently moist soil to establish strong roots, so water them every few days, especially during dry spells. Once established, milkweed is fairly drought-tolerant and can be watered once a week.
To check if the soil is dry, stick your finger an inch into the soil; if it feels dry, it’s time to water. Underwatered milkweed will have drooping leaves and may stop flowering, while overwatering can cause yellowing leaves and root rot.
Temperature and Humidity
The ideal temperatures for milkweed are between 65°F and 85°F. According to experts, it grows vigorously during the warm summer months yet it can also handle cooler temperatures.
It is hardy in USDA zones 3-9. High humidity levels can sometimes lead to fungal diseases, so it’s important to ensure good air circulation around the plants.
Mulching
Did you know mulching can make a big difference in the health of your milkweed? It helps retain moisture in the soil, which is especially beneficial during hot, dry spells. Mulching also suppresses weeds, reducing competition for nutrients.
I prefer using organic mulches like straw, shredded bark, or compost. Spread a 2-3 inch layer around the base of your milkweed, but keep it a few inches away from the stems to prevent rot.
Fertilizer
Fertilizing milkweed is usually unnecessary. However, if your soil is particularly poor, a spring application of compost can provide a nutrient boost. For inorganic options, a light application of balanced 10-10-10 fertilizer once in early spring is sufficient.
Pruning and Deadheading
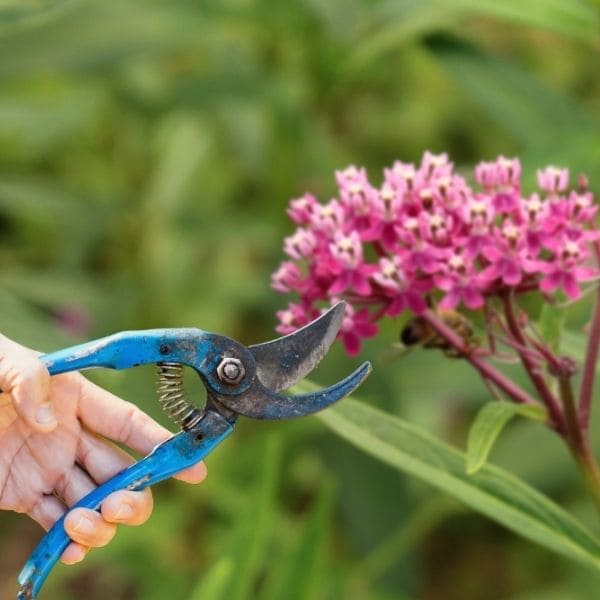
I usually start by deadheading spent flowers throughout the summer to encourage more blooms. This involves snipping off the faded flowers just above a leaf node.
In the fall, I cut back the plants to about six inches from the ground after the first frost. This helps to manage the plant’s size and encourages healthy growth in the spring. You should prune regularly to improve air circulation and reduce the risk of disease.
Pests and Diseases
Aphids are the most common culprits to milkweed. These small insects can quickly gather on stems and leaves, siphoning the plant’s nutrients. To manage this problem, you can spray the affected areas with a strong jet of water.
For more stubborn cases, I turn to insecticidal soap or neem oil, both effective and organic options.
Introducing beneficial insects, like ladybugs, can also help control aphid populations by feasting on aphids. It’s crucial to avoid chemical pesticides, as the same chemicals that kill destructive insects will also kill butterflies and their larvae.
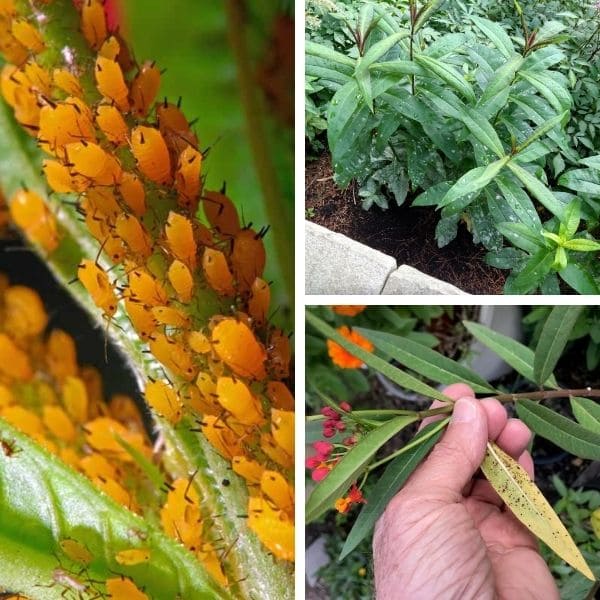
In addition, you need to watch for powdery mildew and rust. I’ve encountered powdery mildew, which appears as a white, powdery coating on the leaves. To treat it, I mix a tablespoon of baking soda with a gallon of water and spray the affected areas.
Rust, on the other hand, shows up as orange or brown spots on the leaves. Removing and disposing of infected leaves can help control its spread.
Common Problems
Poor Germination
Poor germination can happen due to insufficient cold stratification. To solve this, place seeds in a damp paper towel inside a zippered plastic bag and refrigerate for about 30 days before planting. This mimics natural winter conditions and significantly boosts germination rates.
Leaf Discoloration
Leaf discoloration in milkweed is often due to nutrient deficiencies or overwatering. You need to ensure proper drainage and avoid overwatering to keep roots healthy. If the leaves turn pale or show spots, try adding compost to improve soil fertility.
Stunted Growth
Overcrowding can lead to stunted growth plants. Therefore, you should plant milkweed in groups of six or more, spacing plants or thinning seedlings to about 6 to 24 inches apart to avoid competition for resources.
Harvest
Typically, you can start harvesting seeds about three months after planting. Apply light pressure to the pods; if they split at the seam, they’re ripe. Peel open the pod and remove the brown seeds and silk.
Harvesting these seeds is important because it allows you to maintain a healthy milkweed population and support monarch butterflies and other pollinators.
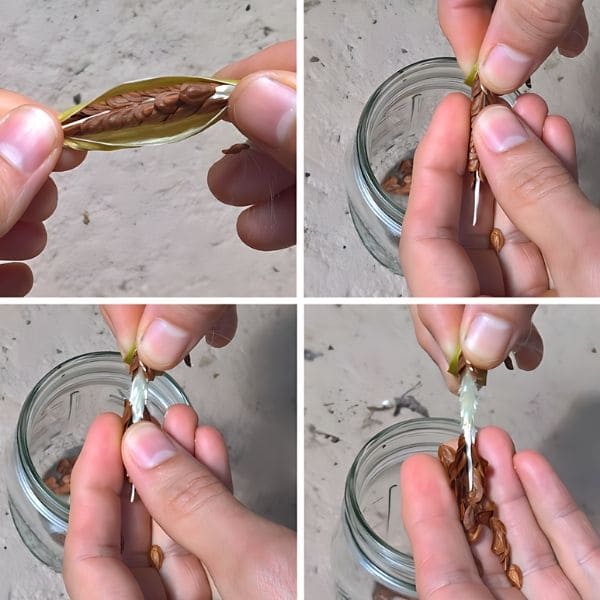
Precaution: Milkweed sap contains toxic cardenolides harming to people and pets if ingested. The sap can also irritate skin and eyes, so always wear gloves, long sleeves, long pants, and eye protection during harvest.
Preservation
After harvesting, let milkweed seeds dry in a few days then store them in a small jar. By preserving seeds, you ensure you have a supply ready for planting in the following season or share with other gardeners.
Fun Facts: The fluffy fibers on milkweed seeds, known as the Silk of America, are hollow and water-resistant. During World War II, they were used as life jacket stuffing. Besides, these hypoallergenic fibers are also perfect for stuffing pillows.
FAQs
Where is the ideal spot to plant milkweed?
For optimal growth, choose sunny locations with well-draining soil. Planting along a fence or in a corner of your yard ensures full sunlight exposure throughout the day, particularly in summer.
Which milkweed species do monarchs prefer?
Swamp milkweed (Asclepias incarnata) and common milkweed (A. syriaca) are particularly attractive to monarchs, as they tend to host a higher number of monarch eggs.
What are the benefits of milkweed?
Milkweed is food for pollinators, especially monarch butterflies. Traditionally, it is also used to treat scrofulous swelling with a salve, addressing diarrhea, aiding lactation in mothers.
Why should milkweed not be planted on coastal areas?
Milkweed thrives in well-drained soil and may not tolerate the salty conditions and sandy soils typical of coastal environments.
Will common milkweed overtake my garden?
Common milkweed spreads via underground rhizomes and can potentially dominate garden spaces. So, consider planting it in confined areas or opt for less aggressive milkweed species like butterfly weed (Asclepias tuberosa) for smaller garden plots.
