I used to think breaking new garden ground meant either renting a rototiller or spending weekends sweating behind a shovel. That changed when I decided to try something older than any machine – pigs.
Pigs are natural tillers. Give them food, a bit of shelter, and a patch of untouched ground, and they’ll do what they were born to do: root, dig, turn, and fertilize. With a little structure and planning, I turned that behavior into one of the most efficient tools on my homestead.
This article is about the setup I built, how it works, and what I’ve learned from using it daily.
What Is a Pig Tiller?
A pig tiller, sometimes called a pig tractor, is a mobile enclosure designed to let pigs do the hard work of soil preparation. By confining them to a controlled space, their instinctive rooting activity breaks up the turf, turns over weeds, and fertilizes the ground.
Instead of gas or electricity, the system runs on kitchen scraps, garden trimmings, and the pigs’ endless curiosity. After just one or two days in a new spot, the difference is loosened soil, exposed roots, and rich, composting manure left behind.

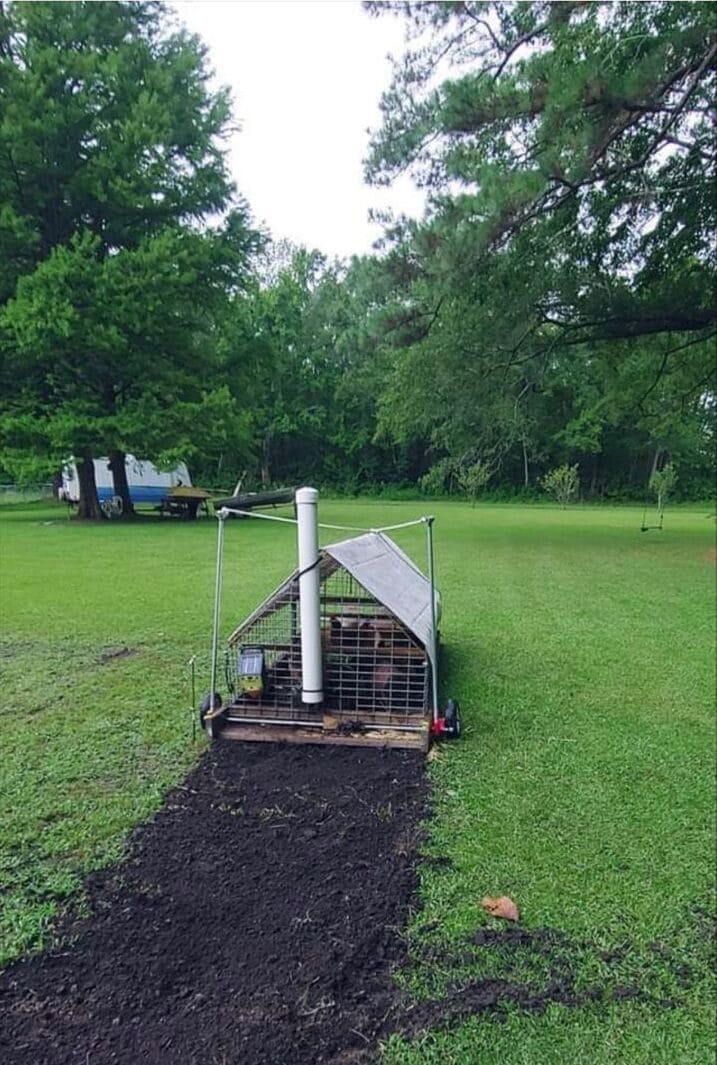
My Pig Tiller Design: A-Frame, Portable, and Practical
When I built mine, I wanted it light enough to move alone but strong enough to contain two pigs weighing about 60 pounds each.
The solution was an A-frame style pen mounted on a wooden skid base with added wheels. It’s just wide enough to cover a tilling path about 4 feet across, which is perfect for raised beds and garden strips.
My project’s dimensions include length (6 feet), width (4 feet) and height (4.5 feet). That gives the pigs enough room to move without getting lazy or turning it into a wallow.
Materials Needed:
Base and Frame:
- 2 2×6 pressure-treated boards, 6 feet long (runners/skids)
- 3 2×4 studs, cut to 4 feet for cross-support and flooring
- 2 1×6 planks for bracing the floor under stress points
- 4 corner brackets and deck screws (1.5 inch and 3 inch)
Walls and Roof:
- Welded wire panel (4×10 feet) bent into an A-frame and secured to the base
- Half-sheet of galvanized roofing (optional in warm weather)
- Zip ties and galvanized staples
Mobility:
- 2 lawnmower bolted to the rear skid ends
- Rope handle
Feeding and Water:
- 4-inch diameter PVC pipe, 3 feet tall, capped at the top with a 90-degree elbow for feed drop
- 2-gallon bucket hung inside for water
- Shade tarp (6×6 feet) tied loosely across the top if the weather turns hot
I used a solar-powered light at night once to test predator deterrence, but it’s optional depending on your setup.
Daily Use and Rotation Schedule
I start each morning by pulling the pen forward one length about 3 to 4 feet. That exposes new grass and gives the pigs a fresh surface to work on.
Within a few hours, they’ve started rooting. By the next morning, most of the sod is flipped, compacted weeds are exposed, and the soil is covered in pig manure.
On days when I feed mostly food scraps, their rooting increases. Grains tend to reduce activity, so I adjust depending on the soil condition I’m after.
Additionally, the pigs never stay in one spot more than 24 hours. Leaving them longer risks compacting the soil or damaging it with too much nitrogen. A short stay keeps them eager and efficient.
What Happens After Tilling?
Once a section is rooted, I move the tiller forward and leave the disturbed soil to settle for about a week. During that time, I rake it lightly and sometimes add compost or mulch on top. After a rain or two, the soil is perfect for planting.
I’ve prepped ground for raised vegetable beds, pumpkin patches or even over crop test plots. This spring, I planted directly into one of the pig-tilled rows without even turning it over again.
A Few Lessons Learned Along the Way
One of the biggest lessons was realizing pigs can outsmart your build if they’re bored. Make sure the enclosure is secure and move it often. I also learned that smaller pigs (under 100 pounds) are ideal for this setup as they’re easy to manage and less likely to break out or destroy the structure.
Another surprise was how efficient the system is at reducing waste. Kitchen scraps, peels, ends, and even weeds became part of the pigs’ diet, which then fed my soil in return.


