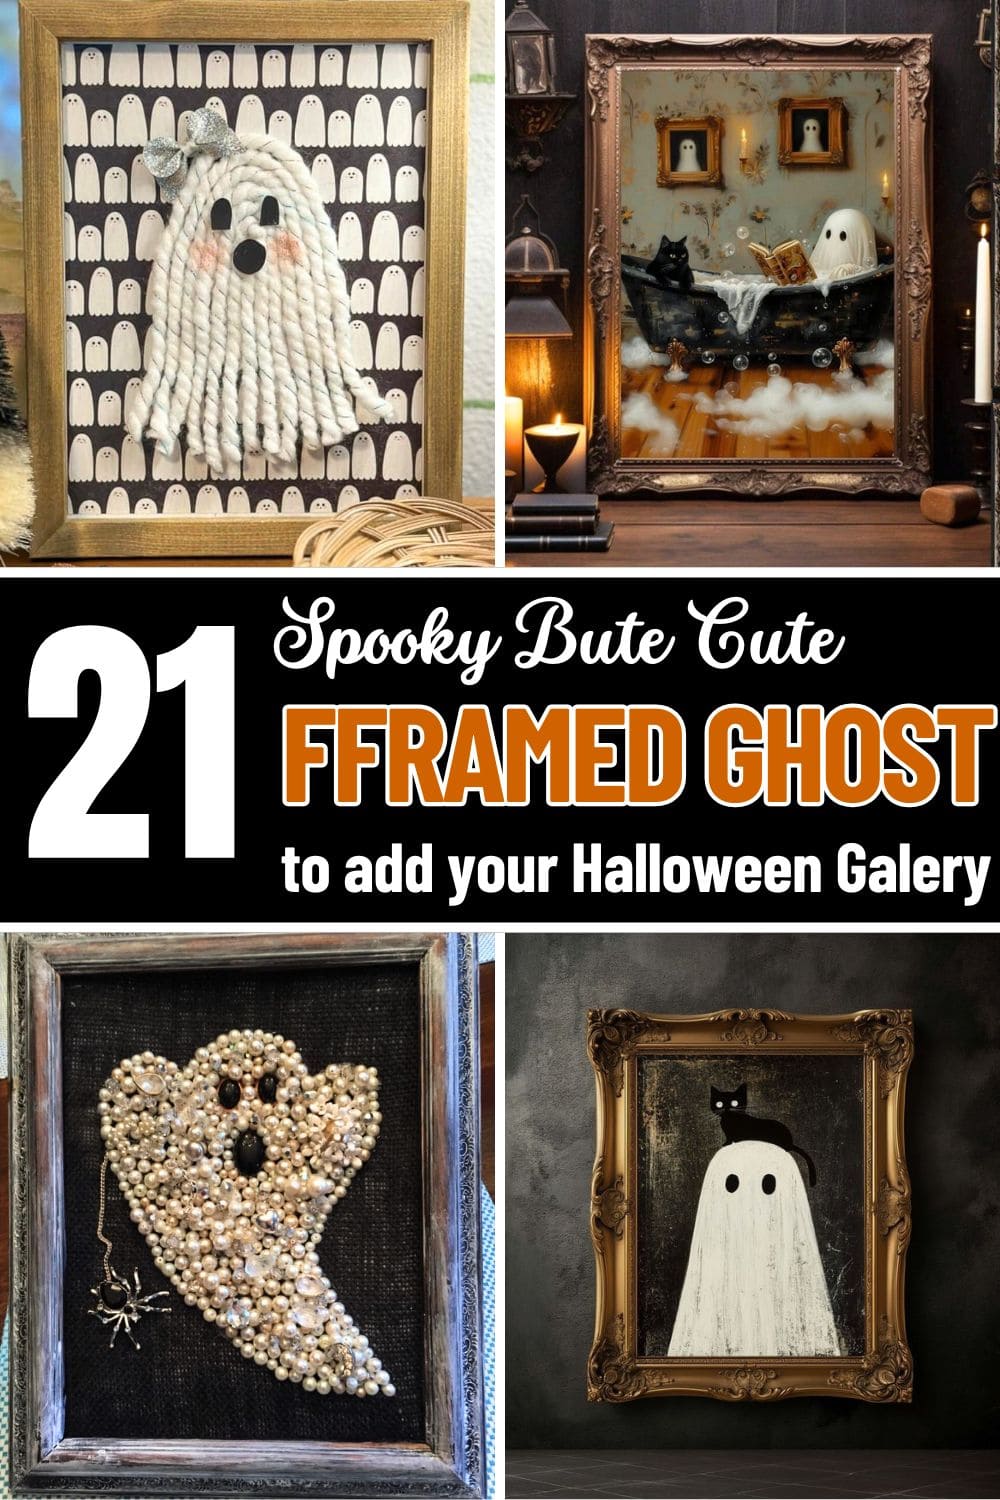
Ghosts have long been a symbol of mystery, mischief, and memory. There’s something delightfully nostalgic about their simple shape and quiet presence, especially when captured in a frame.
These charming framed ghost ideas blend spooky with sweet, turning ordinary materials into wall-worthy art with personality.
You don’t need advanced skills or fancy tools to bring them to life, just a bit of creativity and a love for the season. Each project feels like a little haunted portrait, ready to add warmth and whimsy to your home.
If you’re craving handmade magic this Halloween, these ideas will help your walls come alive with friendly spirits.
#1. Adorable Ghost Family Portrait
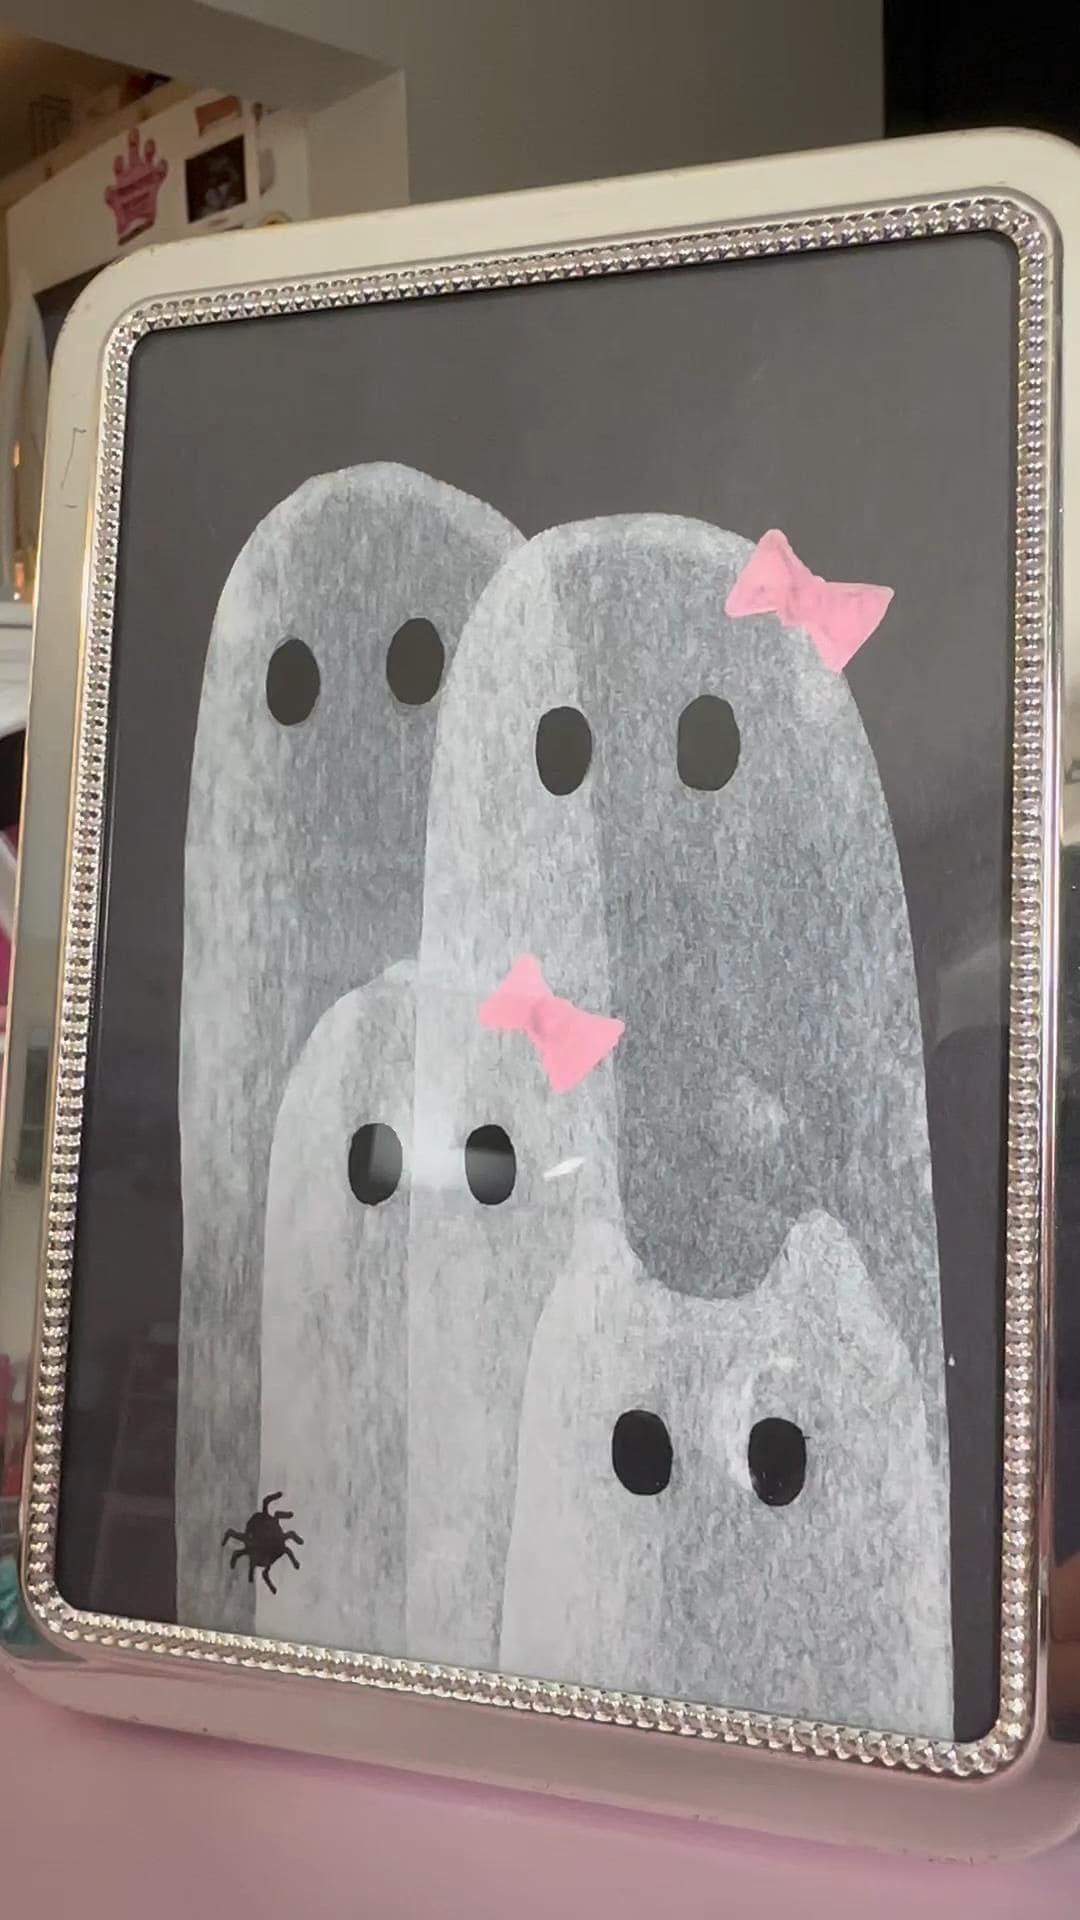
This framed art is pure Halloween sweetness. Against a deep black background, four soft, misty-white ghosts huddle together, each with curious black eyes and a friendly aura.
Two of them wear tiny pink bows, adding a charming, whimsical touch, while a little black spider tiptoes nearby for just the right hint of spook.
Plus, the sleek silver frame with rhinestone trim gives the whole piece a dash of sparkle, making it stand out in any Halloween display.
Materials Needed
- 1 silver rhinestone-trim frame (8″ x 10″)
- Black cardstock or paper
- White chalk or pastel
- Black marker or paper cutouts
- Pink paper or felt
- Small spider sticker
- Glue or double-sided tape
Step-by-step Guide
Step 1: Cut your black cardstock to fit the frame and place it as the background.
Step 2: Draw or smudge white chalk in ghost shapes, layering them slightly for a cozy group look. Then add eyes using black paper dots or marker.
Step 3: Cut tiny pink bows and glue them to a couple of the ghosts.
Step 4: Attach a small spider sticker for an extra Halloween touch, then frame your art.
#2. Ghost and Black Cat Gothic Portrait
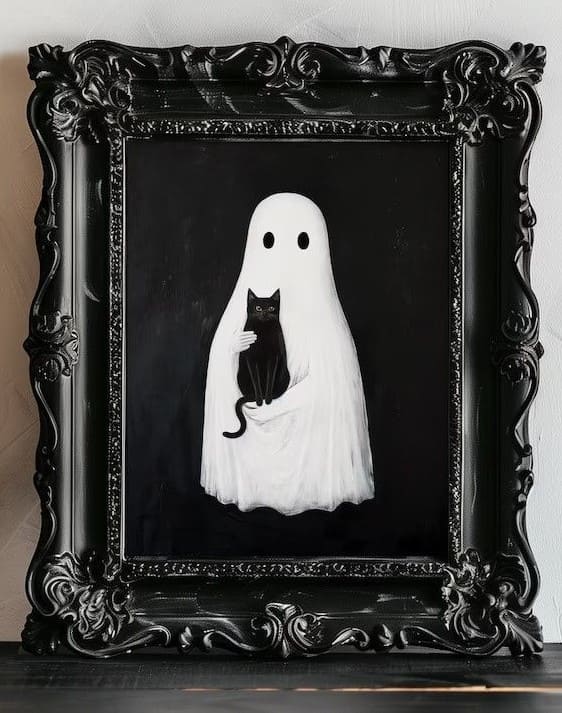
There’s something hauntingly sweet about this framed pair, a gentle ghost holding a black cat like a treasured friend.
The deep black background makes their pale forms almost glow, while the ornate gothic frame gives it that old-world, mysterious vibe. It’s a piece that feels like it could hang in a centuries-old manor, yet fits perfectly on a modern Halloween mantel.
Specially, the subtle balance between eerie and endearing makes it a decoration you’ll want to bring out year after year.
Materials Needed
- 1 ornate black frame (8″ x 10″ works well)
- Black poster board or painted background
- Printed or hand-painted ghost-and-cat image
- Scissors
- Double-sided tape
Step-by-step Guide
Step 1: Prepare your frame by removing the glass and cleaning it thoroughly.
Step 2: Place your black background in the frame as the base.
Step 3: Position your ghost-and-cat image at the center and secure it with tape or glue.
Step 4: Reassemble the frame and display where it can catch the soft glow of candlelight for extra atmosphere.
#3. Elegant Pearl Ghost Frame
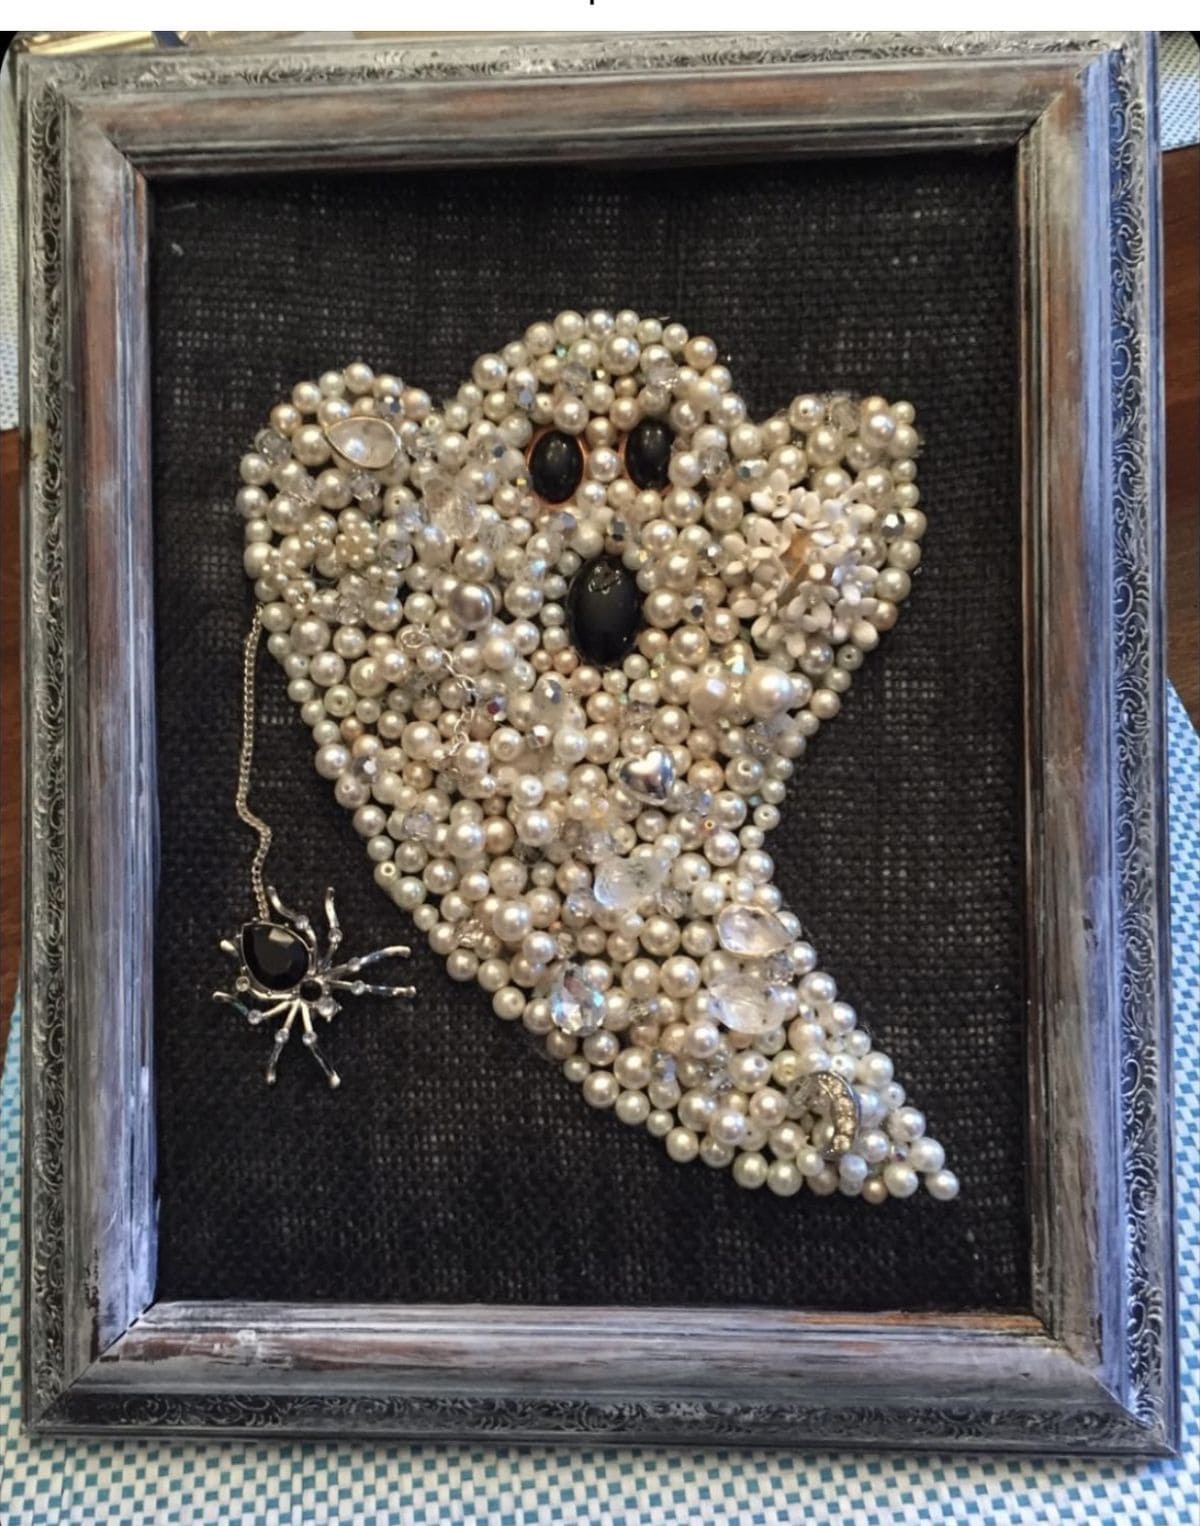
Imagine walking past and catching a sparkle out of the corner of your eye, only to see a friendly phantom made entirely from pearls and gems.
It’s a mix of spooky and sophisticated, and the best part is you can use old costume jewelry or sentimental beads, giving the ghost a story of its own.
Plus, hang it where light can dance across the surface, and it will feel alive in the most charming way.
Materials Needed
- 1 wooden frame (about 11″×14″)
- Black burlap or textured fabric (cut to fit)
- 150-200 faux pearls (4mm-10mm mix)
- 20-30 rhinestones or crystals for sparkle
- 3 black beads or stones
- Optional: vintage brooch
- Strong craft glue
Step-by-step Guide
Step 1: Take out the glass and stretch the black fabric across the frame backing, gluing or taping it neatly at the back.
Step 2: Lightly draw your ghost shape and it doesn’t need to be perfect, just a guide.
Step 3: Start by gluing pearls along the outline, then fill in the shape, mixing sizes so it looks rich and textured.
Step 4: Tuck rhinestones here and there for sparkle, then glue on the black beads for eyes and mouth.
Step 5: Finally, add your charm or brooch for a finishing touch, and your ghost is ready to glow.
#4. Rope Ghost with a Sparkly Bow
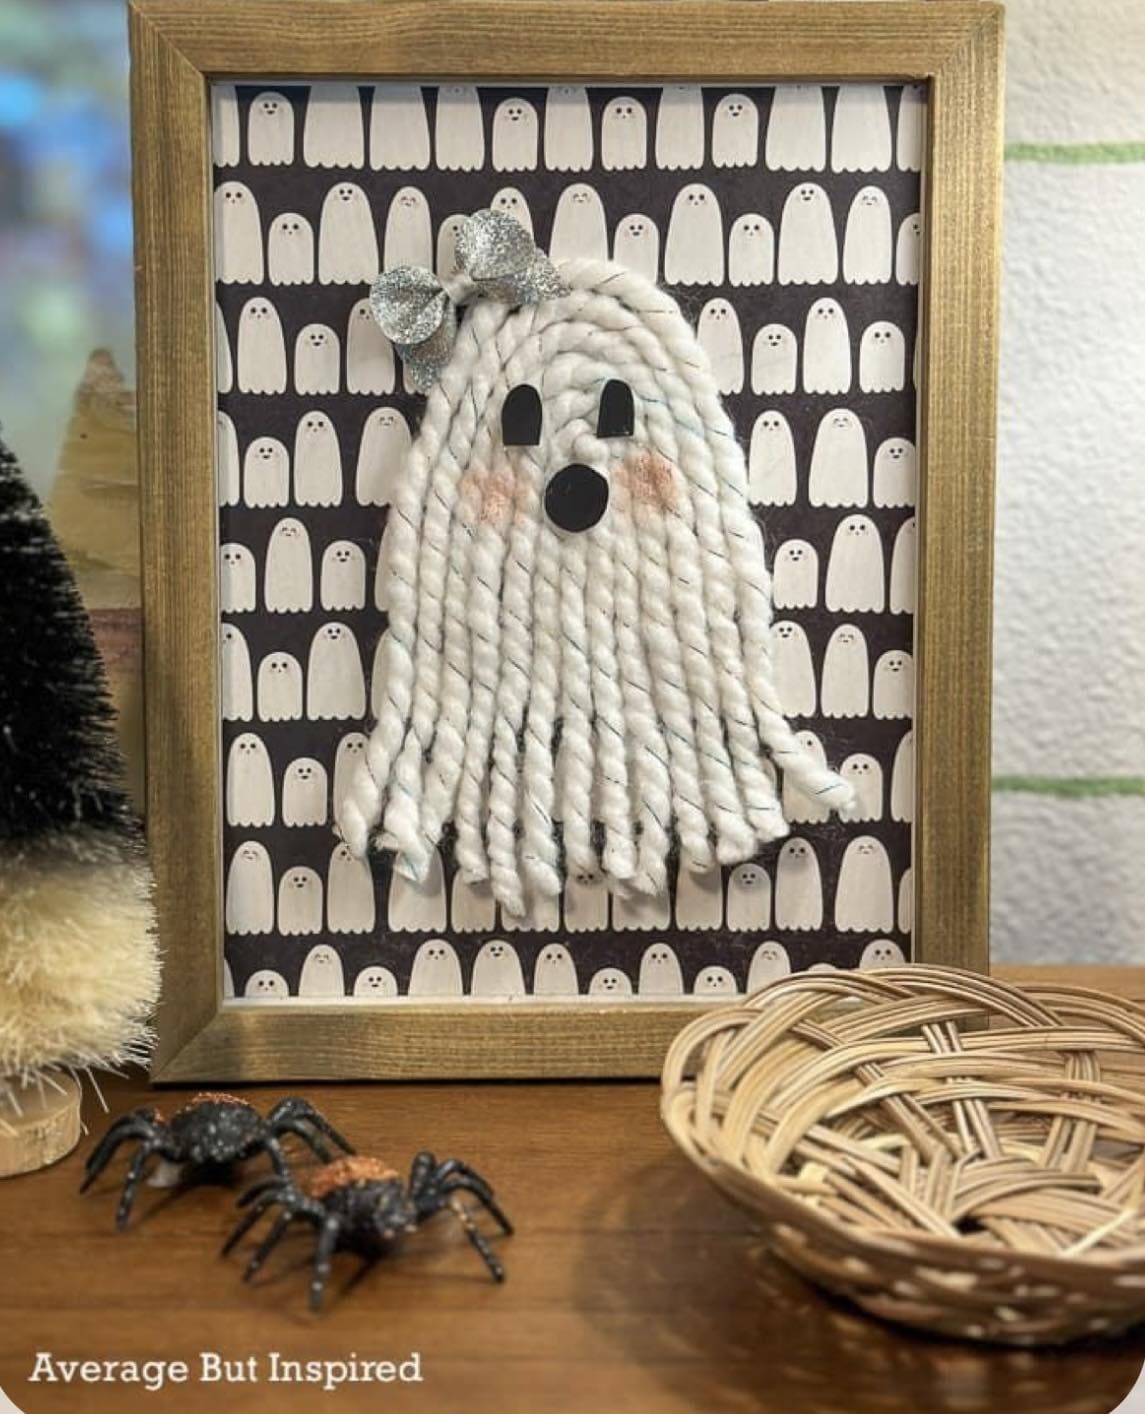
Crafted from thick, twisted white rope, she has a soft, tactile texture that pops against the playful ghost-patterned background. Her rosy cheeks, oval eyes, and glittering silver bow give her a personality that’s more boo-tiful than scary.
Bonus, the simple wooden frame keeps the focus on her whimsical details, making it perfect for a cozy Halloween corner.
Set beside tiny props like faux spiders or mini baskets, this piece turns into a delightful display that’s just as fun for kids as it is for adults who love a touch of festive craftiness.
Materials Needed
- 1 wooden frame (approx. 8″ x 10″)
- Thick twisted white rope, 12-15 strands
- Black felt or cardstock for eyes and mouth
- Blush paint or pastel
- Glittery silver ribbon
- Patterned paper with ghost print
Step-by-step Guide
Step 1: Line your frame with the ghost-patterned paper as a backdrop.
Step 2: Cut rope strands to desired length and glue them in a tapered ghost shape.
Step 3: Add felt eyes and mouth, then lightly dab blush onto the cheeks.
Step 4: Tie and attach a silver glitter bow to complete the look.
#5. Clay Handprint Ghost in Vintage Frame
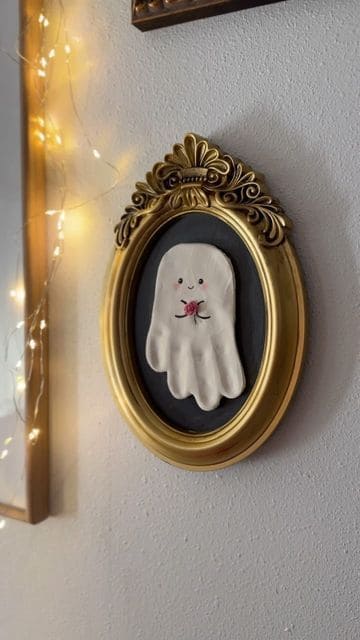
This framed ghost is actually shaped from a child’s handprint, capturing a sweet moment in time and turning it into a spooky-cute keepsake.
The soft ghost form, paired with rosy cheeks and a tiny bow, brings a gentle, storybook charm to your wall. Hung in a vintage-style frame, it feels like a haunted portrait straight out of a cozy Halloween fairytale.
Whether you’re crafting with little ones or just love adding personal touches to your seasonal decor, this project is both simple and sentimental.
Materials Needed
- Air-dry clay (white, about ¼ inch thick)
- Oval vintage-style frame (approx. 6″×8″)
- Black cardstock or painted wood backing
- Acrylic paint (black, pink, red)
- Mini red bow
- Craft glue or hot glue gun
- Rolling pin & butter knife
Step-by-step Guide
Step 1: Roll out a slab of air-dry clay to about ¼ inch thick. Then press a small hand into the clay to create a print, then cut around it in a ghost-like shape using a butter knife.
Step 2: Let the clay dry fully (usually 24-48 hours, depending on brand and thickness). Once hardened, gently sand any rough edges if needed.
Step 3: Paint on eyes, rosy cheeks, and a sweet smile. Now, add tiny accents like a pink tongue or soft blush to give it personality.
Step 4: Mount a black background inside your frame. You can use cardstock, fabric, or even painted cardboard.
Step 5: Glue the ghost in the center and attach the tiny bow near the neck area.
#6. Cottage Garden Ghost Frame
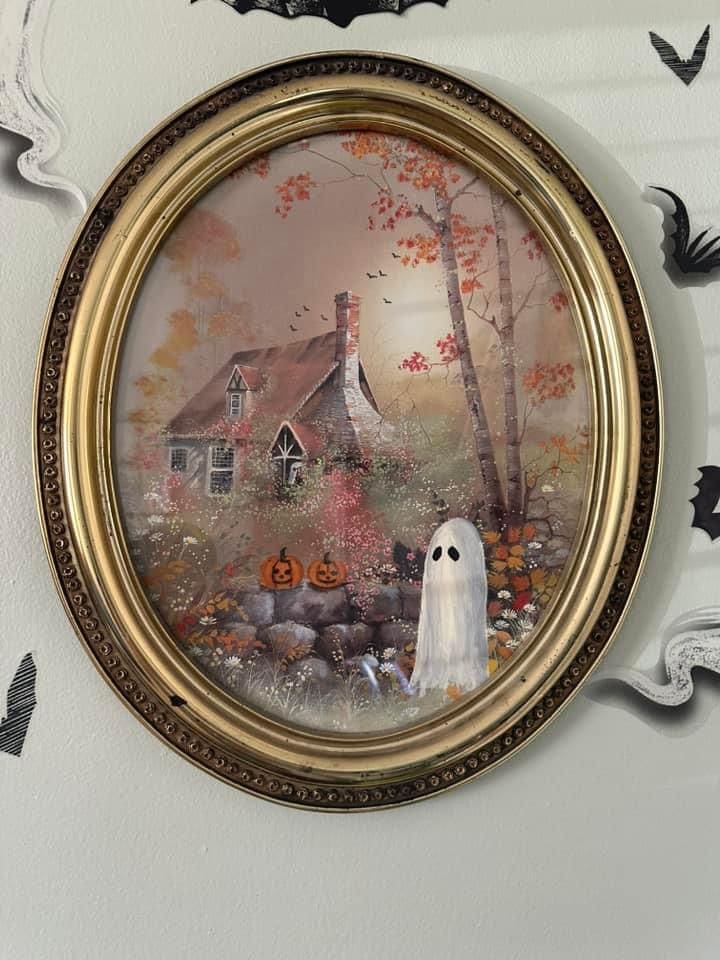
It’s the kind of scene you might dream about on a crisp October evening, a little cottage tucked among autumn trees, pumpkins smiling by the stone wall, and just beyond them, a curious ghost drifting through the garden.
This project is perfect if you want a touch of Halloween magic without losing that cozy, storybook charm.
You’ll be painting right onto a thrifted print, letting the original art peek through while adding your own whimsical twist.
Materials Needed
- 1 oval or round vintage frame (about 8″×10″)
- Thrifted landscape or cottage art print
- Acrylic paints (white, black, orange, green)
- Fine-tip and medium paintbrushes
- Painter’s palette or small dish
- Sealant spray (optional)
Step-by-step Guide
Step 1: Clean your frame and art print gently, making sure there’s no dust.
Step 2: Using a fine brush, paint your ghost shape over a spot in the scene where it feels natural like it’s part of the story.
Step 3: Add two black oval eyes, then bring in small details like pumpkins or bats to enhance the Halloween feel.
Step 4: Let the paint dry fully before spraying with sealant to preserve your work.
Step 5: Hang it where you can see it often, it’s a tiny window into a world where autumn never ends.
#7. Mini Ghost Portrait Collection
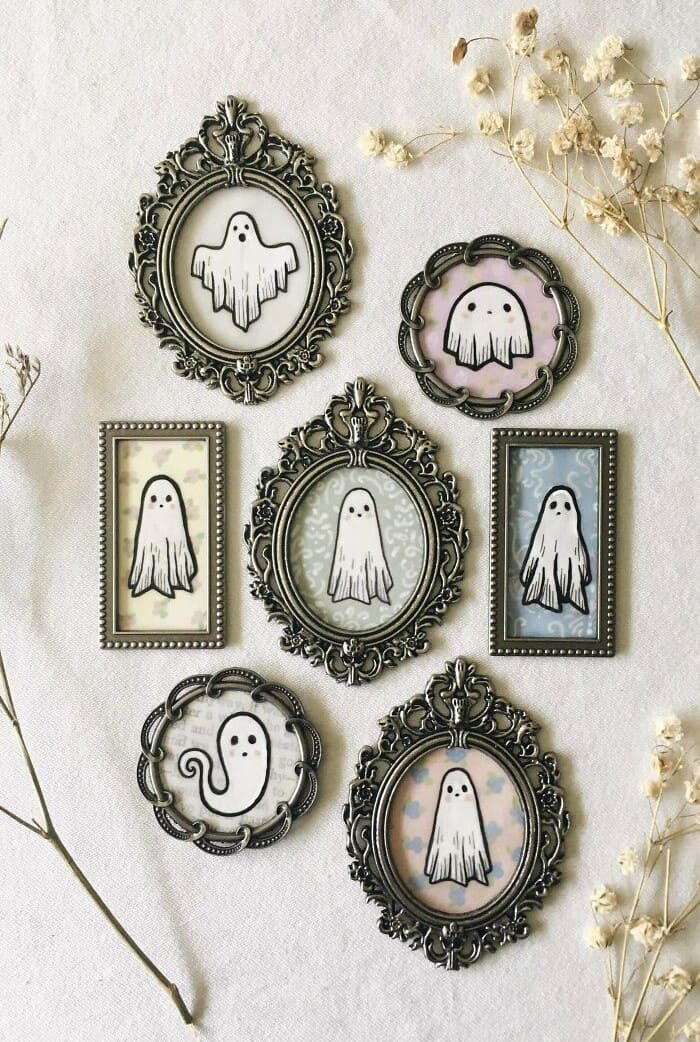
This whimsical set of mini ghost portraits turns Halloween décor into a charming little art gallery. Each ghost illustration has its own personality with some sweet, some shy, one even looking a bit mischievous.
The intricate antique-style silver frames elevate the simple black-and-white drawings, while the soft pastel and patterned backgrounds add a dreamy, vintage feel.
Arranging them together creates a playful yet elegant display perfect for a mantel, entryway, or gallery wall.
Materials Needed
- Miniature ornate silver frames (various shapes)
- Printed or hand-drawn ghost illustrations
- Decorative scrapbook paper
- Glue or double-sided tape
- Scissors
Step-by-step Guide
Step 1: Choose or draw a set of small ghost designs. Then cut background paper to fit each frame.
Step 2: Attach ghost images to the backgrounds.
Step 3: Finally, secure inside frames and arrange as a group for display.
#8. Ghost Bath Time Painting
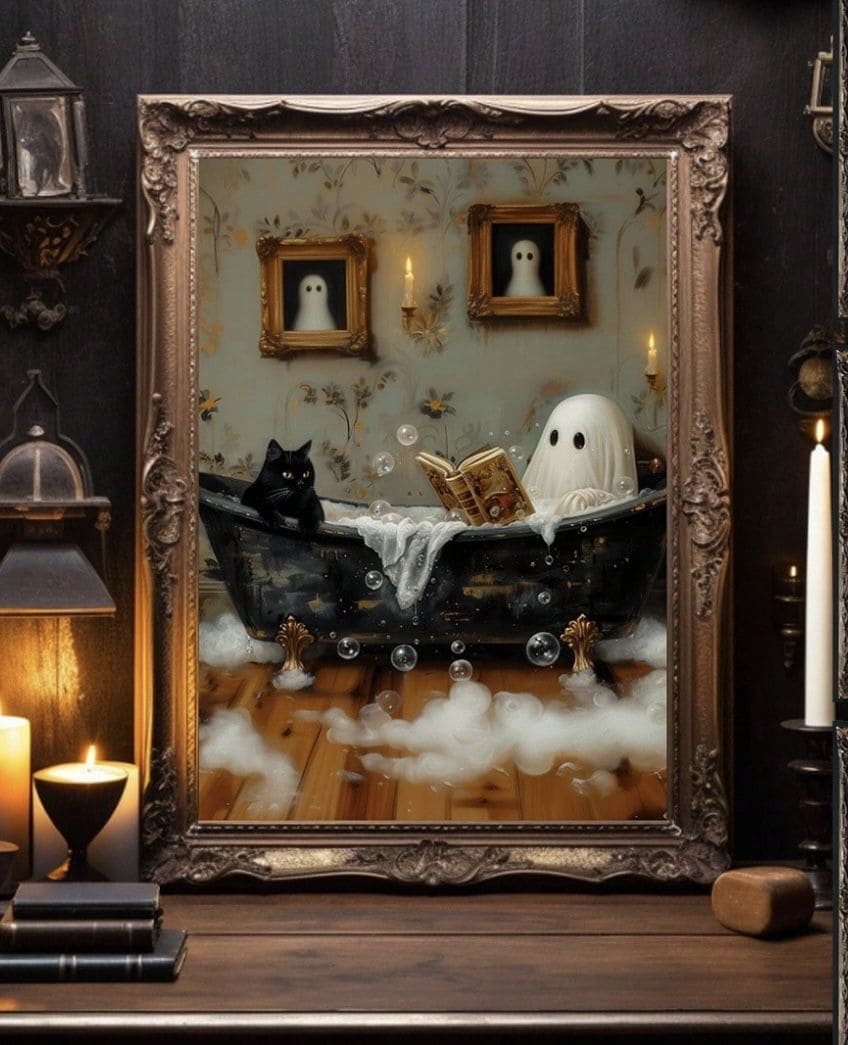
There’s something irresistibly charming about this scene having a little ghost, cozy in a vintage clawfoot tub, surrounded by bubbles and soft candlelight.
With a book in hand and a curious black cat perched nearby, the moment feels both magical and peaceful. The soft wallpaper, adorned with framed ghost portraits, adds a playful, old-world touch, while warm wooden floors peek out from beneath drifting suds.
The gold-framed painting captures a story in motion, as if you’ve stumbled upon a private moment in a haunted house where the spirits enjoy quiet nights too.
Materials Needed
- 1 ornate gold or bronze frame (approx. 12″ x 16″)
- Canvas panel or art print
- Acrylic or oil paints in warm and neutral tones
- Fine detail brushes
Step-by-step Guide
Step 1: Paint or print the scene with warm candlelit tones, focusing on small whimsical details.
Step 2: Add highlights to bubbles and the ghost’s sheet to give texture and life.
Step 3: Frame the finished piece in an ornate frame for a vintage feel.
Step 4: Place it on a mantel or side table alongside candles for maximum cozy-spooky effect.
#9. Candlelit Ghost Portrait
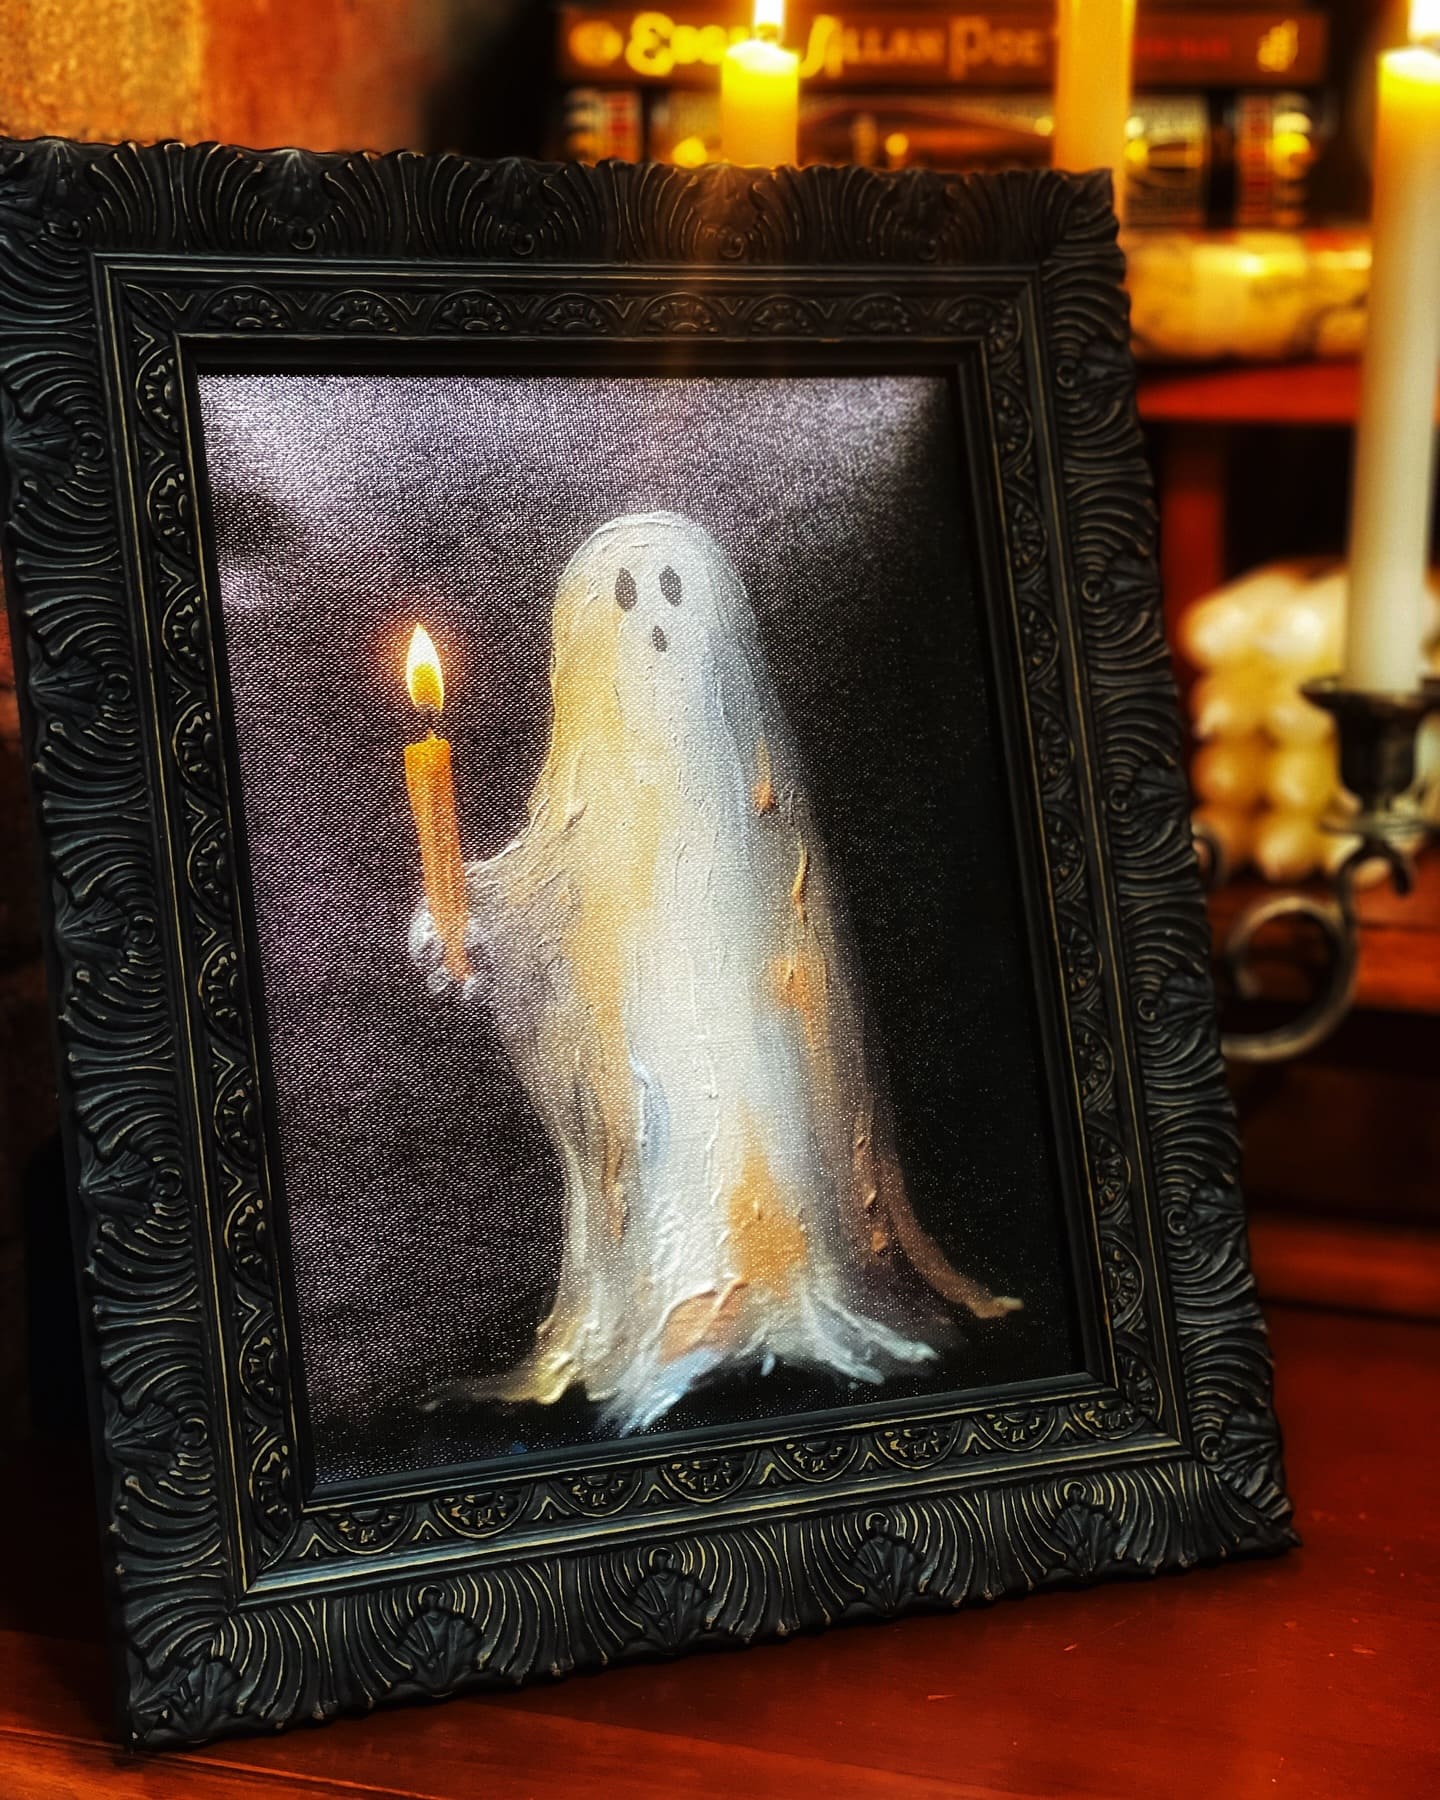
This haunting yet gentle ghost carries a single flickering candle, as if guiding you through a forgotten hallway.
Painted with soft, sweeping strokes, the white sheet shimmers with warm golden highlights from the flame. The dark, textured background makes the light glow even more dramatically, while the ornate black frame adds to its gothic charm.
Placed near real candles or vintage books, it creates the perfect moody Halloween vignette, one that feels like a scene straight from a Victorian ghost story.
Materials Needed
- Ornate black picture frame (approx. 8″ x 10″)
- Canvas or high-quality print of ghost painting
- Acrylic paints in white, cream, gold, and black (if painting)
- Paintbrushes
Step-by-step Guide
Step 1: Select or paint a ghost holding a candle on canvas.
Step 2: Highlight the candlelight with warm tones for a glowing effect.
Step 3: Place in an ornate black frame for a gothic finish.
Step 4: Display near real candles to enhance the atmospheric glow.
#10. Hand-in-Hand Ghosts in a Misty Field
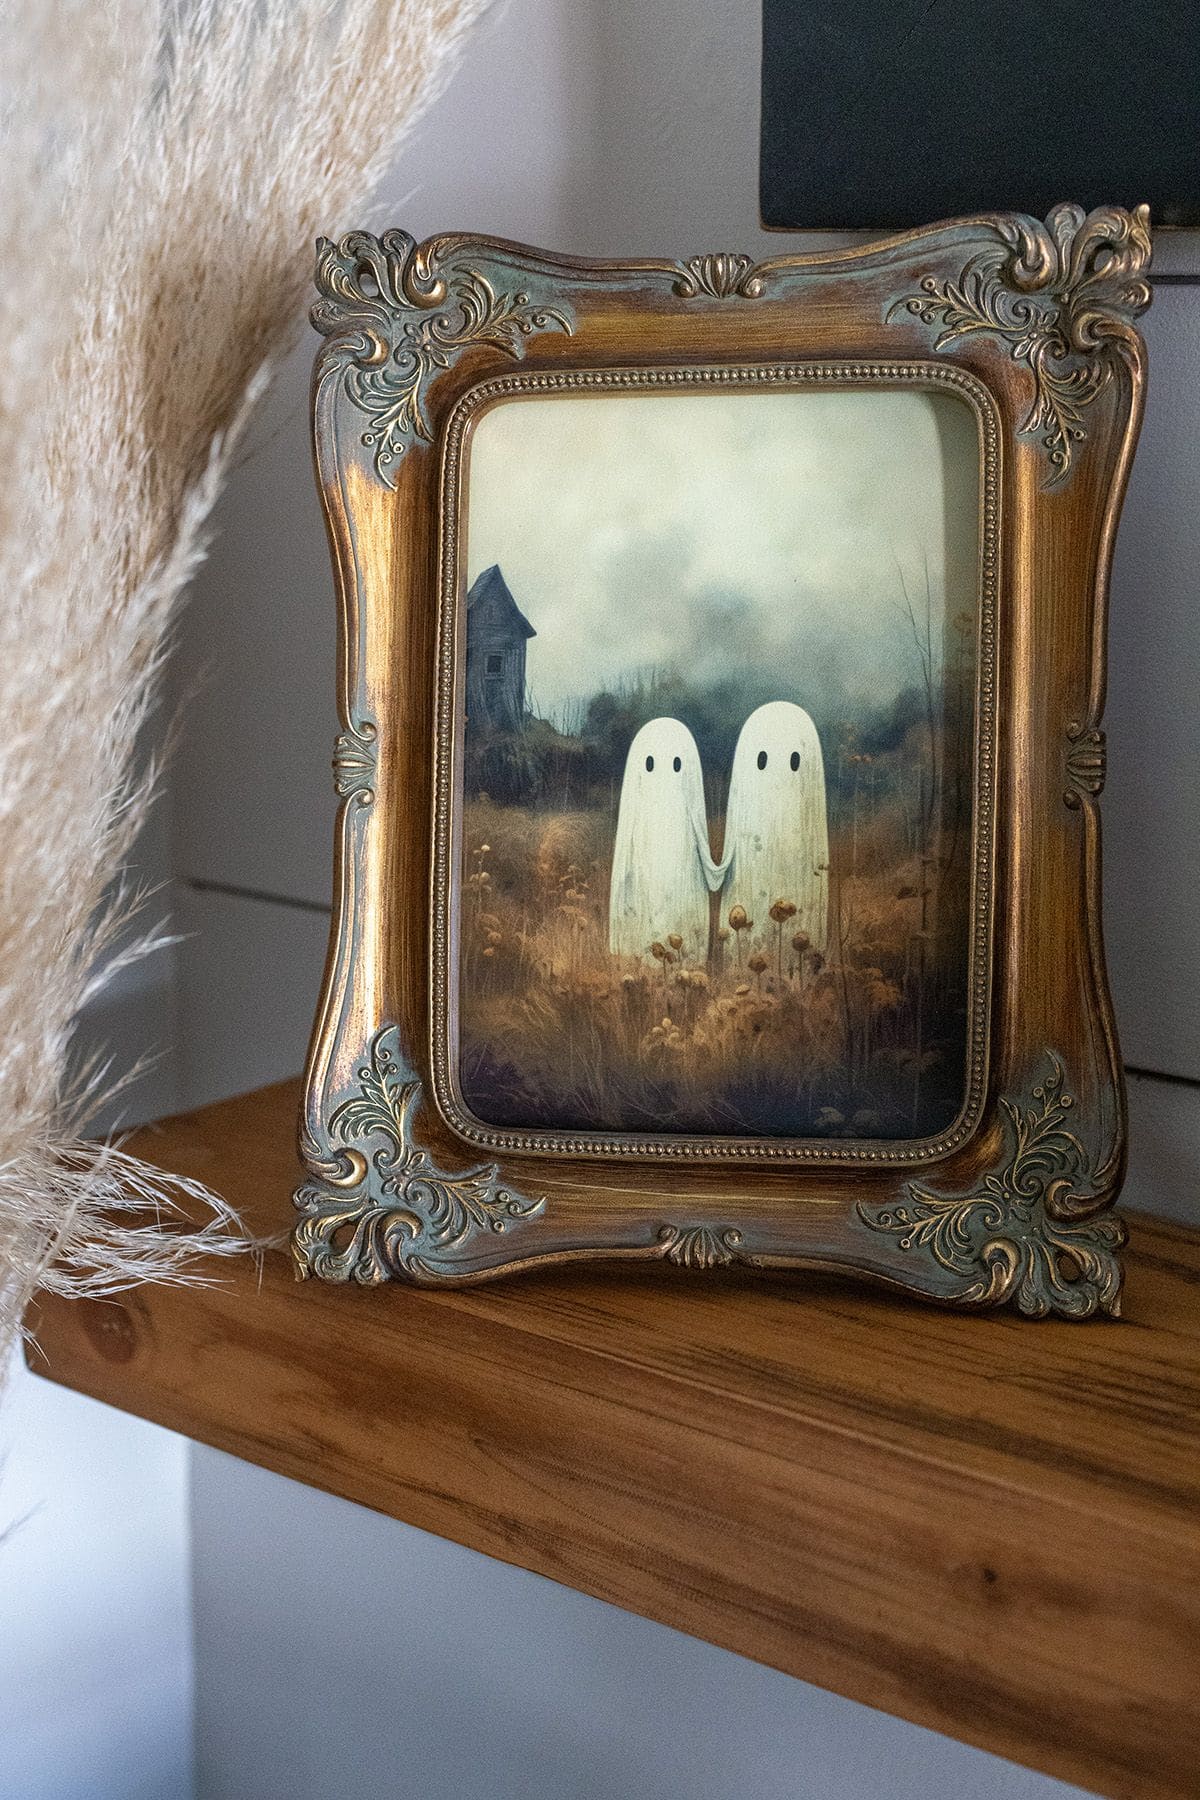
There’s something hauntingly tender about this piece. Two small ghosts stand side by side in a field of golden-brown wildflowers, their hands clasped together as if braving the misty air together.
Behind them, an old, shadowy house looms in the fog, its presence adding an eerie layer to the quiet intimacy of the scene.
Moreover, the muted, earthy palette draws you in, creating a feeling that’s equal parts warmth and melancholy. The ornate bronze-toned frame enhances the timeless quality.
Materials Needed
- 1 ornate antique-style frame (approx. 12″ x 16″)
- Canvas or thick art paper
- Acrylic or oil paints in muted earth tones
- Fine detail brushes
Step-by-step Guide
Step 1: Paint a misty background with soft blending to create depth and atmosphere.
Step 2: Add the ghost figures in clean white, ensuring their shapes feel soft and flowing.
Step 3: Paint the wildflowers in subtle shades for a natural look.
Step 4: Finally, frame in an ornate bronze or gold-toned frame for a vintage finish.
Read more: 24 Adorably Spooky Halloween Ghost Crafts to Try This Season
#11. Pretty in Pink Ghost Painting
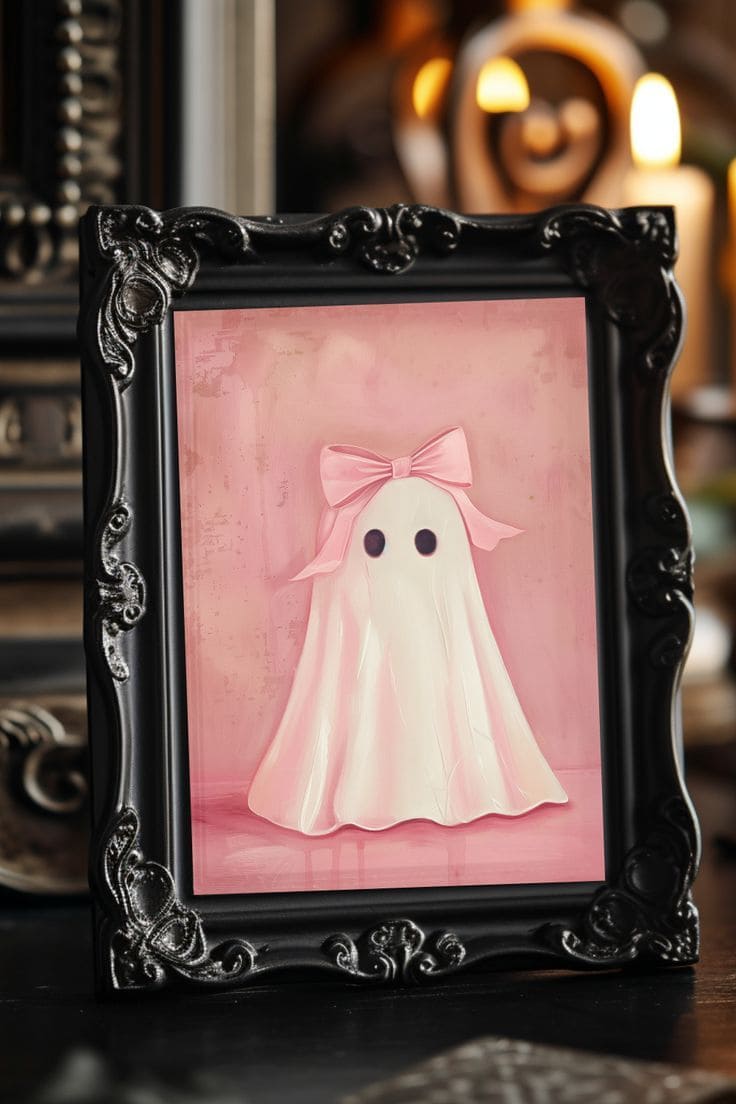
Wow, this little ghost proves that spooky can be absolutely adorable. Draped in a soft, flowing sheet and topped with an oversized pink bow, it feels like a whimsical mix of Halloween charm and sweet vintage style.
The pastel background adds a gentle, romantic atmosphere, making it perfect for a softer seasonal look or even year-round wall art.
Framed in an ornate black frame, the contrast between the gothic detailing and the playful subject creates a captivating balance. It’s the kind of piece that catches eyes and starts conversations.
Materials Needed
- 1 ornate black picture frame (approx. 8″ x 10″)
- Canvas or thick art paper
- Acrylic or oil paints in pink, cream, and black
- Fine tip brush
Step-by-step Guide
Step 1: Paint a soft pink background with subtle shading for depth.
Step 2: Create the ghost shape with flowing, rounded folds for a fabric-like effect.
Step 3: Add the oversized bow in a matching pink tone, keeping strokes smooth for a satin look.
Step 4: Frame the artwork in an ornate black frame to enhance the contrast and elegance.
#12. Candlelit Ghost Painting
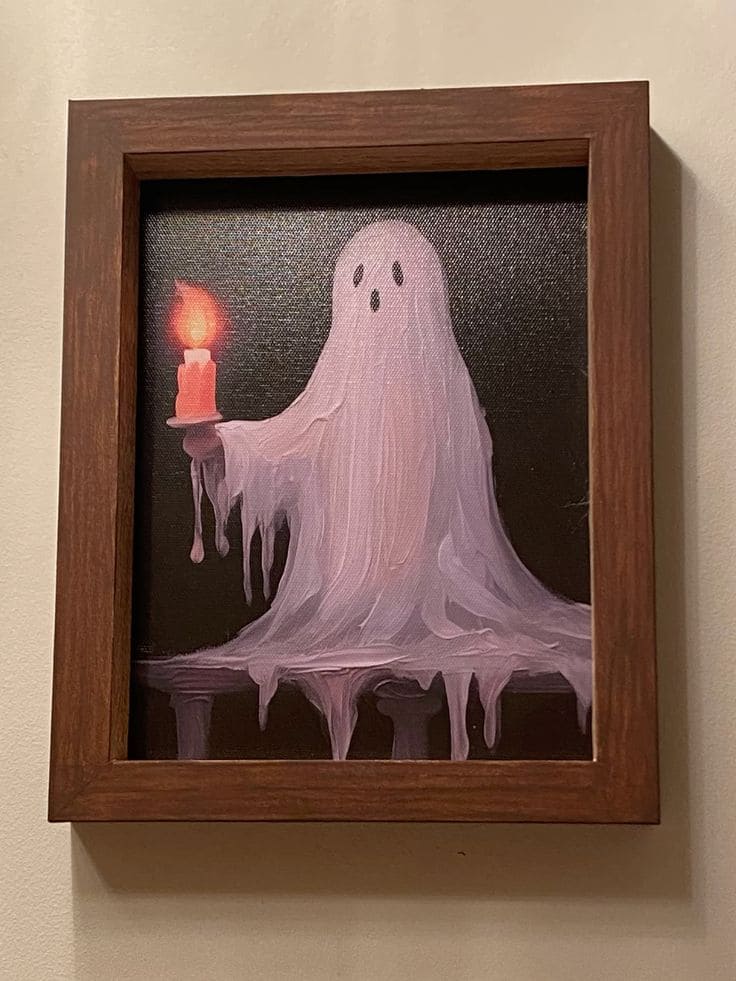
This piece captures a moment that feels straight out of an old ghost story. A spectral figure, painted in soft, flowing lilac strokes, stands draped in a sheet-like form, holding a glowing red candle.
The wax drips down its sides, mirroring the way the ghost’s own form melts and trails over a dark wooden table.
Against a deep black background, the flame’s warm glow casts just enough light to highlight the delicate folds of the ghost’s shape.
Materials Neede
- 1 wooden frame (8″ x 10″)
- Canvas panel
- Acrylic paints (black, lilac, white, red, orange)
- Detail paintbrushes
Step-by-step Guide
Step 1: Paint the canvas black for the background and let dry.
Step 2: Use lilac and white tones to create the ghost’s flowing form, adding soft highlights.
Step 3: Paint the candle with red and orange hues, blending to create a warm flame.
Step 4: Add melting wax details to both the candle and the table for depth. Once dry, place in the wooden frame and hang.
#13. Minimalist Ghost Frame
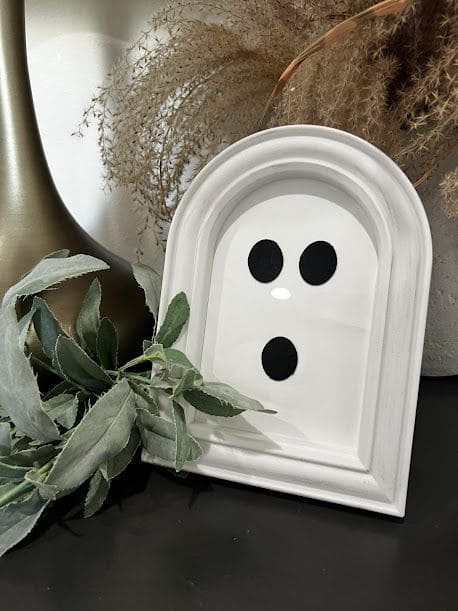
Just three black ovals and a touch of white create a charming, expressive face that says “boo” without needing words.
Framed in a soft arched window-style frame, this ghost feels clean, modern, and almost sculptural. It’s the kind of piece that blends perfectly with neutral Halloween decor or adds a fun contrast to farmhouse or boho-inspired spaces.
You can finish this in less than 15 minutes, but the effect is surprisingly striking. It whispers Halloween in the most tasteful way.
Materials Needed
- Small arched or rounded frame (approx. 5″×7″)
- White cardstock, foam board, or painted wood insert
- 3 black felt or vinyl circles (2 for eyes, 1 for mouth)
- White paint pen
- Craft glue or adhesive dots
- Scissors or circle punch
Step-by-step Guide
Step 1: Paint or prepare your background surface in solid white and let it dry completely before adding anything else.
Step 2: Cut out three simple black circles including two for eyes, one for a round open mouth. Then arrange them in a ghostly face near the top center.
Step 3: Add a tiny white dot above the mouth or on one eye to give it a little personality and dimension.
Step 4: Glue the pieces in place, then insert the design back into the frame.
Step 5: Style it with greenery, dried grasses, or candles to complement its understated charm.
#14. Hand-Painted Ghost Frames
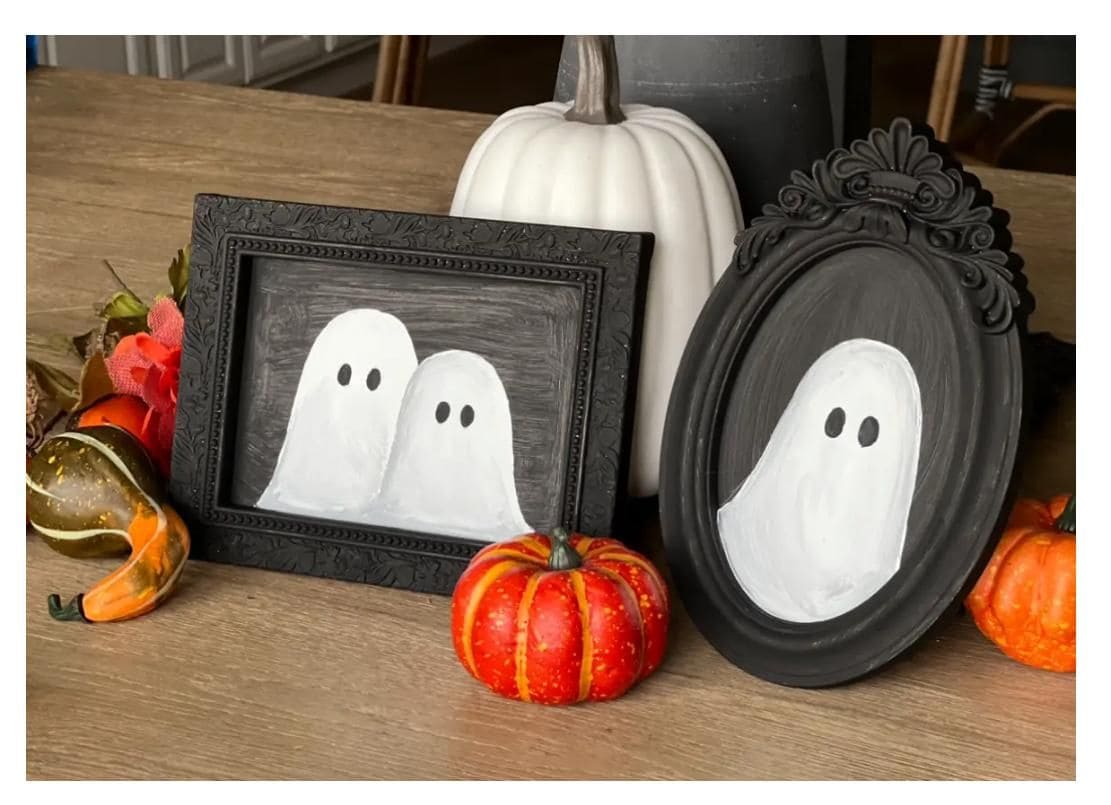
Sometimes the simplest things carry the most charm. These hand-painted ghost silhouettes prove just that with two little figures with wide eyes and a soft white shape, standing quietly in black vintage frames.
You don’t need fancy tools here, just a few strokes of paint and a touch of imagination.
This project is perfect for a cozy craft afternoon and makes a delightful addition to your fall vignette. Paired with mini pumpkins or dried leaves, your ghostly gallery will feel playful yet timeless.
Materials Needed
- Black vintage-style picture frames (any size or shape)
- Black acrylic paint
- White acrylic paint
- Small round paintbrush and flat brush
- Palette or disposable plate
- Cardstock, cardboard, or MDF backing
- Pencil (optional)
Step-by-step Guide
Step 1: Remove the glass from your frames and paint the backing black. Let it dry completely, this will make the ghosts pop.
Step 2: Use a flat brush to gently paint soft, oval ghost shapes with white paint. Don’t worry about making them perfect as the charm is in the imperfections.
Step 3: Add small black dots for eyes. Two simple dots are all it takes to bring your ghosts to life.
Step 4: Once everything is dry, reassemble the frame without the glass and place it among your fall decor.
#15. Rustic Neutrals Ghost Wall Art
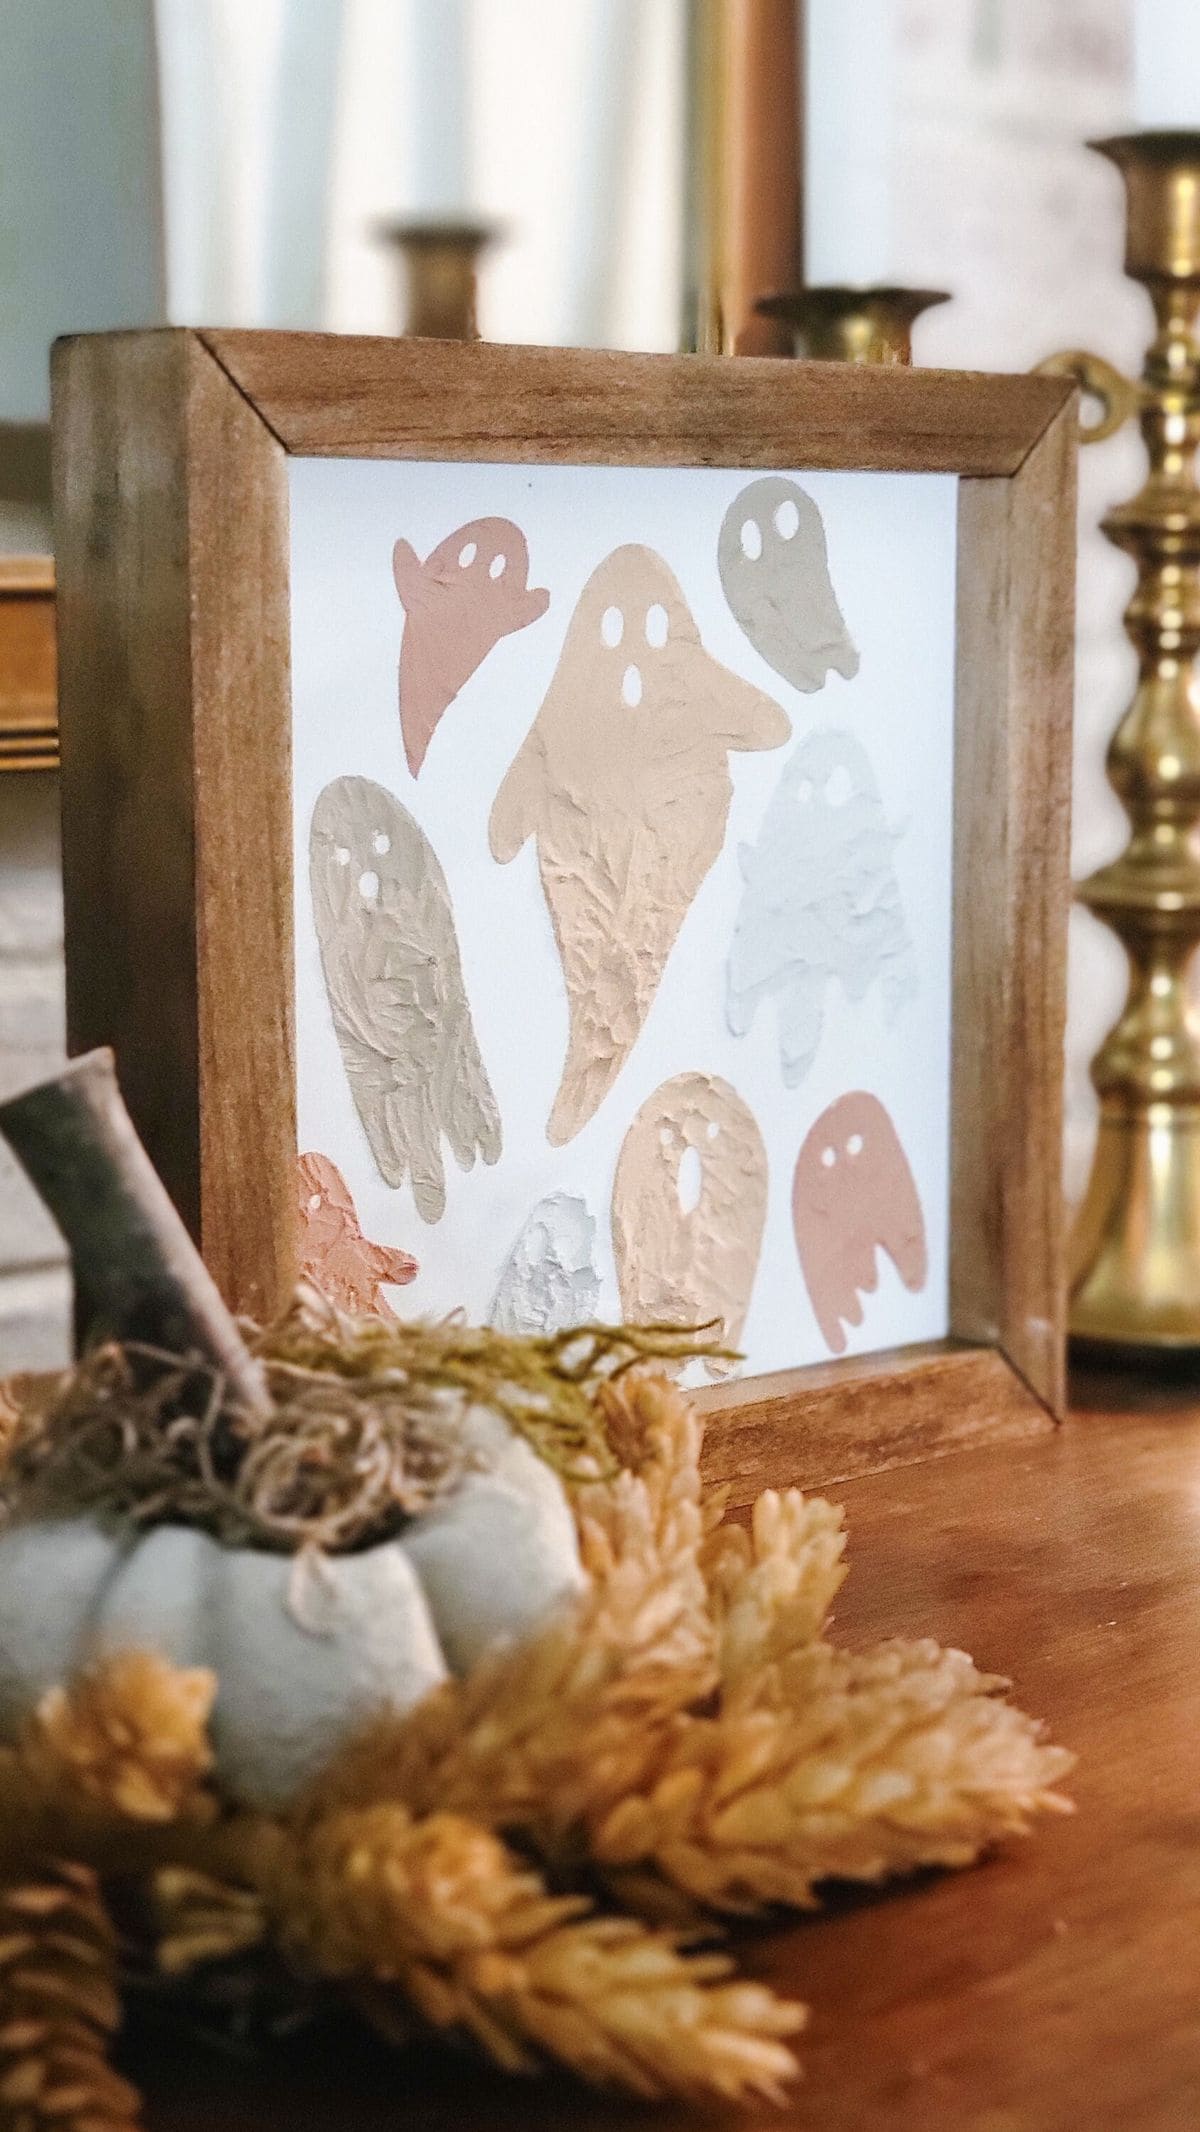
This ghost artwork blends seasonal charm with cozy, farmhouse style. A simple white background sets the stage for a playful mix of hand-painted ghosts in soft neutral shades.
You can see each ghost has a slightly different shape and personality, with small white eyes peeking out as if caught mid-float. The textured brushstrokes give the figures depth, adding a handmade, organic feel.
Framed in a natural wood box frame, it’s the perfect understated Halloween accent for a mantel, shelf, or entryway.
Materials Needed
- 1 wooden box frame (10″ x 10″)
- White cardstock or canvas board
- Neutral acrylic paints (beige, taupe, blush, gray)
- Small detail brush
- White paint for eyes
Step-by-step Guide
Step 1: Cut cardstock or canvas to fit your wooden frame. Then paint ghost shapes in various neutral tones, varying their sizes and angles.
Step 2: Add small white eyes to each ghost for a playful expression.
Step 3: Let the paint dry completely, then insert the artwork into the frame.
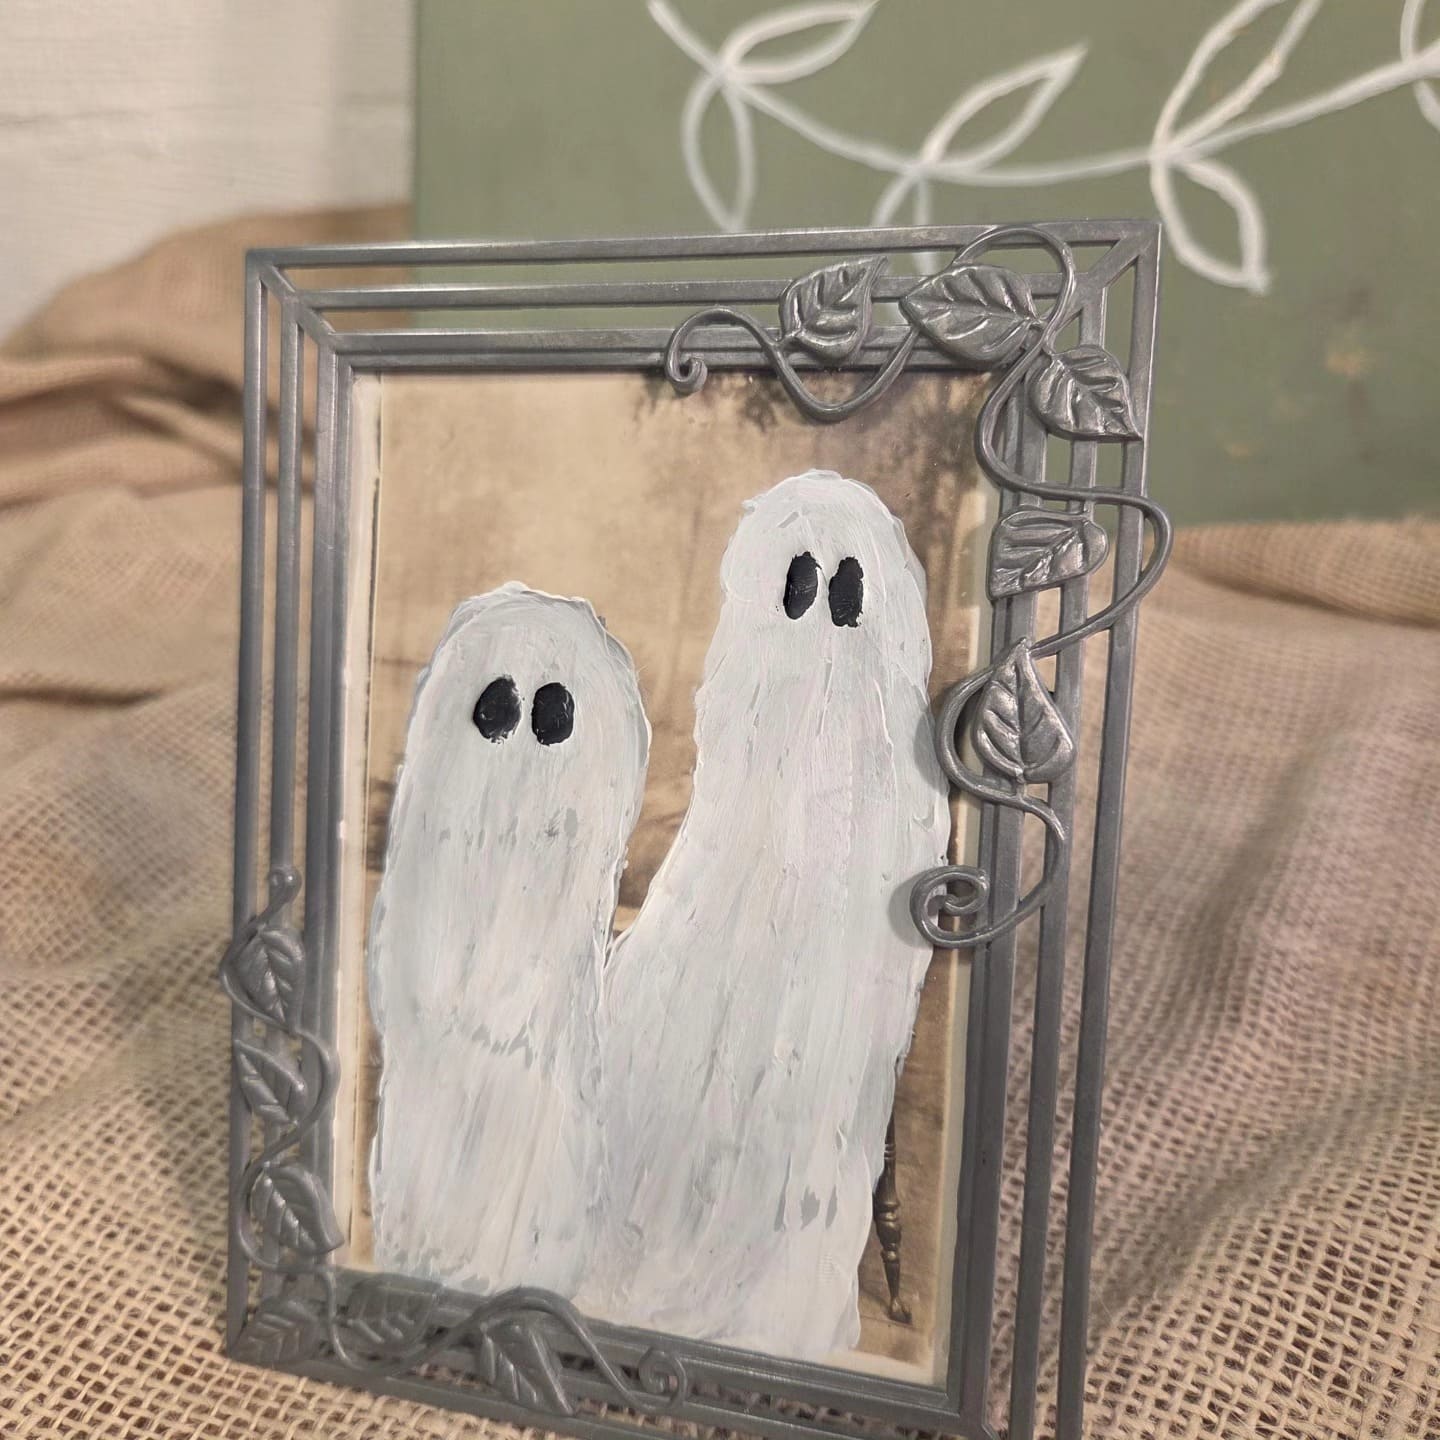
#16. Hand-Painted Ghost Duo Frame
#17. Haunted Portrait Mini Gallery
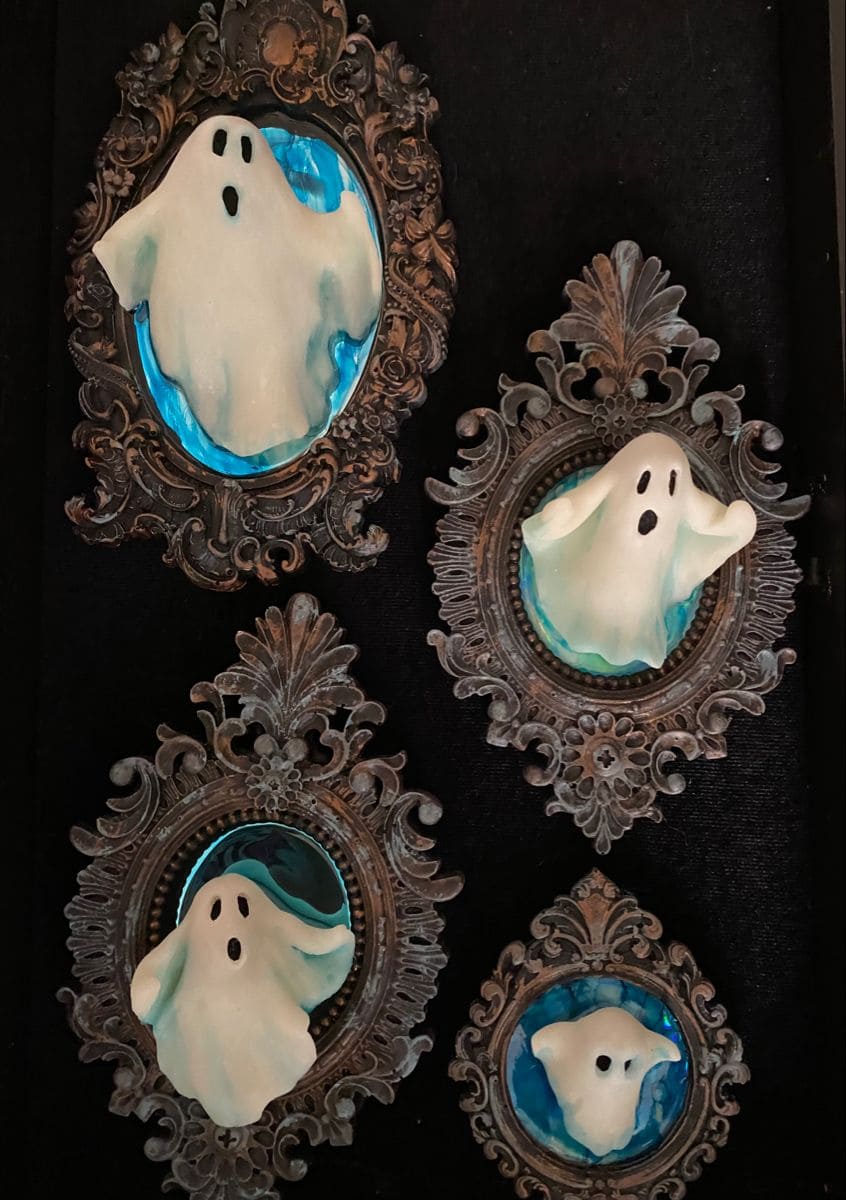
Imagine walking down a creaky hallway and spotting a wall of tiny, ornate frames, each one holding a ghost caught mid-boo!
This project brings that eerie gallery vibe right into your home. The mix of vintage frames and softly glowing blue backdrops makes each spirit feel like it’s peeking into our world for just a moment.
Materials Needed
- 4-6 ornate mini frames (each around 3″-6″)
- Air-dry clay or polymer clay
- White and black acrylic paints
- Blue or teal craft paint
- Hot glue gun and sticks
- Small paintbrushes
Step-by-step Guide
Step 1: Remove any existing photo or glass from your frames and clean them.
Step 2: Shape small ghost figures from clay, give them movement in their arms so each looks unique.
Step 3: Once dry, paint the ghosts white, add black eyes, and let them set.
Step 4: Paint the backing board of each frame in blue or teal for that ghostly glow.
Step 5: Glue your ghosts in place, then hang your mini haunted gallery where guests can stumble upon it if they dare.
#18. Floating Cheesecloth Ghost in Gold Frame
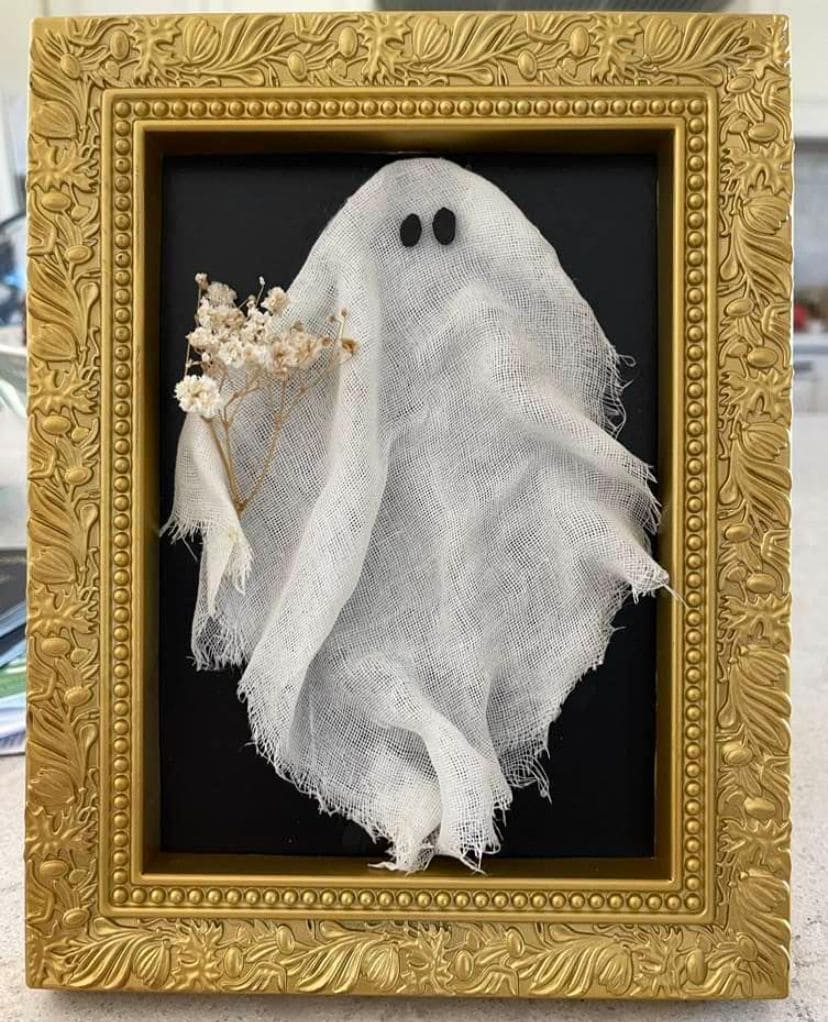
Some ghosts don’t haunt, they drift. This delicate framed spirit has the airy, romantic look of something that wandered in from another time.
Made from simple cheesecloth and posed against a moody black background, this ghost captures that beautiful contrast between softness and spook.
Additionally, the little dried flower tucked under its edge is the final whisper of charmlike your ghost brought a bouquet from the afterlife.
Materials Needed
- 1 piece of cheesecloth (approx. 12″×18″)
- Black cardstock or matte board backing
- Ornate gold picture frame (around 8″×10″)
- Craft glue or hot glue gun
- 2 black felt dots or buttons (for eyes)
- Small dried flower or sprig (baby’s breath works beautifully)
- Scissors
Step-by-step Guide
Step 1: Cut your cheesecloth into a ghostly shape, something flowy, uneven, and soft at the edges. Let the fabric fray naturally; it adds character.
Step 2: Glue the black backing onto your frame’s insert, then lay the ghost shape gently on top, letting it float slightly off the surface in some places.
Step 3: Attach the eyes using tiny felt ovals or black buttons. You can position them toward the top for that classic ghostly gaze.
Step 4: Tuck a dried flower under one edge of the cheesecloth, as if your little phantom is gently carrying it.
Step 5: Secure the art into the frame, and display it proudly.
Tip: If the cheesecloth is too wrinkled or stiff, lightly mist it with water and shape it while drying for that perfect flowy look.
#19. Rustic Fabric Ghost with Pumpkin Frame
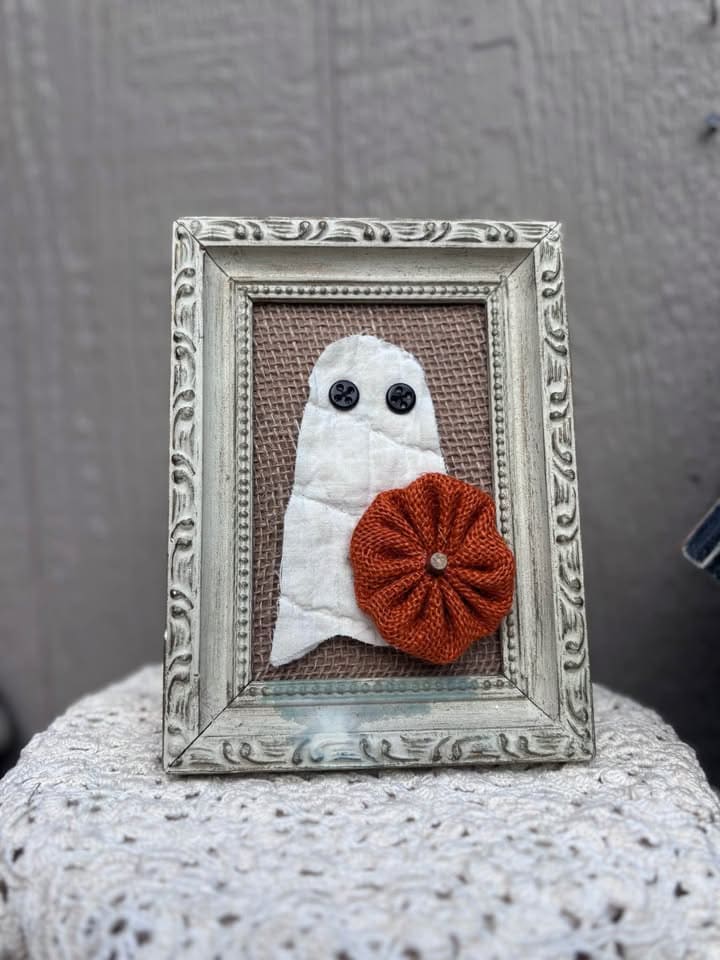
This little ghost feels right at home in a farmhouse Halloween setting. Made from soft quilted fabric with button eyes, it has a charming handmade personality.
The textured burlap background gives it that warm, rustic appeal, while the deep orange fabric pumpkin adds the perfect autumn pop.
Bonus, framed in distressed white wood with vintage-style carvings, it looks like a treasure you might find at a cozy country fair.
Materials Needed
- 1 vintage-style frame (4″ x 6″)
- Small piece of quilted white fabric
- 2 black buttons (½” diameter)
- Burlap fabric
- Orange fabric (3″ diameter)
- Small button
- Hot glue gun and glue sticks
Step-by-step Guide
Step 1: Cut your burlap to fit inside the frame as the background and glue it in place.
Step 2: Cut a small ghost shape from the quilted fabric and glue it to the center of the burlap. Then attach two black buttons for eyes.
Step 3: Create a small gathered fabric pumpkin, sew or glue a button in the center, and attach it beside the ghost.
Step 4: Reassemble the frame and display on a shelf, mantel, or entry table.
#20. Plaid Ghost Frame with Scrabble BOO
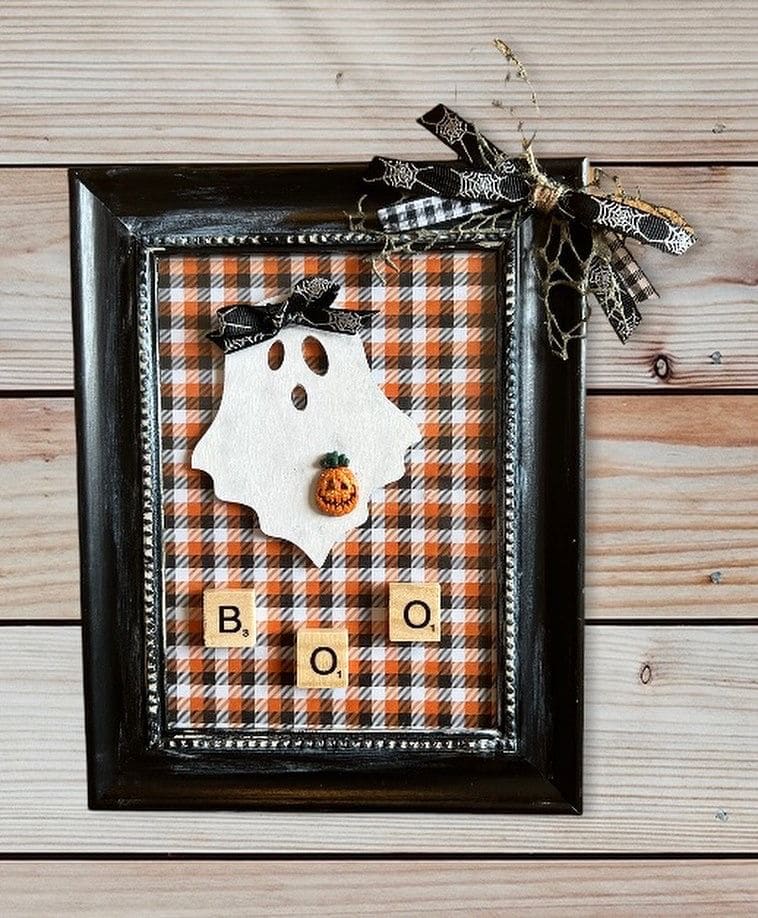
If fall had a voice, it might just shout “BOO!” in this perfectly plaid Halloween frame. This cute and quirky wall piece combines classic country charm with a touch of ghostly fun.
That gingham backdrop feels like a cozy flannel shirt, while the little ghost floats front and center with its felted pumpkin and big surprised eyes.
Whether you hang it in your entryway or prop it up on a mantel, this DIY brings warmth, wit, and a little scare but the friendly kind.
Materials Needed
- Wooden or plastic picture frame (approx. 8″×10″)
- Orange plaid scrapbook paper or fabric (cut to size)
- Ghost cutout (wood, foam, or felt)
- Mini jack-o’-lantern embellishment or button
- 3 Scrabble tiles: B, O, O
- Halloween-themed ribbons (black lace, plaid, spiderwebs)
- Hot glue gun & glue sticks
- Scissors
Step-by-step Guide
Step 1: Start by removing the glass from your frame, then cut your plaid paper or fabric to fit the backing. Then glue or tape it in place as your background.
Step 2: Glue your ghost shape in the upper center of the background. Next, add a cute pumpkin embellishment to its body and a little bow on top for flair.
Step 3: Arrange the Scrabble tiles spelling “BOO” near the bottom, either in a straight line or a slight curve. Now, glue them down carefully.
Step 4: Tie together a few Halloween-themed ribbons into a messy bow, then hot glue it to the upper corner of the frame.
Step 5: Reassemble the frame without the glass, and your festive fall ghost art is ready to shine!
Tip: You can personalize it further with your family name or add more tiles to spell “EEK,” “SPOOKY,” or a fun nickname.
#21. Minimalist Ghost with Black Cat Portrait
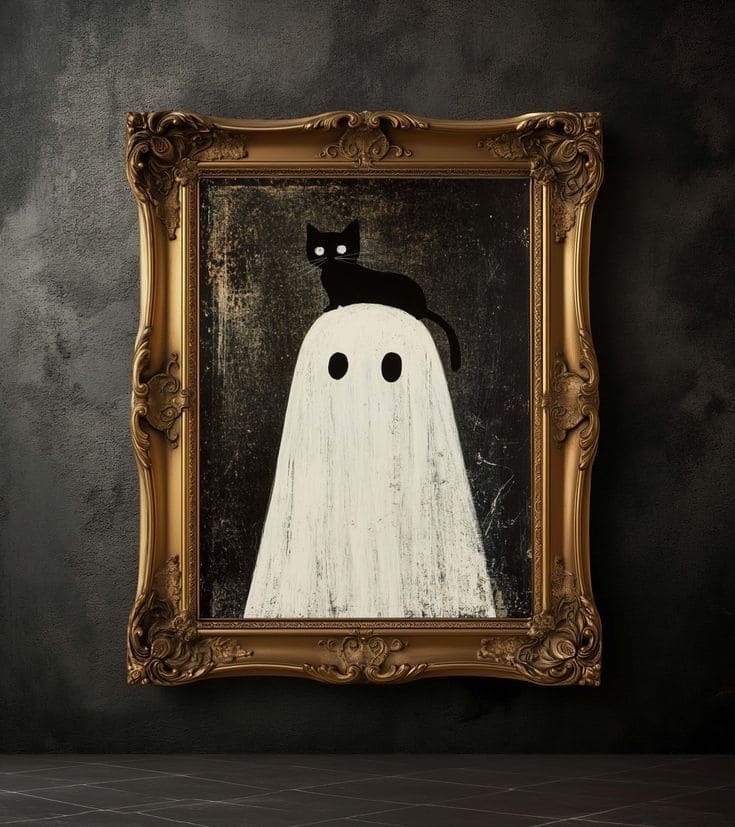
Sometimes, the simplest art leaves the deepest impression. This striking portrait captures a lone white ghost against a dark, weathered backdrop, its smooth, flowing form contrasted by the scratchy texture of the background.
Perched confidently atop its head is a sleek black cat, eyes wide and glowing. The gold ornate frame elevates the piece, adding an air of old-world grandeur to its modern, minimal design.
It’s a perfect choice if you want a Halloween touch without clutter. This pairing of ghostly innocence and feline mischief makes it a conversation starter for any moody, dramatic wall.
Materials Needed
- 1 ornate gold frame (approx. 16″ x 20″)
- Canvas or wood panel
- Acrylic paints in white, black, and textured dark brown
- Flat and detail brushes
Step-by-step Guide
Step 1: Paint the background with layered, distressed textures for an aged look.
Step 2: Create the ghost shape using smooth white strokes, letting some background show for texture.
Step 3: Add the black cat with careful attention to its piercing eyes.
Step 4: Now, you just seal in a gold ornate frame for a dramatic, gallery-worthy finish.
See more: Here’re 20 Creative Ways to Paint Your Doormat This Halloween Season
