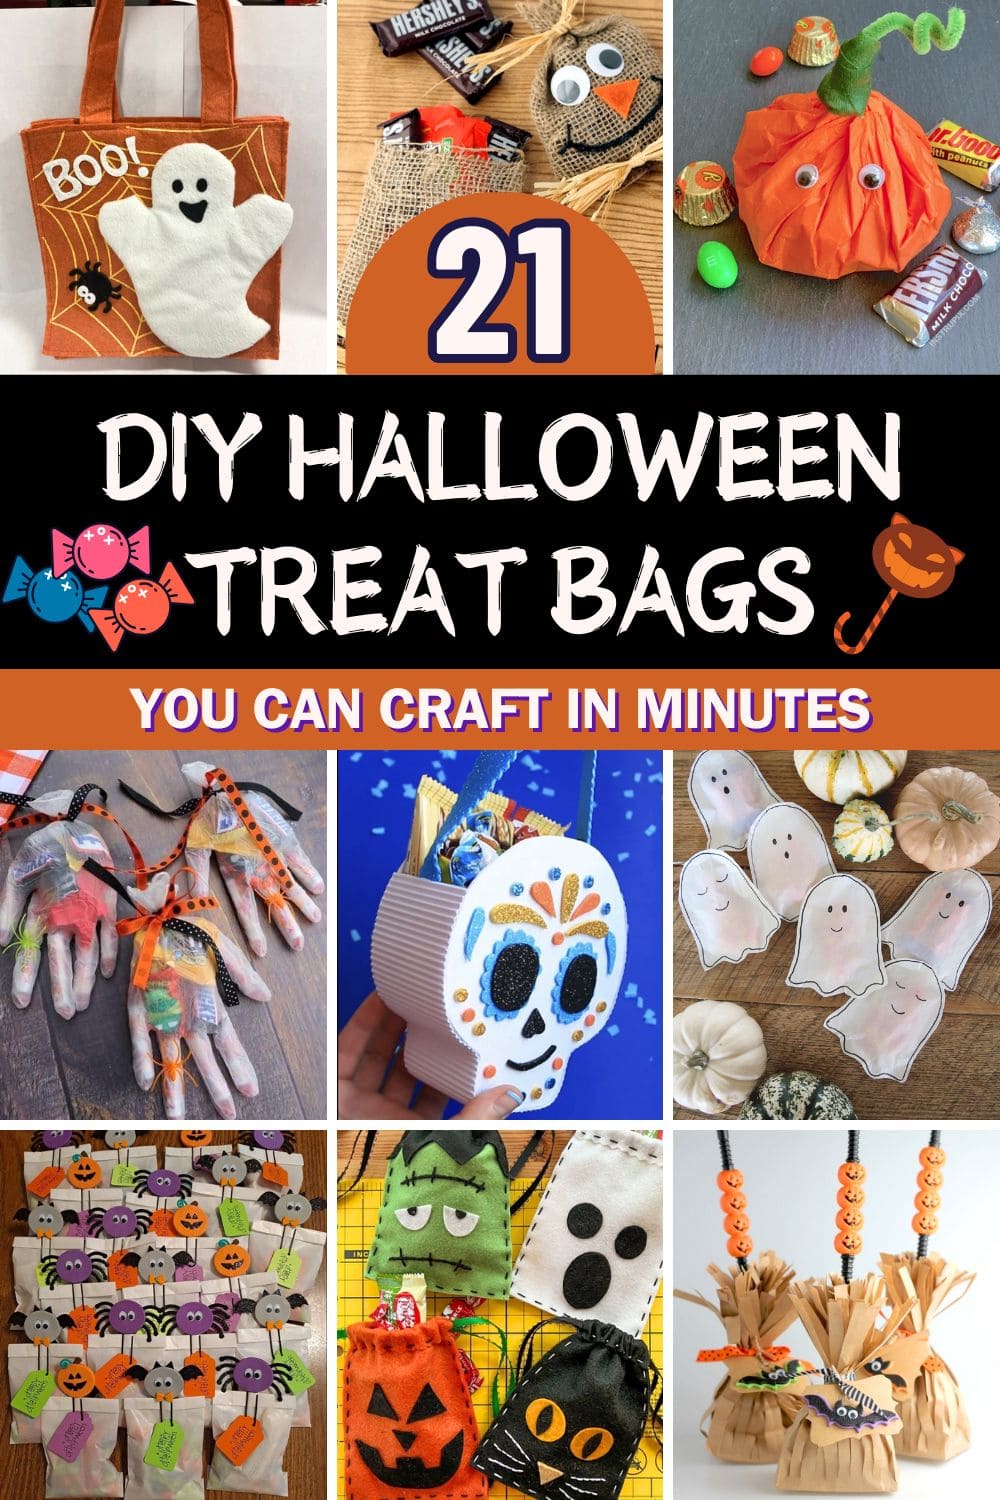
Kids light up at the sight of Halloween treat bags, especially when they’re handmade and full of charm.
If you’re looking for fun, budget-friendly ways to package up candy and goodies this spooky season, these 21 creative ideas are perfect for you.
From cute felt ghosts and fluttering bats to mummified candy bars and spider-covered pouches, these DIY bags add a magical, personal touch to your Halloween gifting.
Whether you’re prepping for a school party, neighborhood trick-or-treaters, or just making memories with your kids, these easy projects turn treats into something extra special.
See more: 26 Fun and Easy Halloween Craft Ideas for Kids and Family
#1. Creepy Candy Hands Treat Bags
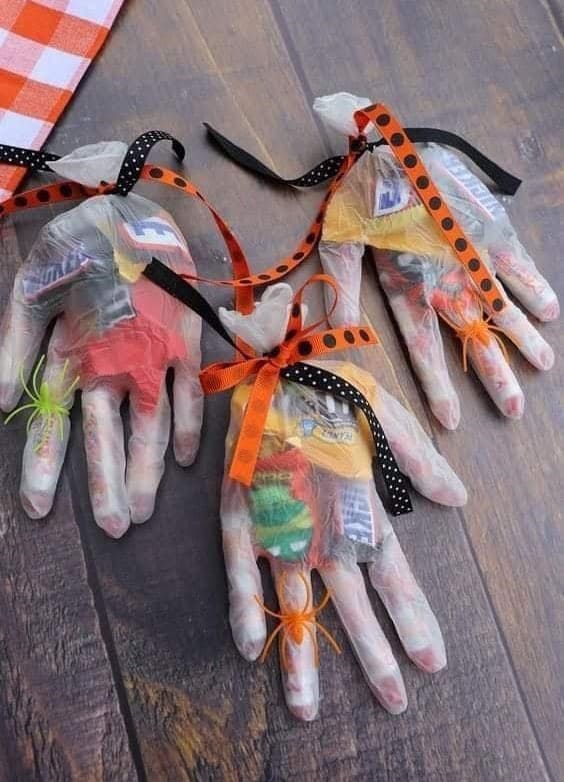
These spooky hand-shaped candy bags will have the kids giggling and grabbing for more! Shaped like ghostly hands, they’re an easy and delightful way to serve up Halloween candy with a creepy twist.
Plus, you can add in a plastic spider or two for a surprise that makes even grown-ups smile.
This craft comes together quickly, making it perfect for classroom parties or trick-or-treating night.
Materials Needed
- 10-12 clear food-safe plastic gloves (standard size)
- 30-40 mini assorted candies (mini Snickers, Starbursts, Laffy Taffy, etc.)
- 10 small plastic spiders (1-2″ wide)
- 5 lengths of Halloween ribbon (18″ each in orange, black, and polka dot styles)
- Scissors
Step-by-step Guide
Step 1: Open each plastic glove gently and slide a piece of candy into every finger to form the bones of the hand.
Step 2: Fill the palm area with a mix of small candies. Don’t overstuff, you want it to keep the hand shape.
Step 3: Add one or two small plastic spiders inside or on top of the glove for a creepy surprise.
Step 4: Gather the glove at the wrist and tie it off tightly with a piece of festive ribbon. Let the ends dangle for extra flair.
Step 5: Repeat for each treat bag and set them out in a spooky bowl or basket.
#2. Day of the Dead Skull Candy Tote
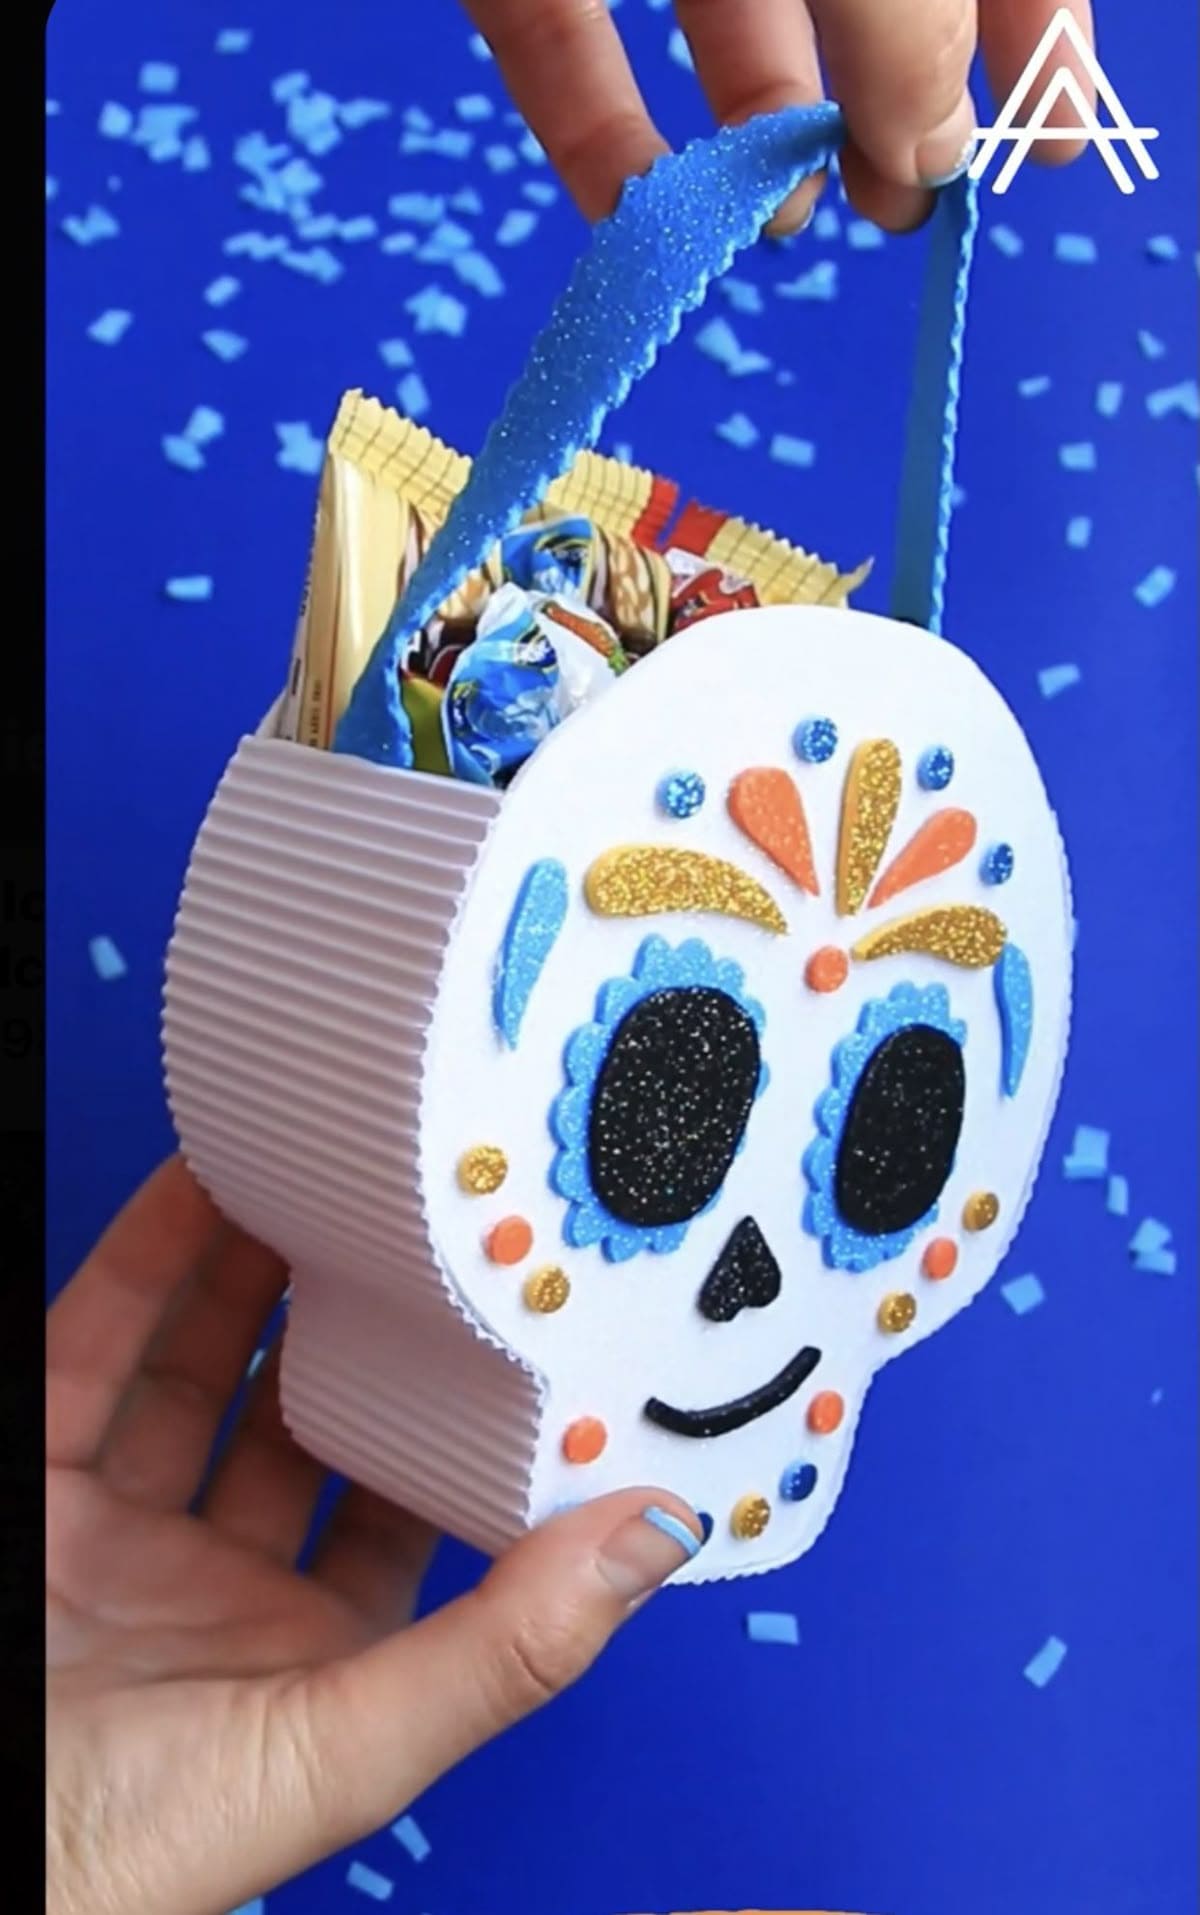
Wow, this sugar skull-inspired tote adds a bold pop of color to your Halloween or Día de los Muertos, celebrations.
With its cheerful glitter accents and playful foam textures, this little bag is perfect for handing out small treats. The rounded shape stands out from classic square totes, and the ribbed sides give it structure and style.
Materials Needed
- 2 white craft foam skull shapes (each approx. 6″ wide x 7″ tall)
- 1 corrugated foam strip (12″ long x 3.5″ tall)
- 1 foam strip for handle (11″ long x 1″ wide, preferably glitter foam)
- Self-adhesive glitter foam sheets in black, orange, gold, and blue
- Hot glue gun and glue sticks
- Scissors and pencil
Step-by-step Guide
Step 1: Cut two identical skull shapes out of thick white foam or use pre-cut pieces if available.
Step 2: Use the corrugated foam strip to form the side walls by curving it around the edges of one skull piece. Then glue along the edge carefully, following the skull’s contour.
Step 3: Once the strip is attached to the first skull, glue the second skull on the other side to create the box structure.
Step 4: Cut out decorative elements like eyes, dots, petals, and the smile from glitter foam and stick them in place on each side of the skull.
Step 5: Finally, glue the glittery handle strip to both sides at the top. Let everything cool and firm up before filling.
#3. Halloween Critter Clip Treat Bags
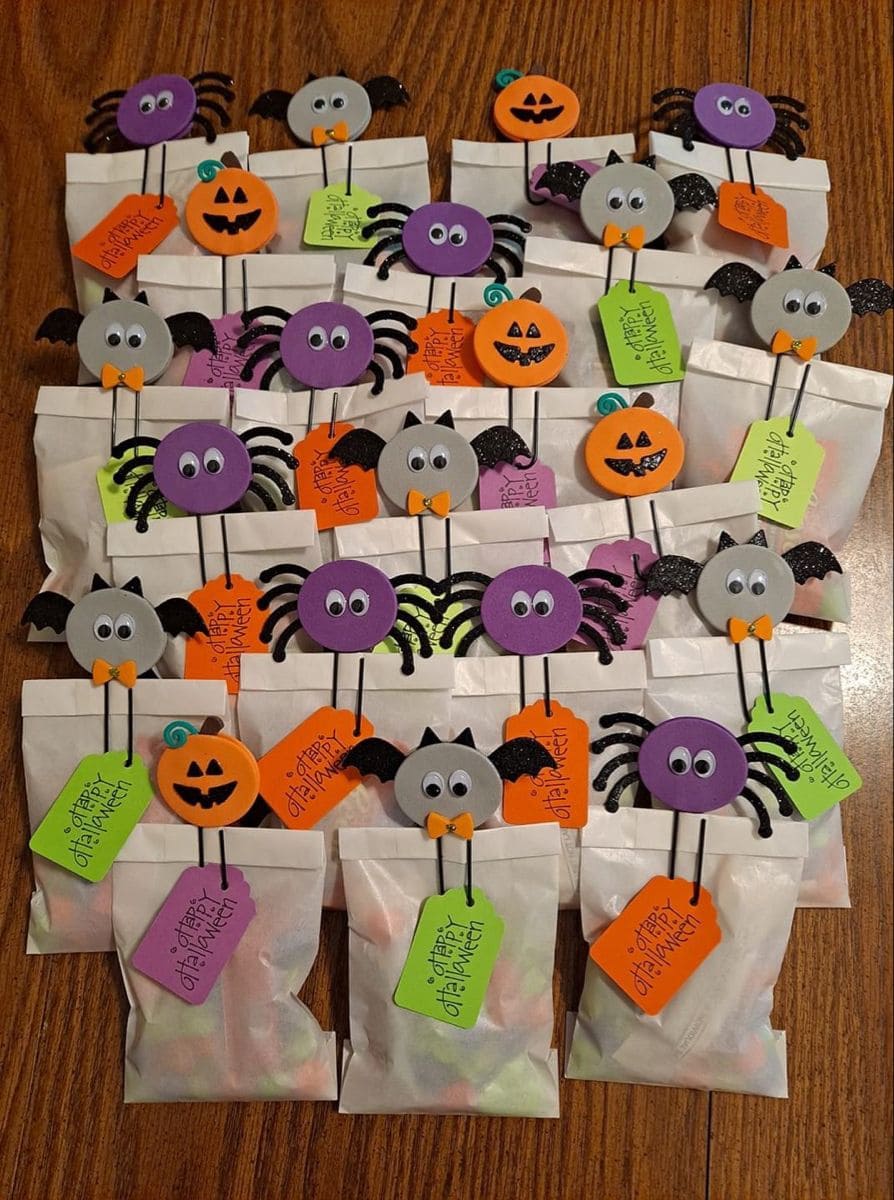
These little treat bags are crawling with charm, each one topped with an adorable bat, spider, or pumpkin made from foam cutouts and wiggly eyes.
Perfect for handing out at school, neighborhood gatherings, or Halloween parties, these bags strike the right balance between spooky and sweet.
Specially, the colorful tags reading “Happy Halloween” add a cheerful pop, and the cute clips holding everything together double as keepsakes kids will love.
Materials Needed
- 20 white snack paper bags (5″×7″)
- 20 small clothespins (2.5″)
- 20 foam Halloween character stickers or cutouts (2-3″ wide)
- 40 googly eyes (1/2″)
- 20 mini gift tags (approx. 2″×1.5″)
- Permanent markers (black, orange, green)
- Glue gun or strong craft glue
- Assorted candies (about 1/3 cup per bag)
Step-by-step Guide
Step 1: Fill each paper bag with an assortment of candies. Then fold the top of the bag down twice to seal it.
Step 2: Write a Halloween greeting on each mini gift tag using colorful markers. Let kids personalize the message!
Step 3: Glue the foam character onto a clothespin. You can also add googly eyes and extra features like bow ties or wings for fun flair.
Step 4: Clip the decorated clothespin onto the top of the treat bag, along with the tag.
Step 5: Repeat for all your bags and watch them disappear fast!
#4. Easy Felt Halloween Treat Bags
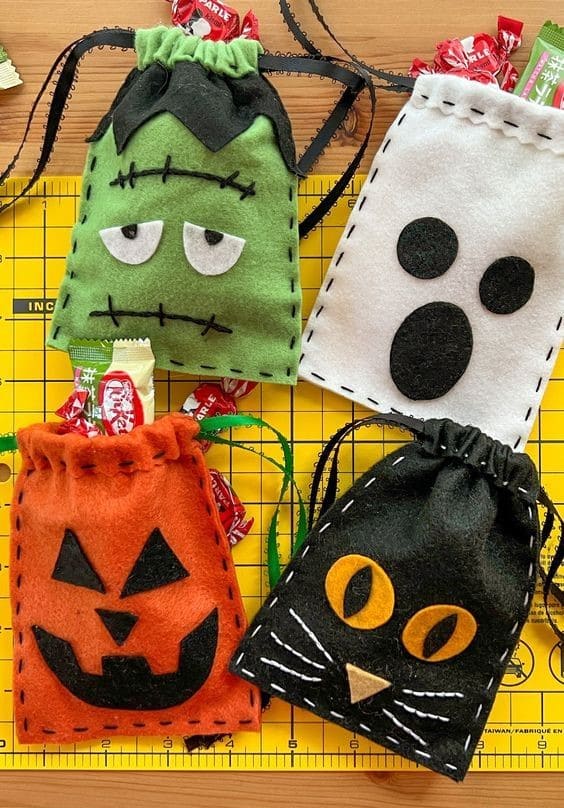
These stitched felt treat bags are hands-down one of the cutest ways to deliver Halloween goodies. Each bag is shaped like a classic drawstring pouch and decorated to look like a playful monster, ghost, black cat, or jack-o’-lantern.
They’re soft to the touch, easy for little hands to carry, and reusable, making them a sustainable choice, too.
Also, the simple stitching gives them a handmade charm, and you can mix and match colors or faces to make each one unique.
Materials Needed
- Felt sheets in black, white, orange, green (9″×12″)
- Embroidery floss or thick thread (black and matching colors)
- Yarn needle or large embroidery needle
- Ribbon or yarn (2 pieces, 14″ each)
- Scissors
- Fabric glue
- Black and colored felt scraps
- Halloween candies (mini packs)
Step-by-step Guide
Step 1: Cut two rectangles from felt, about 5″×7″ each. These will form the front and back of your treat bag.
Step 2: Glue or sew on your character’s face using cut felt shapes, you should think triangles for pumpkin eyes, or stitched lines for Frankenstein’s scars.
Step 3: Sew around three edges using a running stitch, leaving the top open. Then knot securely.
Step 4: Fold the top edge down about ½ inch and sew a channel for the drawstring. Then thread ribbon through using a safety pin.
Step 5: Fill the bag with wrapped candy and pull the drawstring tight. Finally, tie it into a bow for extra cuteness.
#5. Creepy Spiderweb Halloween Tote
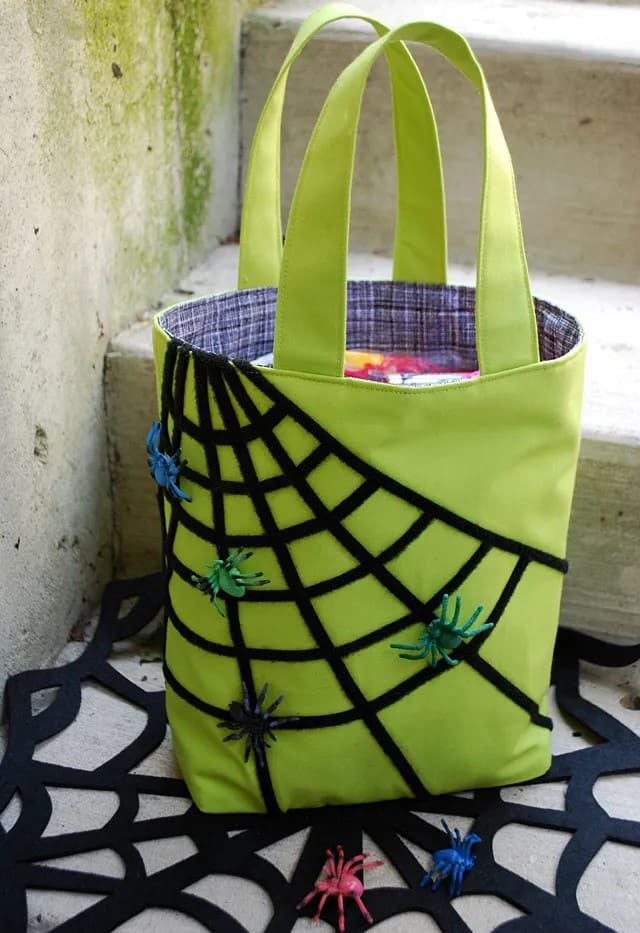
Bold, playful, and perfectly spooky, this bright green spiderweb tote is an eye-catching treat bag your kids will love carrying.
The black fuzzy web against the neon background pops with Halloween energy, and the colorful plastic spiders crawling across it give it a fun, creepy-crawly touch.
Materials Needed
- 1/2 yard neon green cotton fabric
- 1/2 yard cotton fabric
- 1 sheet black felt or flocked foam
- 5-6 plastic spider toys (assorted colors)
- Thread, pins, and sewing machine
- Hot glue gun
Step-by-step Guide
Step 1: Cut two rectangles (approx. 12″ x 14″) from both the green and lining fabrics. Then cut two strips 16″ x 3″ for handles.
Step 2: Sew the outer and lining fabrics separately into bag shapes, then stitch the handles to the outer piece.
Step 3: Turn the lining inside out and nest it inside the outer bag, right sides facing. You now stitch around the top, leaving a gap for turning.
Step 4: Turn the bag right-side-out, then sew the opening closed and topstitch around the edge.
Step 5: Cut a spiderweb shape from black felt and glue it to one side of the bag. Then, use hot glue to attach spiders randomly across the web.
#6. Googly-Eyed Pumpkin Treat Bags
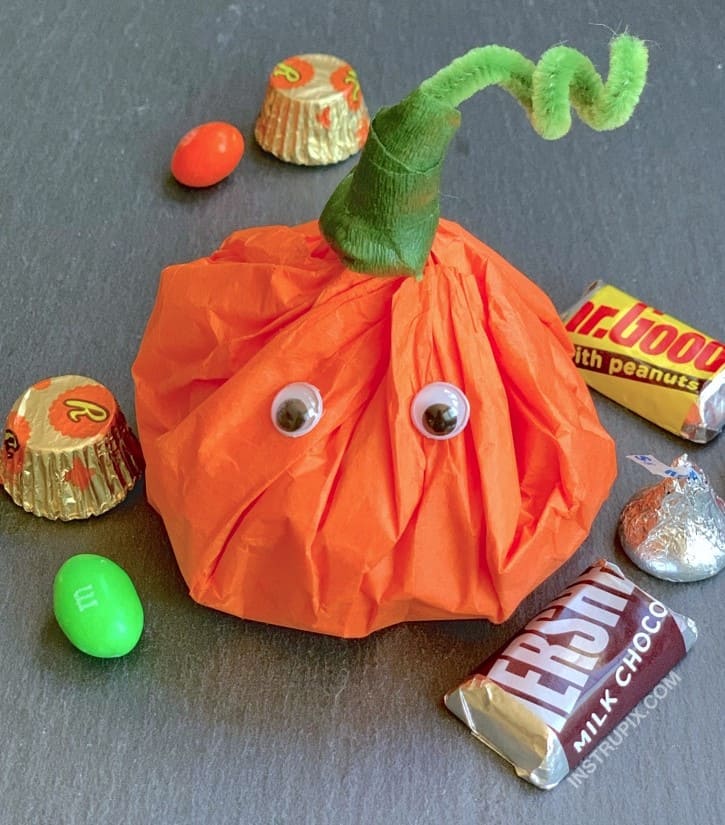
These pumpkin treat bags are a playful twist on gift wrapping, ideal for handing out Halloween goodies or adding charm to your autumn decor.
Made with bright orange tissue paper and topped with a twirled green stem, each one takes on its own quirky personality thanks to those wiggly googly eyes.
Plus, they’re ridiculously easy to make, great for kids’ parties, and look adorable sitting in a candy bowl or basket.
Materials Needed
- 1 sheet orange tissue paper (20″ x 20″)
- Small handful of wrapped candies
- Green pipe cleaner
- Green floral tape
- 2 googly eyes per bag
- Glue dots or craft glue
Step-by-step Guide
Step 1: Lay out the tissue paper and place candy in the center.
Step 2: Gather the tissue up around the candy to form a pumpkin shape, then twist the top to hold it closed.
Step 3: Wrap the twisted section with green floral tape, then curl a pipe cleaner and wrap it around to create a fun stem.
Step 4: Add googly eyes to the front using glue dots or craft glue.
#7. Ghostly Goodie Bags
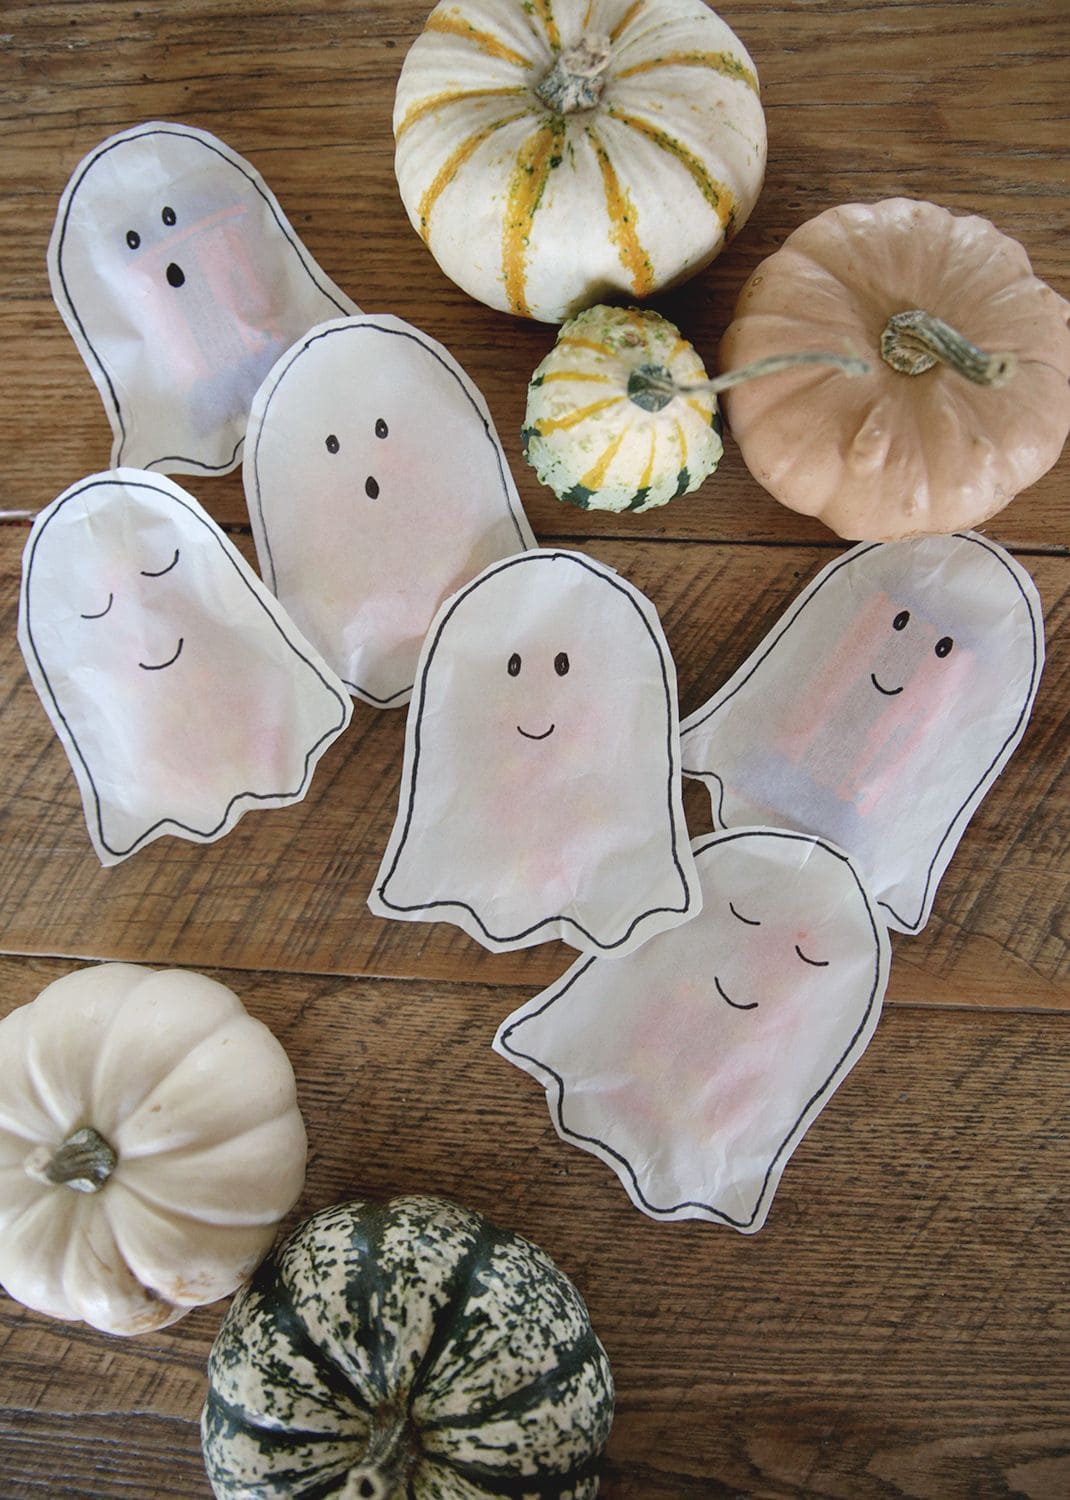
Wow, these sweet little ghost treat bags are hauntingly cute and ridiculously easy to make.
Crafted from white parchment paper and filled with candy or small toys, each ghost comes to life with its own personality, some sleepy, some smiling, and one or two a little surprised.
I bet they’re perfect for handing out at Halloween parties or slipping into lunchboxes for a festive surprise. Also, they’re so easy, even little kids can help make them!
Materials Needed
- White parchment or wax paper
- Black marker
- Scissors
- Stapler
- Treats or small trinkets
Step-by-step Guide
Step 1: Cut out two matching ghost shapes for each bag from parchment paper. Then draw cute or spooky faces on one side using a black pen or marker.
Step 2: Place a few candies between the layers, then staple or glue around the edges to seal.
#8. DIY Ghost Trick-or-Treat Tote
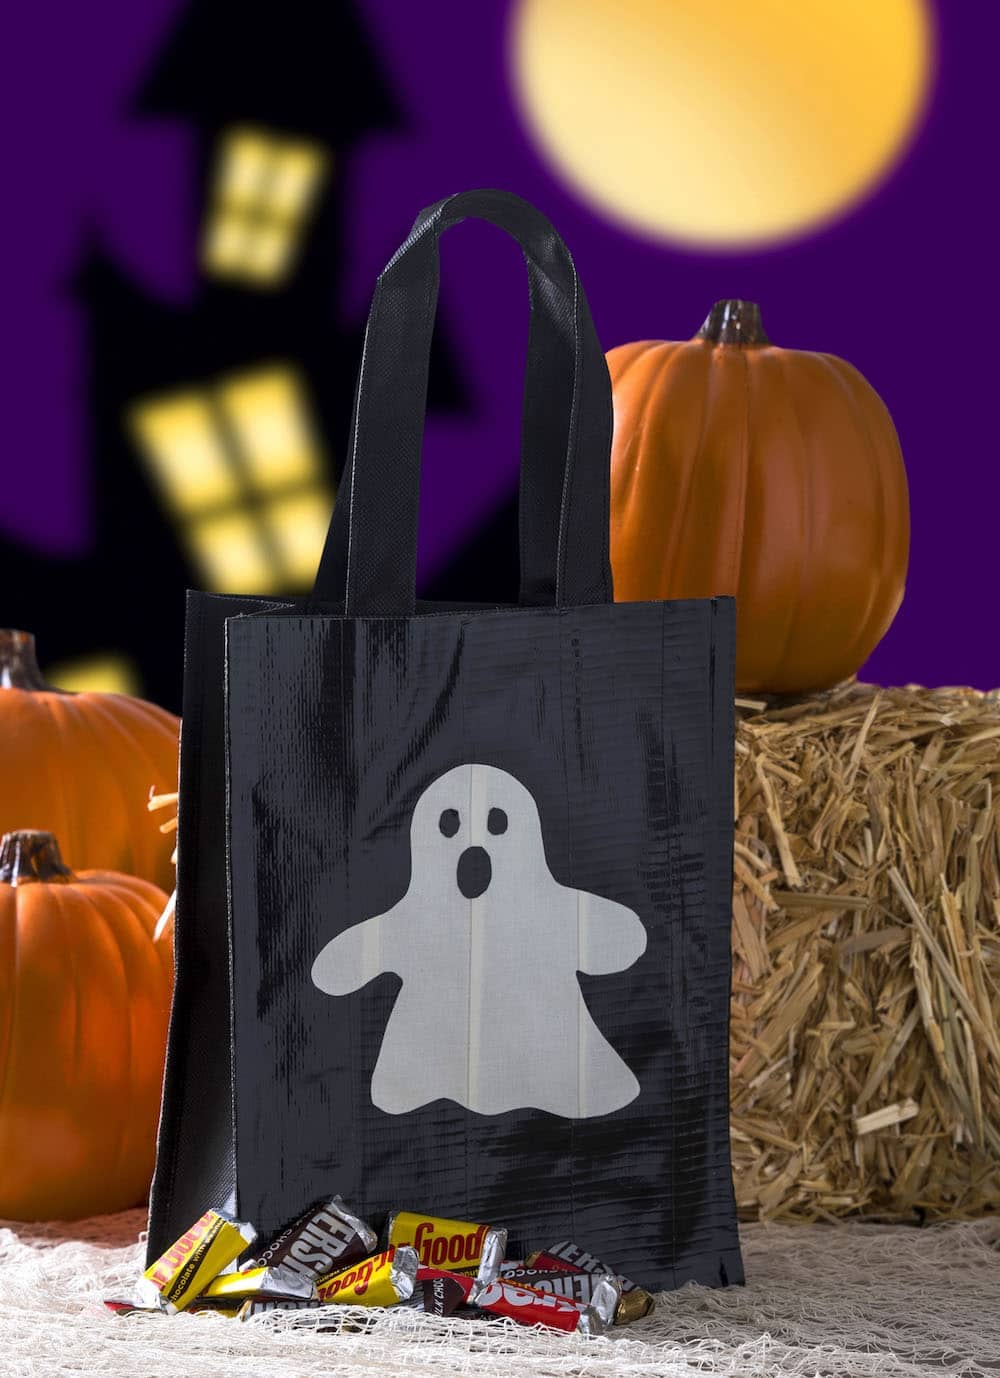
Say goodbye to flimsy plastic buckets as this ghost-themed trick-or-treat tote is bold, durable, and totally reusable.
Made from sturdy duct tape and adorned with a simple white ghost silhouette, it has all the spooky vibes without sacrificing practicality.
Moreover, the glossy black surface adds a sleek contrast that makes the ghost pop, and the wide handles make it comfy for kids to carry a serious candy haul.
Materials Needed
- 1 sheet of black duct tape fabric (approx. 12″ x 18″) or 1 reusable black tote bag
- White duct tape (about 8″ x 8″)
- Scissors
- Ghost template
- Craft knife (optional)
Step-by-step Guide
Step 1: If you’re using duct tape fabric, cut and tape pieces together to form a basic tote shape (12” wide x 14” tall), with two 18” strips for handles.
Step 2: Sketch or print a ghost shape on paper, cut it out, and trace it onto the white tape or vinyl. Then cut around the design carefully.
Step 3: Stick the ghost cutout right in the center of your bag, smoothing it down to prevent air bubbles.
Step 4: Reinforce the handles and edges if needed. Now you can fill with candy and prepare to haunt the neighborhood in style!
#9. Witch’s Broomstick Treat Bags
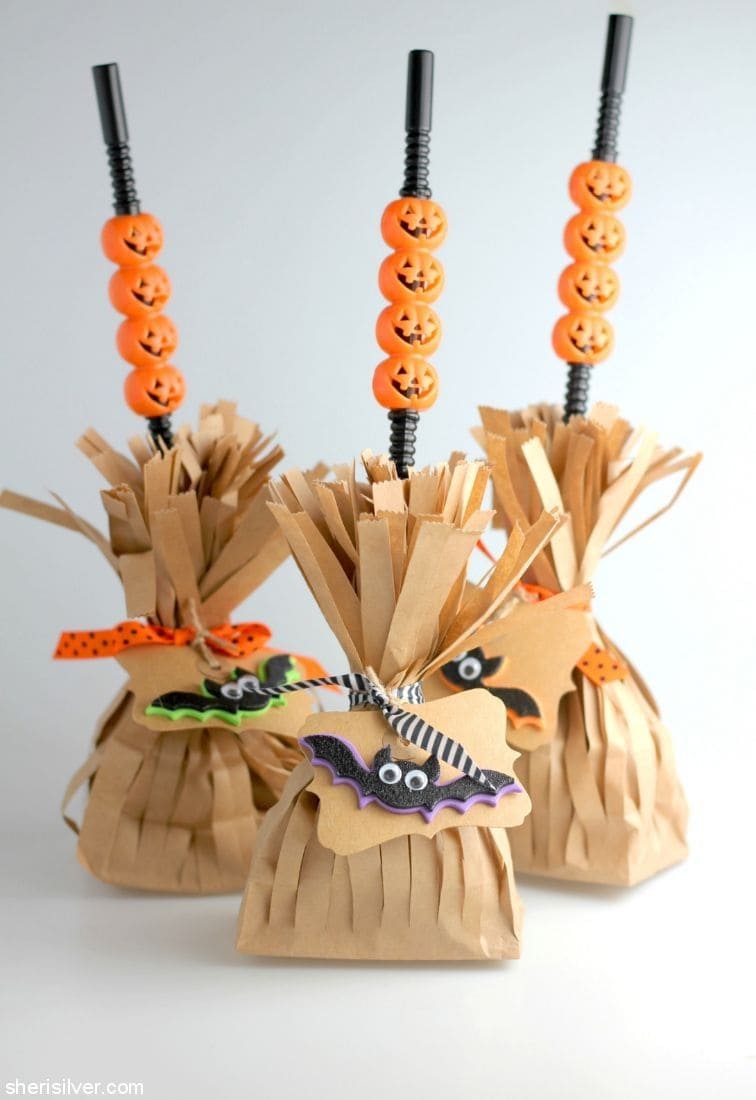
Nothing says Halloween magic quite like a witch’s broom and now you can hand them out as treats!
These adorable brown paper bags transform into whimsical broomsticks with just a few snips and twists. Topped with jack-o’-lantern straws and finished with cheerful ribbons and foam bats, each bag brings a little witchy charm to the party.
Kids won’t just enjoy the candy inside as they’ll want to play with the broom afterward. It’s a perfect combo of fun, festive, and functional.
Materials Needed
- 3 brown paper lunch bags (5″×10″)
- 3 jack-o’-lantern straws (8″ long)
- 3 foam bat stickers or die-cuts (2″ wide)
- 3 Halloween-themed ribbons (12″ each)
- Scissors
- Tape or glue dots
- Assorted Halloween candies (wrapped)
Step-by-step Guide
Step 1: Open a paper bag and lightly stuff it with Halloween candy.
Step 2: Use scissors to fringe the top half of the bag by making vertical cuts around the edge, about 1″ wide and 4″ deep.
Step 3: Insert a straw down the center and gather the fringed edges around it like a broom bristle.
Step 4: Secure tightly with a ribbon and add your bat sticker or embellishment for extra flair.
#10. Spider Web Pillow Box Treats
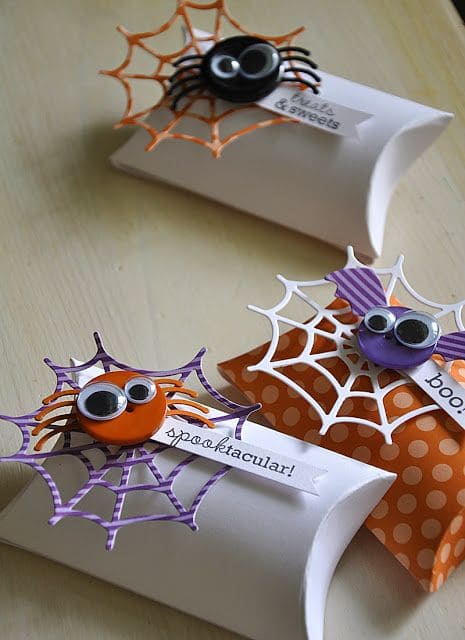
These pillow box treat holders are spooky, sweet, and so satisfying to make. With just a few simple materials, you can turn ordinary cardstock into Halloween surprises topped with wide-eyed spiders perched on colorful webs.
Plus, the 3D details give them a crafty charm, and the pillow shape holds just enough candy to excite without overstuffing.
Perfect for handing out at parties or giving to classmates, these are the kind of small details that guests remember.
Materials Needed
- Cardstock sheets (6″ x 6″) in various prints and colors
- Spider web die cuts or web stickers (approx. 3.5″ diameter)
- 1″ plastic or foam circles for spider bodies (black, orange, or purple)
- 2 googly eyes per spider
- 8 pipe cleaners cut into 1.5″ segments per spider
- Glue or glue dots
- Small candies (fits 5-6 mini pieces)
- Optional: custom Halloween word tags
Step-by-step Guide
Step 1: Cut and fold cardstock into pillow box shape. Use a scoring tool to create curved edges for a smooth closure.
Step 2: Glue or tape the edges together and let dry, then fill with candy.
Step 3: Attach a spider web die cut to the front of each box.
Step 4: Make the spiders: glue pipe cleaner legs to the back of each foam circle, then add googly eyes to the front.
Step 5: Finally, stick your spider on the web and optionally add a cute message tag.
#11. Vampire Bat Treat Bags
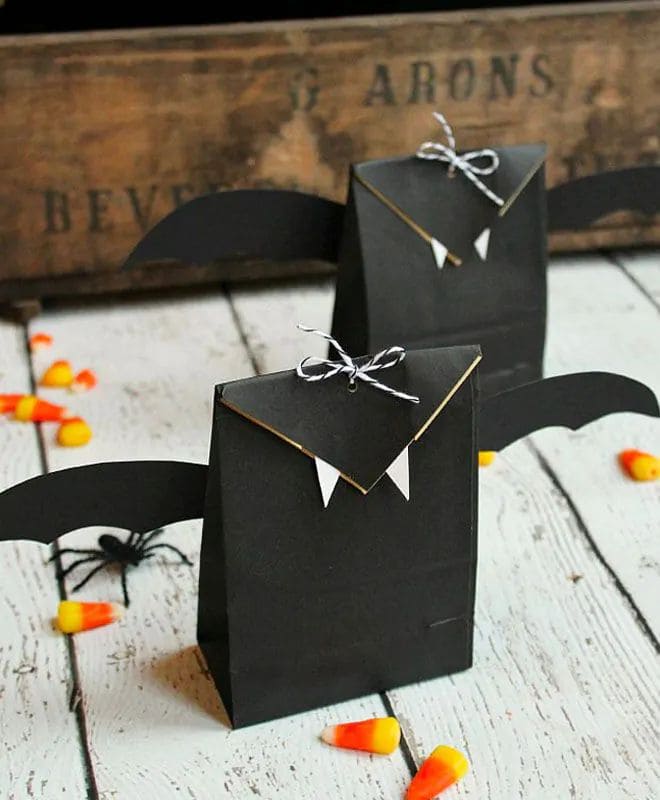
These clever vampire bat treat bags are more than just cute, they’re a total crowd-pleaser.
Topped with a twine bow and filled with candy or small surprises, they make ideal party favors or classroom gifts.
The best part is that they’re easy to whip up and can be made in batches with minimal mess. It’s a perfect spooky project for both kids and grown-up crafters who love to add a handmade touch to Halloween.
Materials Needed
- Black paper lunch bags (approx. 5” x 9”)
- Black cardstock (cut to 6″ x 2″ each)
- White paper (cut into tiny fang shapes)
- Craft glue
- Black and white baker’s twine (10″ length)
- Scissors
- Halloween candy
Step-by-step Guide
Step 1: Cut bat wings from black cardstock using a curvy wing shape and attach one on each side of the bag.
Step 2: Fill the bag with your treats of choice. Then fold the top of the bag into a triangle flap and glue two white fangs underneath it for a vampire effect.
Step 3: Tie a bow with baker’s twine and glue or staple it at the top for a polished finish.
#12. Easy Halloween Drawstring Treat Bags
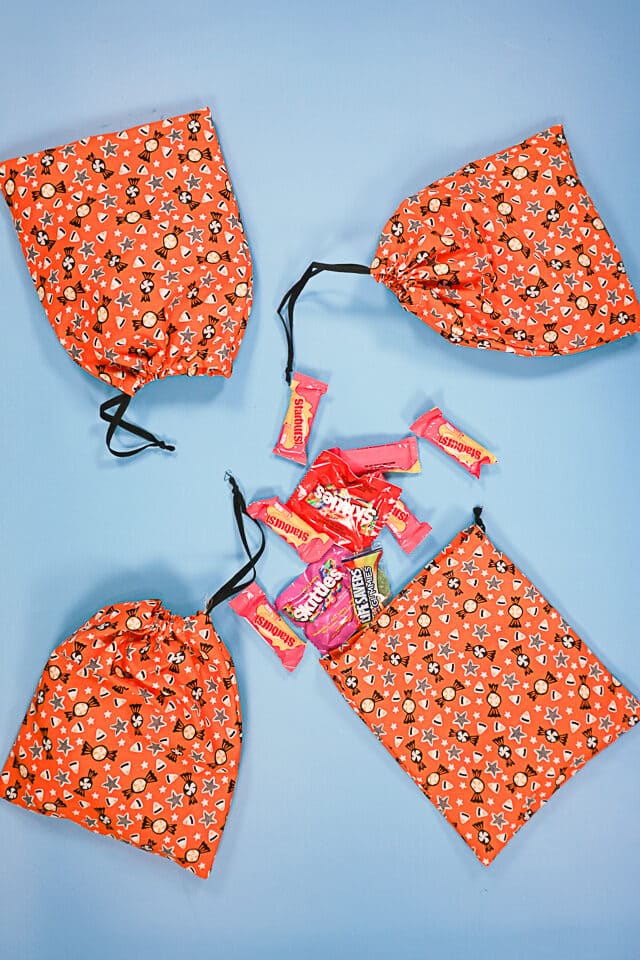
These cheerful orange drawstring treat bags are a simple yet delightful way to hand out Halloween goodies.
Decorated with playful pumpkin and star prints, they give off cozy, vintage vibes while still feeling festive. They’re reusable, washable, and just the right size for little hands to grip.
Perfect for party favors, classroom treats, or a DIY candy pouch, these bags are a beginner-friendly sewing project with loads of charm.
Materials Needed
- Fat quarter (18″ x 22″) of Halloween print cotton fabric (per bag)
- 1 yard black grosgrain ribbon or cord (1/4″ wide)
- Safety pin
- Sewing machine, thread, scissors, and iron
Step-by-step Guide
Step 1: Cut a rectangle of fabric measuring 12″ x 18″ for each bag.
Step 2: Fold the top edge over twice (about 1/2″ each time) and stitch to create a casing for the drawstring.
Step 3: Fold the fabric in half, right sides together, and sew down the sides and bottom, be careful not to stitch over the casing.
Step 4: Turn the bag right side out and press. Now, use a safety pin to thread the ribbon through the casing and tie a knot at each end.
#13. Halloween Quilt Block Tote Bag
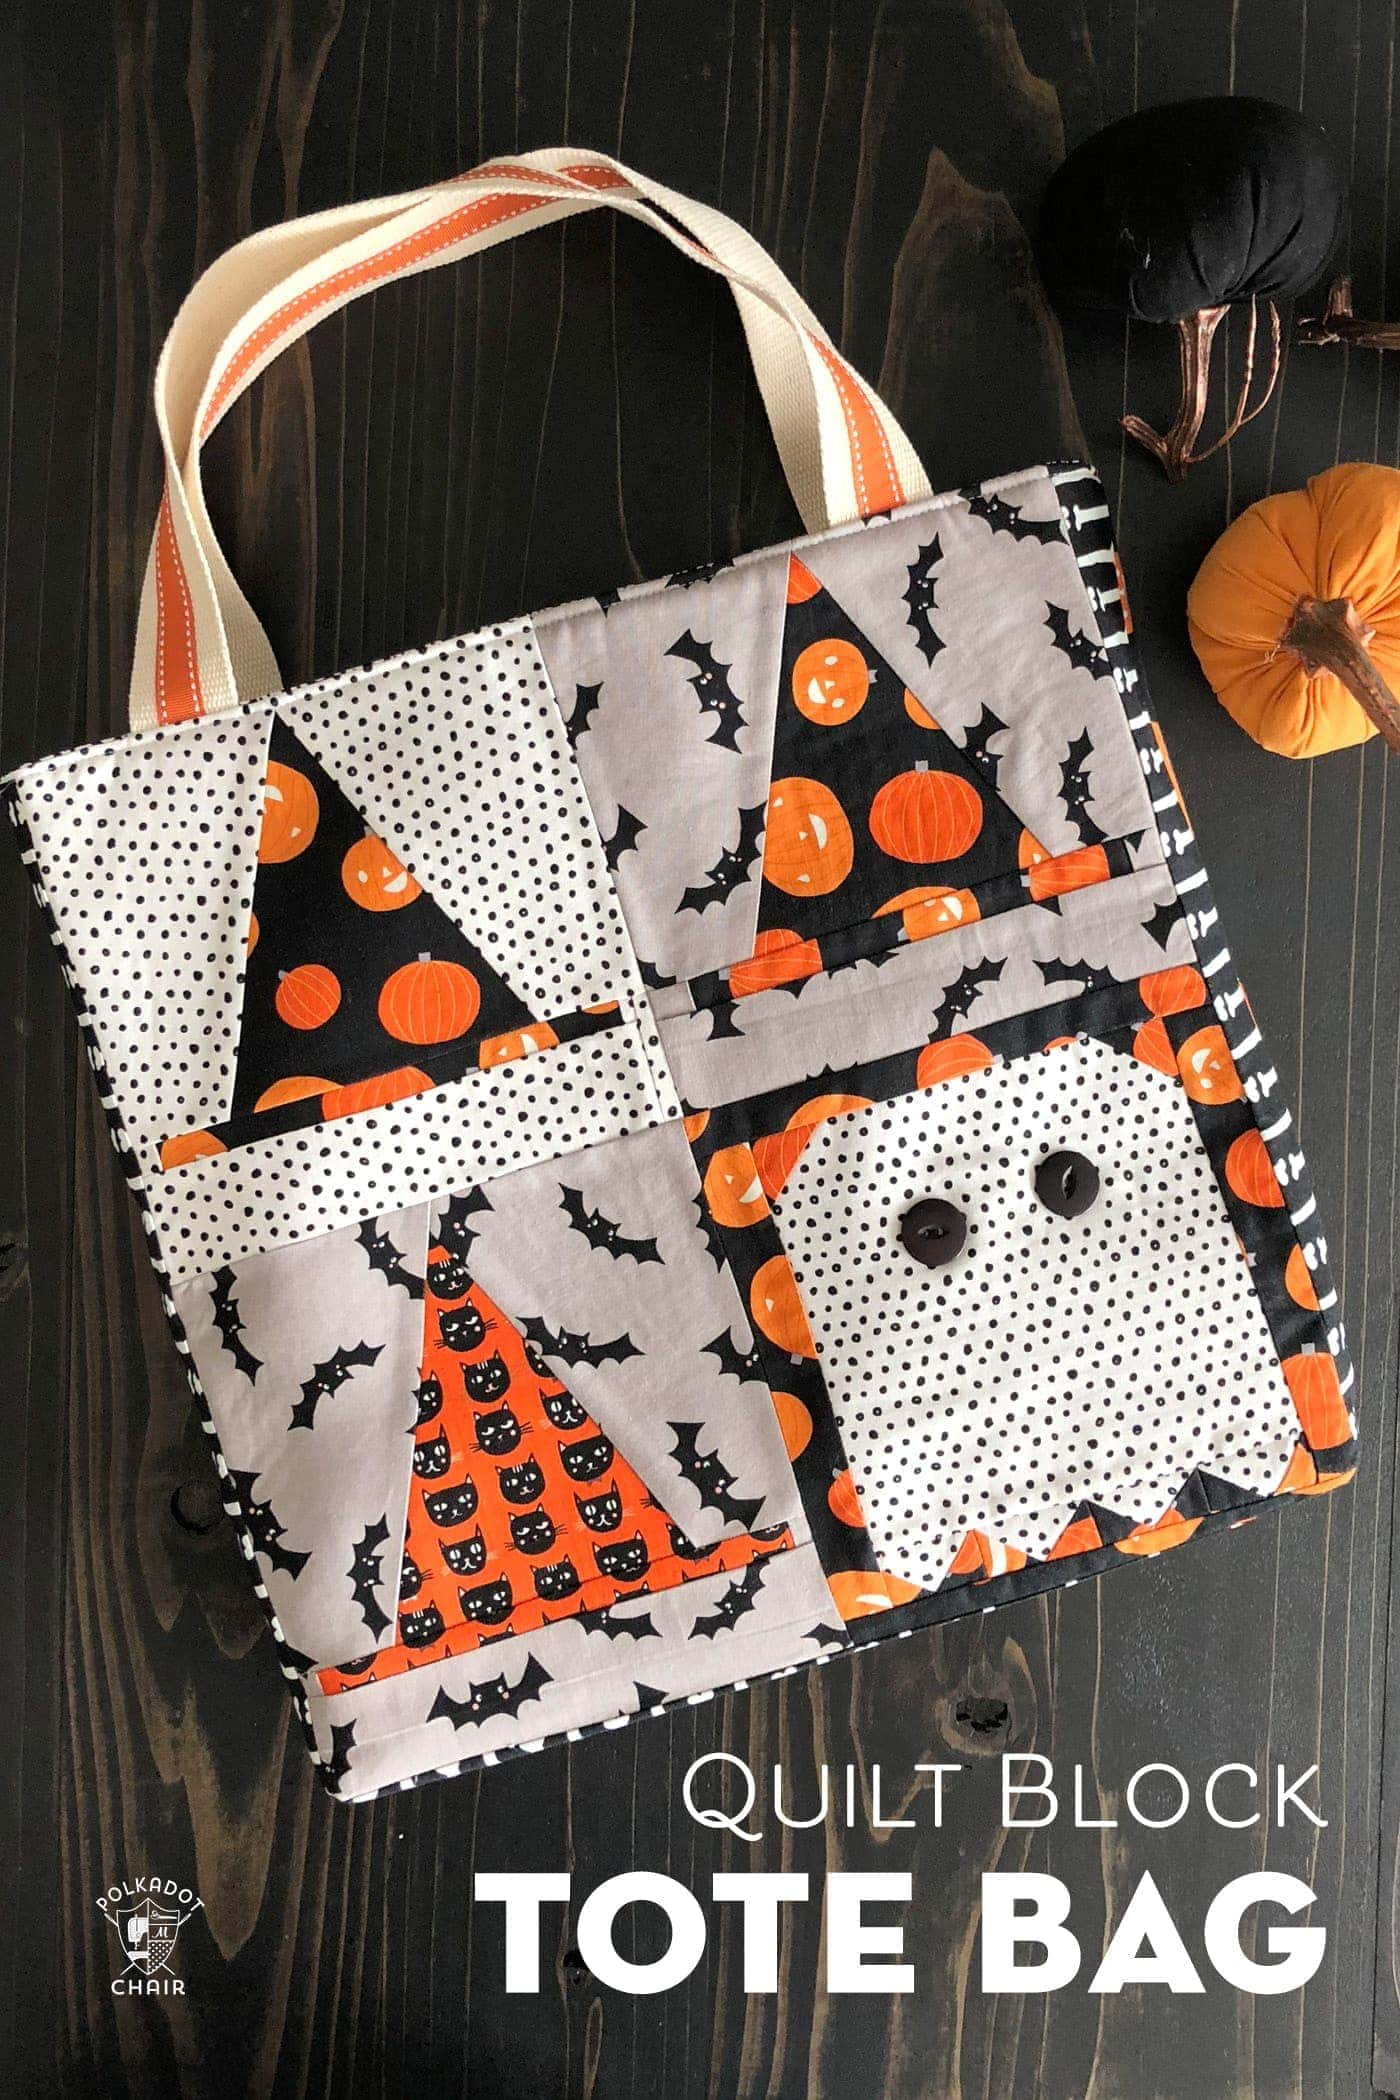
If you love to sew and want a festive tote that doubles as a functional masterpiece, this Halloween quilt block tote bag is for you.
Each side features patchwork witch hats and a ghost peeking through polka dots, bringing together spooky charm and quilter’s pride. It’s sturdy enough for candy hauls or book runs, and it’s a great way to use up those seasonal fabric scraps.
This is one of those projects that feels heirloom-worthy the moment you stitch the last seam.
Materials Needed
- 4 Halloween-themed quilt blocks (each 8″ x 8″)
- 1 backing fabric piece (16″ x 16″)
- 1 lining fabric piece (16″ x 16″)
- 2 pieces of batting (16″ x 16″)
- 2 canvas handles (each 20″ long x 1.5″ wide)
- Sewing machine, thread, scissors, pins, and iron
- Optional: fusible interfacing
Step-by-step Guide
Step 1: Assemble your 4 quilt blocks into a 2×2 grid using a 1/4” seam allowance. Then press all seams flat.
Step 2: Place batting behind the quilt block top and quilt as desired (straight lines work beautifully).
Step 3: Sew together the backing and lining fabrics to create the tote’s body. You can also add batting and quilt if desired.
Step 4: Attach handles to the top edge, spacing them about 4″ from each side seam.
Step 5: Stitch the lining and outer layers together, right sides facing, then turn right side out and press.
#14. Burlap Scarecrow Treat Bags
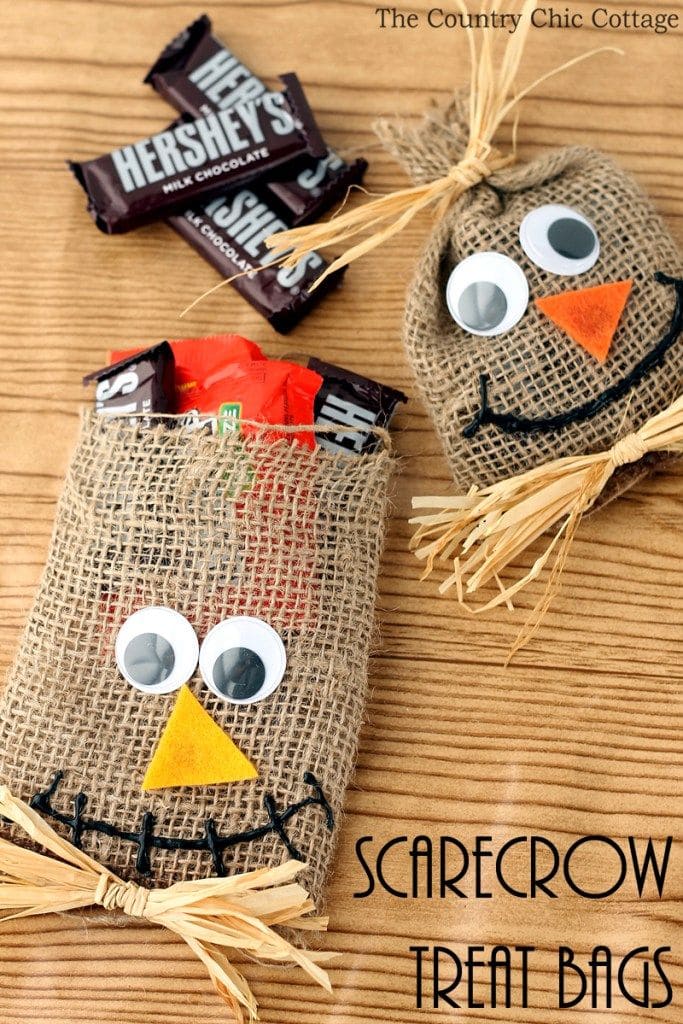
These burlap scarecrow treat bags might just steal the show at your fall festivities. With their scrappy straw hair and stitched smiles, they bring a cozy country charm to your Halloween giveaways.
Specially, each little face feels like a warm hug from a hayride, making them ideal for classroom parties, Thanksgiving tables, or trick-or-treat surprises.
Materials Needed
- Burlap fabric (6″ × 10″ per bag)
- Raffia strands (12″ per bag)
- 2 googly eyes per bag (1″ diameter)
- Orange felt (1″ triangle)
- Black embroidery thread or marker
- Hot glue gun
- Needle and thread (or sewing machine)
- Small candies or chocolates
Step-by-step Guide
Step 1: Cut a piece of burlap to 6″ × 10″. Then fold in half with the rough sides out and sew or glue the sides together, leaving the top open.
Step 2: Turn the pouch inside out so the seams are hidden. Now you’ve got a soft, rustic little bag ready to decorate.
Step 3: Glue on googly eyes near the top. Then add the orange felt triangle just below for the nose, and use thread or a marker to create a stitched smile.
Step 4: Tuck a bundle of raffia into each end of the bag and glue it inside to look like straw hair. Fill the bag with candy, then tie the top shut with more raffia and you are done!
#15. Paper Skeleton Halloween Treat Bags
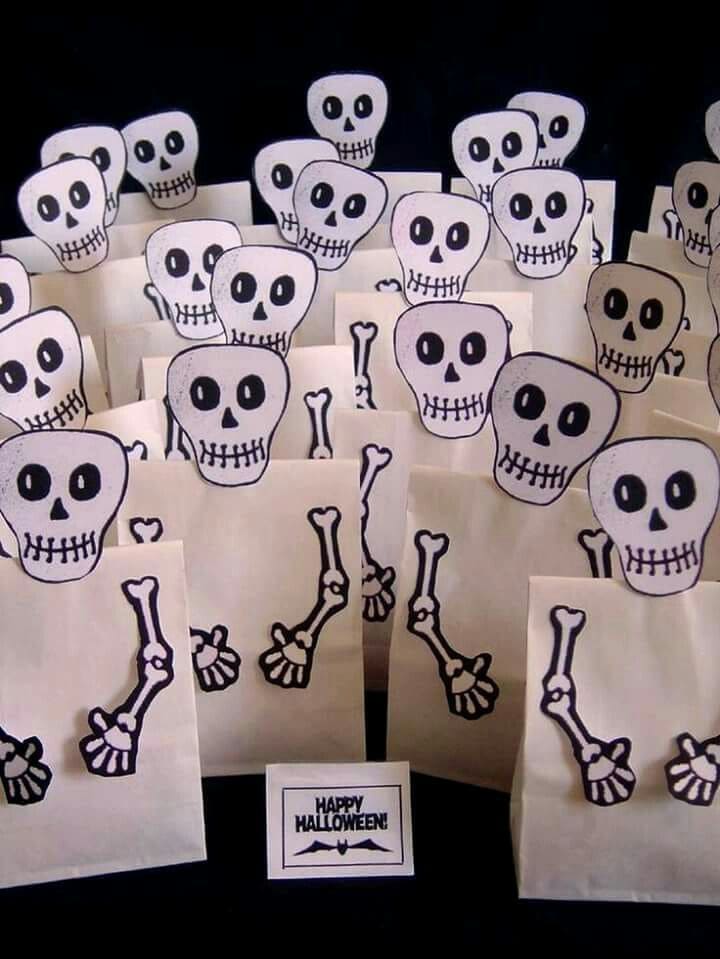
Interestingly, these skeleton-themed Halloween treat bags bring just the right mix of spooky and fun.
Made with plain white paper bags and DIY skeleton parts, they instantly catch attention, especially when arranged in a crowd like a bony little army.
You can see each bag features a skull popping out of the top and a printed skeleton arm across the front, making it look like the treat is handed over by the skeleton itself.
Materials Needed
- White paper bags (5″×8″ size)
- Skeleton head and arm printouts (scaled to approx. 3″ height for heads, 5″ for arms)
- White cardstock or printer paper (A4)
- Black marker
- Scissors
- Glue stick
- Halloween candy or small toys
Step-by-step Guide
Step 1: Print out your skeleton heads and arms on white cardstock. You can use a free online template or sketch your own for more personality.
Step 2: Cut out the pieces carefully. If using regular paper, reinforce with a second layer for sturdiness.
Step 3: Glue one arm to the front of each bag so it stretches across like it’s reaching out. Make sure the fingers curve toward the bottom for a realistic effect.
Step 4: Fill the bag with treats, then fold the top over slightly. Then tape or glue a skeleton head peeking out from the fold.
Tips: For added flair, glue the skeleton head to a popsicle stick and insert it inside the bag like it’s popping out in 3D.
#16. Boo Bags with Ghost Faces
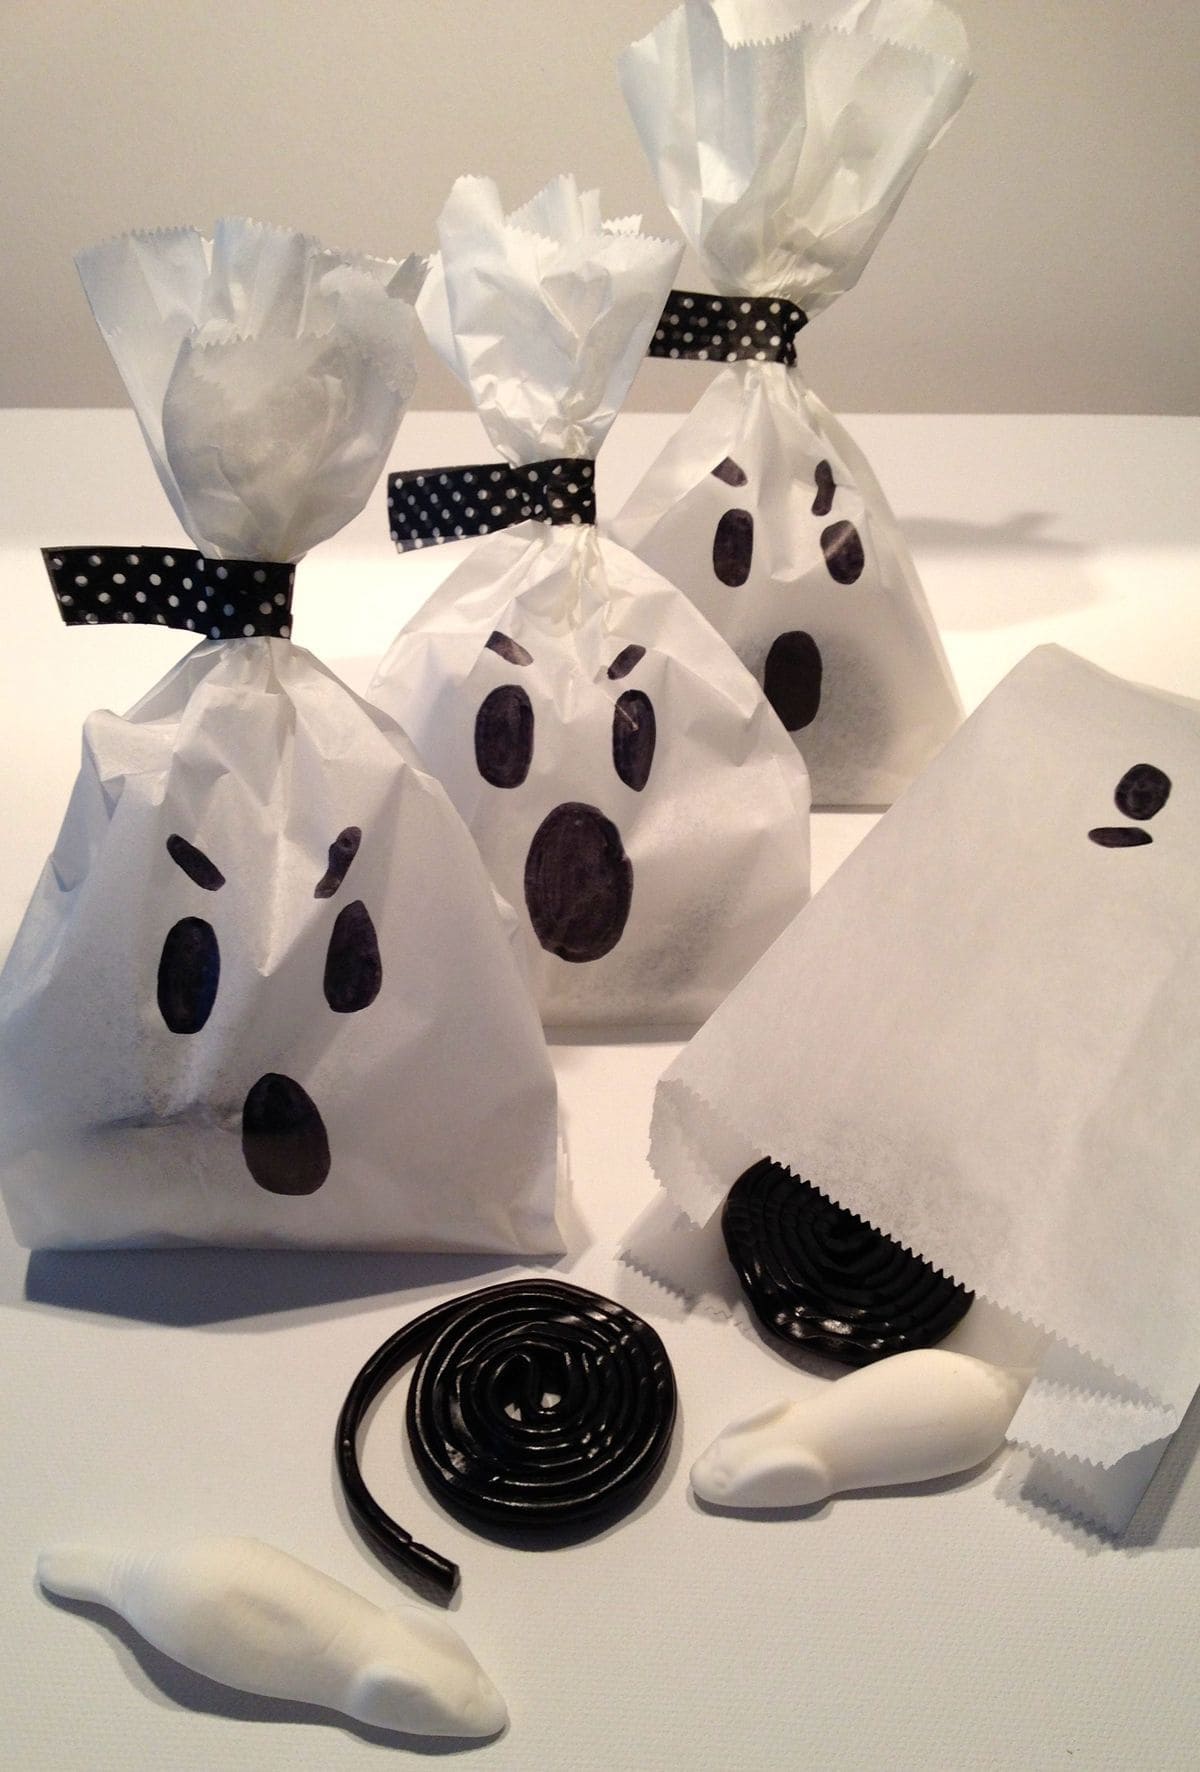
Simple, spooky, and seriously charming, these ghost treat bags are a breeze to make and get tons of compliments.
Using plain white paper bags, you turn each one into a little floating phantom with a few strokes of black marker. They’re lightweight, easy to fill, and perfect for class parties, trick-or-treat handouts, or Halloween playdates.
Additionally, the polka-dot ribbon adds a playful touch while keeping the bag sealed. And the best part is that kids can draw their own ghost expressions.
Materials Needed
- 10 white paper bags (6″×9″)
- 10 pieces of black ribbon with white polka dots (12″ long, 1/2″ wide)
- 1 black permanent marker
- Assorted black and white Halloween candies (licorice wheels, gummy mice, etc.)
Step-by-step Guide
Step 1: Fill each paper bag with your selected candy. You try using black and white sweets for a ghostly vibe.
Step 2: Fold or scrunch the top of the bag and tie it tightly with a piece of ribbon. Then double knot it so it stays secure.
Step 3: Draw ghost faces on the front of each bag using a black marker. Big eyes, spooky brows, and an “O” mouth give the best effect.
Step 4: Display your ghost gang on a tray or hand them out with a friendly boo!
#17. Recycled Halloween Pillow Boxes
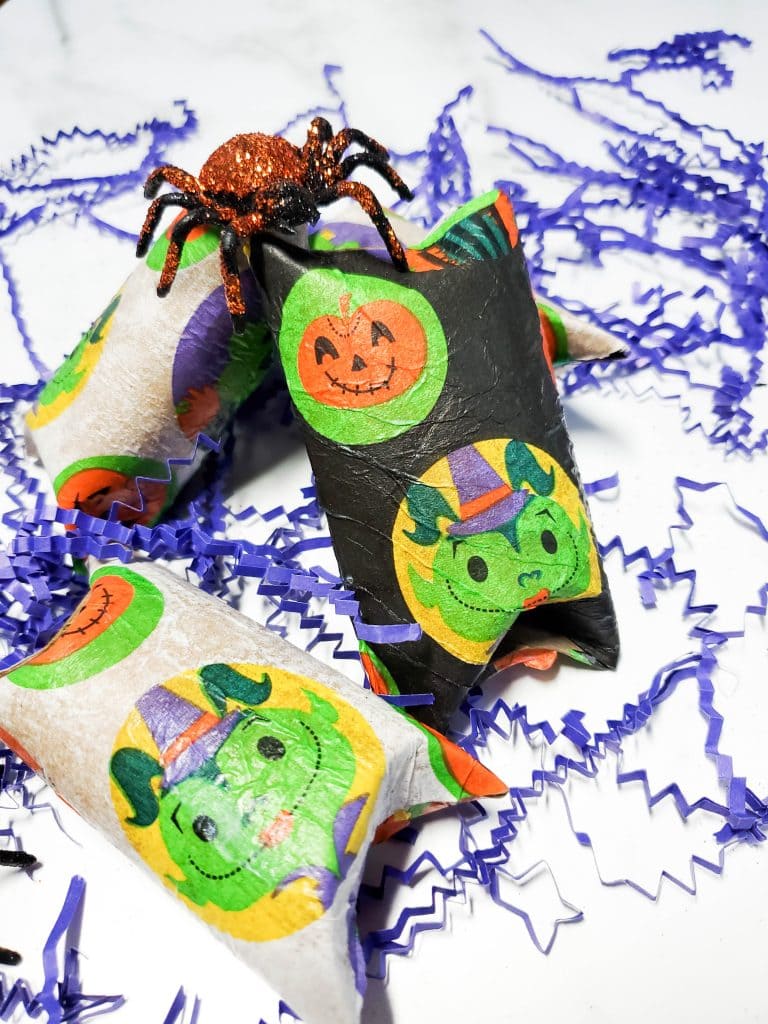
These adorable pillow-shaped treat boxes are made from something you already have: toilet paper rolls!
With their rounded edges and playful Halloween napkin wraps, they turn simple cardboard into festive, candy-filled surprises.
Bonus, the little characters like that green-faced witch or pumpkin grin make them perfect for kids’ parties or school favors.
Materials Needed
- Empty toilet paper rolls
- Decorative Halloween napkins or tissue paper
- Mod Podge
- Small candies or toys
- Paintbrush
- Scissors
- Plastic spider or festive stickers (optional)
Step-by-step Guide
Step 1: Flatten the toilet paper roll, then press one open end inward on both sides to form a curved pillow shape. Do the same on the other side.
Step 2: Cut napkins to size and gently separate the printed layer from the backing. Now, use Mod Podge to adhere the napkin around the roll, smoothing it down carefully.
Step 3: Let it dry completely. Then tuck small candies inside before gently folding the ends inward to seal.
Step 4: Finally, add a little plastic spider on top or tie with ribbon for extra fun!
#18. Halloween Party Popper Treat Tubes
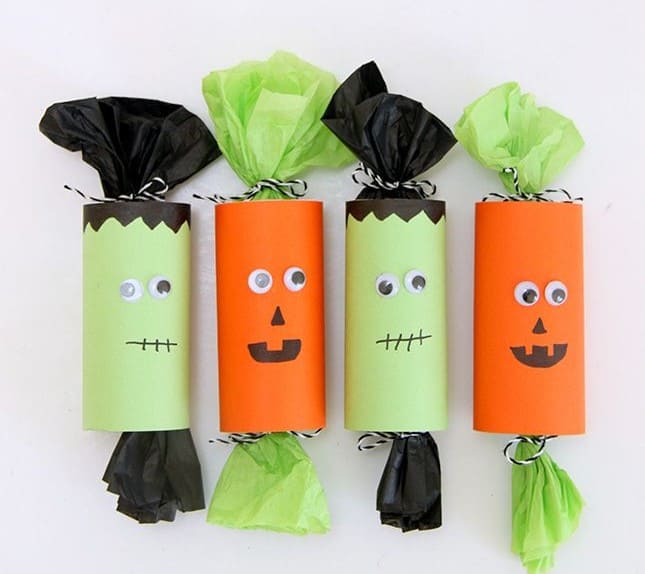
These Halloween party poppers are playful, colorful, and surprisingly simple to make. Each one hides a sweet surprise inside and doubles as a cute character like Frankenstein or a grinning pumpkin.
Made from toilet paper rolls and tissue paper, they’re the kind of craft that turns recycled materials into magic.
Plus, you can hand these out at a classroom party, use them as table favors, or let the kids help create them for a holiday afternoon activity filled with giggles and gluey fingers.
Materials Needed
- Empty toilet paper rolls (4″ long)
- Colored cardstock (green and orange, 4″ × 6″ pieces)
- Black and green tissue paper (10″ × 6″ per popper)
- Googly eyes (½” size)
- Black marker or felt-tip pen
- Glue stick or double-sided tape
- 2 baker’s twine or ribbon (each 12″)
- Small wrapped candies or toys
Step-by-step Guide
Step 1: Wrap the toilet paper roll in colored cardstock and secure with glue or tape. Then use green for Frankenstein or orange for a jack-o’-lantern look.
Step 2: Draw faces with a black marker, add stitches for Frankie or a toothy smile for the pumpkin. Then glue on googly eyes for that silly, animated touch.
Step 3: Place your candy inside the tube. You now cut two tissue paper squares and roll the covered tube in the center, letting the ends stick out like a candy wrapper.
Step 4: Twist the tissue paper ends gently and tie each side with twine or ribbon to hold the shape. Also, give it a light shake to hear the fun rattle of treats inside.
#19. Mummy-Wrapped Chocolate Bars
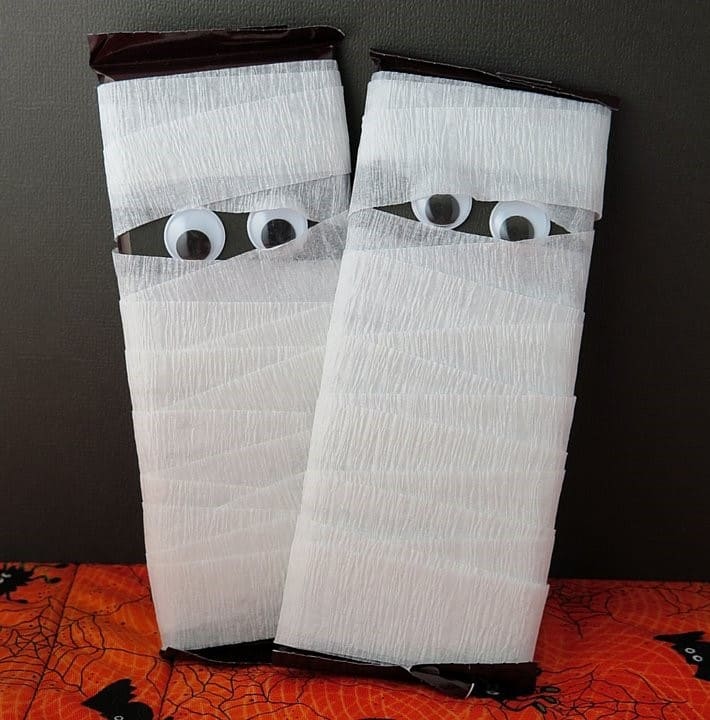
How about turning ordinary chocolate bars into mischievous mummies with this super simple Halloween wrap?
This project is perfect for last-minute party favors or classroom treats. All it takes is a bit of white crepe paper and some googly eyes to bring these spooky sweets to life.
Wrapped snugly like tiny mummies, these bars are almost too cute to eat. Kids love the surprise factor, and they look amazing displayed in a Halloween basket or spooky snack table.
Materials Needed
- Chocolate bars (standard size)
- White crepe paper streamers
- Googly eyes (1 pair per bar)
- Double-sided tape or glue
- Scissors
Step-by-step Guide
Step 1: Use a strip of double-sided tape to anchor one end of the crepe paper to the back of the candy bar.
Step 2: Wrap the crepe paper around the bar in criss-cross fashion, leaving a small space near the top for the eyes.
Step 3: Secure the end of the crepe paper with tape or glue, then stick on the googly eyes where the face peeks out.
#20. Paper Bat Candy Holder
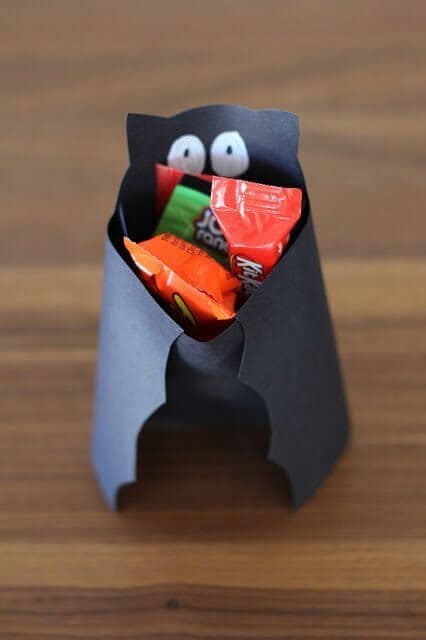
Crafted from sturdy black cardstock, the bat’s wings wrap protectively around a bundle of candy. A pair of wide, silly eyes gives it personality, making each one feel like its own little creature.
Plus, these are great for classroom gifts, trick-or-treat handouts, or just fun additions to your party table. You can even personalize them with names or spooky puns.
Materials Needed
- Black cardstock or construction paper (1 sheet per bat)
- Googly eyes (1 pair per bat)
- Glue or double-sided tape
- Scissors
- Small assorted candies
- Printable or hand-drawn bat template (optional)
Step-by-step Guide
Step 1: Cut out the bat shape from the black paper. You also include wing shapes and a rounded bottom to hold candy.
Step 2: Fold the wings inward so they overlap slightly in front.
Step 3: Glue the edges of the wings together just enough to hold candies securely.
Step 4: Finally, stick on the googly eyes near the top, giving your bat a playful look.
#21. Boo-tiful Ghost Tote Bag
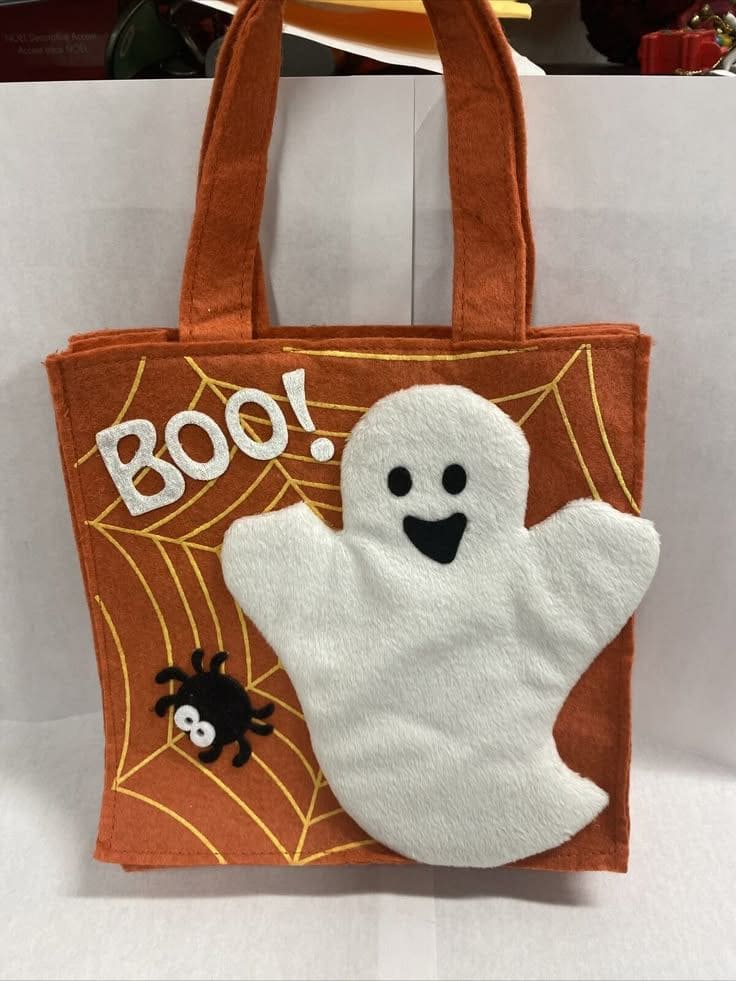
Designed with a fluffy white ghost, a playful spider, and a big glittery “BOO!”, this bag instantly adds Halloween spirit to your candy run.
The sturdy orange felt base makes it durable enough for little hands to carry, while the stitched spiderweb adds a handcrafted detail that feels special.
Moreover, ideal for kids or Halloween-themed gifts, this tote can also be repurposed for festive decor. It’s an adorable alternative to plastic buckets and gives off major cozy craft vibes.
Materials Needed
- Orange felt fabric (12″ x 24″)
- White felt (approx. 6″ x 7″)
- Black and white felt scraps
- Glitter foam letters or iron-on vinyl for “BOO!”
- Embroidery thread or yellow fabric paint
- Scissors
- Hot glue gun
- Sewing machine or needle & thread (optional)
Step-by-step Guide
Step 1: Cut and stitch or glue the orange felt into a simple tote shape with two handles at the top.
Step 2: Create a spiderweb using yellow embroidery thread or fabric paint on one side of the tote.
Step 3: Cut a large ghost shape from white felt and glue it over the web. Then you can add the ghost’s facial features and a small spider cut from black felt.
Step 4: Finally, you attach the “BOO!” letters for a bold, sparkly finish.
Tip: I recommend using Velcro or a magnetic snap inside the bag to stay closed during trick-or-treating.
