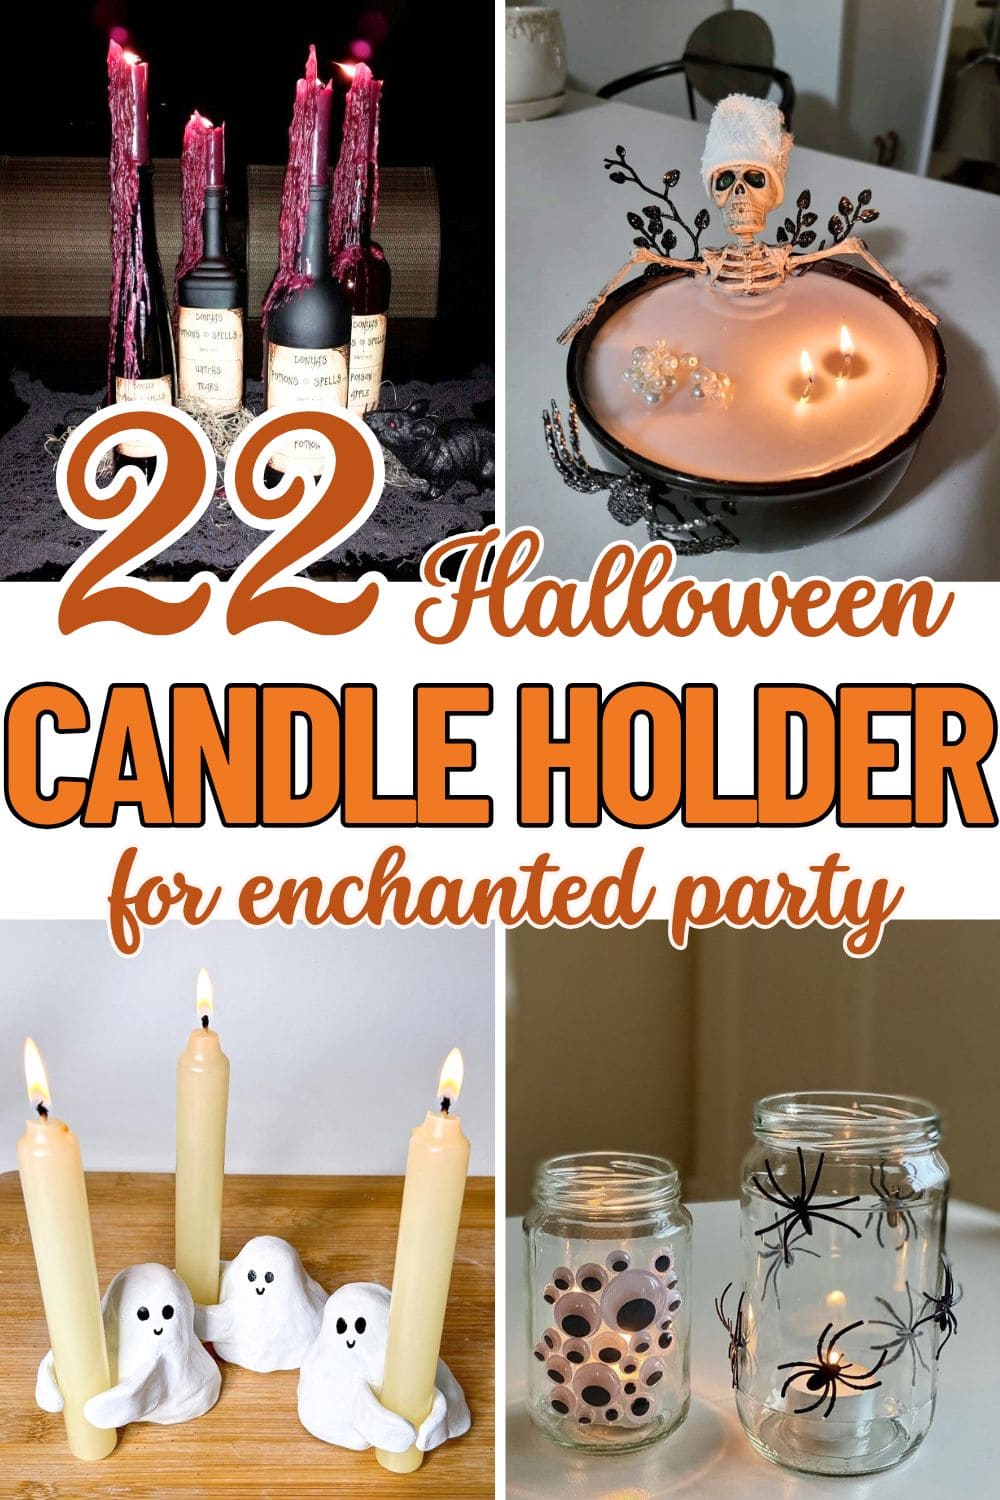
Candles are the heart of Halloween decor. Their flickering flames cast eerie shadows, transform calm corners into haunted hideouts, and bring just the right amount of spooky ambiance to any space.
And when paired with the perfect candle holder, they mesmerize. This season, elevate your eerie aesthetic with handmade candle holders that double as frightful centerpieces.
You don’t need expensive props or store-bought setups. With a little creativity and some hauntingly clever materials, you can craft pieces that steal the spotlight and set the mood for a night full of thrills.
#1. Skeleton Spa Candle Bowl
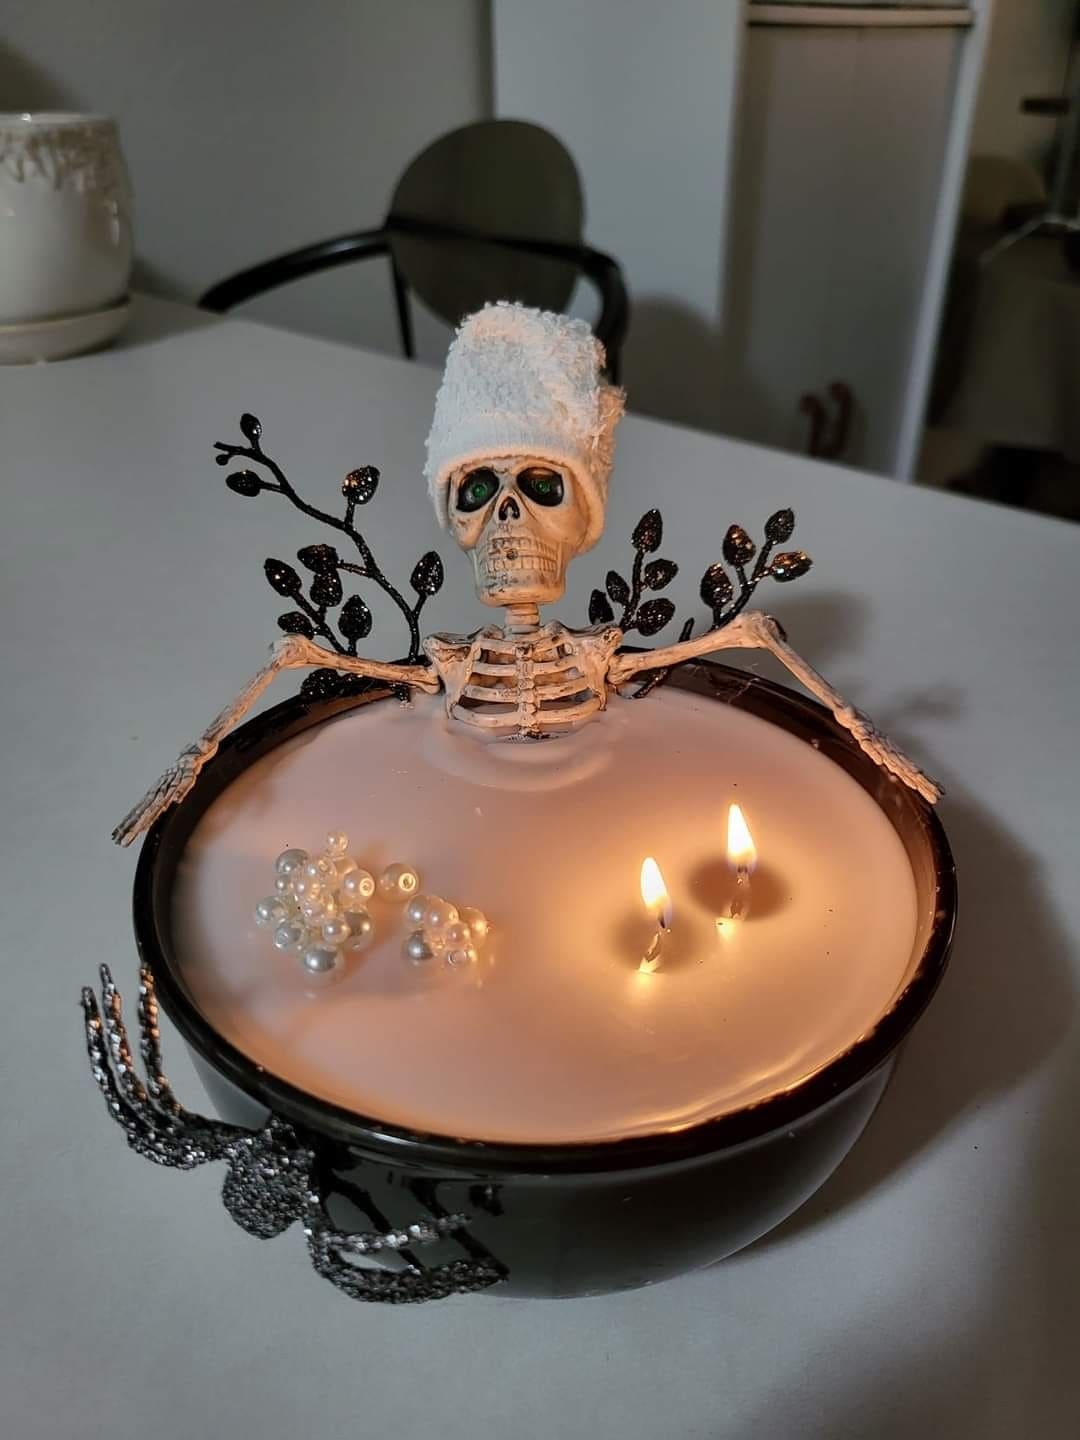
Picture a skeleton enjoying a hot soak in a glowing wax bath, complete with a towel wrap on its head and faux pearl bubbles floating nearby. Black glittered skeletal hands and branches frame the bowl like eerie spa decor.
When lit, the twin flames create a cozy yet ghoulish ambiance like a haunted bathhouse tucked deep inside a haunted mansion.
Materials Needed
- 1 heat-resistant bowl (about 5-6 inches wide)
- Wax (soy or paraffin), 1-2 cups
- 2 pre-tabbed candle wicks
- Mini skeleton figurine
- Small towel scrap for head wrap
- Craft pearls
- Black glittered branches
- Hot glue and optional black paint for bowl
Step-by-step Guide
Step 1: Paint the bowl black if desired and let it dry completely.
Step 2: Attach wicks inside the bowl using hot glue or wick stickers.
Step 3: Melt the wax and pour it into the bowl. Let it cool for about 1-2 minutes, then gently position the skeleton so it looks like it’s soaking in the wax.
Step 4: While wax is still soft, insert the faux pearls and decorations around the figure.
Step 5: Once fully cooled, add the towel wrap and black glittery details around the rim.
#2. Hugging Ghosts Candle Holders
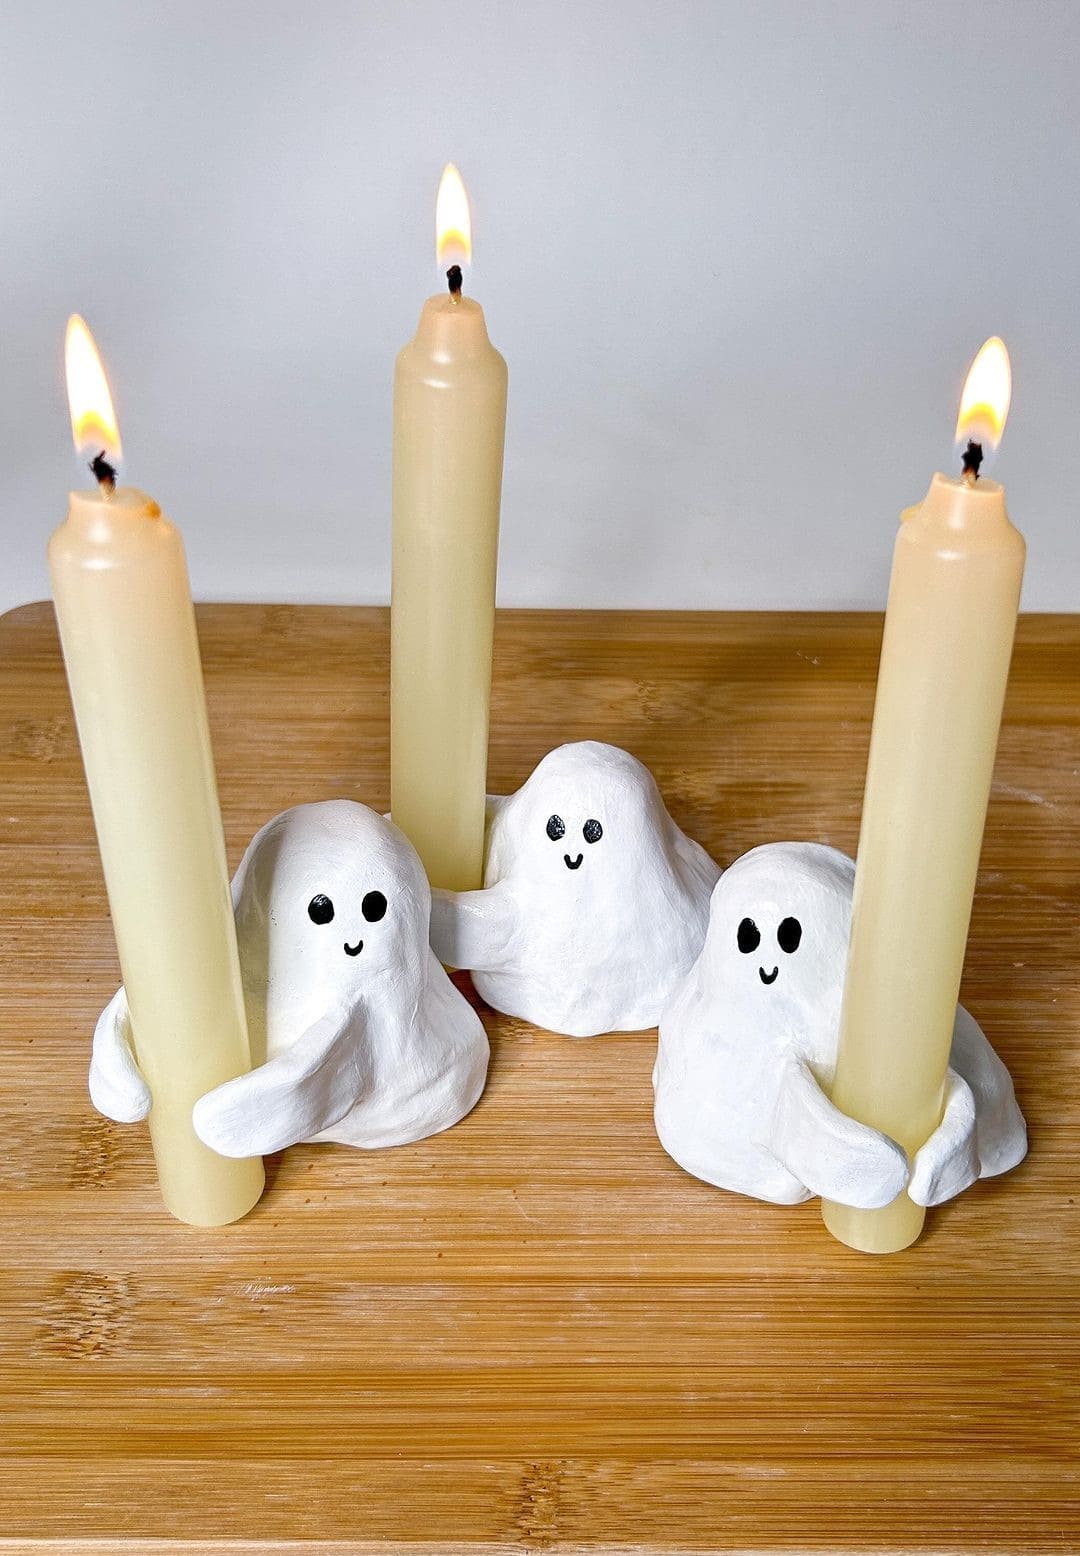
These tiny phantoms might just steal the show at your Halloween dinner table.
With their chubby arms lovingly wrapped around taper candles and their adorable hand-painted faces beaming with joy, they bring a sweet twist to spooky season.
Plus, their playful vibe makes them ideal for a family-friendly setup or a cozy ghost-themed gathering.
Materials Needed
- White air-dry clay (approx. 200g per ghost)
- Beige taper candles (standard width)
- Clay modeling tools
- Black acrylic paint or permanent marker
- Sealer or matte varnish (optional)
Step-by-step Guide
Step 1: Form a small ghost body with rounded head and flowing base. Then shape arms so they wrap around a candle securely.
Step 2: Use a taper candle to gently press into the clay to create a snug holder. Don’t leave it in while drying.
Step 3: Let the ghost dry fully (24-48 hours, depending on clay type).
Step 4: Paint on eyes and a smile with black acrylic or marker. Seal if desired.
Step 5: Once dry, insert your candle and let your ghost glow!
Read more: 25 Super Fun and Cute Air-dry Clay Projects You Can’t Miss
#3. Creepy-Crawly and Eyeball Jar Lanterns
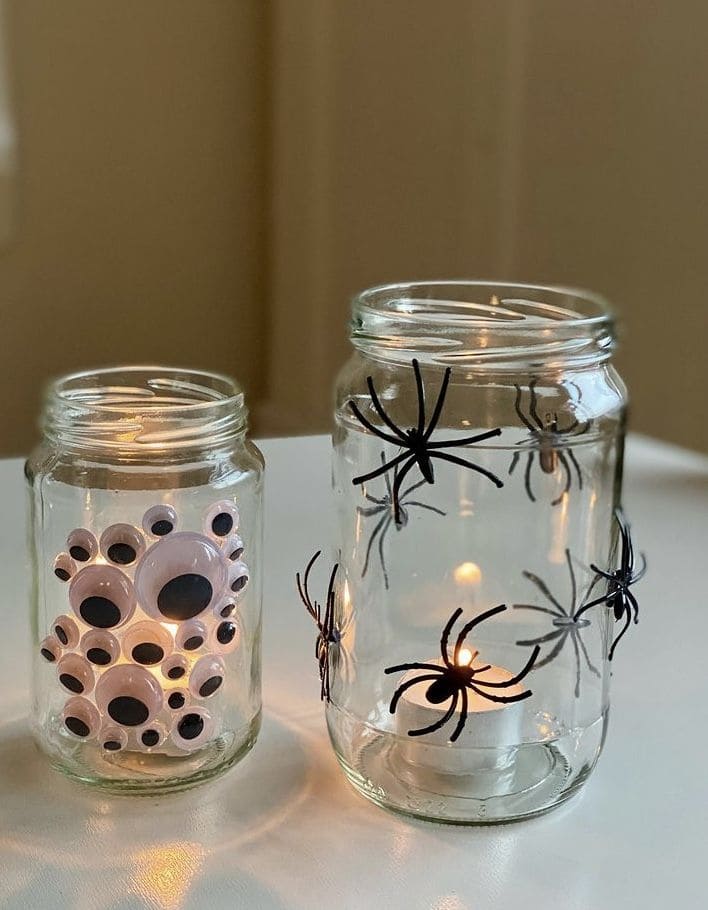
With just a couple of jars, you can instantly conjure up a spine-tingling Halloween glow.
One jar is filled with wiggly googly eyes in different sizes that almost seem to follow your every move. The other is crawling with creepy black spiders scattered across the glass, their silhouettes dancing in the candlelight.
Also, these jars are delightfully eerie and perfect for tabletops, windowsills, or even outdoor steps to light the path for trick-or-treaters.
Materials Needed
- 2 empty glass jars (approx. 5″-6″ tall)
- 20-30 plastic googly eyes (various sizes)
- 8-10 plastic spider rings or stickers
- Glue dots or hot glue gun
- 2 tea light candles or LED tealights
Step-by-step Guide
Step 1: Clean and dry the jars thoroughly. Then glue googly eyes on one jar in a clustered pattern for a watchful effect.
Step 2: Attach plastic spiders on the second jar, spreading them evenly for balance.
Step 3: Drop a tealight inside each jar and light it carefully (or switch on LED alternatives).
Step 4: Place the jars somewhere visible for maximum spook factor.
#4. Potion Bottle Candle Drip Decor
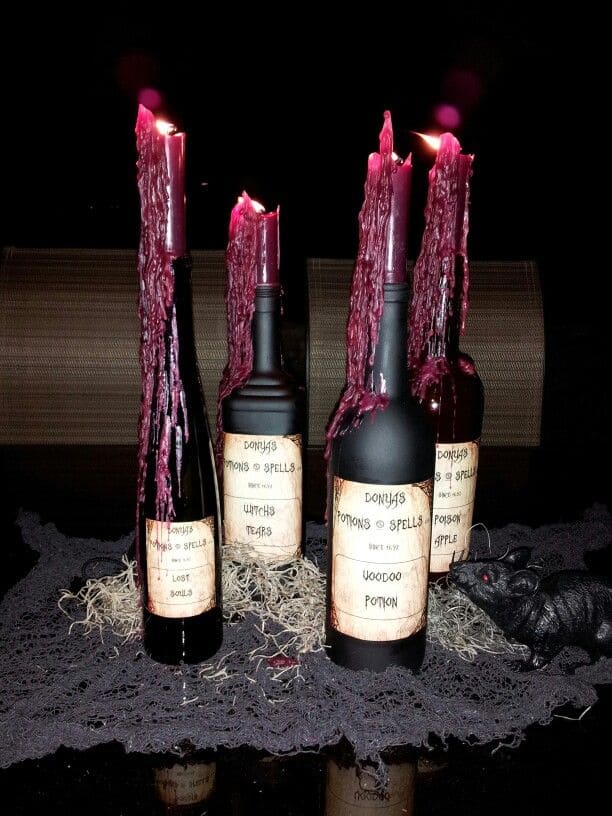
These creepy candle bottles look like they came straight from a witch’s apothecary.
Black-painted wine bottles, each labeled with sinister concoctions like Witch’s Tears, Lost Souls, Voodoo Potion ooze thick crimson wax down their sides, making them look freshly cursed.
Plus, the blood-red candle drips amplify the eerie vibe, perfect for a gothic dinner party or haunted spell station.
Materials Needed
- Empty wine bottles (washed and label-free)
- Matte black spray paint (optional)
- Printable potion labels or handmade tags
- Red taper candles
- Hot glue gun (if you want controlled drip effects)
- Decorative moss or faux cobwebs
Step-by-step Guide
Step 1: Paint your bottles black and let them dry fully. Or leave them dark green or brown for a vintage feel.
Step 2: Apply aged-looking labels to the front. You can print them or handwrite using parchment-style paper.
Step 3: Insert red taper candles. Finally, light them and let wax drip naturally, or use hot glue for a pre-dripped look.
Tip: You can burn candles a few hours before your event for maximum waxy drama. Always monitor the flame.
#5. Mason Jar Spider Votives
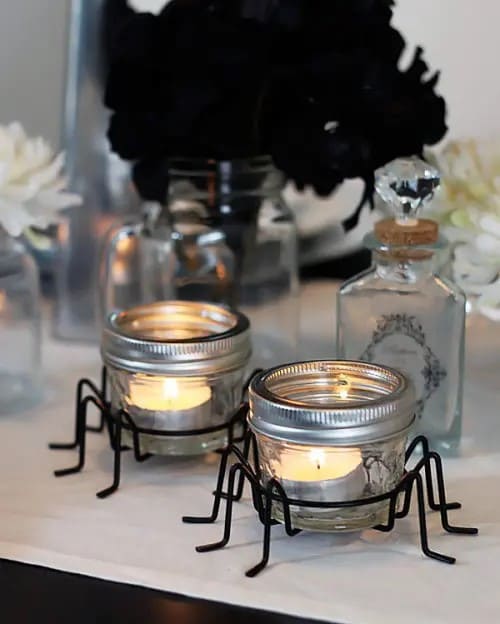
Not every Halloween craft needs to be over-the-top. These mason jar votives bring subtle fright with an adorable twist.
Resting on spider-like wire legs, each jar glows with the soft flicker of candlelight. It’s the kind of DIY that instantly elevates your tabletop decor.
Besides, you can place them on a dining table, mantel, or even a windowsill for a scene that whispers haunted charm without screaming.
Materials Needed
- Two small mason jars (4 oz size)
- Black craft wire (16-18 gauge)
- Wire cutters and pliers
- Tea light candles
Step-by-step Guide
Step 1: Wrap a piece of wire around the bottom of the mason jar to form a stable ring base.
Step 2: Use separate wire pieces to bend and shape eight spider legs for each jar. Then attach them to the base ring securely.
Step 3: Place your candle inside the mason jar and enjoy your spidery soft glow.
#6. Chic Skull Candelabra Centerpiece
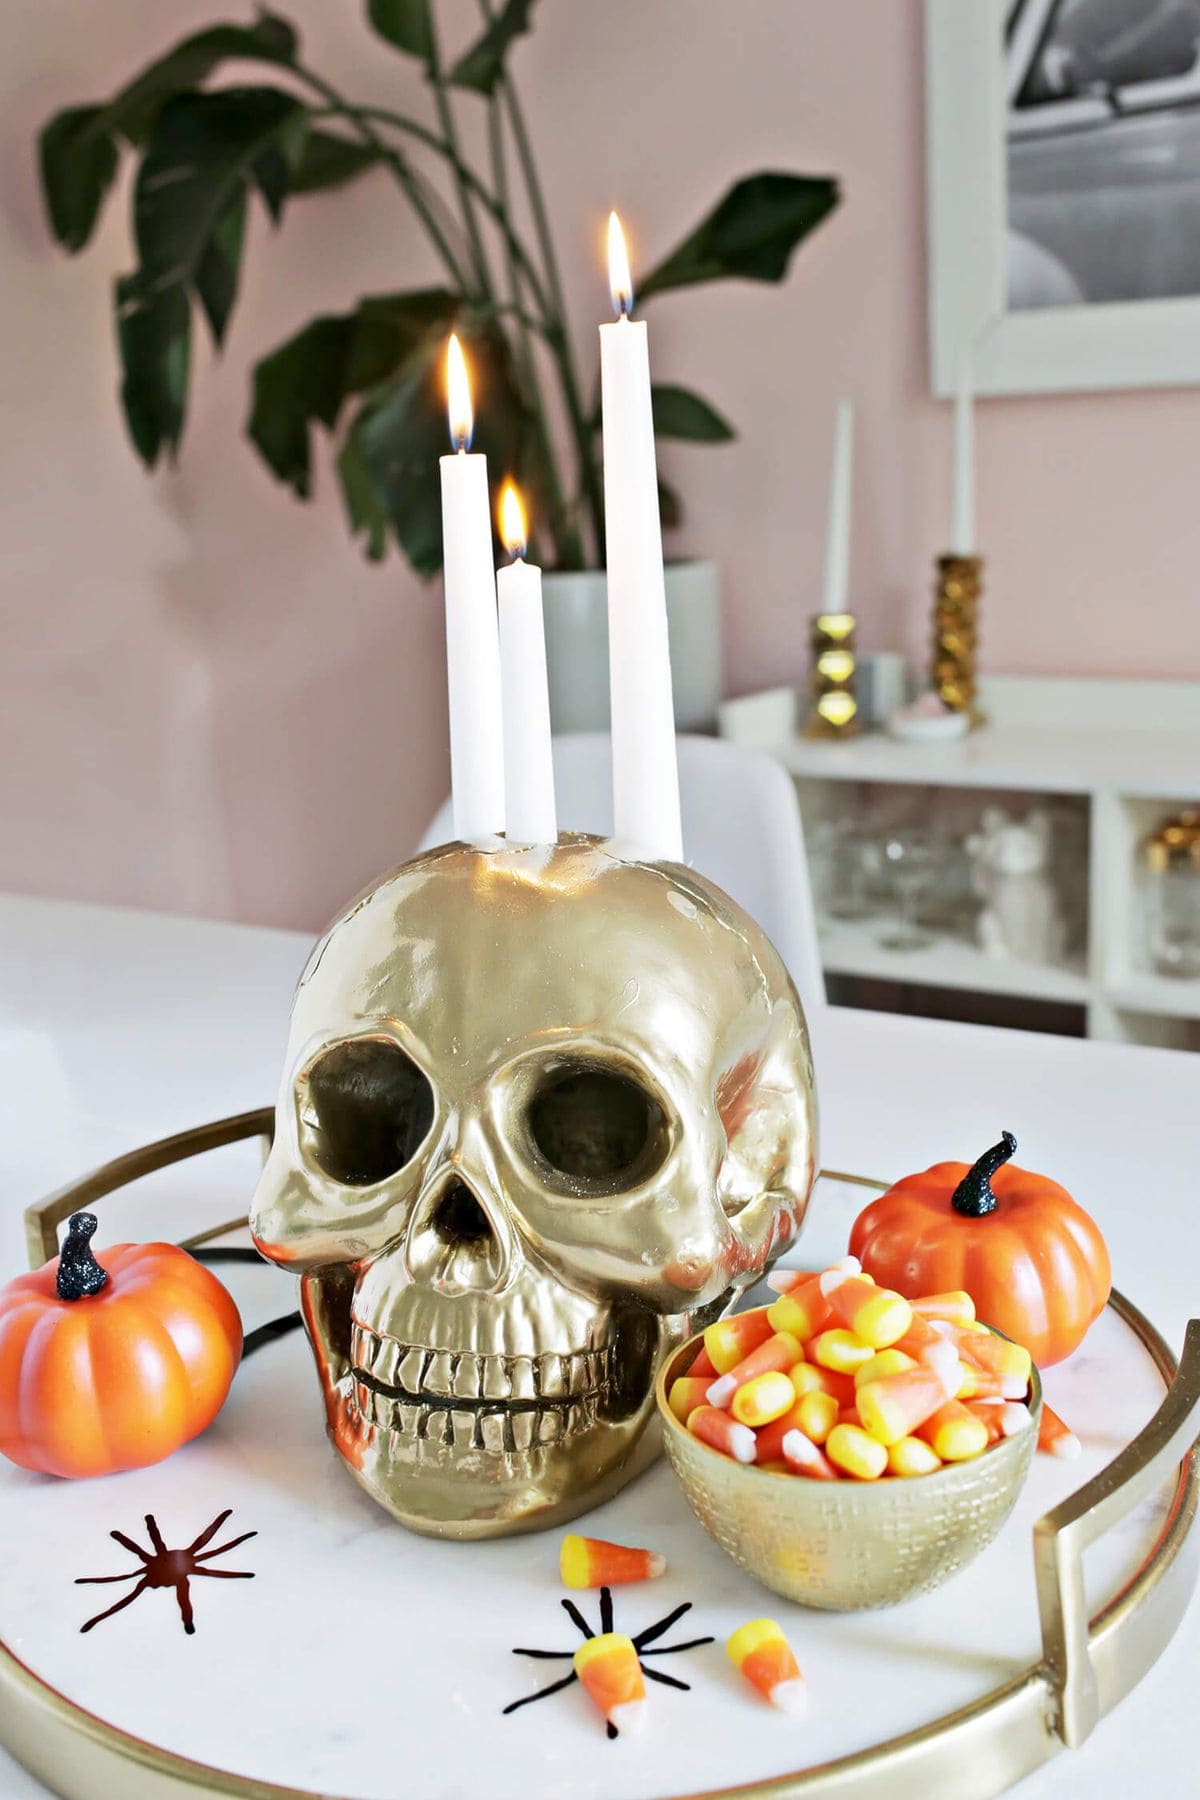
Equal parts eerie and elegant, this golden skull candelabra is your new Halloween dinner party showstopper. The metallic finish adds a luxe touch, while the stark white taper candles bring a classic gothic vibe.
You set it on a marble tray, surround it with candy corn, mini pumpkins, and plastic spiders, and you’ve got a tablescape that balances spooky and sophisticated.
It doesn’t scream Halloween, it smolders with a confident, modern twist. Perfect for glam witches, dark romantics, or anyone who likes their fright polished.
Materials Needed
- Plastic skull (life-sized, hollow)
- Metallic gold spray paint (1 can)
- 3 white taper candles (10-12 inches)
- Drill with 3/4-inch bit
- Tray for display (optional)
Step-by-step Guide
Step 1: Drill three evenly spaced holes on top of the skull, just wide enough to snugly fit your candles.
Step 2: Spray paint the skull gold and let it dry completely (24 hours recommended).
Step 3: Insert taper candles into the holes and light them when it’s time to impress.
#7. Glowing Mummy Jar Lanterns
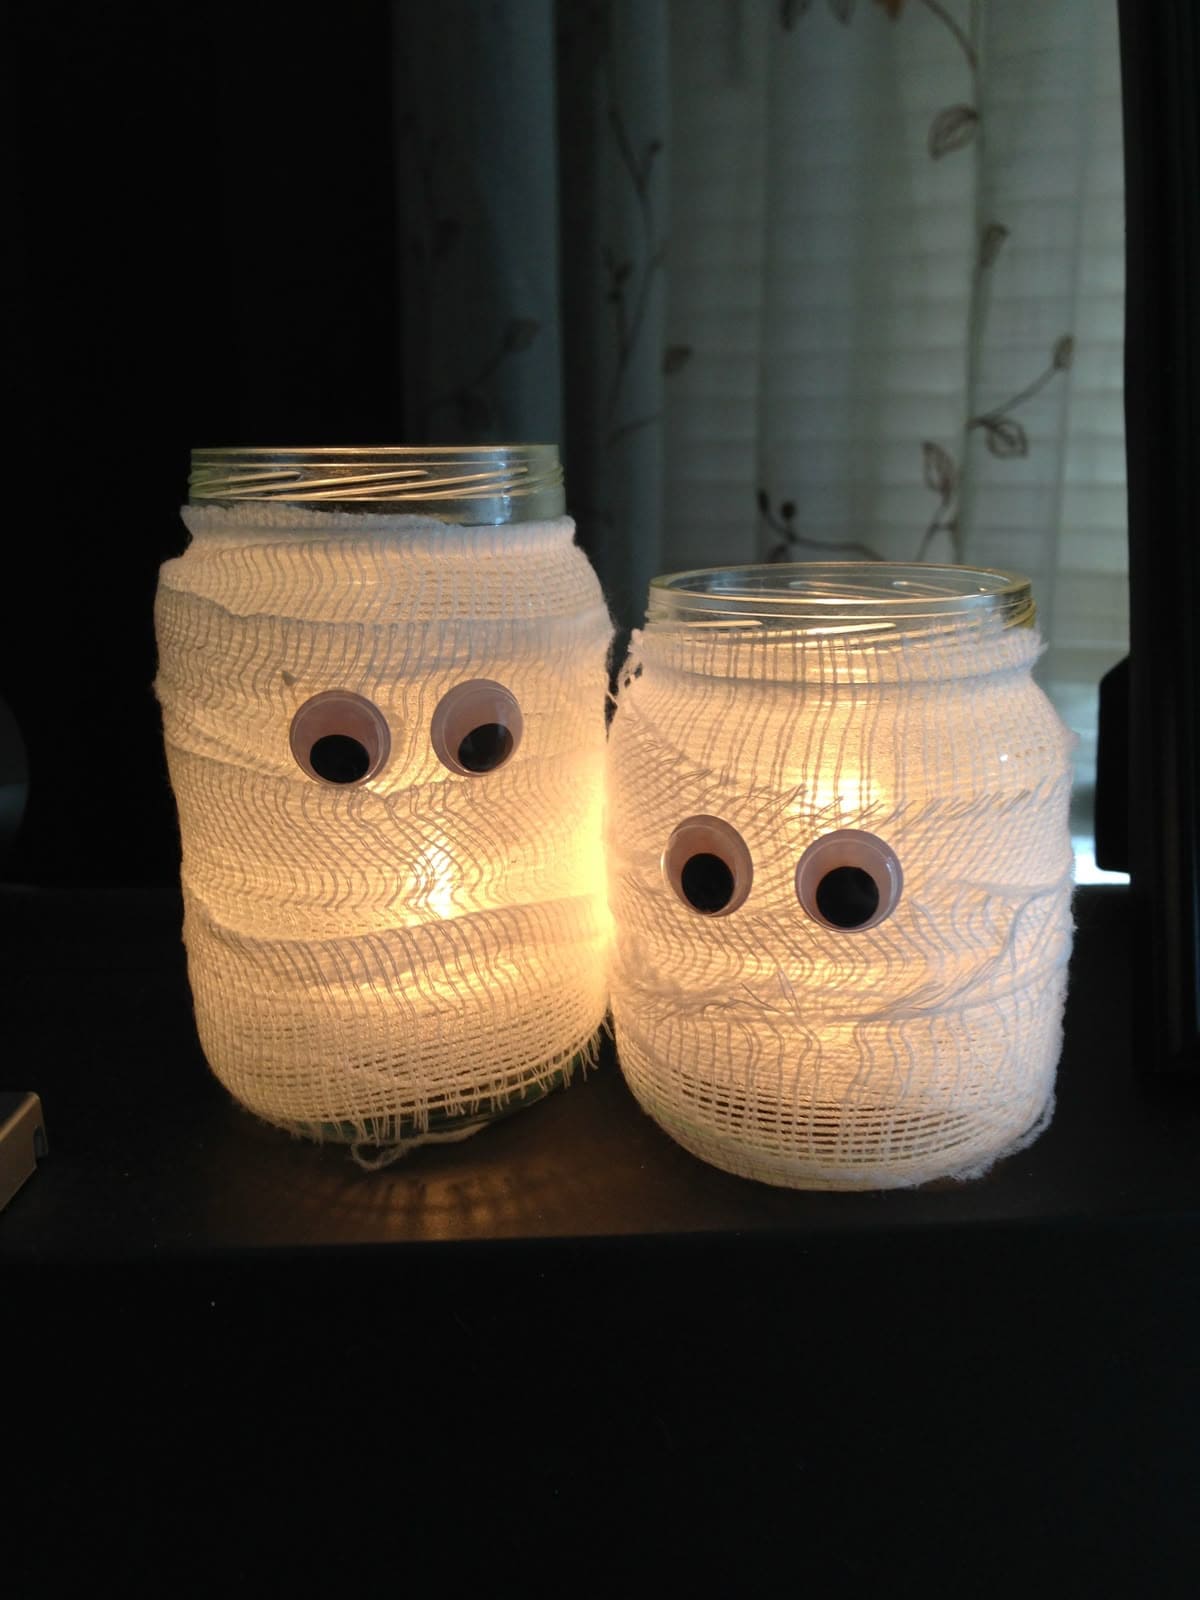
These little mummy jars are so cute, they almost steal the spotlight from the rest of your Halloween decor. Soft gauze wrapped around simple glass jars gives them that classic mummy look.
Once lit from within, they give off a cozy, haunted glow that peeks through the layers like ancient secrets.
With those big googly eyes peering out, they’re perfect for a mantel, windowsill, or Halloween party table.
Materials Needed
- 2 glass jars (around 4″-6″ tall)
- 1 roll of white gauze or medical bandage (at least 2″ wide, 1-2 yards)
- 4 medium-sized googly eyes
- Glue dots or craft glue
- 2 LED tealight candles (flameless for safety)
Step-by-step Guide
Step 1: Wrap each jar with gauze, overlapping the layers like you’re dressing a real mummy.
Step 2: Secure the ends with a dab of glue or by tucking them under a layer.
Step 3: Stick on two googly eyes per jar, letting them peek through a gap in the gauze.
Step 4: Finally, place a flameless tealight inside and enjoy the soft, eerie glow.
#8. Golden Spider Candle Holder
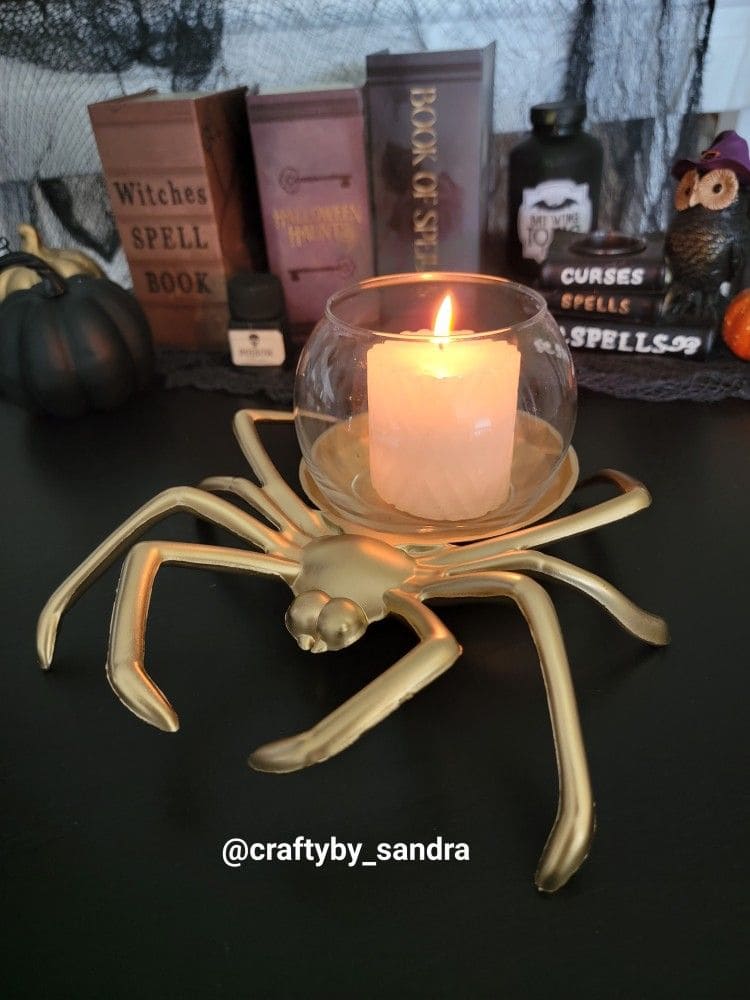
Wow, this glamorous arachnid turns creepy-crawly into candle-lit chic. A plastic Halloween spider, spray-painted gold, becomes the unexpected star of your spooky centerpiece.
With a clear glass votive on its back and a glowing candle nestled inside, it creates an eerie but elegant vibe. It’s perfect for gothic glam lovers or anyone who wants their Halloween decor to sparkle with a bit of sinister charm.
Nestled among old spell books, black pumpkins, or velvet fabric, this spider becomes a haunting focal point on any shelf or table.
Materials Needed
- Large plastic spider (8-10 inches wide)
- Gold spray paint (1 can)
- Round glass candle holder (3-4 inch diameter)
- Hot glue gun or E6000 glue
- Battery-operated or real tealight candle
Step-by-step Guide
Step 1: Spray the plastic spider with gold paint in a well-ventilated area; let it dry fully.
Step 2: Secure the glass candle holder on the spider’s back using hot glue or E6000.
Step 3: Place a tealight inside and position the spider on your Halloween mantle or table.
#9. Glitter Eyeball Glass Candle Holder
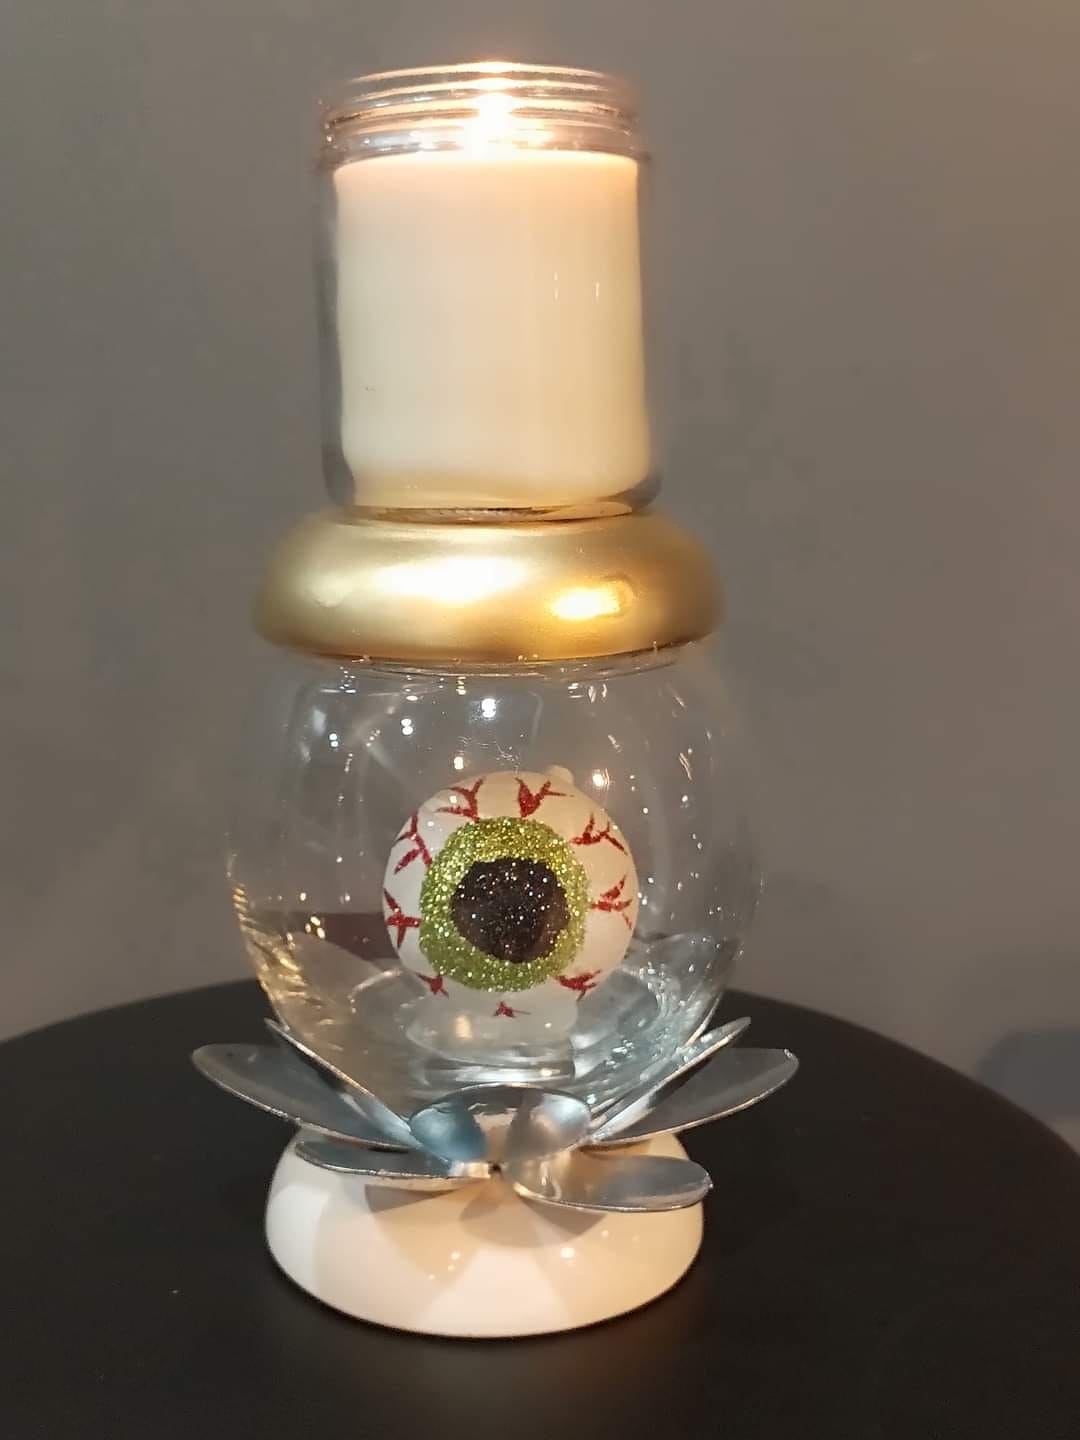
Look at this candle holder! It is not your average Halloween décor, it’s got its eye on you, literally.
Suspended inside a clear glass vessel, a glittery, bloodshot eyeball glares out with playful menace. A creamy white pillar candle rests above, casting a warm glow through the glass and highlighting the spooky sparkle within.
Bonus, it’s the perfect mix of glam and creepy, ideal for adding a conversation-starting centerpiece to your haunted house setup.
Materials Needed
- Small glass jar or round vase with wide base
- Plastic or foam eyeball ornament (approx. 2-3 inches)
- Glitter, paint, and sealant
- Round candle (approx. 3 inches height)
- Gold spray paint
- Metal or faux flower base
Step-by-step Guide
Step 1: Paint the rim of the glass jar gold and allow it to dry completely.
Step 2: Customize the eyeball with red veins and glittery iris details, then seal with clear varnish.
Step 3: Place the eyeball inside the jar so it’s centered and upright.
Step 4: Position the candle on top of the jar opening, ensuring it sits flat and steady.
Step 5: Now you just set the piece on a decorative flower base or coaster for added flair.
#10. Skull Pedestal Spiderweb Candle Holders
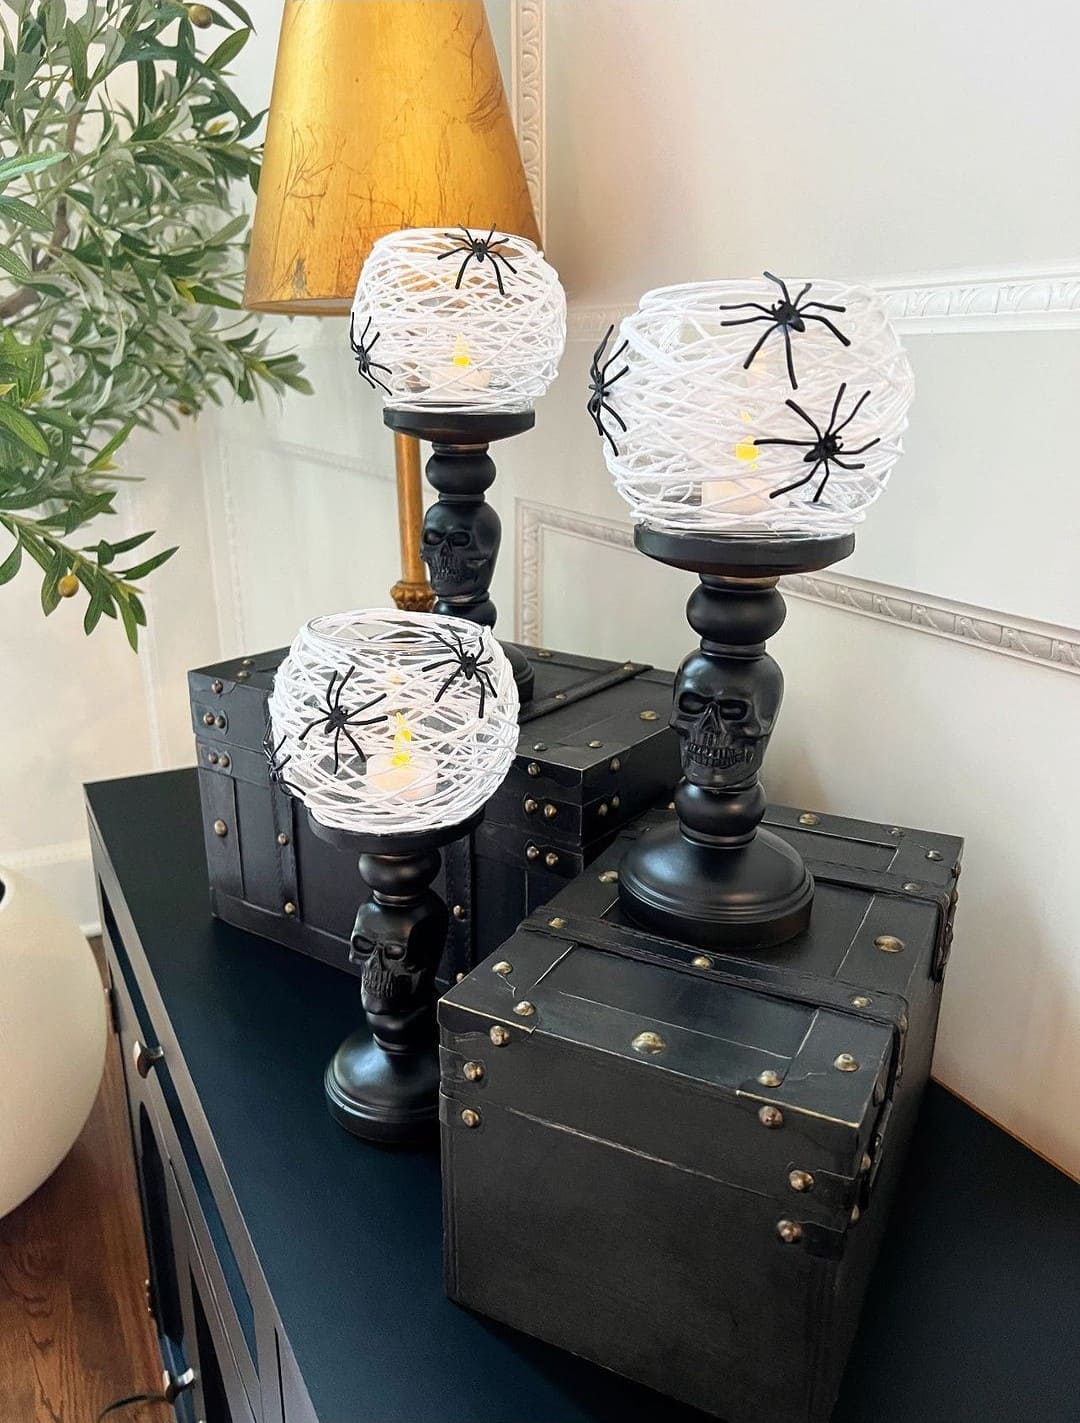
These eerie-yet-elegant Halloween candle holders look like something conjured straight from a gothic apothecary.
Created from Dollar Tree supplies, the black skull pedestals exude just enough menace to thrill your guests, while the white string web globes soften the scene with glowing mystery.
Specially, a few creepy-crawly spiders perched on top give that perfect tingle-down-your-spine moment. Cluster them on stacked boxes like in the photo for height and drama.
Materials Needed
- 3 candle holders or candlesticks with skull details (approx. 6-10 inches tall)
- Black spray paint (if needed)
- Yarn or string (white or glow-in-the-dark)
- Small round balloons
- Mod Podge or white glue
- Plastic spiders
- Battery-operated tea lights
Step-by-step Guide
Step 1: Spray-paint the candlesticks black and let them dry.
Step 2: Inflate small balloons and wrap them tightly with string soaked in Mod Podge. Let dry overnight, then pop the balloons.
Step 3: Place the web balls on top of the holders and insert tea lights inside.
Step 4: Finally, hot glue a few plastic spiders around the web for an added scare.
#11. Haunted Portrait Luminaries
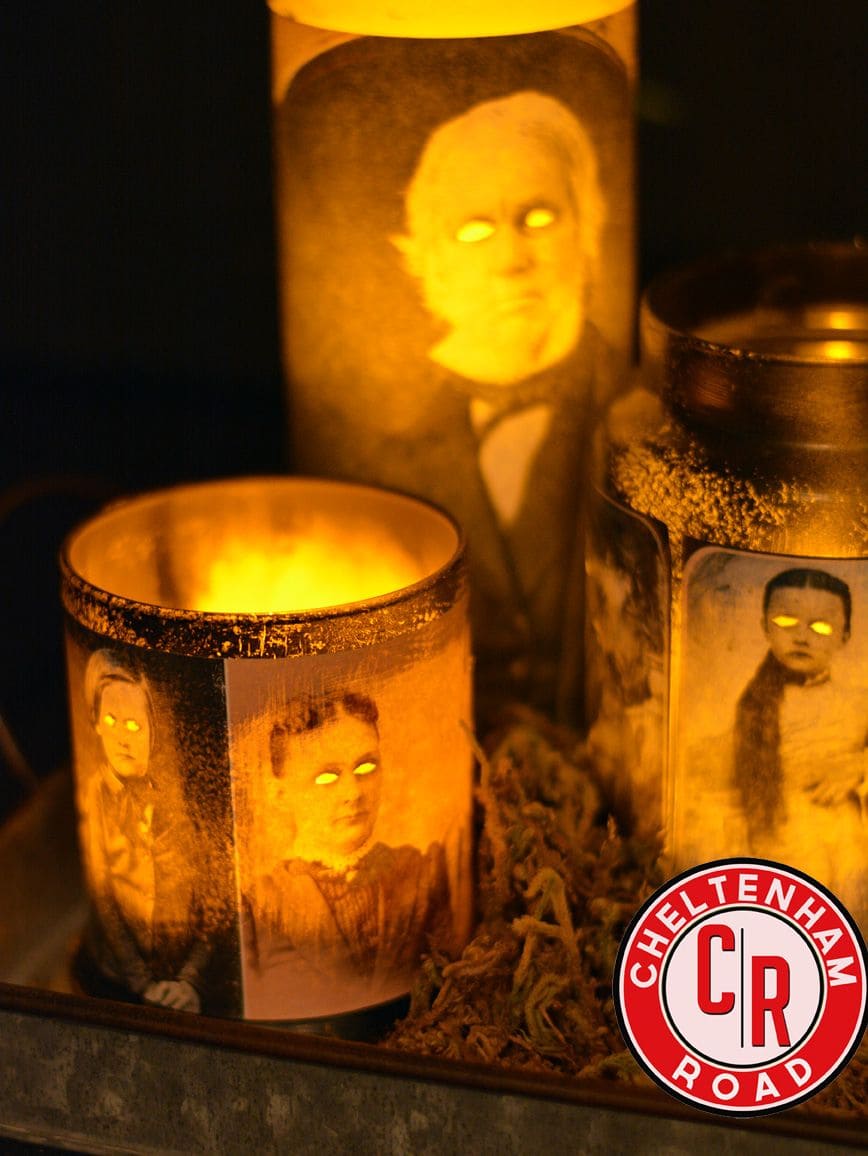
Something about these ghostly faces makes the room feel watched. These haunting Halloween luminaries feature old Victorian portraits with glowing, hollow eyes that seem to follow you across the room.
Backlit with a golden candlelight flicker, the eyes pierce through the dim, creating an unsettling but irresistibly cool effect. They look like vintage family photos until you notice the unnatural glow and feel the chill creep in.
Ideal for a haunted house theme or gothic tablescape, this DIY adds a clever dose of psychological creepiness without a drop of blood.
Materials Needed
- Glass jars (various sizes: 8-16 oz)
- Vintage black-and-white portrait prints (sized to fit jars)
- Glue stick or Mod Podge
- Craft knife or hole punch
- Battery-powered tealights or LED candles
Step-by-step Guide
Step 1: Print and cut out vintage portraits to wrap around each jar. Then cut small holes where the eyes are (you can use a sharp craft knife for precision).
Step 2: Glue the photo onto the jar. Then smooth out any wrinkles gently with your fingers or a flat tool.
Step 3: Place a battery-powered candle inside. Now, watch those glowing eyes come to life the moment the light hits.
#12. Midnight Bat Wings Candle Holder
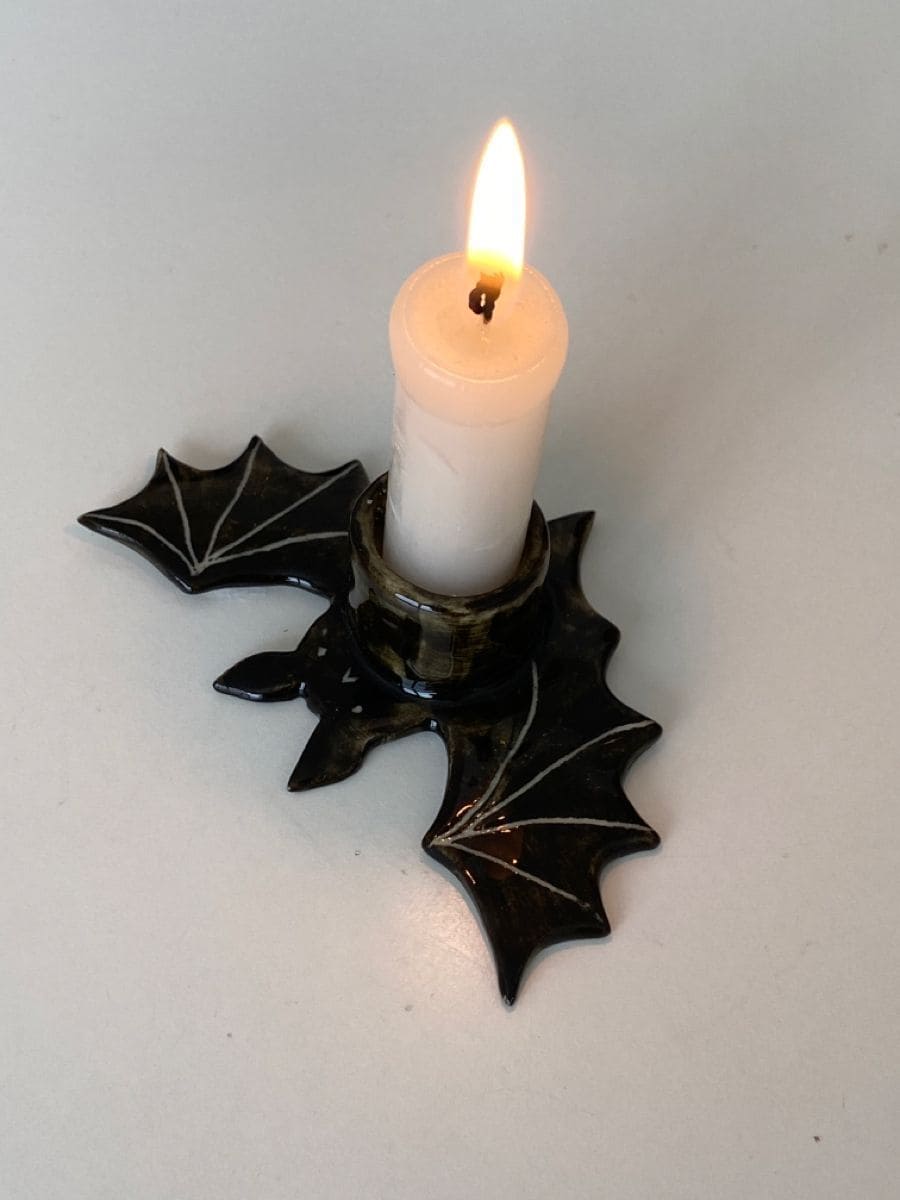
You can see gothic charm takes flight in this winged candle holder that looks straight out of Dracula’s study.
The glossy black wings curve outward from the base like a bat caught mid-hover, while a glowing white candle rises from its center like a beacon in the dark. It’s elegant yet mischievous, perfect for setting a spooky mood on your windowsill, bookshelf, or altar.
Also, the contrast between black ceramic and the soft candlelight creates a dramatic flair without going over the top.
Materials Needed
- Black polymer clay (250g)
- White taper candle (standard size)
- Craft blade or clay sculpting tools
- Glossy black acrylic paint
- Thin white paint pen or fine brush
- Oven (if using oven-bake clay)
Step-by-step Guide
Step 1: Shape the bat body and wings out of clay, forming a circular holder at the center sized to fit your candle snugly.
Step 2: Carve in wing membrane details with a blade. Then bake or let air dry depending on your clay type.
Step 3: Once hardened, paint with glossy black. You highlight the wings using a white pen or thin brush.
Step 4: Insert the candle carefully and place it on a flat surface to enjoy its eerie glow.
#13. Creepy Witch Hand Wall Sconces
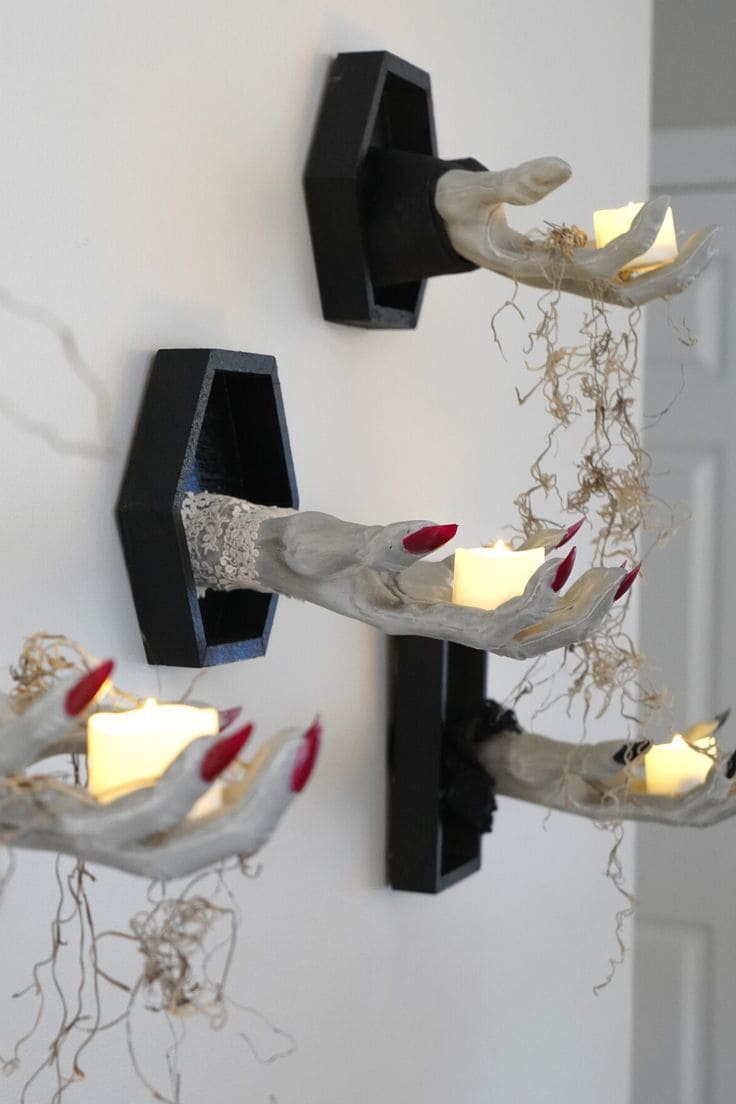
If you want your guests to feel like they’ve entered a haunted manor, these wall-mounted witch hand sconces will do the trick.
With their clawed red nails and weathered gray paint, these disembodied hands extend from shadowy coffins to offer up flickering flames. The effect is both sinister and theatrical.
It’s a craft that leans more toward horror movie set than sweet Halloween whimsy, and that’s exactly why it’s so captivating. You can mount them along hallways, near staircases, or above a gothic entry console for a chillingly chic vibe.
Materials Needed
- Plastic witch or skeleton hands (life-size)
- Wooden boxes or coffin-shaped plaques (approx. 6-8 inches deep)
- Black and gray acrylic paint
- Hot glue gun
- Battery-operated tealight candles
- Optional: Spanish moss, lace scraps, screws
Step-by-step Guide
Step 1: Paint the wooden plaques black and let dry completely.
Step 2: Paint the plastic hands gray, adding shadow details for depth. Let dry, then hot glue the hands inside the wooden plaques so they extend outward.
Step 3: Place a tealight in each palm and decorate with moss or lace for added spookiness.
#14. Hand-Painted Spiderweb Candle Holders
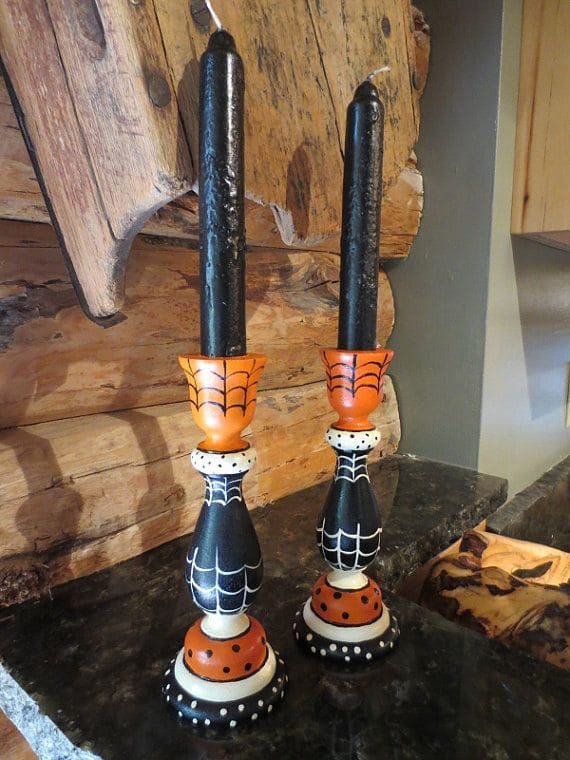
These tall taper candle holders feel like something conjured from a witch’s cozy woodland cottage.
Hand-painted in festive Halloween hues like pumpkin orange, bone white, and spooky black, each holder is adorned with cobweb designs, polka dots, and quirky patterning.
Moreover, the glossy black taper candles add the perfect eerie accent. Whether placed on a mantel or dining table, they balance fun and fright with playful sophistication.
Materials Needed
- 2 wooden candle holders (10-12 inches tall)
- Acrylic paints: black, orange, white
- Fine detail paintbrushes
- Clear acrylic sealer spray
- 2 black taper candles (standard size)
Step-by-step Guide
Step 1: Clean the wooden holders and apply a base coat of your chosen color.
Step 2: Using fine brushes, add spiderwebs, dots, and lines in contrasting colors. Let each section dry before moving to the next.
Step 3: Once paint is dry, seal with a clear coat to preserve the design and add a slight sheen.
Step 4: Add black taper candles and place your spooky masterpieces where they’ll shine.
#15. Gothic Tentacle Candle Holders
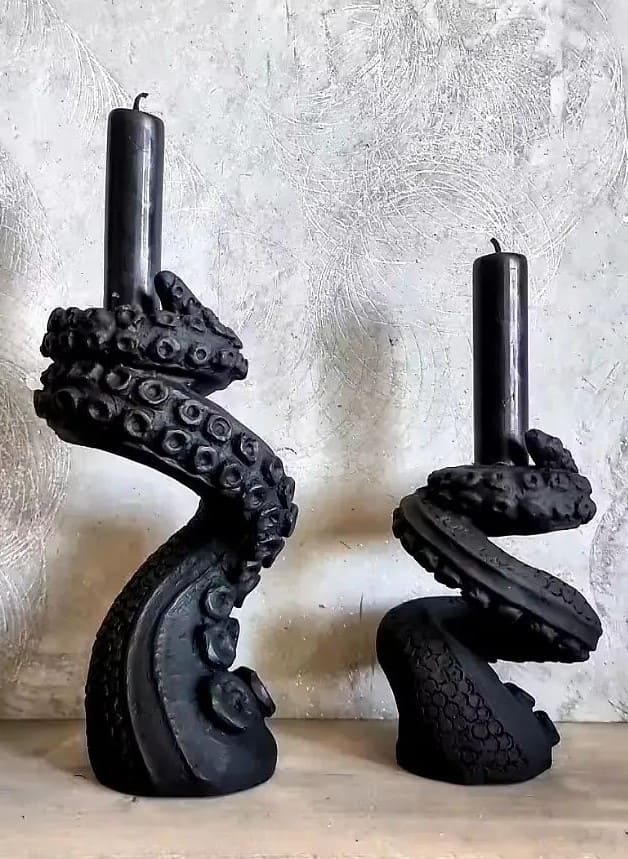
It’s like something from a sunken shipwreck: dark, powerful, and unnervingly elegant. These tentacle candle holders look as though a sea creature reached from the abyss to clutch your taper candles in a hypnotic grip.
They’re sculptural art pieces as much as they are functional decor, commanding attention on any Halloween table, gothic mantel, or dark fantasy setup.
Specially, it’s best for those who like their crafts with a touch of the macabre and mythological.
Materials Needed
- Air-dry clay or polymer clay (500-600g)
- Clay sculpting tools or toothpicks
- Black acrylic paint (2 oz)
- Matte sealant or clear varnish (optional)
- 2 black taper candles
- Heavy-duty glue (if attaching to base)
Step-by-step Guide
Step 1: Shape thick tentacles with natural-looking curves, spiral them upward with enough curl to nestle a candle securely at the top.
Step 2: Use a toothpick or rounded stylus to press in suction cup details along the inside of each tentacle. Don’t rush, this texture brings it to life.
Step 3: Let the clay dry fully (24-48 hours if air-dry), then paint the entire sculpture black. Apply two coats for a bold, shadowy effect.
Step 4: Once dry, place or glue in your taper candles. Optionally, you can seal with matte varnish for a refined, stone-like finish.
#16. Little Ghost Campfire Candle Holder
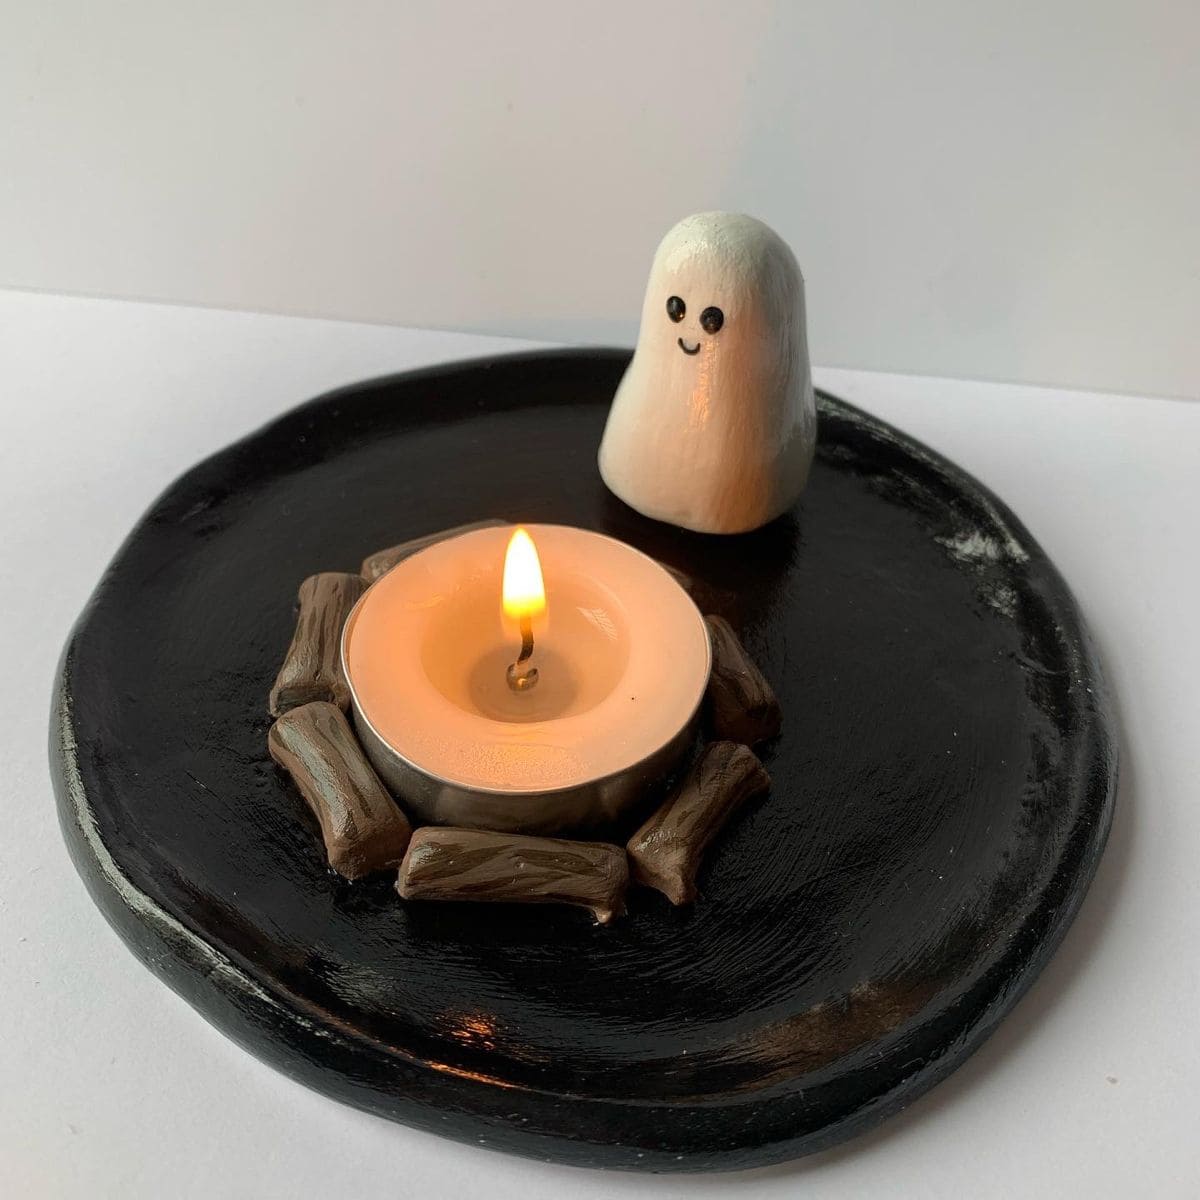
There’s something oddly comforting about this tiny ghost watching over its flickering fire.
Like a spirit who just wants to toast marshmallows and keep you company on chilly October nights.
This piece feels like a scene from a Halloween bedtime story, and the best part is that yu can sculpt it yourself. It’s perfect for a mantel, desk, or little nook where a flicker of friendliness feels just right.
Materials Needed
- Air-dry clay (about 100g)
- Black acrylic paint (1 oz)
- White acrylic paint (1 oz)
- Brown acrylic paint (for logs, 1 oz)
- Fine paintbrush
- Gloss varnish (optional)
- 1 tealight candle (real or LED)
Step-by-step Guide
Step 1: Roll out a round base from your clay, about 5 inches across. You smooth the surface with water and let it set slightly before shaping details.
Step 2: Sculpt a small ghost figure with oval body, rounded top. Then add a little personality with finger dimples for the eyes and smile.
Step 3: Make small log shapes and arrange them in a loose circle, leaving space in the middle for your tealight.
Step 4: Let the clay dry completely (usually 24 hours). Once dry, paint your base black, logs brown, and ghost white.
Step 5: Finally, add black eyes and a smile to your ghost.
See also: 24 Adorably Spooky Halloween Ghost Crafts to Try This Season
#17. Gothic Lace Candle Jar
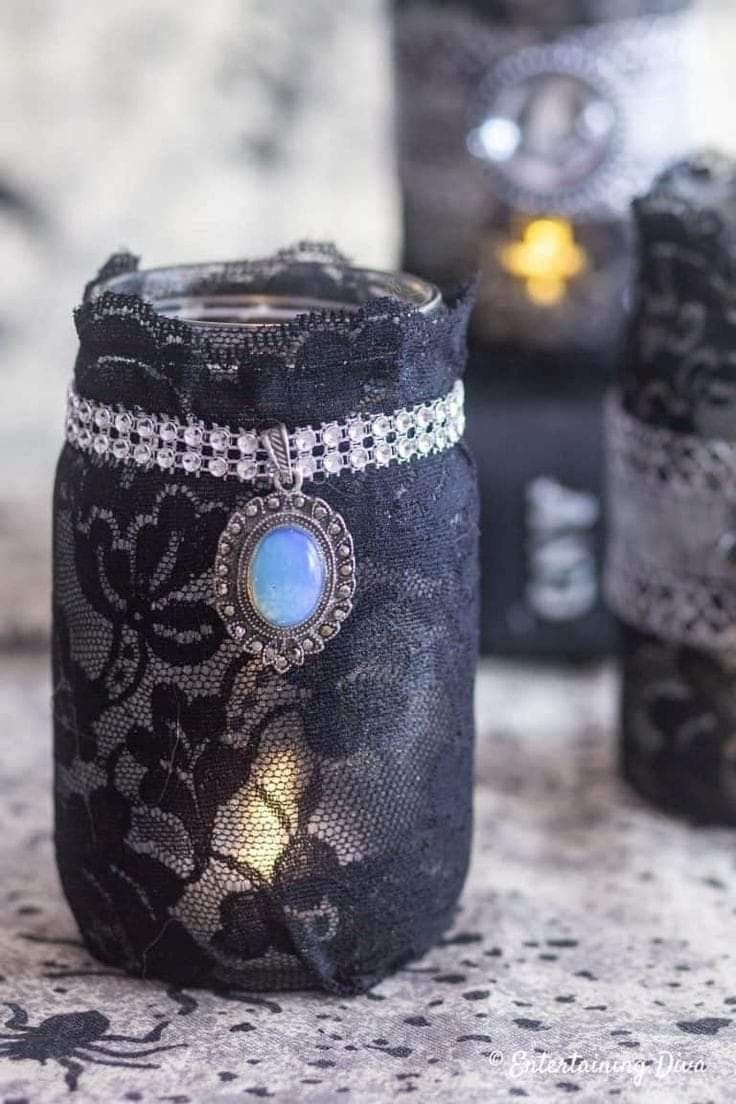
Elegance meets eerie in this stunning gothic lace candle holder. Imagine it flickering softly on a velvet-draped mantel or casting romantic shadows across your Halloween tablescape.
The black lace gives it a Victorian charm, but it’s that jeweled pendant and rhinestone trim that whisper secrets of a haunted heiress.
If your Halloween style leans more mysterious than monstrous, this craft is for you. You’ll love how the lace softens the glow, creating a candlelit aura that feels like a séance is just moments away.
Materials Needed
- 1 small mason jar (8-12 oz size)
- 1 piece of black lace fabric (8″×6″)
- 1 rhinestone ribbon (12″)
- 1 vintage-style pendant or brooch
- Hot glue gun or fabric glue
- 1 tealight candle (real or LED)
Step-by-step Guide
Step 1: Wrap the jar with lace, making sure the pattern aligns neatly around the glass. Then tuck in any excess at the base and glue it down gently.
Step 2: Cut your rhinestone trim to size and glue it around the neck of the jar. It should sit like a necklace.
Step 3: Add your pendant to the front. You can sew it on if it has loops or simply glue it in place for a polished look.
Step 4: Drop in your tealight, light it up, and watch the shadows dance through the lace.
#18. Bloody Handprint Candle Holders
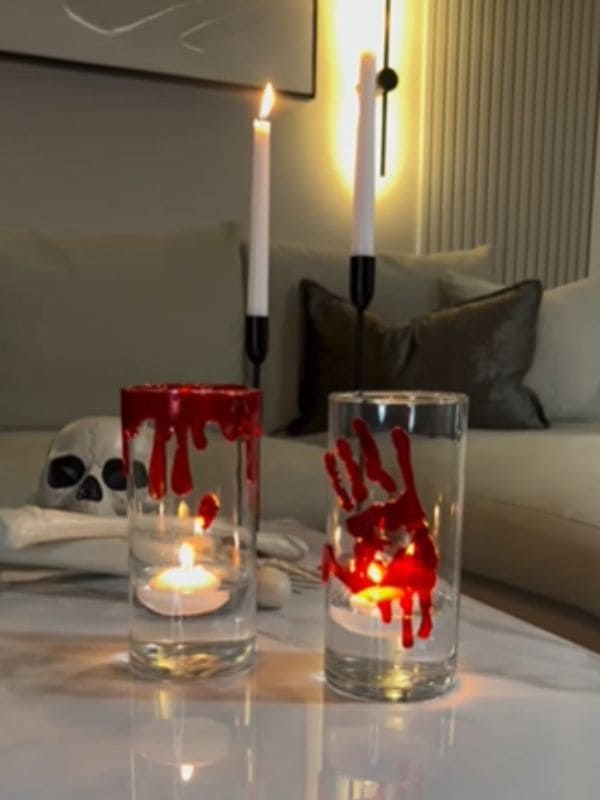
When your guests walk in, the lights dim low, and the flicker of a tiny flame dances behind a blood-red handprint.
These eerie glass candle holders are simple to make, but they deliver a full dose of horror-movie vibes.
Whether you’re planning a haunted dinner party or just want your coffee table to look deliciously disturbing, this craft nails the mood. Plus, you only need a few items, and the result looks straight out of a set designer’s playbook.
Materials Needed
- 2 clear glass candle holders (height: 6″-8″)
- Red glass paint or fake blood gel (about 2 oz)
- 1 paintbrush or your hand
- 2 tealight candles or LED votives
- Paper towels for clean-up
Step-by-step Guide
Step 1: Start by wiping the glass clean. It helps the paint stick better and keeps smudges at bay.
Step 2: If you’re going for the dripping effect, dip your paintbrush into the red paint or blood gel and apply it around the rim. Let it drip naturally down the sides. Don’t overthink it as the messier, the better.
Step 3: Now for the print. Either coat your hand in paint or use a paintbrush to coat it evenly, then press it firmly onto the glass. Let it dry fully for 1-2 hours depending on paint type.
Step 4: Drop a tealight inside and light it up. You’ll instantly see the blood-red glow intensify through the glass.
#19. Witch’s Familiar Claw Candle Holder
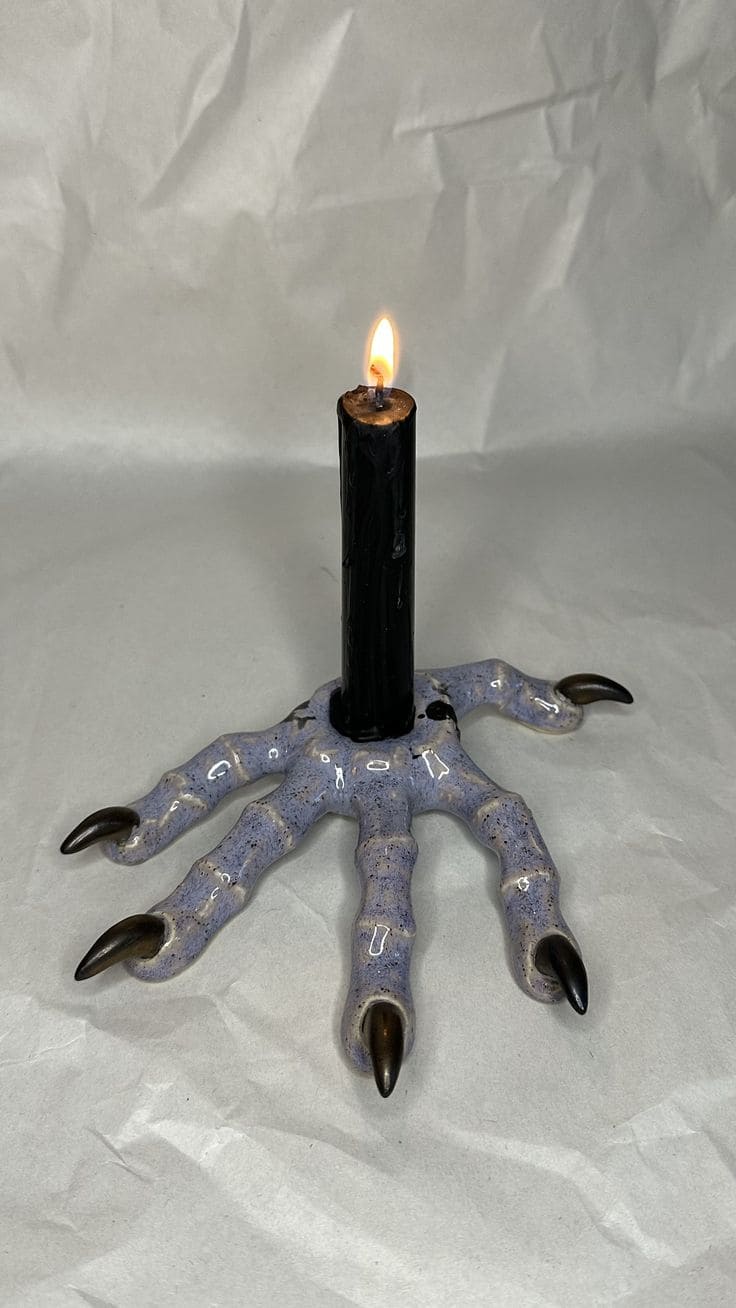
This clawed candle holder looks like it was pried from the vault of a long-forgotten spellcaster. Its gnarled fingers, tipped with black talons, cradle a single black taper like it’s channeling dark magic.
Perfect for a sorcerer’s altar, creepy bookshelf, or to haunt your dinner table with a little necromantic flair.
It’s equal parts creepy and captivating, and surprisingly easy to replicate with the right materials.
Materials Needed
- Air-dry clay or epoxy clay (500g)
- Plastic or resin claws (5 pieces, 1.5-2 inches)
- Black taper candle (standard ¾” base)
- Purple-grey acrylic paint (1-2 oz)
- Small candle cup (optional)
- Matte sealant spray
Step-by-step Guide
Step 1: Sculpt a claw base using clay, spreading five knobby fingers wide like they’re reaching. Make sure the center can hold your candle or cup securely.
Step 2: Attach faux claws to the tips of each finger, blending them smoothly into the clay.
Step 3: Let dry completely (follow clay instructions). Then, paint it with layered strokes of grey and purple, adding light speckles for texture.
Step 4: Seal with matte spray once dry. Insert the candle into the center hole or use a glued-in candle cup for a snug fit.
#20. Beetlejuice Sandworm Candle Holder
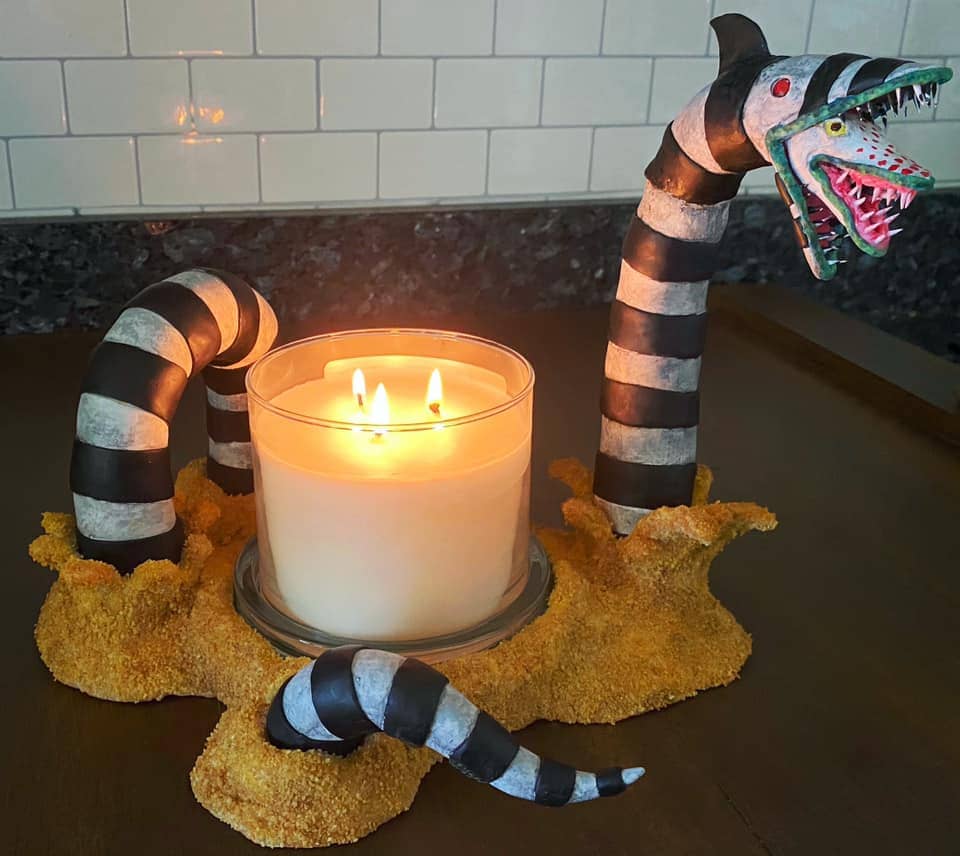
Inspired by the bizarre charm of Beetlejuice, this striped sandworm slithers up from the eerie yellow sand like it’s about to chomp down on your decor.
With exaggerated fangs, bulging eyes, and a tongue that’s straight-up nightmare fuel, it surrounds your candle in a thrilling circle of creepy-cool chaos.
You can easily place this on your kitchen counter or mantel, and you’ll instantly summon Tim Burton vibes with a little fire-lit drama, of course.
Materials Needed
- 1 glass jar candle (3″-4″ diameter)
- 3 segments of lightweight clay or foam
- Acrylic paint (black, white, red, green)
- Hot glue gun
- Yellow sand or textured foam (approx. 10″ wide)
- Optional: Gloss varnish for a shiny finish
Step-by-step Guide
Step 1: Sculpt or bend foam to create three curving snake-like bodies, tapering toward the tips.
Step 2: Paint alternating black and white stripes along each segment and let dry completely.
Step 3: Detail the head like sharp teeth, red gums, and vivid eyes using small brushes for precision.
Step 4: Secure all worm segments around a foam or wood base, gluing firmly.
Step 5: Create textured sand using yellow-tinted foam or sand glued to the base, then place your candle in the center.
#21. Glowing Jack-o’-Lantern Jar Collection
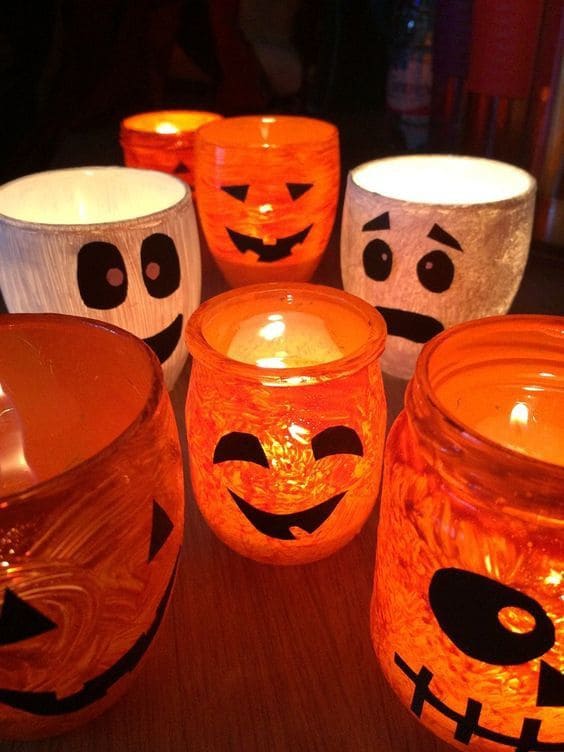
Halloween doesn’t always have to be spooky, sometimes it’s downright adorable.
This cheerful army of glowing jar lanterns is proof. Painted in bright orange and crisp white with expressive jack-o’-lantern and ghost faces, each jar beams with personality.
There’s a sweet heart-eyed pumpkin, a worried little ghost, and even a one-eyed stitched-up ghoul, all lit from within to cast a warm, flickering glow. Grouped together, they create a playful display that feels like a Halloween party in miniature.
Materials Needed
- 6-8 small glass jars (baby food or yogurt jars work well)
- Orange and white tissue paper or acrylic paint
- Black construction paper
- Glue or Mod Podge
- Tealights or LED candles
Step-by-step Guide
Step 1: Paint the outside of each jar with orange or white for a frosted glow. Let dry completely.
Step 2: Cut out funny or spooky faces from black paper and glue them onto the jars. You can also draw them directly using a black marker.
Step 3: Drop a tealight inside each jar, and group them together for maximum effect.
#22. Glowing Witchy Candle Holders
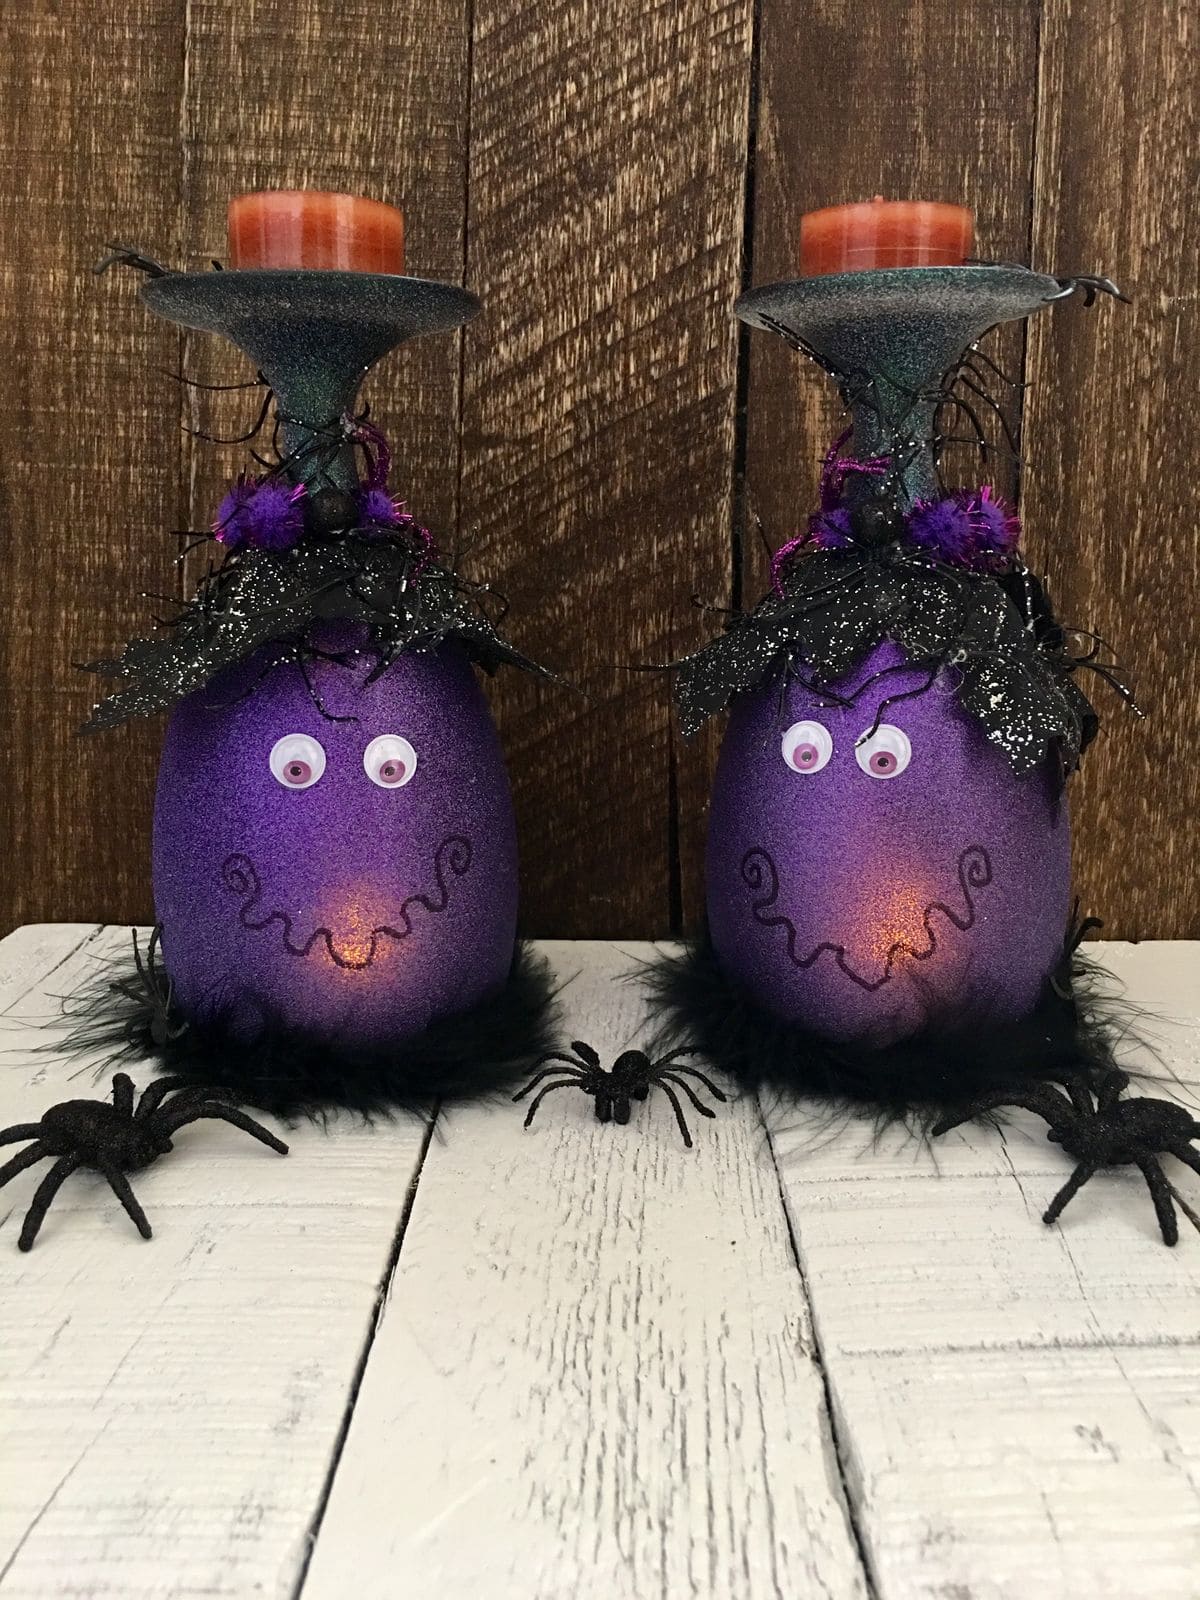
Who said witches can’t be adorable? These glowing purple candle holders bring quirky personality to your Halloween display.
With googly eyes, curly drawn mouths, glittery black spider legs, and spooky feathers for flair, they look like mischievous witches frozen mid-spell.
Specially, the black leaf hats topped with mini taper holders give them a fun, fashionable twist.
When lit, the soft inner glow peeks through the purple shimmer, creating a cozy light with just the right amount of spook. Perfect for mantels, side tables, or even a Halloween-themed kitchen corner.
Materials Needed
- 2 stemless wine glasses or round vases (approx. 5-6 inches tall)
- Purple spray paint or glitter paint
- Battery tea lights
- Googly eyes and black marker
- Black faux leaves, ribbon, and glittery spiders
- Mini candle holders and small orange candles
- Hot glue gun and glue sticks
Step-by-step Guide
Step 1: Paint the glass bases purple and let them fully dry. Then attach googly eyes and draw whimsical faces using a black permanent marker.
Step 2: Place battery-operated tealights inside the glasses to create the glowing effect.
Step 3: Decorate the tops with faux leaves, ribbons, and spiders using hot glue.
Step 4: Glue a mini candle holder upside down on the top and add a small candle for fun flair.
Read more: Here’re 22 Best DIY Candle Holder Ideas to Brighten Up Any Space
