Garden & Crafty - Garden, DIY, Home
  • GARDEN
    • Garden Tips
    • Garden Guide
    • Garden Care
    • Garden Ideas
  • DIY
    • Diy Project
    • Crafty Ideas
  • HOME
    • Decoration
    • Cleaning
    • Tips & Hacks
  • About Us
  • GARDEN
    • Garden Tips
    • Garden Guide
    • Garden Care
    • Garden Ideas
  • DIY
    • Diy Project
    • Crafty Ideas
  • HOME
    • Decoration
    • Cleaning
    • Tips & Hacks
  • About Us
No Result
View All Result
Garden & Crafty - Garden, DIY, Home
Home DIY Diy Project

A Step-by-Step Guide on Making DIY Whimsical Fall Gnome Wreath

Lois Capone by Lois Capone
September 11, 2024
in Diy Project
Reading Time: 3 mins read

IN THIS ARTICLE:

Toggle
  • Tools and materials
  • Step 1: Wrap Burlap Around A Grapevine Cone
  • Step 2. Secure the Burlap with Florist Wire
  • Step 3. Secure the Brim of the Hat
  • Step 4. Hide the Wire with Hot Glue
  • Step 5. Trim the Ends of the Leaf Stems
  • Step 6. Glue the Stems Inside the Hat
  • Step 7. Add Greenery to the Hat
  • Step 8. Add Ribbon Patches
  • Step 9. Attach the Gnome’s Nose
  • Step 10. Create the Wreath Hanger

As the leaves begin to turn vibrant shades of orange and gold, many people eagerly start preparing their homes for the fall season.

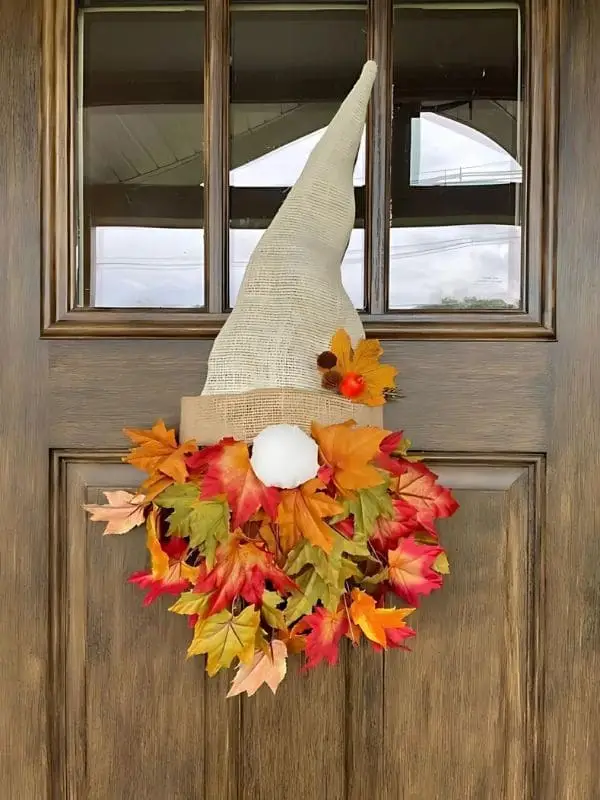
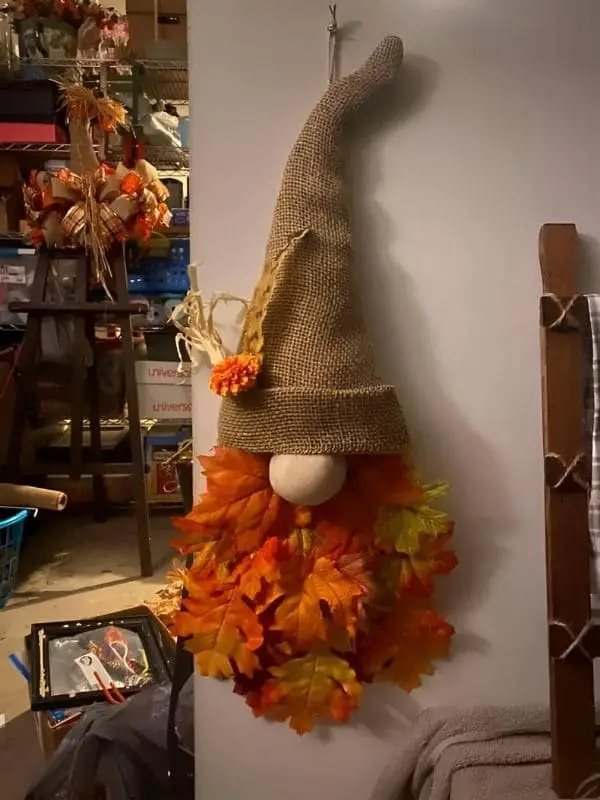
Among these decorations, a fall gnome wreath stands out as a whimsical and heartwarming option. 

If you are also looking for guide on crafting fall gnome wreath, gather your supplies, put on some music, and following the following steps to enjoy your own wreath.


Tools and materials

Materials Needed:

  • Burlap
  • Grapevine cone (for the hat)
  • Florist wire
  • Hot glue gun and glue sticks
  • Faux fall leaves
  • Greenery
  • Ribbon patches
  • Ornaments (for the gnome’s nose)
  • Pipe cleaners (for hangers and added details)
  • Stem cutters
  • Scissors
  • Fabric scraps
  • Pine cones


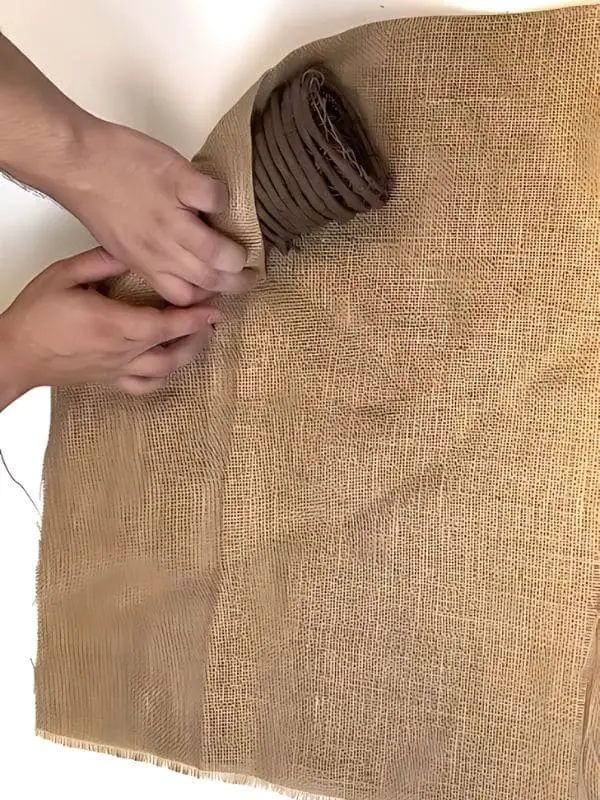
Step 1: Wrap Burlap Around A Grapevine Cone

Wrap Burlap Around A Grapevine Cone

You can begin by cutting a long strip of burlap from your roll. The width of this strip can vary, but typically a width of about four to six inches works well.

Next, starting at the top of the grapevine cone, begin wrapping the burlap around the base, ensuring that it overlaps slightly with each rotation.


Step 2. Secure the Burlap with Florist Wire
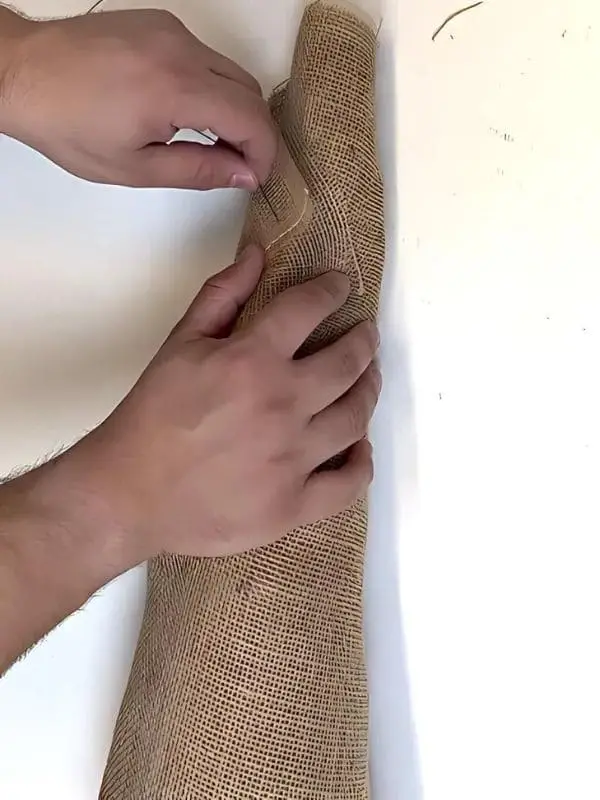
Secure the Burlap with Florist Wire

To secure the burlap effectively, you should cut a length of florist wire, approximately 12 to 18 inches long.

Then thread one end of the wire through the burlap layers at the bottom of the cone, looping it around the grapevine structure.

Take care to keep the wire hidden behind the layers of burlap, as this will create a cleaner, more polished appearance.


Step 3. Secure the Brim of the Hat
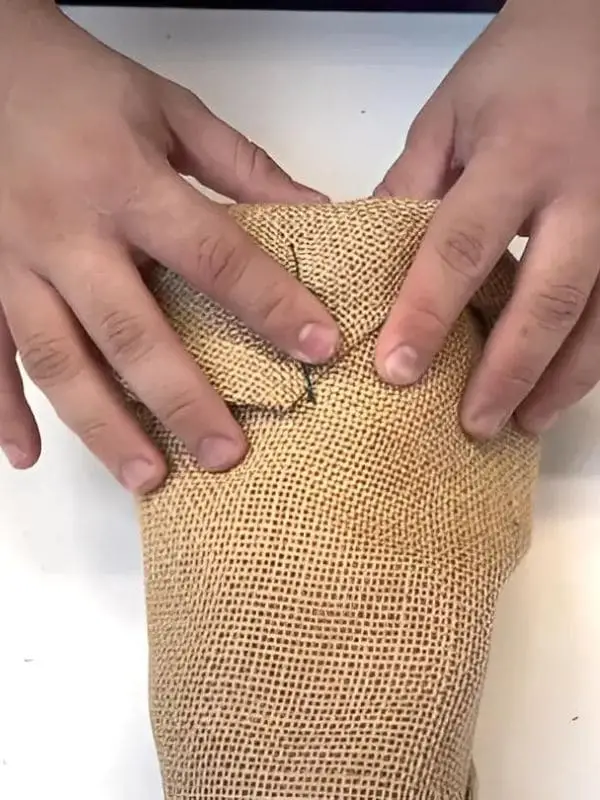
Secure the Brim of the Hat

Now, how deep or wide you choose to make the brim will depend on your personal preference; however, a depth of about two to three inches usually strikes a good balance.

Next, use the florist wire again to secure it in place. Begin at one side of the brim and wrap the wire around the base of the cone, pulling tightly to maintain the folded shape.

With the brim securely in place, your gnome is starting to take shape, and the excitement of seeing your creation come to life adds to the joy of crafting.


Step 4. Hide the Wire with Hot Glue
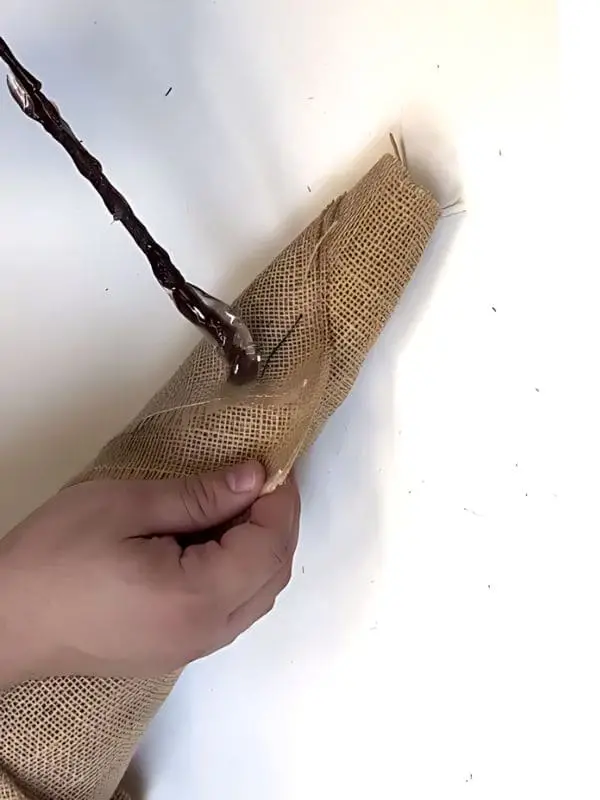
Hide the Wire with Hot Glue

You use a hot glue gun, carefully apply glue along the outer edge of the brim where the wire is located.

Once you’ve applied glue to the brim, allow it to set and cool for a few minutes.


Step 5. Trim the Ends of the Leaf Stems
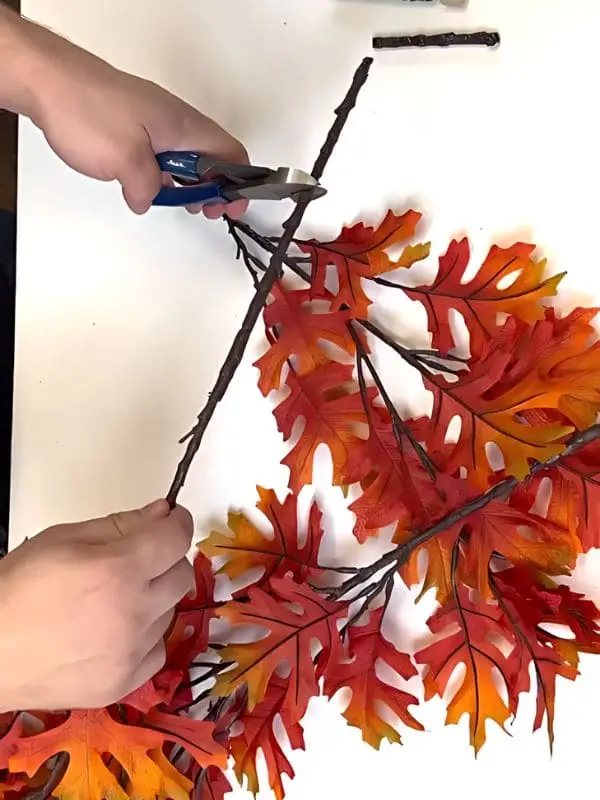
Trim the Ends of the Leaf Stems

Think vibrant oranges, yellows, reds, and browns; these hues will bring warmth to your gnome.

Depending on how bushy you want your gnome’s beard to be, you can aim for 2-4 inches in height, allowing the leaves to cascade down attractively.


Step 6. Glue the Stems Inside the Hat
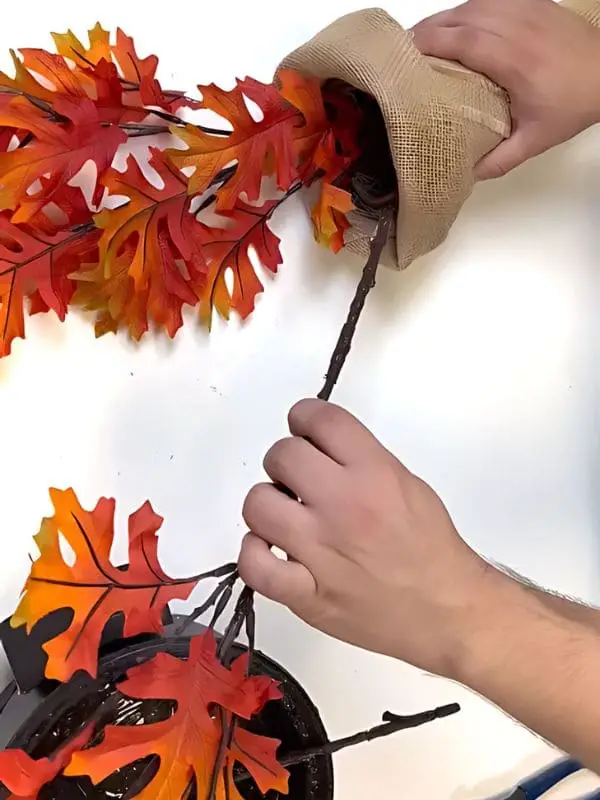
Glue the Stems Inside the Hat

You might want to start with the larger leaves first and then fill in gaps with smaller pieces.

Using your hot glue gun, apply a generous amount of glue to the ends of the leaf stems, then press them firmly against the inside of the hat.


Step 7. Add Greenery to the Hat
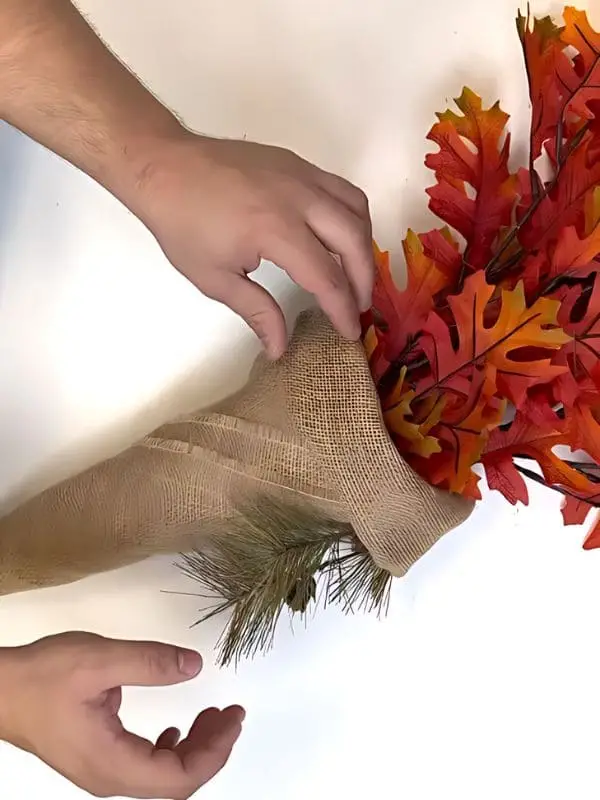
Add Greenery to the Hat

When selecting greenery, think of items that evoke the spirit of fall, such as small pine branches, ferns, or even sprigs of berry-laden plants.

You should trim the greenery around 3-5 inches long, then position the greenery around the top of the hat.


Step 8. Add Ribbon Patches
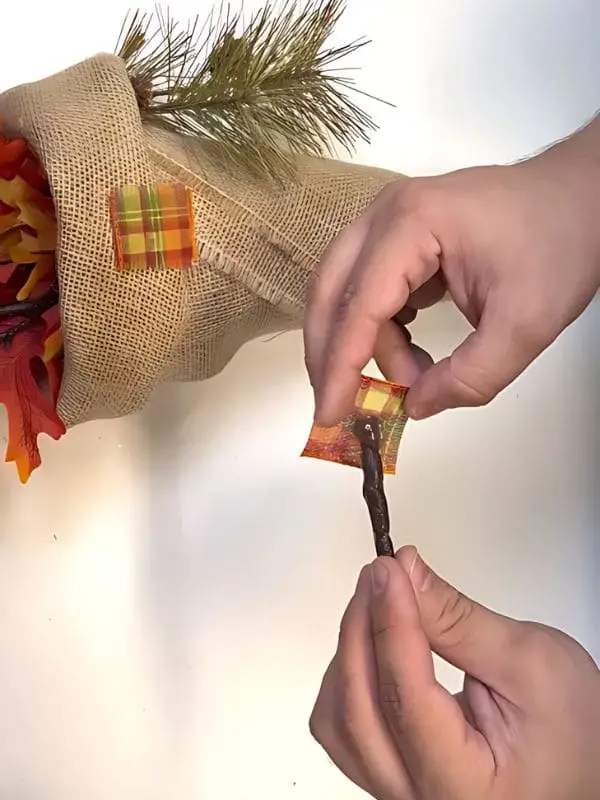
Add Ribbon Patches
Add Ribbon Patches

Plaids, stripes, and polka dots are great options that evoke a cozy, festive feel.

You can aim for various sizes, from small squares to larger rectangles, then use hot glue, attach each ribbon patch onto the gnome’s body.


Step 9. Attach the Gnome’s Nose
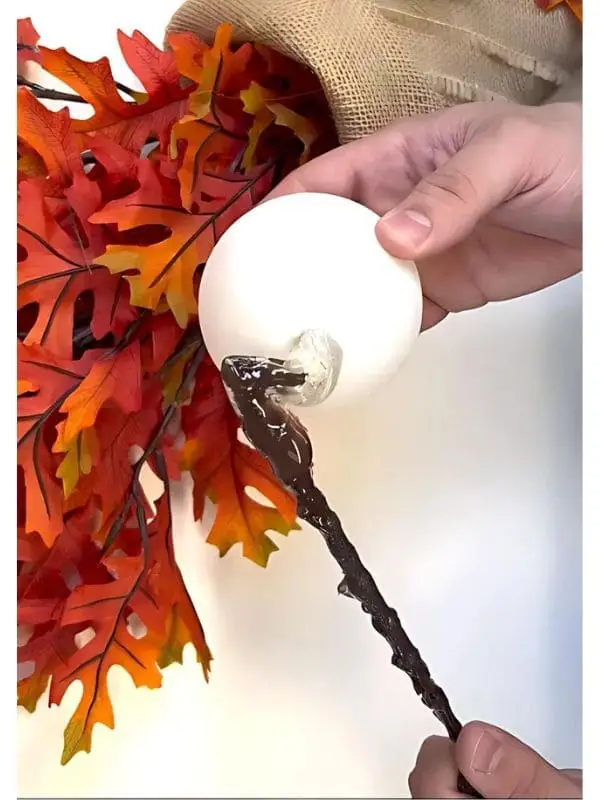
Attach the Gnome's Nose
Attach the Gnome’s Nose

For the gnome’s nose, you can consider using a round ornament or a wooden bead that fits the scale of your gnome.

Next, use hot glue, securely attach the selected ornament at the point where the brim meets the body of the gnome.


Step 10. Create the Wreath Hanger
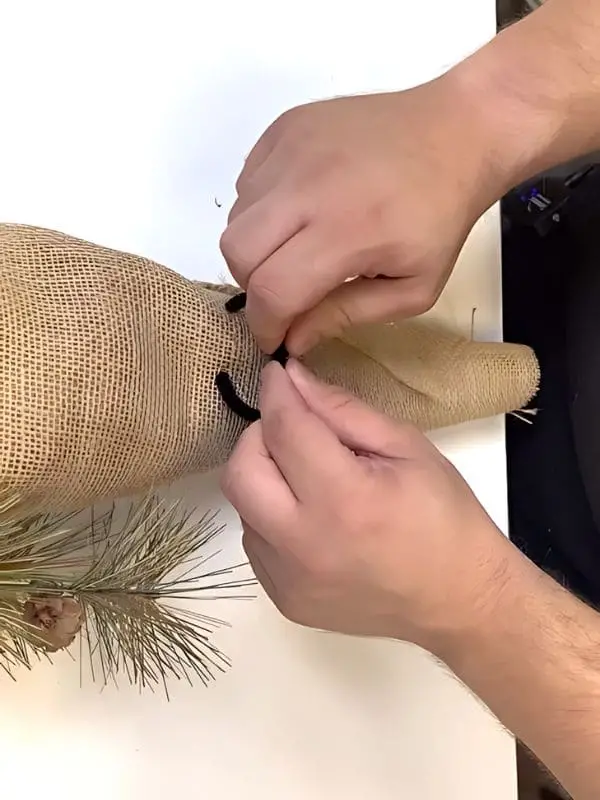
Create the Wreath Hanger

To create a hanger, cut a length of pipe cleaner, then feed one end through the top of the grapevine cone, making sure it goes through the burlap and any securing materials.

Tada! Now you can display your own fall gnome wreath in any corners of house.
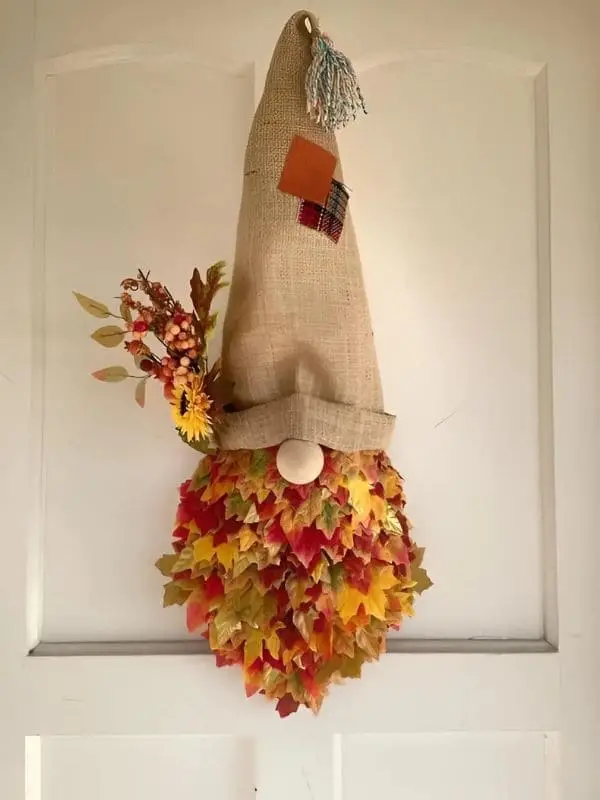
A Step-by-Step Guide on Making DIY Whimsical Fall Gnome WreathA Step-by-Step Guide on Making DIY Whimsical Fall Gnome WreathA Step-by-Step Guide on Making DIY Whimsical Fall Gnome Wreath

A Step-by-Step Guide on Making DIY Whimsical Fall Gnome Wreath
Tags: Fall Decorationgnome
SharePin
Lois Capone

Lois Capone

Lois Capone is a wife and mom in her 50s who enjoys sharing gardening, DIY tips, and home decor ideas. She believes that with some inspiration, anyone can create a special feel in their home and garden.

Related Posts

26 Meaningful DIY Father’s Day Gift Ideas Your Dad Will Truly Appreciate
Diy Project

26 Meaningful DIY Father’s Day Gift Ideas Your Dad Will Truly Appreciate

Every Father’s Day, I find myself searching for something that feels personal, something that says “thank you” in a way...

by Lois Capone
April 22, 2025
30 Family-Friendly DIY 4th of July Decor Ideas to Make This Holiday Extra Special
Diy Project

30 Family-Friendly DIY 4th of July Decor Ideas to Make This Holiday Extra Special

What’s better than celebrating the 4th of July with fireworks, food, and a little family creativity? If you’re looking for...

by Lois Capone
April 21, 2025
27 Adorable & Creative DIY Cat Nook Ideas for a Cozy Feline Retreat
Diy Project

27 Adorable & Creative DIY Cat Nook Ideas for a Cozy Feline Retreat

After all, our feline friends love curling up in their own special hideaways, and a DIY cat nook is the...

by Lois Capone
April 2, 2025
20+ Fun Suncatcher Crafts Kids Will Love Creating and Playing With
Crafty Ideas

20+ Fun Suncatcher Crafts Kids Will Love Creating and Playing With

Have you ever seen the pure joy on a child’s face when they watch colorful light dance across the walls?...

by Lois Capone
March 12, 2025
24 Beautifully Creative Ways to Upcycle Old Keys into Stunning Crafts
Crafty Ideas

24 Beautifully Creative Ways to Upcycle Old Keys into Stunning Crafts

Have you ever wondered what to do with old, unused keys collecting dust in drawers? Instead of letting them sit...

by Lois Capone
February 27, 2025
30 Charming Lace Craft Ideas for Elegant Decor and Thoughtful Gifts
Diy Project

30 Charming Lace Craft Ideas for Elegant Decor and Thoughtful Gifts

Have you ever wondered how to add a touch of timeless elegance to your home or gifts? Lace, with its...

by Lois Capone
April 12, 2025
Load More

Leave a Reply Cancel reply

Your email address will not be published. Required fields are marked *

Categories

  • Cleaning (8)
  • Crafty Ideas (62)
  • Decoration (132)
  • DIY (8)
  • Diy Project (58)
  • GARDEN (39)
  • Garden Care (45)
  • Garden Guide (101)
  • Garden Ideas (280)
  • Garden Tips (69)
  • HOME (90)
  • Tips & Hacks (20)
Garden & Crafty - Garden, DIY, Home

© 2024 gardenandcrafty.com

Navigate Site

  • About Us
  • Privacy Policy
  • Terms Of Service
  • Disclaimer
  • Cookie Policy
  • Webstories
  • Sitemap

Follow Us

No Result
View All Result
  • GARDEN
    • Garden Tips
    • Garden Guide
    • Garden Care
    • Garden Ideas
  • DIY
    • Diy Project
    • Crafty Ideas
  • HOME
    • Decoration
    • Cleaning
    • Tips & Hacks
  • About Us