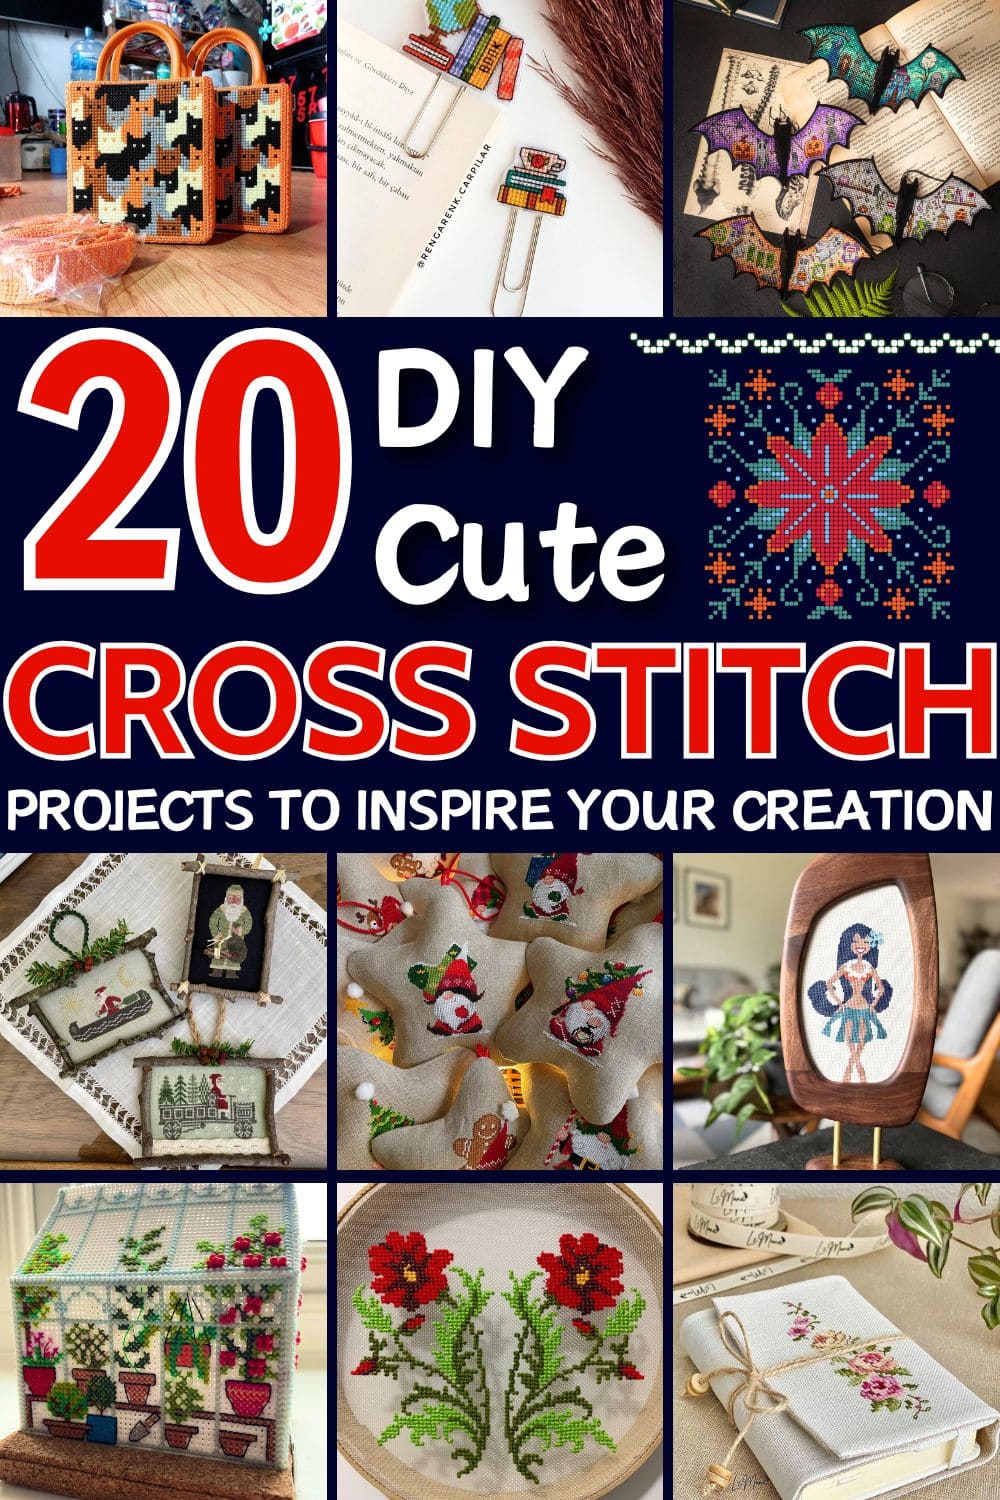
Cross stitch never really goes out of style, it just keeps finding new ways to surprise you.
Whether you’re stitching for relaxation, or the pure joy of creating something by hand, these cross stitch projects bring color and personality to every corner of your home.
Gather your favorite threads, find a comfy spot, and let these delightful designs inspire your next handmade masterpiece.
#1. Santa Bear Cross Stitch Ornament
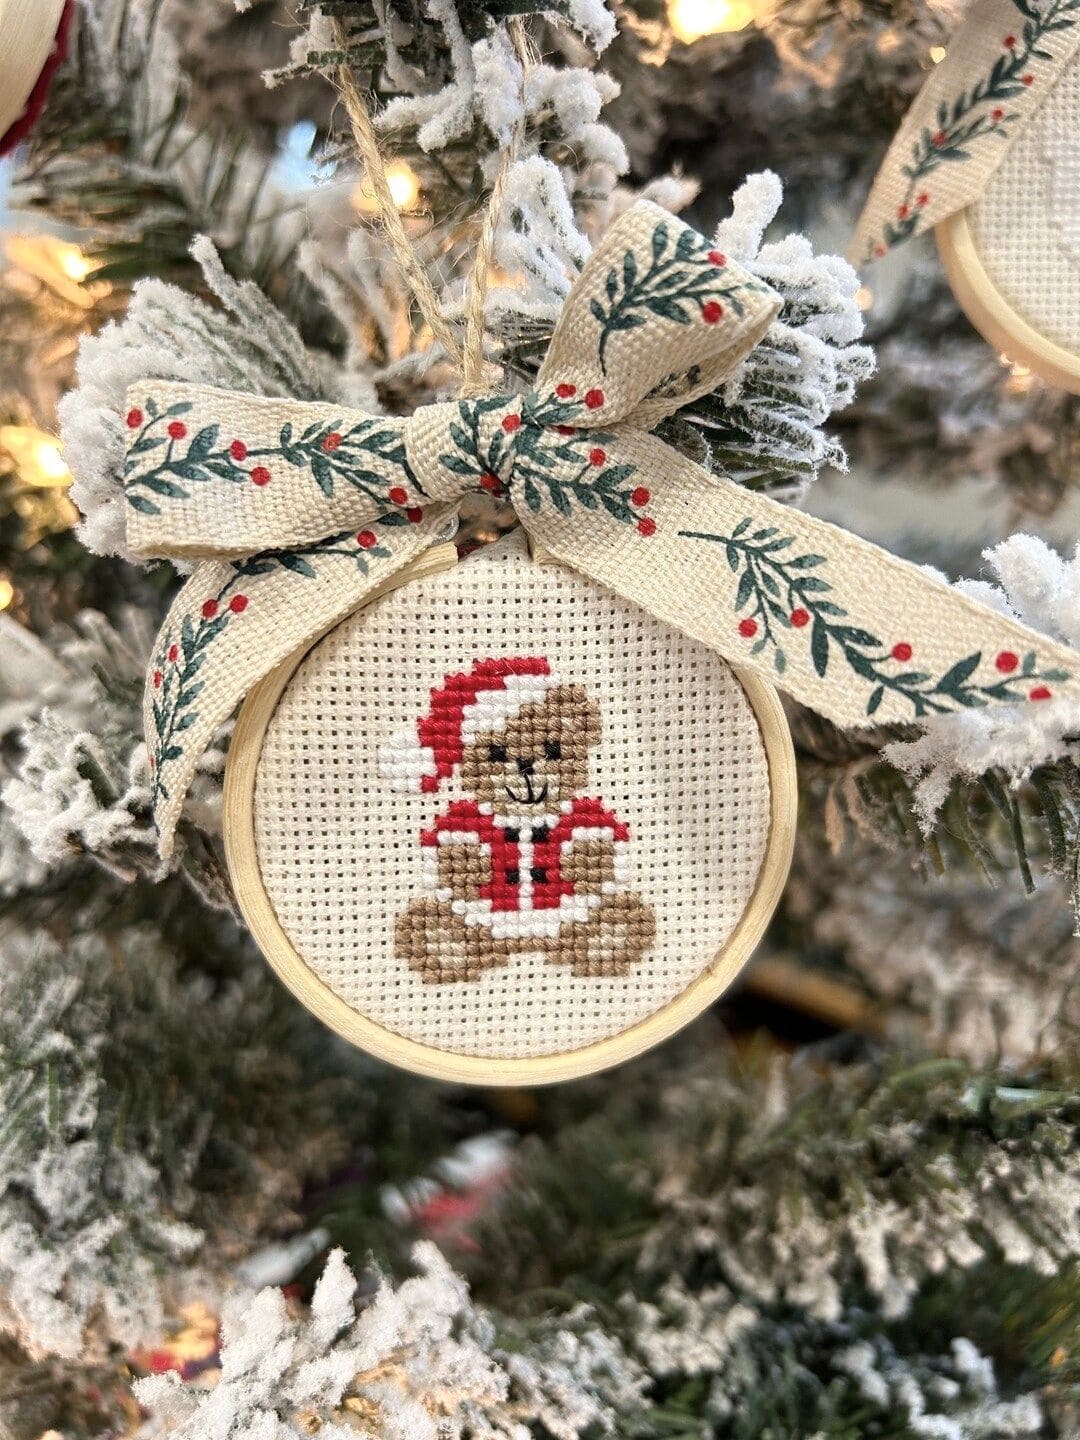
Sweet, festive, and full of nostalgia, this Santa Bear cross stitch ornament instantly brings warmth to your Christmas tree.
The little bear dressed in a red Santa suit adds a handmade charm that feels both classic and cozy.
The snowy background and rustic ribbon bow tie everything together, creating a keepsake you’ll love bringing out year after year.

- Aida fabric ((14 count, 4”×4”))
- Embroidery floss (brown (2 shades), red, white, black, and beige)
- Embroidery needle ((size 24))
- Mini wooden embroidery hoop ((3” diameter))
- Ribbon ((10” length, for bow and hanging))
- Twine or jute string ((6” for loop))
- Small scissors
- Hot glue or craft adhesive
-
Secure your fabric in the mini hoop and find the center. Start with the bear’s body using the lighter brown, then layer darker brown for shading around the edges and paws.
-
Stitch the Santa outfit using red floss for the coat and hat, then fill in white areas for the fur trim. You can add the belt and eyes in black for contrast.
-
Once you complete the stitching, trim the fabric around the hoop, leaving about half an inch for tightening. Next, press the fabric gently from the back to smooth it out.
-
Tie a piece of festive ribbon into a bow and glue it at the top of the hoop. Then add a jute loop for hanging.
-
Finish the back of the hoop by gluing a small felt circle if you want a clean, polished look.
You can personalize the bear’s outfit with small gold thread buttons or a tiny stitched name underneath, it’s a delightful touch for gifting or commemorating your holiday season.
#2. Christmas Gnome Star Ornaments
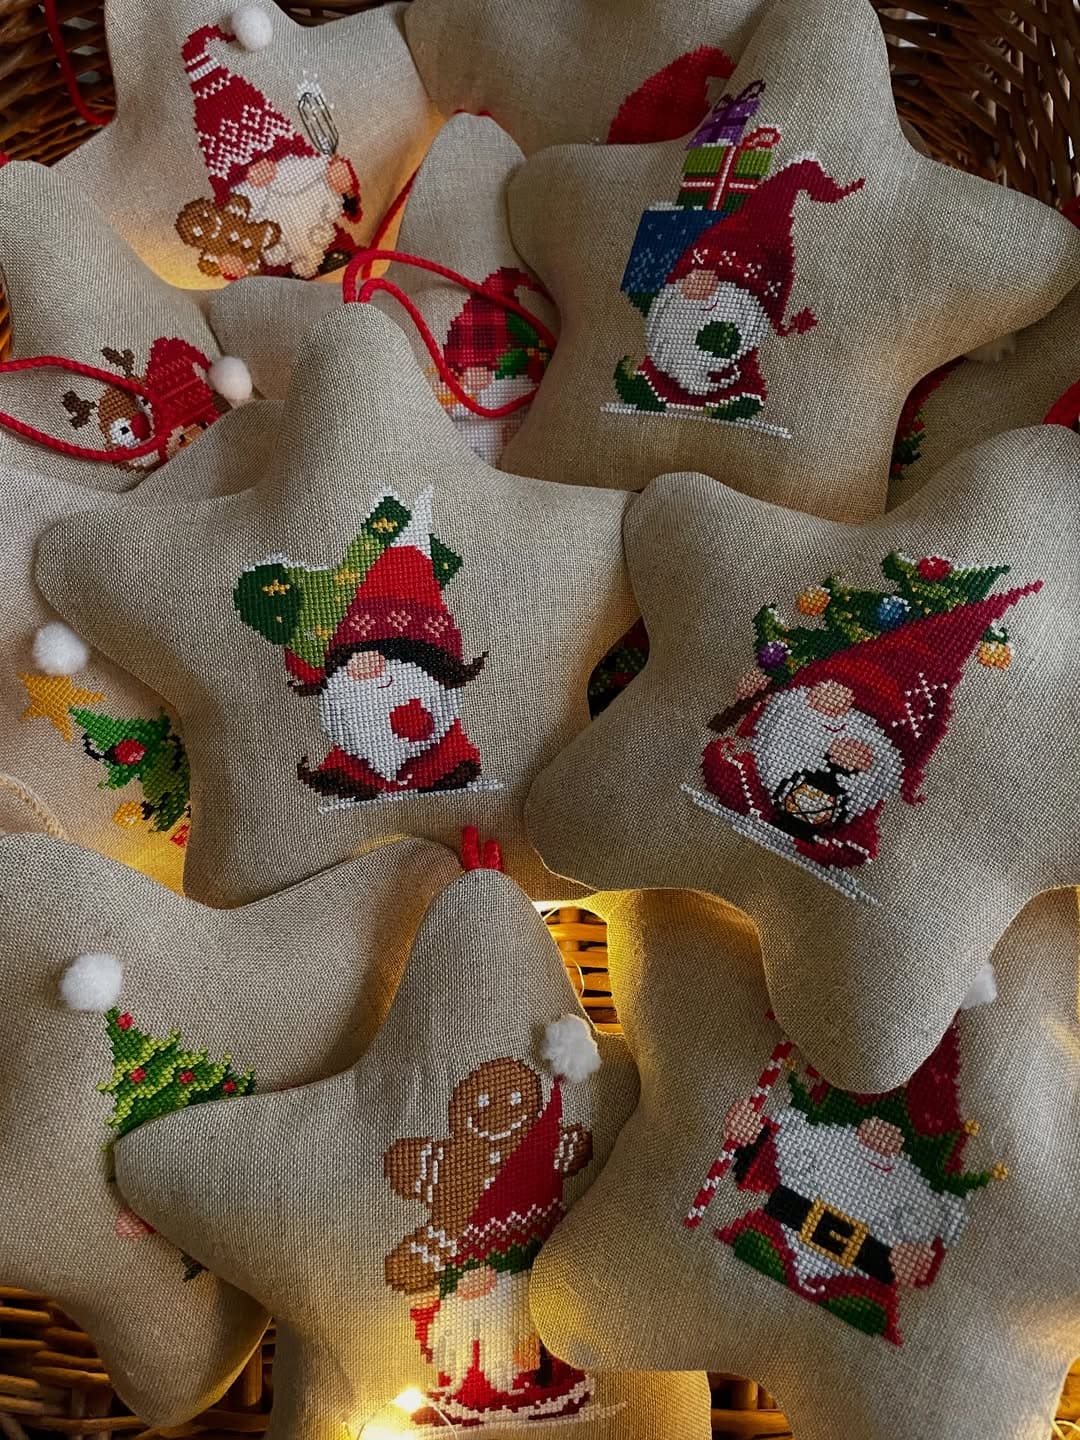
These star-shaped cross stitch ornaments bring Christmas cheer to every corner of your home.
Each one features a whimsical gnome or festive character stitched with love, from Santa hats and candy canes to gingerbread cookies and little gifts.
Plus, the soft linen texture gives them a cozy, old-fashioned charm, while the star shape makes them perfect for hanging on your tree, or displaying in a holiday basket.

- Linen or Aida fabric ((14 count, 6”×6” per star))
- Cotton stuffing or fiberfill ((about ½ cup per ornament))
- Embroidery floss (in 10–12 festive colors (red, green, white, gold, brown, black, pink, and gray))
- Embroidery needle ((size 24 or 26))
- Small scissors
- Sewing machine or needle and thread
- Star-shaped pattern template ((about 4.5”–5” across))
- Ribbon or twine ((6” length for hanging))
- Small pom-poms or buttons for embellishment
-
Choose your favorite gnome or Christmas motif and stitch it on the center of your fabric square. You should keep your stitches neat and use brighter shades for hats, gifts, or candies to make the design pop.
-
Once finished, place the stitched piece right side down on another piece of plain fabric. Then trace your star shape, pin it in place, and sew around the edges, leaving a small opening.
-
Carefully trim the excess fabric around the seam, turn the star right side out, and gently stuff it with cotton or fiberfill until it feels plump.
-
Sew the opening closed by hand using small, invisible stitches.
-
Attach a small loop of ribbon or twine to the top for hanging. You can also add decorative touches like a mini pom-pom or bead for a playful finish.
To create a cohesive set, you can stitch each gnome in a different outfit or color scheme such as reds and golds for warmth, greens and whites for a frosty touch. A sprinkle of tiny bells or sequins can make them twinkle just like the tree lights.
#3. Halloween Bat Cross Stitch Decorations
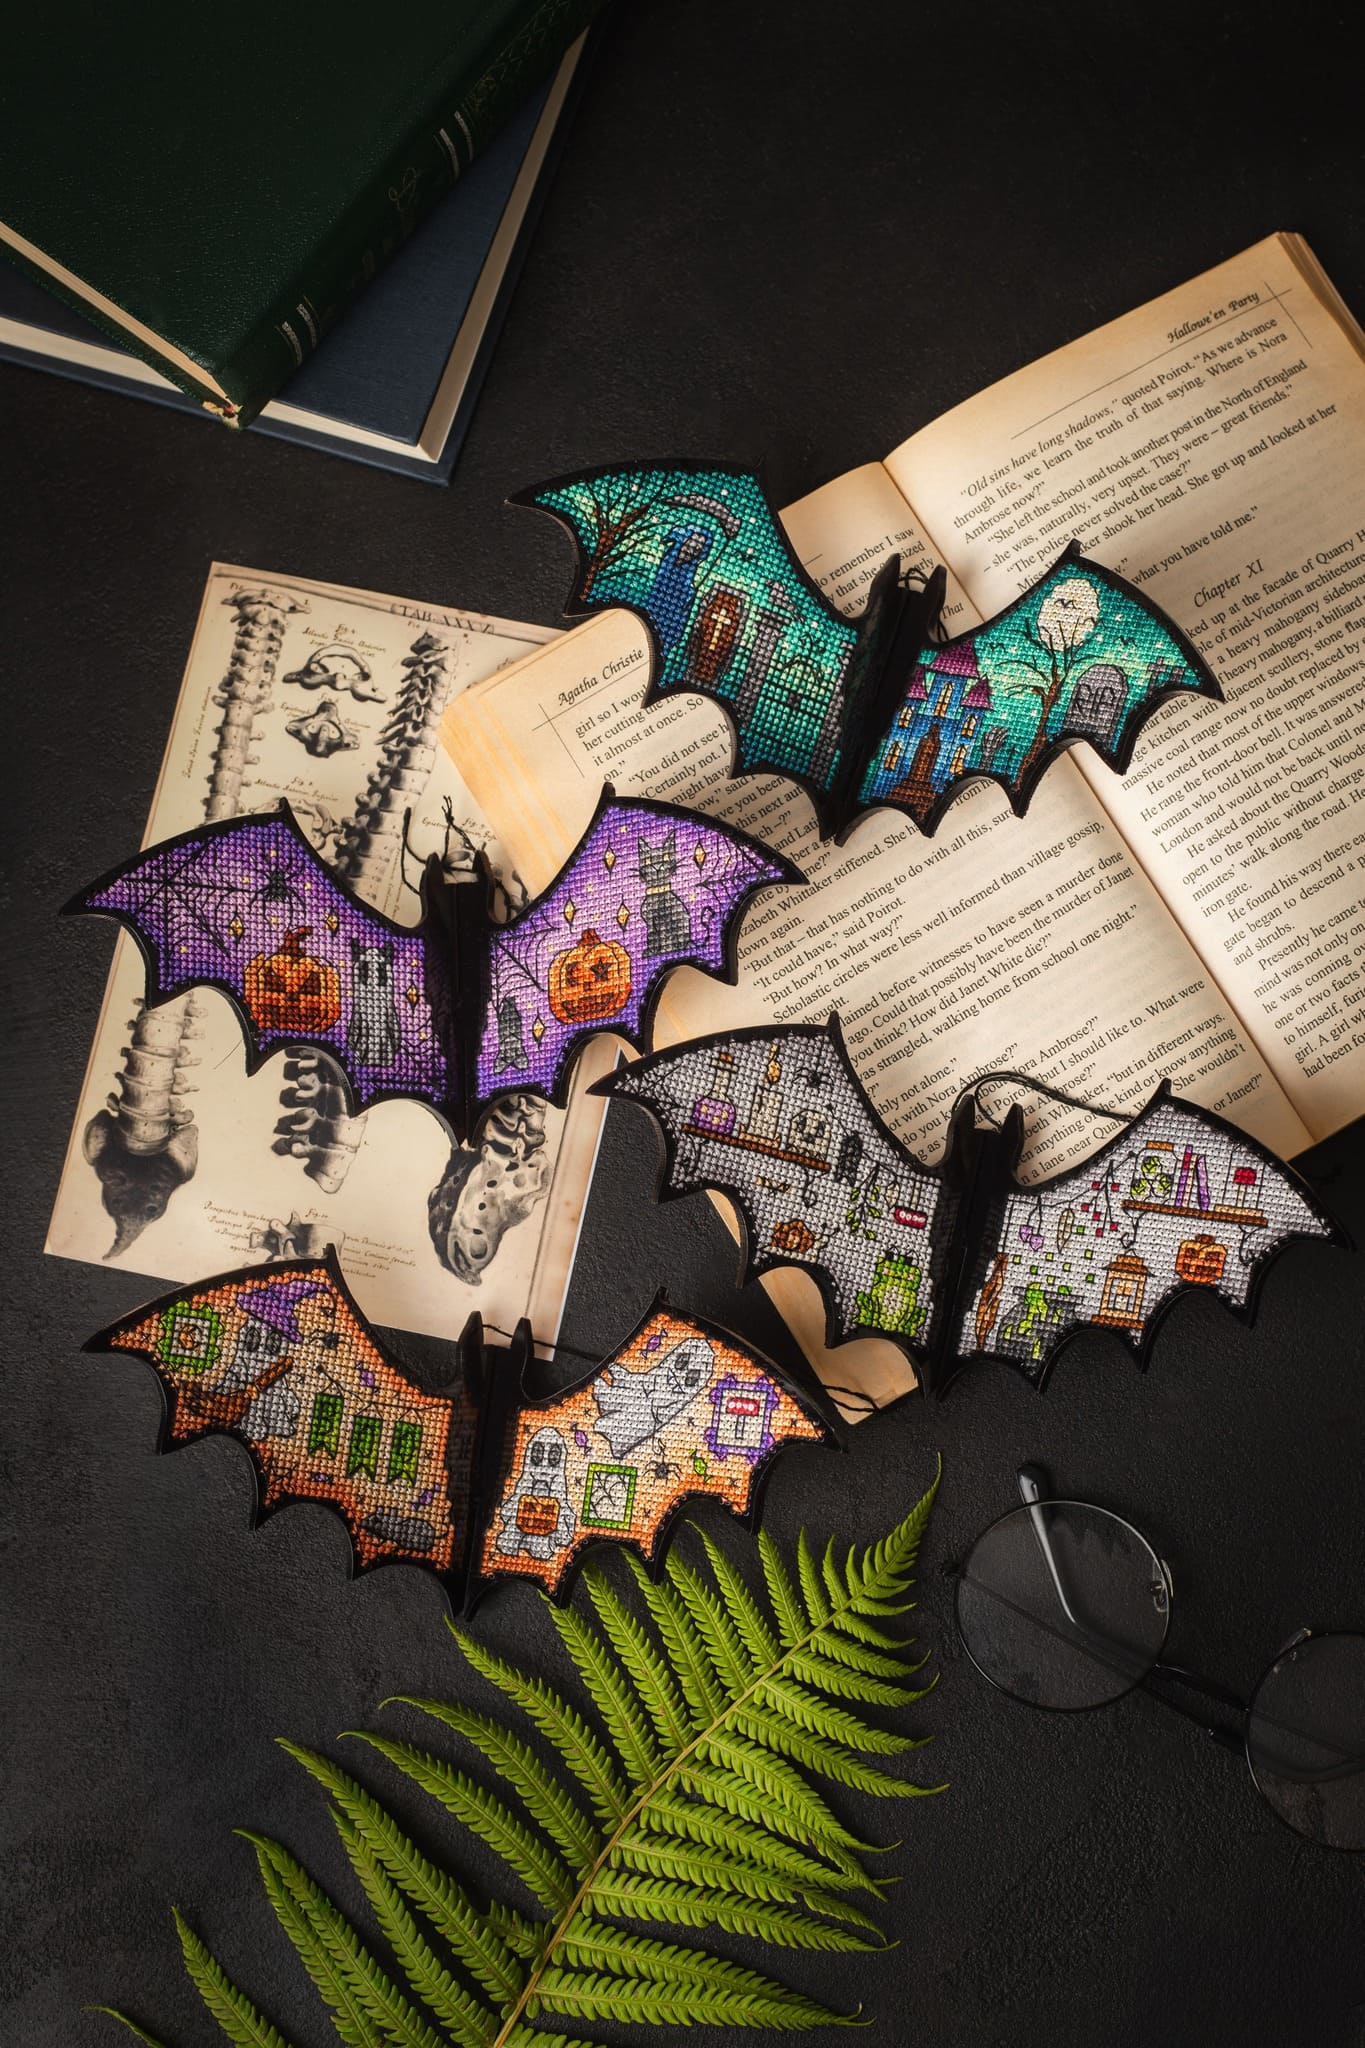
These spooky bat cross stitch decorations are the perfect mix of eerie and enchanting.
Each wing shows haunted houses, glowing pumpkins, potion bottles, and graveyards stitched in dazzling color.
They look incredible when hung in a window, used as wall art, or scattered across a Halloween table setup.

- Plastic canvas sheets ((7 count, black color, 8”×10”))
- Embroidery floss (in 1010-12 colors (purple, orange, green, blue, gray, white, black, yellow, brown, pink, and red))
- 1 skein of metallic silver or gold thread ( for highlights)
- Size 24 tapestry needle
- Small sharp scissors
- Bat cross stitch pattern ((approx. 6” wingspan per bat))
- Hot glue or craft glue
- Black felt sheet ((for backing))
- Thin wire or ribbon ( for hanging)
-
Print or draw your bat template, each about 6 inches wide and 3 inches tall. Cut the shapes from the plastic canvas carefully, keeping clean, curved edges for smooth stitching.
-
Thread your needle with black floss and stitch along the bat’s outer edges to form the silhouette. This gives your piece structure and defines the shape before filling in the details.
-
Begin filling the wings with your chosen Halloween patterns like tiny pumpkins, haunted houses, candles, or gravestones. Use contrasting colors so each motif stands out against the dark base.
-
Add metallic or glow-in-the-dark thread accents for moonlight effects or sparkly stars across the wings. These subtle highlights create a striking shimmer when light hits the surface.
-
Once finished, trim the edges neatly and glue a piece of black felt to the back to hide stitches and add sturdiness.
-
To display, attach a thin wire or ribbon through the top center. You can hang them on branches, curtain rods, or even tape them to your walls for a playful flying effect.
If you make several bats, vary the wing colors like purple, orange, or turquoise backgrounds create a magical mix when displayed together. For extra depth, bend the wings slightly inward before hanging to make them look mid-flight.
#4. Magical Potion Cross Stitch Bookmark
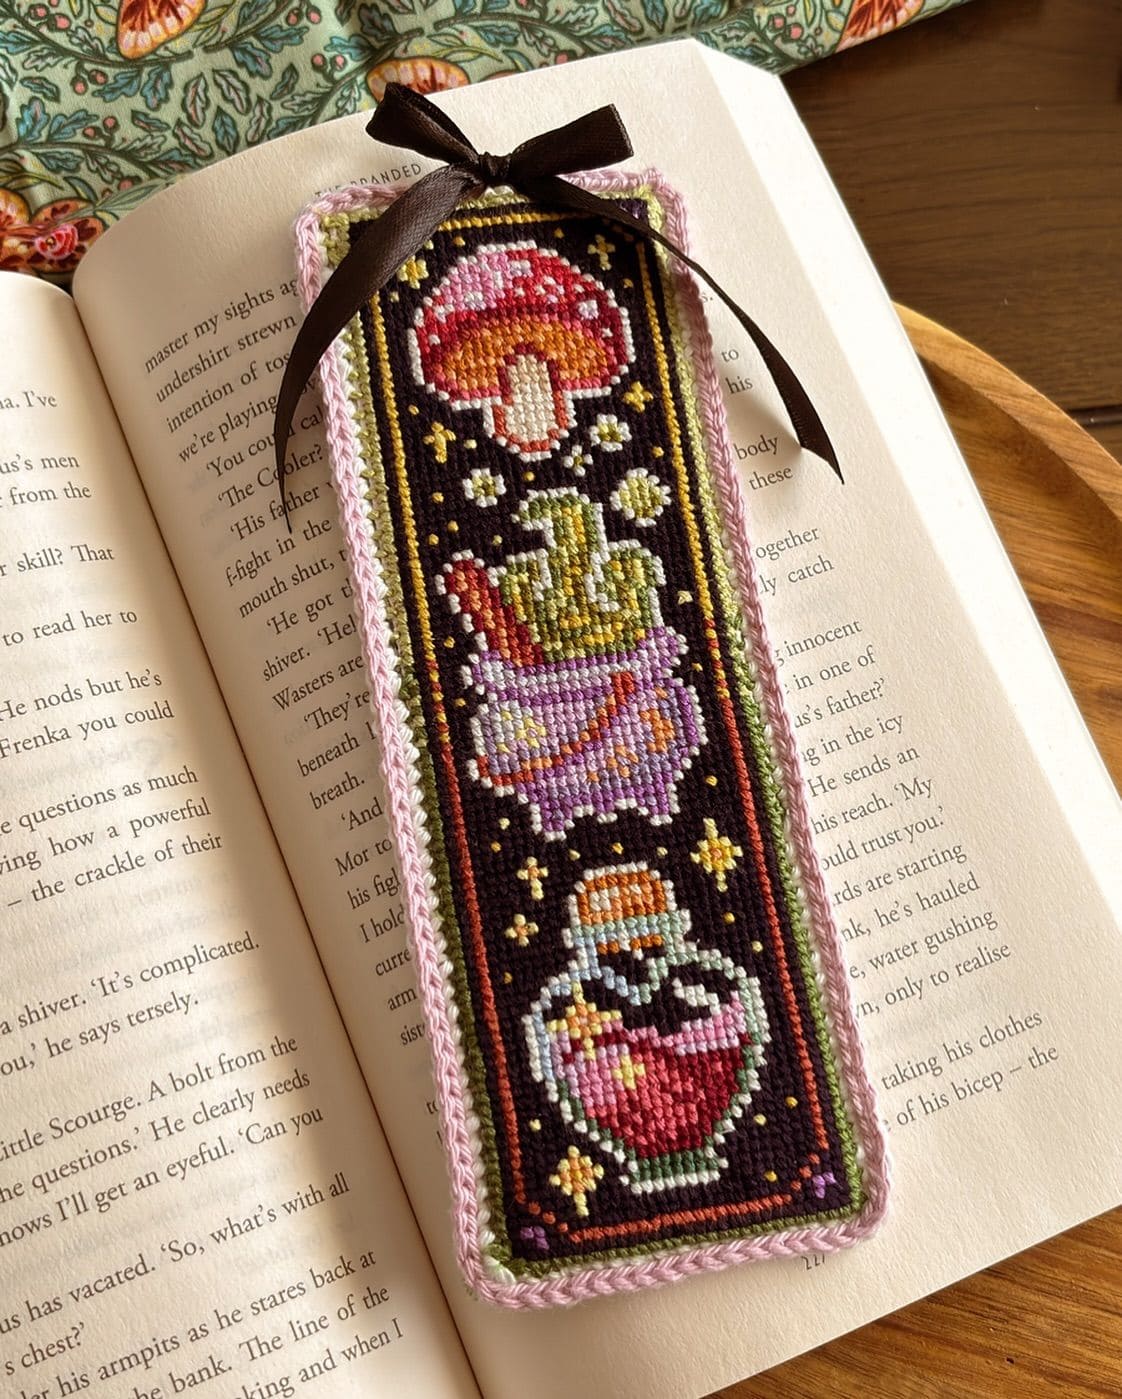
This is a whimsical design that feels like it’s straight out of a spellbook.
The glowing mushroom, bubbling potion, and sparkling bottles make reading feel a little more enchanted.
Perfect for cozy evenings with a novel, it’s not just a bookmark, it’s a small piece of art you’ll treasure with every page you turn.

- Aida fabric ((14 count, 3”×8”))
- Embroidery floss (in 8-10 colors (black, red, green, pink, yellow, white, purple, orange))
- Embroidery needle ((size 24))
- Small scissors
- Backing felt ((3”×8”))
- Craft glue or fabric glue
- Thin ribbon ((10” length for bow))
- Optional: cross stitch pattern for potion or fantasy theme
-
Cut your Aida fabric into a rectangle slightly larger than your final bookmark size. You need to secure it in a small embroidery hoop to keep the stitches even.
-
Start with the darkest color, usually black or deep brown to fill in the background. This sets a rich base that makes your colors glow.
-
Move to the central motifs: begin with the mushroom cap, then the potion bottles. Use contrasting tones to make each section stand out, and sprinkle small stars or dots for a bit of sparkle.
-
Once your design is complete, trim the fabric neatly, leaving a small border. Then attach the felt backing with glue for durability and a clean finish.
-
Finally, add a crocheted or whip-stitched border in a pastel color and tie a slim ribbon at the top.
#5. Floral Pumpkin Cross Stitch Pattern
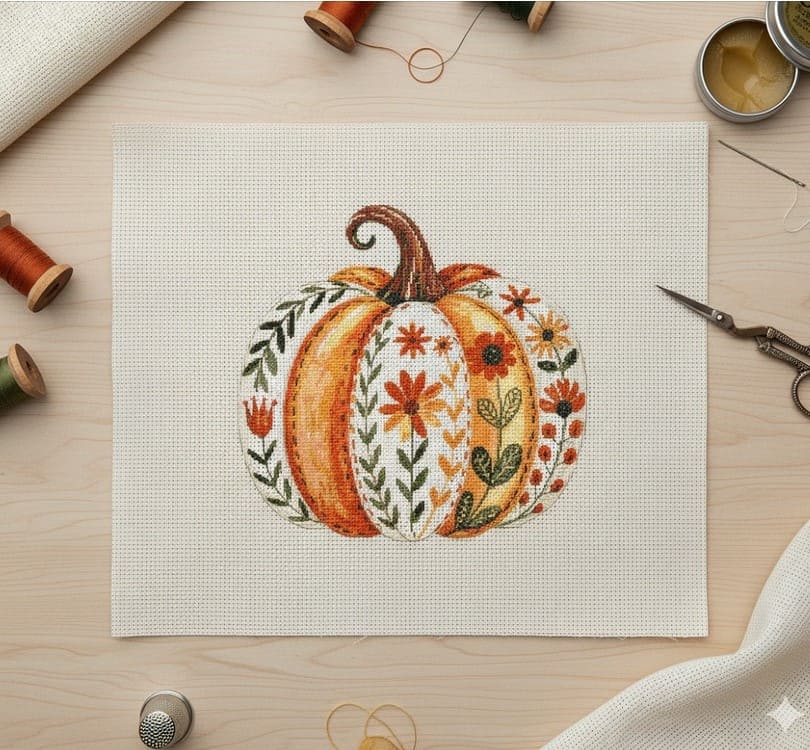
A celebration of autumn’s charm stitched in every detail, this floral pumpkin design blends seasonal warmth with delicate artistry.
The curved panels filled with leaves and blossoms create a cozy, handmade statement perfect for fall décor.
You can frame it, sew it onto a pillow, or use it as a festive wall hanging.

- Aida fabric ((14 count, 10”×10”))
- Embroidery floss (in 8-10 colors (orange, yellow, green, brown, rust, cream, red))
- Embroidery needle ((size 24))
- Small embroidery hoop ((8”))
- Scissors
- Pattern printout or digital chart
- Iron and pressing cloth
-
Secure your fabric in the embroidery hoop and locate the center. Start stitching from the pumpkin’s middle section to keep your design balanced.
-
Use orange and rust tones for the pumpkin body, blending lighter shades toward the center for a natural gradient. You keep your stitches tight but not overly pulled to maintain smooth texture.
-
Add floral motifs along the pumpkin’s sections using greens for vines and leaves, and warm tones like red, mustard, and cream for flowers. Small details such as stems and petals bring the piece to life.
-
Once the pumpkin is fully outlined and filled, add the stem using darker browns, curving the thread to mimic its natural twist.
-
When finished, gently wash or iron the fabric (face down with a cloth on top) to smooth it. Finally, frame your design or attach it to a pillow for seasonal flair.
#6. Tropical Dancer Cross Stitch Display
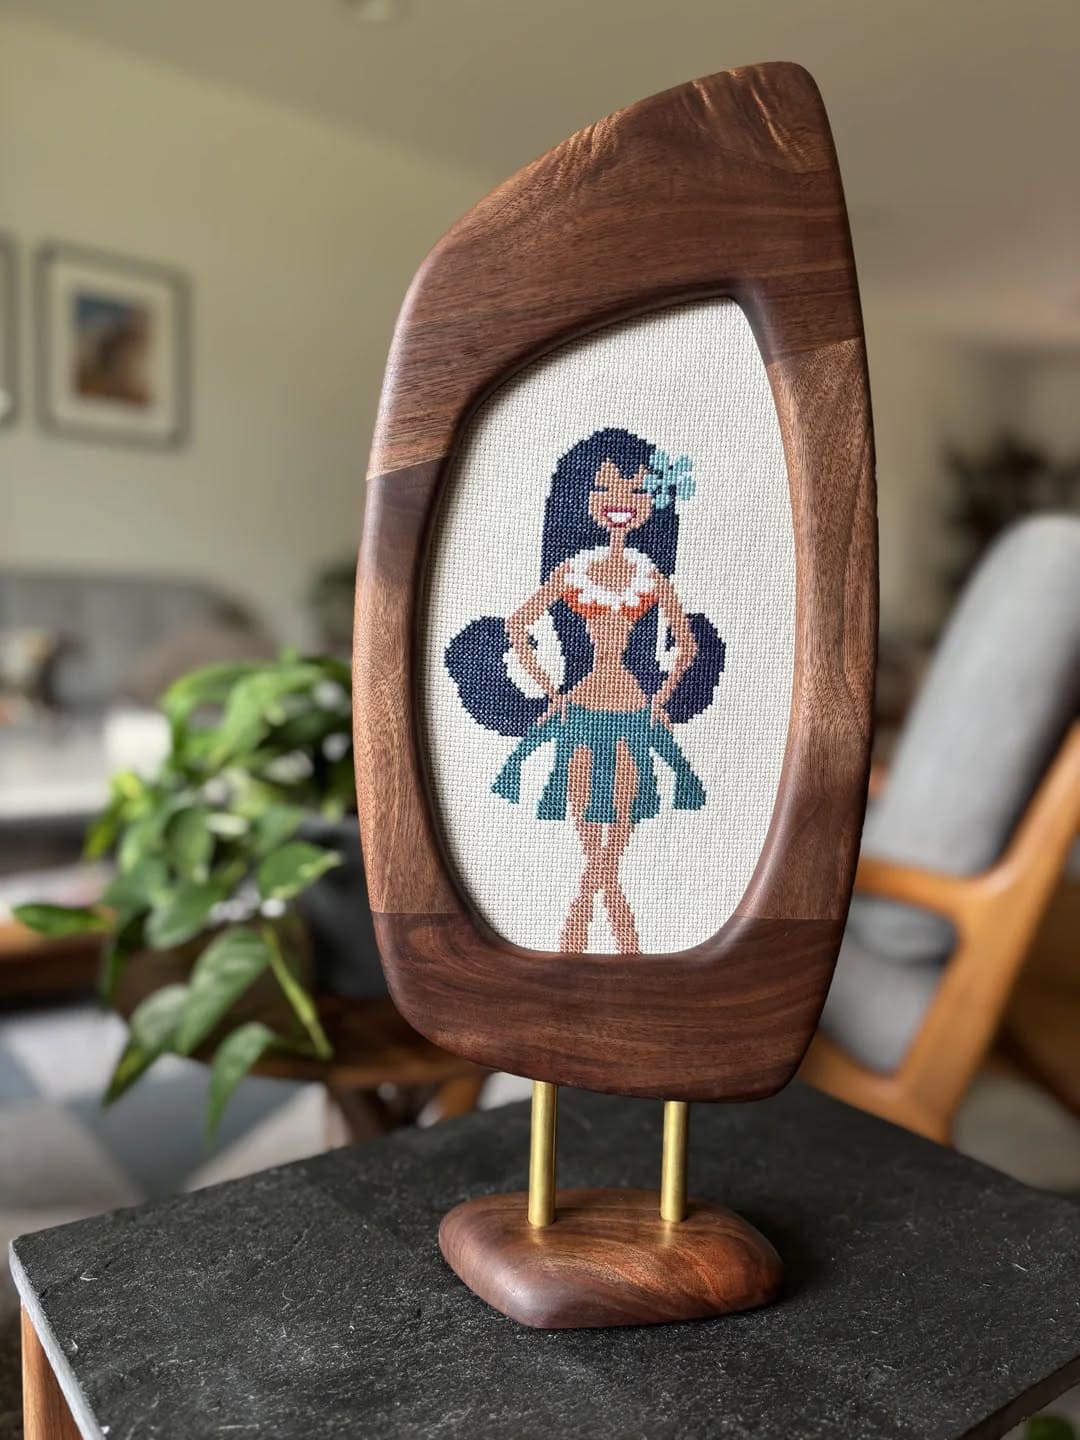
You can see this tropical dancer cross stitch radiates joy and movement.
The rich blues, warm tans, and coral accents bring a breezy, sunlit vibe to your space.
Framed in sculpted wood, it feels both modern and nostalgic like a vacation memory turned into art.

- Aida or linen fabric ((14 count, 8”×10”))
- Embroidery floss (in 6-8 shades (navy, teal, coral, peach, tan, white, turquoise))
- Embroidery needle ((size 24))
- Small embroidery hoop
- Scissors
- Wooden or custom frame ((optional stand base))
- Printable cross stitch dancer pattern
-
Secure your fabric in the embroidery hoop and locate the center to ensure even placement of the figure.
-
Begin stitching the dancer’s body using light tan and peach tones. You should work slowly on skin areas for smooth coverage.
-
Move to the clothing and accessories, use teal for the skirt and navy for her flowing hair. Stitch carefully along the edges to maintain the figure’s graceful shape.
-
Add coral details for the lei and flower, using shorter stitches for petals to create a dimensional look.
-
Once the design is complete, gently press the back of the fabric with a warm iron. Mount it in a wooden frame or a curved display stand to highlight its artistic finish.
#7. Cross Stitch Book Lover Paperclips
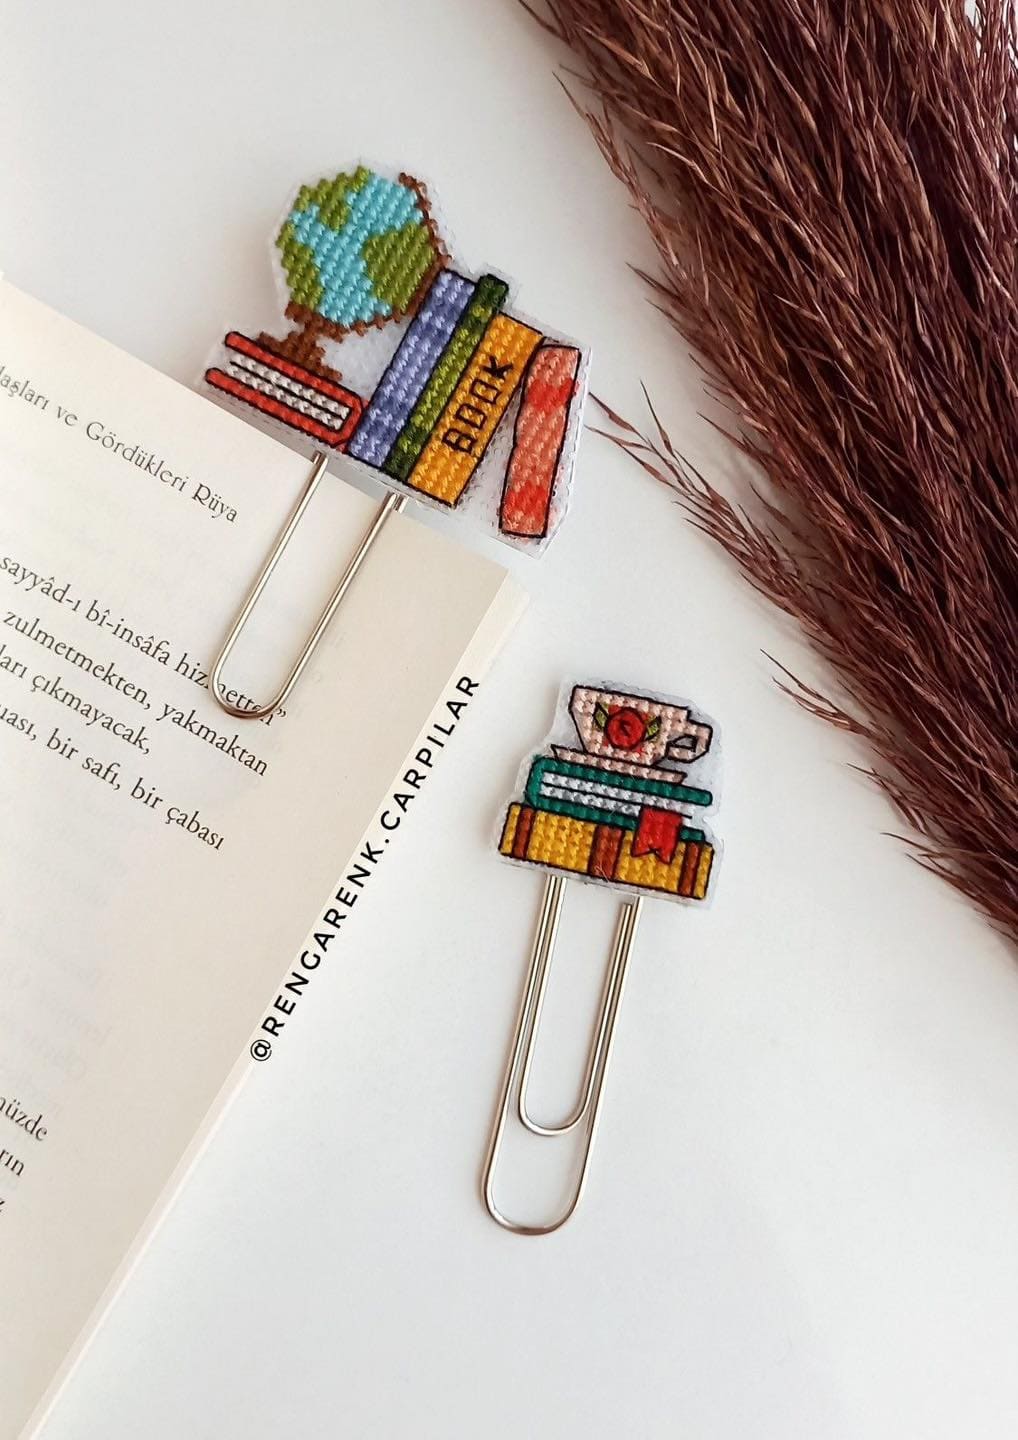
Wow, these adorable paperclips are the perfect way to add your personality to your reading time.
Each one features a tiny cross stitch design, one topped with a globe and a stack of books, the other with a cozy teacup resting on colorful novels.
They’re small, charming, and incredibly satisfying to make.

- 1 small sheet of plastic canvas ((7 count, cut into 2”×2” squares))
- Embroidery floss (in 6-8 assorted colors (reds, greens, yellows, blues, browns))
- 2 tapestry needles ((size 24))
- 2 large paperclips ((3” long))
- Small scissors
- Craft glue or hot glue
- Optional felt backing (for neat finish)
-
Cut your plastic canvas into small rectangles, leaving extra space around the design for easy stitching.
-
Choose your pattern such as a stack of books, a globe, or a teacup and start stitching the outlines with darker thread for definition.
-
Fill in each color section, keeping your stitches tight and even. Then add fun details like book titles or tiny steam swirls from the cup.
-
Trim the edges neatly, then glue a felt piece to the back to hide threads.
-
Attach the finished design securely to the top of a paperclip using strong glue, pressing until it holds firm.
#8. Mini Cross Stitch Greenhouse
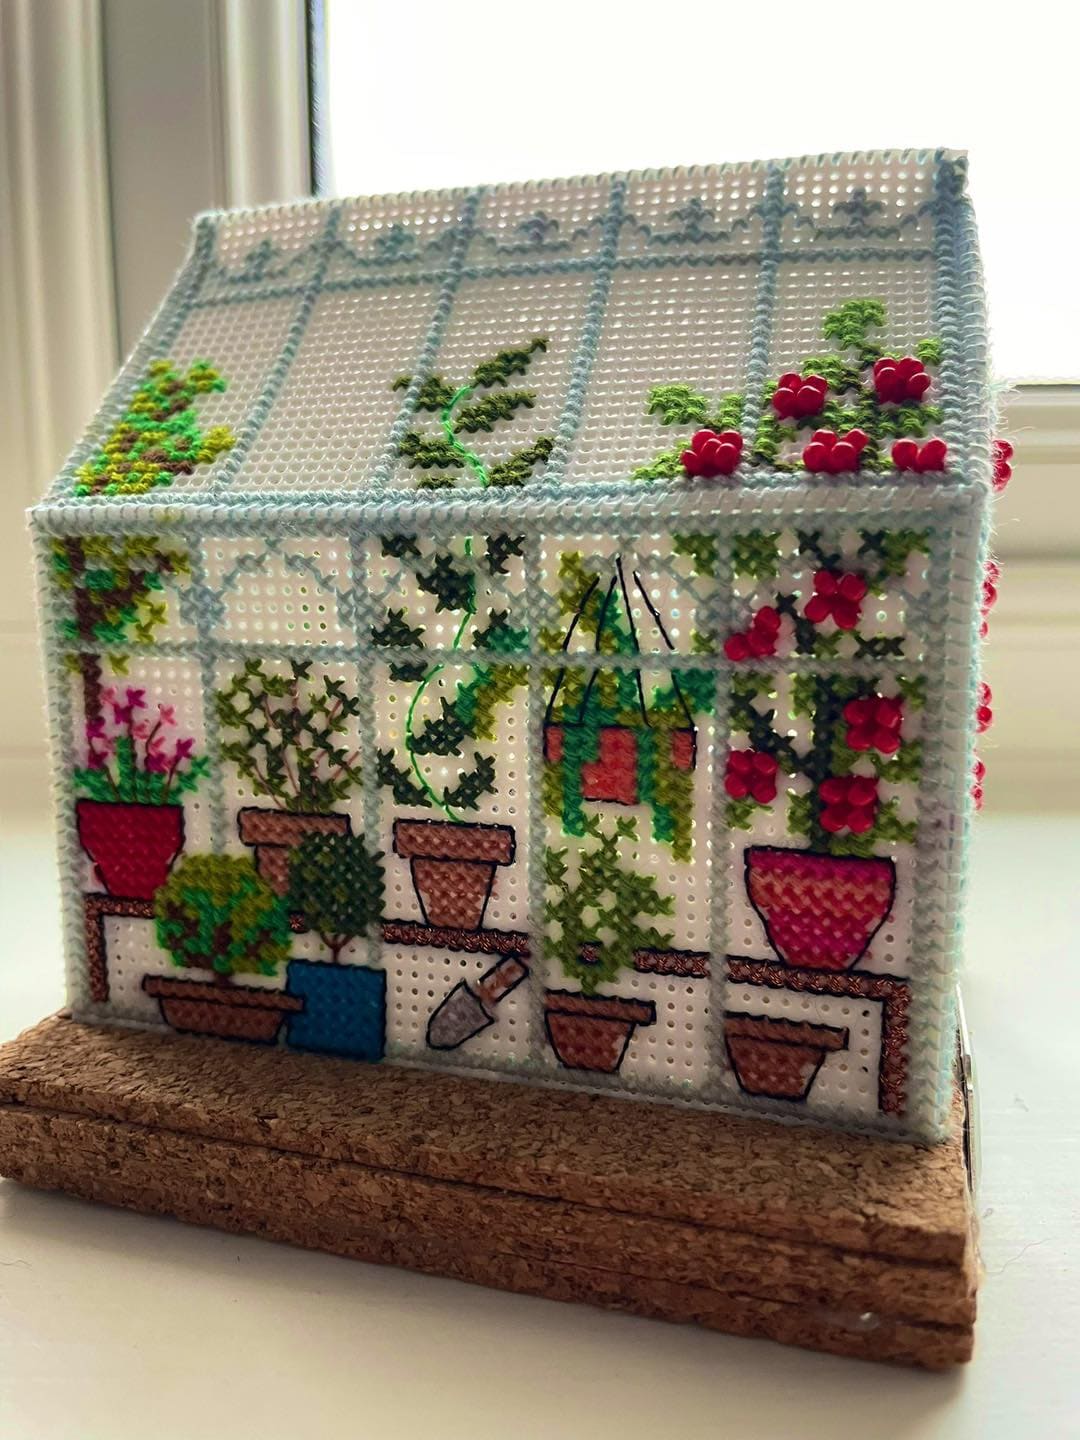
This little cross stitch greenhouse looks like a dream captured in thread.
The light blue outline gives the illusion of glass panes, while the colorful plants inside bring the scene to life.
Once finished, it becomes a sweet handmade display that feels both cozy and full of life, perfect for a desk, shelf, or sunny window corner.

- 1 sheet of plastic canvas ((7 count, 8”×10”))
- Embroidery floss (in 6-8 colors (greens, browns, reds, blues))
- Size 24 tapestry needle
- Small scissors
- Cork or wooden base ((4”×6”))
- Craft glue or hot glue
- Printable greenhouse cross stitch pattern ((optional))
-
Cut your plastic canvas into six panels including two sides, two roof pieces, a front, and a back.
-
Stitch the outlines of each panel using light blue or pastel floss to form the greenhouse frame.
-
Fill in with rows of potted plants, hanging baskets, and vines. Then use French knots for flowers or berries.
-
Join panels together with whip stitches along the edges, forming a box-like greenhouse.
-
Attach the finished structure to a cork or wooden base using glue for stability.
#9. Rustic Santa Cross Stitch Ornaments
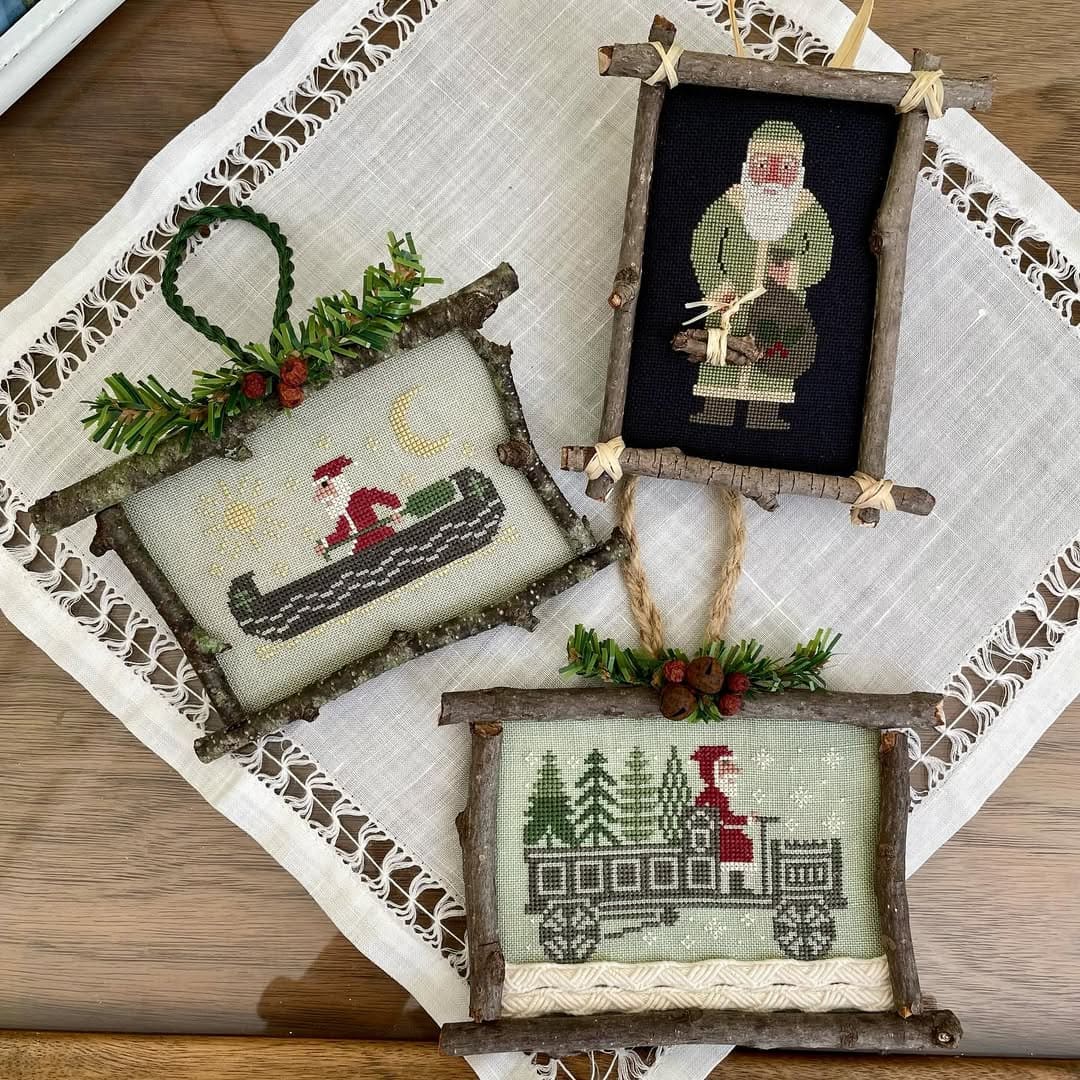
There’s something magical about these rustic Santa cross stitch ornaments, each one tells a little Christmas story.
Whether Santa’s paddling his canoe under the moonlight or riding a forest train through pine trees, every design feels nostalgic and handmade.
The natural wood frames and soft linen backgrounds give them an heirloom quality, perfect for hanging on your tree or gifts.

- Linen or Aida fabric ((14 count, 5”×7” per ornament))
- Embroidery floss (in 8-10 shades (red, white, green, gray, gold, black, and brown))
- Embroidery needle ((size 24 or 26))
- Small scissors
- Cross stitch pattern ((Santa or woodland holiday scenes))
- Natural twigs ((about ¼ inch thick, cut into 6” and 5” pieces))
- Hot glue or strong craft adhesive
- Small faux greenery, pinecones, or berries ( for decoration)
- Twine or jute rope ( for hanging)
-
Stitch your chosen Santa design in the center of the fabric. Use deep reds and earthy greens to keep that classic, vintage holiday feel. Work neatly and evenly for a smooth finish.
-
When your stitching is complete, gently iron the fabric on the reverse side to remove creases. You now trim it into a rectangle, leaving about half an inch of fabric around the border.
-
Cut four twigs, two slightly longer for the top and bottom, and two shorter for the sides. Arrange them into a frame shape and secure the corners with hot glue or twine.
-
Attach your stitched fabric to the back of the frame with glue, making sure it’s centered and stretched evenly.
-
Add a few small sprigs of faux pine, berries, or twine bows at the corners for decoration. Then attach a loop of jute rope or twine to the top for hanging.
For a more authentic touch, you can lightly sand the twigs or brush them with a bit of white paint for a frosted winter look. These rustic ornaments pair beautifully with natural greenery and candlelight.
#10. Whimsical Cross Stitch Bottles Collection
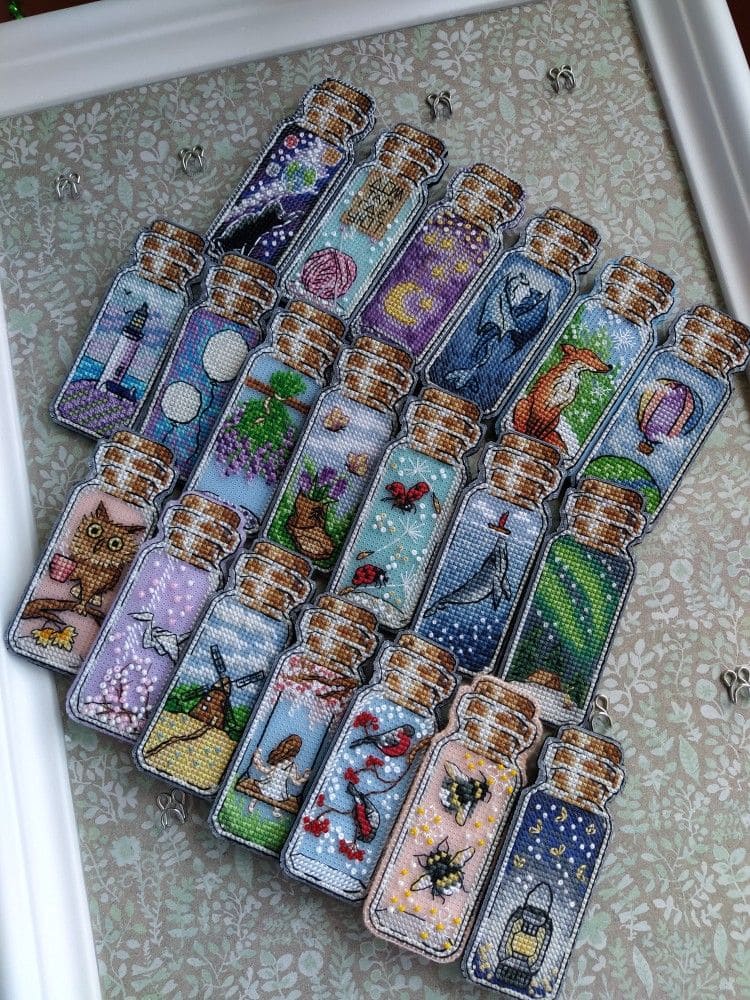
Tiny worlds captured in thread, each bottle tells a miniature story, stitched with color and imagination.
From glowing fireflies and blooming flowers to foxes, birds, and lighthouses, this charming collection turns ordinary fabric into a gallery of bottled dreams.
You can hang them as ornaments, turn them into fridge magnets, or frame them for a delicate wall display.

- 14-count white Aida fabric ((8”×10” for multiple designs))
- Embroidery floss ( in assorted colors (DMC shades recommended))
- Size 24 tapestry needle
- Scissors and fine-tip embroidery snips
- Felt backing sheets
- Hot glue gun or fabric adhesive
- Mini hooks or magnets ((optional for display))
-
Choose your bottle pattern. You can download or sketch different mini-scenes, think night skies, nature, or fantasy themes. Then mark your starting point at the center of the fabric.
-
Begin with the bottle outline using a light gray or brown thread. Stitch carefully to maintain symmetry. Once the outline is done, start filling in the inner scene one color at a time.
-
Use small details such as tiny stars, flowers, or animals to bring each scene alive. Metallic or variegated threads can add depth and sparkle.
-
When finished, trim around the bottle shape, leaving a small fabric margin. Then glue or stitch felt to the back for a neat finish.
-
Attach a hook, magnet, or twine loop depending on how you’d like to display them. You can even mount several on a single frame for a cohesive, storybook look.
#11. Twin Red Bloom Cross Stitch Hoop Art
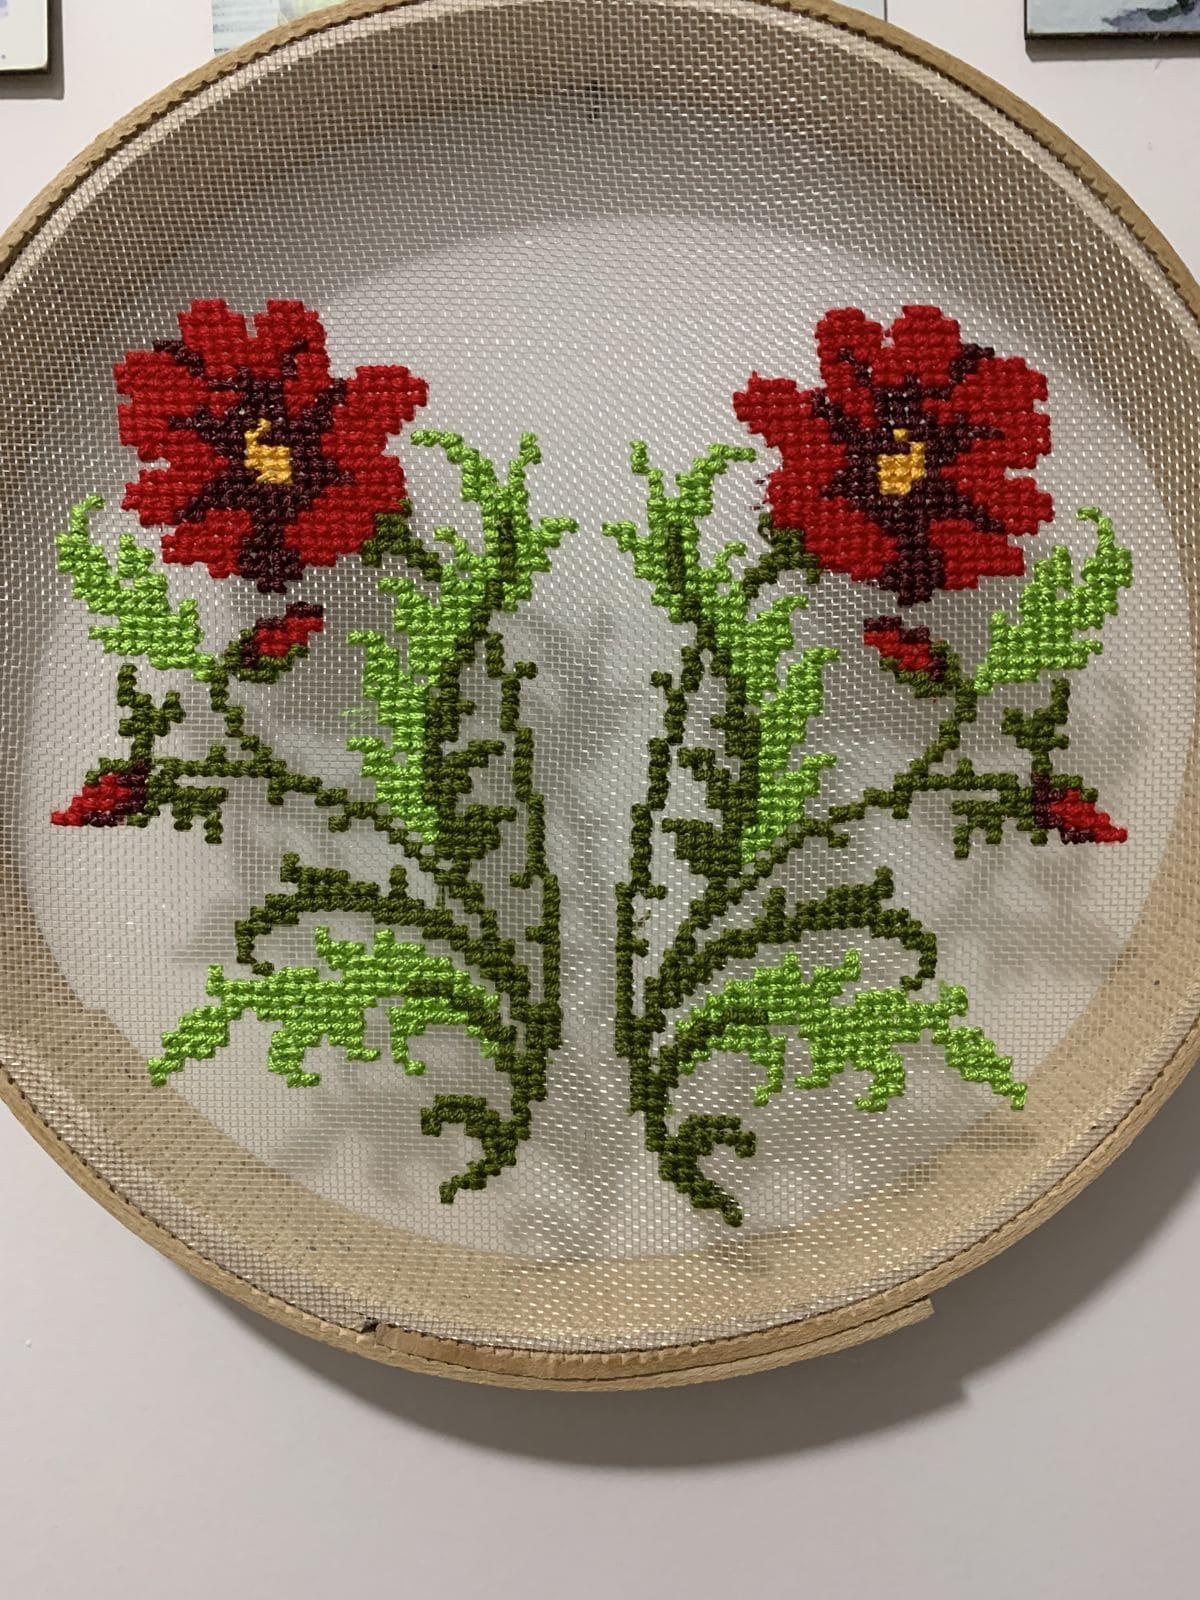
Two radiant red flowers rise like mirrored flames, stitched with precision and grace.
The symmetry of the design gives it a timeless balance, while the contrast of bold petals against soft fabric creates a captivating centerpiece.
This piece makes a perfect wall display or thoughtful handmade gift.

- Aida fabric ((14 count, 8”×8”))
- Embroidery hoop ((7”-8”))
- Embroidery floss (Embroidery floss)
- Embroidery needle ((size 24))
- Small scissors
- Cross stitch pattern or sketch of mirrored flowers
- Iron and pressing cloth
-
Secure your Aida fabric tightly in the embroidery hoop, ensuring it’s smooth and firm to make your stitches even. Center your design area to give both flowers equal space.
-
Begin with the stems and leaves using your darker green thread. Work from the bottom upward, creating a natural curve that mirrors on both sides. You should alternate between lighter and darker greens for texture and dimension.
-
Move on to the petals. Start from the center of each flower, stitching outward in red. Then use the darker red for shadowed areas and the brighter one for highlights to give the petals depth.
-
Stitch the centers with yellow thread and outline lightly with brown for definition. Be mindful not to pull the thread too tight, it helps the texture stay soft and full.
-
Once both flowers are complete, check for any loose threads, then gently press the fabric on the back with a warm iron to smooth it. Now, trim excess fabric or leave it framed in the hoop for display.
#12. Holiday Cross Stitch Cityscape Stocking
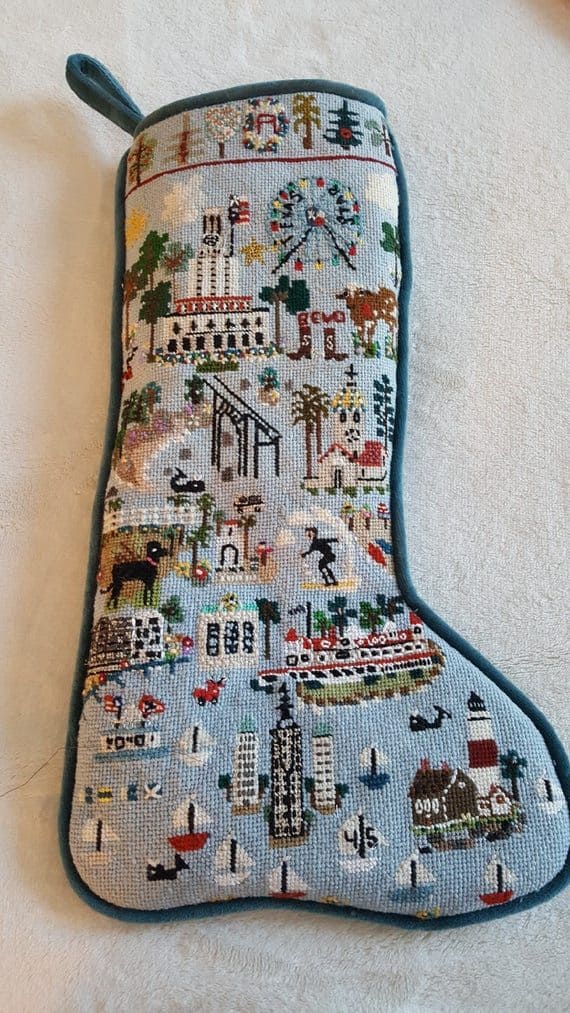
If you love detailed stitching, this cityscape stocking is pure joy to create.
Every inch is filled with life from ferris wheels and boats to tiny buildings and parks.
Also, the mix of soft blues, greens, and festive reds brings a nostalgic warmth, perfect for anyone who enjoys handmade holiday heirlooms.

- 14-count sky blue Aida fabric ((cut to 18” × 24”))
- Embroidery floss (in 25-30 assorted colors (DMC or Anchor))
- Size 24 tapestry needle
- Stocking template ((18” tall))
- Cotton backing fabric ((18” × 24”))
- Quilt batting ((for structure))
- Fabric scissors and pins
- Fabric scissors and pins
- Decorative trim or bias tape ((2 yards))
-
Trace your stocking shape onto the Aida fabric, leaving at least a 1-inch seam allowance around the edges. Mark the design area lightly with pencil or erasable pen.
-
Start stitching from the center, working outward to complete each building, tree, and boat. Then use different thread shades to add texture and movement, especially for water and sky details.
-
When stitching is finished, cut the fabric along the outline. You place the stitched piece and backing fabric right sides together with batting in between.
-
Sew around the edges, leaving the top open. Turn it right side out and iron gently to remove wrinkles.
-
Add a matching trim around the edge and sew a loop at the top corner for hanging.
#13. Cross Stitch Cane Cabinet Makeover
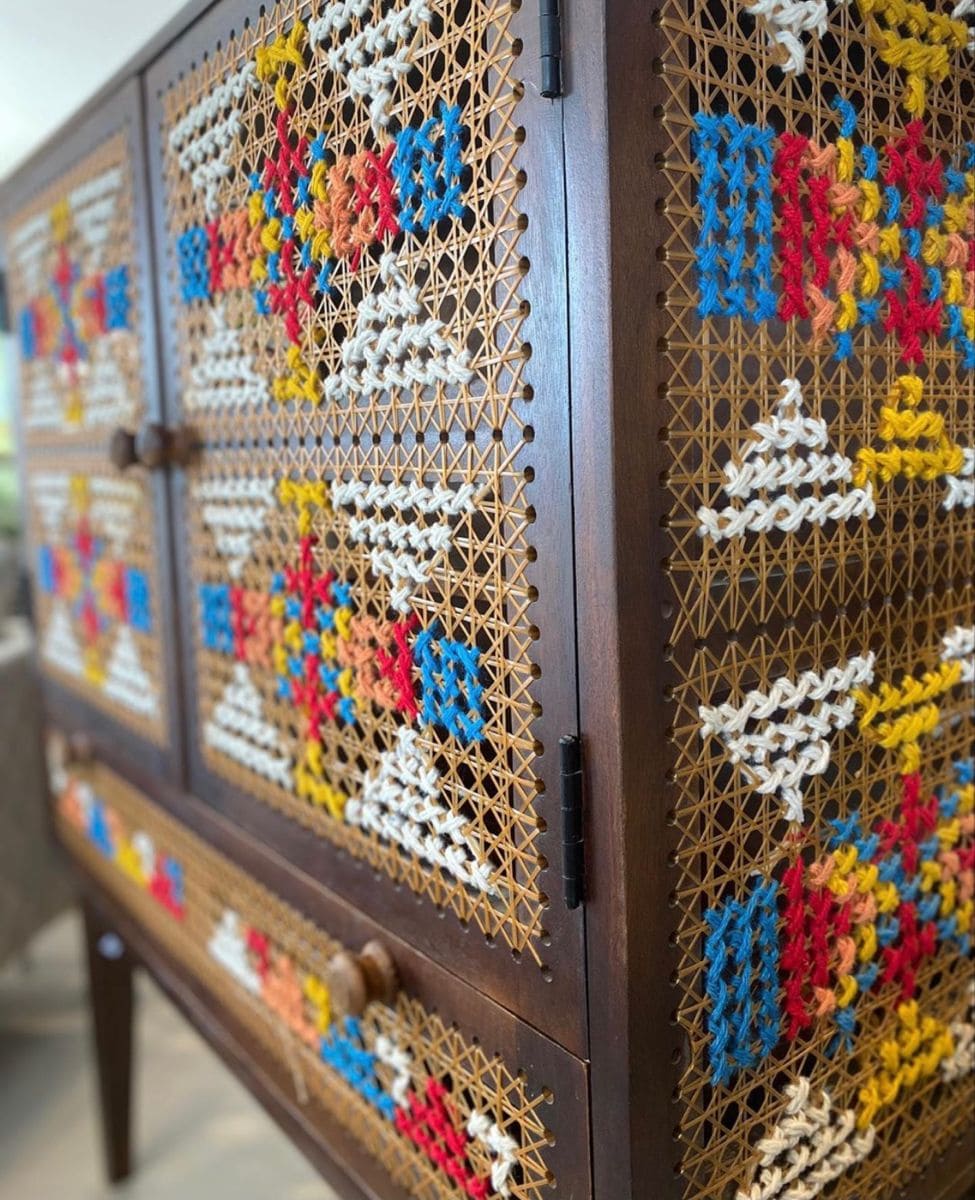
Instead of traditional embroidery cloth, the cross stitch design is done directly on cane webbing, creating a stunning 3D effect.
The thick yarn in bold shades of red, blue, yellow, and cream adds warmth and personality to the dark wood, giving the whole piece a boho yet modern feel.

- Wooden cabinet with cane or rattan panels
- Yarn (in 4-5 colors (medium to thick weight))
- Large plastic yarn needle
- Scissors
- Painter’s tape ((optional for pattern marking))
- Pencil and ruler (for light outlining)
-
Choose or sketch your pattern such as geometric shapes, flowers, or abstract motifs work best. Lightly outline the design on the cane using a pencil or tape to guide your stitches.
-
Cut a length of yarn and thread your needle. Start stitching from the inside of the cabinet panel so your knots remain hidden. Then pull the yarn gently through the cane holes, creating neat, even X shapes.
-
Continue filling the pattern, switching colors as needed. To prevent tangling, work in small sections and secure each yarn end at the back with a simple knot.
-
Once finished, trim any loose ends and check for balance in the design. You can lightly press the yarn with your hand to flatten it if needed.
-
Reattach the cane panels or doors to your cabinet, step back, and admire your creative transformation.
#14. Gothic Dragula Cross Stitch Art
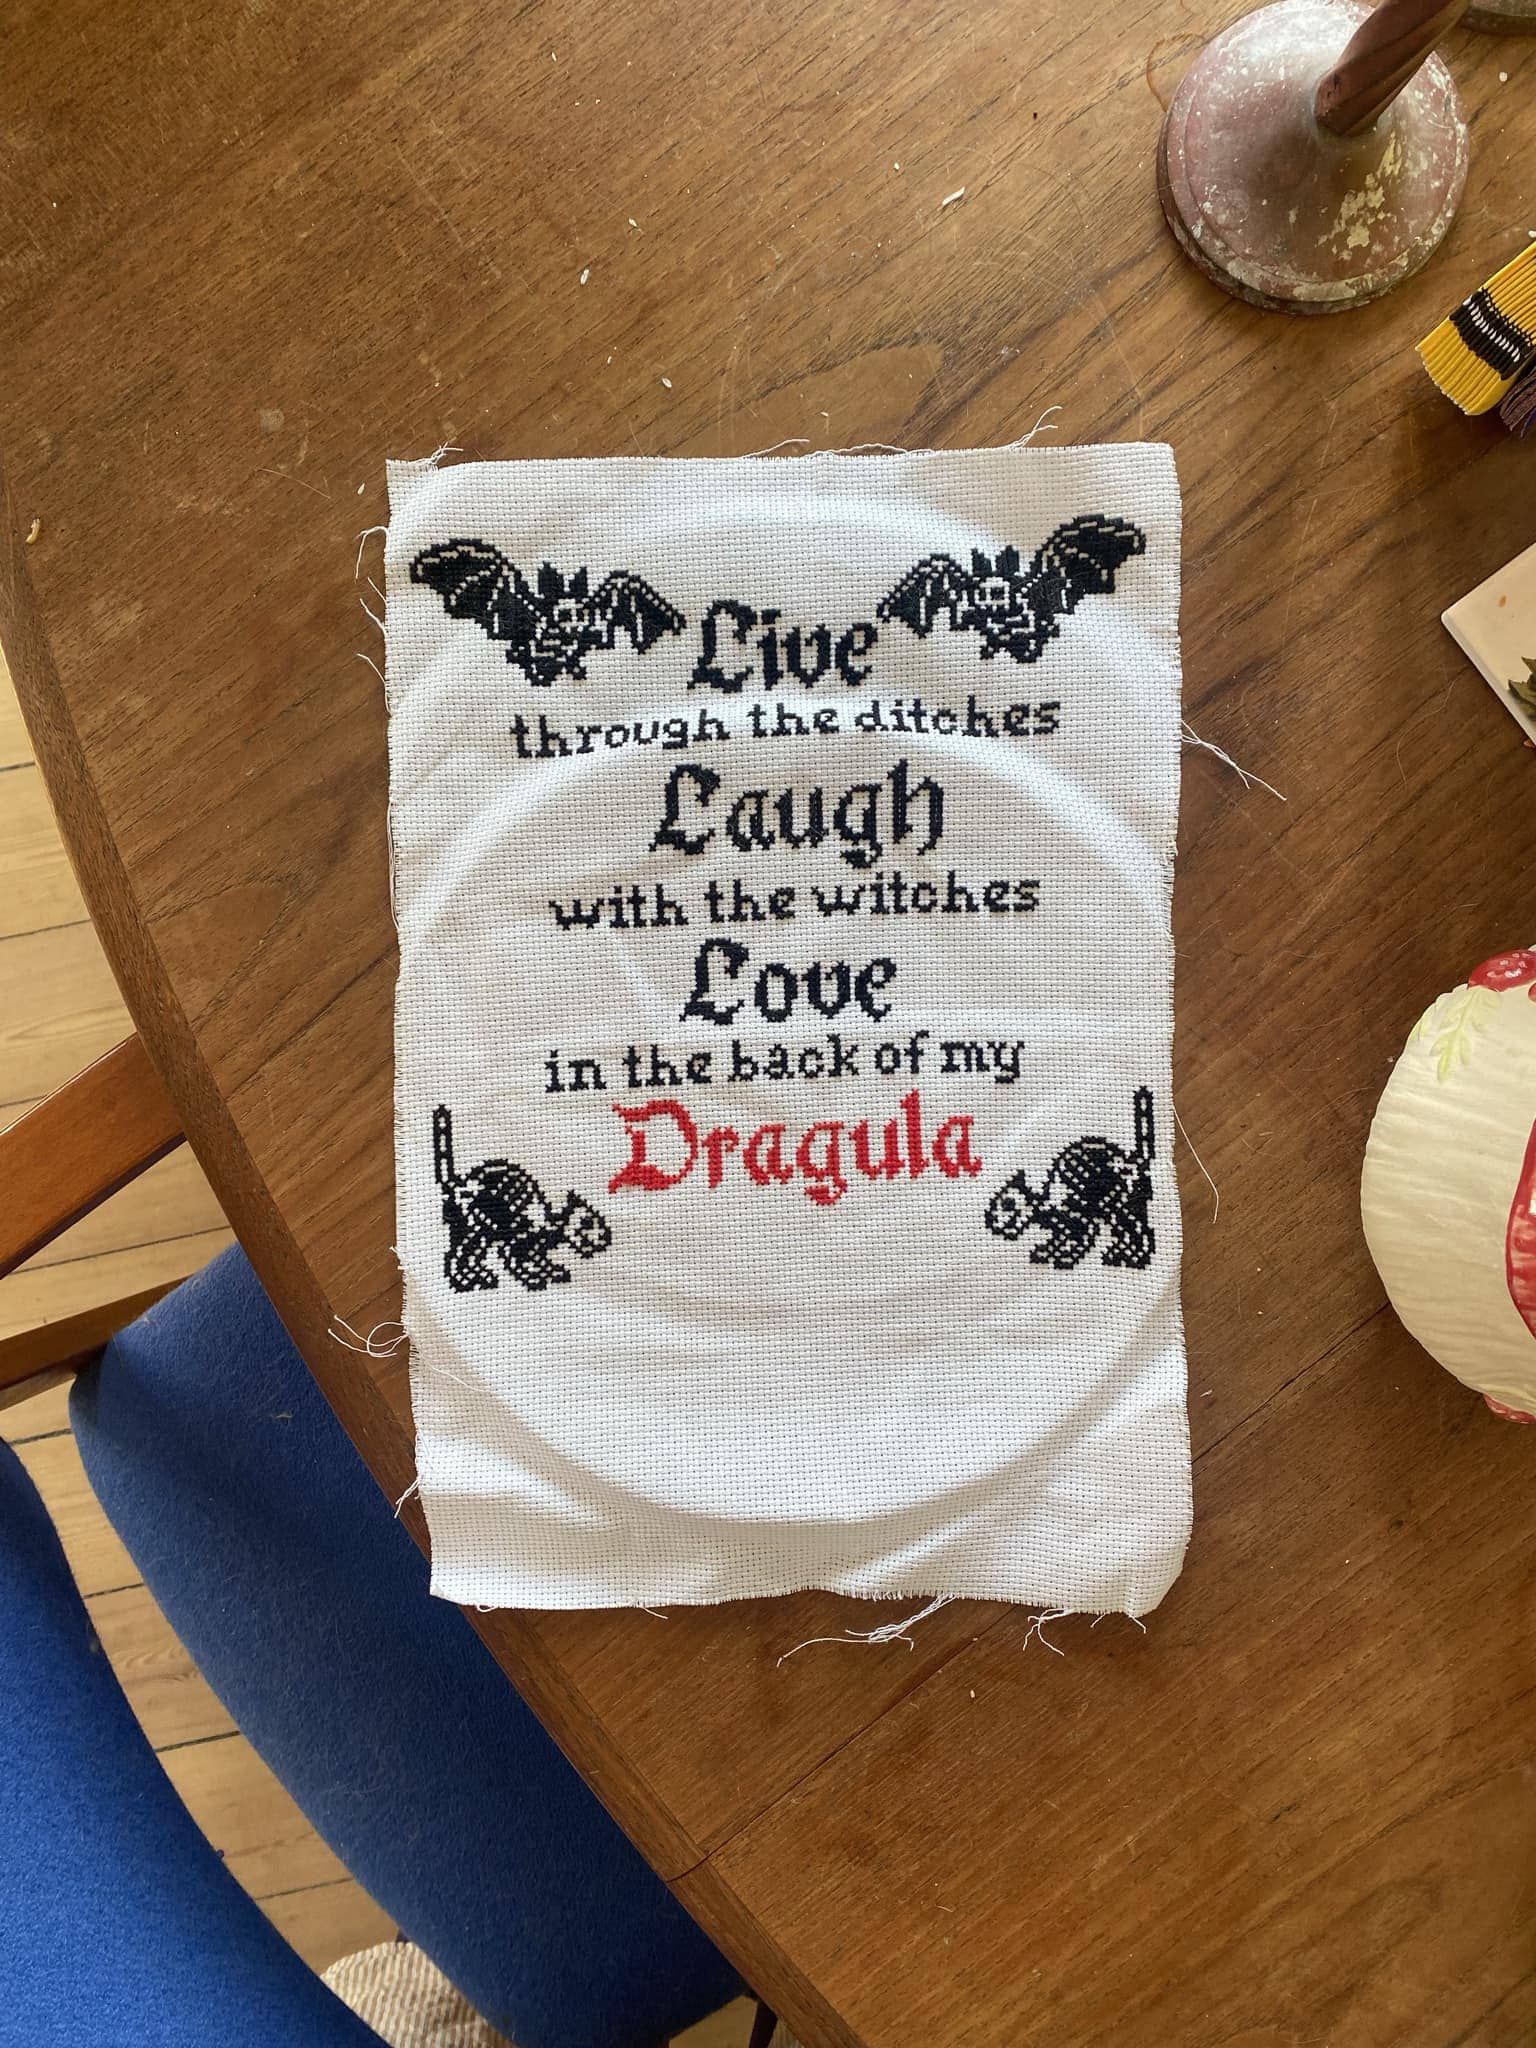
In this craft, the bold black bats, eerie black cats, and that fiery red Dragula create a perfectly spooky balance between charm and rebellion.
It’s the kind of craft that makes you smile every time you pass by, especially if you love Halloween or a good rock lyric.
You can also display it in a frame or turn it into a decorative pillow for your favorite haunted corner.

- Aida fabric ((14 count, 8”×10”))
- Embroidery floss (black (2 skeins) and red (1 skein))
- Embroidery needle ((size 24))
- Small embroidery hoop ((6”))
- Scissors
- Printable “Dragula” cross stitch pattern (Printable “Dragula” cross stitch pattern)
- Iron and pressing cloth
-
Secure your Aida fabric in the hoop, centering the area where your text will go.
-
Start stitching from the middle of the design outward. Use black thread for the words “Live, Laugh, Love” and the decorative bats and cats.
-
Switch to red floss for the word “Dragula,” letting it stand out boldly against the monochrome tones.
-
When the design is complete, trim excess fabric, then gently iron the back to smooth out wrinkles.
-
Frame it, mount it, or turn it into a patch for a bag or jacket, anywhere your spooky humor can shine.
#15. Pixel Hero Cross Stitch Hoop Art
![]()
Wow, a nostalgic tribute to classic adventure games, this cross stitch design brings two pixel-style heroes to life, ready for battle.
Their tiny swords, green tunics, and confident stances make this project perfect for gamers who love handmade art with personality.
The subtle shading and color blending give the characters a 3D look, capturing that old-school pixel magic while adding a touch of modern craft.
![]()
- Aida fabric ((14 count, 8”×8”))
- Wooden embroidery hoop (Wooden embroidery hoop)
- Embroidery floss (in 10-12 colors (greens, yellows, browns, blues, grays, and black))
- Embroidery needle (Embroidery needle )
- Small scissors
- Printable pixel hero pattern ((based on your favorite game character))
- Iron and pressing cloth
-
Stretch your fabric evenly inside the hoop. Find the center point to align your pattern correctly, this ensures the figures sit neatly side by side.
-
Start with the lighter base colors such as skin tones and tunics. Then use small, even stitches to keep the pixel effect crisp and symmetrical.
-
Gradually layer in darker shades for shadows, boots, belts, and outlines. Take your time blending similar tones to give your heroes depth and dimension.
-
Stitch the swords last using cool gray and blue tones for metallic highlights. This helps them stand out sharply against the neutral fabric.
-
Once you finish, gently iron the back of your work to smooth out creases. Finally, trim excess fabric and tighten the hoop to secure the design in place.
#16. Bluebird and Sewing Cross Stitch Design
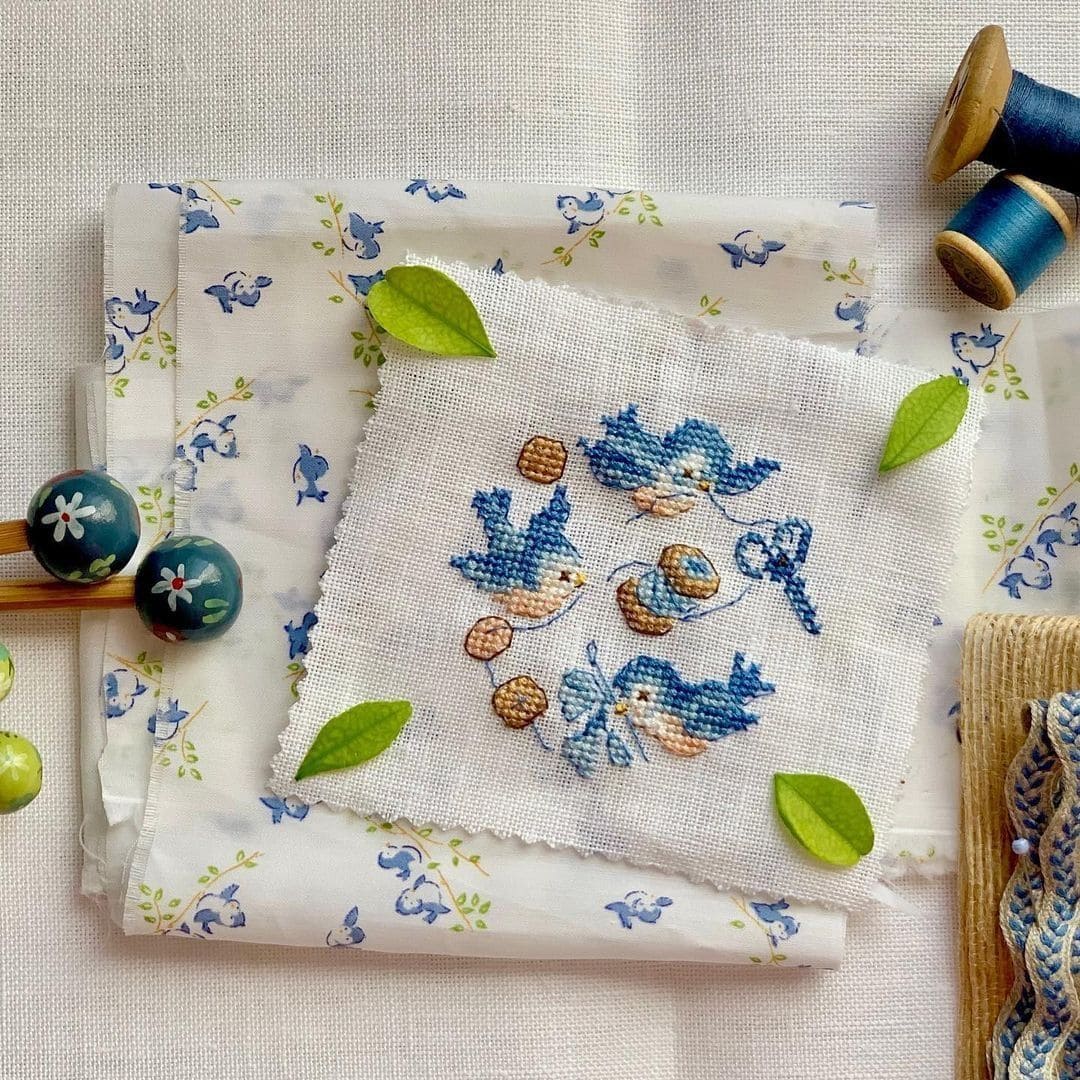
A gentle scene of bluebirds at work, this cross stitch design feels like a whisper of spring captured in fabric
The soft blues and honey tones blend beautifully, giving life to the tiny birds, thread spools, and fluttering butterfly.
It’s delicate, cheerful, and ideal for framing, turning into a pin cushion, or adding to a fabric cover for your sewing journal.

- Linen or Aida fabric ((14 or 16 count, 6”×6”))
- Embroidery floss (in 6-7 shades (sky blue, navy, tan, cream, peach, white, and gray))
- Embroidery needle ((size 24 or 26))
- (size 24 or 26) ((5”))
- Scissors
- Optional: light blue floral backing fabric
- Iron and pressing cloth
-
Place your fabric in the hoop and locate the center of your design area. Start stitching from the middle bird to ensure even spacing.
-
Use soft blue and cream tones for the birds, working from their bodies outward. Keep your stitches small and neat to preserve the fine detail.
-
Add the thread spools and key using tan and gray shades. Outline gently with a darker color for definition.
-
Stitch the butterfly and connecting threads last, it ties the design together with a sense of movement and playfulness.
-
Once completed, carefully wash and iron your piece on the reverse side. Frame it or sew it onto a fabric base to create a charming handmade accent for your sewing space.
#17. Floral Cross Stitch Tote Bag
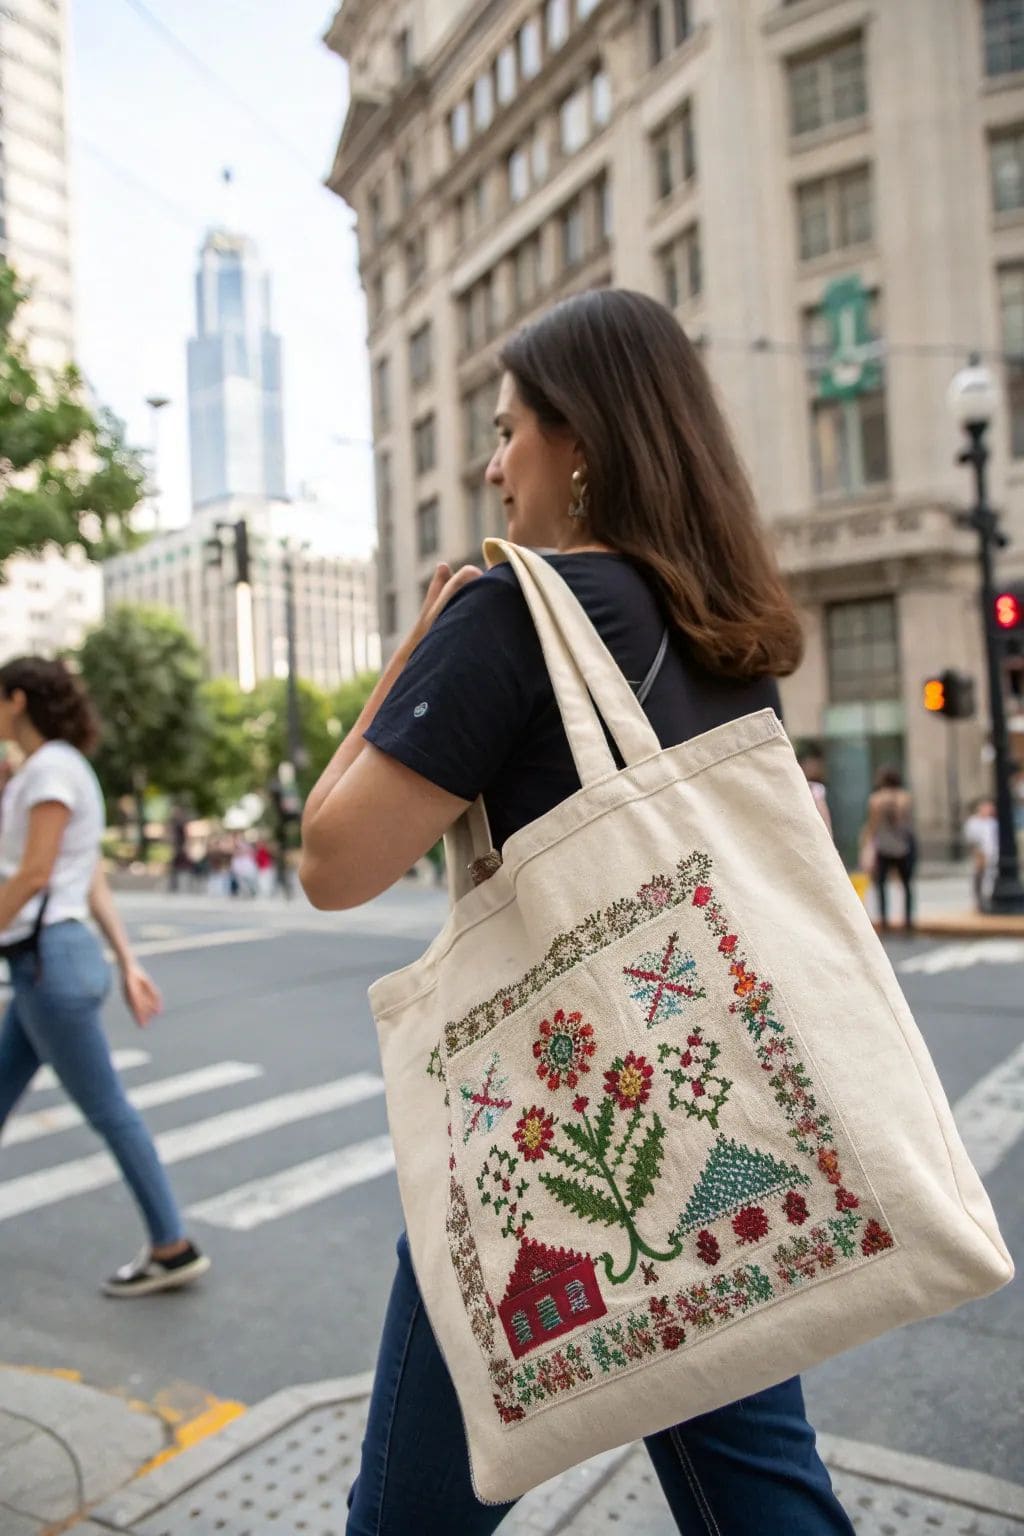
The floral and geometric motifs stitched onto the canvas turn a simple bag into a walking piece of art.
You can carry your books, groceries, or craft supplies with a personal touch that feels uniquely yours.
The warm colors like greens, reds, and golds bloom beautifully against the neutral fabric, making it both eye-catching and meaningful.

- 1 plain canvas tote bag ((14”×16”))
- Embroidery floss (in 8-10 colors (reds, greens, blues, golds, browns))
- Embroidery needle ((size 24 or 26))
- Embroidery hoop ((8”-10”))
- Washable fabric pen or pencil
- Cross stitch pattern of your choice
- Iron-on interfacing ((optional for backing))
-
Wash and iron your tote to remove any wrinkles before you start stitching. Lay it flat on a firm surface.
-
Choose your pattern and lightly trace the grid or outline onto the fabric with a washable pen. Floral, nature-inspired, or folk motifs work beautifully for this type of project.
-
Place the section you’ll work on inside the embroidery hoop to keep the fabric taut. Begin stitching from the center of the design outward, using small, even cross stitches.
-
Switch colors gradually to create dimension, start with greenery, then add flowers, borders, and small accent details. Take breaks to admire how your pattern comes alive with each thread.
-
Once complete, secure all thread ends at the back and press gently with a warm iron (using a pressing cloth). Your finished tote is ready to use and show off, a beautiful blend of creativity and practicality.
#18. Floral Cross Stitch Notebook Cover
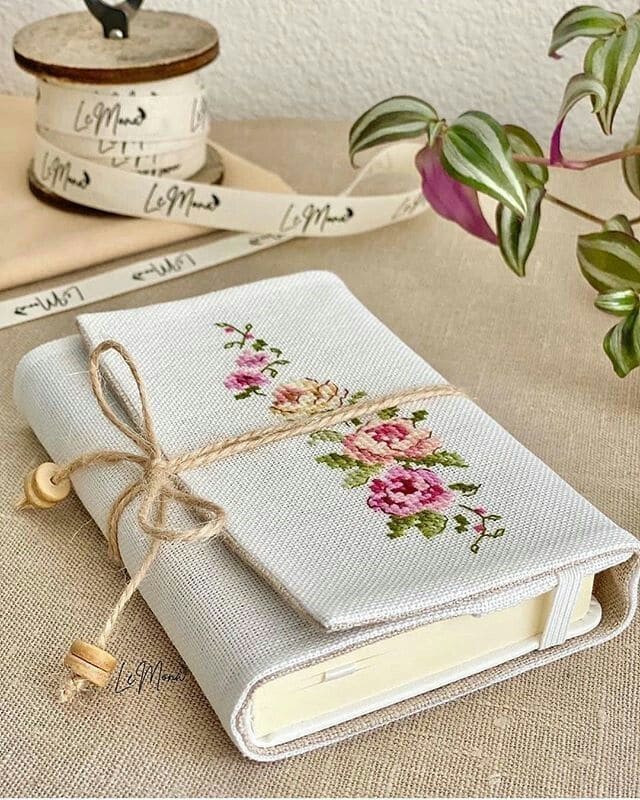
Wow, this elegant notebook cover combines beauty and purpose in the most delicate way.
A soft linen fabric embroidered with blooming pink roses transforms an ordinary notebook into something you’ll cherish.
The gentle hues and detailed stitches give it a timeless charm, perfect for journaling, sketching, or gifting to someone who appreciates handmade keepsakes.

- 1 medium notebook (medium notebook)
- Linen or Aida fabric ((cut to 10”×14”))
- Embroidery floss (in 5-6 shades (pink, white, green, and brown tones))
- Embroidery needle ((size 24 or 26))
- Scissors
- Fabric glue or sewing kit
- Twine or jute string ((about 20 inches long))
- Optional: light interfacing ( for extra sturdiness)
-
Cut your fabric large enough to wrap around your notebook with an inch of extra margin on all sides. Then iron it flat for a neat surface.
-
Choose a floral cross stitch pattern such as roses, peonies, or wildflowers all work beautifully. Then mark the center of your fabric and start stitching outward to keep the design balanced.
-
Once finished, gently iron your stitched fabric (face down on a soft towel) to remove creases without flattening the threads.
-
Wrap the embroidered piece around the notebook, folding the edges neatly inside. Use fabric glue or stitch the corners for a clean finish.
-
Tie a twine bow around it to add a rustic charm and keep your journal securely closed.
#19. Autumn Pumpkin Cross Stitch Display
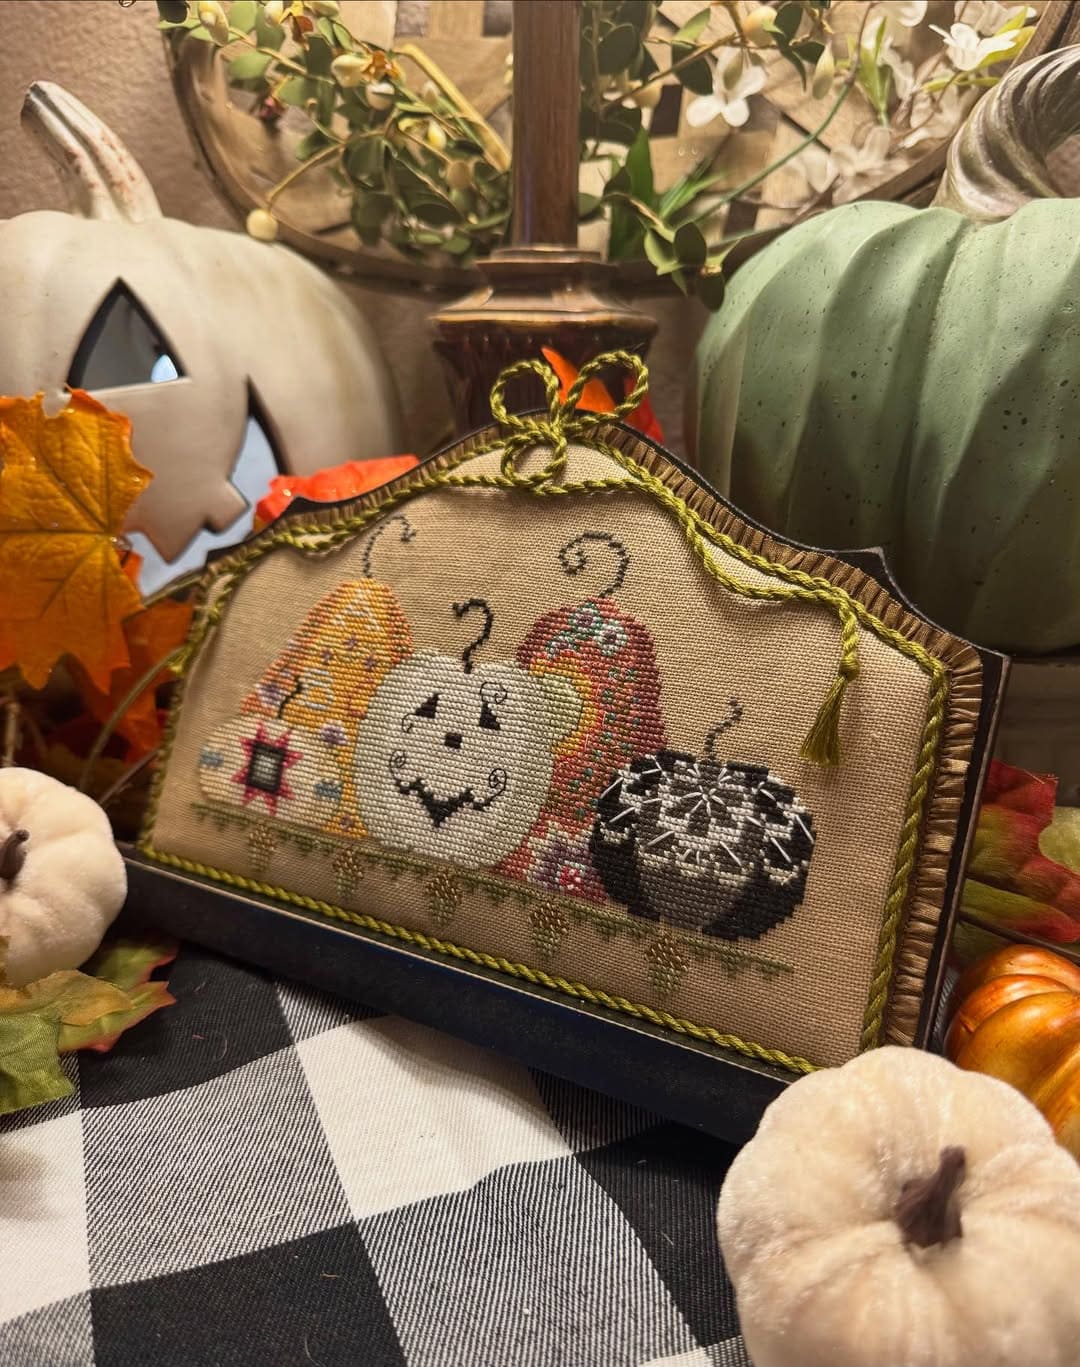
An elegant mix of whimsy and fall warmth, this pumpkin cross stitch display brings personality to your seasonal décor.
Each pumpkin has its own charm including one smiling, another patterned, and a third bold in black and white.
Surrounded by soft pumpkins and autumn leaves, it becomes a statement piece that captures the golden comfort of fall evenings.

- Linen or Aida fabric ((14 count, 8”×10”))
- Embroidery floss (in 10-12 autumn shades (orange, white, brown, green, gold, gray, black, and red))
- Embroidery needle ((size 24 or 26))
- Small scissors
- Fabric backing or interfacing
- Frame or display board ((7”×9”))
- Decorative cord or tassel trim ((about 18” length))
- Hot glue or craft adhesive
- Optional: light batting ( for a padded finish)
-
Secure your fabric in a hoop and find the center of your pattern. Start stitching from the middle pumpkin, using warm oranges and yellows for a natural gradient effect.
-
Add character with small details such as smiling faces, patchwork squares, or stripes. Then use contrasting shades like black and white for extra charm.
-
Once the pumpkins are complete, outline stems and vines in soft green to connect the design and create a balanced flow.
-
Gently iron the finished piece on the back side with a pressing cloth, then attach it to a backing fabric using light glue or double-sided fusible interfacing.
-
Mount your stitched fabric on a shaped display board or frame. Add the decorative cord along the edge with hot glue, and tie a bow or tassel at the top for a refined finish.
This design looks especially beautiful under warm lighting, try placing it near candles or fairy lights to highlight the subtle shading and bring out the cozy glow of your autumn stitches.
#20. Geometric Cat Cross Stitch Handbag
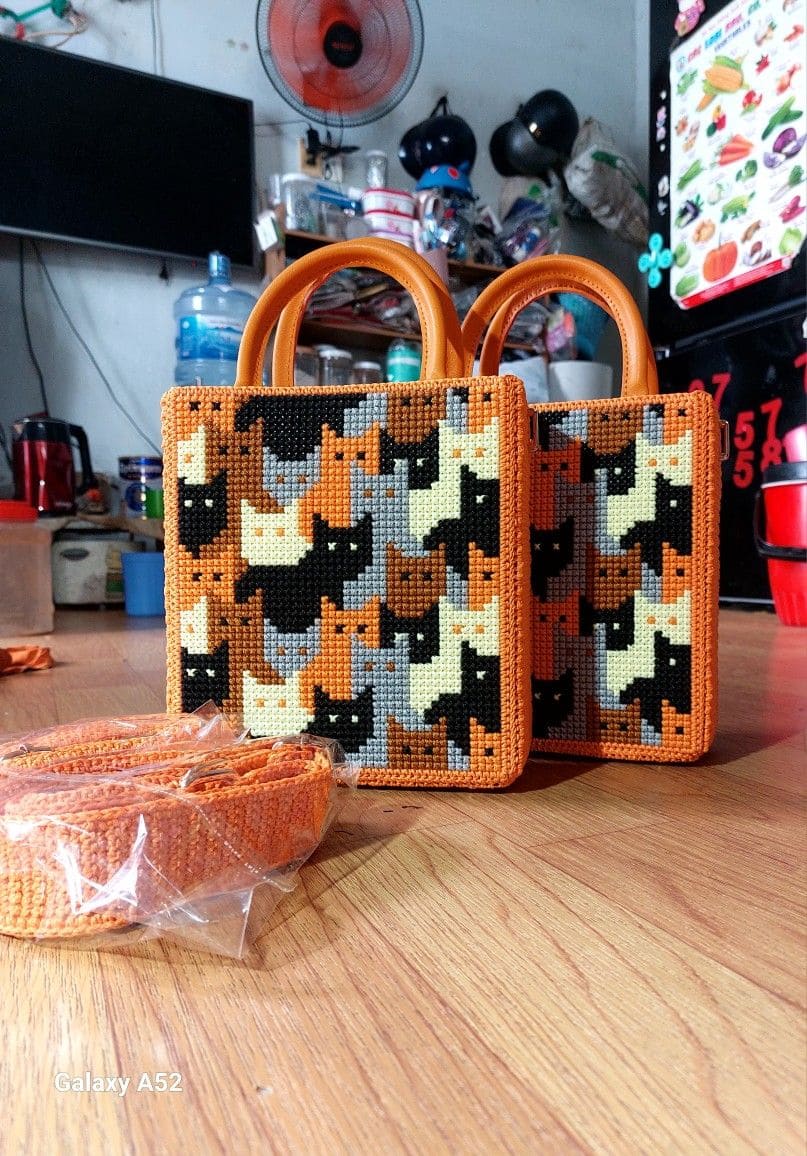
A true showstopper for cat lovers, this cross stitch handbag combines bold geometric charm with everyday functionality.
Each feline face like stitched in warm shades of black, cream, orange, and gray creates a striking mosaic that looks both playful and chic.
The sturdy orange border and leather handles elevate it from a simple craft to a stylish accessory.

- Plastic canvas sheets ((7-count, 8"×10" each – 6 pieces))
- Embroidery floss (in black, cream, orange, gray, and beige)
- Size 16 tapestry needle
- Leather or faux leather handles ((8” long))
- Orange yarn (for edging)
- Lining fabric ((10"×12"))
- Hot glue gun or fabric glue
- Optional: matching crossbody strap ((40” long))
-
Cut your plastic canvas pieces: two panels for the front and back, two sides, one bottom, and one top flap (optional). Make sure the dimensions fit your desired bag size.
-
Cross stitch each cat motif carefully, alternating colors to create a repeating pattern. Keep your tension consistent for an even finish.
-
Once all panels are stitched, trim any extra threads and whipstitch the edges together with orange yarn to form the structure of the bag.
-
Attach the leather handles securely through pre-punched holes or with strong glue. If adding a strap, sew or hook it onto the side edges.
-
Attach the leather handles securely through pre-punched holes or with strong glue. If adding a strap, sew or hook it onto the side edges.
Refer to: 26 Breathtaking Hand Embroidery Ideas to Inspire Your Next Stitch
