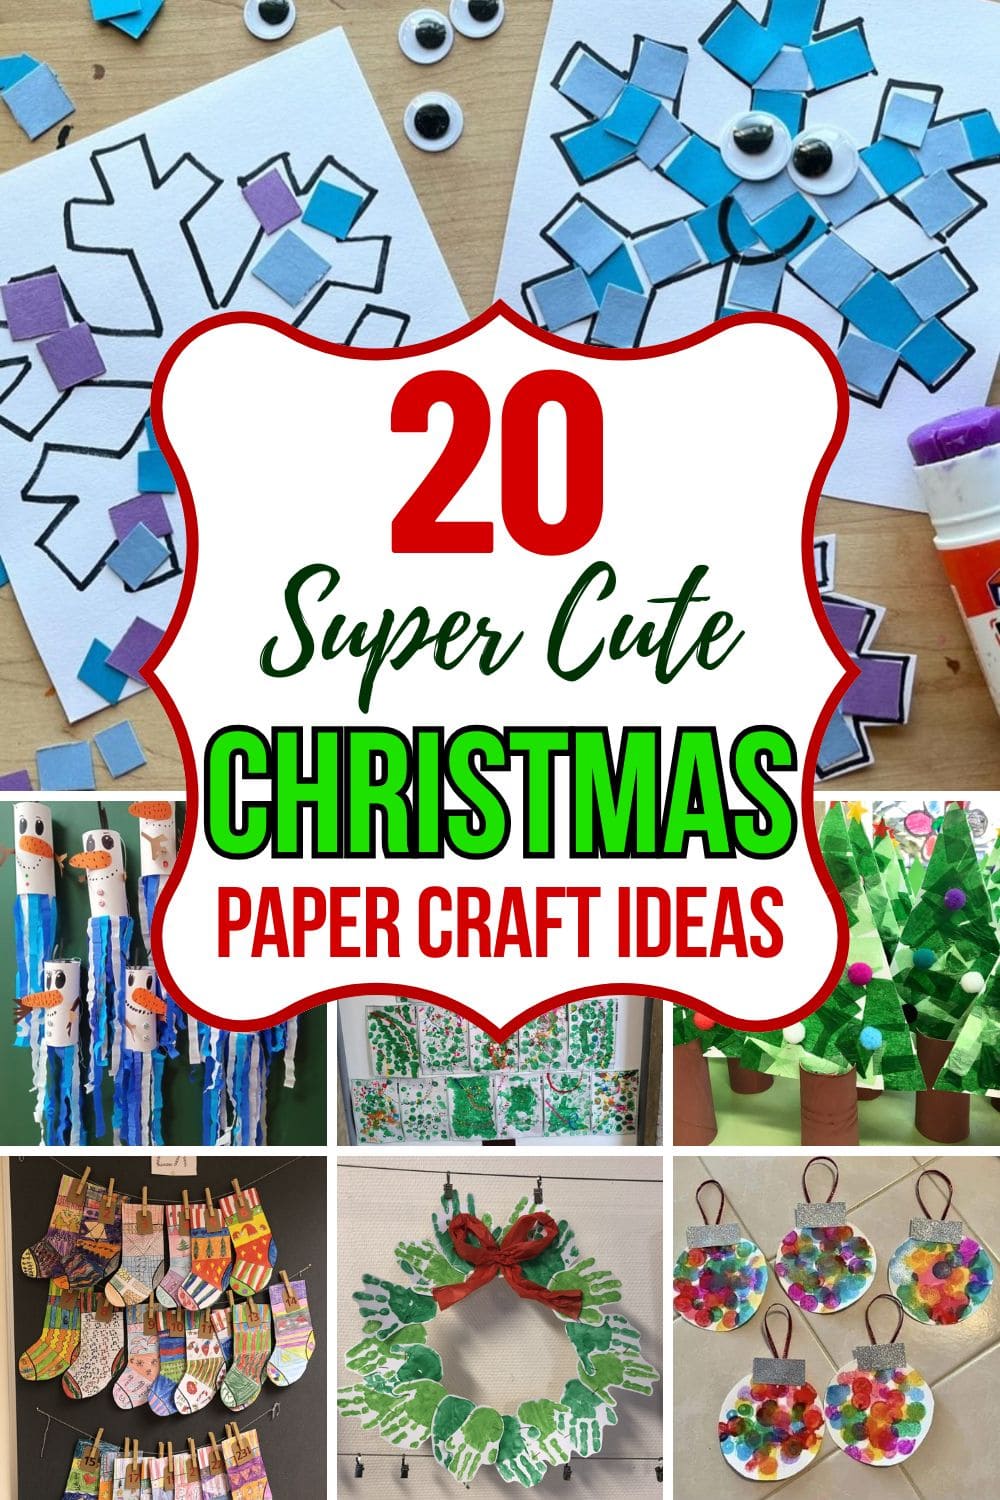
Creating Christmas decorations doesn’t have to stretch your holiday budget.
With just a few sheets of colorful paper, some glue, and a bit of imagination, you can fill your home with handmade festive charm.
These 20 paper craft Ideas are simple, affordable, and full of joy, perfect for cozy afternoons with family or classroom fun with kids.
#1. Tissue Paper Christmas Tree Craft
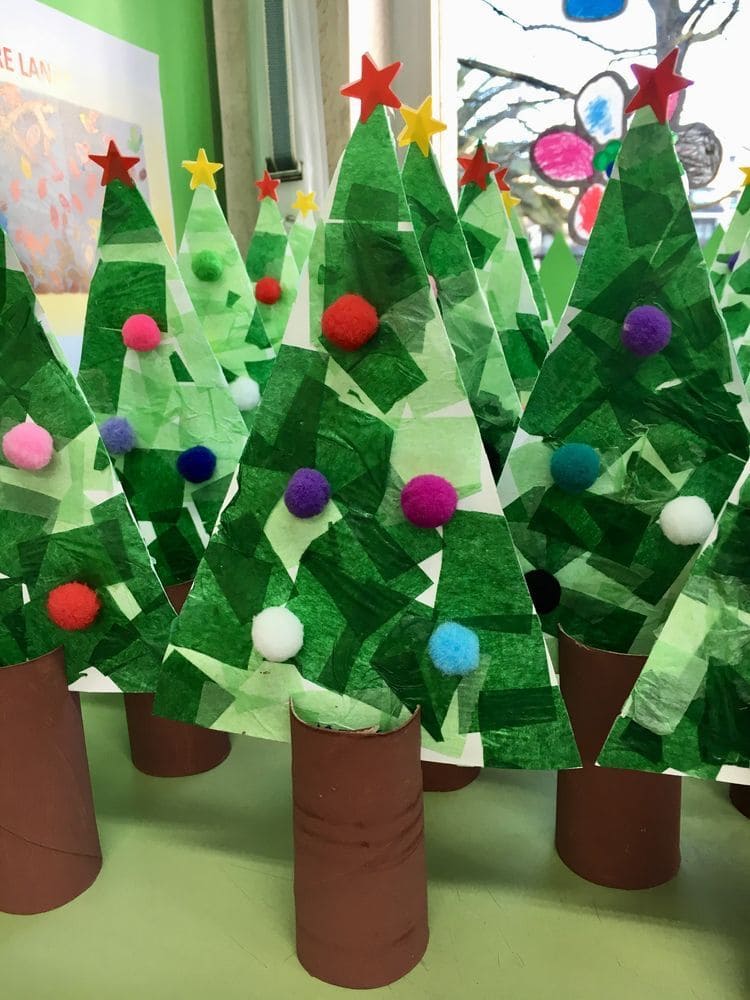
Each tree bursts with bright colors, layers of green, and a touch of handmade warmth.
They’re perfect for decorating your classroom, mantel, or table centerpiece. Kids will love making them since they’re simple, colorful, and allow plenty of creative freedom.
This craft is also a fun way to reuse leftover tissue paper and cardboard rolls while filling your space with Christmas cheer.
Materials
- 6–8 sheets of green tissue paper (various shades for contrast)
- 3–4 sheets of white cardstock (8.5 x 11 inches)
- 4 empty cardboard tubes (4 inches tall each)
- 20 small pom-poms (mix of red, white, blue, pink, purple)
- 4 small yellow or red paper stars (1 inch each)
- Brown acrylic paint and a small brush
- Craft glue or glue stick
- Scissors and pencil
Instructions
- Begin by painting all the cardboard tubes brown to resemble tree trunks. Then set them aside to dry completely.
- On a sheet of cardstock, draw large triangle shapes (about 7 inches tall) to represent the Christmas trees. Now, cut them out carefully.
- Tear or cut the green tissue paper into small squares, around 1 to 2 inches each. Try mixing different shades to create texture and dimension.
- Apply glue to the cardstock triangles, then press tissue squares over the entire surface, overlapping the edges slightly until the paper is fully covered.
- Once the trees are dry, glue small pom-poms across the “branches” as ornaments. Add a paper star to the top for a festive finish.
- Gently glue each triangle onto the rim of a painted tube to form a standing tree. Hold in place for a few seconds until secure.
#2. Paper Santa Hat Name Craft
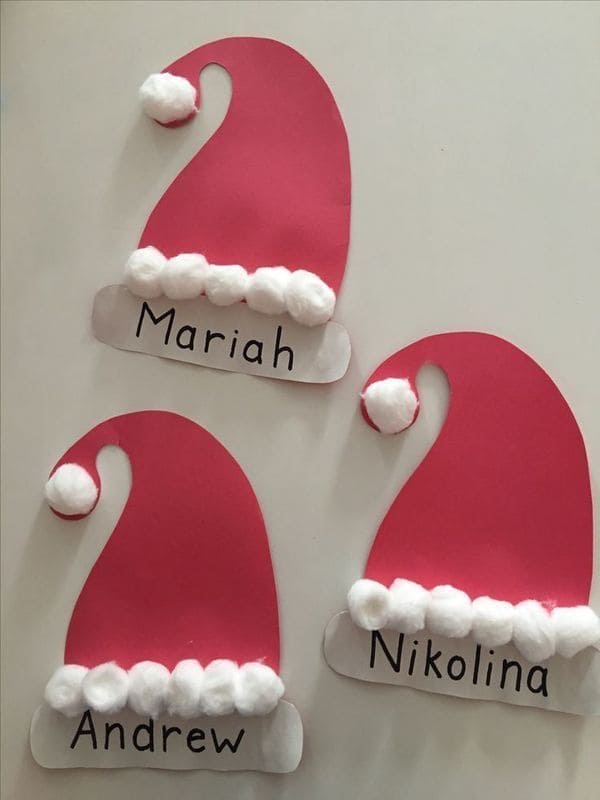
If you’re looking for a cheerful and simple Christmas activity that doubles as a cute classroom decoration, this craft is the perfect choice.
Kids can personalize their own hats, making it a fun way to display names for desks, cubbies, or bulletin boards.
The fluffy cotton balls add a touch of coziness, while the bright red hats bring that unmistakable holiday spirit.
Materials
- Red construction paper (1 sheet per hat, 8.5 x 11 inches)
- White paper (½ sheet per hat for the trim)
- Cotton balls (6–8 per hat)
- Glue stick or school glue
- Scissors
- Black marker for writing names
Instructions
- Draw a Santa hat shape on red construction paper, about 8 inches tall, and cut it out.
- Cut a 2-inch-wide white paper strip to serve as the hat’s brim.
- Glue the brim onto the bottom of the red hat. Then write the child’s name neatly on the white brim using a black marker.
- Add glue along the brim and stick on cotton balls to make the fluffy trim.
- Glue one cotton ball at the tip of the hat for the pom-pom.
#3. Paper Snowman Streamer Craft
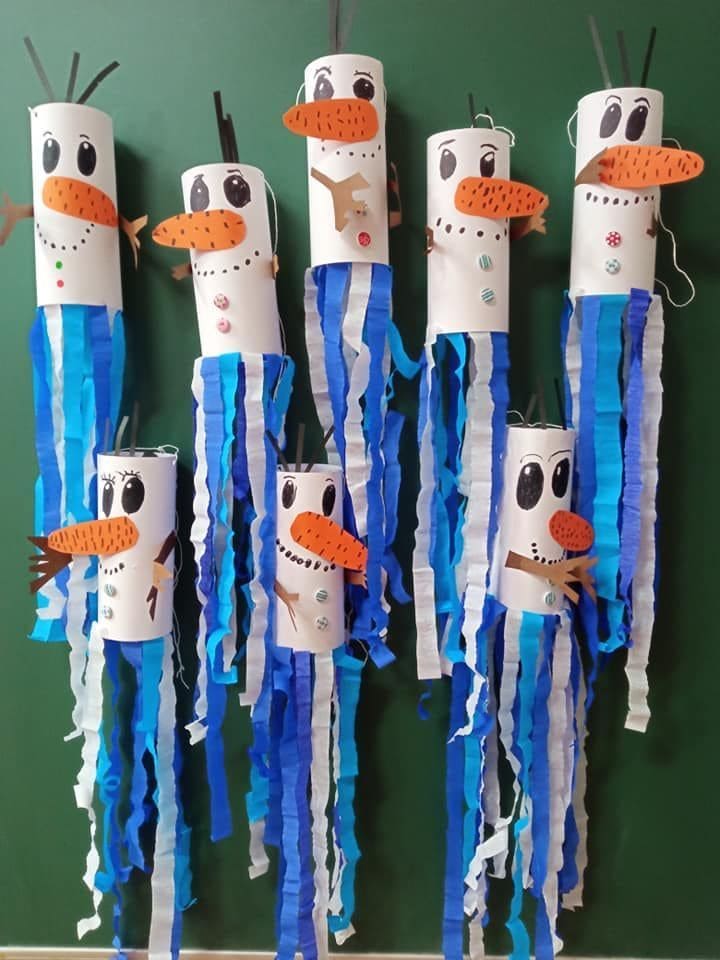
Your snowmen will dance and sway like winter’s breeze. It’s a mix of cheerful creativity and movement.
The flowing blue and white streamers make it look like the snowmen are twirling through falling snow.
Kids will love adding expressive faces, sparkly buttons, and colorful scarves, turning each snowman into a playful personality of its own.
Materials
- White paper rolls or cardstock tubes (8 pieces, 5 inches tall each)
- White, blue, and light-blue crepe paper streamers (cut into 18-inch strips)
- Orange and brown construction paper (1 sheet each)
- Black marker or googly eyes (16 pieces)
- Small decorative buttons (16–20 pieces)
- Scissors, glue stick, and tape
- String or yarn (for hanging, 10 inches per snowman)
Instructions
- Roll white cardstock into a cylinder or use an empty paper towel roll as the snowman’s body. Secure with glue.
- Cut orange paper into carrot-shaped noses and brown paper into stick arms. Then draw or glue eyes and mouths onto each roll, then attach the carrot noses.
- Tape or glue the arms on either side of the snowman’s body.
- Cut blue and white streamers into long strips and glue them to the bottom inside of the roll, alternating colors for a snowy look.
- Decorate the snowman with buttons or stickers for extra detail. You can also punch a small hole on top and tie a string through it for hanging.
#4. Paper Stocking Advent Calendar
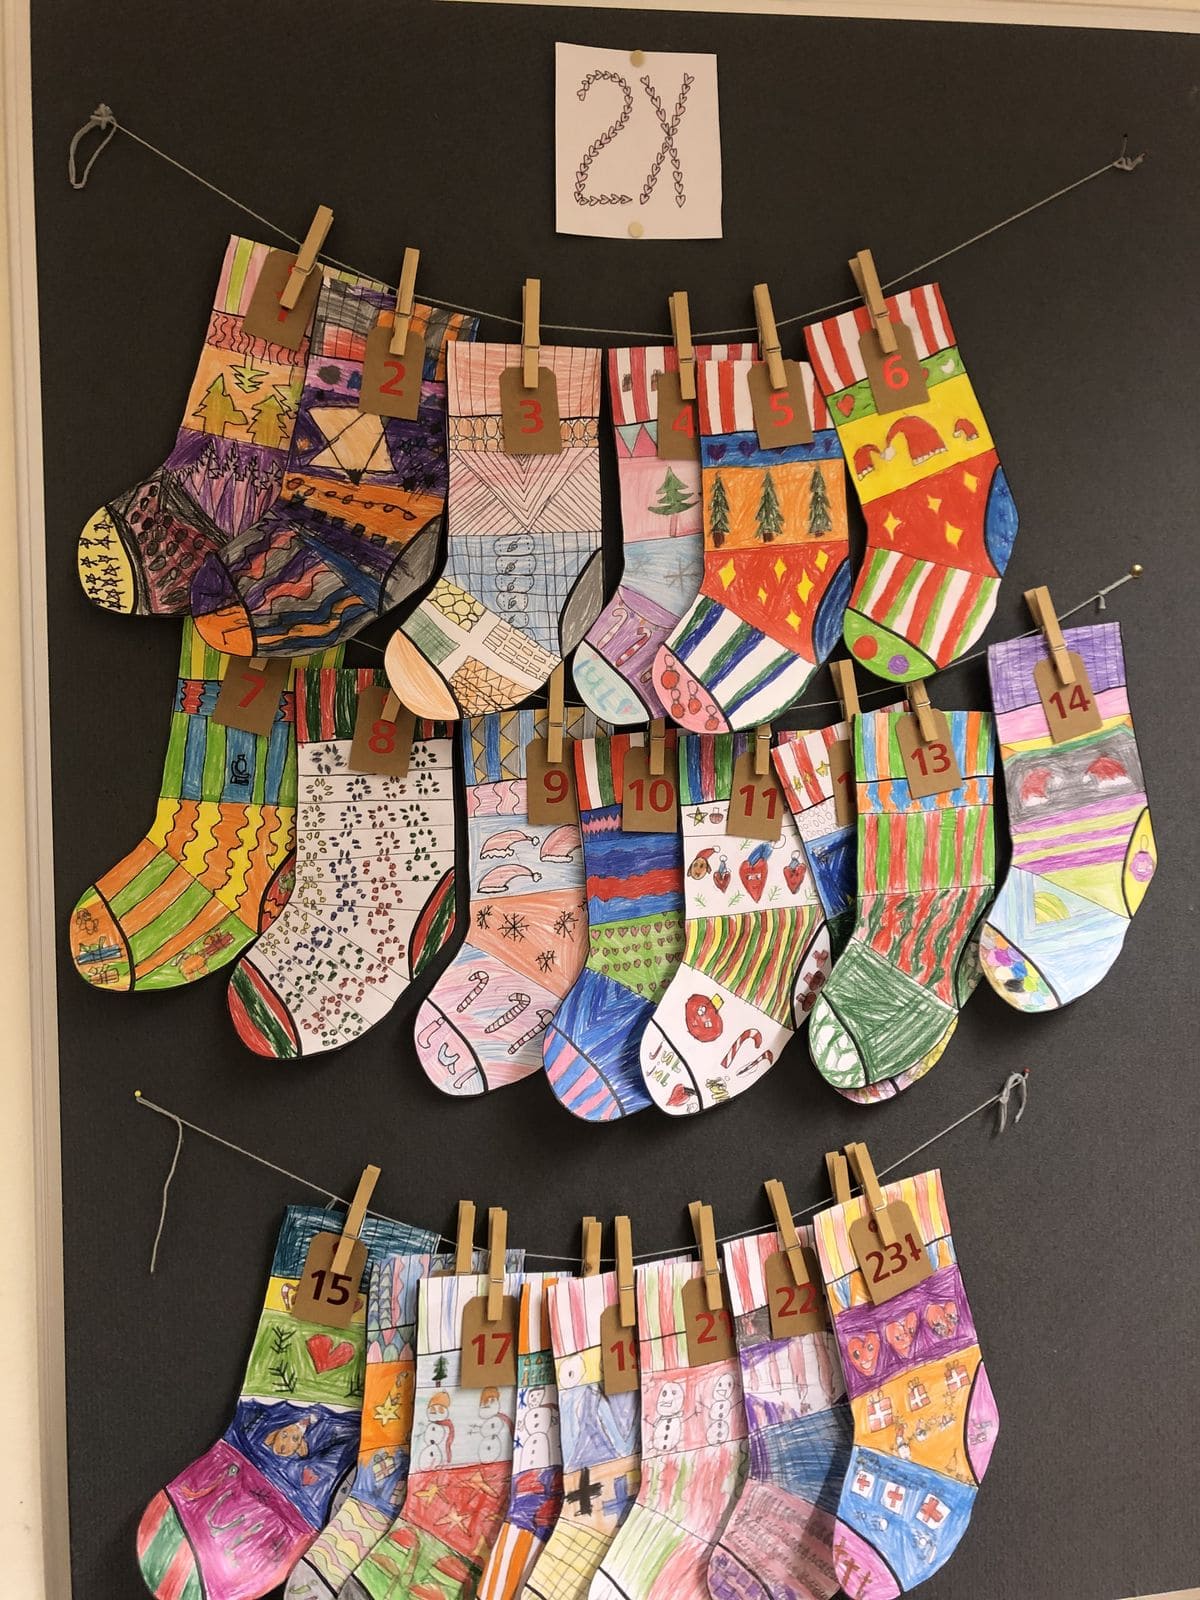
What about turning your classroom or living room wall into a colorful countdown to Christmas?
This stocking advent calendar makes waiting for the big day even more exciting.
Each stocking can represent a date in December, letting kids decorate and personalize their own designs.
Materials
- White cardstock (1 sheet per stocking, 8.5 x 11 inches)
- Coloring supplies (crayons, markers, colored pencils)
- Scissors
- Twine or string (around 5–6 feet long)
- Mini clothespins (24 pieces)
- Number stickers or red marker for labeling
- Hole punch (optional)
Instructions
- Print or draw a stocking template on cardstock and cut it out.
- Let each child decorate a stocking using crayons, markers, or colored pencils. Encourage patterns, holiday themes, or unique designs.
- Label each stocking with a number from 1 to 24, marking each day leading up to Christmas.
- Use a hole punch to make a small hole at the top of each stocking if you plan to hang them with string.
- Cut a length of twine and stretch it across a bulletin board or wall. Then clip each stocking to the string using clothespins in numbered order.
#5. Fingerprint Christmas Ornament Craft
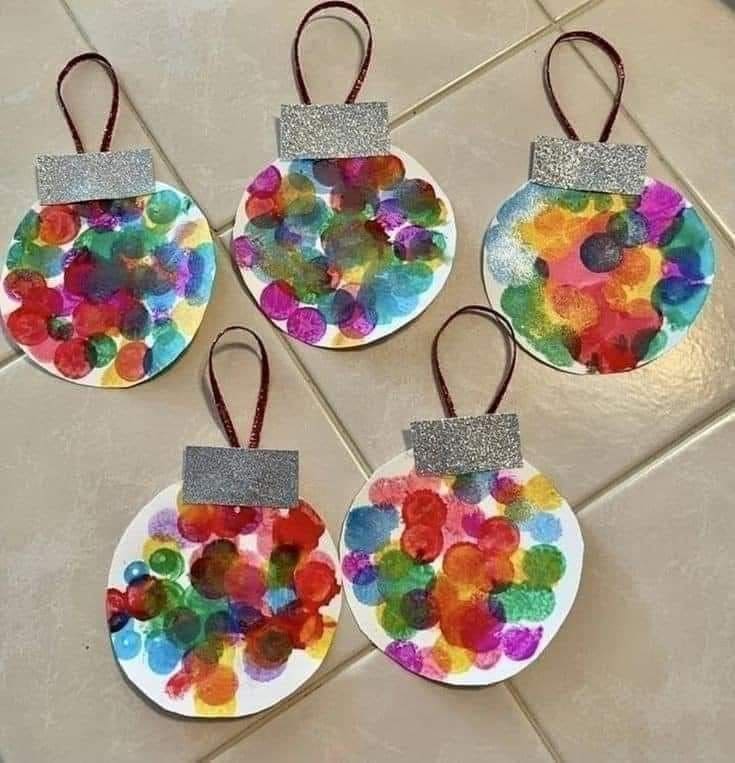
Your child’s tiny fingerprints can turn into the most colorful Christmas ornaments with this joyful fingerprint craft.
It’s an easy, hands-on project that helps kids explore colors and patterns while creating something festive for your tree or home decor.
Each ornament is unique, bursting with cheerful fingerprints that capture a moment in time.
Materials
- White cardstock or thick paper (8.5 x 11 inches, cut into 5 circles of 4 inches each)
- Washable paints in assorted colors (6–8 shades)
- Silver glitter paper (cut into 2 x 1.5-inch rectangles)
- Ribbon or string (6 inches per ornament)
- Scissors and glue stick
- Pencil and small circular object for tracing
Instructions
- Use a cup or round object to trace circles on the cardstock and cut them out, these will be your ornaments.
- Pour small amounts of different colored paints onto a palette or tray.
- Dip your child’s fingertip into the paint and press it gently onto the paper circles, layering multiple colors to create a bright, festive pattern.
- Glue a small rectangle of glitter paper at the top of each ornament to resemble the metal cap.
- Loop a ribbon into a circle and glue it behind the glitter cap to create the hanger.
- Once dry, display them on your Christmas tree or string them together as a colorful garland.
#6. Paper Mosaic Snowflake Craft
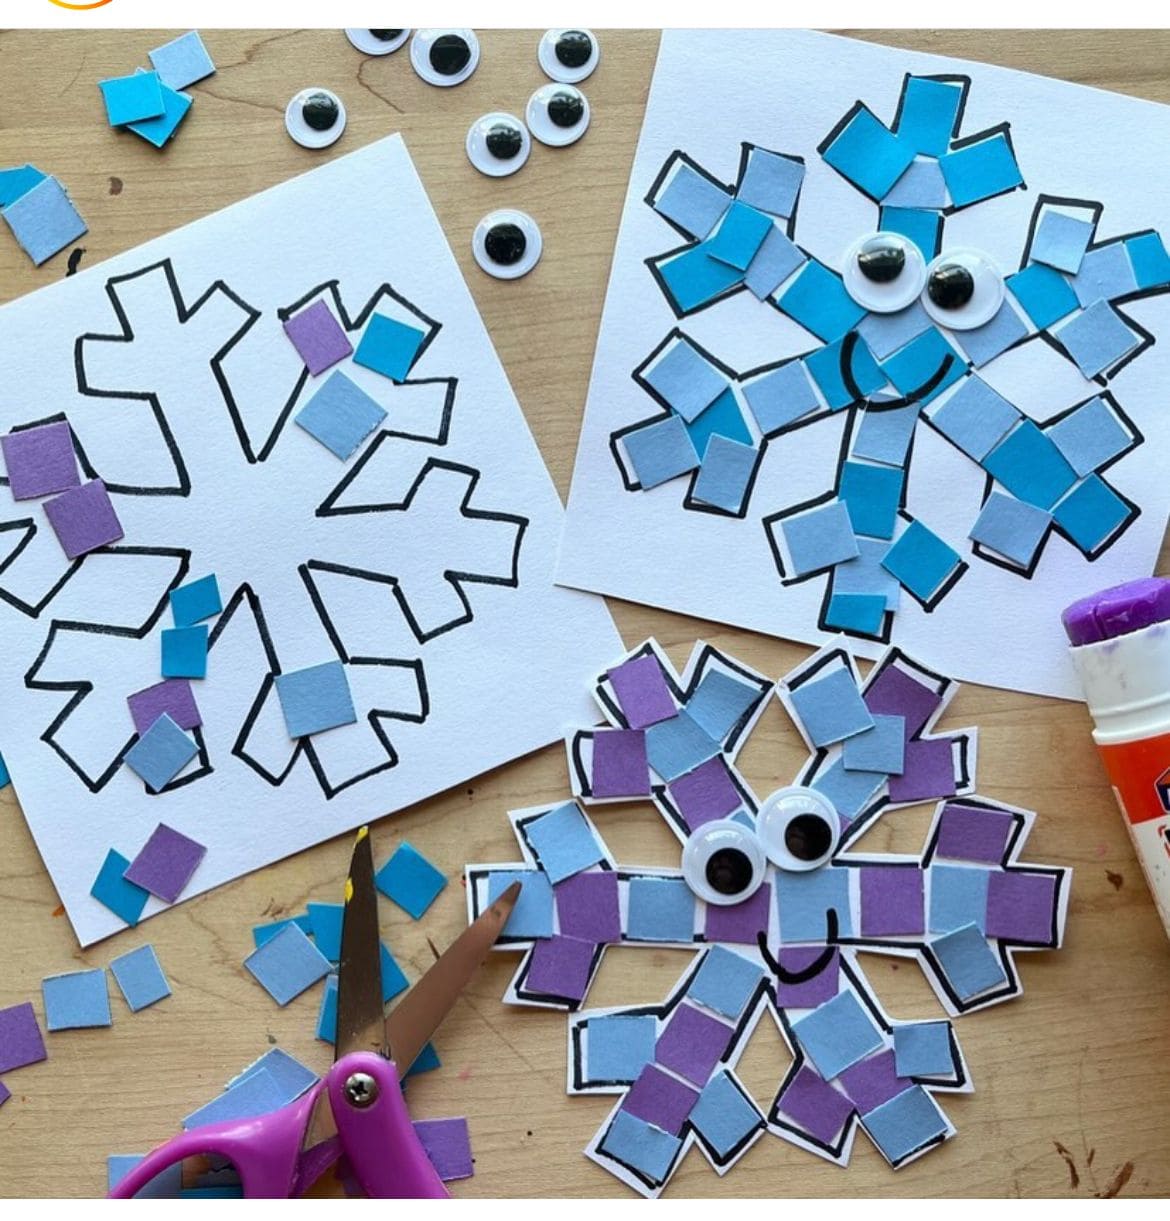
You can turn a simple snowflake template into a winter masterpiece with this paper snowflake craft.
It’s an easy and colorful project that lets kids explore patterns, textures, and shades of blue and purple while strengthening their fine motor skills.
he addition of googly eyes gives each snowflake a cute, playful personality, perfect for classroom walls or home displays during the holidays.
Materials
- White cardstock or thick paper (cut into 6x6-inch squares)
- Blue and purple construction paper (cut into 1-inch squares, about 30–40 pieces per snowflake)
- Googly eyes (2 per snowflake)
- Glue stick
- Scissors
- Black marker (optional, for smiles or details)
- Printed or hand-drawn snowflake outlines
Instructions
- Start by printing or drawing a snowflake outline on white cardstock.
- Cut small squares of blue and purple paper, they don’t have to be perfect; irregular edges give a nice mosaic texture.
- Apply glue inside the snowflake’s lines, and start sticking the paper squares one by one, mixing the colors for a frosty gradient effect.
- Once the design is filled in, glue two googly eyes near the center to give your snowflake a friendly face.
- Next, add a smile or rosy cheeks with a marker if desired.
- Let the glue dry for about 10–15 minutes before displaying your cheerful, mosaic snowflakes on windows, boards, or cards.
#7. Handprint Christmas Wreath Craft
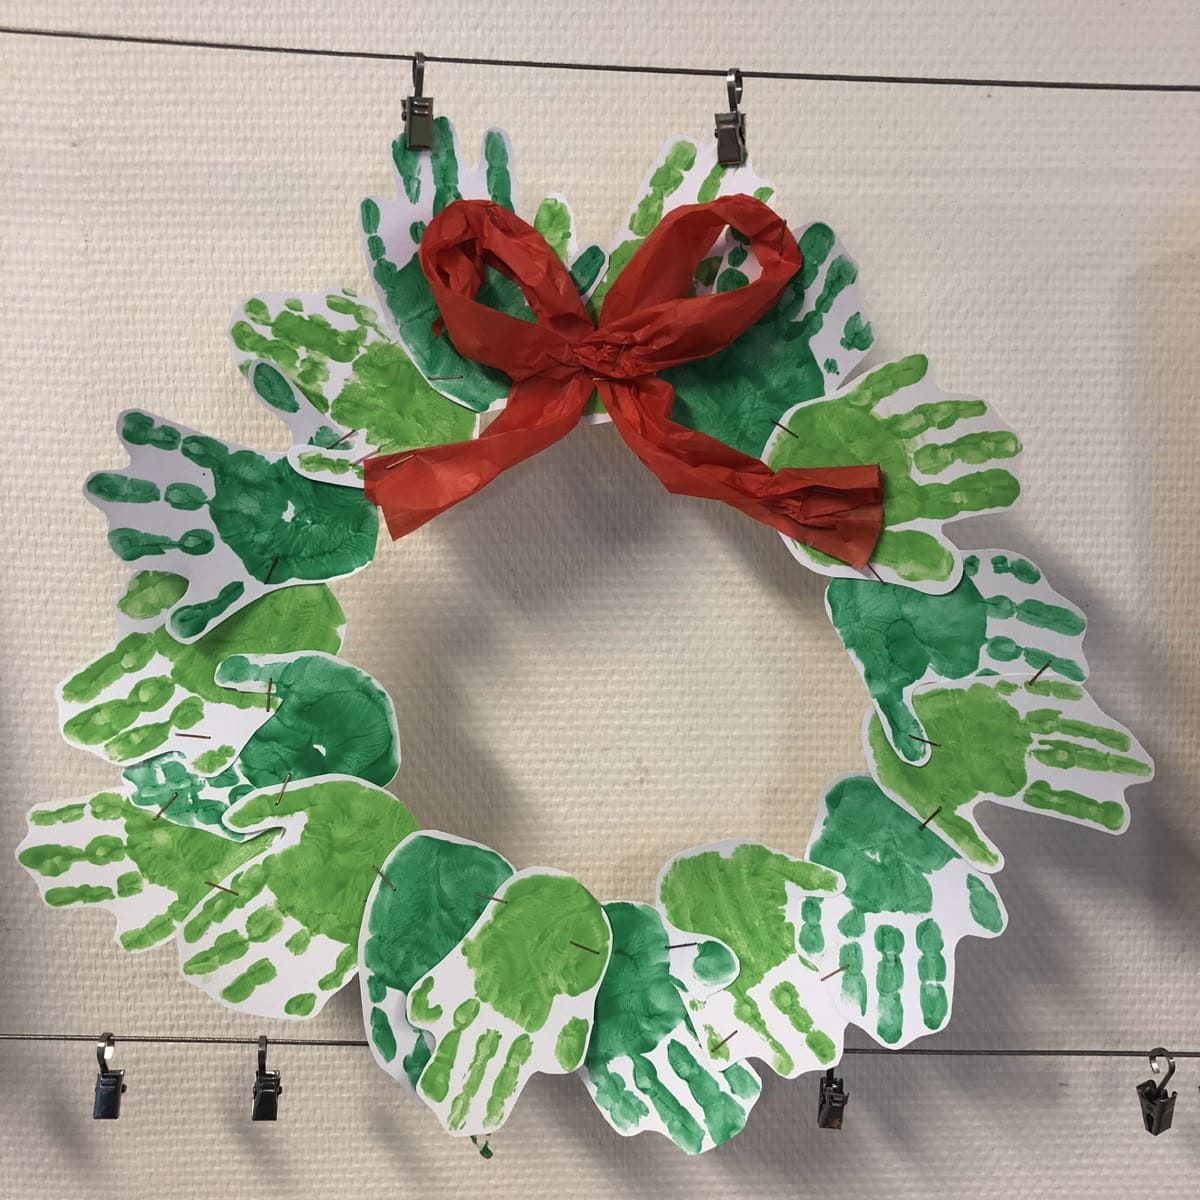
Wow, this handprint wreath combines creativity and sentiment, turning a simple painting activity into a festive keepsake.
Each handprint becomes a leaf, and together they form a circle of holiday cheer.
It’s a perfect family or classroom project that captures the spirit of teamwork, growth, and Christmas joy.
Materials
- 8–10 sheets of white cardstock (8.5 x 11 inches)
- Green washable paint (light and dark shades)
- 1 paintbrush or sponge
- 1 large sheet of cardboard or poster board (18 x 18 inches)
- Scissors and glue stick
- Red tissue paper (1 sheet, 12 x 12 inches) for the bow
- Pencil and tape
Instructions
- Begin by painting your child’s hands with green paint using a brush or sponge. Press handprints onto the cardstock, using both light and dark green shades for variation. You’ll need around 16–20 handprints.
- Once the paint is dry, cut out each handprint carefully, following the outlines closely.
- Draw a large ring (about 14 inches in diameter) on the cardboard or poster board and cut it out to form the wreath base.
- Arrange the handprints around the ring, overlapping them slightly so the fingers fan outward like leaves.
- Glue each handprint securely, alternating shades of green to add depth.
- Twist and shape the red tissue paper into a large bow, then glue or tape it at the top center of the wreath.
#8. Torn Paper Snowman Art
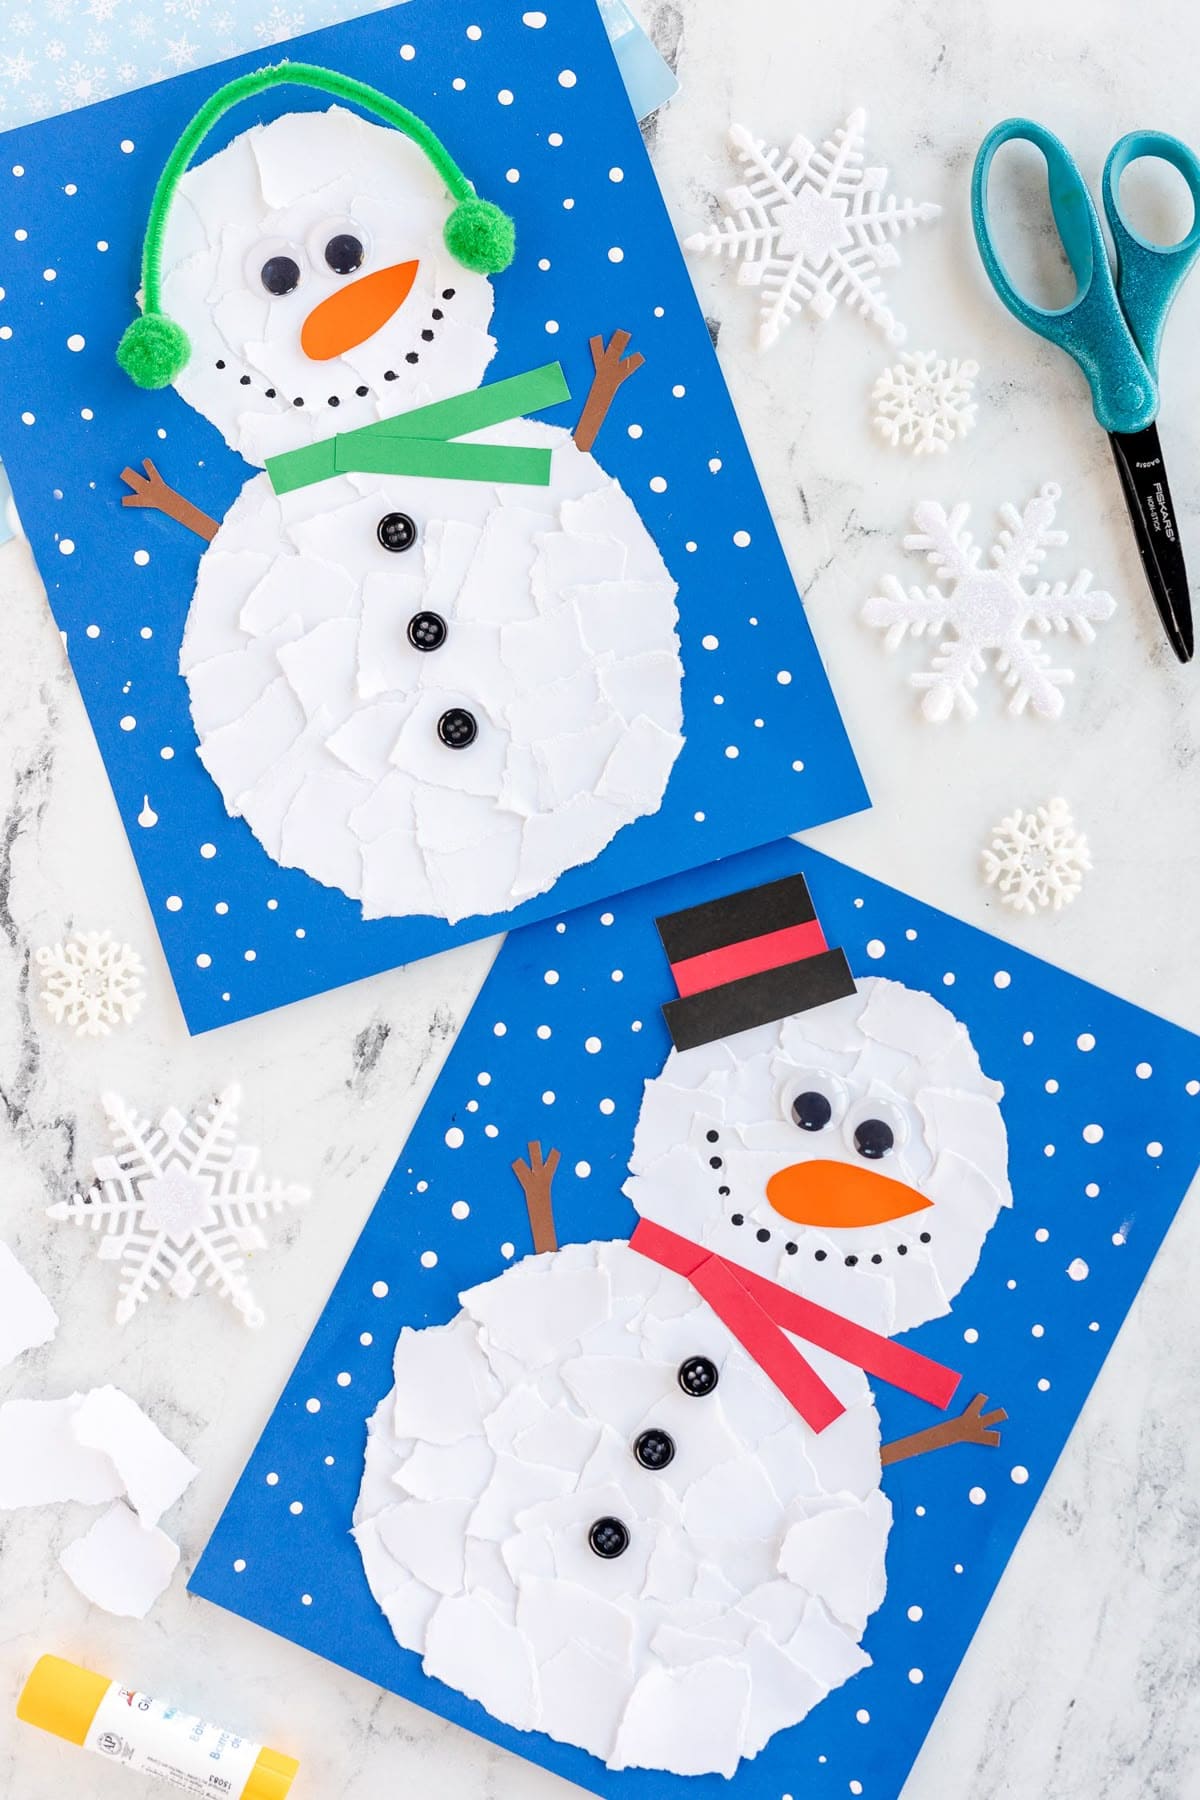
To bring winter fun indoors, this snowman art is a delightful and hands-on craft for kids.
The beauty lies in its imperfection, each torn piece of paper adds texture, giving your snowman a soft, fluffy look.
It’s perfect for preschoolers or family craft time, encouraging fine motor skills while sparking creativity.
Materials
- Blue construction paper (A4 size)
- White paper (2–3 sheets for tearing); Orange paper (for the carrot nose); Brown paper (for arms)
- Colored paper (red, green, or patterned for scarves and hats)
- 3 buttons (or black paper circles)
- Googly eyes (2 per snowman)
- Glue stick
- Black marker or dot stickers
Instructions
- Tear white paper into small irregular pieces, about 1 to 2 inches wide.
- Arrange and glue the torn pieces into two or three circles on the blue paper to form the snowman’s body and head.
- Cut a carrot-shaped nose from orange paper and glue it in place.
- Add googly eyes, draw the smile with a marker, and attach small buttons down the front.
- Cut thin brown strips for the arms and glue them on each side.
- Finally, decorate with a paper scarf or hat, and use white paint or a correction pen to dot snowflakes around.
#9. Paper Snowman Rosette Craft
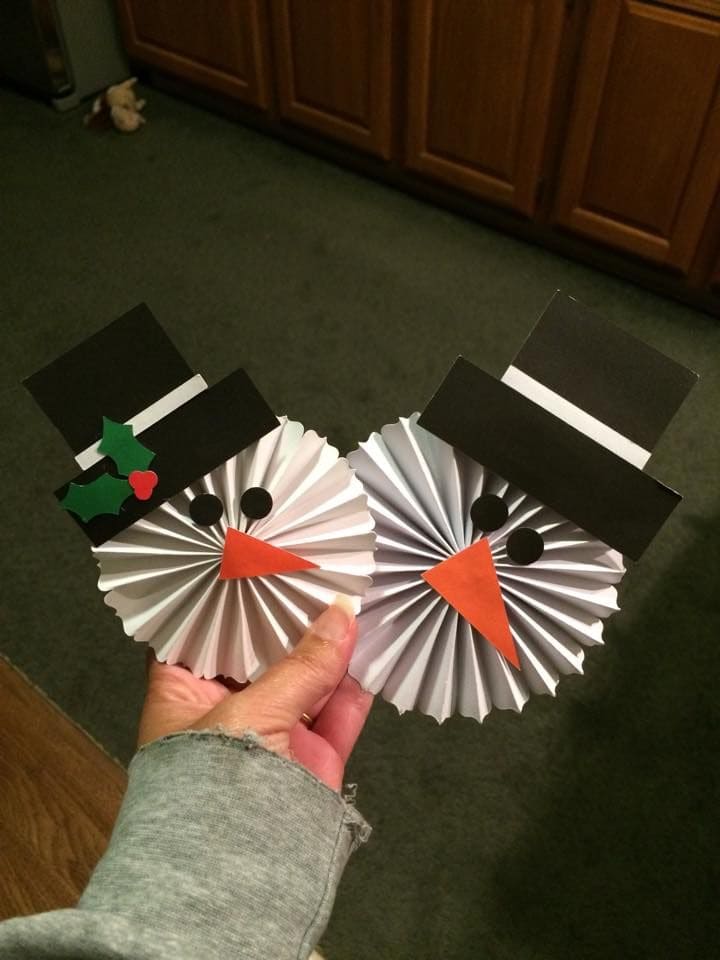
Your holiday decorations will look extra charming with this craft.
It’s a quick, delightful way to turn plain paper into smiling winter friends that can hang on the wall, decorate gifts, or brighten your windows.
Kids will love folding and assembling the rosettes, watching the snowman’s face come to life with every detail they add.
Materials
- White paper (2 sheets per snowman, 8.5 x 11 inches)
- Black paper (1 sheet for hats and eyes)
- Orange paper (small piece for noses)
- Green and red paper (for holly leaves and berries, optional)
- Scissors and glue stick
- Ruler and pencil
- String or tape for hanging
Instructions
- Fold each white sheet accordion-style, about 1 inch per fold, along the short side.
- Fold the accordion in half and glue the ends together to form a circular fan (rosette).
- Cut out two small black circles for eyes and an orange triangle for the carrot nose. Then glue them in place.
- Create a black hat by cutting a rectangle (3 x 2 inches) and a smaller strip for the brim. You can add optional holly leaves and berries for decoration.
- Allow everything to dry, then attach a string at the back to hang your snowmen.
#10. Paper Lace Angels
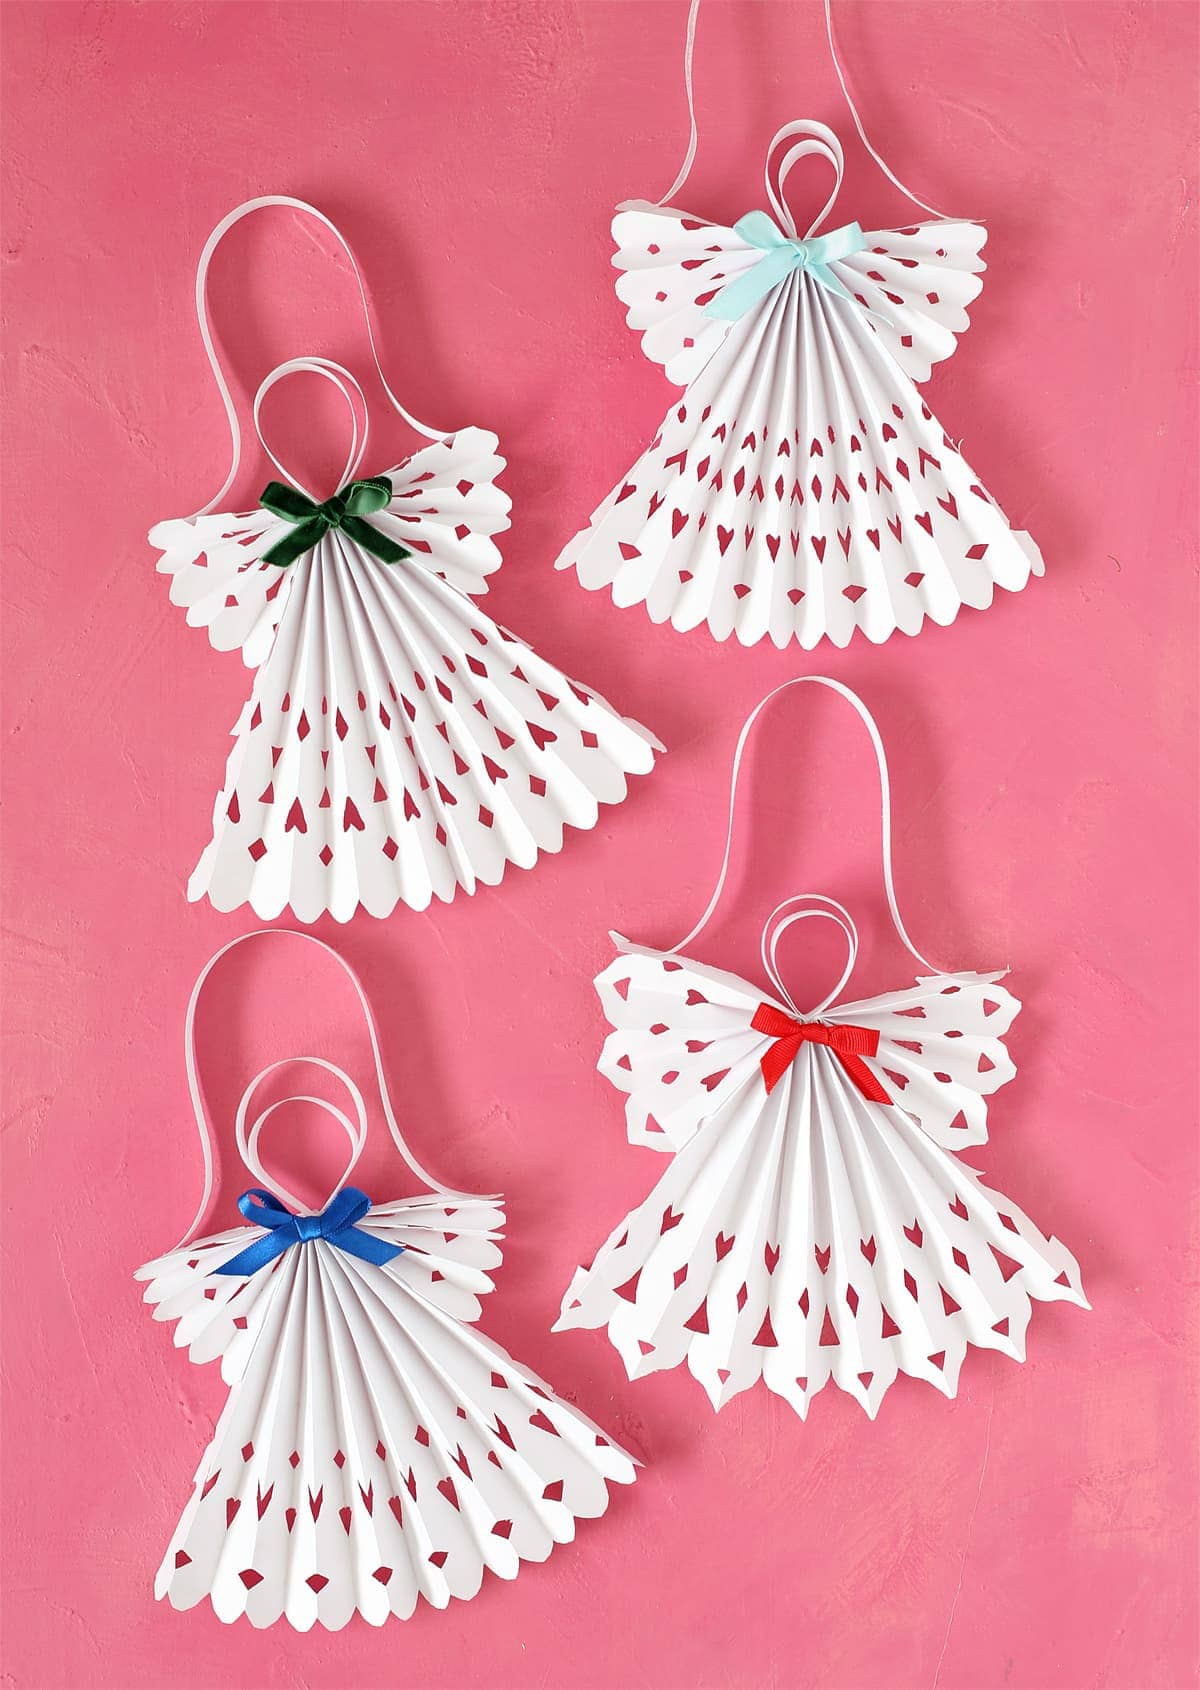
For a delicate touch of Christmas charm, these angels make a beautiful handmade addition to your holiday decor.
The design looks intricate but is surprisingly easy to craft, using only folded paper and a bit of creativity.
Their lace-like edges and soft ribbon bows create a sweet, angelic effect that works perfectly as ornaments, wall hangings, or even gift toppers.
Materials
- White A4 paper sheets (1 per angel)
- Scissors
- Pencil for drawing cut-out patterns
- Ribbon (12 inches for hanging, 6 inches for bow)
- Glue or double-sided tape
Instructions
- Fold a sheet of white paper accordion-style, keeping each fold about 1 inch wide.
- Draw small heart or diamond shapes along the edges and cut them out carefully to create the lace pattern.
- Fold the accordion in half to form the angel’s wings and skirt.
- Secure the center with glue or tape, shaping the top into a head loop by curving the upper folds inward.
- Cut a piece of ribbon, form a bow, and glue it to the angel’s neckline.
- Attach a ribbon loop at the top for hanging. Once done, your angels will add a soft, festive glow wherever you place them.
#11. Stacked Snowman Window Craft
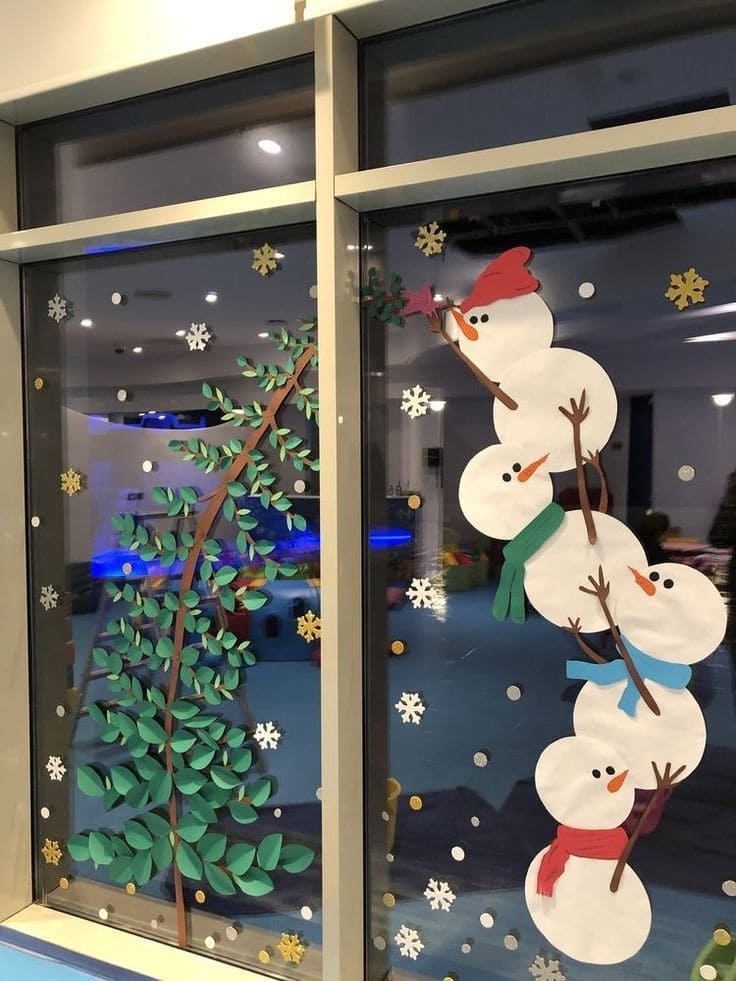
Your windows can sparkle with winter joy using this craft.
It’s a delightful way to decorate your space and bring a festive atmosphere indoors without needing snow outside.
This craft combines large paper cutouts and colorful details to create a playful scene of snowmen working together to place a star on a tree.
Materials
- White construction paper (6 sheets, 8.5 x 11 inches)
- Green, brown, red, blue, and pink paper (2 sheets each)
- Scissors and glue stick
- Tape or removable adhesive dots
- Black and orange markers
- Glitter paper or foam stars (1 pack)
- Cotton balls or paper snowflakes for decoration
Instructions
- Cut out six large circles from the white paper including two for each snowman. Make each one slightly smaller than the one below it.
- Cut arms from brown paper and scarves, hats, and mittens from colored paper. Then use markers to draw faces and buttons on each snowman.
- Arrange and glue the snowmen so they appear stacked, as if they’re helping one another reach the tree.
- On green paper, cut leaf shapes and glue them to a brown paper trunk to form the tree.
- Add a glitter star or foam star to the tree’s top, and tape cotton balls or cut-out snowflakes around the scene.
- Use removable adhesive dots or tape to secure your design onto the window.
#12. Handprint Angel Christmas Craft
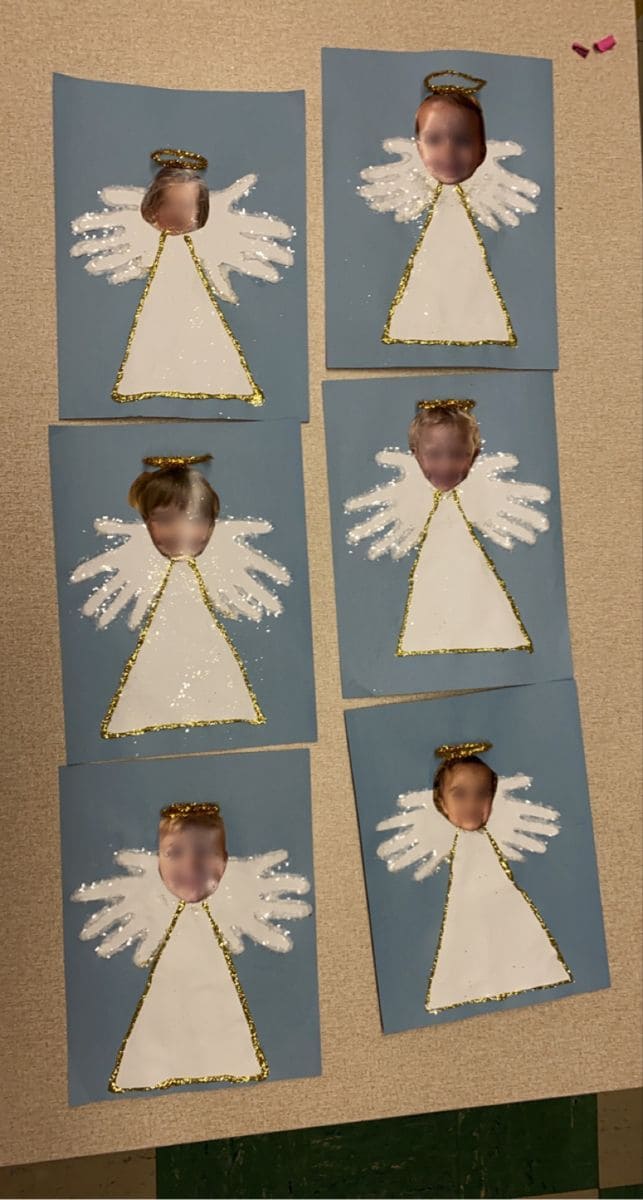
Your child will love turning their handprints into adorable Christmas angels that sparkle with holiday cheer.
This craft combines paint, glitter, and a sweet photo to create a keepsake that captures both creativity and childhood innocence.
Perfect for classroom or home projects, it celebrates the joy of Christmas while encouraging imagination and fine motor skills.
Materials
- 1 sheet of blue cardstock (8.5 x 11 inches) and 1 sheet of white cardstock (8.5 x 11 inches)
- White paint (2 tablespoons)
- Gold glitter glue (1 tube)
- Scissors and glue stick
- Small printed photo (2 x 2 inches)
- Paintbrush or sponge
- Pencil and ruler
Instructions
- Trace and cut a large triangle from the white cardstock, this will be the angel’s dress.
- On the blue background paper, glue the triangle near the bottom center, leaving room for wings and the head.
- Dip your child’s hand in white paint and press it down twice on each side of the triangle, creating angel wings.
- Cut out your child’s photo into an oval shape and glue it on top of the dress for the angel’s face.
- Use gold glitter glue to outline the dress and create a halo above the photo. Then add glitter accents to the wings for sparkle.
#13. Christmas Paper Letter Art
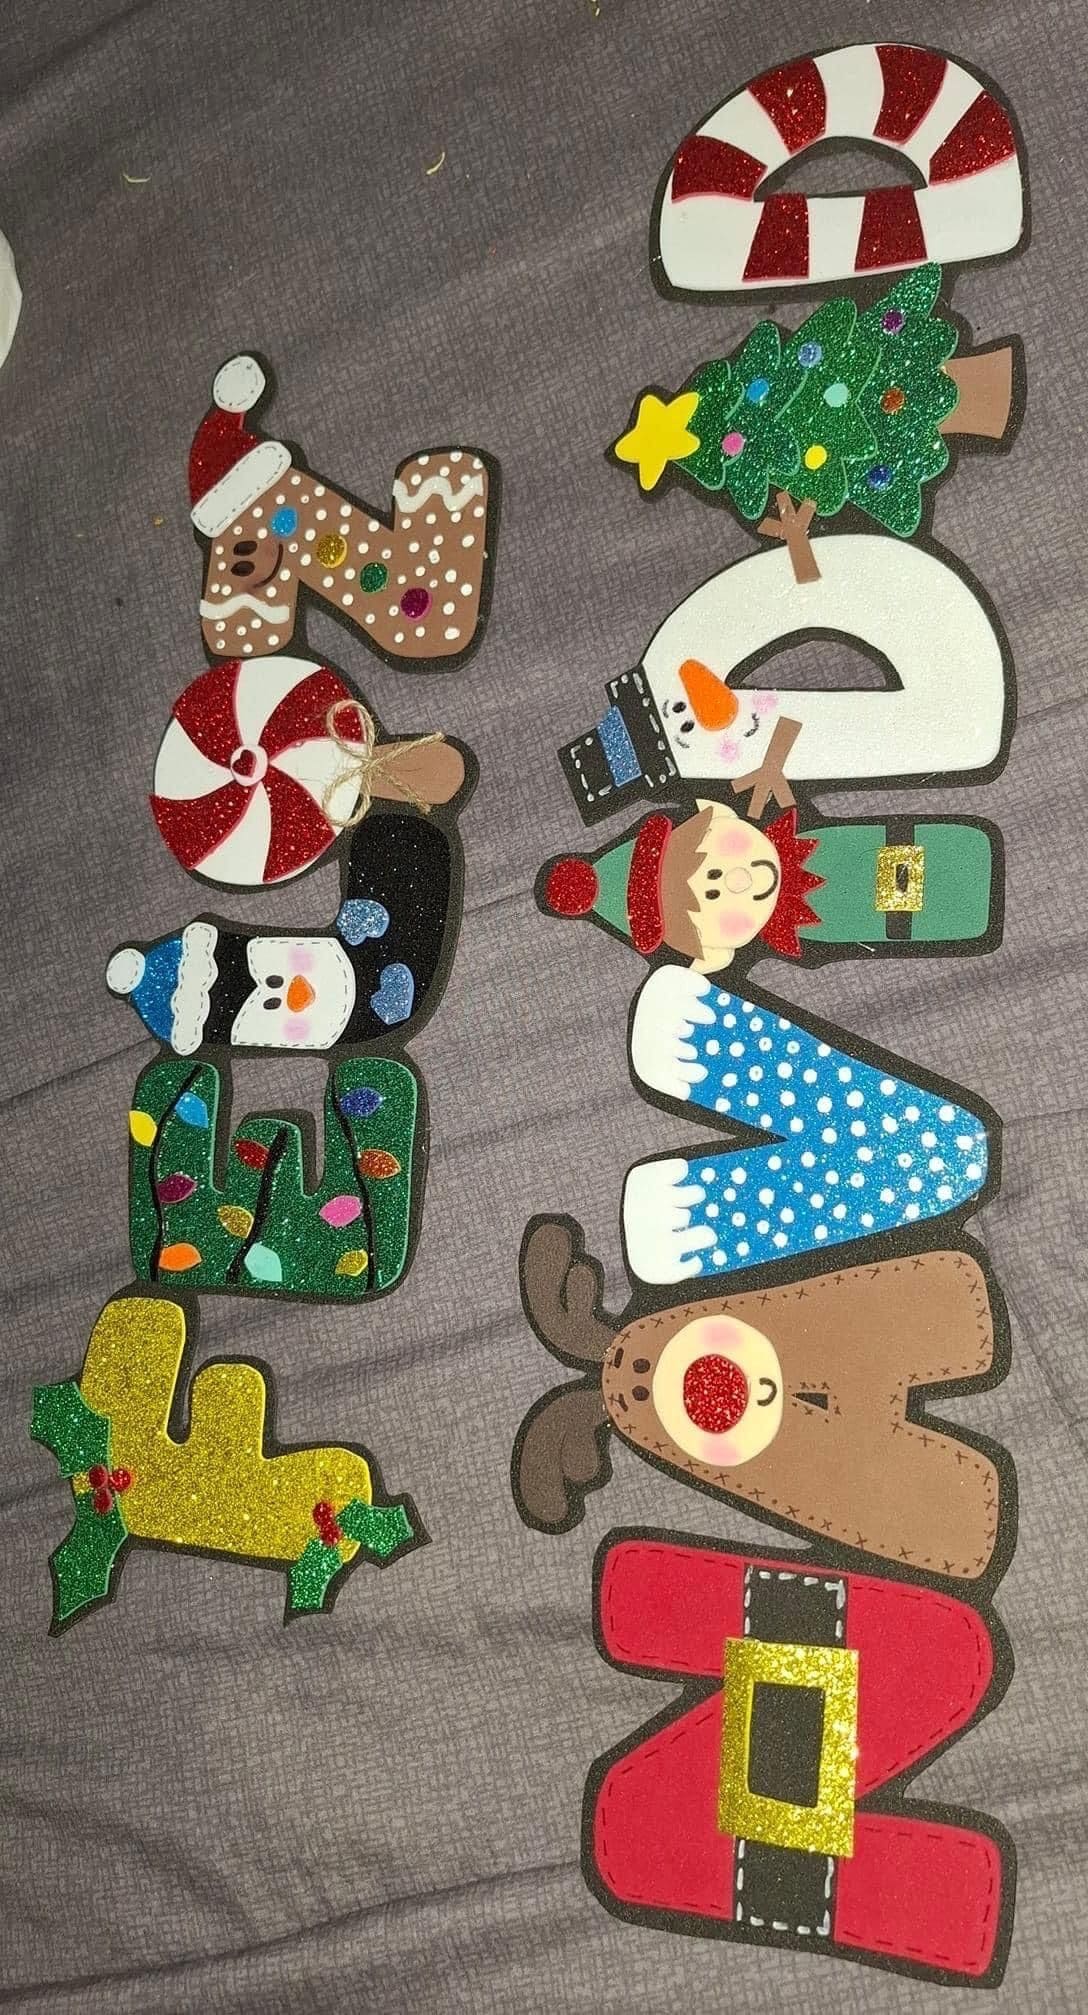
To make your festive decorations stand out, this Christmas letter art is a creative and colorful way to spell out holiday cheer.
Each letter turns into its own joyful scene such as a reindeer, snowman, elf, tree, or candy cane, all made from bright paper with a touch of sparkle.
It’s a perfect classroom or home craft that lets kids mix imagination and precision while building a personalized piece of holiday décor.
Materials
- Colored cardstock or construction paper (red, white, brown, green, yellow, blue)
- Glitter paper (for accents)
- Scissors
- Glue stick or craft glue
- Black marker or pen for details
- Small embellishments (sequins, pom-poms, mini bows, or stickers)
Instructions
- Cut out large block letters (about 5–6 inches tall) from different colors of cardstock to spell “CHRISTMAS.”
- Assign a theme to each letter - for instance, decorate the “C” like a candy cane, make the “R” a reindeer, and turn the “I” into a snowman.
- Cut out small paper shapes like hats, scarves, buttons, stars, and belts to match each theme.
- Add glitter paper for sparkle such as gold for Santa’s belt, green for holly leaves, or white for snowy edges.
- Use a black marker to outline details like stitching, faces, and clothing patterns.
- Once decorated, glue the letters onto a large background sheet or string them together with ribbon to hang as a garland.
#14. Collaborative Fingerprint Christmas Tree Mural
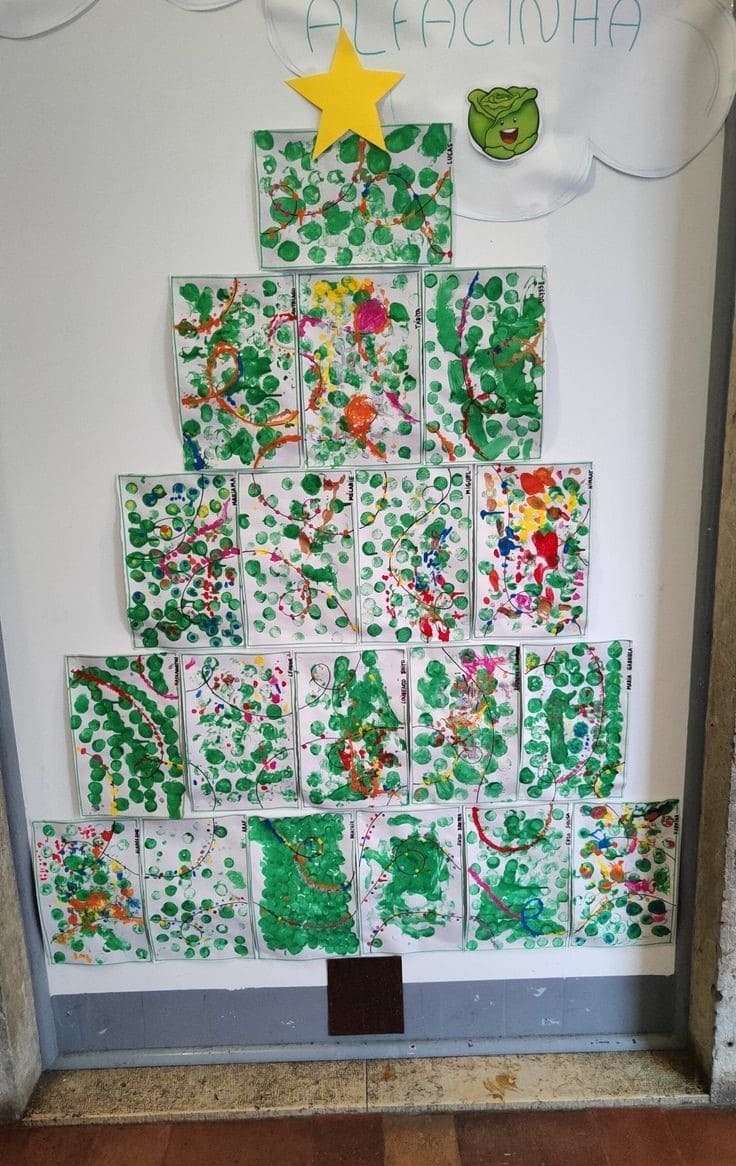
Your classroom wall can become the centerpiece of holiday cheer with this collaborative fingerprint Christmas tree mural.
Each child contributes their unique touch, creating a tree full of color, texture, and joy. The mural looks impressive when completed.
Perfect for schools, preschools, or family gatherings, this activity also helps kids explore patterns and fine motor skills while working together on one beautiful display.
Materials
- 20 sheets of white A4 paper (8.3 x 11.7 inches)
- Green, red, yellow, and blue washable paints
- 1 large yellow star cutout (8 inches wide)
- Paint trays and wipes for cleanup
- Double-sided tape or removable wall adhesive
- Protective tablecloth or old newspaper
Instructions
- Lay out all the paper sheets in a large triangle shape on the floor to visualize your tree layout before hanging it.
- Pour small amounts of washable paint onto trays and let each child dip a finger to create green dots resembling pine needles.
- Use red, yellow, and blue paint to add ornaments and light decorations. Let the kids get creative with patterns and swirls.
- Once the paint dries, tape the sheets onto the wall, starting from the bottom row and stacking upward to form a tree shape.
- Add the large yellow star on top to complete your mural, and write the group or class name above it.
#15. Paper Snowman Choir Christmas Card
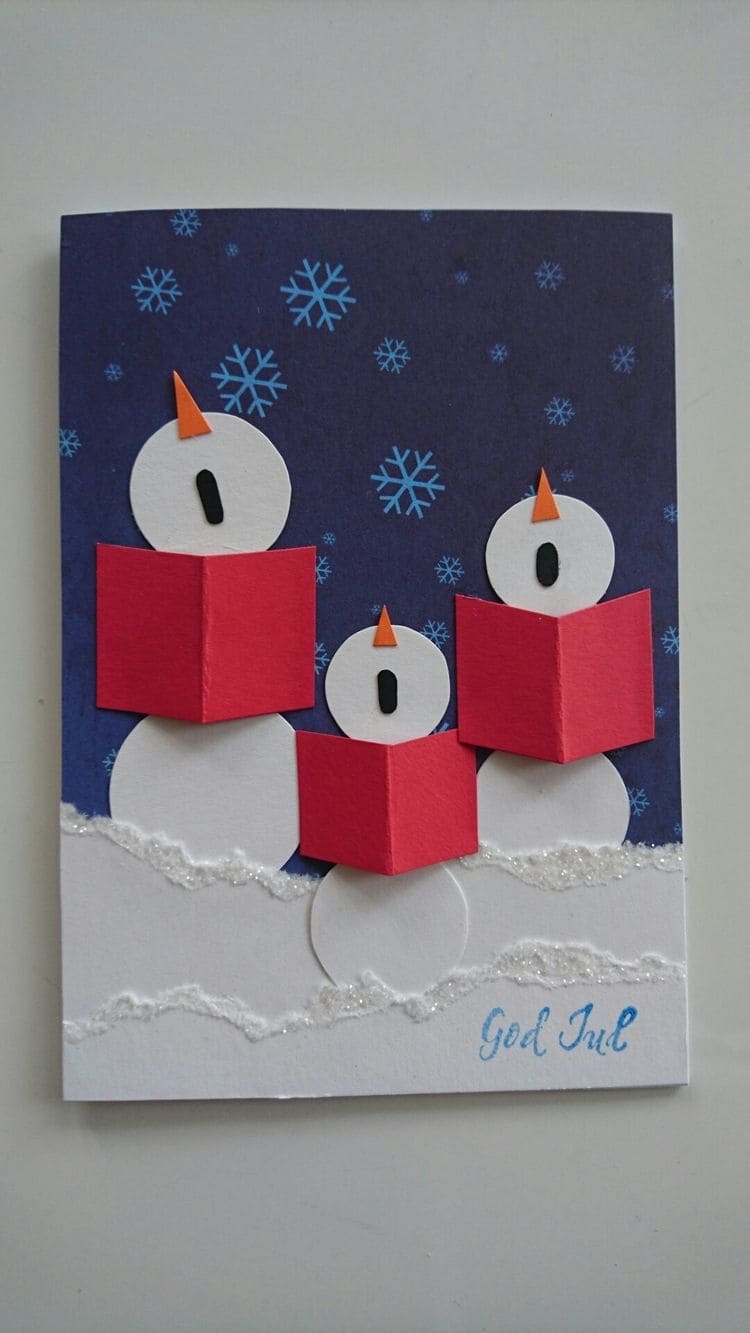
If you love handmade holiday cards, this Paper Snowman Choir Card brings charm and joy in the most heartwarming way.
It features three adorable snowmen singing under the night sky, each holding tiny red carol books.
The layers of white snow and glitter details add texture, while the dark blue background sets a cozy, wintry tone.
Materials
- Dark blue cardstock (5x7 inches for the base)
- White paper or cardstock (for snowmen, 6–8 small and medium circles)
- Red paper (cut into 3 small 1.5x1.5-inch squares for songbooks)
- Orange paper (3 tiny triangles for noses)
- Black paper (3 small ovals for mouths)
- White glitter glue (for snow texture)
- Scissors
- Glue stick or double-sided tape
Instructions
- Fold the dark blue cardstock in half to create your card base.
- Cut white paper into three large and three small circles for the snowmen’s bodies and heads. Then glue them in overlapping layers near the bottom.
- Use red paper squares folded in half to make open books, and glue them to the snowmen’s bodies as if they’re holding carol sheets.
- Add small orange triangles for noses and tiny black ovals for open singing mouths.
- Finally, apply glitter glue along the base for snow texture and let it dry completely.
#16. Paper Tube Advent Calendar
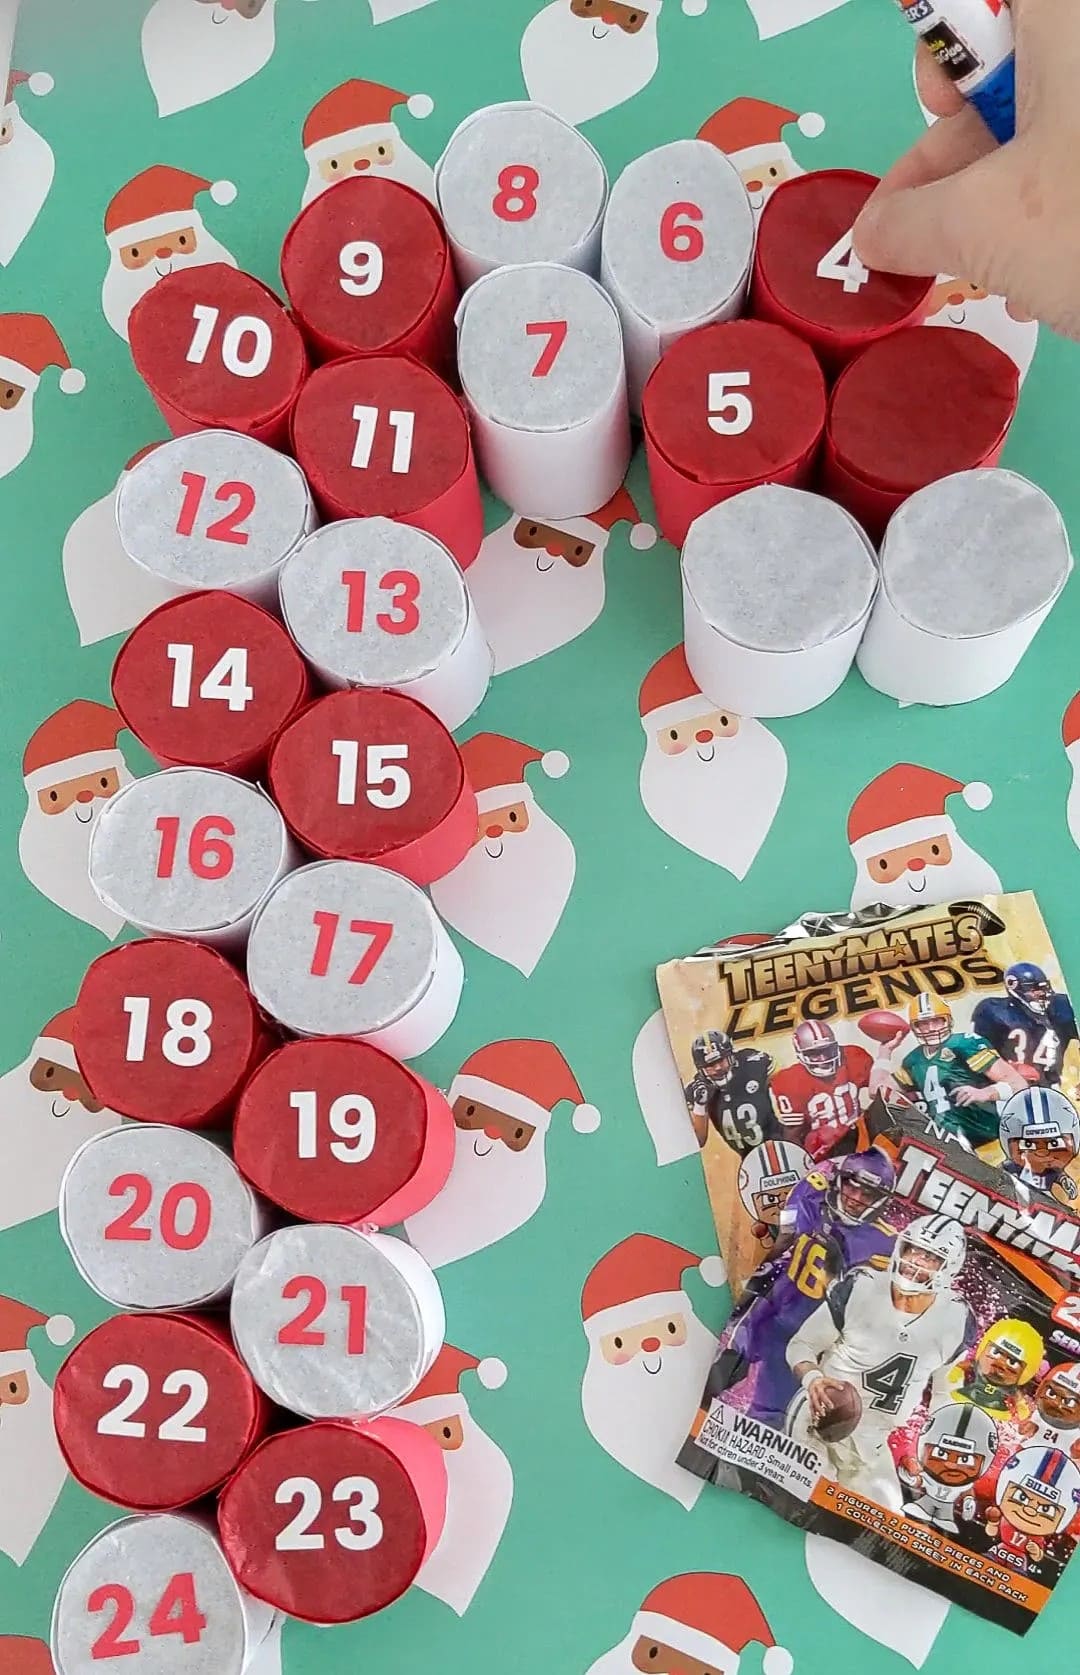
As Christmas excitement builds, this advent calendar turns the countdown into a fun daily surprise.
Crafted from recycled toilet paper rolls, each numbered compartment hides a tiny treat or toy, making every day in December a little more magical.
It’s a creative, eco-friendly project that’s easy enough for kids yet stylish enough to display anywhere in your home.
Materials
- 24 toilet paper rolls (or cut paper tubes, 2 inches each)
- Red and white wrapping or construction paper
- Number stickers (1–24) or printed numbers
- Tissue paper or foil paper (to seal each top)
- Glue stick or double-sided tape
- Small treats or notes for each tube
- Cardboard base or festive wrapping paper for backing
Instructions
- Wrap each toilet paper roll with red or white paper, securing it neatly with glue or tape.
- Fill each tube with a small surprise like candies, stickers, or a mini note of kindness.
- Cover one end of each roll with tissue or foil paper, gluing around the rim to seal it.
- Label each roll from 1 to 24 using stickers or printed numbers.
- Arrange the rolls in the shape of a Christmas tree or candy cane and glue them onto a large cardboard base covered in festive paper.
#17. Handprint Reindeer Christmas Card
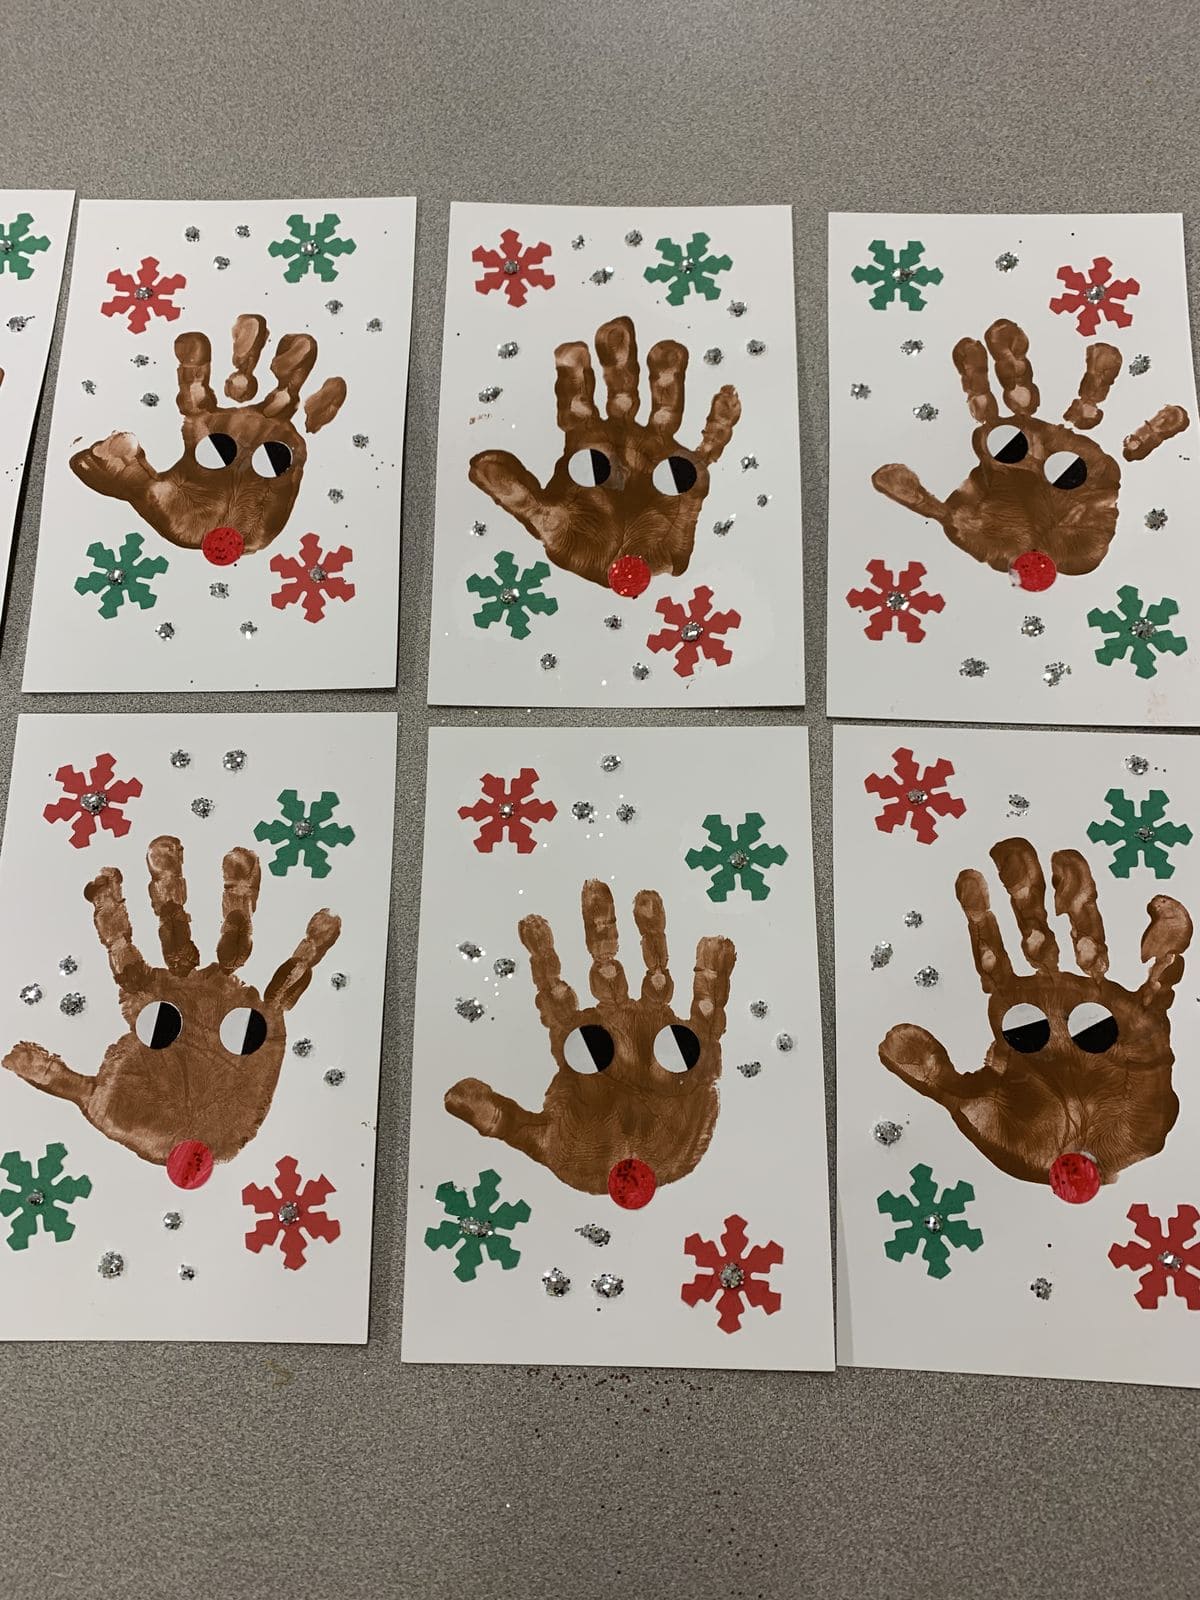
If you want a keepsake that captures both creativity and tiny holiday hands, this reindeer card is an adorable project.
Each reindeer is made from a child’s handprint, turning their little fingers into antlers.
It’s simple, personal, and full of charm, the kind of craft grandparents and teachers will cherish.
Plus, you can add sparkly snowflakes and glitter for a wintry touch that makes every card feel magical.
Materials
- White cardstock (1 sheet per card, 8.5 x 11 inches, folded in half)
- Brown washable paint (2–3 tablespoons)
- Red craft paper or pom-poms (1 per card for the nose)
- Silver glitter glue
- Green and red paper (for snowflakes or decorations)
- Black and white paper scraps (for eyes)
- Paintbrush, glue stick, and scissors
Instructions
- Fold the white cardstock in half to make a card base.
- Using a paintbrush, apply brown paint evenly onto the child’s hand. Then press their hand firmly onto the front of the card to create the reindeer’s face and antlers. Let it dry completely (about 15–20 minutes).
- While waiting, cut out small white circles for the eyes and slightly smaller black circles for pupils. Glue them onto the top center of the handprint.
- Add a red circle or pom-pom at the bottom of the palm for Rudolph’s nose.
- Cut out paper snowflakes or use pre-made stickers to decorate the background.
- Apply small dots of glitter glue around the handprint to mimic falling snow.
#18. Paper Christmas Chain Characters
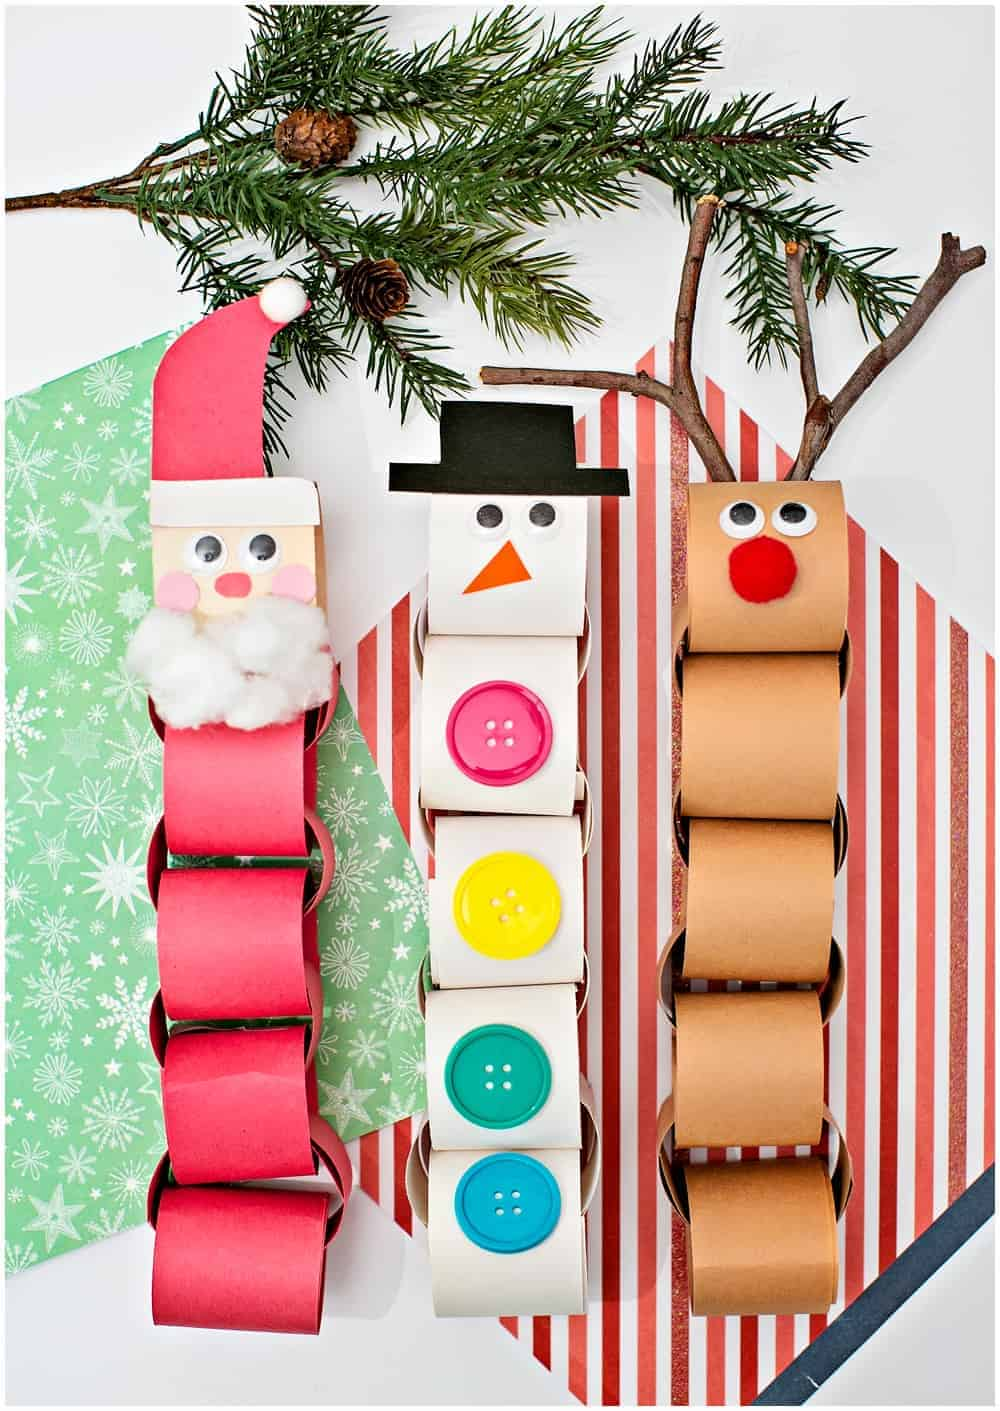
On a cold winter afternoon, this chain craft brings cheer and creativity to the table.
You can turn simple paper loops into adorable holiday characters including Santa, a snowman, and a reindeer, perfect for decorating walls, doors, or even a Christmas countdown chain.
Kids will love seeing their favorite festive friends come to life link by link!
Materials
- Colored paper: red, white, brown, black, orange (A4 sheets)
- Scissors
- Glue stick or tape
- Googly eyes (6 pairs)
- Cotton balls (for Santa’s beard, 3–4 pieces)
- Buttons or colored circles (3 for the snowman)
- Small twigs (for reindeer antlers)
Instructions
- Cut strips of colored paper (1.5 x 8 inches) including red for Santa, white for the snowman, and brown for the reindeer.
- Create paper chains by looping each strip and securing it with glue or tape.
- For Santa, glue cotton balls for the beard and a red paper hat topped with a small white pom-pom.
- For the snowman, add colorful paper or real buttons to the loops and make a small black top hat.
- For the reindeer, attach twigs for antlers, a red circle nose, and googly eyes.
- Let the glue dry, then hang your festive paper chain trio as a fun and playful holiday garland!
#19. Glitter Footprint Christmas Wreath Art
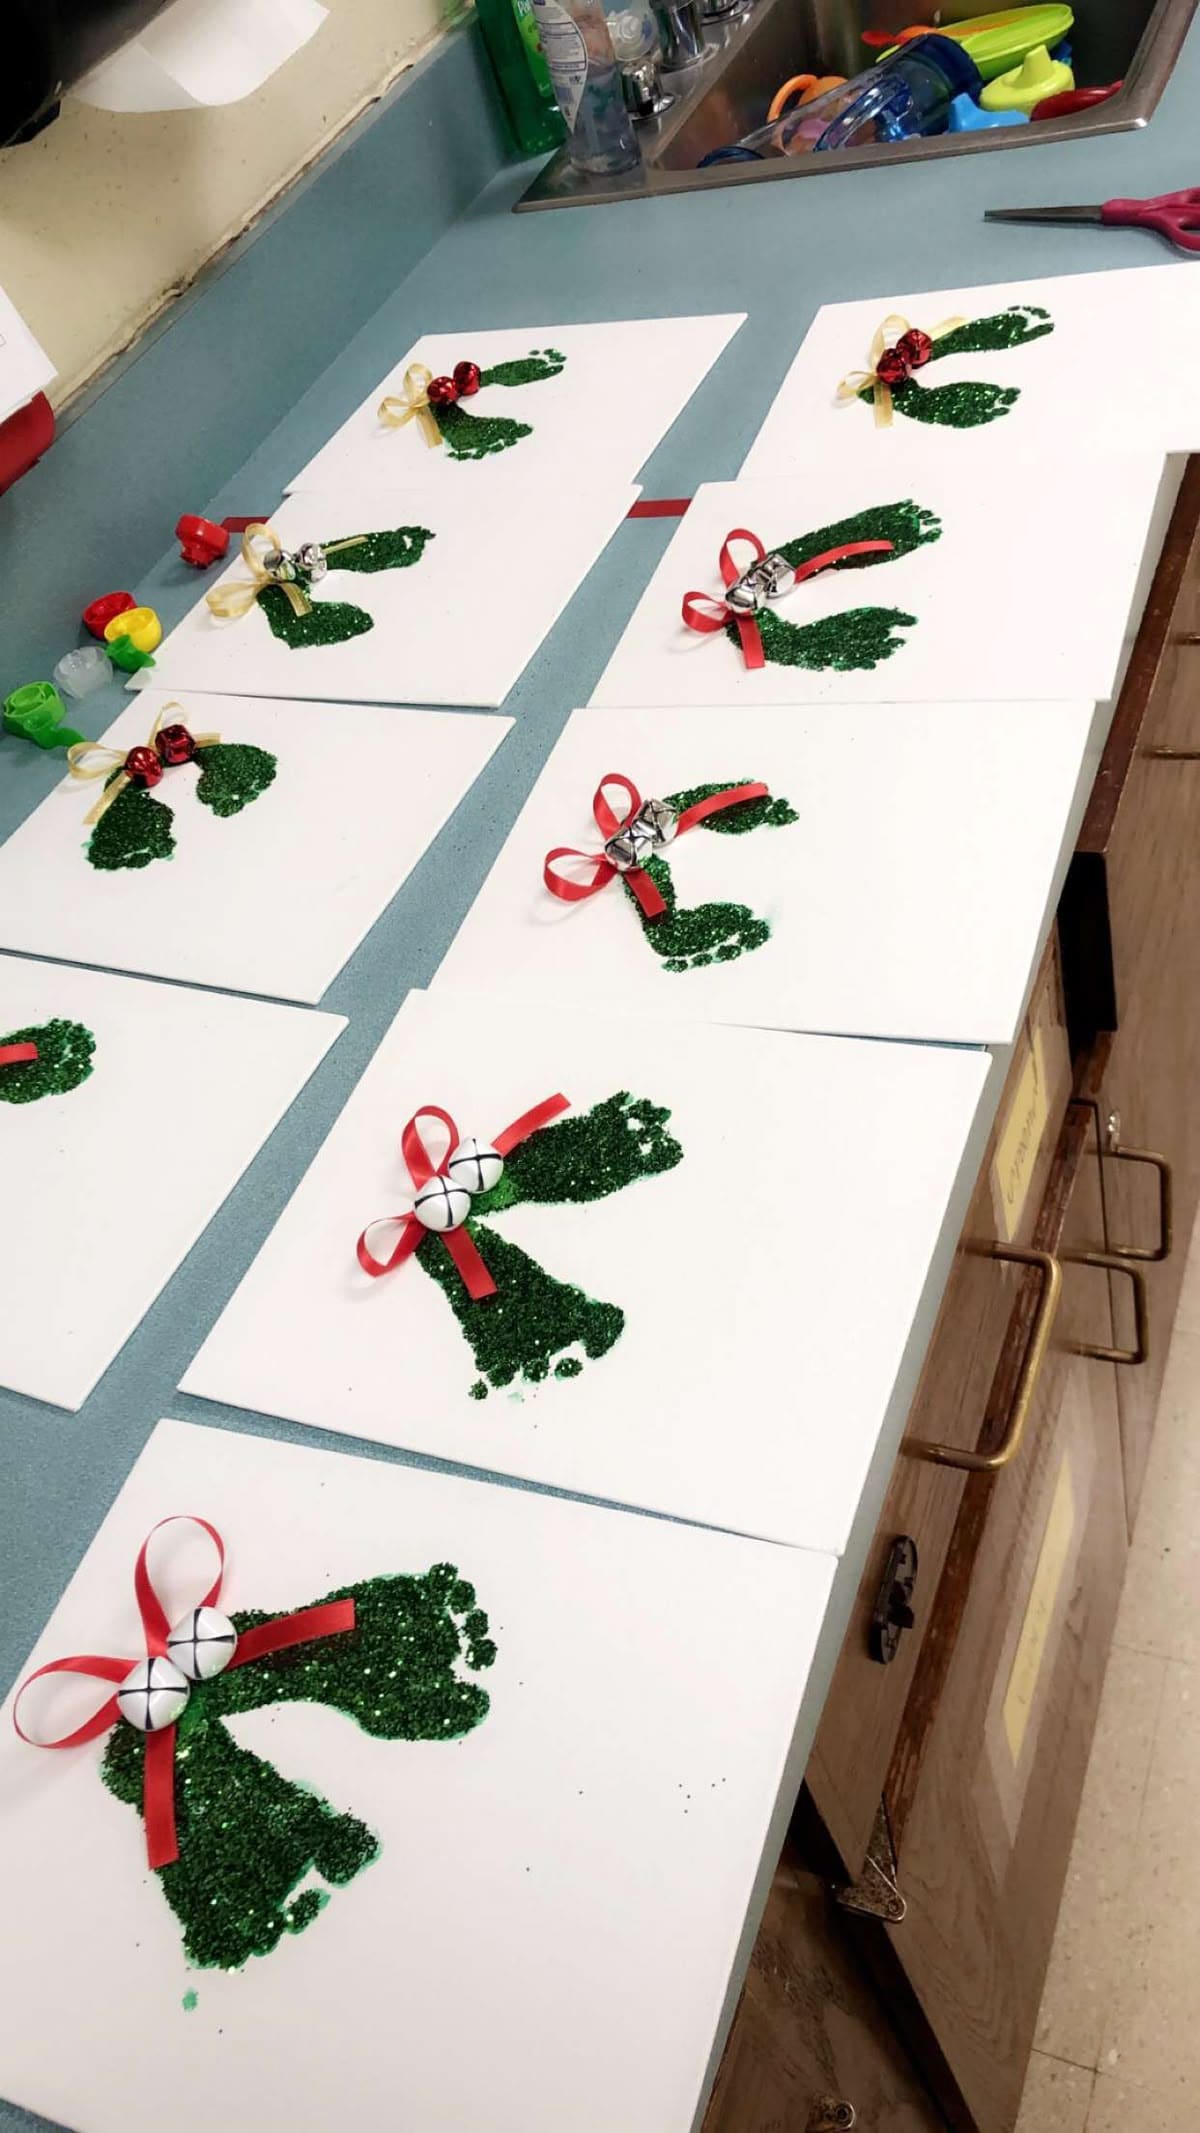
Your little one’s tiny footprints can become a festive keepsake with this adorable wreath art.
It’s a fun, sparkly craft that turns simple materials into a meaningful holiday decoration or gift for grandparents.
The shimmering green glitter gives a cheerful touch, while the ribbon and bells add a traditional Christmas accent.
Materials
- 1 sheet of white cardstock or canvas (8 x 10 inches)
- 2 tablespoons of green glitter
- 1 small paintbrush
- Red or gold ribbon (12 inches long)
- Craft glue and wipes for cleanup
- Green washable paint
- 2–3 mini jingle bells
Instructions
- Paint your child’s foot with green washable paint using a brush ,make sure it’s evenly coated but not dripping.
- Press one footprint slightly angled to the left and another slightly angled to the right, forming a V shape to resemble a wreath bow.
- Once dry, apply glue over the prints and sprinkle green glitter generously. Then shake off the excess to reveal a sparkling texture.
- Tie a small ribbon bow and glue it where the footprints meet, then attach two or three mini bells in the center for a festive look.
#20. Paper Mosaic Christmas Stocking
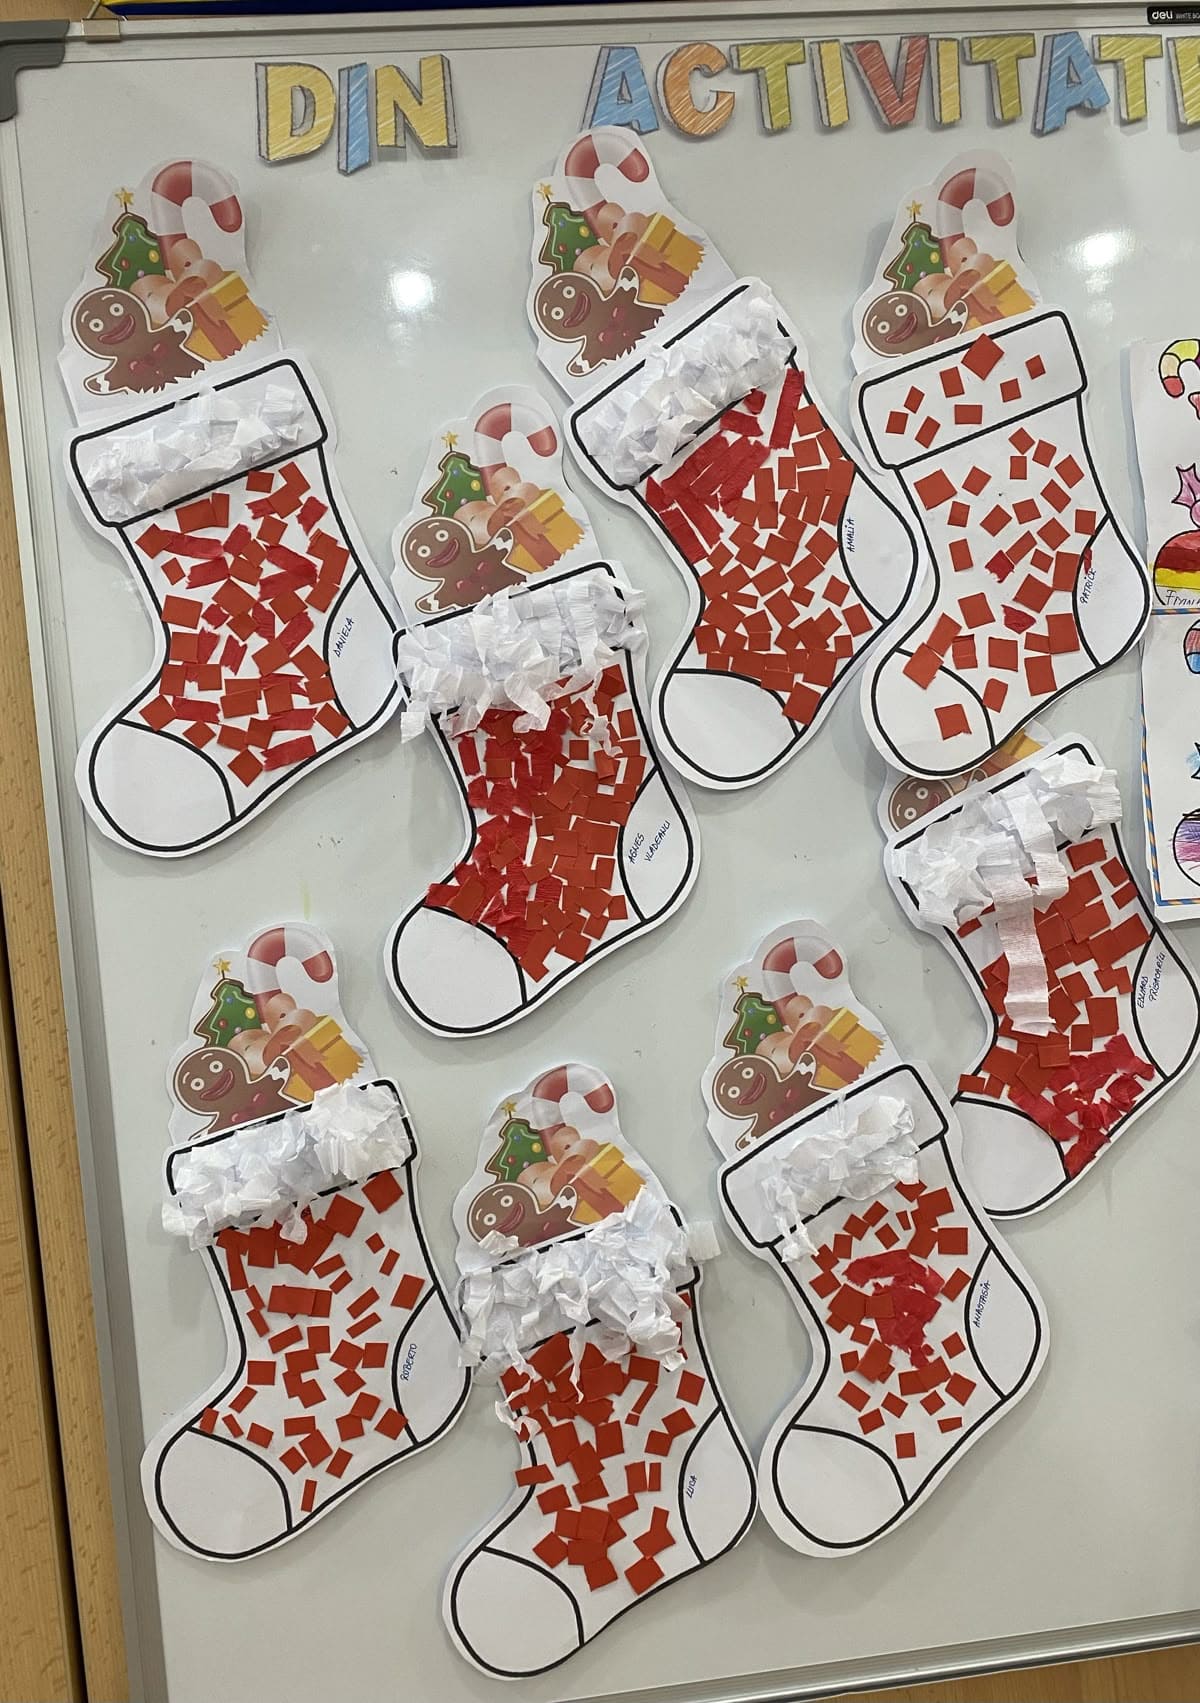
You can bring some festive flair to your classroom or home with these Christmas stockings.
This craft lets kids explore textures and patterns while creating a cheerful decoration that’s full of color and charm.
The torn or cut paper gives it a mosaic look, and the fluffy white trim adds that cozy winter touch.
Materials
- Stocking template (printed on A4 white cardstock)
- Red paper (cut into 1-inch squares or torn pieces, about 30–40 per stocking)
- White tissue paper (for the cuff, about 6 small strips per stocking)
- Glue stick
- Scissors
- Optional: crayons or markers for extra details
Instructions
- Print out a stocking outline on white cardstock and cut it out neatly.
- Cut or tear red paper into small squares or irregular shapes, this forms the mosaic.
- Apply glue to the main part of the stocking and stick the red paper pieces closely together, leaving small gaps for a mosaic effect.
- Take small crumpled bits of white tissue paper and glue them along the top of the stocking to create a fluffy cuff.
- Finally, add extra touches, you draw outlines, or color the heel and toe if desired.
See also: 20+ Cute Christmas Crafts from Egg Cartons for All Ages
