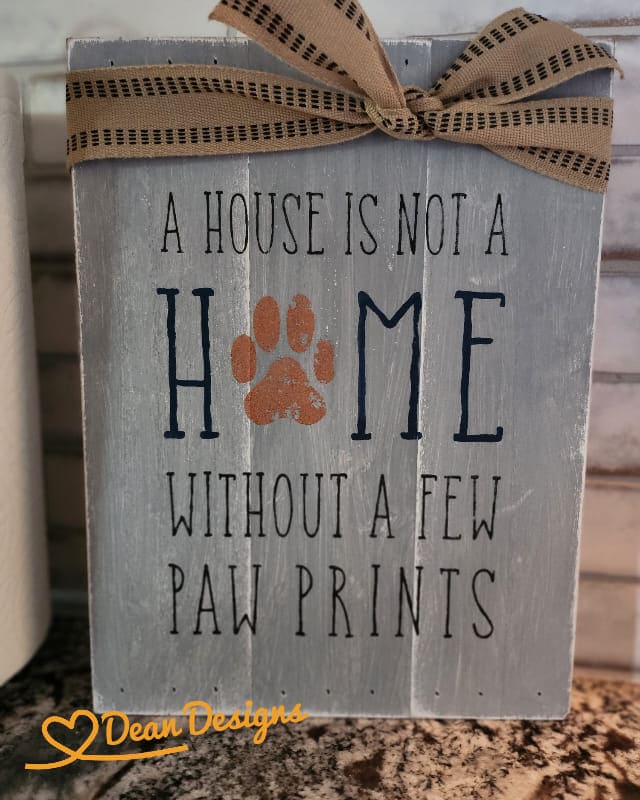
Wooden signs are timeless, but when you add your pet’s paw print, they become personal treasures.
This project is easy even for beginners, and the results look like something you’d find in a boutique.
You’ll paint the board, stencil or hand-letter the phrase, and then stamp your pet’s paw for that heartfelt touch.
Plus, a ribbon tied on top adds the perfect finishing detail. It’s the kind of DIY you can repeat for different seasons, using new colors or festive bows.
Materials Needed
- 1 wooden board (approx. 10” × 12” × 1” thick)
- Acrylic paint (1 bottle, base color of choice, e.g., gray or white)
- Small paintbrush set (flat 2” brush for base, fine brushes for lettering)
- Letter stencils (optional, 2-3” tall letters for uniform text)
- Non-toxic paint for paw print (1 small bottle in chosen color)
- Ribbon (1 roll, 1.5” wide × 24” long, burlap or patterned)
- Sandpaper (1 sheet, medium grit)
- Pencil for light sketching
- Clear sealant spray (1 can, matte or glossy finish)
Step-by-step Guide
Step 1: Lightly sand your wooden board so the surface is smooth and ready for painting. Wipe away dust with a cloth.
Step 2: Apply your base coat of acrylic paint using a flat brush. Let it dry completely before moving to the next step.
Step 3: Sketch or stencil your chosen phrase onto the board with pencil. Once you’re happy with the placement, go over it carefully with paint.
Step 4: Dip your pet’s paw in non-toxic paint (spread it evenly with a sponge for best results) and press it onto the board where you want it featured.
Step 5: Once the paw print dries, tie your ribbon into a bow and attach it to the top of the sign for a finished look.
Step 6: Spray the entire sign with clear sealant to protect the paint and paw print. Then, allow it to dry fully before hanging or displaying.
Tips:
If you’d rather not use your pet’s actual paw, trace it on paper first and cut out a stencil to paint on the board. This way, you can practice without worrying about smudges.
