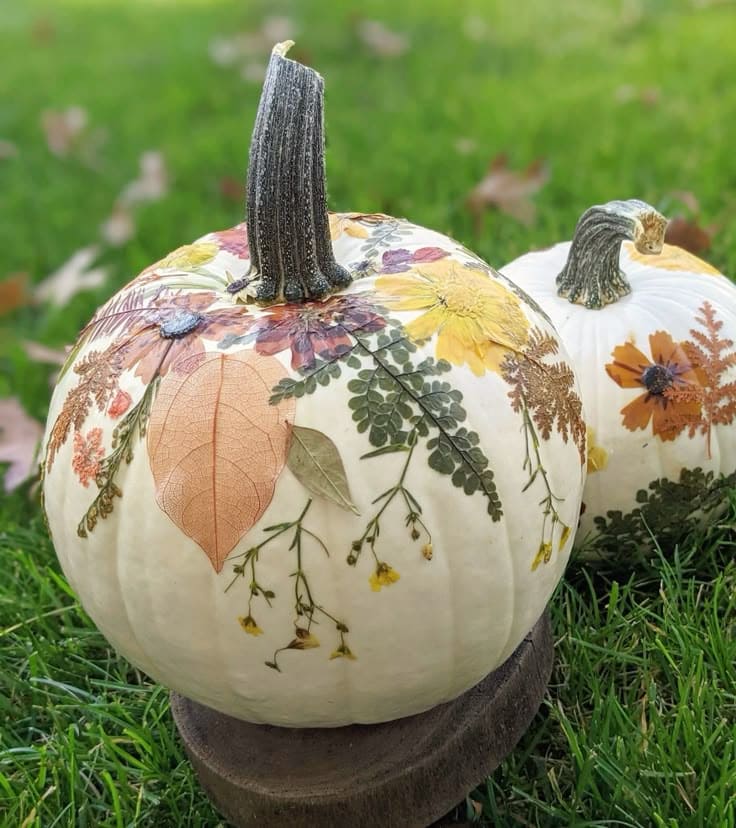
 Think of your pumpkin as a blank canvas. Instead of spooky faces, this time it blooms with the colors of fall gardens.
Golden marigolds, fern fronds, and delicate petals come together to create a piece that looks like it grew straight from the earth.
Place it on your table or doorstep, and it becomes less of a Halloween decoration and more of a celebration of the season itself.
Materials Needed
- 1 medium-sized pumpkin (8-10 inches wide, white or pale works best)
- Pressed flowers and leaves (15-20 pieces in mixed sizes)
- Mod Podge or decoupage glue (8 oz jar)
- Soft bristle brush (1” wide)
- Wax paper or newspaper
- Optional: Clear acrylic spray (150 ml)
Step-by-step Guide
Step 1: Wipe down your pumpkin to remove dirt and allow it to fully dry before decorating.
Step 2: Lay out your pressed flowers on the pumpkin surface to get an idea of placement before gluing.
Step 3: Brush a thin layer of Mod Podge on the pumpkin, press the flower gently in place, and smooth it down with your fingers or a brush.
Step 4: Continue layering flowers and leaves, overlapping slightly for a natural effect.
Step 5: Once complete, coat the pumpkin with a thin layer of Mod Podge or finish with clear acrylic spray for durability.
Tip:
White pumpkins give the best contrast, but orange ones work too as pressed ferns and darker petals pop beautifully against the warmer tones.
