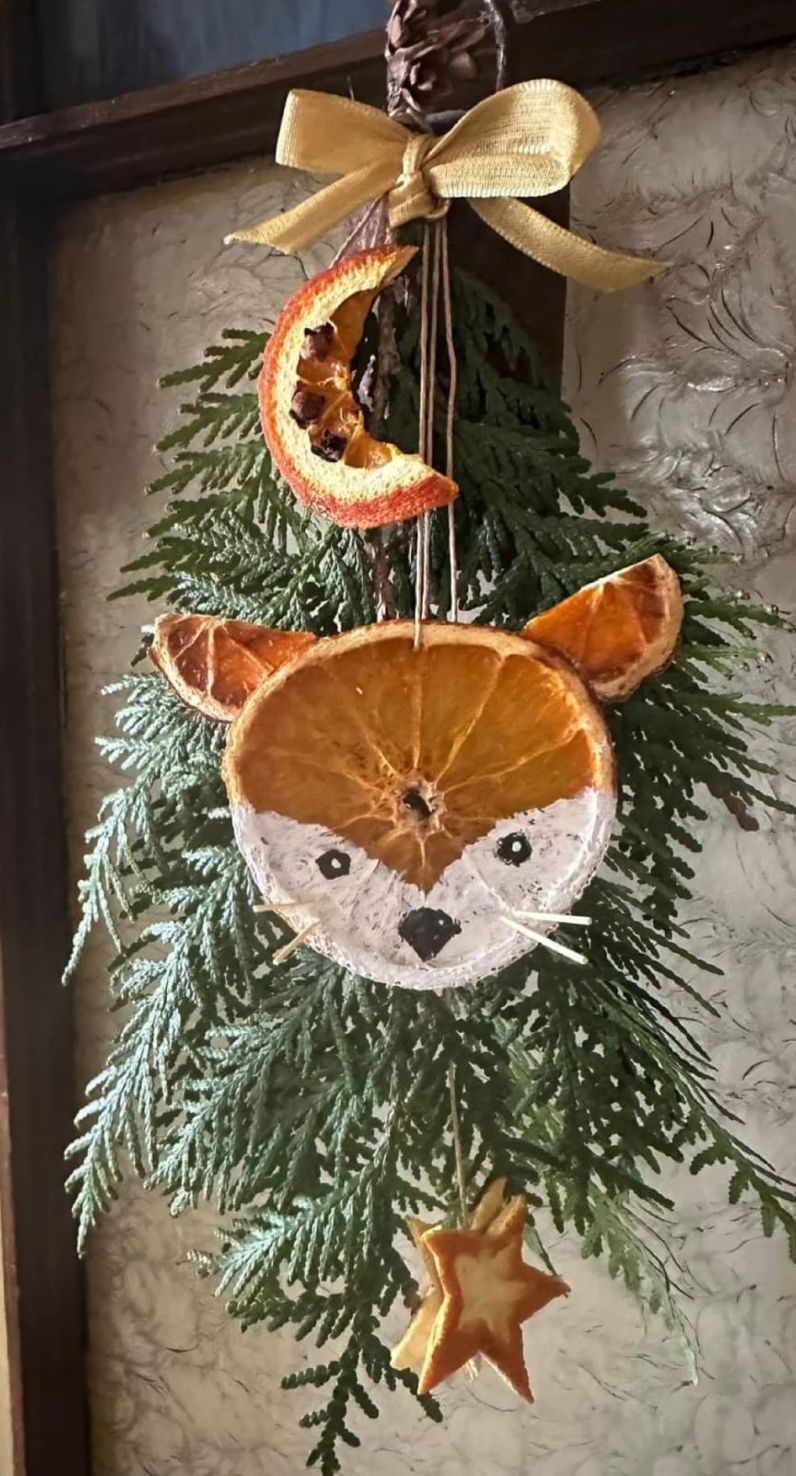
 Imagine handing over a package where a tiny fox peeks out from the tag, made from nothing more than a dried orange slice.
The natural texture of the peel becomes the fox’s fur, while a little paint adds life and expression.
Add pine sprigs, and suddenly your gift feels like it came straight out of a winter woodland.
These fox tags don’t just label presents, they give them personality.
Materials Needed
- 6-8 dried orange slices (approx. 2.5-3 inches in diameter)
- White acrylic paint (small tube)
- Brown acrylic paint (small tube)
- Black acrylic paint or paint pen
- Fine-tip paintbrushes (sizes 0-2 for detail, 4-6 for base)
- Small piece of thick paper or felt (for cutting fox ears)
- Hot glue gun or strong craft glue
- Gold or jute twine (12-14 inches per tag)
- Pine sprigs or greenery clippings
- Plain kraft paper gift bags or boxes
Step-by-step Guide
Step 1: Lay your dried orange slices flat on a piece of paper towel or craft mat. This will prevent paint smudges.
Step 2: With a fine brush, paint two white triangular sections at the bottom sides of the orange slice to form the fox’s cheeks.
Next, allow the natural orange peel to show in between for the fur. Let the paint dry for 5-10 minutes.
Step 3: Mix brown paint with a touch of orange and carefully fill in the upper part of the slice above the cheeks, leaving a triangular shape. This becomes the fox’s forehead.
Step 4: Use black paint (or a paint pen) to add a small triangular nose at the bottom center of the slice.
Then add two tiny dots for the eyes just above the cheeks. Allow all details to dry completely.
Step 5: Cut out two small triangles from thick paper or felt for the ears.
You paint them brown, leaving the inner part white for detail. Once dry, glue them to the top edge of the orange slice so they peek above like real fox ears.
Step 6: Thread a piece of gold twine or rustic jute string through the orange slice (you can pierce a small hole with a needle or hot glue a loop at the back).
Step 7: Tie the fox tag onto a kraft paper gift bag. Add a small pine sprig tucked under the knot for a festive, woodland touch.
Step 8: Step back and admire the transformation, your simple gift bag now carries a woodland character full of charm.
Notes:
For variation, you can paint other animals using the same technique such as an owl, a bear, or even a snowy fox with more white paint.
