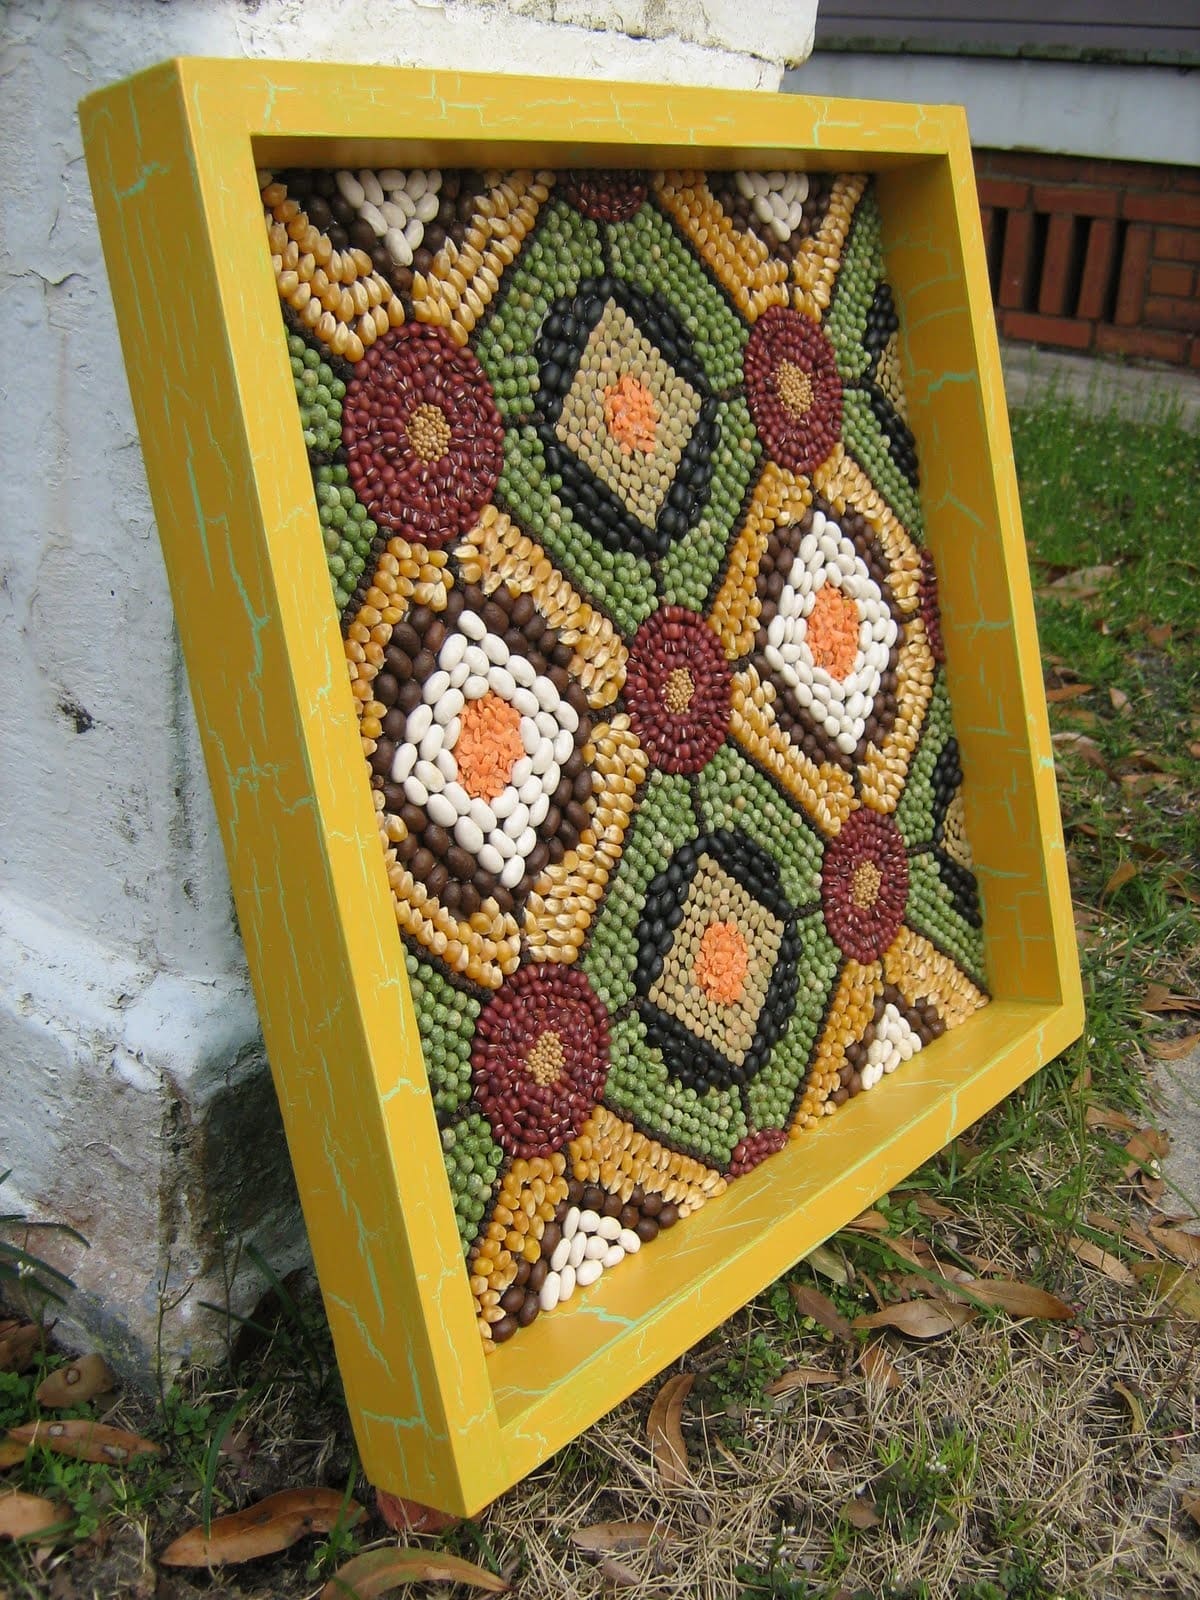
 If you want a bean craft that looks gallery-worthy, this geometric mosaic is the project to try.
Using a wooden tray or frame as your base, you’ll carefully arrange beans into repeated hexagon and diamond shapes.
Each section becomes a miniature pattern, and when combined, the full artwork is striking and durable.
It’s the kind of project that can be customized with any color scheme, stick to earth tones for a rustic look or mix bright beans for a more playful vibe.
Materials Needed
- Wooden tray or shadow box frame (12” × 12” or larger)
- Cardboard insert cut to fit tray base (1 piece)
- White beans – approx. 100 pieces
- Red kidney beans – approx. 80 pieces
- Green mung beans – approx. 120 pieces
- Black beans – approx. 80 pieces
- Yellow corn kernels – approx. 100 pieces
- Lentils (orange or brown) – 60-80 pieces
- Strong craft glue or hot glue gun
- Clear sealant or Mod Podge
- Ruler and pencil
Step-by-step Guide
Step 1: Place your cardboard insert inside the wooden tray. Then lightly draw hexagons and diamonds with a ruler and pencil to guide your design.
Step 2: Start at the center of one hexagon.
Next, apply glue in small sections, arranging lentils in the middle, then surround them with black beans, creating a layered ring.
Step 3: Continue outward with different beans such as green mung beans, white beans, and corn kernels, repeating patterns for symmetry.
Step 4: Alternate shapes (hexagons and diamonds) across the entire board, filling each with a consistent bean pattern.
You should work slowly to keep edges neat.
Step 5: Once complete, let the mosaic dry overnight. Then seal the surface with a thin layer of Mod Podge or spray-on clear sealant to protect and add shine.
Step 6: Frame your piece or hang it directly, it’s ready to become a focal point in your home.
Notes:
For easier alignment, you can use painter’s tape as temporary borders when filling sections with beans. This keeps edges crisp and avoids glue overflow.
