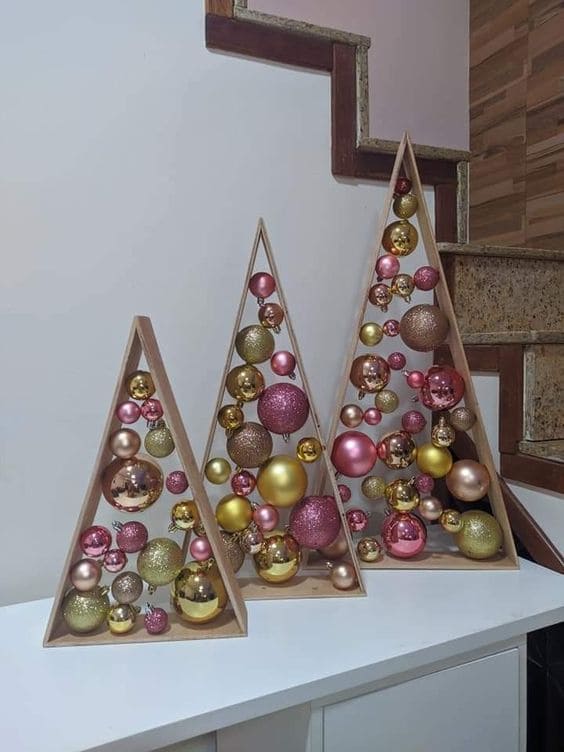
 Instead of pine needles, you’re filling the frame with ornaments that look like bubbles of joy frozen midair.
Each bauble reflects twinkling lights, laughter, and the magic of gathering at home.
Making them feels like building your own mini forest of color including one tree, two trees, or a whole cluster.
The best part is that you decide the palette. Go with traditional red and green, or try metallics for a glamorous touch.
Materials Needed
- Wood pallet planks (cut into strips: 3 pieces per triangle, 1” thick × 2” wide)
- Sizes recommended: 24” tall (small), 36” tall (medium), 48” tall (large)
- Wood screws or finishing nails (1.5” size)
- Wood glue
- Sandpaper (120-150 grit)
- Spray paint or wood stain (optional, for finishing)
- Assorted Christmas ornaments (20-40 pieces per tree, mix of 1”-4” sizes)
- Hot glue gun and sticks
- Measuring tape and miter saw (for 60° angled cuts)
Step-by-step Guide
Step 1: Cut pallet wood into three equal lengths for each triangle. You can adjust depending on the height you want with small, medium, or large.
Step 2: Use a miter saw to cut 60° angles at each end so the pieces fit together as a triangle.
Step 3: Sand all edges smooth, then assemble the frame using wood glue and nails/screws.
Step 4: Leave the wood natural for rustic style or paint/stain for a polished look.
Step 5: Arrange ornaments inside the frame, starting with larger ones at the bottom and filling gaps with smaller ones.
Step 6: Hot glue ornaments securely in place, layering to create depth and dimension.
Step 7: Display your triangle trees together for a bold statement or scatter them throughout your home for festive continuity.
Notes:
If you plan to store these after the holidays, glue ornaments only lightly or use wire so they can be removed and replaced with different color schemes each year.
