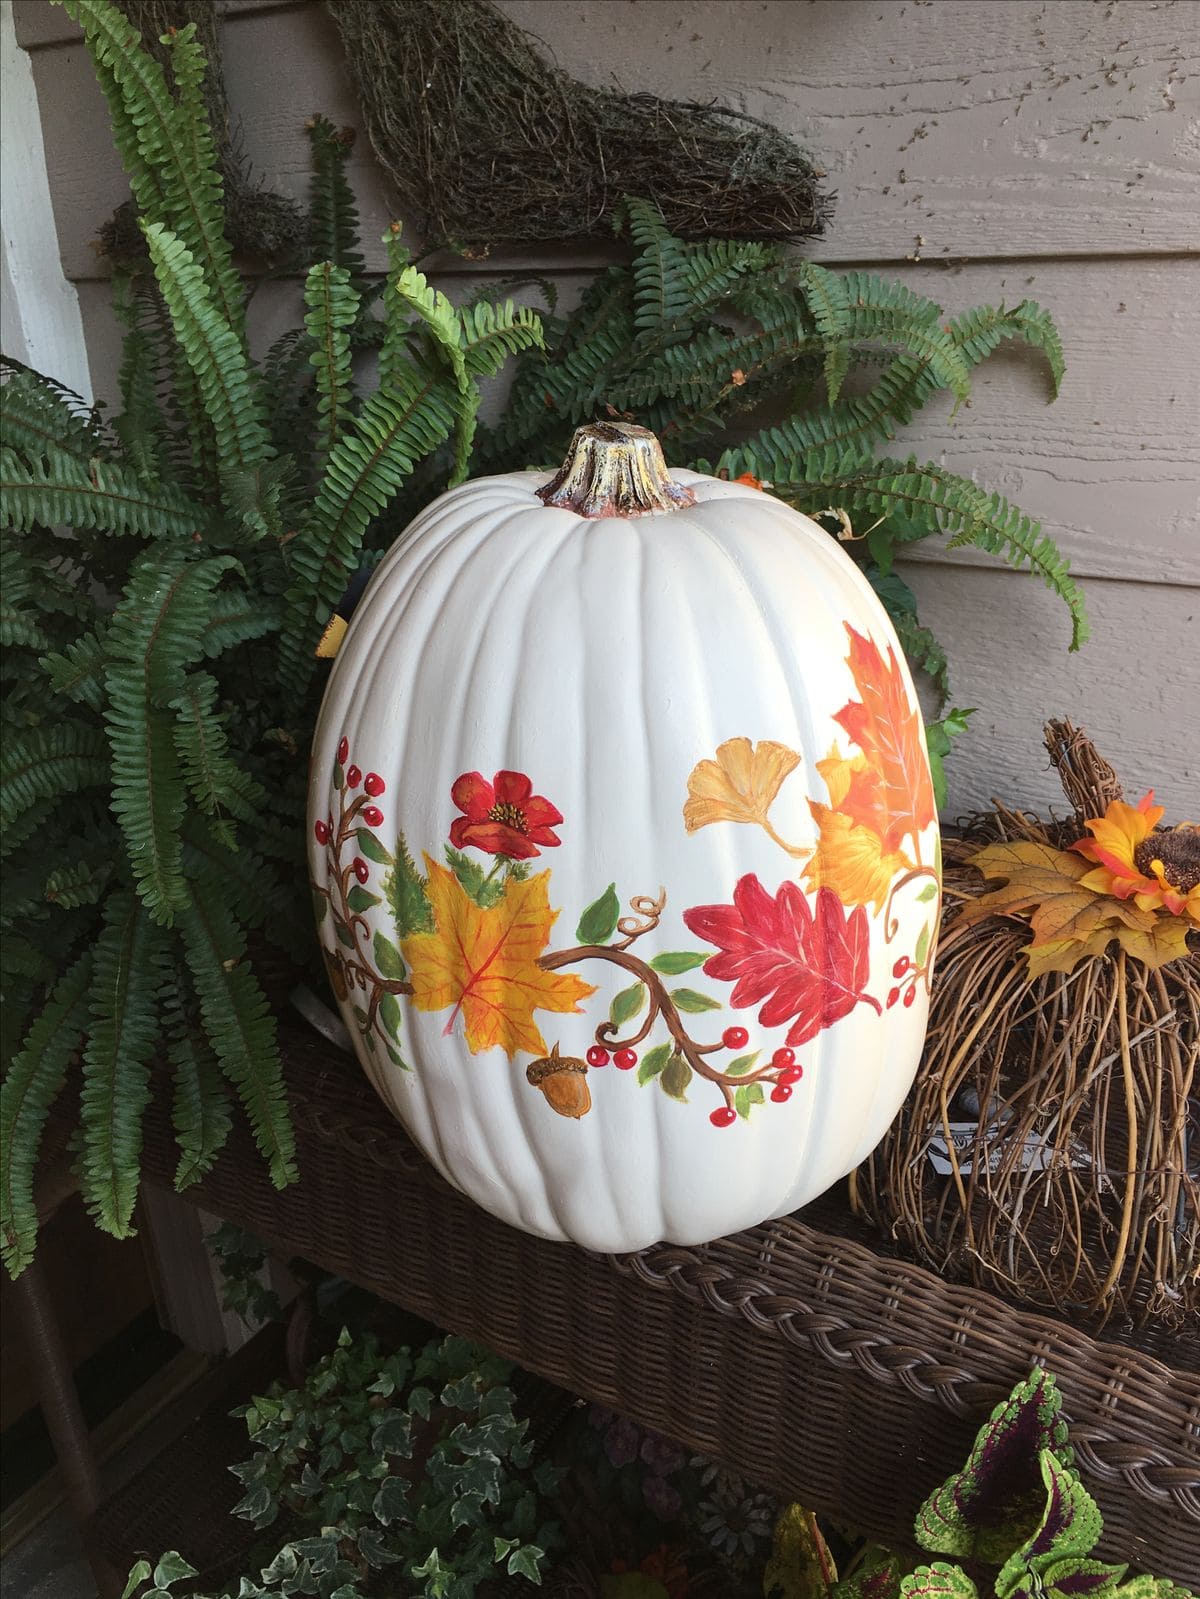
Imagine setting this pumpkin by your door, no mess, no carving, just a clean surface carrying the colors of fall. It feels like a stroll through crisp leaves translated onto a canvas of white.
The reds, yellows, and oranges play together like a chorus of thanksgiving.
Guests will pause, smile, and maybe even ask if you painted it yourself.
Moreover, the charm lies in its simplicity: one pumpkin, a few strokes of paint, and you’ve captured the heart of the season.
Materials Needed
- 1 craft or faux pumpkin (12-14” tall, preferably white)
- Acrylic paints (red, orange, yellow, green, brown)
- Fine-tip paintbrush
- Medium round brush
- Pencil (to lightly sketch leaf outlines)
- Paper towels and water cup
- Clear acrylic sealer spray
Step-by-step Guide
Step 1: Wipe your pumpkin clean so paint adheres smoothly.
Step 2: Use a pencil to sketch outlines of leaves, acorns, or vines around the surface.
Step 3: Begin filling the leaves with orange, red, and yellow, blending colors for a natural look.
Step 4: Add veins, stems, and vines with a fine brush and brown or green paint.
Step 5: Let the design dry completely, then spray a clear sealer to keep your artwork vibrant.
Notes:
This project works beautifully on faux pumpkins, so you can reuse your painted piece year after year.
For a more personal touch, you can even add initials or a short Thanksgiving message along the vines.
