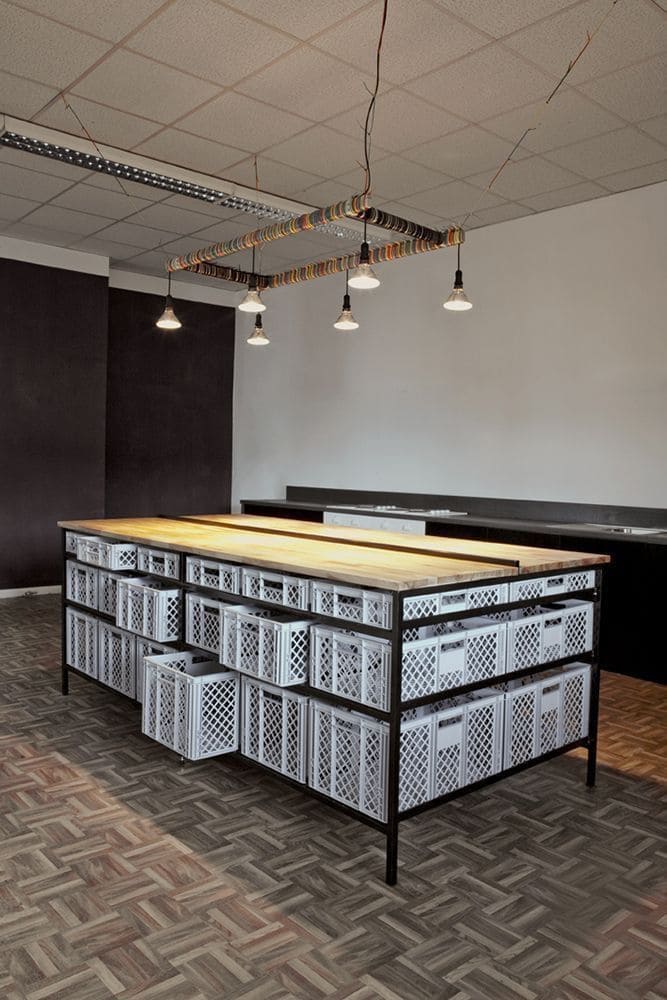
 You can see this island looks like a strong wooden table at first glance, but underneath, it’s a hive of crates, each one a little chamber of its own.
Tools, fabrics, kitchen staples or whatever you store, the crates cradle them like building blocks of a bigger whole.
It’s a dresser reimagined as an island, practical yet poetic, giving your space a heartbeat of both function and design.
Materials Needed
- 12-18 plastic milk crates (standard 13″ × 13″ size)
- Steel or wood frame (custom built to fit crate dimensions)
- Wooden countertop (approx. 6′ × 3′, sealed and sanded)
- Metal screws and brackets
- Drill and screwdriver
- Measuring tape and carpenter’s square
- Optional: caster wheels if you want mobility
Step-by-step Guide
Step 1: Measure the number of crates you want to include and design your frame accordingly.
Each crate should slide in and out with ease, leaving about ½″ clearance on each side.
Step 2: Assemble your metal or wooden frame. If you’re using steel, secure the joints with brackets and screws for extra stability.
Step 3: Place the crates inside the frame, making sure they slide in smoothly. Then adjust the spacing if needed.
Step 4: Attach the wooden countertop securely to the frame. You now sand and seal the surface so it’s durable for daily use.
Step 5: Test the drawers by pulling the crates in and out. Make adjustments until everything feels smooth and balanced.
Step 6: Style your new island, use it in the garage as a workbench, in the kitchen as a rustic-meets-industrial prep station, or in a studio as a craft command center.
Tips:
I love using clear or white crates for a minimalist look, but you can swap them for colorful ones if you want more personality.
Adding caster wheels makes it even more versatile, rolling wherever your project takes you.
