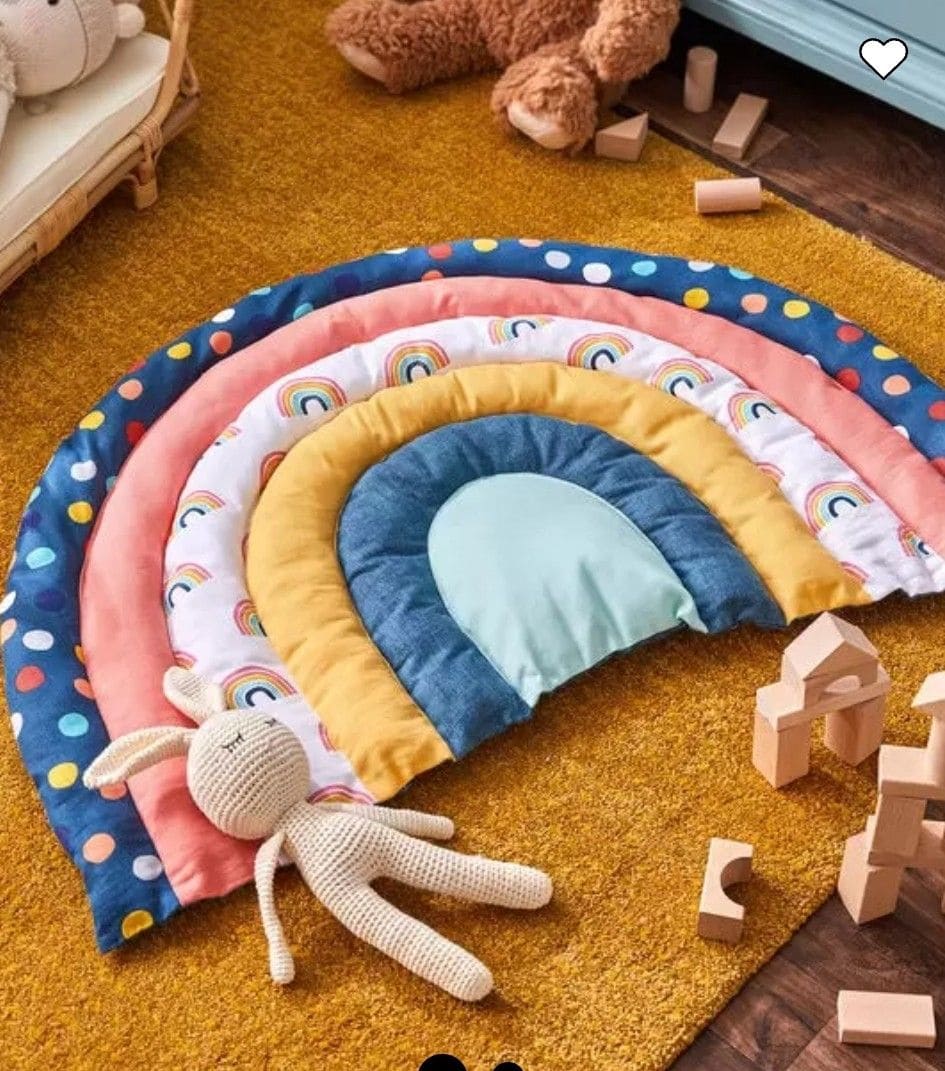
Think of this mat as a rainbow brought down to earth, stitched together with fabric and love.
Your child won’t just sit on it, they’ll imagine sliding down the arcs or resting in the middle of the colors. It’s more than fabric; it’s a story underfoot, a soft stage where childhood unfolds.
Materials Needed
- Assorted cotton or linen fabrics (5-6 colors for rainbow arcs)
- Soft fabric for backing (quilt cotton, fleece, or muslin)
- Polyester or cotton batting for padding
- Paper for large rainbow template
- Fabric scissors and rotary cutter
- Pins or fabric clips
- Sewing machine and matching threads
Step-by-step Guide
Step 1: Draft your rainbow on paper. Draw 5-6 large arcs, each about 4-6 inches wide. Then cut out the paper templates to trace onto fabric.
Step 2: Cut fabric arcs using your templates. You can pair each arc with a matching backing piece.
Step 3: Stitch each arc with right sides facing, leaving a small opening.
Then turn it right side out, press, and stuff lightly with batting to give it a plush feel. Close the seam neatly.
Step 4: Arrange your arcs in rainbow order on top of your backing fabric. You pin them down so they nest together evenly.
Step 5: Sew each arc onto the backing fabric, starting from the innermost arc and working outward. This creates a layered padded rainbow effect.
Step 6: Finish the edges by folding the backing fabric around or adding bias tape for a clean border.
Step 7: Place it in your child’s room, nursery, or play corner. It’s sturdy enough for sitting but soft enough for lounging.
Tips:
I once made one of these with patterned fabrics like polka dots, stripes, even tiny rainbows and it turned out whimsical.
If you want a sensory element, tuck a crinkle sheet inside one arc or sew ribbons along the edge. Kids absolutely love exploring those little details.
