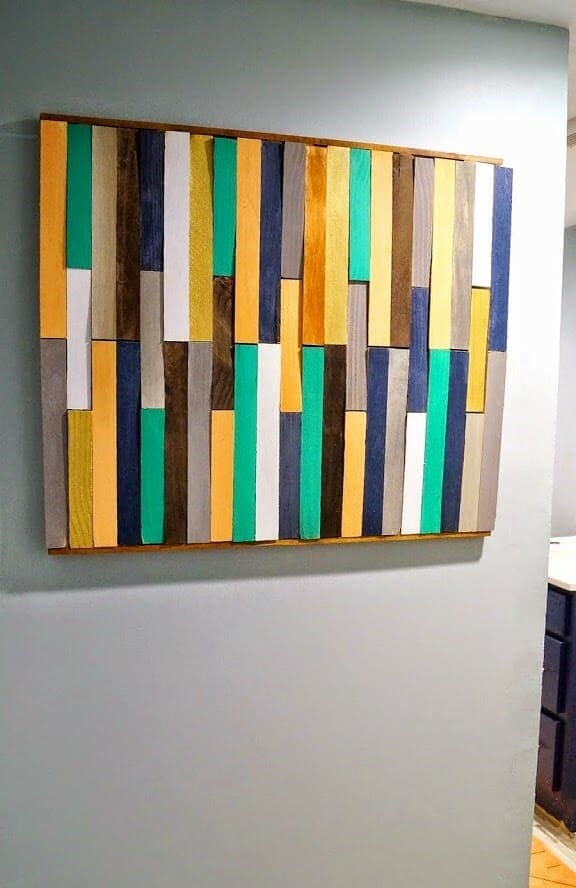
Instead of blending shims into rustic neutrals, you’ll be playing with bold blocks of color to create an art piece that’s cheerful yet balanced.
The design lets you experiment freely, paint shims in your chosen palette, arrange them like a puzzle, and suddenly your wall has a one-of-a-kind installation that feels handcrafted yet stylish enough to hang anywhere.
Materials Needed
- 60-70 wood shims (6″-8″)
- 1 plywood backing board (approx. 20″×30″)
- Assorted acrylic paints (green, teal, yellow, gray, navy, white, or your custom palette)
- Wood stain (optional)
- Paintbrushes (fine and flat)
- Wood glue
- Sandpaper (120 grit)
- Trim pieces (optional)
- Picture hangers or sawtooth hangers
Step-by-step Guide
Step 1: Sand your shims lightly so paint adheres smoothly. Decide on your palette, you can use three to five colors for balance.
Step 2: Paint groups of shims in different shades, leaving a few natural or stained for warmth. Let them dry completely.
Step 3: Lay out your backing board and begin arranging the shims vertically. Now, mix up the colors so they feel random but harmonious. Step back often to see the balance.
Step 4: Once satisfied with the layout, glue each shim onto the board carefully, pressing firmly as you go.
Step 5: Trim the edges with a wooden frame if desired, then attach hanging hardware.
Tip: When painting, I like to layer a thin wash of stain over bold colors, it softens them slightly and gives the piece depth, so the finished panel feels both modern and organic.
