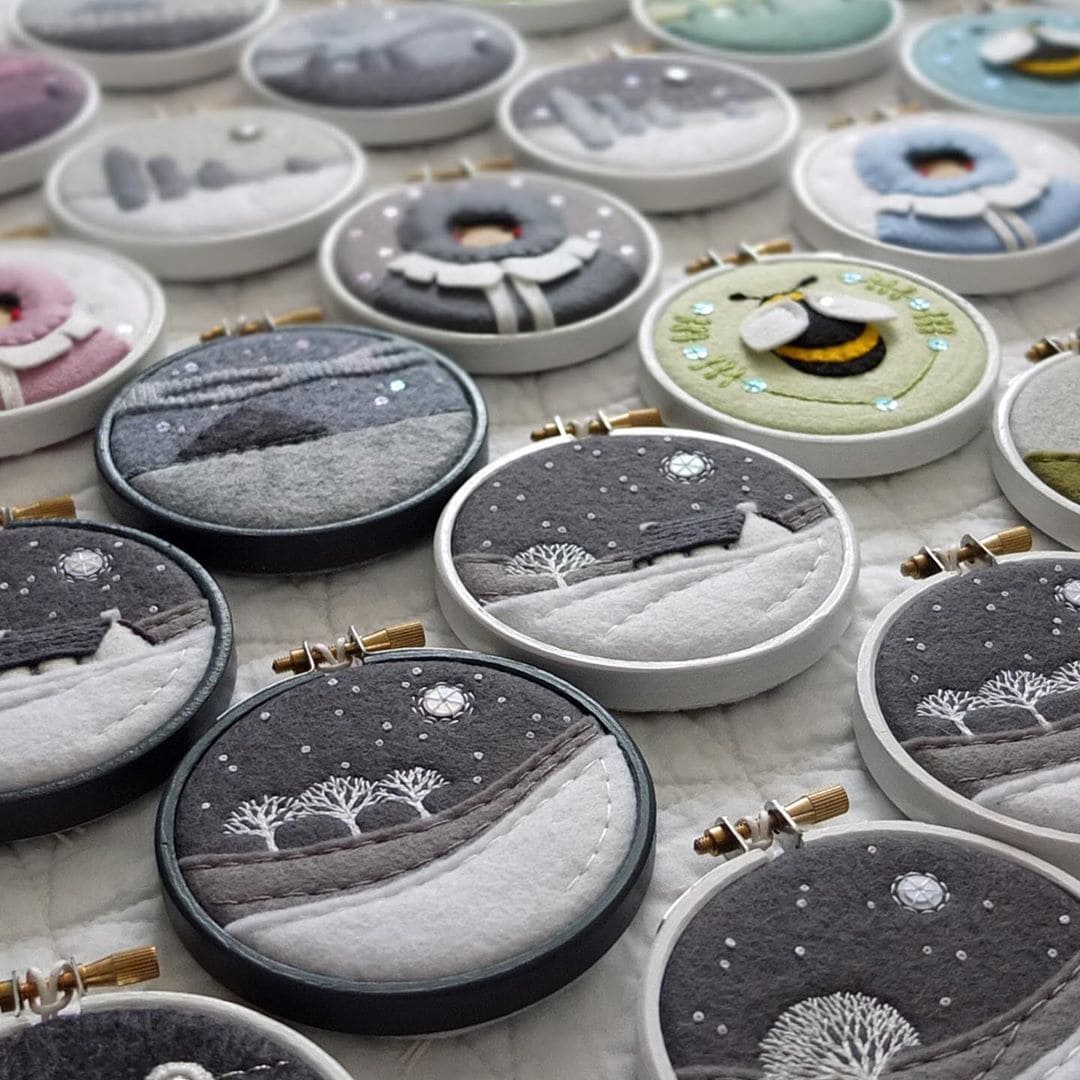
Imagine looking out the window on a winter night and seeing a quiet hillside under the moonlight, that’s the feeling this embroidery hoop recreates.
Using layers of felt for the ground and sky, you’ll stitch only the essential details: a few snowy trees, falling flakes, and a glowing moon or star.
It’s a beginner-friendly project that balances hand-stitching with felt appliqué, so even if you’ve never embroidered before, you’ll get a polished result.
Materials Needed
- 1 embroidery hoop (6″-8″)
- Felt sheets in white, gray, and dark gray/black
- Embroidery floss in white, gray, and black
- Embroidery needle and sharp scissors
- Sequins, seed beads, or metallic thread
- Fabric glue or a few basting stitches
- Optional: colored felt
- Optional: felt backing
Step-by-step Guide
Step 1: Stretch a piece of dark felt in your embroidery hoop to serve as the night sky. Then pull it taut so it forms a smooth base.
Step 2: Cut pieces of white and gray felt into curved strips to form snowy hills.
Next, layer them across the bottom half of the hoop, overlapping slightly for depth. You can secure with tiny stitches or fabric glue.
Step 3: Add details: stitch small trees with straight white stitches, sew a line of footprints, or create a small house with colored felt scraps. These little additions give character to your winter scene.
Step 4: Use French knots or tiny straight stitches with white floss to scatter snowflakes across the sky. For sparkle, sew sequins or beads as stars or moonlight reflections.
Step 5: Outline hills or trees with subtle stitching if you want more definition. Keep stitches small so the felt remains the star.
Step 6: Finish by securing all threads at the back and trimming any excess felt. Optionally, you can attach a felt circle to cover the back neatly.
