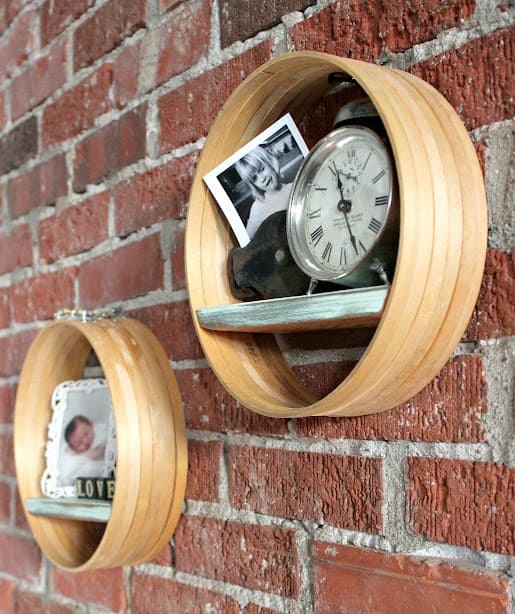
Imagine having tiny display cases that feel handmade yet stylish. That’s exactly what these embroidery hoop shelves offer.
They’re circles of charm that frame your favorite keepsakes, giving even the simplest objects a sense of importance.
By sandwiching a small plank between two hoops, you instantly get a functional shelf that looks far more expensive than it is.
You can stain the wood for a rustic farmhouse vibe, paint it sleek black for modern flair, or even use mismatched hoops for a quirky gallery wall. These shelves prove that organization can be beautiful when creativity leads the way.
Materials Needed
- 2 embroidery hoops per shelf (same size, ideally 10″-12″)
- 1 small wooden plank or scrap wood
- Wood glue or strong craft glue
- Clamps
- Sandpaper
- Wood stain or paint (optional)
- Picture hangers or nails
- Small items for display (frames, plants, clocks, etc.)
Step-by-step Guide
Step 1: Separate your embroidery hoops. For each shelf, you’ll use two outer rings to form the circular frame.
Step 2: Cut a wooden plank to match the inner diameter of your hoops. Then sand the edges so it fits snugly and smoothly inside.
Step 3: Place the plank horizontally between the two hoops, about 1/3 from the bottom, creating a shelf.
Step 4: Apply wood glue along the contact points where the plank meets the hoop. You also press together firmly and clamp in place until the glue dries completely.
Step 5: Once dry, you can leave the wood natural for a rustic look, or stain/paint it to suit your décor.
Step 6: Attach a picture hanger to the back of the hoop, or simply hang it on a sturdy nail.
Step 7: Finally, style your shelves with lightweight items such as photographs, candles, tiny plants, or decorative trinkets.
